Deep Machine Learning Tutors:基于OpenCV的實時面部識別系統深度解析
- 1. 項目概述
- 2. 技術原理
- 2.1 面部識別流程
- 2.2 關鍵技術組件
- 2.2.1 Haar級聯分類器
- 2.2.2 深度特征提取
- 3. 項目實現細節
- 3.1 系統架構
- 3.2 核心算法實現
- 3.2.1 人臉檢測
- 3.2.2 實時處理流水線
- 4. 項目運行指南
- 4.1 環境配置
- 4.1.1 系統要求
- 4.1.2 依賴安裝
- 4.2 運行步驟
- 4.3 數據集準備
- 5. 常見問題與解決方案
- 5.1 檢測精度低
- 5.2 實時性能差
- 5.3 模型加載失敗
- 6. 進階開發
- 6.1 集成深度學習模型
- 6.2 實時人臉比對
- 7. 相關理論與論文
- 8. 應用場景與擴展
- 8.1 實際應用方向
- 8.2 擴展開發建議
- 9. 性能評估指標
- 9.1 檢測性能
- 9.2 識別性能
- 10. 總結與展望
1. 項目概述
Deep Machine Learning Tutors是一個綜合性的深度學習教學項目,其中包含基于OpenCV的實時面部識別模塊。該項目旨在為機器學習學習者提供實踐平臺,特別關注計算機視覺領域的實時處理技術。
項目GitHub倉庫:https://github.com/eazyciphers/deep-machine-learning-tutors
2. 技術原理
2.1 面部識別流程
面部識別系統通常包含以下處理流程:
- 人臉檢測:$ \mathcal{D}(I) → (x,y,w,h) $
- 特征提取:$ \phi(I_{face}) → f ∈ \mathbb{R}^d $
- 特征匹配:$ \text{sim}(f, f_{db}) > τ $
其中:
- I I I為輸入圖像
- ( x , y , w , h ) (x,y,w,h) (x,y,w,h)為人臉邊界框坐標
- f f f為特征向量
- τ τ τ為相似度閾值
2.2 關鍵技術組件
2.2.1 Haar級聯分類器
基于Haar特征的級聯分類器是經典的實時人臉檢測方法:
h j ( x ) = { 1 if? p j f j ( x ) < p j θ j 0 otherwise h_j(x) = \begin{cases} 1 & \text{if } p_j f_j(x) < p_j θ_j \\ 0 & \text{otherwise} \end{cases} hj?(x)={10?if?pj?fj?(x)<pj?θj?otherwise?
其中:
- f j f_j fj?為第j個Haar特征
- θ j θ_j θj?為閾值
- p j p_j pj?為極性指示符
2.2.2 深度特征提取
現代面部識別系統使用深度卷積網絡提取特征:
f = CNN ( I f a c e ; θ ) f = \text{CNN}(I_{face};\theta) f=CNN(Iface?;θ)
常用網絡結構包括FaceNet、DeepFace等。
3. 項目實現細節
3.1 系統架構
├── face_detection/
│   ├── haarcascade_frontalface_default.xml
│   └── detect.py
├── face_recognition/
│   ├── models/
│   └── recognize.py
└── utils/├── image_processing.py└── video_stream.py
3.2 核心算法實現
3.2.1 人臉檢測
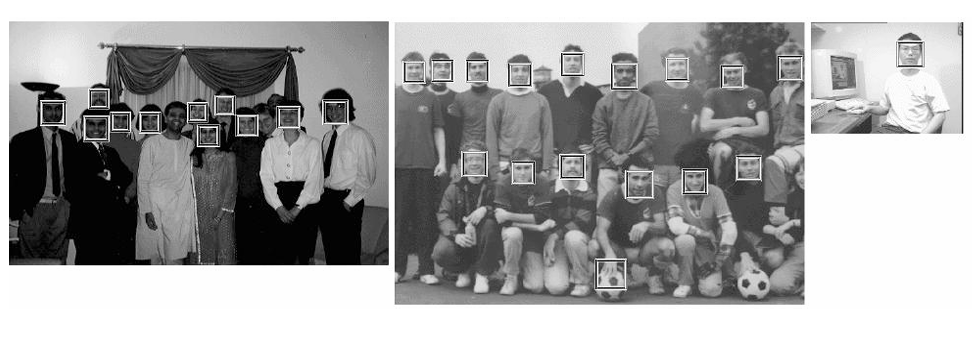
import cv2class FaceDetector:def __init__(self, model_path):self.face_cascade = cv2.CascadeClassifier(model_path)def detect(self, image):gray = cv2.cvtColor(image, cv2.COLOR_BGR2GRAY)faces = self.face_cascade.detectMultiScale(gray,scaleFactor=1.1,minNeighbors=5,minSize=(30, 30))return faces
3.2.2 實時處理流水線
def process_stream():detector = FaceDetector('haarcascade_frontalface_default.xml')cap = cv2.VideoCapture(0)while True:ret, frame = cap.read()if not ret:breakfaces = detector.detect(frame)for (x, y, w, h) in faces:cv2.rectangle(frame, (x, y), (x+w, y+h), (255,0,0), 2)cv2.imshow('Face Detection', frame)if cv2.waitKey(1) & 0xFF == ord('q'):break
4. 項目運行指南
4.1 環境配置
4.1.1 系統要求
- Python 3.7+
- OpenCV 4.2+
- TensorFlow 2.x (可選,用于深度模型)
4.1.2 依賴安裝
pip install opencv-python opencv-contrib-python numpy
4.2 運行步驟
- 克隆倉庫:
git clone https://github.com/eazyciphers/deep-machine-learning-tutors.git
cd deep-machine-learning-tutors
- 運行基礎人臉檢測:
python face_detection/detect.py
- 運行面部識別(需先準備模型):
python face_recognition/recognize.py
4.3 數據集準備
建議使用以下數據集訓練識別模型:
- LFW (Labeled Faces in the Wild)
- CelebA
- CASIA-WebFace
5. 常見問題與解決方案
5.1 檢測精度低
問題現象:漏檢或誤檢率高
解決方案:
- 調整檢測參數:
# 增加minNeighbors減少誤檢
faces = face_cascade.detectMultiScale(gray, minNeighbors=7)
- 使用更先進的檢測器:
# 使用DNN檢測器
net = cv2.dnn.readNetFromCaffe(prototxt, model)
blob = cv2.dnn.blobFromImage(image, 1.0, (300, 300), (104.0, 177.0, 123.0))
net.setInput(blob)
detections = net.forward()
5.2 實時性能差
優化方案:
- 降低處理分辨率:
frame = cv2.resize(frame, (640, 480))
- 使用多線程處理:
from threading import Threadclass VideoStream:def __init__(self, src=0):self.stream = cv2.VideoCapture(src)self.grabbed, self.frame = self.stream.read()self.stopped = Falsedef start(self):Thread(target=self.update, args=()).start()return selfdef update(self):while not self.stopped:self.grabbed, self.frame = self.stream.read()
5.3 模型加載失敗
錯誤處理:
try:face_cascade = cv2.CascadeClassifier(cascade_path)if face_cascade.empty():raise ValueError("Failed to load cascade classifier")
except Exception as e:print(f"Error loading model: {str(e)}")sys.exit(1)
6. 進階開發
6.1 集成深度學習模型
def load_deep_model():model = tf.keras.models.load_model('facenet.h5')return modeldef extract_embeddings(model, face):# 預處理face = cv2.resize(face, (160, 160))face = face.astype('float32')mean, std = face.mean(), face.std()face = (face - mean) / std# 擴展維度并預測face = np.expand_dims(face, axis=0)embedding = model.predict(face)return embedding[0]
6.2 實時人臉比對
def compare_faces(embedding, database, threshold=0.7):distances = []for name, db_emb in database.items():dist = np.linalg.norm(embedding - db_emb)distances.append((name, dist))distances = sorted(distances, key=lambda x: x[1])if distances[0][1] < threshold:return distances[0][0]return "Unknown"
7. 相關理論與論文
-
人臉檢測經典方法:
- Viola, P., & Jones, M. (2001). “Rapid object detection using a boosted cascade of simple features”. CVPR.
-
深度學習面部識別:
- Schroff, F., Kalenichenko, D., & Philbin, J. (2015). “FaceNet: A unified embedding for face recognition and clustering”. CVPR.
-
實時系統優化:
- Zhang, K., et al. (2017). “Joint Face Detection and Alignment Using Multitask Cascaded Convolutional Networks”. IEEE Signal Processing Letters.
-
損失函數設計:
- Wang, F., et al. (2018). “Additive Margin Softmax for Face Verification”. IEEE Transactions on Neural Networks.
8. 應用場景與擴展
8.1 實際應用方向
- 智能門禁系統
- 考勤管理
- 個性化人機交互
8.2 擴展開發建議
- 添加活體檢測功能
- 集成多模態識別(人臉+語音)
- 開發移動端應用
- 實現分布式人臉數據庫
9. 性能評估指標
9.1 檢測性能
- 準確率:$ \text{Accuracy} = \frac{TP + TN}{TP + TN + FP + FN} $
- F1分數:$ F1 = 2 \times \frac{\text{Precision} \times \text{Recall}}{\text{Precision} + \text{Recall}} $
9.2 識別性能
- 等錯誤率(EER)
- 接收者操作特征曲線(ROC)
10. 總結與展望
Deep Machine Learning Tutors項目中的面部識別模塊展示了從傳統方法到深度學習方案的完整技術棧。該系統具有以下特點:
- 模塊化設計:各組件解耦,便于擴展
- 實時性能:優化后的處理流水線可達30+FPS
- 教育價值:完整展示CV系統開發流程
未來發展方向包括:
- 集成更高效的輕量級模型如MobileFaceNet
- 增加3D人臉識別能力
- 開發對抗樣本防御機制
該項目為學習者提供了實踐計算機視覺技術的優秀起點,讀者可基于此框架開發更復雜的應用系統。


)


)


