文章目錄
- 1. 前言
- 2. 創建 DefaultMessageStore
- 3. DefaultMessageStore#load
- 3.1 CommitLog#load
- 3.2 loadConsumeQueue 加載 ConsumeQueue 文件
- 3.3 創建 StoreCheckpoint
- 3.4 indexService.load 加載 IndexFile 文件
- 3.5 recover 文件恢復
- 3.6 延時消息服務加載
- 4. registerProcessor 注冊 code 處理器
- 5. ConfigManager.persist
- 6. protectBroker 保護 broker
- 7. fetchNameServerAddr 定時任務定時拉取 NameServer 地址
- 8. 小結
本文章基于 RocketMQ 4.9.3
1. 前言
- 【RocketMQ】- 源碼系列目錄
- 【RocketMQ Broker 相關源碼】- broker 啟動源碼(1)
在前面【RocketMQ Broker 相關源碼】- broker 啟動源碼(1)這篇文章中,我們對 broker 啟動的源碼進行了簡要梳理,著重介紹了 broker 啟動過程中所涉及的各項服務,以及啟動流程中具體執行的操作。至于這些服務的具體功能,以及其背后源碼的詳細實現,還有上一篇文章中遺留下來的一些方法和比較重要的類,我們在這篇文章中去介紹。
2. 創建 DefaultMessageStore
DefaultMessageStore 是 RocketMQ 中默認的消息存儲核心類,broker 對消息的操作都需要經過這個類,比如消息查詢、消息添加、消息拉取 … 所以在調用 BrokerController#initialize 的時候第二步就是創建 DefaultMessageStore,那么我們就來看下這個類的構造方法。
public DefaultMessageStore(final MessageStoreConfig messageStoreConfig, final BrokerStatsManager brokerStatsManager,final MessageArrivingListener messageArrivingListener, final BrokerConfig brokerConfig) throws IOException {// 消息到達監聽器, 消息重放之后會通知 pullRequestHoldService 服務消息到達, 接著就可以處理消費者的消息拉取請求this.messageArrivingListener = messageArrivingListener;// broker 配置this.brokerConfig = brokerConfig;// 消息存儲配置this.messageStoreConfig = messageStoreConfig;// broker 數據統計管理類this.brokerStatsManager = brokerStatsManager;// MappedFile 分配服務this.allocateMappedFileService = new AllocateMappedFileService(this);// 實例化 CommitLog, 默認是不支持 Dleger 高可用模式的if (messageStoreConfig.isEnableDLegerCommitLog()) {this.commitLog = new DLedgerCommitLog(this);} else {this.commitLog = new CommitLog(this);}// 創建 ConsumeQueue 集合, 存儲了 topic -> (queueId, ConsumeQueue) 的關系this.consumeQueueTable = new ConcurrentHashMap<>(32);// 初始化 ConsumeQueue 刷盤服務this.flushConsumeQueueService = new FlushConsumeQueueService();// 初始化過期 CommitLog 文件清除服務this.cleanCommitLogService = new CleanCommitLogService();// 初始化過期 ConsumeQueue 文件清除服務this.cleanConsumeQueueService = new CleanConsumeQueueService();// 初始化消息存儲統計服務this.storeStatsService = new StoreStatsService();// 初始化 Index 索引服務this.indexService = new IndexService(this);// 判斷是否初始化 HAService 主從同步服務if (!messageStoreConfig.isEnableDLegerCommitLog()) {this.haService = new HAService(this);} else {this.haService = null;}// 初始化消息重放服務this.reputMessageService = new ReputMessageService();// 初始化延時消息服務this.scheduleMessageService = new ScheduleMessageService(this);// 初始化堆外緩存this.transientStorePool = new TransientStorePool(messageStoreConfig);// 初始化堆外緩存的 ByteBuffer, 默認大小是 5if (messageStoreConfig.isTransientStorePoolEnable()) {this.transientStorePool.init();}// 啟動 MappedFile 分配線程this.allocateMappedFileService.start();// 啟動 Index 文件服務線程this.indexService.start();// 創建消息重放列表, 用于構建 ConsumeQueue、Index 索引, 默認順序是 ConsumeQueue -> Indexthis.dispatcherList = new LinkedList<>();this.dispatcherList.addLast(new CommitLogDispatcherBuildConsumeQueue());this.dispatcherList.addLast(new CommitLogDispatcherBuildIndex());// 創建 DefaultMessageStore 的根目錄文件File file = new File(StorePathConfigHelper.getLockFile(messageStoreConfig.getStorePathRootDir()));// 確保根文件父目錄, 也就是 ${user.home}/store(又或者 broker.conf 里面設置的 storePathRootDir) 被創建MappedFile.ensureDirOK(file.getParent());// 確保 CommitLog 文件父目錄, 也就是 ${user.home}/store/commitlog(又或者 broker.conf 里面設置的 storePathCommitLog) 被創建MappedFile.ensureDirOK(getStorePathPhysic());// 確保 ConsumeQueue 文件父目錄, 也就是 ${user.home}/store/consumequeue(又或者 broker.conf 里面設置的 storePathConsumeQueue) 被創建MappedFile.ensureDirOK(getStorePathLogic());// 設置文件權限是可讀寫, 在 DefaultMessageStore 啟動的時候會加鎖, 確保只有一個 broker 對這個根目錄下的文件操作lockFile = new RandomAccessFile(file, "rw");
}
可以看到在這個構造器里面就是初始化了一堆服務,按照順序一個一個往下說:
messageArrivingListener:消息到達監聽器, 消息重放之后會通知 pullRequestHoldService 服務消息到達, 接著就可以處理消費者的消息拉取請求,這個監聽器是跟消費者消息拉取有關的,后面講到消費者拉取消息的時候會重點說下。brokerConfig:broker 配置。messageStoreConfig:消息存儲配置,里面記錄了消息存儲服務的一些參數。brokerStatsManager:broker 數據統計管理類,比如 broker 里面添加了多少次消息,添加的消息的總大小 …allocateMappedFileService:MappedFile 分配服務,用來創建 MappedFile 的,這個服務在文章 【RocketMQ 存儲】- RocketMQ 如何高效創建 MappedFile 有詳細介紹。CommitLog:就是存儲消息的 CommitLog,一個 broker 中有一個 CommitLog,但是 CommitLog 中包含了多個 MappedFile。consumeQueueTable:存儲了 topic -> <queueId, ConsumeQueue> 的關系,一個 topic 下面有多個隊列,而這些隊列可以分配到不同的 broker,所以這個集合保存了當前這個 broker 下面存儲的 topic -> (id, queue) 的映射,也就是說通過 topic 可以找到所有的 ConsumeQueue。flushConsumeQueueService:ConsumeQueue 刷盤服務,這個服務在文章 【RocketMQ 存儲】ConsumeQueue 刷盤服務 FlushConsumeQueueService 有詳細介紹。cleanCommitLogService:CommitLog 文件清除服務,清除 CommitLog 的過期文件,這個服務在文章 【RocketMQ 存儲】- CommitLog 過期清除服務 CleanCommitLogService 有詳細介紹。cleanConsumeQueueService:ConsumeQueue 文件清除服務,清除 ConsumeQueue 的過期文件,這個服務在文章 【RocketMQ 存儲】- ConsumeQueue 過期清除服務 CleanConsumeQueueService 中有詳細介紹。storeStatsService:消息存儲統計服務。indexService:消息存儲統計服務。storeStatsService:Index 索引服務,用于管理 Index 索引,構建、刪除 … 邏輯都是在里面進行。haService:主從同步服務,在【RocketMQ 高可用】這幾篇文章中有詳細介紹這個類。reputMessageService:消息重放服務,用于構建 ConsumeQueue 索引、Index 索引、SQL92 的 bitMap 過濾處理,在 【RocketMQ 存儲】消息重放服務-ReputMessageService
中有詳細介紹。scheduleMessageService:延時消息服務,處理延時消息的。transientStorePool:堆外緩存,實現讀寫分離,雖然通過 MappedByteBuffer 的 mmap 進行文件映射到了 page cache,同時通過 mlock 鎖定了這篇內存進行 swap 交換。但是當 page cache 臟頁數據越來越多的時候,內核的 pdflush 線程就會將 page cache 中的臟頁回寫到磁盤中,這里是我們不能控制的。所以當臟頁寫入磁盤之后,我們通過 MappedByteBuffer 寫入數據還是會觸發缺頁中斷,這樣就會導致寫入數據延遲,性能產生毛刺現象。為了解決這個問題,RocketMQ 引入了堆外緩存提供讀寫分離,當數據要寫入的時候,先寫入 writeBuffer,這段 writeBuffer 只是普通堆外緩存,不涉及臟頁回寫,所以寫入的時候不會阻塞,而后臺線程就會不斷將這部分數據 commit 到 page cache 中。lockFile:${user.home}/store/lock(storePathRootDir),當 DefaultMessageStore 啟動的時候會往里面寫入 lock,這是為了確保只有一個 broker 對這個根目錄下的文件操作,根目錄默認是 ${user.home}/store,但是也可以在 broker.conf 中設置 storePathRootDir 為根目錄。
3. DefaultMessageStore#load
在 BrokerController#initialize 方法中,通過 DefaultMessageStore#load 去加載各個目錄下面的文件到內存中,如 CommitLog、ConsumeQueue、StoreCheckPoint 等文件,下面就來看下這個方法的源碼。
/*** 加載 MessageStore 下面的消息存儲文件* @throws IOException*/
public boolean load() {boolean result = true;try {// 判斷下上次 RocketMQ 關閉是不是正常關閉boolean lastExitOK = !this.isTempFileExist();log.info("last shutdown {}", lastExitOK ? "normally" : "abnormally");// 1.加載 CommitLog 文件result = result && this.commitLog.load();// 2.加載 ConsumeQueue 文件result = result && this.loadConsumeQueue();if (result) {// 3.加載 checkpoint 檢查點文件,文件位置是 ${home}/store/checkpointthis.storeCheckpoint =new StoreCheckpoint(StorePathConfigHelper.getStoreCheckpoint(this.messageStoreConfig.getStorePathRootDir()));// 4.加載 IndexFile 文件this.indexService.load(lastExitOK);// 5.恢復 ConsumeQueue 和 CommitLog 文件,也就是將這些數據恢復到內存中this.recover(lastExitOK);log.info("load over, and the max phy offset = {}", this.getMaxPhyOffset());if (null != scheduleMessageService) {// 6.加載延時消息服務result =  this.scheduleMessageService.load();}}} catch (Exception e) {log.error("load exception", e);result = false;}if (!result) {// 如果上面的操作有異常,這里就停止創建 MappedFile 的服務this.allocateMappedFileService.shutdown();}return result;
}
3.1 CommitLog#load
這個方法就是用于加載 CommitLog 文件,其實就是加載 Commit 存儲文件夾下面的文件到內存中,下面是源碼。
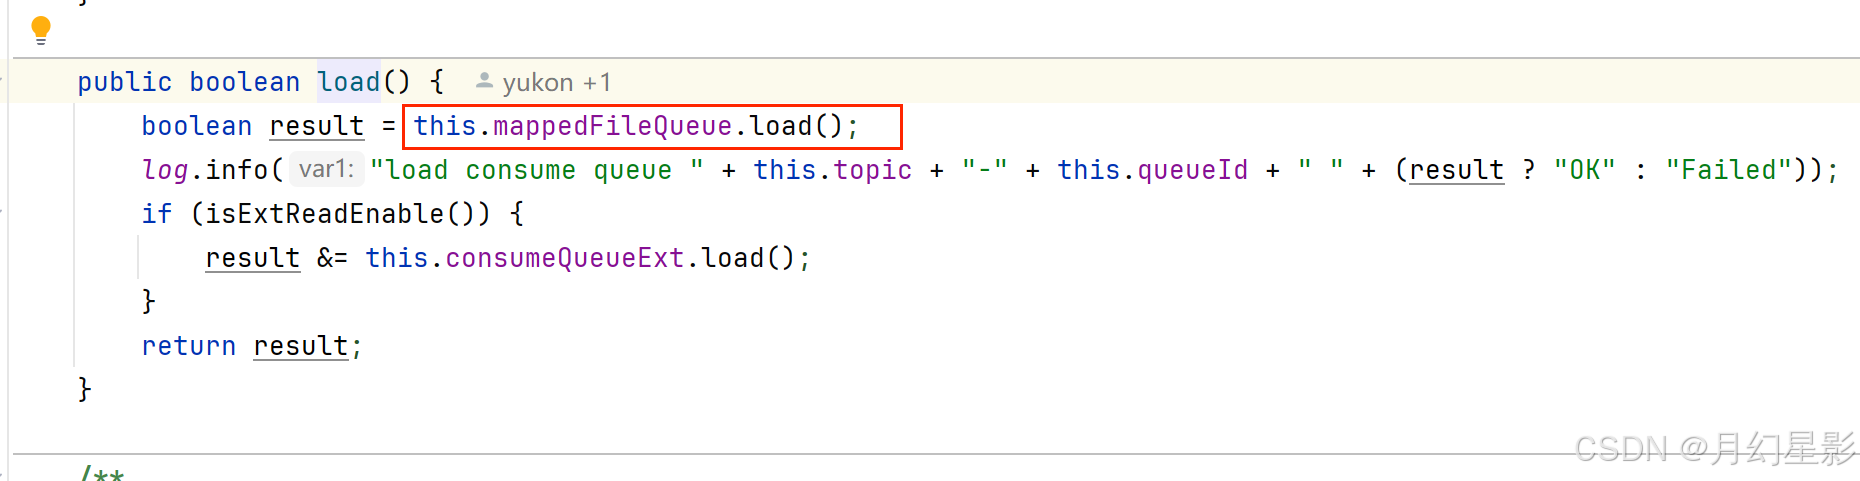
/*** 加載 CommitLog 文件* @return*/
public boolean load() {// 加載 CommitLog 文件boolean result = this.mappedFileQueue.load();log.info("load commit log " + (result ? "OK" : "Failed"));return result;
}/*** 加載文件* @return*/
public boolean load() {// 文件存放目錄// ${home}/store/commitlogFile dir = new File(this.storePath);// 獲取內部的文件集合File[] ls = dir.listFiles();if (ls != null) {// 如果文件夾下存在文件,那么進行加載return doLoad(Arrays.asList(ls));}return true;
}
因為 CommitLog 一個文件大小是 1GB,所以這個文件夾下面可能有多個文件,需要用到 doLoad 方法,傳入一個集合。
/*** 加載文件* @param files* @return*/
public boolean doLoad(List<File> files) {// 將文件按照文件名排序,這里的文件名就是文件的起始偏移量files.sort(Comparator.comparing(File::getName));// 遍歷所有文件for (File file : files) {if (file.length() != this.mappedFileSize) {// 到這里就是文件實際大小如果不等于設定的文件大小,就直接返回,不加載其他文件,這里 length 就是創建文件的時候設定的文件大小log.warn(file + "\t" + file.length()+ " length not matched message store config value, please check it manually");return false;}try {// 每一個 CommitLog 或者 ConsumeQueue 文件都需要創建一個MappedFile mappedFile = new MappedFile(file.getPath(), mappedFileSize);// 將下面三個指針位置設置成文件大小// MappedByteBuffer 或者 writeBuffer 中 position 的位置mappedFile.setWrotePosition(this.mappedFileSize);// MappedByteBuffer 或者 writeBuffer 中 flush 刷盤的位置mappedFile.setFlushedPosition(this.mappedFileSize);// writeBuffer 中 commit 提交數據到 page cache 中的位置mappedFile.setCommittedPosition(this.mappedFileSize);// 將 MappedByteBuffer 添加到集合 mappedFiles 中this.mappedFiles.add(mappedFile);log.info("load " + file.getPath() + " OK");} catch (IOException e) {log.error("load file " + file + " error", e);return false;}}return true;
}
可以看到就是在加載文件的時候,會把三個指針 wrotePosition、flushedPosition、committedPosition 設置成 mappedFileSize,這個 mappedFileSize 在 CommitLog 文件下就是 1GB,因為默認從磁盤讀取出來的數據肯定就已經是刷盤成功的了,所以這里直接設置為 mappedFileSize,但是有一個問題就是如果你的 RocketMQ 是突然崩潰了,就比如我這里直接 windows 啟動,在這之前我只往 CommitLog 里面寫入了幾條消息,但是這里的設置會導致這三個指針的值都是 1G,就跟實際不符合。

但是這里設置了 1G 之后,在 DefaultMessageStore#load 的第 5 步 this.recover(lastExitOK) 會恢復 ConsumeQueue 和 CommitLog 文件,也就是將這些數據恢復到內存中,同時糾正偏移量,所以是沒問題的。
3.2 loadConsumeQueue 加載 ConsumeQueue 文件
上面加載完 CommitLog 之后,這里就要加載 ConsumeQueue 文件了。
/*** 加載 ConsumeQueue 文件* @return*/
private boolean loadConsumeQueue() {// 文件路徑是 ${user.home}/store/consumequeue, 當然這個 ${user.home}/store 也可以在 broker.conf 里面通過 storePathRootDir 配置根目錄File dirLogic = new File(StorePathConfigHelper.getStorePathConsumeQueue(this.messageStoreConfig.getStorePathRootDir()));// 獲取這個目錄下面的所有文件File[] fileTopicList = dirLogic.listFiles();if (fileTopicList != null) {// 遍歷文件for (File fileTopic : fileTopicList) {// 獲取文件名, ConsumeQueue 文件和 CommitLog 不一樣, CommitLog 是所有 topic 都存到一起, ConsumeQueue 是 topic 分// 開存儲, 文件名就是 topicString topic = fileTopic.getName();// 獲取 ${storePathRootDir}/consumequeue/${topic} 下面的文件列表File[] fileQueueIdList = fileTopic.listFiles();if (fileQueueIdList != null) {// 遍歷, 因為 ConsumeQueue 默認就是 4 個隊列, 所以需要遍歷這些隊列for (File fileQueueId : fileQueueIdList) {int queueId;try {// 隊列 IDqueueId = Integer.parseInt(fileQueueId.getName());} catch (NumberFormatException e) {continue;}// 創建 ConsumeQueue, 這里傳了 topic 和 queueId 進去構造器, 因為文件路徑就是 ${storePathRootDir}/consumequeue/${topic}/${queueId}ConsumeQueue logic = new ConsumeQueue(topic,queueId,StorePathConfigHelper.getStorePathConsumeQueue(this.messageStoreConfig.getStorePathRootDir()),this.getMessageStoreConfig().getMappedFileSizeConsumeQueue(),this);// 將創建出來的 ConsumeQueue 添加到 consumeQueueTable 中this.putConsumeQueue(topic, queueId, logic);// ConsumeQueue#load 方法if (!logic.load()) {return false;}}}}}log.info("load logics queue all over, OK");return true;
}
這里的文件加載和前面 CommitLog 的差不多,只是獲取文件名的時候 ConsumeQueue 文件和 CommitLog 不一樣,CommitLog 是所有 topic 都存到一起,ConsumeQueue 是 topic 分開存儲,所以 ConsumeQueue 的文件路徑就是 ${storePathRootDir}/consumequeue/${topic}/${queueId},最后創建出 ConsumeQueue 之后需要添加到 consumeQueueTable 中,添加的邏輯如下。
/*** 添加 ConsumeQueue 映射關系* @param topic* @param queueId* @param consumeQueue*/
private void putConsumeQueue(final String topic, final int queueId, final ConsumeQueue consumeQueue) {// 獲取 topic 下面的 ConsumeQueue 集合ConcurrentMap<Integer/* queueId */, ConsumeQueue> map = this.consumeQueueTable.get(topic);if (null == map) {// 初始化map = new ConcurrentHashMap<Integer/* queueId */, ConsumeQueue>();// 添加map.put(queueId, consumeQueue);this.consumeQueueTable.put(topic, map);if (MixAll.isLmq(topic)) {this.lmqConsumeQueueNum.getAndIncrement();}} else {// 直接添加, 會覆蓋map.put(queueId, consumeQueue);}
}
添加完之后調用 ConsumeQueue 的 load 方法去加載 ConsumeQueue 文件,但是其實加載的邏輯跟 CommitLog 是一樣的,只是加載的文件不同,因為都是走的 mappedFileQueue.load() 的邏輯,這個邏輯上面 3.1 小結也說過了,這里不再贅述。
3.3 創建 StoreCheckpoint
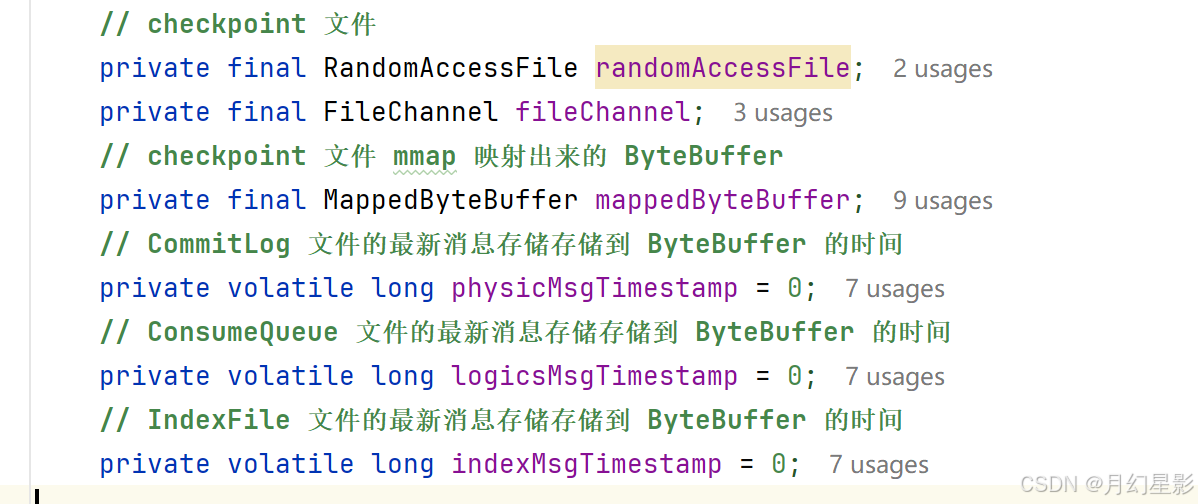
加載 checkpoint 檢查點文件,文件位置是 ${storePathRootDir}/checkpoint,這個 checkpoint 就是檢查點文件,CommitLog、ConsumeQueue、IndexFile 這三個文件的最新消息的存儲時間點會被記錄,如果 broker 異常重啟了,這時候就會根據這三個時間點來恢復文件。
當然這里就是來看一下創建的構造器邏輯,關于這三個值的使用在 recover 方法有用到,之前的文件也講過,所以如果有需要可以去看下之前的文章,就是正常異常退出恢復那兩篇。
public StoreCheckpoint(final String scpPath) throws IOException {// 判斷是否存在當前文件// D:\\javaCode\\rocketmq-source\\config\\store\\checkpointFile file = new File(scpPath);MappedFile.ensureDirOK(file.getParent());// 文件是否存在boolean fileExists = file.exists();// mmap 映射this.randomAccessFile = new RandomAccessFile(file, "rw");this.fileChannel = this.randomAccessFile.getChannel();this.mappedByteBuffer = fileChannel.map(MapMode.READ_WRITE, 0, MappedFile.OS_PAGE_SIZE);if (fileExists) {log.info("store checkpoint file exists, " + scpPath);// 記錄最新 CommitLog 文件的最新添加到 ByteBuffer 的時間戳this.physicMsgTimestamp = this.mappedByteBuffer.getLong(0);// 最新 ConsumeQueue 文件的最新添加到 ByteBuffer 的時間戳this.logicsMsgTimestamp = this.mappedByteBuffer.getLong(8);// 最新 IndexFile 文件的最新添加到 ByteBuffer 的時間戳this.indexMsgTimestamp = this.mappedByteBuffer.getLong(16);log.info("store checkpoint file physicMsgTimestamp " + this.physicMsgTimestamp + ", "+ UtilAll.timeMillisToHumanString(this.physicMsgTimestamp));log.info("store checkpoint file logicsMsgTimestamp " + this.logicsMsgTimestamp + ", "+ UtilAll.timeMillisToHumanString(this.logicsMsgTimestamp));log.info("store checkpoint file indexMsgTimestamp " + this.indexMsgTimestamp + ", "+ UtilAll.timeMillisToHumanString(this.indexMsgTimestamp));} else {// 文件不存在log.info("store checkpoint file not exists, " + scpPath);}
}
3.4 indexService.load 加載 IndexFile 文件
/*** 加載 IndexFile 文件, 路徑是 ${storePathRootDir}/index* @param lastExitOK 上一次 RocketMQ 是否正常退出* @return*/
public boolean load(final boolean lastExitOK) {// 首先獲取這個文件夾路徑下面的所有文件File dir = new File(this.storePath);File[] files = dir.listFiles();if (files != null) {// 文件目錄名稱排序Arrays.sort(files);for (File file : files) {try {// 構建 IndexFileIndexFile f = new IndexFile(file.getPath(), this.hashSlotNum, this.indexNum, 0, 0);// 加載 IndexFilef.load();// 如果上一次不是正常退出if (!lastExitOK) {// 如果說 IndexFile 最后一條消息的 storeTimeStamp 比 StoreCheckPoint 中記錄的要大if (f.getEndTimestamp() > this.defaultMessageStore.getStoreCheckpoint().getIndexMsgTimestamp()) {// 說明這個 IndexFile 有一部分數據是臟數據, 刪掉這個文件f.destroy(0);continue;}}log.info("load index file OK, " + f.getFileName());// 加到 indexFileList 里面this.indexFileList.add(f);} catch (IOException e) {log.error("load file {} error", file, e);return false;} catch (NumberFormatException e) {log.error("load file {} error", file, e);}}}return true;
}
這個方法就用到了我們提到的 StoreCheckPoint 文件里面的數據,如果 IndexFile 記錄的最新的索引的消息在 CommitLog 的存儲時間比 StoreCheckPoint 文件里面記錄的 indexMsgTimestamp 要大,說明這個 IndexFile 文件就是一個不合法的文件,至少是數據不合法的,因為 indexMsgTimestamp 這個變量就是在 IndexFile 滿了刷盤的時候才會記錄,比如將一個寫滿了的 IndexFile 文件刷盤就記錄一下這個 indexMsgTimestamp 變量。
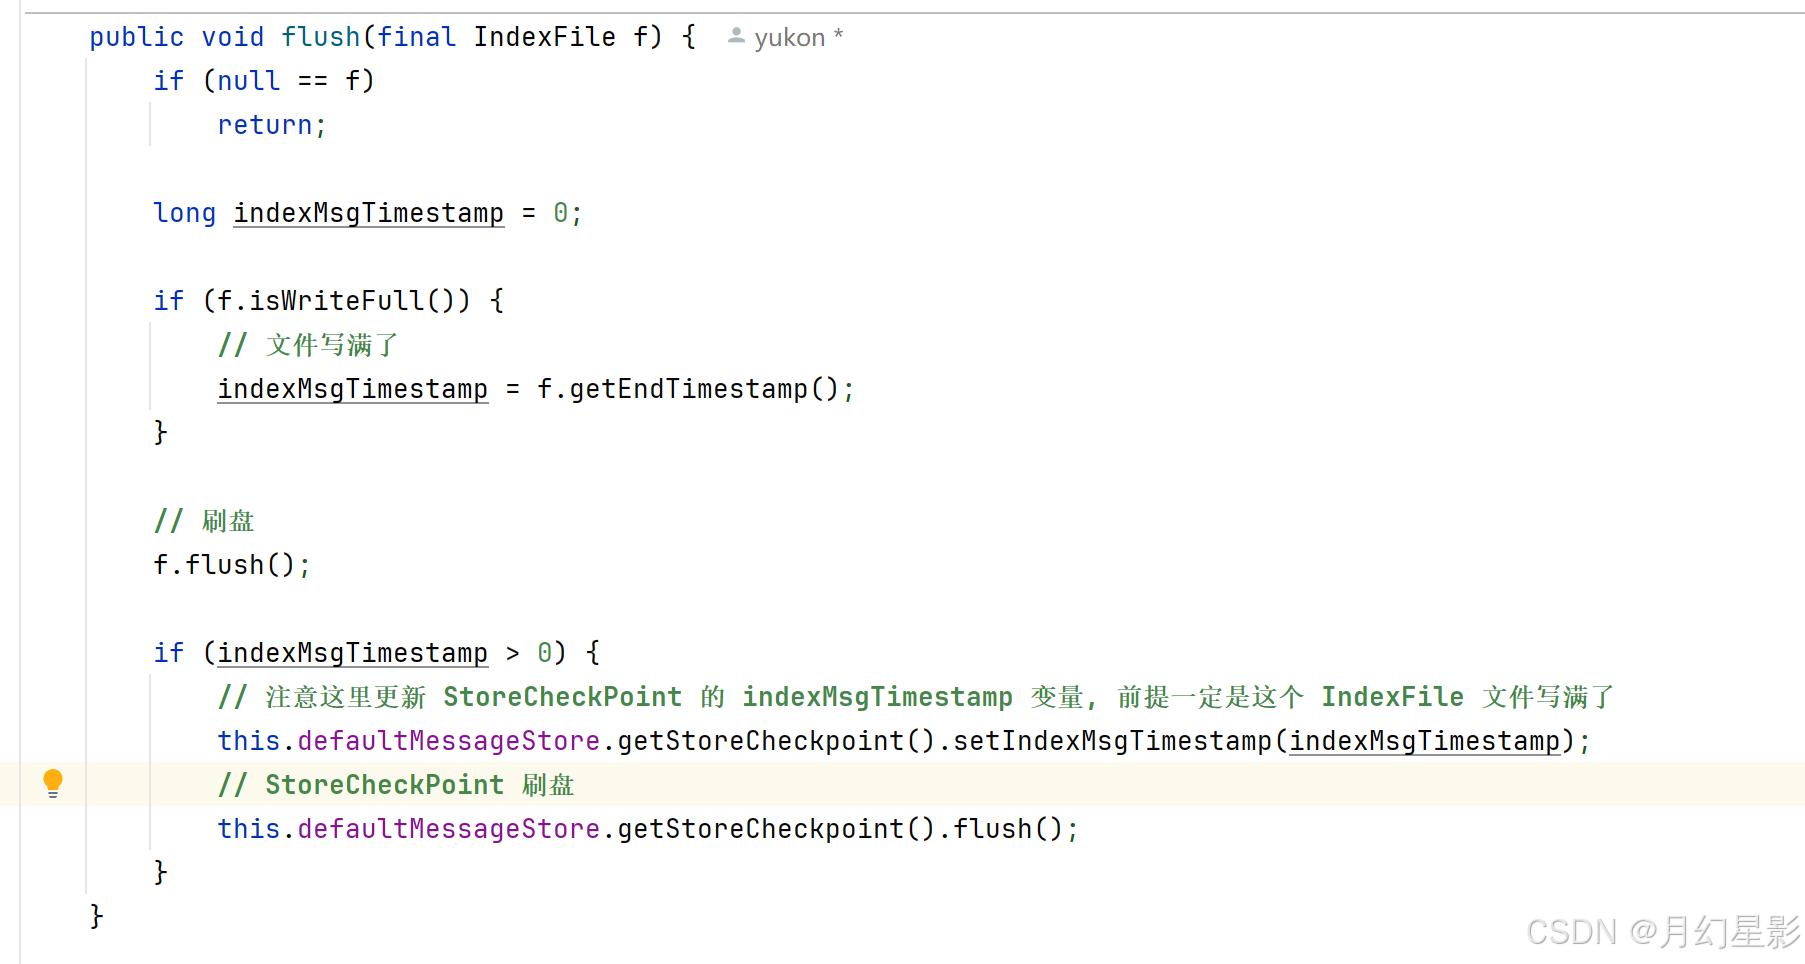
所以看上面圖也能看出來,刷盤的時候必須要文件寫滿了才會去更新 indexMsgTimestamp,這就意味者這個變量就是記錄完整的 IndexFile 刷盤的時間,而不是刷盤一次就記錄一次,因此如果說 IndexFile 最后一條消息的 storeTimeStamp 比 StoreCheckPoint 中記錄的要大,就說明這個 IndexFile 肯定是有問題的。
至于為什么可以這么記錄,因為 IndexFile 不像 CommitLog 和 ConsumeQueue 那樣,一個 IndexFile 就是一個 MappedFile 來存儲所有數據,像 CommitLog 和 ConsumeQueue 都是用 MappedFileQueue 存儲 MappedFile 集合的,所以這里還是有點不同的。
3.5 recover 文件恢復
這里的文件恢復代碼如下:
/*** 恢復 CommitLog 和 ConsumeQueue 中的數據到內存中* @param lastExitOK*/
private void recover(final boolean lastExitOK) {// 恢復所有 ConsumeQueue 文件,返回的是 ConsumeQueue 中存儲的最大有效 CommitLog 偏移量long maxPhyOffsetOfConsumeQueue = this.recoverConsumeQueue();// 上一次 Broker 退出是正常退出還是異常退出if (lastExitOK) {// 這里就是正常退出,所以正常恢復 CommitLogthis.commitLog.recoverNormally(maxPhyOffsetOfConsumeQueue);} else {// 這里就是異常退出,所以異常恢復 CommitLogthis.commitLog.recoverAbnormally(maxPhyOffsetOfConsumeQueue);}// 最后恢復 topicQueueTablethis.recoverTopicQueueTable();
}
正常異常恢復的邏輯在前面講 RocketMQ 存儲部分的時候已經講過了,所以這里就不再多說。
- 【RocketMQ 存儲】- 異常退出恢復邏輯 recoverAbnormally
- 【RocketMQ 存儲】- 正常退出恢復邏輯 recoverNormally
3.6 延時消息服務加載
延時消息屬于消息消費的一種,這里后面講到消費者的時候也會詳細講解,這里先不多說。
4. registerProcessor 注冊 code 處理器
/*** 注冊 Code 處理器*/
public void registerProcessor() {/*** SendMessageProcessor*/SendMessageProcessor sendProcessor = new SendMessageProcessor(this);sendProcessor.registerSendMessageHook(sendMessageHookList);sendProcessor.registerConsumeMessageHook(consumeMessageHookList);// 消息發送的處理器this.remotingServer.registerProcessor(RequestCode.SEND_MESSAGE, sendProcessor, this.sendMessageExecutor);this.remotingServer.registerProcessor(RequestCode.SEND_MESSAGE_V2, sendProcessor, this.sendMessageExecutor);this.remotingServer.registerProcessor(RequestCode.SEND_BATCH_MESSAGE, sendProcessor, this.sendMessageExecutor);this.remotingServer.registerProcessor(RequestCode.CONSUMER_SEND_MSG_BACK, sendProcessor, this.sendMessageExecutor);this.fastRemotingServer.registerProcessor(RequestCode.SEND_MESSAGE, sendProcessor, this.sendMessageExecutor);this.fastRemotingServer.registerProcessor(RequestCode.SEND_MESSAGE_V2, sendProcessor, this.sendMessageExecutor);this.fastRemotingServer.registerProcessor(RequestCode.SEND_BATCH_MESSAGE, sendProcessor, this.sendMessageExecutor);this.fastRemotingServer.registerProcessor(RequestCode.CONSUMER_SEND_MSG_BACK, sendProcessor, this.sendMessageExecutor);/*** PullMessageProcessor, 專門用于處理 PULL_MESSAGE 這個請求 CODE, 也就是消息拉取請求*/this.remotingServer.registerProcessor(RequestCode.PULL_MESSAGE, this.pullMessageProcessor, this.pullMessageExecutor);this.pullMessageProcessor.registerConsumeMessageHook(consumeMessageHookList);/*** ReplyMessageProcessor*/ReplyMessageProcessor replyMessageProcessor = new ReplyMessageProcessor(this);replyMessageProcessor.registerSendMessageHook(sendMessageHookList);this.remotingServer.registerProcessor(RequestCode.SEND_REPLY_MESSAGE, replyMessageProcessor, replyMessageExecutor);this.remotingServer.registerProcessor(RequestCode.SEND_REPLY_MESSAGE_V2, replyMessageProcessor, replyMessageExecutor);this.fastRemotingServer.registerProcessor(RequestCode.SEND_REPLY_MESSAGE, replyMessageProcessor, replyMessageExecutor);this.fastRemotingServer.registerProcessor(RequestCode.SEND_REPLY_MESSAGE_V2, replyMessageProcessor, replyMessageExecutor);/*** QueryMessageProcessor*/NettyRequestProcessor queryProcessor = new QueryMessageProcessor(this);this.remotingServer.registerProcessor(RequestCode.QUERY_MESSAGE, queryProcessor, this.queryMessageExecutor);this.remotingServer.registerProcessor(RequestCode.VIEW_MESSAGE_BY_ID, queryProcessor, this.queryMessageExecutor);this.fastRemotingServer.registerProcessor(RequestCode.QUERY_MESSAGE, queryProcessor, this.queryMessageExecutor);this.fastRemotingServer.registerProcessor(RequestCode.VIEW_MESSAGE_BY_ID, queryProcessor, this.queryMessageExecutor);/*** ClientManageProcessor*/ClientManageProcessor clientProcessor = new ClientManageProcessor(this);this.remotingServer.registerProcessor(RequestCode.HEART_BEAT, clientProcessor, this.heartbeatExecutor);this.remotingServer.registerProcessor(RequestCode.UNREGISTER_CLIENT, clientProcessor, this.clientManageExecutor);this.remotingServer.registerProcessor(RequestCode.CHECK_CLIENT_CONFIG, clientProcessor, this.clientManageExecutor);this.fastRemotingServer.registerProcessor(RequestCode.HEART_BEAT, clientProcessor, this.heartbeatExecutor);this.fastRemotingServer.registerProcessor(RequestCode.UNREGISTER_CLIENT, clientProcessor, this.clientManageExecutor);this.fastRemotingServer.registerProcessor(RequestCode.CHECK_CLIENT_CONFIG, clientProcessor, this.clientManageExecutor);/*** ConsumerManageProcessor*/ConsumerManageProcessor consumerManageProcessor = new ConsumerManageProcessor(this);this.remotingServer.registerProcessor(RequestCode.GET_CONSUMER_LIST_BY_GROUP, consumerManageProcessor, this.consumerManageExecutor);this.remotingServer.registerProcessor(RequestCode.UPDATE_CONSUMER_OFFSET, consumerManageProcessor, this.consumerManageExecutor);this.remotingServer.registerProcessor(RequestCode.QUERY_CONSUMER_OFFSET, consumerManageProcessor, this.consumerManageExecutor);this.fastRemotingServer.registerProcessor(RequestCode.GET_CONSUMER_LIST_BY_GROUP, consumerManageProcessor, this.consumerManageExecutor);this.fastRemotingServer.registerProcessor(RequestCode.UPDATE_CONSUMER_OFFSET, consumerManageProcessor, this.consumerManageExecutor);this.fastRemotingServer.registerProcessor(RequestCode.QUERY_CONSUMER_OFFSET, consumerManageProcessor, this.consumerManageExecutor);/*** EndTransactionProcessor*/this.remotingServer.registerProcessor(RequestCode.END_TRANSACTION, new EndTransactionProcessor(this), this.endTransactionExecutor);this.fastRemotingServer.registerProcessor(RequestCode.END_TRANSACTION, new EndTransactionProcessor(this), this.endTransactionExecutor);/*** Default*/AdminBrokerProcessor adminProcessor = new AdminBrokerProcessor(this);this.remotingServer.registerDefaultProcessor(adminProcessor, this.adminBrokerExecutor);this.fastRemotingServer.registerDefaultProcessor(adminProcessor, this.adminBrokerExecutor);
}
這里就是注冊處理器的邏輯,上一篇文章我們說過,RocketMQ 發送請求的時候會在請求頭設置 code 表示這個請求是什么類型的請求,這個請求需要使用什么處理器來處理就是在這里注冊的,同時 broker 處理請求的時候不可能是單線程處理的,肯定是封裝成一個 runnable 線程任務去處理,所以需要傳入一個線程池來并發執行。
5. ConfigManager.persist
在 BrokerController#initialize 中啟動了多個定時任務來定時持久化,下面來看下這個持久化的源碼。
/*** 持久化到文件中, 持久化 json 和 json.bak 文件*/
public synchronized void persist() {// 需要持久化的數據String jsonString = this.encode(true);if (jsonString != null) {// 需要持久化的文件路徑String fileName = this.configFilePath();try {// 持久化邏輯MixAll.string2File(jsonString, fileName);} catch (IOException e) {log.error("persist file " + fileName + " exception", e);}}
}
這里面就是用了模板方法的設計模式,ConfigManager 是一個抽象類,需要持久化的數據 encode、需要持久化的文件路徑 configFilePath 都是子類實現的,下面是 ConfigManager 的子類。

6. protectBroker 保護 broker
RocketMQ 作為消息隊列,肯定會存在消息堆積的情況,如果是堆積量比較少那還行,可以新啟動多幾個消費者來加速消費,但是如果堆積量比較大,這就不得不懷疑是不是消費者出什么問題了,比如代碼出 bug 導致消費進度一致不變。
我們知道消費者消費之前都會先去 broker 拉取消息到本地,然后再在本地消費,所以如果消費者拉取消息的進度一直不變,而生產者又在不斷新增消息,就會導致消息堆積量越來越多。
這個 protectBroker 方法就是去檢測如果這個消費者組的消息拉取進度落后最新消息超過 16G, 說明有可能這個消費者組里面的消費者出問題了, 不能正常消費消息, 所以這時候就會將消費者組的訂閱配置設置為禁止消費, 需要人為介入去修復。
public void protectBroker() {// 如果禁止消費者緩慢讀取if (this.brokerConfig.isDisableConsumeIfConsumerReadSlowly()) {final Iterator<Map.Entry<String, MomentStatsItem>> it = this.brokerStatsManager.getMomentStatsItemSetFallSize().getStatsItemTable().entrySet().iterator();while (it.hasNext()) {final Map.Entry<String, MomentStatsItem> next = it.next();// fallBehindBytes 記錄的是消費者組剩余可以拉取的消息大小final long fallBehindBytes = next.getValue().getValue().get();// 如果超過了 16Gif (fallBehindBytes > this.brokerConfig.getConsumerFallbehindThreshold()) {final String[] split = next.getValue().getStatsKey().split("@");final String group = split[2];LOG_PROTECTION.info("[PROTECT_BROKER] the consumer[{}] consume slowly, {} bytes, disable it", group, fallBehindBytes);// 設置這個消費者組的 consumeEnable 為 false, 禁止這個消費者組里面的消費者對這個 topic 消費this.subscriptionGroupManager.disableConsume(group);}}}}
7. fetchNameServerAddr 定時任務定時拉取 NameServer 地址
broker 啟動的時候在 start 方法會啟動一個定時任務去定期拉取 NameServer 地址,當然這里的定期拉取 NameServer 地址的前提是用戶沒有在 broker.conf 文件中設置 namesrvAddr 配置。
public String fetchNameServerAddr() {try {// 從地址服務器拉取 nameserver 的地址String addrs = this.topAddressing.fetchNSAddr();if (addrs != null) {if (!addrs.equals(this.nameSrvAddr)) {log.info("name server address changed, old: {} new: {}", this.nameSrvAddr, addrs);this.updateNameServerAddressList(addrs);// 更新 nameSrvAddr 屬性this.nameSrvAddr = addrs;return nameSrvAddr;}}} catch (Exception e) {log.error("fetchNameServerAddr Exception", e);}return nameSrvAddr;
}
核心源碼是下面的 fetchNSAddr,來看下代碼。
/*** 拉取 nameserver 的地址* @return*/
public final String fetchNSAddr() {return fetchNSAddr(true, 3000);
}/*** 拉取 nameserver 的地址* @param verbose* @param timeoutMills* @return*/
public final String fetchNSAddr(boolean verbose, long timeoutMills) {String url = this.wsAddr;try {// 向 wsAddr 地址發送查詢 NameServer 的請求if (!UtilAll.isBlank(this.unitName)) {url = url + "-" + this.unitName + "?nofix=1";}HttpTinyClient.HttpResult result = HttpTinyClient.httpGet(url, null, null, "UTF-8", timeoutMills);if (200 == result.code) {String responseStr = result.content;if (responseStr != null) {// 處理返回結果return clearNewLine(responseStr);} else {log.error("fetch nameserver address is null");}} else {log.error("fetch nameserver address failed. statusCode=" + result.code);}} catch (IOException e) {if (verbose) {log.error("fetch name server address exception", e);}}if (verbose) {String errorMsg ="connect to " + url + " failed, maybe the domain name " + MixAll.getWSAddr() + " not bind in /etc/hosts";errorMsg += FAQUrl.suggestTodo(FAQUrl.NAME_SERVER_ADDR_NOT_EXIST_URL);log.warn(errorMsg);}return null;
}private static String clearNewLine(final String str) {// 去除前后的空格String newString = str.trim();int index = newString.indexOf("\r");if (index != -1) {// 截取 \r 前面的字符串return newString.substring(0, index);}index = newString.indexOf("\n");if (index != -1) {// 截取 \n 前面的字符串return newString.substring(0, index);}// 沒有 \r 和 \n 字符, 直接返回原來的字符串return newString;
}
拉取的邏輯就是往 url 發送 get 請求來獲取地址,所以這里的核心就是如何找到這個 url,也就是代碼中的 wsAddr。由于這個屬性是 TopAddressing 的,我們就看下這個屬性是怎么設置的。

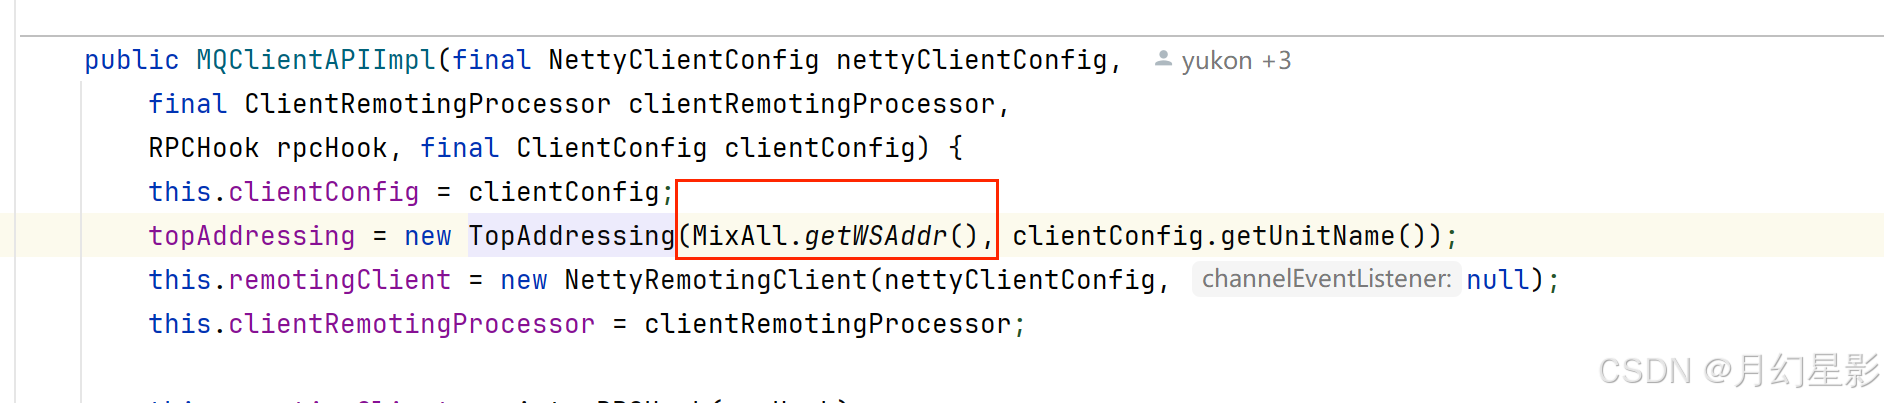
可以看到這個屬性就是從 MixAll.getWSAddr 這個方法獲取到的,這個方法就是用于獲取地址服務器的請求地址。
/*** 獲取 WS 地址* @return*/
public static String getWSAddr() {// 屬性 rocketmq.namesrv.domain,默認值 jmenv.tbsite.netString wsDomainName = System.getProperty("rocketmq.namesrv.domain", DEFAULT_NAMESRV_ADDR_LOOKUP);// 屬性 rocketmq.namesrv.domain.subgroup,默認值 nsaddrString wsDomainSubgroup = System.getProperty("rocketmq.namesrv.domain.subgroup", "nsaddr");// wsAddr 的默認值是 http://jmenv.tbsite.net:8080/rocketmq/nsaddrString wsAddr = "http://" + wsDomainName + ":8080/rocketmq/" + wsDomainSubgroup;// 如果存在 ':', 比如說 127.0.0.1:9876if (wsDomainName.indexOf(":") > 0) {// wsAddr 的會被設置成 http://127.0.0.1:9876/rocketmq/nsaddrwsAddr = "http://" + wsDomainName + "/rocketmq/" + wsDomainSubgroup;}// 返回 ws 地址return wsAddr;
}
如果在沒有配置系統變量的情況下,默認就是 http://jmenv.tbsite.net:8080/rocketmq/nsaddr,這個一般也用不到吧,除非是用一個服務來統一管理 NameServer 地址,這里就看下注釋即可。
8. 小結
承接上一篇文章,本篇對其中一些關鍵方法進行了補充說明。將這兩篇文章結合起來,我們就梳理出了 broker 啟動的大致邏輯。
在 broker 啟動過程中,涉及眾多方法,本文已著重對部分重要方法進行了補充介紹。不過,還有一些同樣關鍵的操作尚未展開,比如將 broker 信息注冊到 NameServer 這一操作。考慮到其重要性和復雜性,我會專門撰寫一篇文章深入剖析。
至此,關于 broker 啟動的大致邏輯就講解到這里了。后續文章,我們再一同深入探討其他關鍵環節。
如有錯誤,歡迎指出!!!!

)

)


包中關于SMTP協議支持的屬性參數配置)


:關于angular里面的響應式數據入門使用)

詳解)


