文章目錄
- 📚初始化腳手架
- 🐇創建初體驗
- 🐇分析腳手架結構
- 🐇關于render
- 🐇查看默認配置
- 📚ref與props
- 🐇ref屬性
- 🐇props配置項
- 📚混入
- 📚插件
- 📚scoped樣式
學習鏈接:尚硅谷Vue2.0+Vue3.0全套教程丨vuejs從入門到精通,本文對應p61-p69,博客參考尚硅谷公開筆記,補充記錄實操。
📚初始化腳手架
🐇創建初體驗
- Vue 腳手架是 Vue 官方提供的標準化開發工具(開發平臺)。
CLI:command line interface(目前已經維護了,但也試一試)
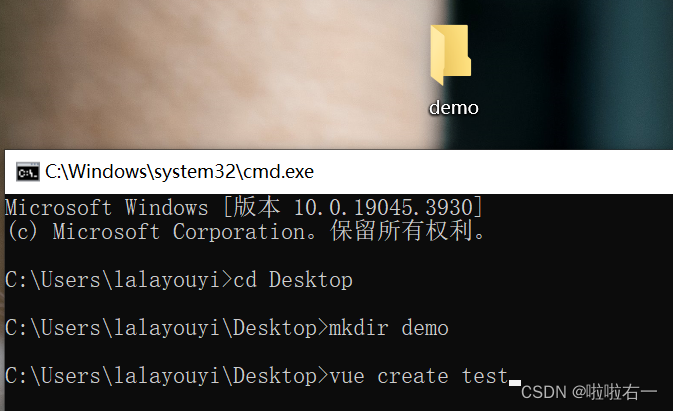
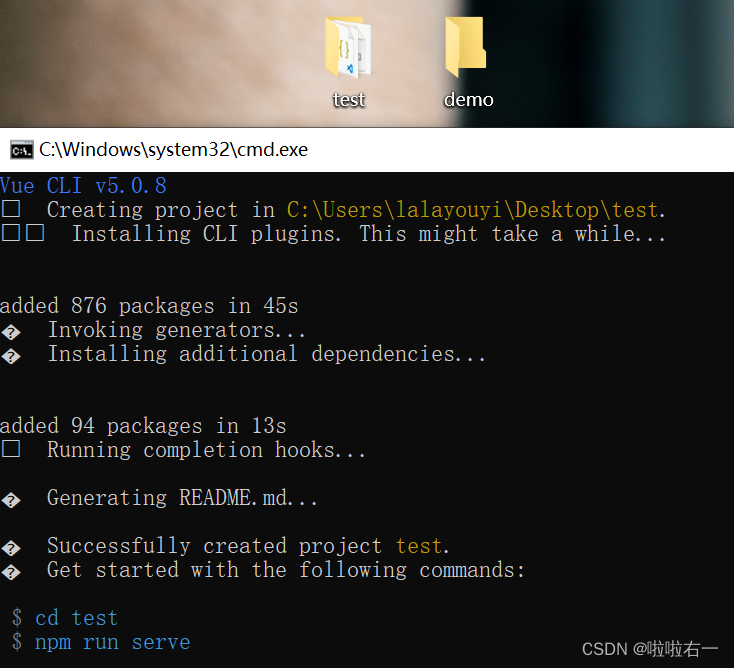
- 全局安裝:
npm config set registry https://registry.npm.taobao.orgnpm install -g @vue/cli
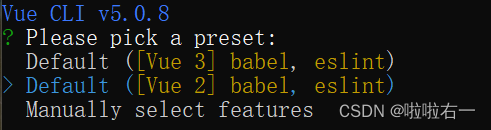
- 創建過程
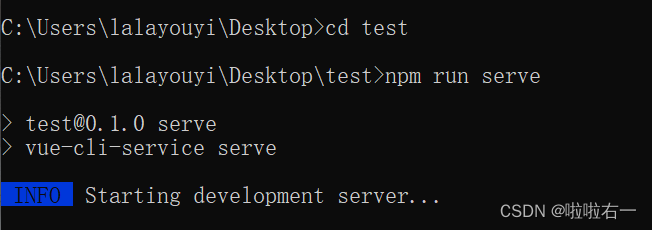
- 切換到要創建項目的目錄,然后使用
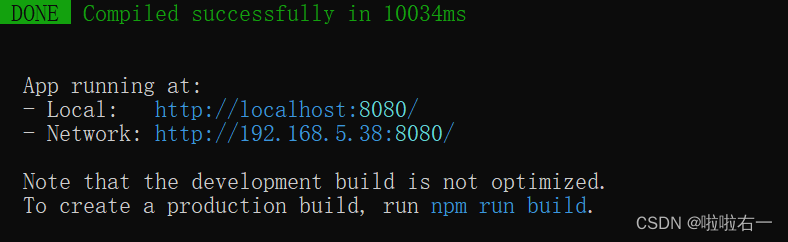
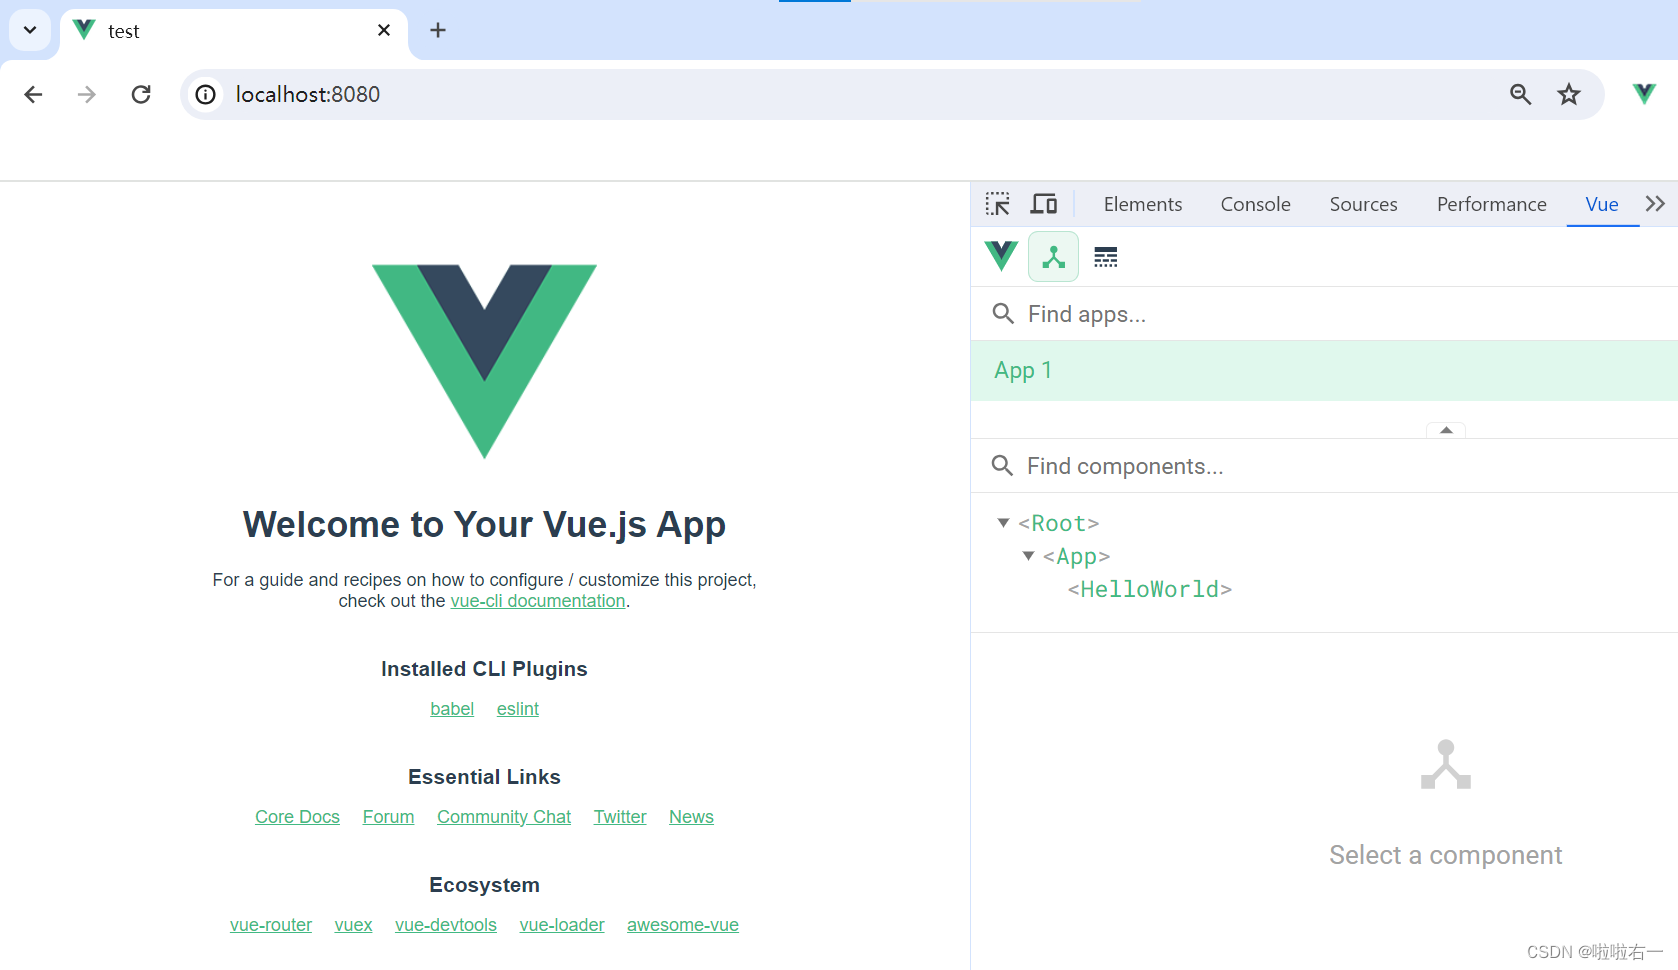
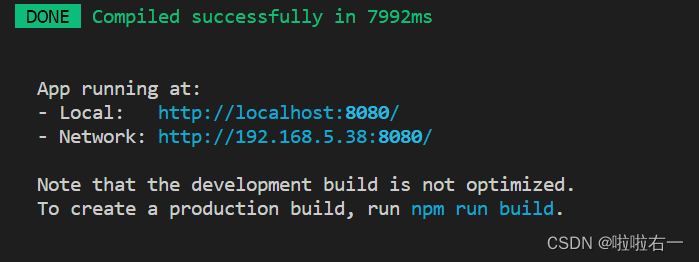
vue create xxxx命令創建項目。 - 啟動項目:
npm run serve - 停止項目:
ctrl+C

- 切換到要創建項目的目錄,然后使用
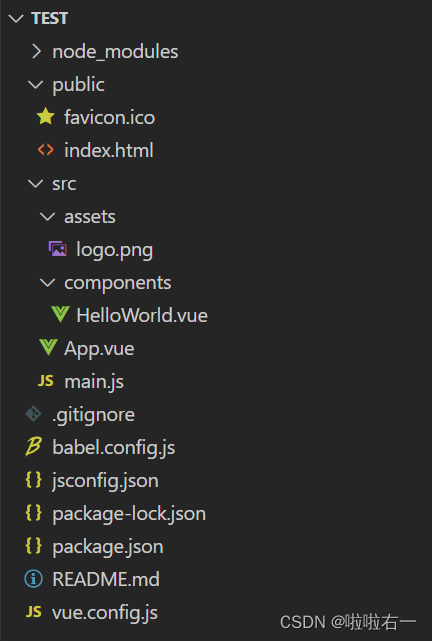
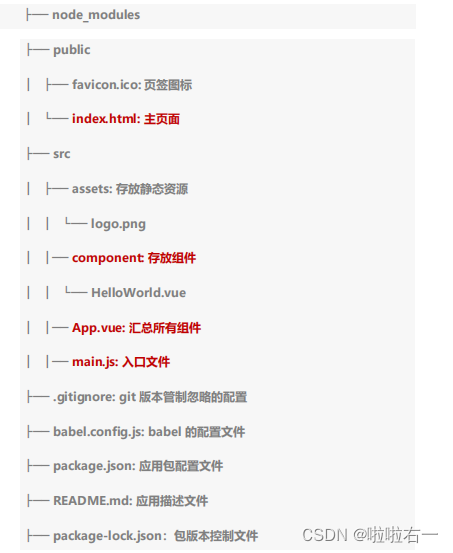
🐇分析腳手架結構
- 詳見講解,實操見真知
- 填坑,把上一節沒跑出來的代碼跑一下
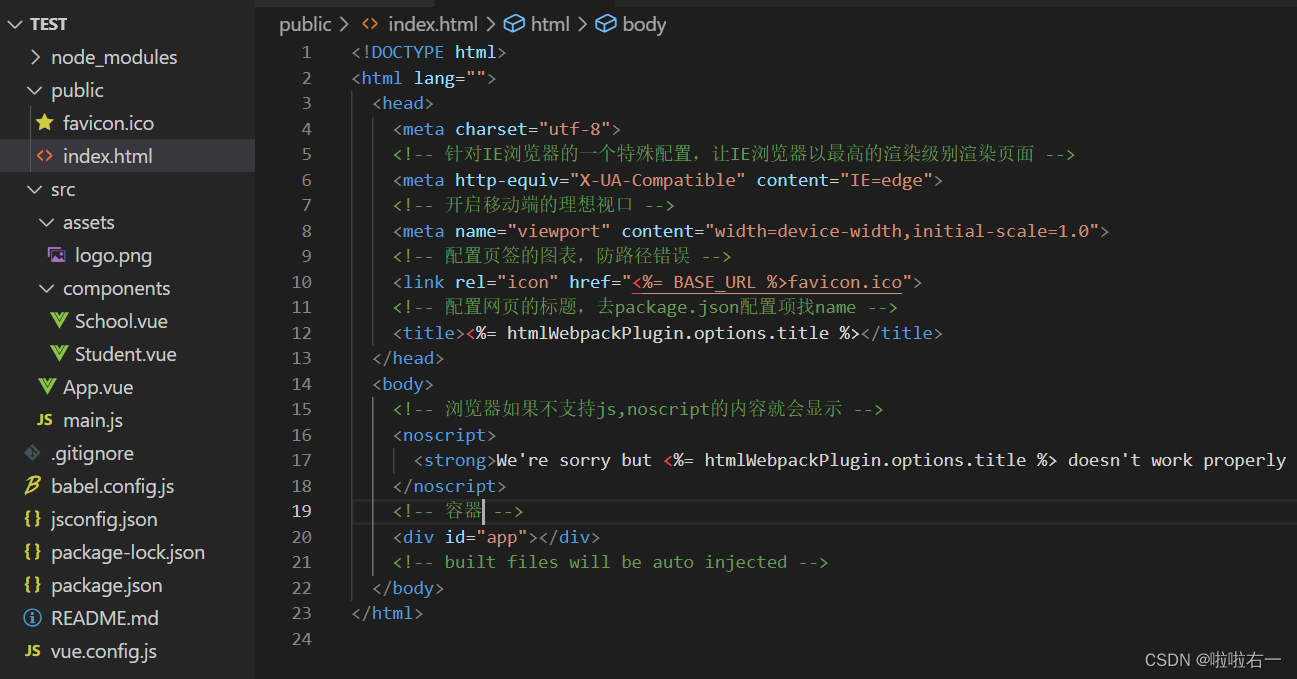
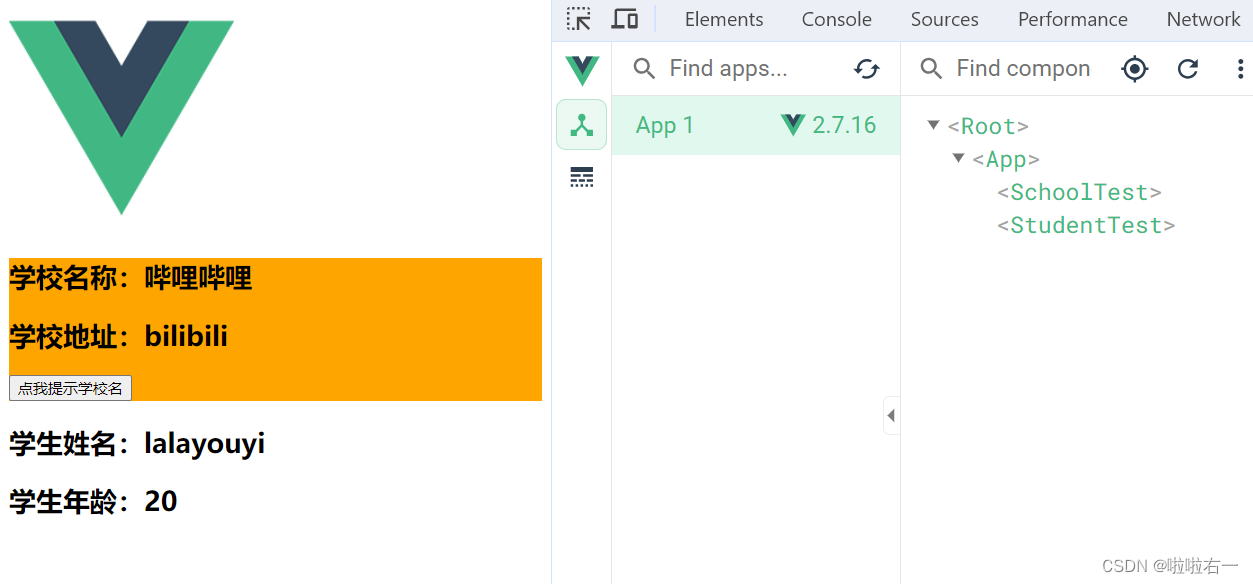
- ??把對應的地址鏈接調整后,運行后出現如下報錯:
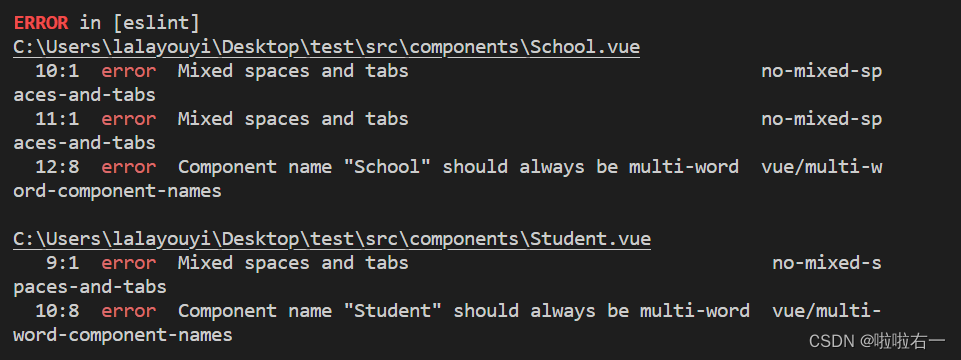
- ①將School和Student對應命名改為復合命名。
- ②package.json文件中的
eslintConfig,找到rules處,添加以下代碼即可解決"rules":{"no-mixed-spaces-and-tabs":0 }
- 運行結果
🐇關于render
- 與上一節最后一個小案例不同的是,Vue默認創建的
main.js如下,且我在上述案例應用時直接應用了默認生成的main.jsimport Vue from 'vue' import App from './App.vue'Vue.config.productionTip = falsenew Vue({render: h => h(App), }).$mount('#app') render函數的本質就是創建元素,也就是說本質是類似于以下的函數:render(createElement){return createElement('h1','你好啊') } //精簡后就是: render: h => h('h1','你好啊') //也就是上邊的render: h => h(App)- 按原來的版本運行了一下,會報錯。解決辦法是,修改
import Vue from 'vue'為import Vue from 'vue/dist/vue'。原來引入的vue其實是殘缺版的vue(缺少了模板解析器),它無法解析template,標簽類型的template不受影響,也即.vue文件里的<template></template>不受影響。// 原來的寫法 new Vue({el:'#app',template:`<App></App>`,components:{App}, })
- 為什么要用殘缺版vue——更精簡。
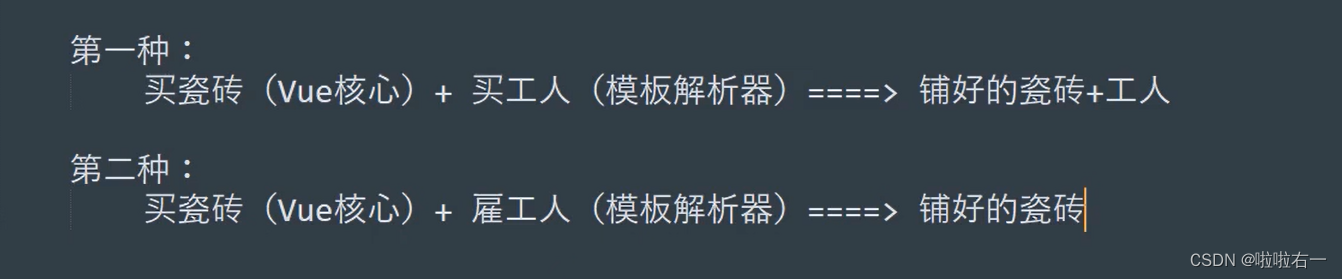
- 關于不同版本的Vue:
vue.js與vue.runtime.xxx.js的區別:vue.js是完整版的Vue,包含核心功能 + 模板解析器。vue.runtime.xxx.js是運行版的Vue,只包含核心功能,沒有模板解析器。
- 因為
vue.runtime.xxx.js沒有模板解析器,所以不能使用template配置項。需要使用render函數接收到的createElement函數去指定具體內容。
🐇查看默認配置
- Vue腳手架隱藏了所有webpack相關的配置。
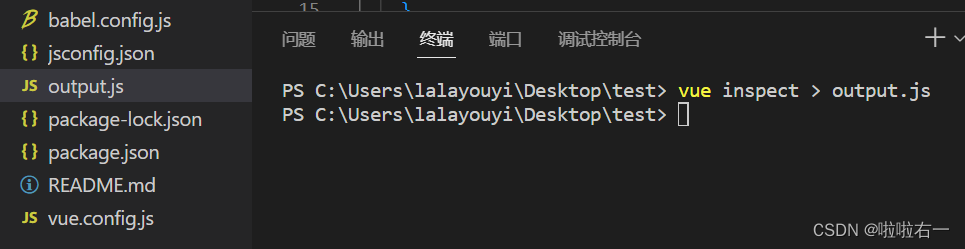
- 若想查看具體的webpack配置,要執行
vue inspect > output.js,會生成output.js和vue.config.js(這里和教程不一樣,現在后者也會直接生成)。 - 使用
vue.config.js可以對腳手架進行個性化定制,詳情見官網配置參考(不過一般誰改哇[?_??])。
📚ref與props
后續代碼都在上述框架里修改,文內不一定展示完整代碼。
🐇ref屬性
-
被用來給元素或子組件注冊引用信息(id的替代者)
-
應用在html標簽上獲取的是真實DOM元素,應用在組件標簽上是組件實例對象(vc)
-
使用方式:
- 打標識:
<h1 ref="xxx">.....</h1>或<School ref="xxx"></School> - 獲取:
this.$refs.xxx
<template><div><h1 v-text="msg" ref="title"></h1><button ref="btn" @click="showDOM">點我輸出上方的DOM元素</button><School ref="sch"/></div>
</template><script>//引入School組件import School from './components/School-Test'export default {name:'App',components:{School},data() {return {msg:'歡迎學習Vue!'}},methods: {showDOM(){console.log(this.$refs.title) //真實DOM元素console.log(this.$refs.btn) //真實DOM元素console.log(this.$refs.sch) //School組件的實例對象(vc)}},}
</script>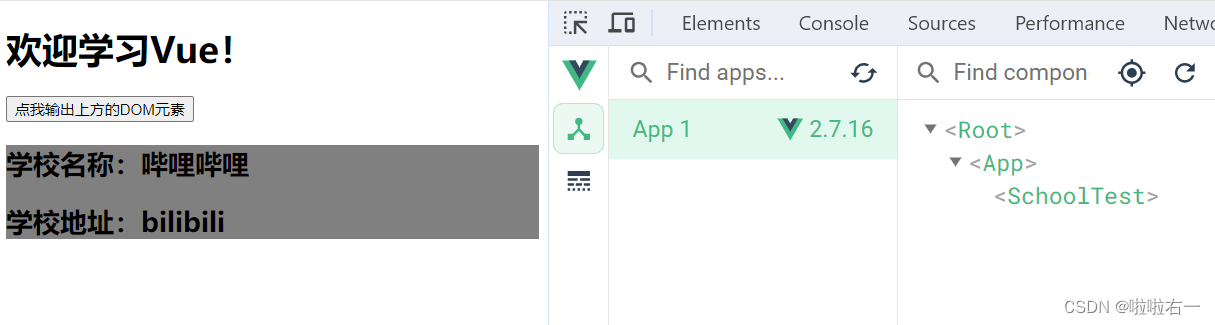

- 打標識:
🐇props配置項
-
功能:讓組件接收外部傳過來的數據
-
傳遞數據:
<Demo name="xxx"/> -
接收數據:
-
第一種方式(只接收):
props:['name'] -
第二種方式(限制類型):
props:{name:String} -
第三種方式(限制類型、限制必要性、指定默認值):
props:{name:{type:String, //類型required:true, //必要性default:'老王' //默認值}
}
備注:props是只讀的,Vue底層會監測你對props的修改,如果進行了修改,就會發出警告,若業務需求確實需要修改,那么請復制props的內容到data中一份,然后去修改data中的數據。
-
-
傳的時候:
<Student name="youyi" sex="女" :age="20"/>(App.vue)<template><div><Student name="youyi" sex="女" :age="20"/></div> </template><script>import Student from './components/Student-Test'export default {name:'App',components:{Student}} </script> -
接收的時候:
props,必須要寫類似于微信轉賬確認(Student-Test.vue)<template><div><h1>{{msg}}</h1><h2>學生姓名:{{name}}</h2><h2>學生性別:{{sex}}</h2><h2>學生年齡:{{myAge+1}}</h2><button @click="updateAge">嘗試修改收到的年齡</button></div> </template><script>export default {name:'Student-Test',data() {console.log(this)return {msg:'我是一個尚硅谷的學生',//props優先級更高,先接收//和后續update以及上述+1對應,可以規避vue報錯和錯亂myAge:this.age}},methods: {updateAge(){this.myAge++}},//簡單聲明接收(傳過來了你要確認接收)// props:['name','age','sex'] //接收的同時對數據進行類型限制(不該收的不收)/* props:{name:String,age:Number,sex:String} *///接收的同時對數據:進行類型限制+默認值的指定+必要性的限制props:{name:{type:String, //name的類型是字符串required:true, //name是必要的},age:{type:Number,default:99 //默認值},sex:{type:String,required:true}}} </script>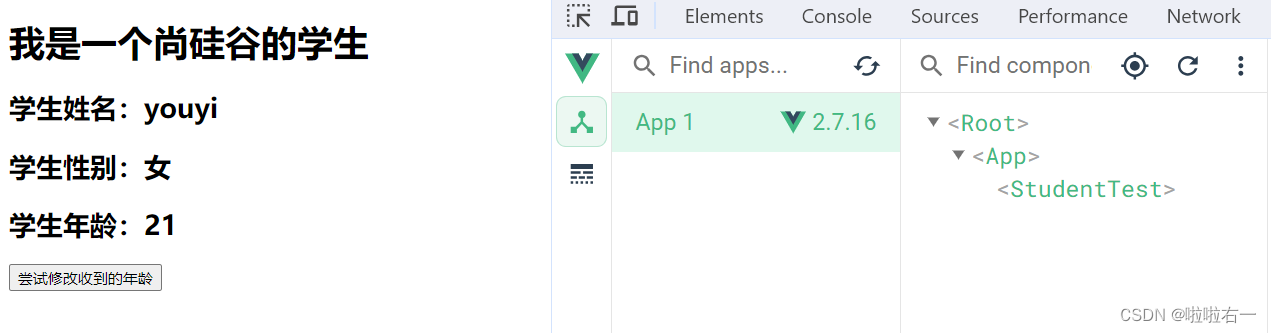
📚混入
-
功能:可以把多個組件共用的配置提取成一個混入對象(提取公因數)。
-
使用方式:
-
第一步定義混合:
{data(){....},methods:{....}.... } -
第二步使用混入:
- 全局混入:
Vue.mixin(xxx) - 局部混入:
mixins:['xxx']
- 全局混入:
-
-
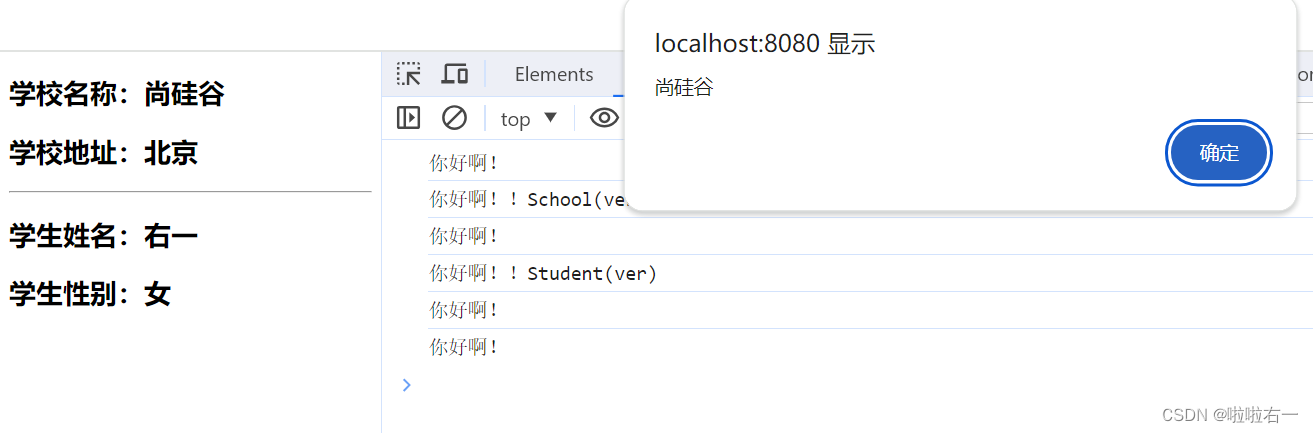
Student-Test.vue<template><div><h2 @click="showName">學生姓名:{{name}}</h2><h2>學生性別:{{sex}}</h2></div> </template><script>// 局部// import {hunhe,hunhe2} from '../mixin'export default {name:'Student-Test',data() {return {name:'右一',sex:'女'}},mounted() {// 混合的mounted優先,原有的mounted在后console.log('你好啊!!Student(ver)')},// mixins:[hunhe,hunhe2]} </script> -
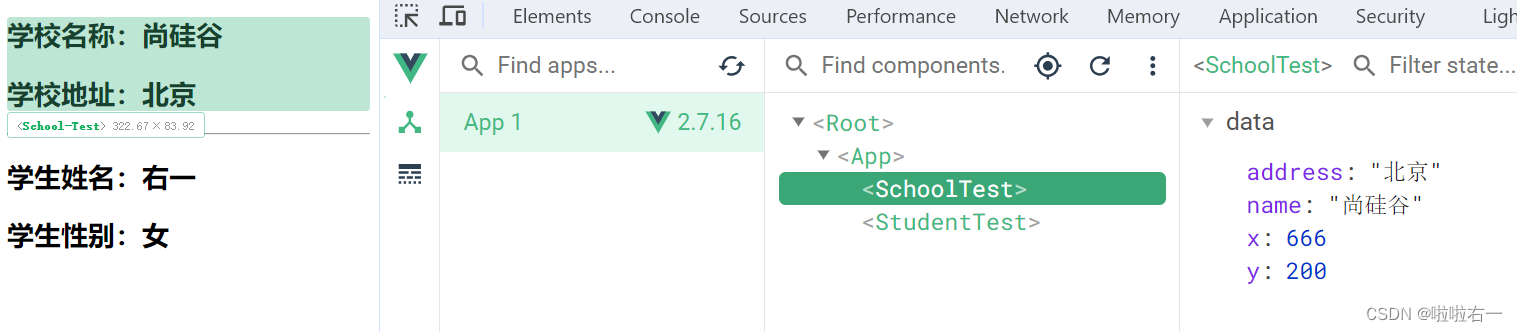
School-Test.vue<template><div><h2 @click="showName">學校名稱:{{name}}</h2><h2>學校地址:{{address}}</h2></div> </template><script>//引入一個hunhe// import {hunhe,hunhe2} from '../mixin'export default {name:'School-Test',data() {return {name:'尚硅谷',address:'北京',x:666}},mounted() {console.log('你好啊!!School(ver)')},// mixins:[hunhe,hunhe2],} </script> -
App.vue<template><div><School/><hr><Student/></div> </template><script>import School from './components/School-Test'import Student from './components/Student-Test'export default {name:'App',components:{School,Student}} </script> -
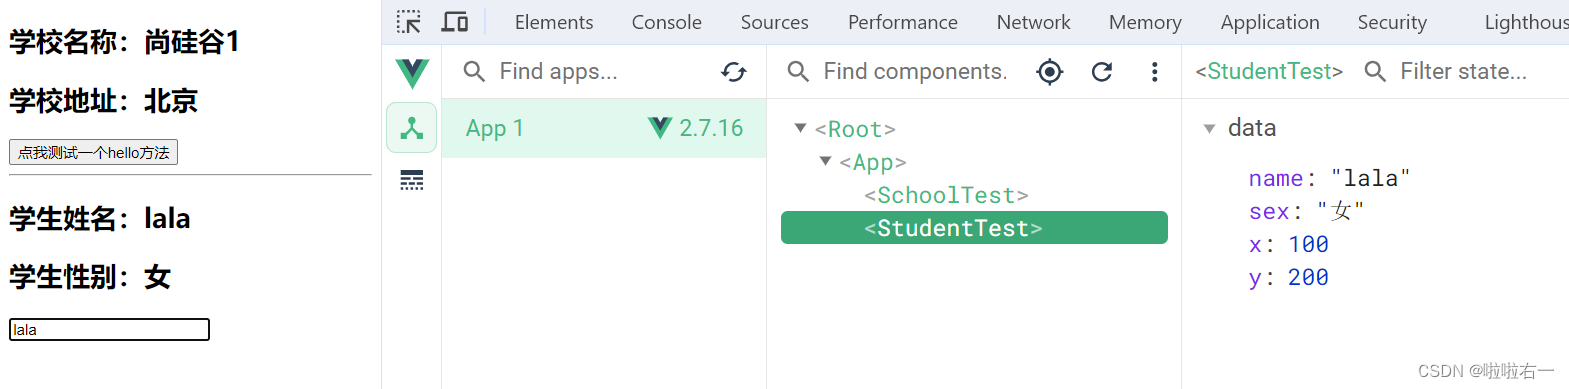
mixin.jsexport const hunhe = {methods: {showName(){alert(this.name)}},mounted() {// 混合的mounted是全局性的,什么都要摻和一下// 混合的mounted優先,原有的mounted在后console.log('你好啊!')}, } export const hunhe2 = {data() {return {//數據混合作為一個補充,不干擾原有數據x:100,y:200}}, } -
main.js//引入Vue import Vue from 'vue' //引入App import App from './App.vue' import {hunhe,hunhe2} from './mixin' //關閉Vue的生產提示 Vue.config.productionTip = falseVue.mixin(hunhe) Vue.mixin(hunhe2)//創建vm new Vue({el:'#app',render: h => h(App) })

📚插件
-
功能:用于增強Vue。
-
本質:包含install方法的一個對象,install的第一個參數是Vue,第二個以后的參數是插件使用者傳遞的數據。
-
定義插件:
對象.install = function (Vue, options) {// 1. 添加全局過濾器Vue.filter(....)// 2. 添加全局指令Vue.directive(....)// 3. 配置全局混入(合)Vue.mixin(....)// 4. 添加實例方法Vue.prototype.$myMethod = function () {...}Vue.prototype.$myProperty = xxxx } -
使用插件:
Vue.use()
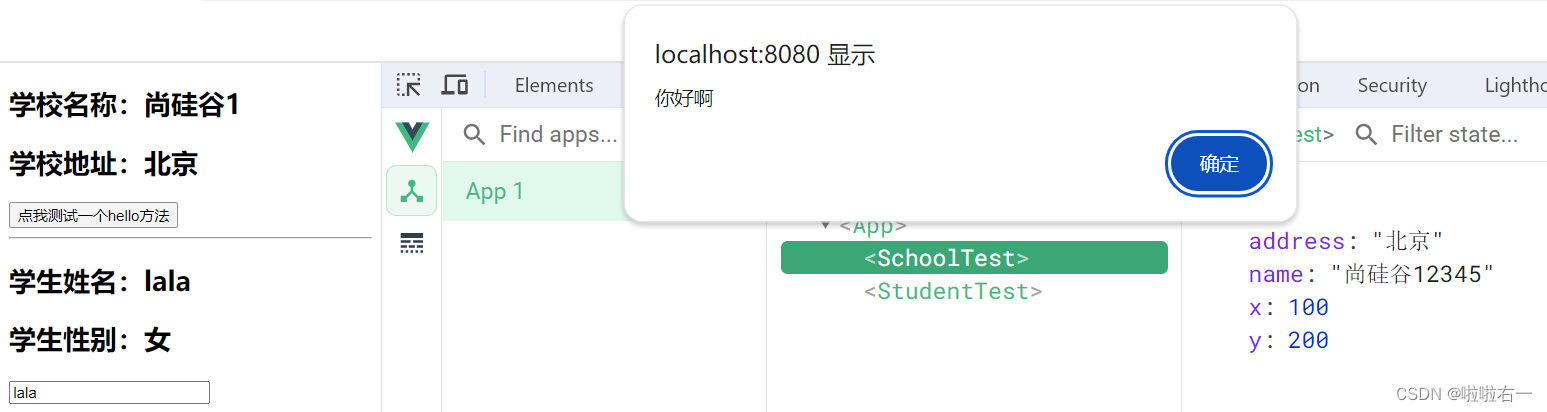
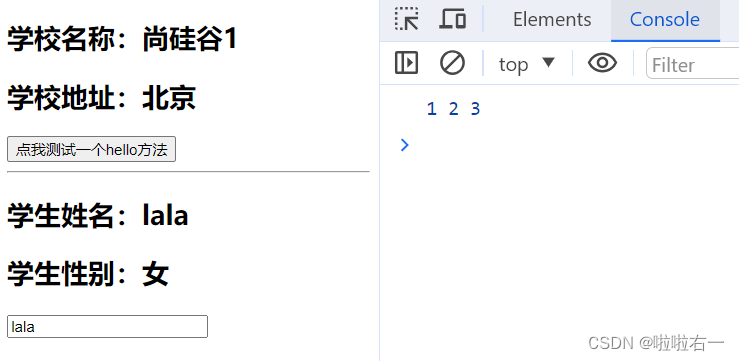
plugins.jsexport default {install(Vue,x,y,z){console.log(x,y,z)//全局過濾器Vue.filter('mySlice',function(value){return value.slice(0,4)})//定義全局指令Vue.directive('fbind',{//指令與元素成功綁定時(一上來)bind(element,binding){element.value = binding.value},//指令所在元素被插入頁面時inserted(element,binding){// eslint-disable-line no-unused-varselement.focus()},//指令所在的模板被重新解析時update(element,binding){element.value = binding.value}})//定義混入Vue.mixin({data() {return {x:100,y:200}},})//給Vue原型上添加一個方法(vm和vc就都能用了)Vue.prototype.hello = ()=>{alert('你好啊')}} }Student.Test.vue<template><div><h2>學生姓名:{{name}}</h2><h2>學生性別:{{sex}}</h2><input type="text" v-fbind:value="name"></div> </template><script>export default {name:'Student-Test',data() {return {name:'lala',sex:'女'}},} </script>School-Test.vue<template><div><h2>學校名稱:{{name | mySlice}}</h2><h2>學校地址:{{address}}</h2><button @click="test">點我測試一個hello方法</button></div> </template><script>export default {name:'School-Test',data() {return {name:'尚硅谷12345',address:'北京',}},methods: {test(){this.hello()}},} </script>App.vue同上。main.js//引入Vue import Vue from 'vue' //引入App import App from './App.vue' //引入插件 import plugins from './plugins' //關閉Vue的生產提示 Vue.config.productionTip = false//應用(使用)插件 Vue.use(plugins,1,2,3) //創建vm new Vue({el:'#app',render: h => h(App) })
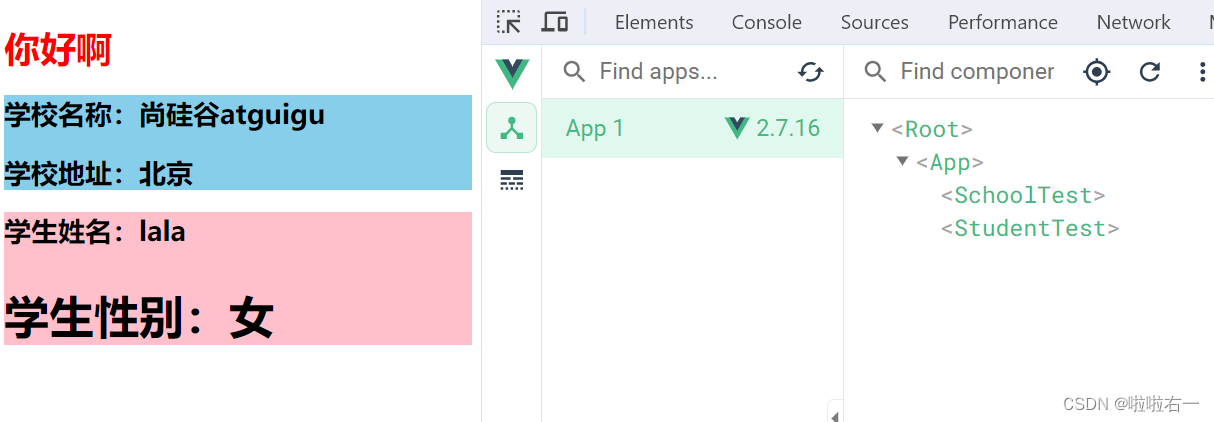
📚scoped樣式
- 作用:讓樣式在局部生效,防止沖突。
- 寫法:
<style scoped>
School.Test.vue<template><div class="demo"><h2 class="title">學校名稱:{{name}}</h2><h2>學校地址:{{address}}</h2></div> </template><script>export default {name:'School-Test',data() {return {name:'尚硅谷atguigu',address:'北京',}}} </script><style scoped>.demo{background-color: skyblue;} </style>Student.Test.vue<template><div class="demo"><h2 class="title">學生姓名:{{name}}</h2><h2 class="sex">學生性別:{{sex}}</h2></div> </template><script>export default {name:'Student-Test',data() {return {name:'lala',sex:'女'}}} </script><style lang="less" scoped>.demo{background-color: pink;.sex{font-size: 40px;}} </style>App.vue<template><div><h1 class="title">你好啊</h1><School/><Student/></div> </template><script>import Student from './components/Student-Test'import School from './components/School-Test'export default {name:'App',components:{School,Student}} </script><style scoped>.title{color: red;} </style>
- ps:腳手架不支持less,需要額外安裝
npm install less-loader,安裝好之后run即可(和視頻不同,現在已經兼容了)


)


)


