內容概要
1、Form表單
2、Ajax
3、布局,Django母板
4、序列化
5、Ajax相關
6、分頁
7、XSS攻擊
8、CSRF
9、CBV、FBV
10、類中用裝飾器的兩種方法
11、上傳文件
?12、數據庫正向查詢、反向查詢、多對多查詢
13、jQuery對象和DOM對象可以互相轉換
14、cookie和session
?
用戶管理,功能:
1、用戶登錄
2、注冊
3、注銷
4、后臺管理菜單
5、班級操作
6、老師、學生
?
補充知識點:
前端提交數據到后端的兩種方法:
——form表單
——ajax
?
1、Form表單? ? ? ? ? ? ? ? ? ? ? ? ? ? ? ? ? ? ? ? ? ? ? ? ? ? ? ? ? ? ? ? ? ? ? ? ? ? ? ? ? ? ? ? ? ? ? ??
?
用法:
通過type=submit提交
一般表單提交通過type=submit實現,input type="submit",瀏覽器顯示為button按鈕,通過點擊這個按鈕提交表單數據跳轉到/url.do
<form action="/url.do" method="post"><input type="text" name="name"/><input type="submit" value="提交">
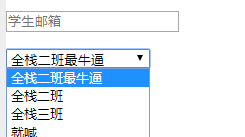
</form> 學生管理的添加頁面中,下拉框選班級用select? ?option標簽
add_student.html中
<form action="/add_student.html" method="POST"><p><input placeholder="學生姓名" type="text" name="name" /></p><p><input placeholder="學生郵箱" type="text" name="email" /></p><p><!-- <input placeholder="班級ID" type="text" name="cls_id" /> -->
{#             form表單提交時會將select里面選中的結果cls_id=value的值一起提交過去 #} <select name="cls_id">{% for op in cls_list %}<option value="{{ op.id }}">{{ op.caption }}</option>{% endfor %}</select></p><input type="submit" value="提交"/></form>
views中的函數def add_student(request):if request.method == "GET":cls_list = models.Classes.objects.all()[0: 20]return render(request, 'add_student.html', {'cls_list': cls_list})elif request.method == "POST":name = request.POST.get('name')email = request.POST.get('email')cls_id = request.POST.get('cls_id')models.Student.objects.create(name=name,email=email,cls_id=cls_id)return redirect('/student.html')
?
詳細內容:
表單標簽<form>
? ? ? 表單用于向服務器傳輸數據。
1.表單屬性
HTML 表單用于接收不同類型的用戶輸入,用戶提交表單時向服務器傳輸數據,從而實現用戶與Web服務器的交互。表單標簽, 要提交的所有內容都應該在該標簽中.
? ? ? ? ? ? action: 表單提交到哪. 一般指向服務器端一個程序,程序接收到表單提交過來的數據(即表單元素值)作相應處理,比如https://www.sogou.com/web
? ? ? ? ? ? method: 表單的提交方式 post/get 默認取值 就是 get(信封)
? ? ? ? ? ? ? ? ? ? ? ? ? get: 1.提交的鍵值對.放在地址欄中url后面. 2.安全性相對較差. 3.對提交內容的長度有限制.
? ? ? ? ? ? ? ? ? ? ? ? ? post:1.提交的鍵值對 不在地址欄. 2.安全性相對較高. 3.對提交內容的長度理論上無限制.
? ? ? ? ? ? ? ? ? ? ? ? ? get/post是常見的兩種請求方式.
2.表單元素
? ? ? ? ? ?<input> ?標簽的屬性和對應值? ? ? ? ? ? ??
type: text 文本輸入框password 密碼輸入框radio 單選框checkbox 多選框 submit 提交按鈕 button 按鈕(需要配合js使用.) button和submit的區別?file 提交文件:form表單需要加上屬性enctype="multipart/form-data" name: 表單提交項的鍵.注意和id屬性的區別:name屬性是和服務器通信時使用的名稱;而id屬性是瀏覽器端使用的名稱,該屬性主要是為了方便客戶端編程,而在css和javascript中使用的value: 表單提交項的值.對于不同的輸入類型,value 屬性的用法也不同:1.type="button", "reset", "submit" - 定義按鈕上的顯示的文本2.type="text", "password", "hidden" - 定義輸入字段的初始值3.type="checkbox", "radio", "image" - 定義與輸入相關聯的值 checked: radio 和 checkbox 默認被選中4.readonly: 只讀. text 和 password5.disabled: 對所用input都好使.上傳文件注意兩點:
?1 請求方式必須是post
?2 enctype="multipart/form-data"
?
實例:接收文件的py文件
def index(request):print request.POSTprint request.GETprint request.FILESfor item in request.FILES:fileObj = request.FILES.get(item)f = open(fileObj.name, 'wb')iter_file = fileObj.chunks()for line in iter_file:f.write(line)f.close()return HttpResponse('ok')
2、Ajax? ? ? ? ? ? ? ? ? ? ? ? ? ? ? ? ? ? ? ? ? ? ? ? ? ? ? ? ? ? ? ? ? ? ? ? ? ? ? ? ? ? ? ? ? ? ? ? ? ? ? ? ? ? ? ? ? ? ? ?
基于jQuery的ajax:
$.ajax({url:"//",data:{a:1,b:2}, /*當前ajax請求要攜帶的數據,是一個json的object對象,ajax方法就會默認地把它編碼成某種格式(urlencoded:?a=1&b=2)發送給服務端;*/dataType: /*預期服務器返回的數據類型,服務器端返回的數據會根據這個值解析后,傳遞給回調函數。*/type:"GET",success:function(){}})
基于JS的ajax:
采用ajax異步方式,通過js獲取form中所有input、select等組件的值,將這些值組成Json格式,通過異步的方式與服務器端進行交互,
一般將表單數據傳送給服務器端,服務器端處理數據并返回結果信息等
用法:
- 處理瀏覽器兼容問題,來創建XMLHttpRequest對象:
- 創建XMLHttpRequest對象;
- 調用open()方法打開與服務器的連接;
- 調用send()方法發送請求;
- 為XMLHttpRequest對象指定onreadystatechange事件函數,這個函數會在 XMLHttpRequest的1、2、3、4,四種狀態時被調用;
<h1>AJAX</h1>
<button οnclick="send()">測試</button>
<div id="div1"></div><script>function createXMLHttpRequest() {try {return new XMLHttpRequest();//大多數瀏覽器} catch (e) {try {return new ActiveXObject("Msxml2.XMLHTTP");} catch (e) {return new ActiveXObject("Microsoft.XMLHTTP");}}}function send() {var xmlHttp = createXMLHttpRequest();xmlHttp.onreadystatechange = function() {if(xmlHttp.readyState == 4 && xmlHttp.status == 200) {var div = document.getElementById("div1");div.innerText = xmlHttp.responseText;div.textContent = xmlHttp.responseText;}};xmlHttp.open("POST", "/ajax_post/", true);//post: xmlHttp.setRequestHeader("Content-Type", "application/x-www-form-urlencoded");xmlHttp.send(null);  //post: xmlHttp.send("b=B");}</script>#--------------------------------views.py
from django.views.decorators.csrf import csrf_exemptdef login(request):print('hello ajax')return render(request,'index.html')@csrf_exempt   #csrf防御
def ajax_post(request):print('ok')return HttpResponse('helloyuanhao')
注:POST請求時,要在send之前,open之后加請求頭
3、布局,Django母板? ? ? ? ? ? ? ? ? ? ? ? ? ? ? ? ? ? ? ? ? ? ? ? ? ? ? ? ? ? ? ? ? ? ? ? ? ? ? ? ? ? ? ? ? ? ? ? ?
母板中:
{% block title(給這個block取一個名字) %}
………………
{% endblock %}
?子模板中:
{% extends "base.html" %}#繼承自“base.html”{% block title %}Future time{% endblock %}{% block content %}
<p>In {{ hour_offset }} hour(s), it will be {{ next_time }}.</p>
{% endblock %}
?
?
?
?
?
?
?
?8.CSRF? ? ? ? ? ? ? ? ? ? ? ? ? ? ? ? ? ? ? ? ? ? ? ? ? ? ? ? ? ? ? ? ? ? ? ? ? ? ? ? ? ? ? ? ? ? ? ? ? ? ? ? ? ? ? ? ? ? ? ? ?
{%csrf_token%}:csrf_token標簽
? ? ?用于生成csrf_token的標簽,用于防治跨站攻擊驗證。注意如果你在view的index里用的是render_to_response方法,不會生效,而應該用render。
???? 其實,這里是會生成一個input標簽,和其他表單標簽一起提交給后臺的。
<form action="{% url "bieming"%}" ><input type="text"><input type="submit"value="提交">{%csrf_token%}
</form>
?
?
9.FBV 和 CBV? ? ? ? ? ? ? ? ? ? ? ? ? ? ? ? ? ? ? ? ? ? ? ? ? ? ? ? ? ? ? ? ? ? ? ? ? ? ? ? ? ? ? ? ? ? ? ? ? ? ? ? ? ? ? ? ?
views.py
# 方法一:FBV
def login(request):if request.method == "POST":user = request.POST.get("user")pwd = request.POST.get("pwd")c = models.Administrator.objects.filter(username=user,password=pwd).count()print(c)if c:#設置session中存儲的數據request.session["is_login"] = Truerequest.session["username"] = user#尤其注意跳轉到哪個頁面!!!return render(request,"index.html",{"username":user})else:msg = "用戶名或密碼錯誤"return redirect("/login.html",{"msg":msg})return render(request,"login.html")
-----------------------------------------------------------------
urs.py
# url(r'^login.html$', views.login),
cbv:
#CBV
from django import views
class Login(views.View):def get(self,request,*args,**kwargs):return render(request, "login.html")def post(self,request,*args,**kwargs):user = request.POST.get("user")pwd = request.POST.get("pwd")c = models.Administrator.objects.filter(username=user, password=pwd).count()print(c)if c:#設置session中存儲的數據request.session["is_login"] = Truerequest.session["username"] = user#尤其注意跳轉到哪個頁面!!!return render(request,"index.html",{"username":user})else:msg = "用戶名或密碼錯誤"return redirect("/login.html",{"msg":msg})
-----------------------------------------------------
urs.pyurl(r'^login.html$', views.Login.as_view()),#以類的方式進行創建
?
10.類中用裝飾器? ? ? ? ? ? ? ? ? ? ? ? ? ? ? ? ? ? ? ? ? ? ? ? ? ? ? ? ? ? ? ? ? ? ? ? ? ? ? ? ? ? ? ? ? ? ? ? ? ? ? ? ? ??
?方法一:自定義裝飾器
from django import views
from django.utils.decorators import method_decorator#1.引入庫
#2.定義裝飾器函數
def outer(func):def inner(request,*args,**kwargs):print(request.method)return func(request,*args,**kwargs)return innerclass Login(views.View):#3.使用裝飾器@method_decorator(outer)def get(self,request,*args,**kwargs):return render(request, "login.html")
?方法二:自定義dispatch方法,同時繼承父類該方法,等同于裝飾器
from django import viewsclass Login(views.View):#1.先執行自定義的dispatch方法def dispatch(self, request, *args, **kwargs):print(11111)if request.method == "GET":return HttpResponse("ok")#2.再調用父類中的dispatch方法,dispatch方法類似路由分發ret = super(Login,self).dispatch(request, *args, **kwargs)print(22222)return retdef get(self,request,*args,**kwargs):return render(request, "login.html")def post(self,request,*args,**kwargs):user = request.POST.get("user")pwd = request.POST.get("pwd")c = models.Administrator.objects.filter(username=user, password=pwd).count()print(c)if c:#設置session中存儲的數據request.session["is_login"] = Truerequest.session["username"] = user#尤其注意跳轉到哪個頁面!!!return render(request,"index.html",{"username":user})else:msg = "用戶名或密碼錯誤"return redirect("/login.html",{"msg":msg})
?
11、上傳文件
文件上傳
----- Form表單上傳文件 基于FormData() (上傳后,頁面需要刷新后才能顯示)
----- Ajax上傳文件 基于FormData() (無需刷新頁面)
----- 基于form表單和iframe自己實現ajax請求 (因為有些瀏覽器可能不兼容FormData())
a.form表單上傳
-------------------------views.py--------------------------------
import os
def upload(request):if request.method == 'GET':img_list = models.Img.objects.all()return render(request,'upload.html',{'img_list': img_list})elif request.method == "POST":user = request.POST.get('user')fafafa = request.POST.get('fafafa')obj = request.FILES.get('fafafa') # request.FILES.get來接收文件file_path = os.path.join('static','upload',obj.name) #地址拼接f = open(file_path, 'wb')for chunk in obj.chunks():  #obj.chunks很多塊文件(文件是分塊接收的)f.write(chunk)f.close()models.Img.objects.create(path=file_path)   #將圖片保存到數據庫return redirect('/upload.html')--------------------------------------upload.html------------------------
<form method="POST" action="/upload.html" enctype="multipart/form-data"><input type="text" name="user" /><input type="file" name="fafafa" /><input type="submit" value="提交" /></form><div>{% for item in img_list %}<img style="height: 200px;width: 200px;" src="/{{ item.path }}" />{% endfor %}</div>
-----------------------------models.py------------------------------------
class Img(models.Model):path = models.CharField(max_length=128)
b. 悄悄的上傳(ajax)
xmlHttpRequestxml = new XMLHttpRequest();xml.open('post', '/upload.html', true) #以post方式發送到/upload.html,以異步方式發xml.send("k1=v1; k2=v2;")jQuery $.ajax({url:data: {'k1': 'v1', 'k2': 'v2'}})FormData對象dict = new FormData()dict.append('k1','v1');dict.append('k2','v2');dict.append('fafafa', 文件對象);xml.send(dict)或$.ajax({url:data: dict,})
?實例:讓用戶看到當前上傳的圖片
三種ajax方法的實例:
<!DOCTYPE html>
<html lang="en">
<head><meta charset="UTF-8"><title>上傳文件</title><style>.container img{width: 200px;height: 200px;}</style><script>function li(arg) {console.log(arg);}</script>
</head>
<body><h1>測試Iframe功能</h1><input type="text" id="url" /><input type="button" value="點我" οnclick="iframeChange();" /><iframe  id="ifr" src=""></iframe><hr/><h1>基于iframe實現form提交</h1><form action="/upload.html" method="post" target="iframe_1" enctype="multipart/form-data"><iframe style="display: none"  id="iframe_1" name="iframe_1" src="" οnlοad="loadIframe();"></iframe><input type="text" name="user" /><input type="file" name="fafafa" /><input type="submit" /></form><h1>圖片列表</h1><div class="container" id="imgs">{% for img in img_list %}<img src="/{{ img.path }}">{% endfor %}</div>    <input type="file" id="img" /><input type="button" value="提交XML" οnclick="UploadXML()" /><input type="button" value="提交JQ" οnclick="Uploadjq()" /><script src="/static/jquery-2.1.4.min.js"></script><script>function UploadXML() {var dic = new FormData();dic.append('user', 'v1');dic.append('fafafa', document.getElementById('img').files[0]);var xml = new XMLHttpRequest();xml.open('post', '/upload.html', true);xml.onreadystatechange = function () {if(xml.readyState == 4){var obj = JSON.parse(xml.responseText);if(obj.status){var img = document.createElement('img');img.src = "/" + obj.path;document.getElementById("imgs").appendChild(img);}}};xml.send(dic);}function Uploadjq() {var dic = new FormData();dic.append('user', 'v1');dic.append('fafafa', document.getElementById('img').files[0]);$.ajax({url: '/upload.html',type: 'POST',data: dic,processData: false,  // tell jQuery not to process the datacontentType: false,  // tell jQuery not to set contentTypedataType: 'JSON',success: function (arg) {if (arg.status){var img = document.createElement('img');img.src = "/" + arg.path;$('#imgs').append(img);}}})}function  iframeChange() {var url = $('#url').val();$('#ifr').attr('src', url);}function loadIframe() {console.log(1);// 獲取iframe內部的內容var str_json = $('#iframe_1').contents().find('body').text();var obj = JSON.parse(str_json);if (obj.status){var img = document.createElement('img');img.src = "/" + obj.path;$('#imgs').append(img);}}</script></body>
</html>
views.py文件:
import os
def upload(request):if request.method == 'GET':img_list = models.Img.objects.all()return render(request,'upload.html',{'img_list': img_list})elif request.method == "POST":user = request.POST.get('user')fafafa = request.POST.get('fafafa')#只能獲取到文件名obj = request.FILES.get('fafafa')#必須這樣才能取到文件file_path = os.path.join('static','upload',obj.name)f = open(file_path, 'wb')for chunk in obj.chunks():f.write(chunk)f.close()models.Img.objects.create(path=file_path)ret = {'status': True, 'path': file_path}return HttpResponse(json.dumps(ret))
?12、數據庫正向查詢、反向查詢、多對多查詢
一、一對多(ForeignKey)
-------------------------------views.py----------------------------------------------def test(request):
# 例一:# pro_list = models.Province.objects.all()# print(pro_list)# city_list = models.City.objects.all()# print(city_list)
正向查找(通過具有外鍵字段的類,City)# filter(故意寫錯,可以知道可以添加哪些字段)# v = models.City.objects.all()# print(v)反向查找(如_ _name)# v = models.Province.objects.values('id','name','city__name')# print(v)# pro_list = models.Province.objects.all()# for item in pro_list:#     print(item.id,item.name,item.city_set.filter(id__lt=3))  #id<3return HttpResponse("OK")--------------------------------models.py----------------------------------
class Province(models.Model):name = models.CharField(max_length=32)class City(models.Model):name = models.CharField(max_length=32)pro = models.ForeignKey("Province")
二、多對多查詢(ManyToMany)
?
----------------------------------------views.py-------------------------------------------------
# 例二:
def test(request):
1、創建:多表操作時,可以忽略manytomany,不影響單表的字段創建# 如:# models.Book.objects.create(name='書名')# models.Author.objects.create(name='人名')正向查找 第三張表(因為m在author里面)# obj,人,金鑫# obj = models.Author.objects.get(id=1)# # 金鑫所有的著作全部獲取到# obj.m.all()反向查找 第三張表(用...._set)# 金品買# obj = models.Book.objects.get(id=1)# # 金鑫,吳超# obj.author_set.all()2、性能方面:# 正向查找# 10+1   以下方法查詢數據庫次數多,性能不高# author_list = models.Author.objects.all()# for author in author_list:#     print(author.name,author.m.all())#推薦此方法,用values來傳值# author_list = models.Author.objects.values('id','name','m', "m__name")# for item in author_list:#     print(item['id'],item['name'],'書籍ID:',item['m'],item['m__name'])3、添加、刪除、清空、set#正向操作:# obj = models.Author.objects.get(id=1)# 第三張表中增加一個對應關系  1  5# 增加# obj.m.add(5)          第三張表中增加一個對應關系  1  5# obj.m.add(*[4,5])     第三張表中增加一個對應關系  1  4和1   5# obj.m.add(5,6)# 刪除第三張表中.....的對應關系# obj.m.remove(5)# obj.m.remove(5,6)# obj.m.remove(*[5,6])# 清空# obj.m.clear()# 更新對應關系    id=1的只能對應1和對應2和對應3,id=1的其他對應關系會被自動刪掉# obj.m.set([1,2,3])# 反向操作:# obj = models.Book.objects.get(id=1)# obj.author_set.add(1)# obj.author_set.add(1,2,3,4)# ...同上return HttpResponse("OK")
-----------------------------models.py-----------------------------class Book(models.Model):name =models.CharField(max_length=32)class Author(models.Model):name = models.CharField(max_length=32)m = models.ManyToManyField('Book')
系統默認生成第三張表(關系表)
?
三、等于和不等于(補充)
models.tb.objects.filter(name='root') name 等于models.tb.objects.exclude(name='root') name 不等于models.tb.objects.filter(id__in=[11,2,3]) 在models.tb.objects.exclude(id__in=[11,2,3]) 不在
13、jQuery對象和DOM對象可以互相轉換
?
obj = document.getElementById('sel')
$(obj)	dom轉為jQuery$('#sel')
$('#sel')[0]	jQuery轉成dom對象select標簽的Dom對象中有 selectedOptions來獲得選中的標簽op1 = $('#sel')[0].selectedOptions	dom標簽再用jQuery對象的appendTo()方法,就可將選中的標簽加到右邊的空標簽里面$(op1).appendTo("#none")		jQuery標簽
14、JSONP原理(面試重點):跨域用的
jsonp的本質就是動態的在head里面創建script標簽,執行完后,又將其刪除
用jsonp原因:
由于瀏覽器的同源策略,所以跨域請求不行,所以要想跨域請求,需要用jsonp,jsonp不是一個技術,而是一種策略,是小機智,由于script擴展src不受同源策略保護,所以可以動態的生成一個script標簽,加上src屬性,請求完成后就立即將此script標簽刪除。
?
?自己寫一個jsonp:
<!DOCTYPE html>
<html lang="en">
<head><meta charset="UTF-8"><title>Title</title>
</head>
<body><input type="button" οnclick="jsonpRequest();" value="跨域請求" /><script>TAG = null;/* 定義一個全局變量tag*/function jsonpRequest() {TAG = document.createElement('script'); TAG.src = "http://www.jxntv.cn/data/jmd-jxtv2.html?callback=list&_=1454376870403"; // 返回值是list([11,22,33,44])document.head.appendChild(TAG);}function list(arg) {console.log(arg); document.head.removeChild(TAG);}</script>
</body>
</html>
14、cookie和session
Cookie:
就是保存在瀏覽器端的鍵值對
可以利用做登錄
1、保存在用戶瀏覽器
2、可以主動清楚
3、也可以被“偽造”
4、跨域名cookie不共享
5、瀏覽器設置不接受cookie后,就登錄不上了
Cookie是什么?
客戶端瀏覽器上保存的鍵值對
服務端操作的Cookie服務端操作的Cookieobj.set_cookie('k1','v1')obj.set_cookie('k1','v1',max_age=10)v = datetime.datetime.utcnow() + datetime.timedelta(seconds=10)obj.set_cookie('k1','v1',max_age=10,expires=v)----------------------------------參數-------------------------------- 1、可設置超時時間,超時后cookie就自動失效max-age、expires都可用于設置超時時間2、path: / 表示,全局生效/xxxx/ 表示,只有當前url生效3、domian:設置域名,可設置頂級域名,cookie可在頂級域名下生效。obj.set_cookie('k4','v4',max_age=10,expires=v, domain='oldboy.com')obj.set_cookie('k1','v1')4、httponly: 僅僅HTTP網絡傳輸使用,不能通過js獲取cookie。
客戶端瀏覽器上操作cookie客戶端瀏覽器上操作cookiedom --> 麻煩jquery插件 --> 先準備:(1)jquery.cookie.js(2)jquery.cookie.js用法:$.cookie()一個參數:$.cookie(k) 獲得值兩個參數:$.cookie(k,v) 設置值
?
Session:
session是服務器端的一個鍵值對
session內部機制依賴于cookie
request.session['k'] 獲取值request.session['k1'] = v 設置鍵值對request.session['k2'] = vdel request.session['k1'] 刪除request.session.clear() 清空# 獲取、設置、刪除Session中數據request.session['k1']request.session.get('k1',None)request.session['k1'] = 123request.session.setdefault('k1',123) # 存在則不設置del request.session['k1']# 所有 鍵、值、鍵值對request.session.keys()request.session.values()request.session.items()request.session.iterkeys()request.session.itervalues()request.session.iteritems()# 用戶session的隨機字符串request.session.session_key# 將所有Session失效日期小于當前日期的數據刪除request.session.clear_expired()# 檢查 用戶session的隨機字符串 在數據庫中是否request.session.exists("session_key")# 刪除當前用戶的所有Session數據request.session.delete("session_key")
?
:報表導出,對比poi、jxl和esayExcel的效率...)


)


)


