qiankun 是一個基于 single-spa 的微前端實現庫,旨在幫助大家能更簡單、無痛的構建一個生產可用微前端架構系統。
本文主要記錄下如何接入 qiankun 微前端。主應用使用 vue2,子應用使用 vue3、react。
一、主應用
主應用不限技術棧,只需要提供一個容器 DOM,然后注冊微應用并 start 即可。
1、創建項目
// @vue/cli 5.0.4
npm install @vue/cli -g
?
vue create main-vue
主應用選擇 vue2.x 版本。 具體創建步驟,便不在此一一敘述。

s?
項目創建之后,配置路由,頁面布局等。整體效果如下圖。
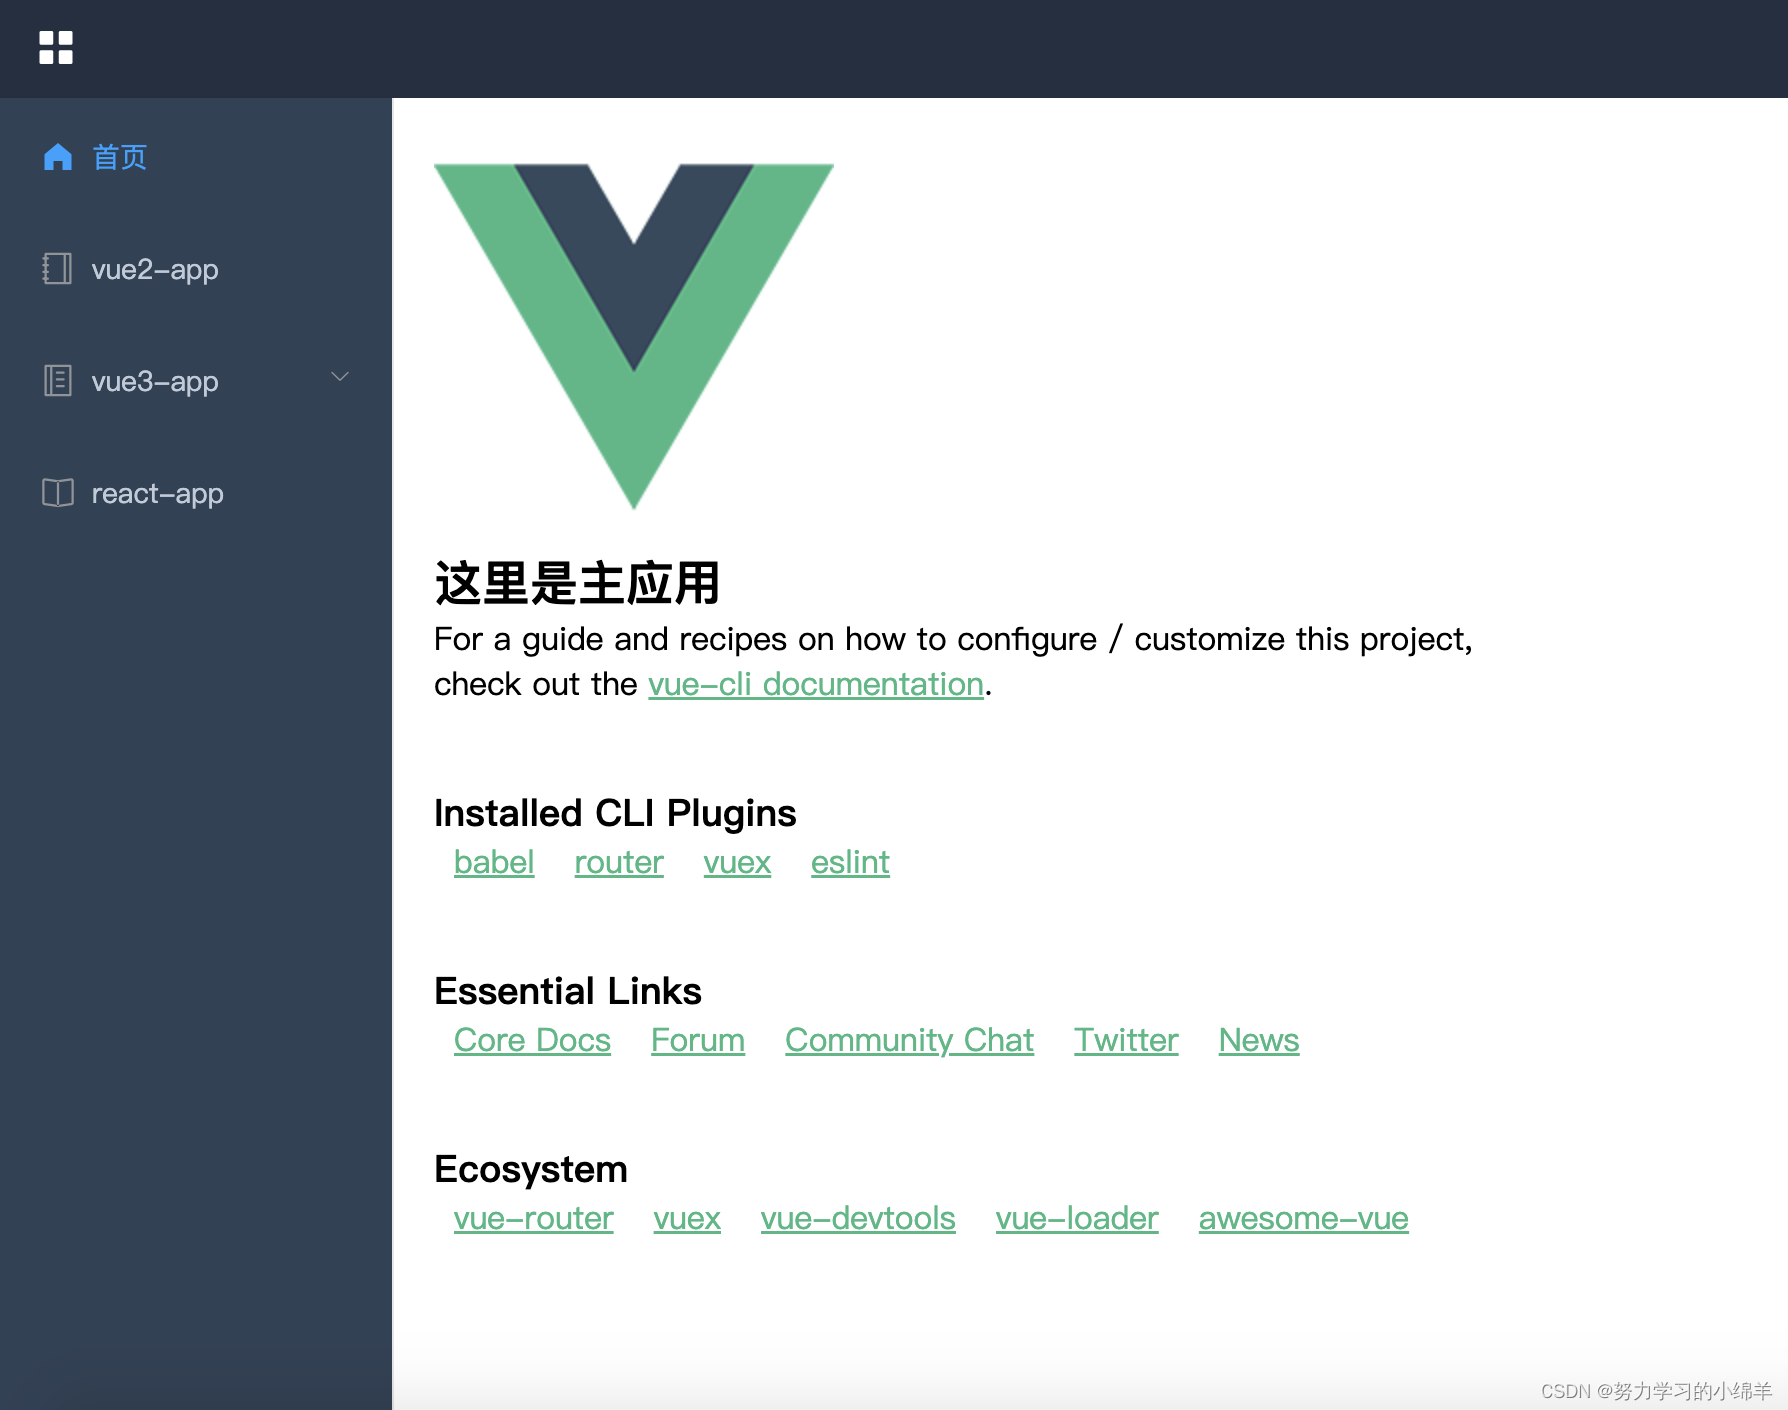
?
2、安裝 qiankun
npm i qiankun -S

3、 注冊微應用并啟動
新建微應用子列表文件 micros/app.js
// src/micros/app.js
// 子應用列表
const apps = [
? {
? ? name: 'vue2-app', // 子應用app name 推薦與子應用的package的name一致
? ? entry: '//localhost:8081/', // 子應用的入口地址,就是你子應用運行起來的地址
? ? container: '#micro-container', // 掛載子應用內容的dom節點 `# + dom id`【見上面app.vue】
? ? activeRule: '/vue2App' // 子應用的路由前綴
? },
? {
? ? name: 'vue3-app',
? ? entry: '//localhost:8082/',
? ? container: '#micro-container',
? ? activeRule: '/vue3App'
? },
? {
? ? name: 'react-app',
? ? entry: '//localhost:8083/',
? ? container: '#micro-container',
? ? activeRule: '/react'
? }
]
?
export default apps
注冊微應用
// src/micros/index.js
import { addGlobalUncaughtErrorHandler, registerMicroApps, start} from 'qiankun'
// 微應用的信息
import apps from './app'
?
/**
?* 注冊微應用
?* 第一個參數 - 微應用的注冊信息
?* 第二個參數 - 全局生命周期鉤子
?*/
registerMicroApps(apps, {
? // qiankun 生命周期鉤子 - 微應用加載前
? beforeLoad: (app) => {
? ? // 加載微應用前,加載進度條
? ? console.log('before load=====', app.name)
? ? return Promise.resolve()
? },
? // qiankun 生命周期鉤子 - 微應用掛載后
? afterMount: (app) => {
? ? // 加載微應用前,進度條加載完成
? ? console.log('after mount=====', app.name)
? ? return Promise.resolve()
? }
}
)
?
/**
?* 添加全局的未捕獲異常處理器
?*/
addGlobalUncaughtErrorHandler((event) => {
? console.error(event)
? const { message: msg } = event
? if (msg && msg.includes('died in status LOADING_SOURCE_CODE')) {
? ? console.error('微應用加載失敗,請檢查應用是否可運行')
? }
})
?
// 導出 qiankun 的啟動函數
export default start
配置主應用路由
// src/router/index.js
?
import Vue from 'vue'
import VueRouter from 'vue-router'
?
Vue.use(VueRouter)
?
const routes = [
? {
? ? path: '/',
? ? name: 'home',
? ? component: () => import('@/components/Home.vue'),
? ? children: [{
? ? ? path: '/',
? ? ? name: 'hello',
? ? ? component: () => import('@/views/HomeView.vue')
? ? },{
? ? ? path: '/vue2App',
? ? ? name: 'vue2App'
? ? }, {
? ? ? path: '/vue3App',
? ? ? name: 'vue3App'
? ? }, {
? ? ? path: '/vue3App/list',
? ? ? name: 'vueAppList'
? ? }, {
? ? ? path: '/react',
? ? ? name: 'react'
? ? }]
? }
]
?
const router = new VueRouter({
? mode: 'history',
? base: process.env.BASE_URL,
? routes
})
?
export default router
頁面設置子應用的掛載節點
<template>
? <div class="wrapper">
? ? <MyHeader></MyHeader>
? ? <el-container class="content">
? ? ? <el-aside width="200px">
? ? ? ? <MySider></MySider>
? ? ? </el-aside>
? ? ? <el-main>
? ? ? ? <router-view></router-view>
? ? ? ? <!-- 掛載子應用節點 -->
? ? ? ? <div id="micro-container"></div>
? ? ? </el-main>
? ? </el-container>
? </div>
</template>
?
<script>
? import MyHeader from './Header.vue'
? import MySider from './Sider.vue'
?
? export default {
? ? name: 'MyHome',
? ? components: {
? ? ? MyHeader,
? ? ? MySider
? ? },
? ? data() {
? ? ? return {
?
? ? ? }
? ? }
? }
</script>
?
<style lang="less">
? .content {
? ? height: calc(100% - 50px);
? }
</style>
在 main.js 中引入并啟動 qiankun
// src/main.js
?
import Vue from 'vue'
import App from './App.vue'
import router from './router'
import store from './store'
import '../src/assets/style/reset.less'
import './plugins/element.js'
?
import start from '@/micros'
// 啟動
start()
?
Vue.config.productionTip = false
?
new Vue({
? router,
? store,
? render: h => h(App)
}).$mount('#app')
二、微應用
微應用分為有 webpack 構建和無 webpack 構建項目,有 webpack 的微應用(主要是指 Vue、React、Angular)需要做的事情有:
新增 public-path.js 文件,用于修改運行時的 publicPath。
微應用建議使用 history 模式的路由,需要設置路由 base,值和它的 activeRule 是一樣的。
在入口文件最頂部引入 public-path.js,修改并導出三個生命周期函數。
修改 webpack 打包,允許開發環境跨域和 umd 打包。
無 webpack 構建的微應用直接將 lifecycles 掛載到 window 上即可。
微應用無需安裝 qiankun。
三、vue2-app 微應用
?1、創建項目
// vue-cli 2.9.6
npm install vue-cli -g
?
npm install webpack-cli -g
?
npm init webpack vue-app
2、在 src 目錄新增 public-path.js
// src/public-path.js
if(window.__POWERED_BY_QIANKUN__) {
? __webpack_public_path__ = window.__INJECTED_PUBLIC_PATH_BY_QIANKUN__;
}
?
修改路由文件,建議使用history 模式的路由,并設置路由 base,值和它的 activeRule 是一樣的。
// src/router/index.js
import Vue from 'vue'
import Router from 'vue-router'
import HelloWorld from '@/components/HelloWorld'
?
Vue.use(Router)
?
export default new Router({
? mode: 'history',
? base: window.__POWERED_BY_QIANKUN__ ? "/vue2App" : "/",
? routes: [
? ? {
? ? ? path: '/',
? ? ? name: 'HelloWorld',
? ? ? component: HelloWorld
? ? }
? ]
})
入口文件 main.js 修改,為了避免根 id #app 與其他的 DOM 沖突,需要限制查找范圍。并導出三個生命周期函數。
// src/main.js
import Vue from 'vue'
import App from './App'
import router from './router'
import "./public-path";
?
Vue.config.productionTip = false
?
// 定義一個Vue實例
let instance = null
// 渲染方法
function render(props = {}) {
? const { container } = props
? instance = new Vue({
? ? router,
? ? render: (h) => h(App)
? }).$mount(container ? container.querySelector('#app'): '#app')
}
// 獨立運行時
if(!window.__POWERED_BY_QIANKUN__) {
? render()
}
//暴露主應用生命周期鉤子
/**
?* bootstrap : 在微應用初始化的時候調用一次,之后的生命周期里不再調用
?*/
export async function bootstrap() {
? console.log('vue2-app bootstraped');
}
/**
?* mount : 在應用每次進入時調用
?*/
export async function mount(props) {
? console.log('vue2-app mount', props);
? render(props);
}
/**
?* unmount :應用每次 切出/卸載 均會調用
?*/
export async function unmount() {
? console.log("vue2-app unmount")
? instance.$destroy();
? instance.$el.innerHTML = '';
? instance = null;
}
修改 webpack 打包,允許開發環境跨域和 umd 打包。
// build/webpack.base.conf.js
'use strict'
const config = require('../config')
const APP_NAME = require('../package.json').name
?
module.exports = {
? output: {
? ? path: config.build.assetsRoot,
? ? filename: '[name].js',
? ? publicPath: process.env.NODE_ENV === 'production'
? ? ? ? config.build.assetsPublicPath
? ? ? : config.dev.assetsPublicPath,
? ? // 微應用的包名,這里與主應用中注冊的微應用名稱一致
? ? library: APP_NAME,
? ? // 將你的 library 暴露為所有的模塊定義下都可運行的方式
? ? libraryTarget: "umd",
? ? // 按需加載相關,設置為 webpackJsonp_VueMicroApp 即可
? ? jsonpFunction: `webpackJsonp_${APP_NAME}`,
? },
? ...
}
// build/webpack.dev.conf.js
const devWebpackConfig = merge(baseWebpackConfig, {
? ?...
? ?devServer: {
? ? ?...
? ? ?// 關閉主機檢查,使微應用可以被 fetch
? ? ?disableHostCheck: true,
? ? ?// 配置跨域請求頭,解決開發環境的跨域問題
? ? ?headers: {
? ? ? ?"Access-Control-Allow-Origin": "*",
? ? ?}
? ?}
})
運行效果如下:
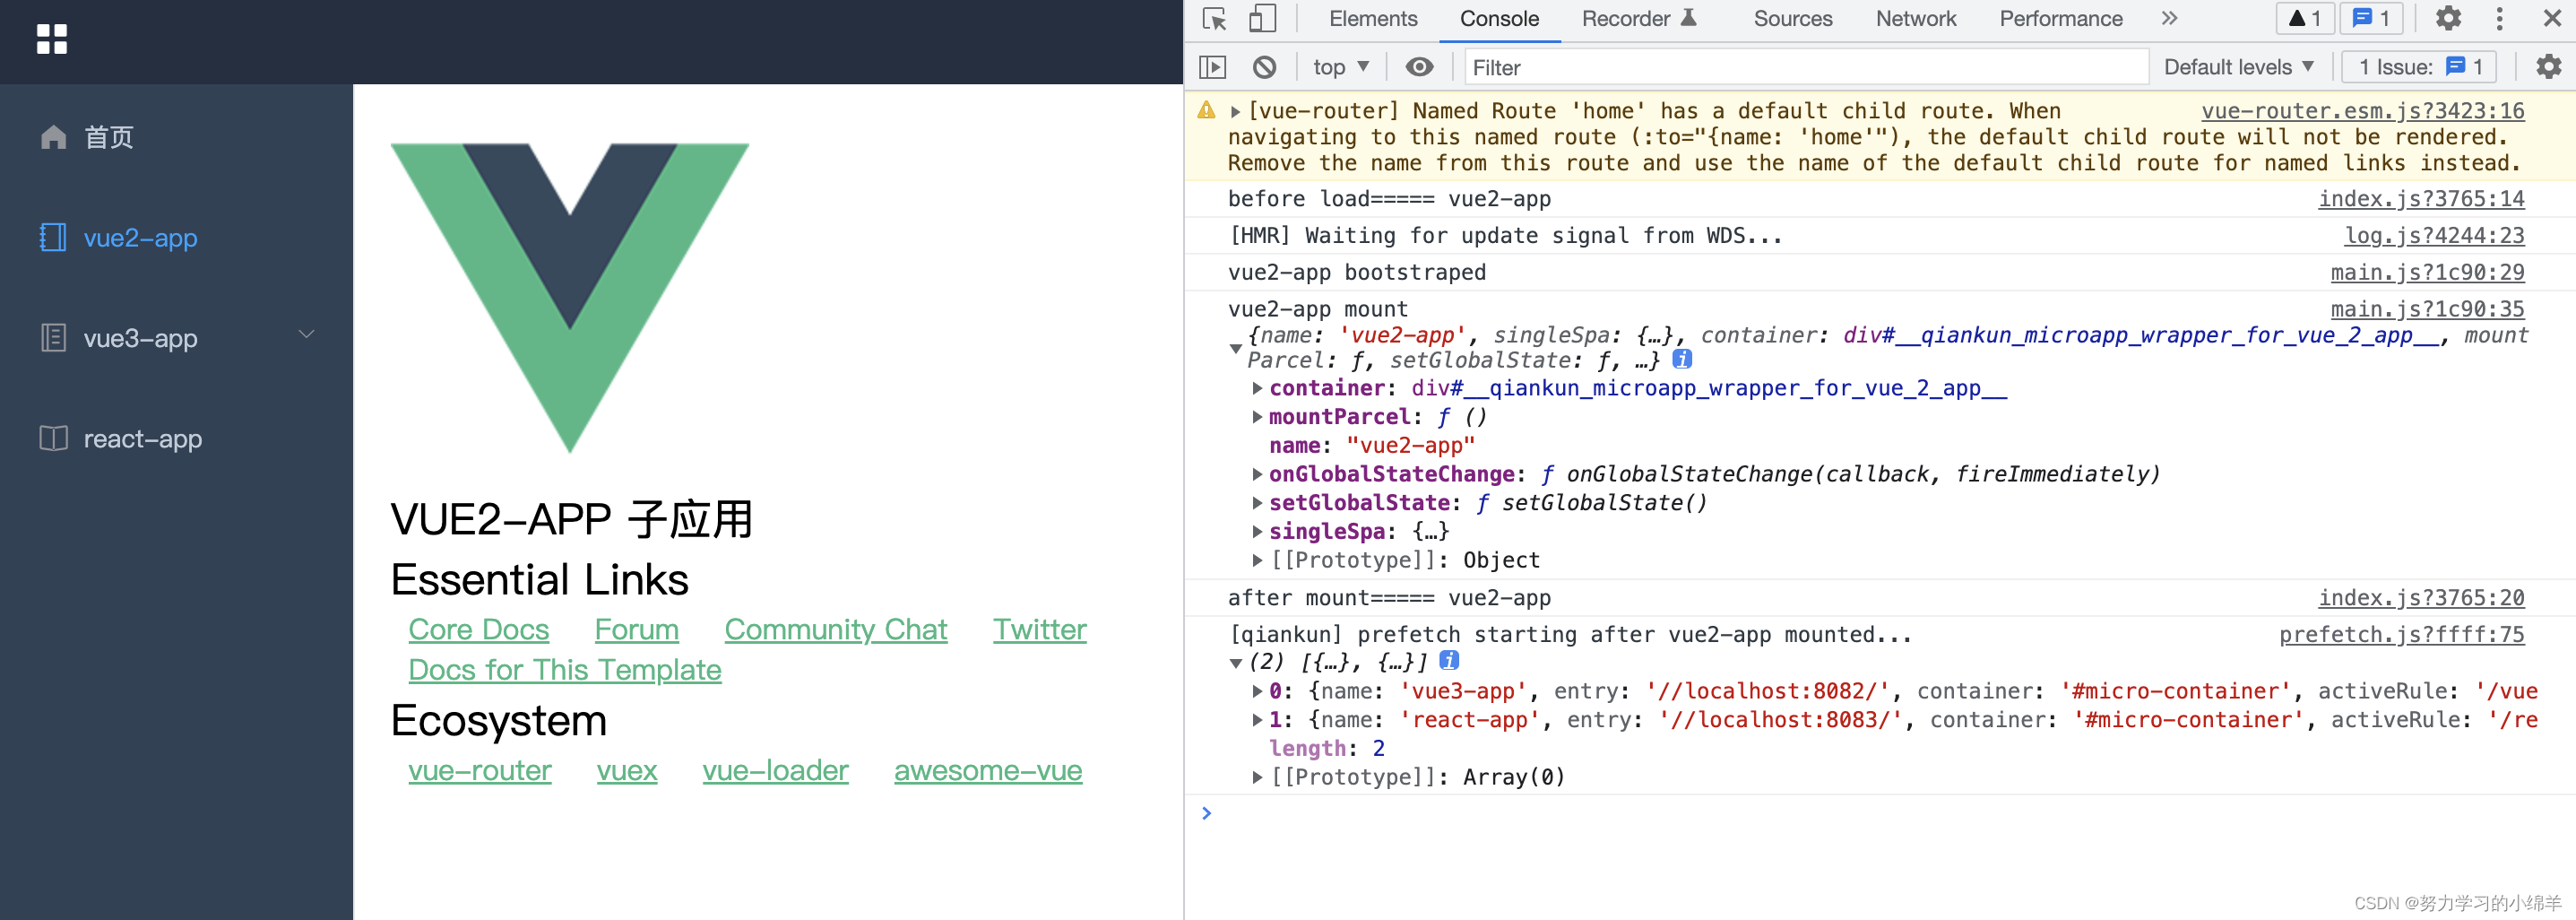
?
四、vue3-app 微應用
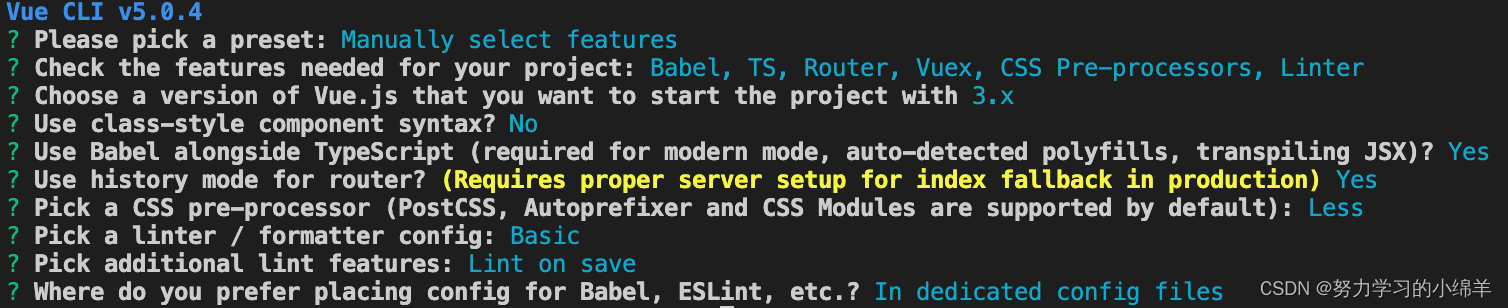
1、創建項目
// @vue/cli 5.0.4
npm install @vue/cli -g
?
vue create vue3-app
?2、在 src 目錄新增 public-path.ts
?
// src/public-path.ts
if ((window as any).__POWERED_BY_QIANKUN__) {
? __webpack_public_path__ = (window as any).__INJECTED_PUBLIC_PATH_BY_QIANKUN__;
}
修改路由文件。
// src/router/index.ts
import { createRouter, createWebHistory, RouteRecordRaw } from "vue-router";
?
const routes: Array<RouteRecordRaw> = [
? {
? ? path: "/",
? ? name: "home",
? ? component: () => import("@/components/Home.vue"),
? ? children: [
? ? ? {
? ? ? ? path: "/",
? ? ? ? name: "index",
? ? ? ? component: () => import("../views/HomeView.vue"),
? ? ? },
? ? ? {
? ? ? ? path: "/list",
? ? ? ? name: "list",
? ? ? ? component: () => import("../views/AboutView.vue"),
? ? ? },
? ? ],
? },
];
?
const router = createRouter({
? history: createWebHistory(
? ? window.__POWERED_BY_QIANKUN__ ? "/vue3App" : process.env.BASE_URL
? ),
? routes,
});
?
export default router;
?入口文件 main.ts 修改
// src/main.ts
import Vue, { createApp } from "vue";
import App from "./App.vue";
import router from "./router";
import store from "./store";
import "./public-path.ts";
?
// 定義一個Vue實例
let instance: Vue.App<Element>;
// 需要定義該接口,否則`/src/router/index.ts`無法使用`Window.__POWERED_BY_QIANKUN__`
declare global {
? interface Window {
? ? __POWERED_BY_QIANKUN__?: string;
? }
}
interface IRenderProps {
? container: Element | string;
}
?
// 渲染方法
function render(props: IRenderProps) {
? const { container } = props;
? instance = createApp(App);
? instance
? ? .use(store)
? ? .use(router)
? ? .mount(
? ? ? container instanceof Element
? ? ? ? ? (container.querySelector("#app") as Element)
? ? ? ? : (container as string)
? ? );
}
// 獨立運行時
if (!window.__POWERED_BY_QIANKUN__) {
? render({ container: "#app" });
}
?
//暴露主應用生命周期鉤子
/**
?* bootstrap : 在微應用初始化的時候調用一次,之后的生命周期里不再調用
?*/
export async function bootstrap() {
? console.log("vue3-app bootstraped");
}
?
/**
?* mount : 在應用每次進入時調用
?*/
export async function mount(props: any) {
? console.log("mount vue3-app", props);
? render(props);
}
?
/**
?* unmount :應用每次 切出/卸載 均會調用
?*/
export async function unmount() {
? console.log("unmount vue3-app app");
? instance.unmount();
}
?修改 webpack 打包,允許開發環境跨域和 umd 打包。
注意:webpack5 中 jsonpFunction 修改為 chunkLoadingGlobal
// vue.config.js
const path = require("path");
?
const APP_NAME = require("./package.json").name;
?
function resolve(dir) {
? return path.join(__dirname, dir);
}
?
module.exports = {
? outputDir: "dist",
? assetsDir: "static",
? filenameHashing: true,
? devServer: {
? ? host: "localhost",
? ? hot: true,
? ? port: 8082,
? ? client: {
? ? ? overlay: {
? ? ? ? errors: true,
? ? ? ? warnings: false,
? ? ? },
? ? },
? ? // 配置跨域請求頭,解決開發環境的跨域問題
? ? headers: {
? ? ? "Access-Control-Allow-Origin": "*",
? ? },
? },
? // 自定義webpack配置
? configureWebpack: {
? ? resolve: {
? ? ? alias: {
? ? ? ? "@": resolve("src"),
? ? ? },
? ? },
? ? output: {
? ? ? // 把子應用打包成 umd 庫格式
? ? ? // // 微應用的包名,這里與主應用中注冊的微應用名稱一致
? ? ? library: APP_NAME,
? ? ? // 將你的 library 暴露為所有的模塊定義下都可運行的方式
? ? ? libraryTarget: "umd",
? ? ? // 按需加載相關,設置為 webpackJsonp_微應用名稱 即可
? ? ? chunkLoadingGlobal: `webpackJsonp_${APP_NAME}`,
? ? },
? },
};
運行效果如下:
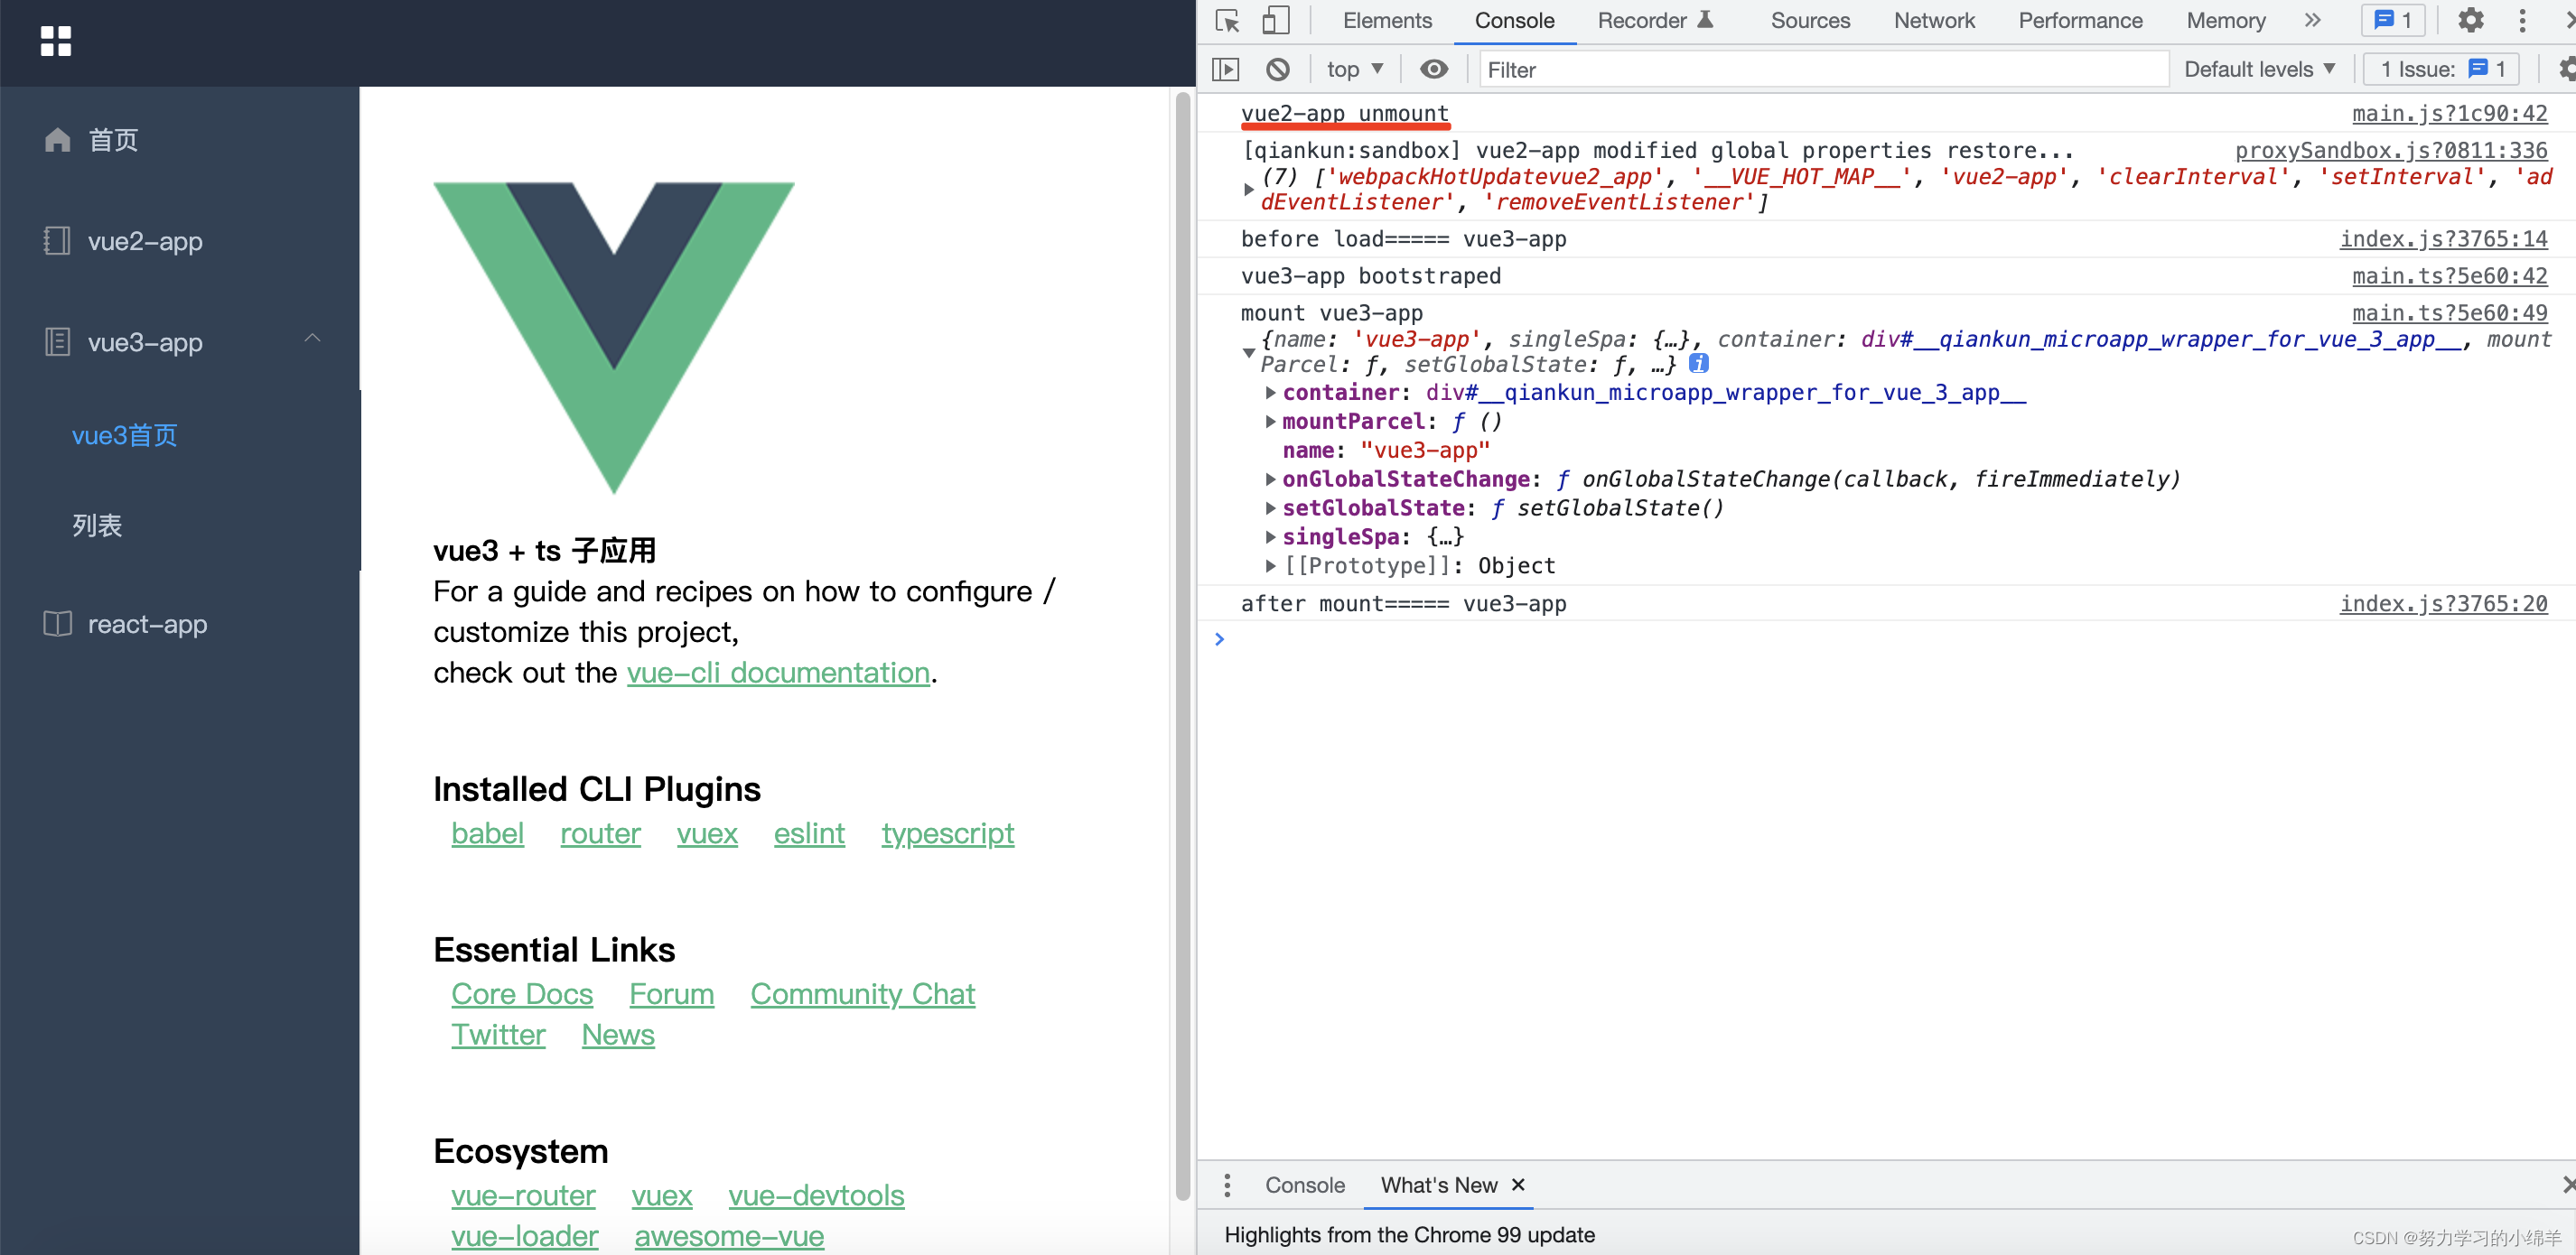
?
五、react-app 微應用
1、創建項目,以 create-react-app 生成的 react 17 項目為例,搭配 react-router-dom 6.x。
npx create-react-app react-app --template typescript
?
npm i react-router-dom
在根目錄下添加 .env 文件,設置項目監聽的端口
// react-app/.env
PORT=8083
BROWSER=none
2??、新建 public-path.ts
// src/public-path.ts
if ((window as any).__POWERED_BY_QIANKUN__) {
? __webpack_public_path__ = (window as any).__INJECTED_PUBLIC_PATH_BY_QIANKUN__;
}
如上面代碼報錯,可以通過補充定義進行修復。以下代碼最好放到全局引入的 TypeScript 定義文件中。
interface Window {
? __POWERED_BY_QIANKUN__?: string
? __INJECTED_PUBLIC_PATH_BY_QIANKUN__?: string
}
?
declare let __webpack_public_path__: string | undefined
設置 history 模式路由的 base
// src/App.tsx
import React from 'react';
import { Routes, Route, BrowserRouter} from 'react-router-dom'
import './App.css';
import Home from './components/home';
?
function App() {
? return (
? ? <div>
? ? ? {/* 設置路由命名空間 */}
? ? ? <BrowserRouter basename={window.__POWERED_BY_QIANKUN__ ? '/react' : '/'}>
? ? ? ? <Routes>
? ? ? ? ? <Route path="/" element={<Home />} />
? ? ? ? </Routes>
? ? ? </BrowserRouter>
? ? </div>
? );
}
?
export default App;
修改入口文件 index.tsx
// src/index.tsx
import React from 'react';
import ReactDOM from 'react-dom';
import './index.css';
import App from './App';
import reportWebVitals from './reportWebVitals';
import './types.d.ts'
import "./public-path";
?
/**
?* bootstrap 只會在微應用初始化的時候調用一次,下次微應用重新進入時會直接調用 mount 鉤子,不會再重復觸發 bootstrap。
?* 通常我們可以在這里做一些全局變量的初始化,比如不會在 unmount 階段被銷毀的應用級別的緩存等。
?*/
export async function bootstrap() {
? console.log('react-app bootstraped');
}
/**
?* 應用每次進入都會調用 mount 方法,通常我們在這里觸發應用的渲染方法
?*/
export async function mount(props: any) {
? console.log('react-app mount');
? ReactDOM.render(<App />, props.container ? props.container.querySelector('#root') : document.getElementById('root'));
}
/**
?* 應用每次 切出/卸載 會調用的方法,通常在這里我們會卸載微應用的應用實例
?*/
export async function unmount(props: any) {
? console.log('react-app unmount');
? ReactDOM.unmountComponentAtNode(props.container ? props.container.querySelector('#root') : document.getElementById('root'));
}
/**
?* 可選生命周期鉤子,僅使用 loadMicroApp 方式加載微應用時生效
?*/
export async function update(props: any) {
? console.log('react-app update props', props);
}
?
ReactDOM.render(
? <React.StrictMode>
? ? <App />
? </React.StrictMode>,
? document.getElementById('root')
);
?
// If you want to start measuring performance in your app, pass a function
// to log results (for example: reportWebVitals(console.log))
// or send to an analytics endpoint. Learn more: https://bit.ly/CRA-vitals
reportWebVitals();
修改 webpack 配置,安裝插件 react-app-rewired
npm install react-app-rewired -D
修改 package.json
// react-app/package.json
"scripts": {
? "start": "react-app-rewired start",
? "build": "react-app-rewired build",
? "test": "react-app-rewired test",
? "eject": "react-app-rewired eject"
}
在 react-app-rewired 配置完成后,新建 config-overrides.js 文件來配置 webpack。
// react-app/config-overrides.js
const path = require("path");
const APP_NAME = require("./package.json").name;
?
module.exports = {
? webpack: (config) => {
? ? // 微應用的包名,這里與主應用中注冊的微應用名稱一致
? ? config.output.library = APP_NAME;
? ? // 將你的 library 暴露為所有的模塊定義下都可運行的方式
? ? config.output.libraryTarget = "umd";
? ? // 按需加載相關,設置為 webpackJsonp_VueMicroApp 即可
? ? config.output.chunkLoadingGlobal = `webpackJsonp_${APP_NAME}`;
? ? config.output.globalObject = 'window';
? ? config.output.publicPath = `//localhost:${process.env.PORT}/`;
?
? ? config.resolve.alias = {
? ? ? ...config.resolve.alias,
? ? ? "@": path.resolve(__dirname, "src"),
? ? };
? ? return config;
? },
?
? devServer: function (configFunction) {
? ? return function (proxy, allowedHost) {
? ? ? const config = configFunction(proxy, allowedHost);
? ? ? // 關閉主機檢查,使微應用可以被 fetch
? ? ? // config.disableHostCheck = true;
? ? ? config.allowedHosts = "all";
? ? ? // 配置跨域請求頭,解決開發環境的跨域問題
? ? ? config.headers = {
? ? ? ? "Access-Control-Allow-Origin": "*",
? ? ? };
? ? ? // 配置 history 模式
? ? ? config.historyApiFallback = true;
?
? ? ? return config;
? ? };
? },
};
3、運行效果如下

?
原文鏈接:https://blog.csdn.net/lhz_333/article/details/123767105


![[Go版]算法通關村第十二關黃金——字符串沖刺題](http://pic.xiahunao.cn/[Go版]算法通關村第十二關黃金——字符串沖刺題)


![[MAUI]在.NET MAUI中實現可拖拽排序列表](http://pic.xiahunao.cn/[MAUI]在.NET MAUI中實現可拖拽排序列表)


—— Python 的文件操作)

