前兩篇文章介紹了加載過程,本文從Feign的入口開始分析執行過程,還是從FeignBlockingLoadBalancerClient.execute來入手
public class FeignBlockingLoadBalancerClient implements Client {private static final Log LOG = LogFactory.getLog(FeignBlockingLoadBalancerClient.class);private final Client delegate;private final LoadBalancerClient loadBalancerClient;private final LoadBalancerClientFactory loadBalancerClientFactory;@Overridepublic Response execute(Request request, Request.Options options) throws IOException {//請求路徑final URI originalUri = URI.create(request.url());//獲取到要調用的服務idString serviceId = originalUri.getHost();DefaultRequest<RequestDataContext> lbRequest = new DefaultRequest<>(new RequestDataContext(buildRequestData(request), hint));//在這步創建了每個服務的子容器 Set<LoadBalancerLifecycle> supportedLifecycleProcessors = LoadBalancerLifecycleValidator.getSupportedLifecycleProcessors(//在這步創建了每個服務的子容器loadBalancerClientFactory.getInstances(serviceId, LoadBalancerLifecycle.class),RequestDataContext.class, ResponseData.class, ServiceInstance.class);supportedLifecycleProcessors.forEach(lifecycle -> lifecycle.onStart(lbRequest)); //執行loadBalancer的負載均衡策略,返回將過濾后的服務,非常重要ServiceInstance instance = loadBalancerClient.choose(serviceId, lbRequest);org.springframework.cloud.client.loadbalancer.Response<ServiceInstance> lbResponse = new DefaultResponse(instance);//省略...//將ServiceInstance進行解析后,轉換為真正的http方式進行遠程調用服務String reconstructedUrl = loadBalancerClient.reconstructURI(instance, originalUri).toString();Request newRequest = buildRequest(request, reconstructedUrl);LoadBalancerProperties loadBalancerProperties = loadBalancerClientFactory.getProperties(serviceId);return executeWithLoadBalancerLifecycleProcessing(delegate, options, newRequest, lbRequest, lbResponse,supportedLifecycleProcessors, loadBalancerProperties.isUseRawStatusCodeInResponseData());}protected Request buildRequest(Request request, String reconstructedUrl) {return Request.create(request.httpMethod(), reconstructedUrl, request.headers(), request.body(),request.charset(), request.requestTemplate());}private String getHint(String serviceId) {LoadBalancerProperties properties = loadBalancerClientFactory.getProperties(serviceId);String defaultHint = properties.getHint().getOrDefault("default", "default");String hintPropertyValue = properties.getHint().get(serviceId);return hintPropertyValue != null ? hintPropertyValue : defaultHint;}}
loadBalancerClientFactory.getInstances(serviceId, LoadBalancerLifecycle.class)
在這步是創建了每個服務的負載均衡子容器,loadBalancerClientFactory的生成過程在上篇文章已經分析了,這里getInstances實際調用的是父類NamedContextFactory
NamedContextFactory.getInstances
public <T> Map<String, T> getInstances(String name, Class<T> type) {AnnotationConfigApplicationContext context = getContext(name);return BeanFactoryUtils.beansOfTypeIncludingAncestors(context, type);
}
NamedContextFactory.getContext
protected AnnotationConfigApplicationContext getContext(String name) {if (!this.contexts.containsKey(name)) {synchronized (this.contexts) {if (!this.contexts.containsKey(name)) {//創建子容器,name為服務名 value為容器this.contexts.put(name, createContext(name));}}}return this.contexts.get(name);
}
NamedContextFactory.createContext
protected AnnotationConfigApplicationContext createContext(String name) {AnnotationConfigApplicationContext context;//創建容器if (this.parent != null) {DefaultListableBeanFactory beanFactory = new DefaultListableBeanFactory();if (parent instanceof ConfigurableApplicationContext) {beanFactory.setBeanClassLoader(((ConfigurableApplicationContext) parent).getBeanFactory().getBeanClassLoader());}else {beanFactory.setBeanClassLoader(parent.getClassLoader());}context = new AnnotationConfigApplicationContext(beanFactory);context.setClassLoader(this.parent.getClassLoader());}else {context = new AnnotationConfigApplicationContext();}//configurations就是LoadBalancerClientSpecification類型的LoadBalancerAutoConfiguration和BlockingLoadBalancerClientAutoConfiguration//這里是將@LoadBalancerClient對應的負載均衡配置注冊到對應的容器中//由以上可知通過此步我們可以使用@LoadBalancerClient自定義負載均衡策略//如果不自定義的話,這里為falseif (this.configurations.containsKey(name)) {for (Class<?> configuration : this.configurations.get(name).getConfiguration()) {context.register(configuration);}}//這時的configurations中會有LoadBalancerClientSpecification類型的LoadBalancerAutoConfiguration和BlockingLoadBalancerClientAutoConfigurationfor (Map.Entry<String, C> entry : this.configurations.entrySet()) {if (entry.getKey().startsWith("default.")) {//不會進去for循環體,因為LoadBalancerAutoConfiguration和BlockingLoadBalancerClientAutoConfiguration//包裝成LoadBalancerClientSpecification后entry.getValue().getConfiguration()沒有值for (Class<?> configuration : entry.getValue().getConfiguration()) {context.register(configuration);}}}//defaultConfigType就是LoadBalancerClientConfiguration,在子類LoadBalancerClientFactory的構造方法傳入//在剛才分析LoadBalancerClientFactory的時候介紹過context.register(PropertyPlaceholderAutoConfiguration.class, this.defaultConfigType);context.getEnvironment().getPropertySources().addFirst(new MapPropertySource(this.propertySourceName,Collections.<String, Object>singletonMap(this.propertyName, name)));//將父容器添加進去if (this.parent != null) {// Uses Environment from parent as well as beanscontext.setParent(this.parent);}context.setDisplayName(generateDisplayName(name));context.refresh();return context;
}
重點:
可以看到當每個服務創建子容器后,LoadBalancerAutoConfiguration、BlockingLoadBalancerClientAutoConfiguration、LoadBalancerClientConfiguration這三個非常重要的裝配配置類都注冊到了每個子容器中
服務的子容器創建完成后,下面就開始執行負載均衡的流程了
BlockingLoadBalancerClient.choose
public <T> ServiceInstance choose(String serviceId, Request<T> request) {//獲取負載均衡器ReactiveLoadBalancer<ServiceInstance> loadBalancer = loadBalancerClientFactory.getInstance(serviceId);if (loadBalancer == null) {return null;}Response<ServiceInstance> loadBalancerResponse = Mono.from(loadBalancer.choose(request)).block();if (loadBalancerResponse == null) {return null;}return loadBalancerResponse.getServer();
}
loadBalancerClientFactory.getInstance(serviceId)
public ReactiveLoadBalancer<ServiceInstance> getInstance(String serviceId) {return getInstance(serviceId, ReactorServiceInstanceLoadBalancer.class);
}
這時的getInstance調用的是父類NamedContextFactory.getInstance
NamedContextFactory.getInstance
public <T> T getInstance(String name, Class<T> type) {AnnotationConfigApplicationContext context = getContext(name);try {return context.getBean(type);}catch (NoSuchBeanDefinitionException e) {// ignore}return null;
}
protected AnnotationConfigApplicationContext getContext(String name) {if (!this.contexts.containsKey(name)) {synchronized (this.contexts) {if (!this.contexts.containsKey(name)) {this.contexts.put(name, createContext(name));}}}return this.contexts.get(name);
}
剛才介紹了,在BlockingLoadBalancerClient.choose執行之前,子容器已經創建完畢,這里就執行返回
容器返回后,獲取ReactorServiceInstanceLoadBalancer類型的對象,此類型的對象就是在LoadBalancerClientConfiguration創建的,我們再看一眼
@Configuration(proxyBeanMethods = false)
@ConditionalOnDiscoveryEnabled
public class LoadBalancerClientConfiguration {private static final int REACTIVE_SERVICE_INSTANCE_SUPPLIER_ORDER = 193827465;@Bean@ConditionalOnMissingBeanpublic ReactorLoadBalancer<ServiceInstance> reactorServiceInstanceLoadBalancer(Environment environment,LoadBalancerClientFactory loadBalancerClientFactory) {String name = environment.getProperty(LoadBalancerClientFactory.PROPERTY_NAME);return new RoundRobinLoadBalancer(loadBalancerClientFactory.getLazyProvider(name, ServiceInstanceListSupplier.class), name);}//省略
}
RoundRobinLoadBalancer結構圖
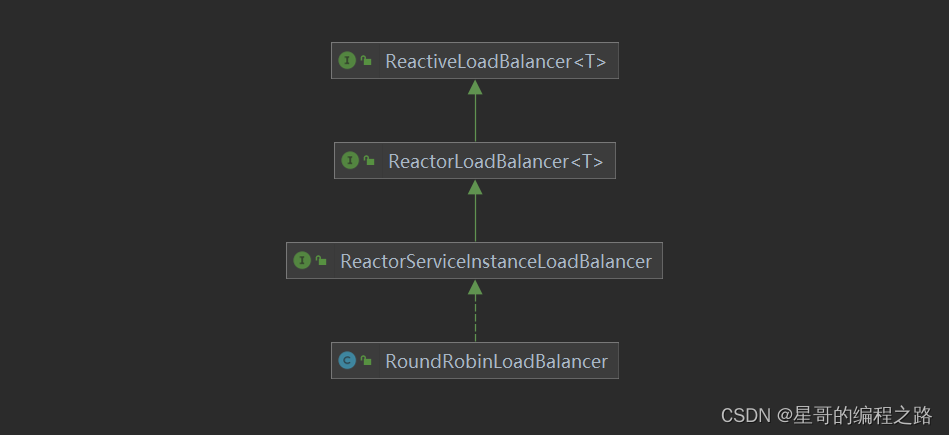
所以loadBalancerClientFactory.getInstance(serviceId)返回的就是RoundRobinLoadBalancer,然后就會調用此策略進行執行
RoundRobinLoadBalancer.choose
public Mono<Response<ServiceInstance>> choose(Request request) {ServiceInstanceListSupplier supplier = serviceInstanceListSupplierProvider.getIfAvailable(NoopServiceInstanceListSupplier::new);return supplier.get(request).next().map(serviceInstances -> processInstanceResponse(supplier, serviceInstances));
}
serviceInstanceListSupplierProvider.getIfAvailable(NoopServiceInstanceListSupplier::new)就是獲取注冊中心的服務列表了processInstanceResponse執行具體的負載均衡策略
serviceInstanceListSupplierProvider
public T getIfAvailable(Supplier<T> defaultSupplier) throws BeansException {return delegate().getIfAvailable(defaultSupplier);
}default T getIfAvailable(Supplier<T> defaultSupplier) throws BeansException {T dependency = getIfAvailable();//dependency 的類型是CachingServiceInstanceListSupplierreturn (dependency != null ? dependency : defaultSupplier.get());
}
RoundRobinLoadBalancer.processInstanceResponse
private Response<ServiceInstance> processInstanceResponse(ServiceInstanceListSupplier supplier,List<ServiceInstance> serviceInstances) {//serviceInstances就是獲取的服務列表了	//getInstanceResponse(serviceInstances)就是真正的負債均衡策略了Response<ServiceInstance> serviceInstanceResponse = getInstanceResponse(serviceInstances);if (supplier instanceof SelectedInstanceCallback && serviceInstanceResponse.hasServer()) {//((SelectedInstanceCallback) supplier).selectedServiceInstance(serviceInstanceResponse.getServer());}return serviceInstanceResponse;
}
RoundRobinLoadBalancer.getInstanceResponse
private Response<ServiceInstance> getInstanceResponse(List<ServiceInstance> instances) {if (instances.isEmpty()) {if (log.isWarnEnabled()) {log.warn("No servers available for service: " + serviceId);}return new EmptyResponse();}// Do not move position when there is only 1 instance, especially some suppliers// have already filtered instancesif (instances.size() == 1) {return new DefaultResponse(instances.get(0));}// Ignore the sign bit, this allows pos to loop sequentially from 0 to// Integer.MAX_VALUEint pos = this.position.incrementAndGet() & Integer.MAX_VALUE;ServiceInstance instance = instances.get(pos % instances.size());return new DefaultResponse(instance);
}
可以看到是輪訓的策略
那么服務列表是怎么獲取的呢,在下篇文章中我們回詳細的分析


)

)


