本文轉載自testerhome;
作者:xinxi1990 ;
原文鏈接:https://testerhome.com/topics/18719;
轉載以分享知識為目的,著作權歸原作者所有,如有侵權,請聯系刪除。
postman使用
創建用例集
啟動postman以后,會看到這個控制面板.
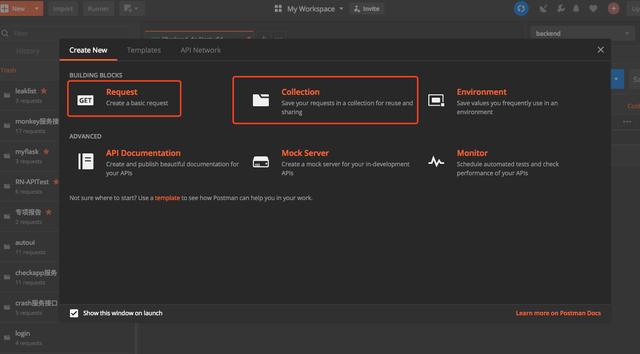
點擊Request是創建一個Request測試請求,但是需要創建用例集保存這個請求.
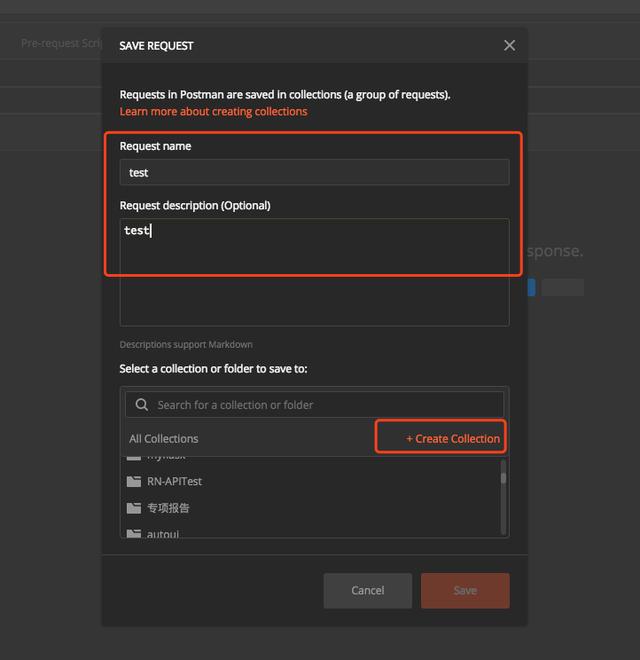
點擊Collection是創建一個用例集來保存測試請求.
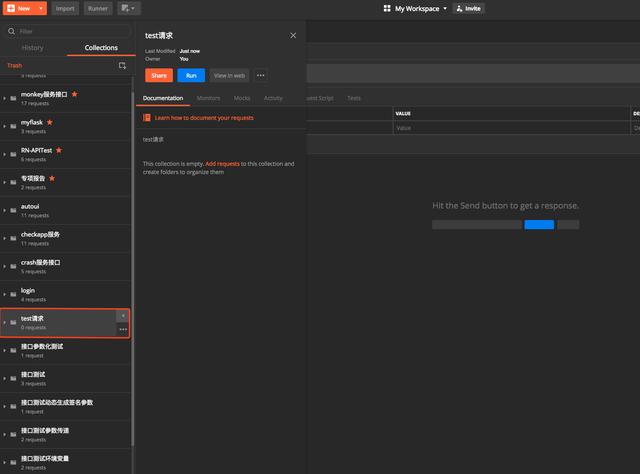
創建Collection完成后,會在左側生成用例集文件架,每次創建的測試接口都要保存到用例集中.
第一個接口測試
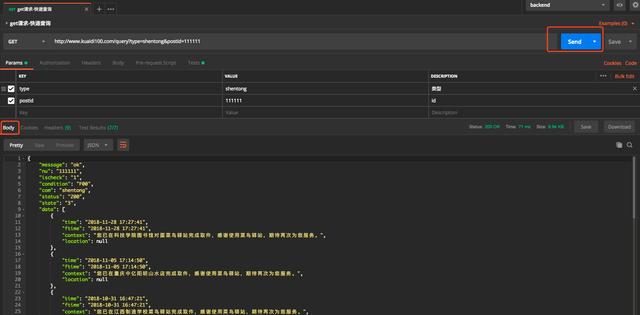
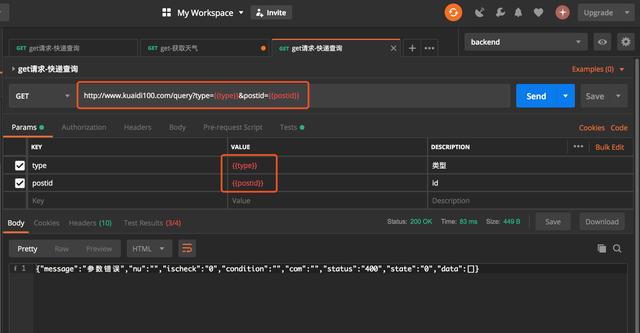
創建get請求為例,通常需要寫url、params、headers,會把params拼接到url末尾.
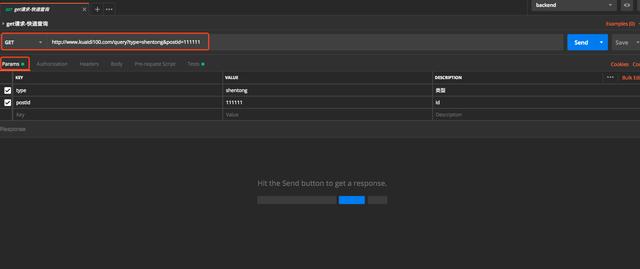
點擊send按鈕并且請求成功,會展示響應結果.
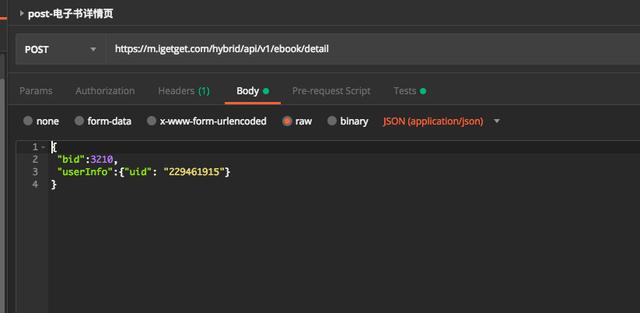
創建post請求為例,通常需要寫url、body、headers等參數,body參數格式一般是form或者json格式.具體body使用那個格式,需要按照接口文件中的參數.
接口斷言
點擊Tests編寫測試斷言
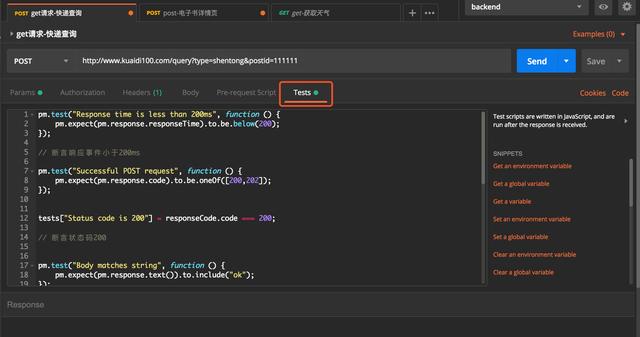
斷言響應時間
pm.test("Response time is less than 200ms", function () { pm.expect(pm.response.responseTime).to.be.below(200);});// 斷言響應事件小于200ms斷言狀態碼
pm.test("Successful POST request", function () { pm.expect(pm.response.code).to.be.oneOf([200,202]);});// 斷言狀態碼200-202區間斷言響應中包含某個字符串
pm.test("Body matches string", function () { pm.expect(pm.response.text()).to.include("ok");});// 斷言響應中包含"ok"斷言響應中的字段等于某個值
pm.test("message test", function () { var jsonData = pm.response.json(); pm.expect(jsonData["message"]).to.eql("ok");});// 斷言響應中"message" = ok"斷言響應中的字段不等于某個值
var jsonData = JSON.parse(responseBody);tests["message不為bad"] = jsonData["message"] != "bad";// 斷言響應中"message" != bad"斷言響應中的列表長度
pm.test("data list test", function () { var jsonData = pm.response.json(); pm.expect(jsonData["data"].length).to.eql(41);});// 斷言響應中"list"的字段長度斷言響應中的列表中第幾個元素的字段值
pm.test("data list 0 test", function () { var jsonData = pm.response.json(); pm.expect(jsonData["data"][0]["time"]).to.eql("2018-11-28 17:27:41");});// 斷言響應中"list 0的"的time字段的值json schema驗證
tv4是postman內置的JSON Schema驗證庫,參考:https://geraintluff.github.io/tv4/
responseBody如下==:==
{ "errCode": 0, "errMsg": "", "data": { "id": 3210, "title": "",const customerSchema = { "type": "object", "properties": { "errCode": { "type": "integer", "minimum": 0, "maximum": 3, "minLength": 2, "maxLength": 3 }, "errMsg": {"type": "string"}, }};var customer = JSON.parse(responseBody);// console.log(customer);tests["Valid Data1"] = tv4.validate(customer, customerSchema);//驗證json中的errCode類型是integer,并且驗證最小值和最大值區間、驗證長度區間以上是常用斷言方法,更多使用參考:https://learning.getpostman.com/docs/postman/scripts/test_scripts/
測試前準備
發送請求之前往往需要準備數據,比如設置header中參數或者計算簽名.
使用Pre-request Script可以編寫一些準備數據.
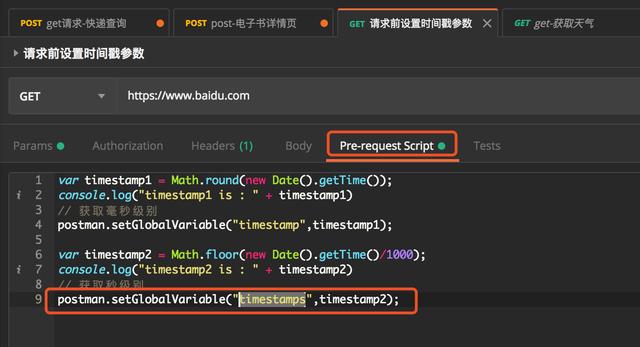
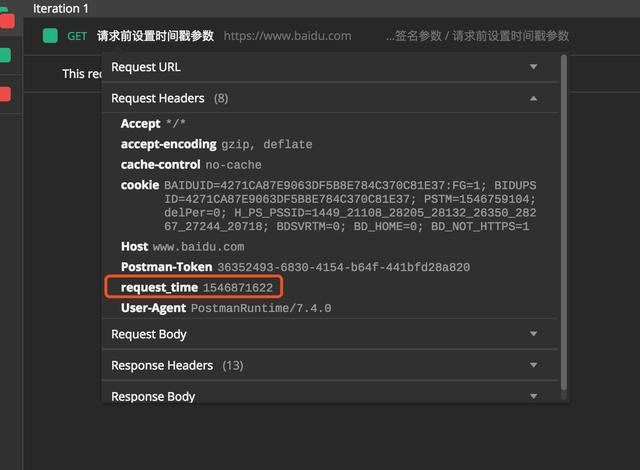
在header頭中引入剛剛設置{{timestamps}}環境變量.
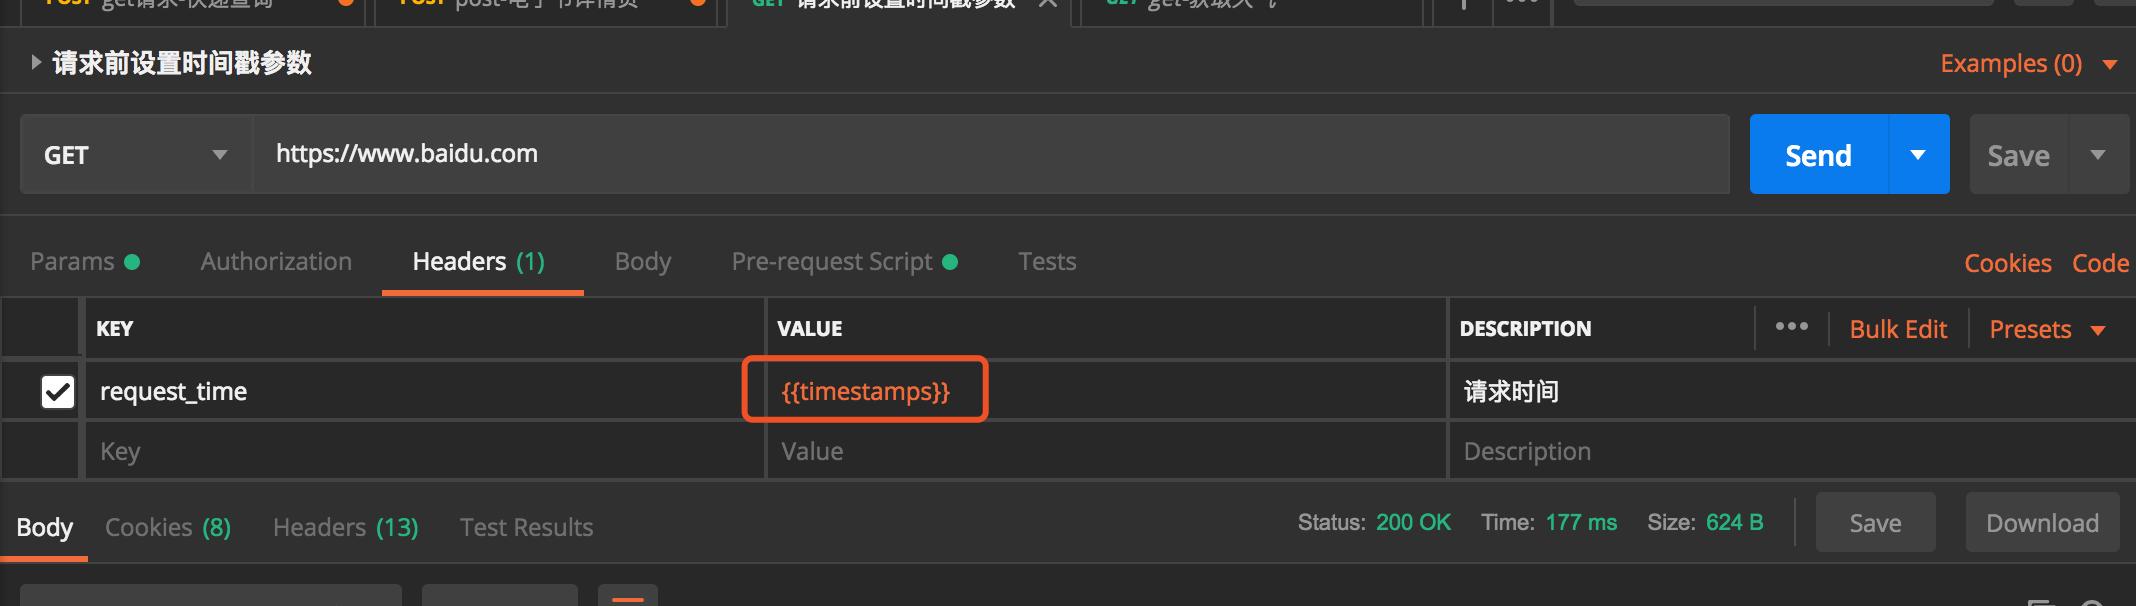
可以看到header中已經填寫了時間戳參數.
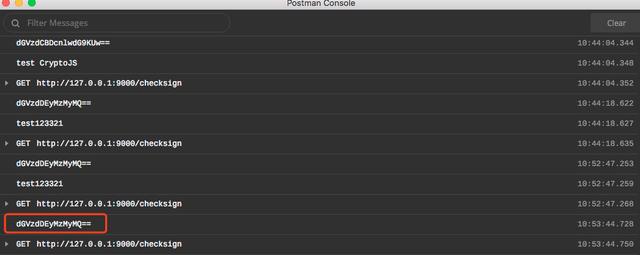
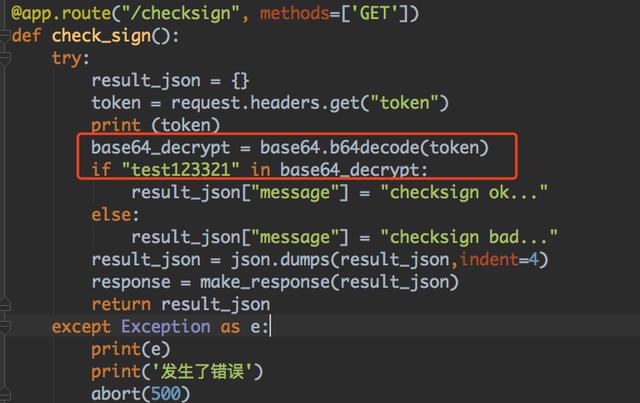
請求前編寫加密算法
var username = "test";var pwd = "123321";var base64Str = CryptoJS.enc.Utf8.parse(username+pwd);var token = CryptoJS.enc.Base64.stringify(base64Str);postman.setGlobalVariable("token",token);console.log(token);// 使用賬號+密碼的base64位加密算法加密生成的字符串
header頭中攜帶生成加密的token變量
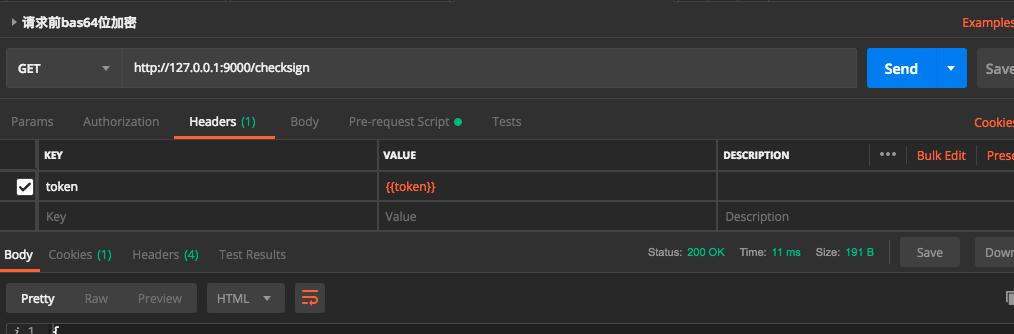
服務端使用base64位解密
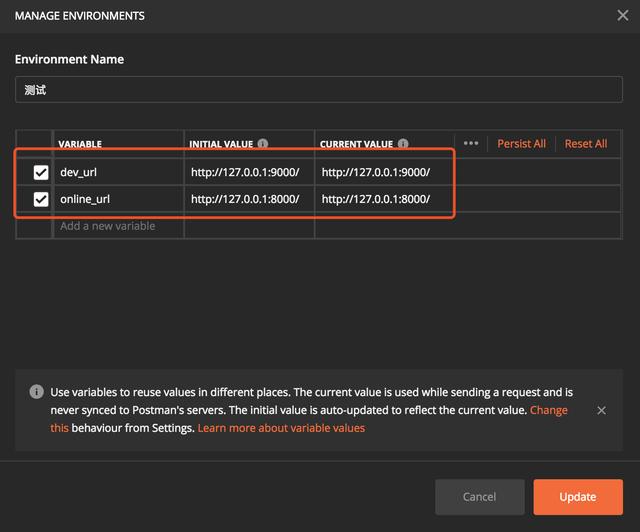
接口環境變量

接口參數化
全局變量
局部變量
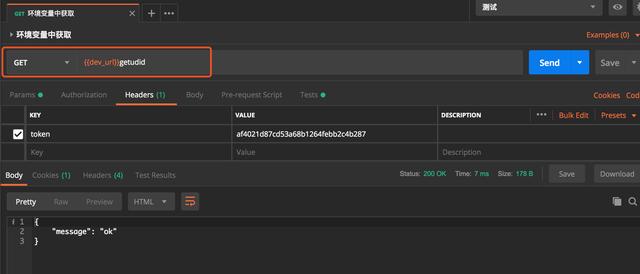
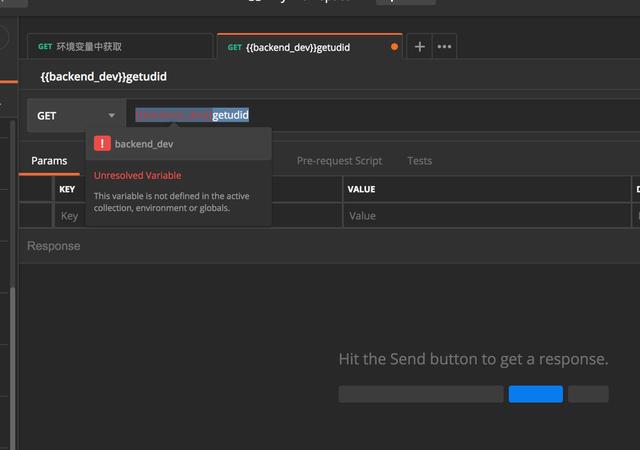
使用{{}}作為變量
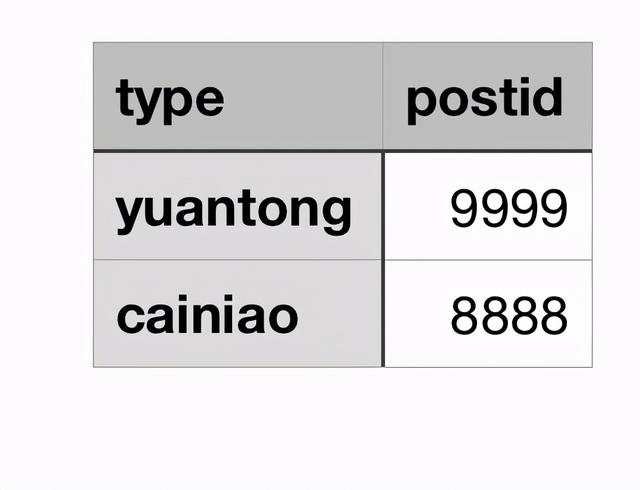
參數化文件
.csv文件格式,第一行是變量名,后面是具體賦值.
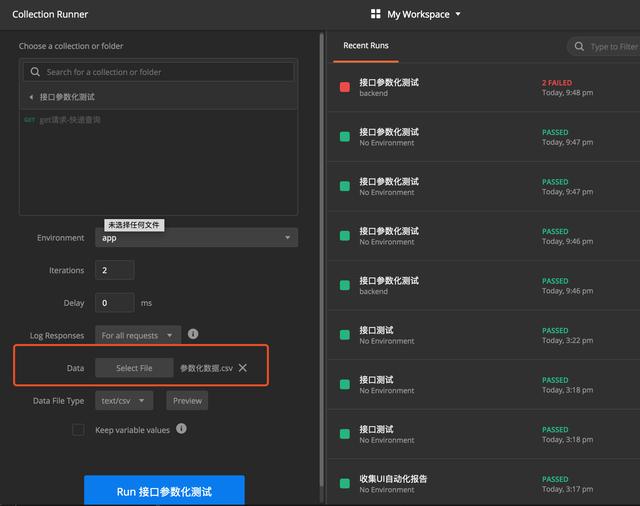
選擇參數化文件
接口參數傳遞
在登錄接口的響應數據中獲取token值.
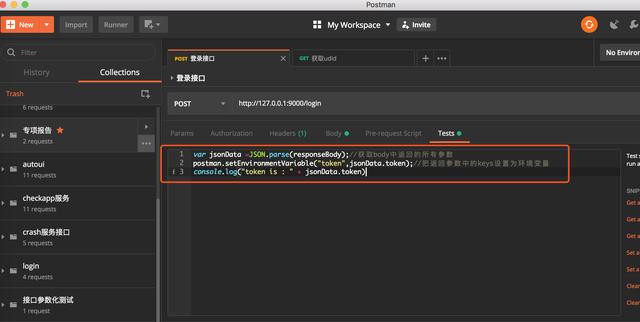
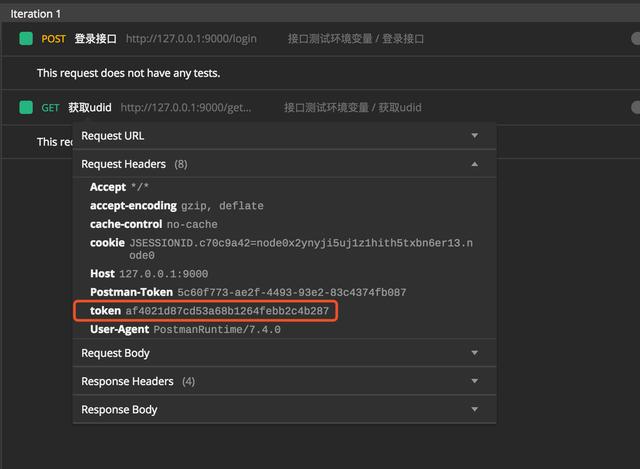
把token傳遞給第二個接口中的header頭中.
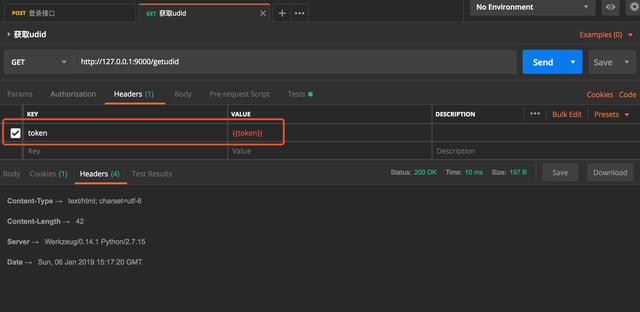
第二個接口中的header頭中已經拿到了token.
其他常用的方法
設置環境變量
pm.environment.set("variable_key", "variable_value");設置全局變量
pm.globals.set("variable_key", "variable_value");獲取環境變量
pm.environment.get("variable_key");獲取全局變量
pm.globals.get("variable_key");清除環境變量
pm.environment.unset("variable_key");清除全局變量
pm.globals.unset("variable_key");newman使用
官方教程
https://learning.getpostman.com/docs/postman/collection_runs/command_line_integration_with_newman/
安裝
npm install -g newman
運行
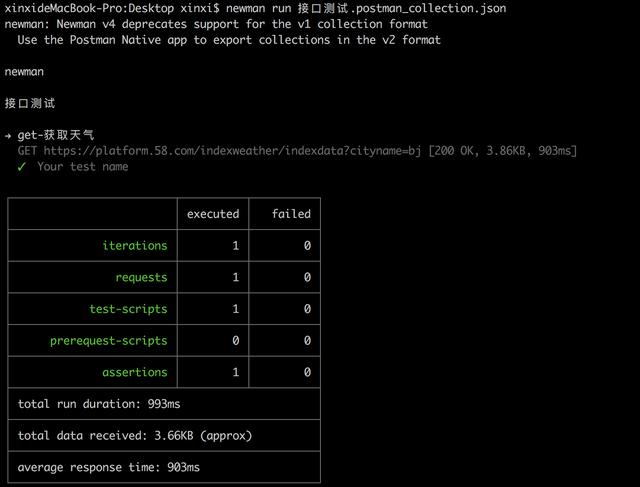
簡單運行
newman run 接口測試.postman_collection.json打印循環次數、請求次數、斷言次數、耗時等,但是沒有輸出文件.
循環執行
newman run 接口測試.postman_collection.json -n 2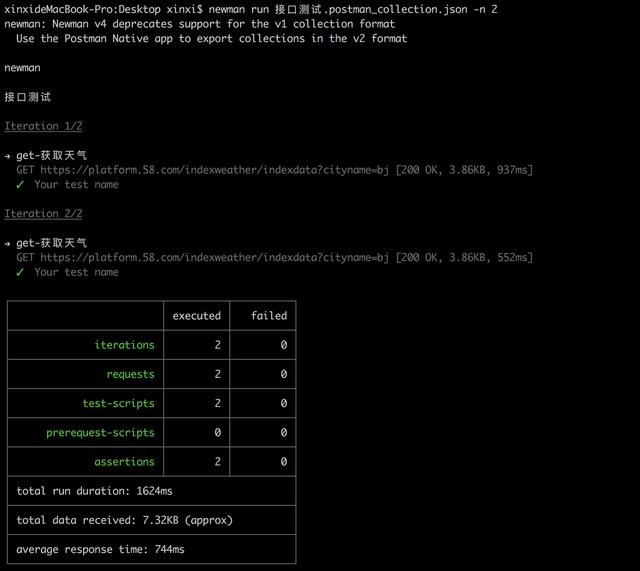
參數化
-d是參數化文件
newman run 接口參數化測試.postman_collection.json -d 參數化數據.csv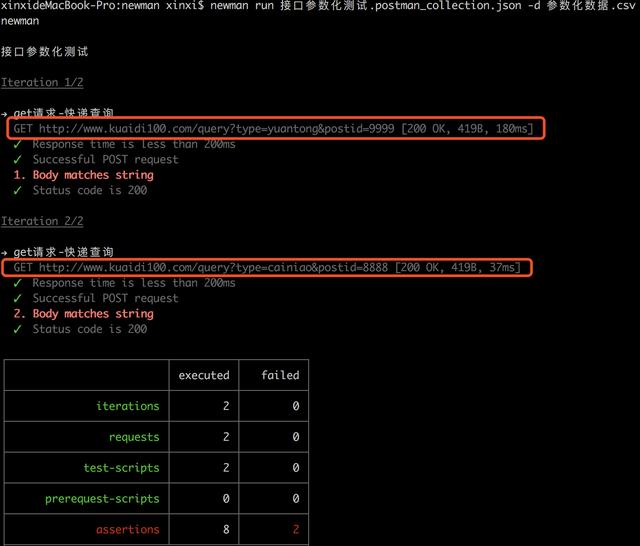
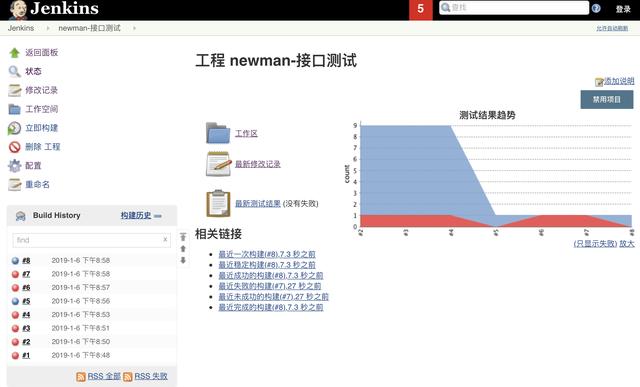
報告
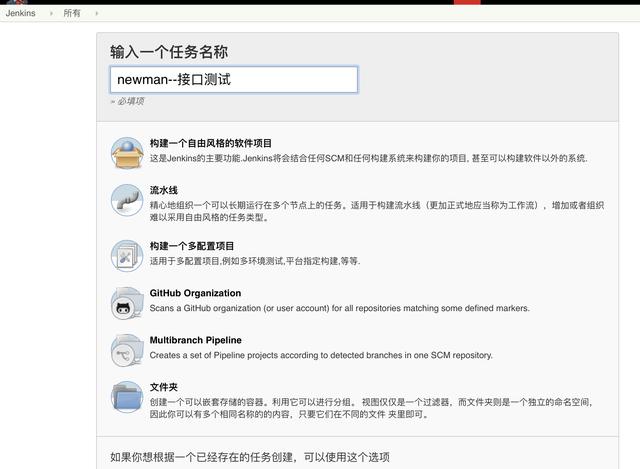
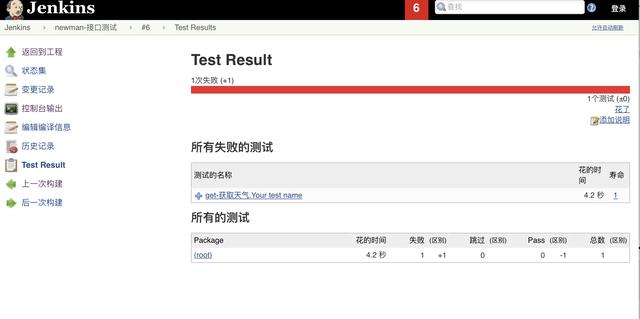
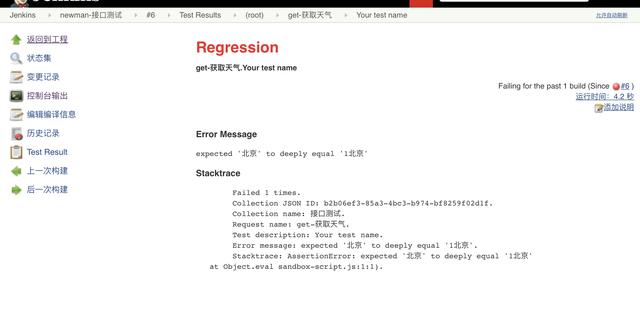
jenkins持續集成
在jenkins中創建自由風格的job
job配置
構建shell配置
newman run 文件路徑/接口測試.postman_collection.json--reporters cli,html,json,junit--reporter-json-export jsonOut.json--reporter-junit-export xmlOut.xml--reporter-html-export htmlOut.html構建后報告配置參數
**/*.xml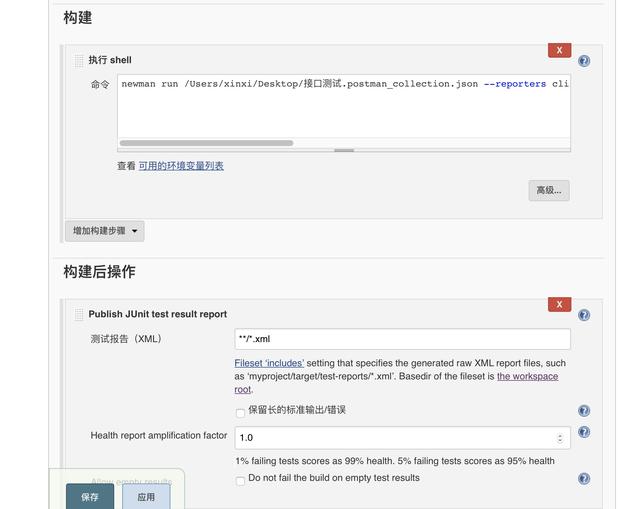

)


)


)


)