According to people in the know, React Hooks are hot, hot, hot. In this article, we follow Christian Jensen's 14-part tutorial to find out about the basics of this new feature of React. Follow along to find out more!
據知情人士稱,React Hooks很熱,很熱。 在本文中,我們將按照Christian Jensen的14部分教程來了解React這個新功能的基礎。 繼續了解更多!

介紹 (Intro)
Hooks are new to the React library and allow us to share logic between components and make them reusable.
鉤子是React庫的新增功能,它使我們能夠在組件之間共享邏輯并使它們可重用。
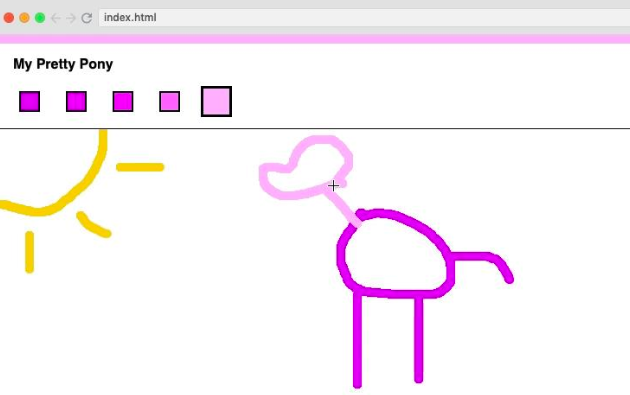
In this course, we will be building a paint app similar to Microsoft Paint, which will allow us to name our project, switch out colors, get a new batch of colors and of course paint.
在本課程中,我們將構建一個類似于Microsoft Paint的Paint應用程序,這將使我們能夠為項目命名,切換顏色,獲得新的一批顏色,當然還有Paint。
Scrimba allows you to pause screencasts at any time and play with the code. It's a great way to learn by doing!
Scrimba允許您隨時暫停截屏視頻并播放代碼。 這是邊干邊學的好方法!
先決條件 (Prerequisites)
The course assumes some prior knowledge of ES6, JSX, State and Props, but no worries, we've got you covered - check out our Scrimba articles by hitting the links above.
本課程假定您具有ES6 , JSX,狀態和道具的一些先驗知識 ,但是不用擔心,我們已經為您覆蓋了-點擊上面的鏈接,查看我們的Scrimba文章。
If you are completely new to React, be sure to check out our Scrimba React course
如果您是React的新手,請務必查看我們的Scrimba React課程
useState第1部分 (useState - Part 1)
First, we give our application a way to manage state using useState.
首先,我們為應用程序提供了一種使用useState管理狀態的方法。
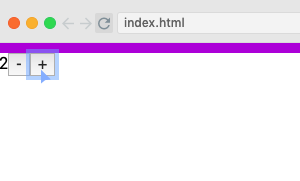
In our <Playground.js /> component, we declare a component called <Playground /> and create buttons to increment and decrement it. We then give useState an argument of (0) and use state restructuring to get state and setState (the function which updates the state) from our useState function. These are now renamed to count and setCount. We then render our count in the browser.
在我們的<Playground.js />組成部分,我們宣布了一個名為組件<Playground />并創建按鈕來遞增和遞減它。 然后,將useState的參數useState (0),并使用狀態重組從useState函數中獲取state和setState (更新狀態的函數)。 現在將它們重命名為count和setCount 。 然后,我們在瀏覽器中呈現計數。
Lastly, we render buttons which update the count using an inline function which will be triggered on the click.
最后,我們渲染按鈕,該按鈕使用嵌入式功能更新計數,該功能將在單擊時觸發。
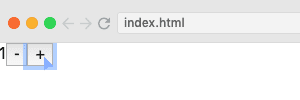
To ensure our count is accurate, we pass a function to our setState function instead of a value. This function takes the current state as its argument, which is then updated:
為了確保計數準確,我們將一個函數而不是值傳遞給setState函數。 該函數將當前狀態作為其參數,然后對其進行更新:
import React, { useState } from "react";
import randomColor from "randomcolor";export default function Playground() {const [count, setCount] = useState(0);return (<div>{count}<button onClick={() => setCount((currentCount) => currentCount - 1)}>-</button><button onClick={() => setCount((currentCount) => currentCount + 1)}>+</button></div>);
}
If you're worried about the performance of inline functions, take a look a this blog.
如果您擔心內聯函數的性能,請訪問此博客。
useState第2部分 (useState - Part 2)
Now we add our name input to the <Name.js /> component so the user can name their project.
現在,我們將名稱輸入添加到<Name.js />組件中,以便用戶可以命名其項目。
To set up<Name.js /> with a useState Hook, we need to import the Hook with a named import and then set our state up. Our state will be name and we will update it with setName. We then call useState and pass in an empty string as our default state value.
要使用useState Hook設置<Name.js /> ,我們需要使用命名的import導入Hook,然后設置狀態。 我們的狀態將是name ,我們將使用setName對其進行更新。 然后,我們調用useState并傳入一個空字符串作為默認狀態值。
We now need an input element with four properties. These are:
現在,我們需要一個具有四個屬性的輸入元素。 這些是:
value, which will always be the statenamefrom abovevalue,它始終是上方的州nameonChange, which will usesetStateinline to updatenameby passing the value intosetStateonChange,將使用setState內嵌到更新name由傳遞值到setStateonClickwhich uses setSelectionRange which takes a start index of 0 and end index of the length of the string to select the entire name, making it easier for the end-user to change the name.onClick使用setSelectionRange,它采用起始索引0和字符串長度的終止索引來選擇整個名稱,從而使最終用戶更容易更改名稱。placeholder, which we set to 'Untitled'.placeholder,我們將其設置為“無標題”。
import React, { useState } from "react";export default function Name() {const [name, setName] = useState("");return (<label className="header-name"><inputvalue={name}onChange={(e) => setName(e.target.value)}onClick={(e) => e.target.setSelectionRange(0, e.target.value.length)}placeholder="Untitled"/></label>);
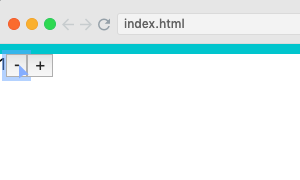
}We can now name our project and select the name to reset it with just one click:
現在,我們可以命名我們的項目,只需單擊一下即可選擇要重置的名稱:

useEffect (useEffect)
Currently, our Playground.js component is simply rendering a counter where can increment or decrement the count. Now we will update this so that every time the count is changed, the color of something is also changed.
當前,我們的Playground.js組件只是在渲染一個計數器,可以在其中增加或減少計數。 現在,我們將對其進行更新,以便每次更改計數時,事物的顏色也將更改。
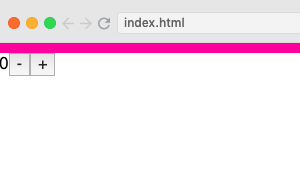
We use the useState Hook to set up the initial color, which we set to null and the function to update it (setColor). Now, we set up useEffect to update this color. useEffect's first argument is setColor, which we want to set to a randomColor.
我們使用useState Hook設置初始顏色(將其設置為null和用于對其進行更新的函數( setColor )。 現在,我們設置useEffect來更新該顏色。 useEffect的第一個參數是setColor,我們要將其設置為randomColor 。
As we only want a change in count to trigger useEffect, we set this as the second argument. If the count value hasn't changed, the Hook will not run the effect and the color will remain the same.
由于我們只希望更改count來觸發useEffect ,因此將其設置為第二個參數。 如果計數值未更改,則掛鉤將不會運行效果,并且顏色將保持不變。
import React, { useState, useEffect } from "react";
import randomColor from "randomcolor";export default function Playground() {const [count, setCount] = useState(0);const [color, setColor] = useState(null);useEffect(() => {setColor(randomColor());}, [count]);return (<div style={{ borderTop: `10px solid ${color}` }}>{count}<button onClick={() => setCount((currentCount) => currentCount - 1)}>-</button><button onClick={() => setCount((currentCount) => currentCount + 1)}>+</button></div>);
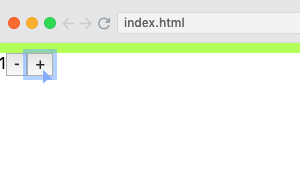
}Now, our color changes every time we increment or decrement our count.
現在,每次增加或減少計數時,顏色都會改變。
useState和useEffect挑戰 (useState & useEffect Challenge)
It's now time to test the skills we have acquired so far. In this screencast, a function which gets some random colors for us has been added to <Paint.js />:
現在是時候測試我們到目前為止掌握的技能了。 在此截屏視頻中,向我們提供了一些隨機顏色的函數已添加到<Paint.js />:
const getColors = () => {const baseColor = randomColor().slice(1);fetch(`https://www.thecolorapi.com/scheme?hex=${baseColor}&mode=monochrome`).then((res) => res.json()).then((res) => {setColors(res.colors.map((color) => color.hex.value));setActiveColor(res.colors[0].hex.value);});
};
Our task is to write the functions for setColors, which will give us an array of hex colors and setActiveColor, which will tell use what the active color is.
我們的任務是為setColors編寫函數,這將為我們提供十六進制顏色的數組,并為setActiveColor編寫函數,這將告訴使用什么是活動顏色。
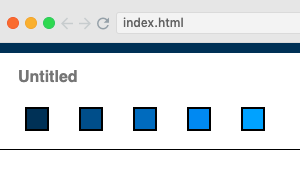
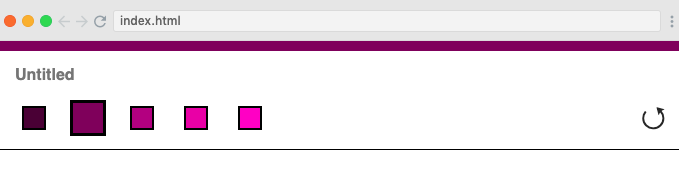
If we set up everything correctly, the UI will update with five colors which we can click on to expand. We only need useState and useEffect for this test.
如果我們正確設置了所有內容,則用戶界面將更新為五種顏色,可以單擊以展開。 我們僅需要useState和useEffect進行此測試。
useState和useEffect解決方案# (useState & useEffect Solution#)
In this screencast, Christian walks us through how to give functionality to the <ColorPicker /> component. At the end of it, we now have some colors:
在此截屏視頻中,克里斯汀(Christian)指導我們如何為<ColorPicker />組件賦予功能。 最后,我們有了一些顏色:
useEffect清理 (useEffect Clean Up)
Now we add a component called <WindowSize.js /> which will show the window width and height at the bottom of the screen when the user resizes the window. This then disappears after half a second.
現在,我們添加了一個名為<WindowSize.js />的組件,當用戶調整窗口大小時,它將在屏幕底部顯示窗口的寬度和高度。 然后半秒鐘后消失。
When we set up a timer or an event listener, we also need to clean it up once the component unmounts. This requires two pieces of state - the window size and visibility of the <WindowSize /> component:
設置計時器或事件偵聽器時,一旦組件卸載,我們還需要對其進行清理。 這需要兩種狀態-窗口大小和<WindowSize />組件的可見性:
export default function WindowSize() {const [[windowWidth, windowHeight], setWindowSize] = useState([window.innerWidth,window.innerHeight,]);const [visible, setVisible] = useState(false);
}
Now we set up our effect, which adds the event listener:
現在我們設置效果,添加事件偵聽器:
useEffect(() => {const handleResize = () => {};window.addEventListener("resize", handleResize);
});
Next, we set up the cleanup phase. This returns the function and an empty array is passed in to tell it that useEffect should only run on the first mount. The cleanup will then run and remove the event listener:
接下來,我們設置清理階段。 這將返回該函數,并傳入一個空數組以告訴它useEffect應該僅在第一次安裝時運行。 然后將運行清理并刪除事件偵聽器:
useEffect(() => {const handleResize = () => {};window.addEventListener("resize", handleResize);return () => window.removeEventListener("resize", handleResize);
}, []);
We now set up the window size, the visibility and the timer so that the the resize window appears and then disappears after 500 milliseconds:
現在,我們設置窗口大小,可見性和計時器,以使調整大小窗口出現,然后在500毫秒后消失:
const [visible, setVisible] = useState(false);
useEffect(() => {const handleResize = () => {setWindowSize([window.innerWidth, window.innerHeight]);setVisible(true);setTimeout(() => setVisible(false), 500);};window.addEventListener("resize", handleResize);return () => window.removeEventListener("resize", handleResize);
}, []);
However, we do not want to add a new timer every time the user resizes the window, so we also need to clean up the timer with clearTimeout(timeoutId):
但是,我們不想每次用戶調整窗口大小時都添加一個新計時器,因此我們還需要使用clearTimeout(timeoutId)清除計時器:
timeoutId = setTimeout(() => setVisible(false), 500);To give clearTimeout the timeoutId from the last time the function ran, we use closures, which means that we declare our timeoutId variable outside the handleResize function. This way, the variable is still available to the inner function. Every time the function runs, the previous timeout will be cleared and a new one will be set up.
為了給clearTimeout從上一次運行該函數起提供timeoutId ,我們使用了Closures ,這意味著我們在handleResize函數之外聲明了timeoutId變量。 這樣,變量仍可用于內部函數。 每次運行該功能時,上一個超時將被清除,并且將設置一個新的超時。
Lastly, we render our resize function to the browser.The final code can be seen in the screencast.
最后,我們將調整大小功能呈現給瀏覽器,最終的代碼可以在截屏中看到。
Now, whenever the user resizes their window, the window size is set to the current window size, the visibility is set to true, and a timer is started to set the visibility to false after 500 milliseconds.
現在,每當用戶調整窗口大小時,窗口大小將設置為當前窗口大小,可見性設置為true,并啟動計時器以在500毫秒后將可見性設置為false。

useRef挑戰 (useRef Challenge)
If you need to access to actual DOM elements in React, you may need to use Refs. React has a Hook, useRef, which is dedicated to Refs.
如果您需要訪問React中的實際DOM元素,則可能需要使用Refs。 React有一個Hook, useRef ,專門用于Refs。
To use a Ref, it needs to be added to the element:
要使用Ref,需要將其添加到元素中:
<inputref={inputRef}type="range"onChange={(e) => setCount(e.target.value)}value={count}
/>
This input is a slider which updates the count and therefore the selected color. As the value is also tied to the count, the slider will also adjust if the count is changed via the buttons we added earlier.
此輸入是一個滑塊,可更新count并因此更新所選顏色。 由于該值也與計數相關,如果通過前面添加的按鈕更改了計數,則滑塊也會進行調整。
We have now declared our Ref, but we also need to set it up by calling useRef:
現在我們已經聲明了Ref,但是我們還需要通過調用useRef來進行設置:
const inputRef = useRef();In order to focus the input every time we change the count with the buttons, we simply add the necessary logic inside the effect which runs when the buttons are clicked:
為了每次使用按鈕更改計數時都集中輸入,我們只需在單擊按鈕時運行的效果內添加必要的邏輯即可:
useEffect(() => {setColor(randomColor())inputRef.current.focus()},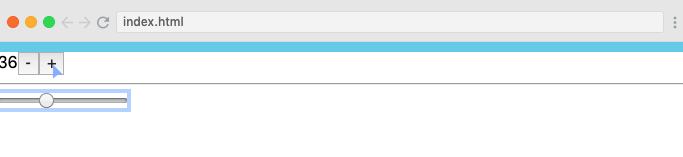
Currently, the canvas is set to the height of the window itself, which makes it possible for the user to scroll within the canvas, which can lead to empty whitespace if the image is exported.
當前,畫布設置為窗口本身的高度,這使用戶可以在畫布內滾動,如果導出圖像,則可能導致空白。
Our challenge now is to ensure that the canvas of our paint app is only as big as the window minus the header height. To do this, we need to use useRef to get the height of the header and subtract it from the window's height.
現在我們面臨的挑戰是確保繪畫應用程序的畫布僅與窗口減去標題高度一樣大。 為此,我們需要使用useRef來獲取標題的高度,并將其從窗口的高度中減去。
useRef解決方案 (useRef Solution)
In this screencast Christian walks us through how to get the correct canvas height with useRef.
在此截屏視頻中,Christian引導我們了解如何使用useRef獲得正確的畫布高度。
After this, the user is no longer able to scroll, except for a few pixels offset between Scrimba's browser and a regular browser. There is now no whitespace at the bottom of the image.
此后,除了Scrimba瀏覽器和常規瀏覽器之間的幾個像素偏移之外,用戶不再能夠滾動。 現在,圖像底部沒有空格。
useCallback和useMemo +挑戰 (useCallback & useMemo + Challenge)
In this screencast, we are introduced to the concept of _ memoization_. This is when a pure function returns the same output from a calculation it has previous processed, rather than re-running the entire calculation:
在此截屏視頻中,我們介紹了_ memoization_的概念。 這是當純函數從先前處理過的計算返回相同的輸出時,而不是重新運行整個計算時:
function Calculate(num) {// first call, num === 3... ok I will calculate thatreturn fetchComplicatedAlgorithmToAdd47(3); // returns 50 after a while// second call, num === 5... ok I guess I have to calculate that tooreturn fetchComplicatedAlgorithmToAdd47(5); // returns 52 after a while// third call, num === 3... WAIT, I've seen this before! I know this one!return 50; // immediately
}
React provides two Hooks which allow us to use memoization: useCallback and useMemo.
React提供了兩個Hook,它們允許我們使用useCallback : useCallback和useMemo 。
useCallback ### (useCallback###)
We start off with a very simple component in Playground.js which renders the number of times the function has rendered:
我們從Playground.js中的一個非常簡單的組件開始,該組件呈現該函數呈現的次數:
function Calculate(num) {const renderCount = useRef(1);return <div>{renderCount.current++}</div>;
}
Now let's say that the component should only render when the count changes, but not when the color changes. To achieve this, we could use useCallback. We assign the result of useCallback to a variable called calculate:
現在讓我們說,該組件僅在計數改變時才渲染,而在顏色改變時不應該渲染。 為此,我們可以使用useCallback 。 我們的結果分配useCallback給一個變量稱為calculate :
const calculate = useCallback(<Calculate />, [count]);We will now render our new calculate variable instead of the <Calculate /> component. Now, the component only renders when the count is changed, and not when the 'Change Color' button is clicked.
現在,我們將呈現新的calculate變量,而不是<Calculate />組件。 現在,該組件僅在更改計數時才渲染,而不是在單擊“更改顏色”按鈕時才渲染。
We also need to render our <Calculate /> component instead of the variable we previously used and create a callback function. We use useCallback and assign it to a variable called cb. The count is the only dependency, meaning that if the count changes we will get a new function instance:
我們還需要呈現我們的<Calculate />組件而不是先前使用的變量,并創建一個回調函數。 我們使用useCallback并將其分配給名為cb的變量。 count是唯一的依賴項,這意味著如果計數發生變化,我們將獲得一個新的函數實例:
const cb = useCallback((num) => console.log(num), [count]);Now we pass in a number (which is set to the count) to the Calculate component and the callback function, which we log to the console. Whenever the Calculate component re-renders (i.e. when the plus and minus buttons are clicked), the current count will be logged to the console.
現在,我們將一個數字(設置為count)傳遞給Calculate組件和回調函數,并將其登錄到控制臺。 每當重新Calculate組件時(即單擊加號和減號按鈕時),當前計數都將記錄到控制臺。
However, with this method, the count is also logged to the console when we click the 'Change Color' button. This is because we are using memoization for our console.log function, but not for our actual component, meaning that is not checking whether the callback function is the same as a previous one.
但是,使用這種方法,當我們單擊“更改顏色”按鈕時,計數也會記錄到控制臺。 這是因為我們正在為console.log函數使用備忘錄,但沒有為實際組件使用備忘錄,這意味著不檢查回調函數是否與上一個相同。
React.memo (React.memo)
To solve this, we add React.memo to the Calculate component. Now, it will check the inputs and see whether they are the same, and will not render if so:
為了解決這個問題,我們將React.memo添加到Calculate組件中。 現在,它將檢查輸入并查看它們是否相同,如果相同,將不進行渲染:
const Calculate = React.memo(({ cb, num }) => {cb(num);const renderCount = useRef(1);return <div>{renderCount.current++}</div>;
});
The 'Change Color' button now no longer logs the count to the console.
現在,“更改顏色”按鈕不再將計數記錄到控制臺。
useMemo ### (useMemo###)
To see what useMemo can do, we add a useCallback call right next to a useMemo call:
要查看useMemo可以做什么,我們在useCallback調用旁邊添加一個useMemo調用:
useCallback(() => console.log("useCallback"));
useMemo(() => console.log("useMemo"));
This tells us that useMemo is used every time the function renders. This is because useCallback returns the functions, whereas useMemo returns the result of the function:
這告訴我們每次函數渲染時都會使用useMemo 。 這是因為useCallback返回函數,而useMemo返回函數結果:
useCallback(() => console.log("useCallback")); // return the function
useMemo(() => console.log("useMemo")); // return the result of the function
useMemo can be used for some expensive functions which you want to memoize. UseCallback, on the other hand, is better for passing a callback into a component when you don't want to render the component unnecessarily.
useMemo可用于一些您想useMemo昂貴功能。 另一方面, UseCallback可以在您不想不必要地呈現組件時將回調傳遞給組件。
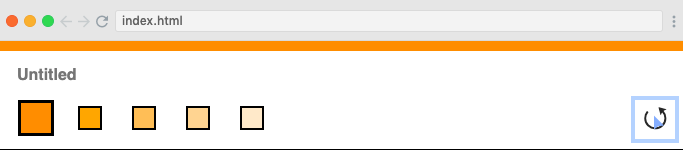
The screencast finishes with a new challenge. Our paint app currently offers only a few colors to work with. Our challenge is to add some functionality to a newly-added refresh button so that the user can click the button and get some new colors. This should take place in RefreshButton.js, which is currently taking in a callback and should be calling that callback when the refresh button is clicked. Our challenge is to pass in the callback using useCallback or useMemo.
截屏視頻結束了新的挑戰。 我們的繪畫應用程序目前僅提供幾種顏色供您使用。 我們的挑戰是為新添加的刷新按鈕添加一些功能,以便用戶單擊該按鈕并獲得一些新的顏色。 這應該在RefreshButton.js ,該當前正在接受回調,并且在單擊刷新按鈕時應調用該回調。 我們的挑戰是使用useCallback或useMemo傳遞回調。
As a bonus challenge, we are also asked to use React.memo to memoize the <Name /> component, which is currently rendering unnecessarily every time we change our colors.
作為一個額外的挑戰,我們還被要求使用React.memo <Name />組件,該組件當前每次更改顏色時都不必要地渲染。
useCallback解決方案 (useCallback Solution)
Now, Christian walks us through the solution to the previous challenges, follow him in this marvellous screencast.
現在,克里斯汀(Christian)帶領我們完成了先前挑戰的解決方案,并在這個出色的截屏視頻中跟隨他。
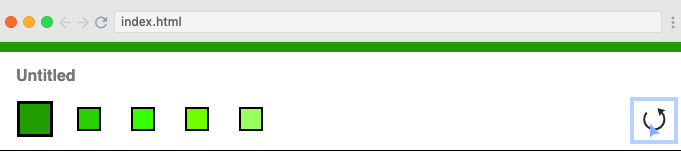
At the end of the screencast, our refresh button is now supplying shiny new colors when clicked:
在截屏視頻的結尾,單擊時,我們的刷新按鈕現在將提供閃亮的新顏色:
定制鉤 (Custom Hooks)
Here, we learn about custom Hooks by refactoring the <WindowSize /> component into a Hook. This is great for reusability.
在這里,我們通過將<WindowSize />組件重構為掛鉤來了解自定義掛鉤。 這對于可重用性非常有用。
Currently, <WindowSize /> is handling two different sets of state; the window size and visibility. As visibility might not be needed in future uses of <WindowSize />, we move its logic into our <Paint /> component, which is also where we will use our useWindowSize Hook.
當前, <WindowSize />正在處理兩個不同的狀態集。 窗口大小和可見性。 由于將來使用<WindowSize />可能不需要可見性,因此我們將其邏輯移到<Paint />組件中,這也是我們將使用useWindowSize Hook的地方。
The following lines are removed from WindowSize.js:
以下行已從WindowSize.js中刪除:
let timeoutId;
///
setVisible(true);
clearTimeout(timeoutId);
timeoutId = setTimeout(() => setVisible(false), 500);
Additionally, the following lines now need to be returned from <Paint.js /> instead of <WindowSize />:
此外,現在需要從<Paint.js />而不是<WindowSize />返回以下行:
<div className={`window-size ${visible ? "" : "hidden"}`}>{windowWidth} x {windowHeight}
</div>
The window width and height will be returned from <WindowSize />:
窗口的寬度和高度將從<WindowSize />返回:
return [windowWidth, windowHeight];To make the windowWidth and windowHeight variables available, we add the following code to <Paint.js />:
為了使windowWidth和windowHeight變量可用,我們將以下代碼添加到<Paint.js /> :
const [windowWidth, windowHeight] = useWindowSize();To implement the visibility logic so that we can show and hide the window size as necessary, we pass in a callback to our useWindowSize Hook and use a Ref to make timeoutID available between renders:
為了實現可見性邏輯,以便我們可以根據需要顯示和隱藏窗口大小,我們將回調傳遞給useWindowSize Hook,并使用Ref使timeoutID在渲染之間可用:
let timeoutId = useRef();
const [windowWidth, windowHeight] = useWindowSize(() => {setVisible(true);clearTimeout(timeoutId.current);timeoutId.current = setTimeout(() => setVisible(false), 500);
});
We can now call this when we need to from <WindowSize />:
現在,我們可以在<WindowSize />調用它:
export default function useWindowSize(cb) {const [[windowWidth, windowHeight], setWindowSize] = useState([window.innerWidth,window.innerHeight,]);useEffect(() => {const handleResize = () => {cb();setWindowSize([window.innerWidth, window.innerHeight]);};window.addEventListener("resize", handleResize);return () => window.removeEventListener("resize", handleResize);}, []);return [windowWidth, windowHeight];
}
We now have the same functionality as before but the <WindowSize /> logic is in a reusable Hook.
現在,我們具有與以前相同的功能,但是<WindowSize />邏輯位于可重用的Hook中。
The lessons ends with another challenge - to convert the <Canvas /> component into a function which uses Hooks instead of lifecycle methods.
這些課程以另一個挑戰結束-將<Canvas />組件轉換為使用Hooks而非生命周期方法的函數。
使用Hooks構建繪畫應用 (Building the paint app with Hooks)
This screencast walks us through how to convert <Canvas /> into a functional component using Hooks. It also shows us how to refactor our app to make it much cleaner and more readable. A big advantage of using Hooks is that all related logic is next to each other, in contrast to our old components in which related logic items were separated from each other.
該截屏視頻指導我們如何使用Hooks將<Canvas />轉換為功能組件。 它還向我們展示了如何重構我們的應用程序,使其更加整潔和可讀性強。 使用Hooks的一大優勢是,所有相關的邏輯都彼此相鄰,這與我們以前的舊組件不同,在舊的組件中,相關的邏輯項彼此分開。
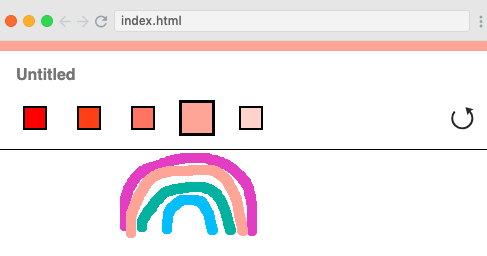
At the end of the screencast, our paint app is finally finished and we are ready to paint our masterpieces:
在截屏視頻的結尾,我們的繪畫應用程序終于完成了,我們可以繪畫我們的杰作了:
奧托羅 (Outro)
We have now finished the React Hooks course. We have learnt about:
現在,我們已經完成了React Hooks課程。 我們了解到:
useState, which manages stateuseState,它管理狀態useEffect, which does side effects,useEffect,它有副作用,useRef, which gets references to DOM elements and keeps values across rendersuseRef,它獲取對DOM元素的引用并在渲染器之間保留值useCallback, which creates functions which don't need to be created on every renderuseCallback,它創建不需要在每個渲染器上都創建的函數useMemo, which memoizes expensive computationsuseMemo,用于記憶昂貴的計算React.Memo, which can go around a React component and memoize itReact.Memo,它可以繞過React組件并對其進行React.Memocustom Hooks, which allow us to create our own reusable logic.custom Hooks,它允許我們創建自己的可重用邏輯。
There are two rules to keep in mind when using any of these Hooks:
使用這些掛鉤中的任何兩個時,都需要牢記兩個規則:
- Only call Hooks at the top level of the React component, i.e. not within if blocks or anything similar. 僅在React組件的頂層調用Hook,即不在if塊或類似內容之內。
- Only call Hooks from React functions, not your own custom functions. 僅從React函數調用Hook,而不是您自己的自定義函數。
Congratulations on following the tutorial and learning all the skills used in this project. To further your learning, check out Scrimba's free, six-hour Learn React for Free course which aims to make you a React wizard!
恭喜您按照教程學習了本項目中使用的所有技能。 為了進一步學習,請查看Scrimba的免費六小時免費學習React免費課程,該課程旨在使您成為React向導!
Happy coding!
編碼愉快!
翻譯自: https://www.freecodecamp.org/news/learn-react-hooks-by-building-a-paint-app/
)
)


)


)

)


