手打不易,如果轉摘,請注明出處!
注明原文:https://zhangxiaofan.blog.csdn.net/article/details/129832925
目錄
前言
版本
?配置通用說明
項目結構
代碼
啟動類
實體類
基礎使用——增刪改查(@Cached、@CacheInvalidate、@CacheUpdate)
基礎使用——@CreateCache注解和手動方式
基礎使用——@CacheRefresh 詳解
前言
最近有個項目用到jetcache,正好用到,加上spring-boot在使用jetcache的時候會有一些需要注意的坑,下面通過基礎使用來給大家簡單介紹。
下面有一些示例代碼,都有注釋,這些注釋可以仔細閱讀一下!
版本
本篇的jetcache、jedis等版本如下:
<dependency><groupId>com.alicp.jetcache</groupId><artifactId>jetcache-starter-redis</artifactId><version>2.7.3</version>
</dependency>
<dependency><groupId>redis.clients</groupId><artifactId>jedis</artifactId><version>4.1.0</version>
</dependency>
完整的maven的pom.xml如下:
<?xml version="1.0" encoding="UTF-8"?><project xmlns="http://maven.apache.org/POM/4.0.0" xmlns:xsi="http://www.w3.org/2001/XMLSchema-instance"xsi:schemaLocation="http://maven.apache.org/POM/4.0.0 http://maven.apache.org/xsd/maven-4.0.0.xsd"><modelVersion>4.0.0</modelVersion><groupId>org.example</groupId><artifactId>spring-boot-redis-jetcache-base</artifactId><version>1.0-SNAPSHOT</version><packaging>war</packaging><name>spring-boot-redis-jetcache-base</name><parent><groupId>org.springframework.boot</groupId><artifactId>spring-boot-starter-parent</artifactId><version>2.4.6</version><relativePath/> <!-- lookup parent from repository --></parent><properties><project.build.sourceEncoding>UTF-8</project.build.sourceEncoding><project.reporting.outputEncoding>UTF-8</project.reporting.outputEncoding><maven.compiler.source>1.8</maven.compiler.source><maven.compiler.target>1.8</maven.compiler.target><java.version>1.8</java.version></properties><dependencies><dependency><groupId>org.springframework.boot</groupId><artifactId>spring-boot-starter</artifactId></dependency><dependency><groupId>org.springframework.boot</groupId><artifactId>spring-boot-starter-web</artifactId></dependency><dependency><groupId>org.springframework.boot</groupId><artifactId>spring-boot-starter-thymeleaf</artifactId></dependency><dependency><groupId>org.springframework.boot</groupId><artifactId>spring-boot-starter-test</artifactId><scope>test</scope></dependency><dependency><groupId>org.springframework.boot</groupId><artifactId>spring-boot-configuration-processor</artifactId><optional>true</optional></dependency><dependency><groupId>org.springframework.boot</groupId><artifactId>spring-boot-devtools</artifactId><scope>runtime</scope></dependency><dependency><groupId>org.projectlombok</groupId><artifactId>lombok</artifactId><version>1.18.8</version></dependency><dependency><groupId>org.springframework.boot</groupId><artifactId>spring-boot-starter-aop</artifactId><exclusions><exclusion><artifactId>aspectjweaver</artifactId><groupId>org.aspectj</groupId></exclusion></exclusions></dependency><dependency><groupId>org.aspectj</groupId><artifactId>aspectjweaver</artifactId><version>1.9.5</version></dependency><dependency><groupId>org.apache.commons</groupId><artifactId>commons-lang3</artifactId><version>3.10</version></dependency><dependency><groupId>com.alicp.jetcache</groupId><artifactId>jetcache-starter-redis</artifactId><version>2.7.3</version></dependency><dependency><groupId>redis.clients</groupId><artifactId>jedis</artifactId><version>4.1.0</version></dependency><dependency><groupId>com.alibaba</groupId><artifactId>fastjson</artifactId><version>2.0.25</version></dependency><dependency><groupId>com.esotericsoftware</groupId><artifactId>kryo</artifactId><version>5.4.0</version></dependency></dependencies><build><plugins><plugin><groupId>org.springframework.boot</groupId><artifactId>spring-boot-maven-plugin</artifactId><version>2.1.0.RELEASE</version></plugin></plugins></build>
</project>
配置文件 application.yml 如下:?
server:servlet:context-path: /port: 8081# 官方表示,不會支持 redisson 客戶端, 僅支持 jedis 和 lettuce 鏈接:https://github.com/alibaba/jetcache/issues/634
jetcache:statIntervalMinutes: 10 # 默認值0,統計間隔,0表示不統計areaInCacheName: false # 默認值false, 是否將 areaName 作為遠程緩存key前綴# 本地local:# 默認分組配置,可以創建多個,對應@Cached和@CreateCache的 area 屬性, 默認名就是 'default'default:type: caffeine # 可選 linkedhashmap,caffeinekeyConvertor: fastjson # 指定KEY的轉換方式, 可選 fastjson2,fastjson,jackson# 遠程remote:default:type: rediskeyConvertor: fastjson # 指定KEY的轉換方式, 可選 fastjson2,fastjson,jacksonvalueEncoder: java # 可選 java,kryo,kryo5valueDecoder: java # 可選 java,kryo,kryo5poolConfig:minIdle: 5maxIdle: 20maxTotal: 50host: 127.0.0.1port: 6379password: 123456
?配置通用說明
參考官網:https://github.com/alibaba/jetcache/blob/master/docs/CN/Config.md
| 屬性 | 默認值 | 說明 |
|---|---|---|
| jetcache.statIntervalMinutes | 0 | 統計間隔,0表示不統計 |
| jetcache.areaInCacheName | true(2.6-) false(2.7+) | jetcache-anno把cacheName作為遠程緩存key前綴,2.4.3以前的版本總是把areaName加在cacheName中,因此areaName也出現在key前綴中。2.4.4以后可以配置,為了保持遠程key兼容默認值為true,但是新項目的話false更合理些,2.7默認值已改為false。 |
| jetcache.hiddenPackages | 無 | @Cached和@CreateCache自動生成name的時候,為了不讓name太長,hiddenPackages指定的包名前綴被截掉 |
| jetcache.[local/remote].${area}.type | 無 | 緩存類型。tair、redis為當前支持的遠程緩存;linkedhashmap、caffeine為當前支持的本地緩存類型 |
| jetcache.[local/remote].${area}.keyConvertor | fastjson2 | key轉換器的全局配置,2.6.5+已經支持的keyConvertor:fastjson2/jackson;2.6.5-只有一個已經實現的keyConvertor: fastjson。僅當使用@CreateCache且緩存類型為LOCAL時可以指定為none,此時通過equals方法來識別key。方法緩存必須指定keyConvertor |
| jetcache.[local/remote].${area}.valueEncoder | java | 序列化器的全局配置。僅remote類型的緩存需要指定,2.7+可選java/kryo/kryo5;2.6-可選java/kryo |
| jetcache.[local/remote].${area}.valueDecoder | java | 序列化器的全局配置。僅remote類型的緩存需要指定,2.7+可選java/kryo/kryo5;2.6-可選java/kryo |
| jetcache.[local/remote].${area}.limit | 100 | 每個緩存實例的最大元素的全局配置,僅local類型的緩存需要指定。注意是每個緩存實例的限制,而不是全部,比如這里指定100,然后用@CreateCache創建了兩個緩存實例(并且注解上沒有設置localLimit屬性),那么每個緩存實例的限制都是100 |
| jetcache.[local/remote].${area}.expireAfterWriteInMillis | 無窮大 | 以毫秒為單位指定超時時間的全局配置(以前為defaultExpireInMillis) |
| jetcache.remote.${area}.broadcastChannel | 無 | jetcahe2.7的兩級緩存支持更新以后失效其他JVM中的local cache,但多個服務共用redis同一個channel可能會造成廣播風暴,需要在這里指定channel,你可以決定多個不同的服務是否共用同一個channel。如果沒有指定則不開啟。 |
| jetcache.local.${area}.expireAfterAccessInMillis | 0 | 需要jetcache2.2以上,以毫秒為單位,指定多長時間沒有訪問,就讓緩存失效,當前只有本地緩存支持。0表示不使用這個功能。 |
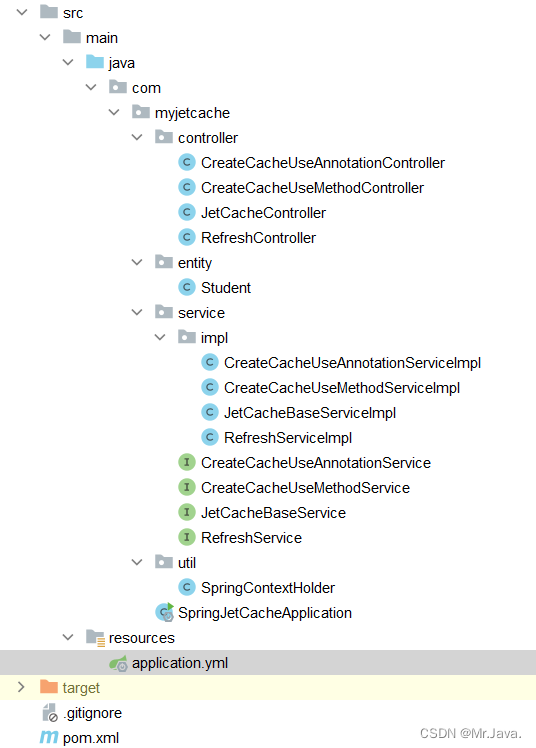
項目結構
代碼
啟動類
import com.alicp.jetcache.anno.config.EnableCreateCacheAnnotation;
import com.alicp.jetcache.anno.config.EnableMethodCache;import org.springframework.boot.SpringApplication;
import org.springframework.boot.autoconfigure.SpringBootApplication;
import org.springframework.scheduling.annotation.EnableScheduling;@SpringBootApplication
// 開啟 Cache
@EnableMethodCache(basePackages = "com.myjetcache")
// 如果不用@CreateCache注解可以刪除 EnableCreateCacheAnnotation
@EnableCreateCacheAnnotation
@EnableScheduling
public class SpringJetCacheApplication {public static void main(String[] args) {SpringApplication.run(SpringJetCacheApplication.class, args);}
}
實體類
@Data
public class Student implements Serializable {private static final long serialVersionUID = 1L;private static final Random RANDOM = new Random();/*** 當對象只包含基本數據類型的時候,RADM工具可以直接展示數據. 非基本數據類型的字段, 默認不會展示.*/private Integer id;private String name;private Integer age;public static Student getStudent(String id) {Student student = new Student();student.setId(Integer.parseInt(id));student.setName(UUID.randomUUID().toString().substring(0, 3));student.setAge(RANDOM.nextInt(9999));return student;}
}
基礎使用——增刪改查(@Cached、@CacheInvalidate、@CacheUpdate)
先定義接口
public interface JetCacheBaseService {Student add(Student student);void delete(Long id);void update(Student student);Student get(Long id);Student get(Long id, boolean isUseCache);
}
寫好實現類
需注意的點:
@Cached——[增]
注意點:
- 由于我們是在方法上使用,該注解緩存的是方法 return 的數據,因此方法返回類型不能是 void
- 緩存執行的是 com.alicp.jetcache.Cache#PUT() , 接口默認是異步存儲?
@CacheInvalidate——[刪]
- 注意點:方法執行后,再刪除
@CacheUpdate——[改]
- 注意點:方法執行后,再修改,作者說明: https://github.com/alibaba/jetcache/issues/115
@Cached——[查]
注意點:
- 先查緩存,無緩存則走方法
- 如果注解配合?condition 屬性,那么?condition=true: 查緩存, 無緩存則走方法;condition=false: 不查緩存, 直接執行方法(查數據庫)
@Slf4j
@Service
public class JetCacheBaseServiceImpl implements JetCacheBaseService {private final Random random = new Random();/*** 增 @Cached* 緩存執行的是 com.alicp.jetcache.Cache#PUT() , 接口默認是異步存儲** @param student spel表達式取值* @return 待緩存的的數據(注意,這個返回值不能void)*/@Override@Cached(area = "default", name = "my:jetcache:", key = "#student.id", cacheType = CacheType.BOTH,expire = 3600, localExpire = 10, timeUnit = TimeUnit.SECONDS, cacheNullValue = false)public Student add(Student student) {log.info("student:{}", JSON.toJSONString(student));return student;}/*** 刪 @CacheInvalidate* 方法執行后,再刪除,作者 huangli 表示也不會增加這個功能選項, 自主控制粒度即可*/@Override@CacheInvalidate(name = "my:jetcache:", key = "#id")public void delete(Long id) {log.info("delete");}/*** 改 @CacheUpdate* 方法執行后,再修改. 作者說明:https://github.com/alibaba/jetcache/issues/115*/@Override@CacheUpdate(name = "my:jetcache:", key = "#student.id", value = "#student")public void update(Student student) {log.info("update:{}", JSON.toJSONString(student));}/*** 查* 先查緩存,無緩存則走方法*/@Override@Cached(name = "my:jetcache:", key = "#id")public Student get(Long id) {log.info("load from db");// 當緩存不存在, 模擬從數據庫查詢return loadFromDb(id);}/*** 查* condition=true: 查緩存, 無緩存則走方法* condition=false: 不查緩存, 直接執行方法(查數據庫)*/@Override@Cached(name = "my:jetcache:", key = "#id", condition = "#isUseCache==true")public Student get(Long id, boolean isUseCache) {// 當 isUseCache 為 false, 或者 緩存不存在的時候, 插敘數據庫log.info("load from db, isUseCache:{}", isUseCache);// 當緩存不存在, 模擬從數據庫查詢return loadFromDb(id);}/*** 模擬從數據庫查詢*/private Student loadFromDb(Long id) {Student student = new Student();student.setId(Math.toIntExact(id));student.setName("load from db");student.setAge(random.nextInt(100));return student;}
}
基礎使用——@CreateCache注解和手動方式
由于?@CreateCache 以及標記為@Deprecated了,這里優先將手動方式
我們先看下屬性說明:
@CreateCache屬性表
參考官網Link:https://github.com/alibaba/jetcache/blob/master/docs/CN/CreateCache.md#createcache%E5%B1%9E%E6%80%A7%E8%A1%A8
| 屬性 | 默認值 | 說明 |
|---|---|---|
| area | “default” | 如果需要連接多個緩存系統,可在配置多個cache area,這個屬性指定要使用的那個area的name |
| name | 未定義 | 指定緩存的名稱,不是必須的,如果沒有指定,會使用類名+方法名。name會被用于遠程緩存的key前綴。另外在統計中,一個簡短有意義的名字會提高可讀性。如果兩個@CreateCache的name和area相同,它們會指向同一個Cache實例 |
| expire | 未定義 | 該Cache實例的默認超時時間定義,注解上沒有定義的時候會使用全局配置,如果此時全局配置也沒有定義,則取無窮大 |
| timeUnit | TimeUnit.SECONDS | 指定expire的單位 |
| cacheType | CacheType.REMOTE | 緩存的類型,包括CacheType.REMOTE、CacheType.LOCAL、CacheType.BOTH。如果定義為BOTH,會使用LOCAL和REMOTE組合成兩級緩存 |
| localLimit | 未定義 | 如果cacheType為CacheType.LOCAL或CacheType.BOTH,這個參數指定本地緩存的最大元素數量,以控制內存占用。注解上沒有定義的時候會使用全局配置,如果此時全局配置也沒有定義,則取100 |
| serialPolicy | 未定義 | 如果cacheType為CacheType.REMOTE或CacheType.BOTH,指定遠程緩存的序列化方式。JetCache內置的可選值為SerialPolicy.JAVA和SerialPolicy.KRYO。注解上沒有定義的時候會使用全局配置,如果此時全局配置也沒有定義,則取SerialPolicy.JAVA |
| keyConvertor | 未定義 | 指定KEY的轉換方式,用于將復雜的KEY類型轉換為緩存實現可以接受的類型,JetCache內置的可選值為KeyConvertor.FASTJSON和KeyConvertor.NONE。NONE表示不轉換,FASTJSON通過fastjson將復雜對象KEY轉換成String。如果注解上沒有定義,則使用全局配置。 |
先定義接口
public interface CreateCacheUseMethodService {Cache<String, String> getStringMethodCache();
}
注意實現類有下面幾個要注意的地方:
- refresh屬性功能,必須要 QuickConfig 顯示創建,不要用?cache.config().setRefreshPolicy() ,否則可能會出現無效的情況
- cache.config().setLoader() 加載器會遍歷每一個key,并執行這個加載器;緩存沒有key的時候是不會執行的,首次 set/get 都會創建 key?
- 由于refresh 會用加載器刷新所有key,那么一定要設置?stopRefreshAfterLastAccess,表示多久不使用對應的key緩存則會停止刷新。
- 本地緩存的時間 < 遠程緩存的時間,緩存refresh的時間可以接近遠程緩存時間,也可以大于它
代碼如下,可以仔細閱讀注釋:
import com.alicp.jetcache.Cache;
import com.alicp.jetcache.CacheManager;
import com.alicp.jetcache.RefreshPolicy;
import com.alicp.jetcache.anno.CacheType;
import com.alicp.jetcache.template.QuickConfig;
import com.myjetcache.service.CreateCacheUseMethodService;import lombok.extern.slf4j.Slf4j;import org.springframework.beans.factory.annotation.Autowired;
import org.springframework.stereotype.Service;import java.time.Duration;
import java.util.UUID;import javax.annotation.PostConstruct;@Slf4j
@Service
public class CreateCacheUseMethodServiceImpl implements CreateCacheUseMethodService {@Autowiredprivate CacheManager cacheManager;private Cache<String, String> stringMethodCache;@PostConstructpublic void init() {// 注意必須要refreshPolicy() ,才能創建 RefreshCache, 否則自動刷新功能無效QuickConfig quickConfigStringCache = QuickConfig.newBuilder("myStringCache:use:method:") // 緩存的前綴.cacheType(CacheType.BOTH) // local 和 remote 組合成兩級緩存.expire(Duration.ofSeconds(3600)) // 遠程過期時間.localExpire(Duration.ofSeconds(5)) // 本地過期時間, 應該小于遠程過期時間, 只對CacheType.LOCAL和CacheType.BOTH有效.localLimit(1000) // 本地緩存的最大元素數量, 默認:100.cacheNullValue(false) // 是否緩存 NULL 值.refreshPolicy(getRefreshPolicy()) // 這里必須顯式創建, 不要使用 cache.config().setRefreshPolicy(), 否則無效.build();stringMethodCache = cacheManager.getOrCreateCache(quickConfigStringCache);// 刷新執行的加載器, 會遍歷刷新每一個keystringMethodCache.config().setLoader(this::loadFromDb);}/*** 創建刷新策略* 等于注解:@CacheRefresh(refresh = 10, refreshLockTimeout = 10, stopRefreshAfterLastAccess = 3600, timeUnit = TimeUnit.SECONDS)*/private RefreshPolicy getRefreshPolicy() {RefreshPolicy refreshPolicy = new RefreshPolicy();// 刷新時間間隔refreshPolicy.setRefreshMillis(10 * 1000L);// 類型為 BOTH/REMOTE 的緩存刷新時,同時只會有一臺服務器在刷新,這臺服務器會在遠程緩存放置一個分布式鎖,此配置指定該鎖的超時時間// 不管有多少臺服務器,同時只有一個服務器在刷新,這是通過 tryLock 實現的refreshPolicy.setRefreshLockTimeoutMillis(10 * 1000);// 指定多久未訪問后停止自動刷新。 注意:不指定則會一直刷新refreshPolicy.setStopRefreshAfterLastAccessMillis(3600 * 1000);return refreshPolicy;}/*** 刷新執行的加載器* 每個key都有一個刷新任務, 因此必須設置 stopRefreshAfterLastAccess* 注意: 沒有key則不會定時執行數據庫加載器, 首次 get/set 都相當于創建了key** @param key 刷新的key*/public String loadFromDb(String key) {// 模擬從數據庫讀取數據String uuid = UUID.randomUUID().toString();log.info("[Use Method] key:{},load cache form db:{}", key, uuid);return uuid;}@Overridepublic Cache<String, String> getStringMethodCache() {return stringMethodCache;}
}
?上面是手動創建,接下來我們看下如何使用注解 @CreateCache 創建(不建議使用該注解,因為被作者標記為過期 @Deprecated?了)
先定義一個接口
public interface CreateCacheUseAnnotationService {Cache<String, String> getStringCache();
}
實現類如下,注解的屬性跟上面手動方式的屬性可以對應,可以看上面代碼的注解。
import com.alicp.jetcache.Cache;
import com.alicp.jetcache.anno.CacheRefresh;
import com.alicp.jetcache.anno.CacheType;
import com.alicp.jetcache.anno.CreateCache;
import com.myjetcache.service.CreateCacheUseAnnotationService;import lombok.extern.slf4j.Slf4j;import org.springframework.stereotype.Service;import java.util.UUID;
import java.util.concurrent.TimeUnit;import javax.annotation.PostConstruct;@Slf4j
@Service
public class CreateCacheUseAnnotationServiceImpl implements CreateCacheUseAnnotationService {/*** 注解方式* local 失效后, 會從 redis 查, redis 也沒有則會執行數據庫加載器*/@CreateCache(name = "myStringCache:use:annotation:", cacheType = CacheType.BOTH, expire = 3600, localExpire = 5,localLimit = 1000)@CacheRefresh(refresh = 20, refreshLockTimeout = 10, stopRefreshAfterLastAccess = 3600, timeUnit = TimeUnit.SECONDS)private Cache<String, String> stringCache;@PostConstructpublic void init() {// 1.cache.get(),如果local和redis都沒有緩存, 則會執行數據庫加載器 loadFromDb()// 2.定時刷新刷新的加載器, 會為每一個key創建刷新任務; 注意: 沒有key則不會定時執行數據庫加載器, 首次 get/set 都相當于創建了keystringCache.config().setLoader(this::loadFromDb);}/*** 刷新執行的加載器,jetcache會為每個key都會創建一個刷新任務, 因此必須設置 stopRefreshAfterLastAccess, 否則內存消耗太大** @param key 刷新的key*/public String loadFromDb(String key) {// 模擬從數據庫讀取數據String uuid = UUID.randomUUID().toString();log.info("[Use Annotation] key:{},load cache form db:{}", key, uuid);return uuid;}@Overridepublic Cache<String, String> getStringCache() {return stringCache;}
}
基礎使用——@CacheRefresh 詳解
需要注意的點如下:
注意 CacheRefresh 會為每個key創建定時任務, 定時來執行這個方法
官方文檔:
1.目的是為了防止緩存失效時造成的雪崩效應打爆數據庫
2.對key比較少,實時性要求不高,加載開銷非常大的緩存場景,適合使用自動刷新
CacheRefresh 刷新機制:
1.如果 CacheType.LOCAL ,那么多個節點會重復刷新。
2.如果 CacheType.REMOTE ,通過在遠程緩存中的分布式鎖'_#TS#',保證一個周期內只有一個節點執行了刷新操作.
3.如果 CacheType.BOTH ,即兩級緩存,通過在遠程緩存中的分布式鎖,保證一個周期內只有一個節點執行了刷新操作.
注意:僅更新REMOTE,其節點的本地緩存不會更新.jetcache支持給遠程和本地緩存設置不同的超時時間,所以可以把本地緩存的超時時間設置短一點.
CachePenetrationProtect 注解作用——當緩存訪問【未命中】的情況下,對并發進行的加載行為進行保護;當前版本實現的是單JVM內的保護,即同一個JVM中同一個key只有一個線程去加載,其它線程等待結果
具體代碼如下:
public interface RefreshService {String getRefreshStringCache(String key);Student getRefreshMapCache(Object obj);
}
實現類:?
import com.alibaba.fastjson.JSON;
import com.alicp.jetcache.anno.CachePenetrationProtect;
import com.alicp.jetcache.anno.CacheRefresh;
import com.alicp.jetcache.anno.CacheType;
import com.alicp.jetcache.anno.Cached;
import com.myjetcache.entity.Student;
import com.myjetcache.service.RefreshService;import lombok.extern.slf4j.Slf4j;import org.springframework.stereotype.Service;import java.util.Random;
import java.util.UUID;
import java.util.concurrent.TimeUnit;
import java.util.concurrent.atomic.AtomicInteger;@Slf4j
@Service
public class RefreshServiceImpl implements RefreshService {private final Random random = new Random();private final AtomicInteger atomicInteger = new AtomicInteger(0);/*** 注意 CacheRefresh 會為每個key創建定時任務, 定時來執行這個方法* 官方文檔:* 1.目的是為了防止緩存失效時造成的雪崩效應打爆數據庫* 2.對key比較少,實時性要求不高,加載開銷非常大的緩存場景,適合使用自動刷新* <p>* CacheRefresh 刷新機制:* 1.如果 CacheType.LOCAL ,那么多個節點會重復刷新。* 2.如果 CacheType.REMOTE ,通過在遠程緩存中的分布式鎖'_#TS#',保證一個周期內只有一個節點執行了刷新操作.* 3.如果 CacheType.BOTH ,即兩級緩存,通過在遠程緩存中的分布式鎖,保證一個周期內只有一個節點執行了刷新操作.* 注意:僅更新REMOTE,其節點的本地緩存不會更新.jetcache支持給遠程和本地緩存設置不同的超時時間,所以可以把本地緩存的超時時間設置短一點.* <p>* CachePenetrationProtect 注解:* 當緩存訪問【未命中】的情況下,對并發進行的加載行為進行保護.* 當前版本實現的是單JVM內的保護,即同一個JVM中同一個key只有一個線程去加載,其它線程等待結果** @param key 緩存的 key* @return 緩存的 value*/@Override@Cached(name = "my:refresh:stringCache.", key = "#key", cacheNullValue = true, cacheType = CacheType.BOTH,expire = 3600, localExpire = 60, timeUnit = TimeUnit.SECONDS)@CacheRefresh(timeUnit = TimeUnit.SECONDS, refresh = 10, refreshLockTimeout = 10, stopRefreshAfterLastAccess = 3600)@CachePenetrationProtectpublic String getRefreshStringCache(String key) {String value;// 模擬查詢數據庫, 首次查詢返回 null, 以后每次查詢,如果緩存不存在,則返回 隨機uuidif (atomicInteger.get() == 0) {atomicInteger.addAndGet(1);value = null;} else {// 每隔10秒就會刷新新的uuid到 本地和redisvalue = UUID.randomUUID().toString();}log.info("return value:{}", value);return value;}/*** Map結構的SpEL表達式參考下面的寫法* 入參是的 SpEL是 key* return 是存儲的 value*/@Override@Cached(area = "default", name = "my:jetcache:", key = "#obj['id']", cacheType = CacheType.BOTH,expire = 3600, localExpire = 60, timeUnit = TimeUnit.SECONDS, cacheNullValue = false)@CacheRefresh(timeUnit = TimeUnit.SECONDS, refresh = 10, refreshLockTimeout = 10, stopRefreshAfterLastAccess = 3600)@CachePenetrationProtectpublic Student getRefreshMapCache(Object obj) {log.info("obj:{}", JSON.toJSONString(obj));Student student = Student.getStudent(String.valueOf(random.nextInt(100)));log.info("after refresh:{}", JSON.toJSONString(student));return student;}
}
測試類:
@RestController
@Slf4j
public class RefreshController {private final Random random = new Random();@Autowiredprivate RefreshService refreshService;@GetMapping("/refreshstringcache/get")public String getStringCache() {String stringCache = refreshService.getRefreshStringCache("myStringCache");log.info(stringCache);return stringCache;}@GetMapping("/getrefreshmapcache/get")public Student getRefreshMapCache() {Map<String, Object> body = new HashMap<>();body.put("userId", "1");body.put("id", "123");return refreshService.getRefreshMapCache(body);}
}
上面代碼是Jetcache的簡單自測,滿足一般的業務開發,如果更深入的了解,請到官網學習:https://github.com/alibaba/jetcache/blob/master/docs/CN/Readme.md


Flutter與Native頁面互相跳轉)


