
問題引入
在小強學Python+OpenCV之-1.4.2裁剪一節,我們使用的是numpy數組切片功能實現圖片區域的裁剪。
那么,如果我們想要裁剪圖像中任意形狀的區域時,應該怎么辦呢?
答案是,使用掩膜(masking)。
但是這一節我們先看一下掩膜的基礎。圖像的位運算。
代碼
編寫python腳本masking.py如下:
# 導入庫
import numpy as np
import argparse
import cv2# 構建參數解析器
ap = argparse.ArgumentParser()
ap.add_argument("-i", "--image", required=True, help="Path to the image")
args = vars(ap.parse_args())# 加載貓的圖像
image = cv2.imread(args["image"])
cv2.imshow("Cat", image)# 創建矩形區域,填充白色255
rectangle = np.zeros(image.shape[0:2], dtype = "uint8")
cv2.rectangle(rectangle, (25, 25), (275, 275), 255, -1)
cv2.imshow("Rectangle", rectangle)# 創建圓形區域,填充白色255
circle = np.zeros(image.shape[0:2], dtype = "uint8")
cv2.circle(circle, (150, 150), 150, 255, -1)
cv2.imshow("Circle", circle)# 在此例(二值圖像)中,以下的0表示黑色像素值0, 1表示白色像素值255
# 位與運算,與常識相同,有0則為0, 均無0則為1
bitwiseAnd = cv2.bitwise_and(rectangle, circle)
cv2.imshow("AND", bitwiseAnd)
cv2.waitKey(0)# 或運算,有1則為1, 全為0則為0
bitwiseOr = cv2.bitwise_or(rectangle, circle)
cv2.imshow("OR", bitwiseOr)
cv2.waitKey(0)# 非運算,非0為1, 非1為0
bitwiseNot = cv2.bitwise_not(circle)
cv2.imshow("NOT", bitwiseNot)
cv2.waitKey(0) # 異或運算,不同為1, 相同為0
bitwiseXor = cv2.bitwise_xor(rectangle, circle)
cv2.imshow("XOR", bitwiseXor)
cv2.waitKey(0)
效果
運行腳本:

相信大家看到效果,再結合代碼可以很容易理解。
裁剪
下面,我們利用OR結果(有點像貓的頭像輪廓)把本課的主題圖片中的貓的頭像剪切出來。
我們需要修改一下,矩形區域的大小,去掉下邊的兩個角。
cv2.rectangle(rectangle, (25, 25), (275, 220), 255, -1)最終調整后的代碼如下:
# 導入庫
import numpy as np
import argparse
import cv2# 構建參數解析器
ap = argparse.ArgumentParser()
ap.add_argument("-i", "--image", required=True, help="Path to the image")
args = vars(ap.parse_args())# 加載貓的圖像
image = cv2.imread(args["image"])
cv2.imshow("Cat", image)# 創建矩形區域,填充白色255
rectangle = np.zeros(image.shape[:2], dtype = "uint8")
cv2.rectangle(rectangle, (380, 100), (575, 200), 255, -1)
cv2.imshow("Rectangle", rectangle)# 創建圓形區域,填充白色255
circle = np.zeros(image.shape[:2], dtype = "uint8")
cv2.circle(circle, (475, 180), 105, 255, -1)
cv2.imshow("Circle", circle)# 或運算
bitwiseOr = cv2.bitwise_or(rectangle, circle)
cv2.imshow("OR", bitwiseOr)
cv2.waitKey(0)mask = bitwiseOr
cv2.imshow("Mask", mask)# Apply out mask -- notice how only the person in the image is cropped out
masked = cv2.bitwise_and(image, image, mask=mask)
cv2.imshow("Mask Applied to Image", masked)
cv2.waitKey(0)
運行得到
得到:
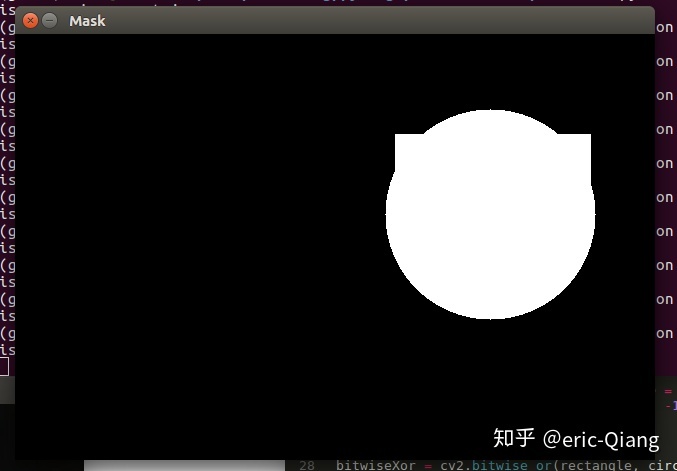

我們“近似”得到了貓的頭像。
總結
1. 與或非異或運算與我們的常識類似。
2. 掩膜操作就是兩幅圖像(numpy數組)的位運算操作。


![全新升級的AOP框架Dora.Interception[3]: 基于特性標注的攔截器注冊方式](http://pic.xiahunao.cn/全新升級的AOP框架Dora.Interception[3]: 基于特性標注的攔截器注冊方式)


![全新升級的AOP框架Dora.Interception[4]: 基于表達式的攔截器注冊](http://pic.xiahunao.cn/全新升級的AOP框架Dora.Interception[4]: 基于表達式的攔截器注冊)


