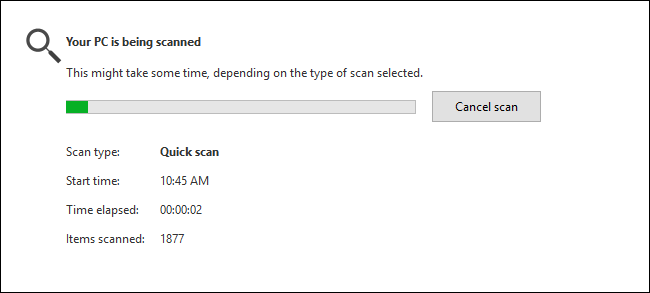
Windows Defender automatically performs background scans during your PC’s idle moments, but doesn’t include an easy way to schedule a full scan. There is a way to do it, though.
Windows Defender在PC空閑時自動執行后臺掃描,但是沒有包括安排完整掃描的簡便方法。 不過,有一種方法可以做到。
Starting with Windows 8, Windows Defender came as a built-in antivirus app, replacing the standalone Microsoft Security Essentials that came before. Security Essentials provided an easy way to schedule a scan through the app’s interface, but that ability went away in Windows Defender. Instead, Windows Defender performs partial scans during times when your PC is idle. If you keep your PC turned off when you’re not using it—or you put it to sleep and have it set to not wake up for regular maintenance—you can still schedule a scan using the Windows Task Scheduler. And you can make that scheduled scan a one-off or regular thing.
從Windows 8開始, Windows Defender作為內置的防病毒應用程序出現,取代了以前的獨立Microsoft Security Essentials。 Security Essentials提供了一種通過應用程序界面安排掃描計劃的簡便方法,但是Windows Defender中的該功能消失了。 而是,Windows Defender在PC空閑時執行部分掃描。 如果您在不使用PC時將其關閉,或者將其置于睡眠狀態并設置為不進行定期維護而喚醒,則仍可以使用Windows Task Scheduler計劃掃描。 您可以使計劃掃描成為一次性或常規的掃描。
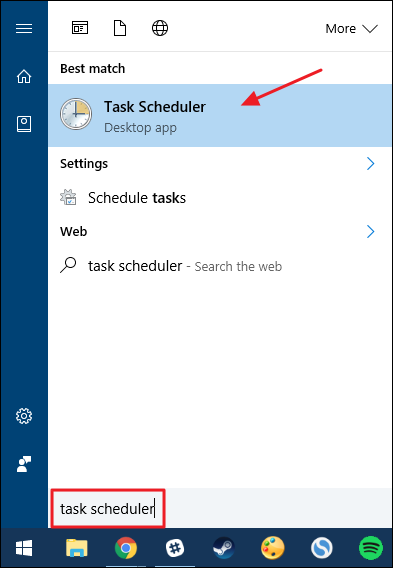
In Windows 10, hit Start, type “task scheduler,” and then click the result or hit Enter. In Windows 8, you’ll need to type “schedule tasks” instead.
在Windows 10中,單擊“開始”,鍵入“任務計劃程序”,然后單擊結果或單擊Enter。 在Windows 8中,您需要輸入“計劃任務”。
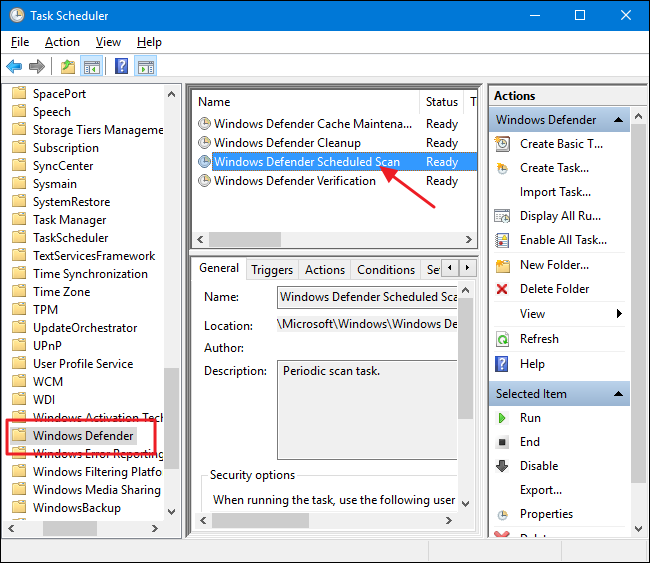
In the left hand navigation pane of the Task Scheduler window, drill down to the following location:
在“任務計劃程序”窗口的左側導航窗格中,向下鉆取到以下位置:
Task Scheduler (Local) > Task Scheduler Library > Microsoft > Windows > Windows Defender
In the middle pane, in the list of tasks, double-click the “Windows Defender Scheduled Scan” task to open its properties window.
在中間窗格的任務列表中,雙擊“ Windows Defender預定掃描”任務以打開其屬性窗口。
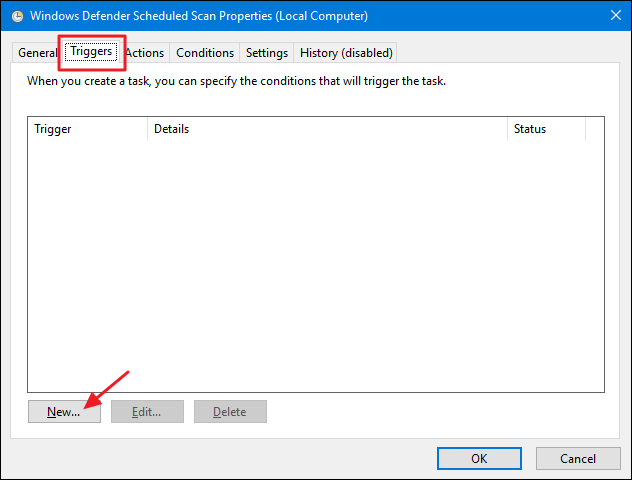
In the properties window, switch to the “Triggers” tab. Notice that there are no triggers by default, since Windows handles background scanning as part of its maintenance routines. Create a new trigger by clicking the “New” button.
在屬性窗口中,切換到“觸發器”選項卡。 請注意,默認情況下沒有觸發器,因為Windows將后臺掃描作為其維護例程的一部分進行處理。 單擊“新建”按鈕創建一個新觸發器。
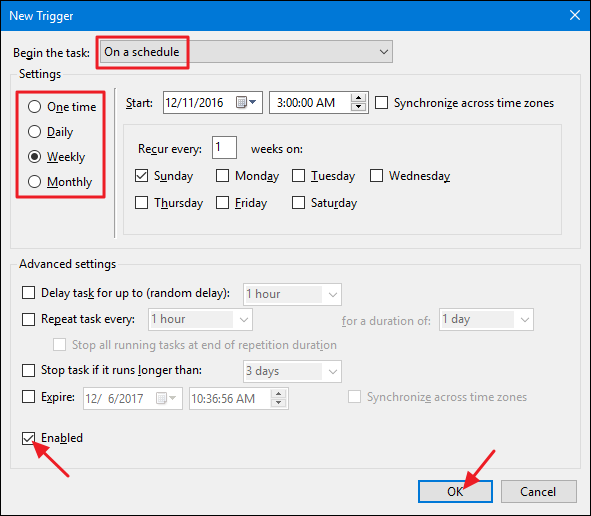
In the “New Trigger” window make sure “On a schedule” is selected on the “Begin the task” drop-down menu. You can set the scan to run one time or to recur daily, weekly, or monthly. When you’ve set up the schedule you like, make sure the “Enabled” option at the bottom is checked and then click “OK.”
在“新觸發器”窗口中,確保在“開始任務”下拉菜單中選擇了“按計劃”。 您可以將掃描設置為一次運行,或者每天,每周或每月重復一次。 設置好所需的計劃后,請確保已選中底部的“啟用”選項,然后單擊“確定”。
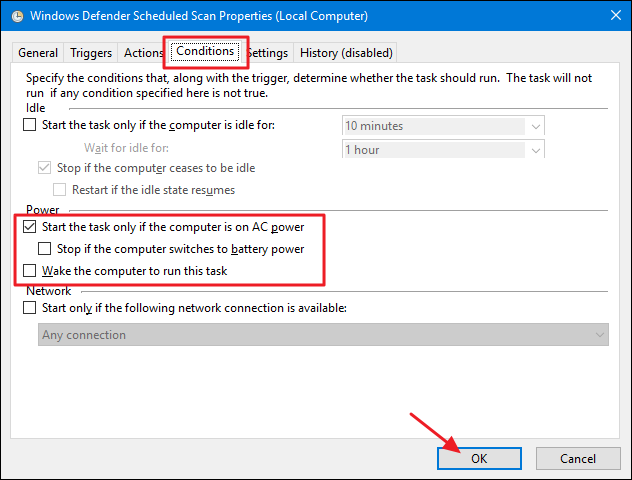
There are also a couple of other useful options on the “Conditions” tab. If you’re on a laptop, you might want select the “Start the task only if the computer is on AC power” and “Stop if the computer switches to battery power” options to prevent the task from running your battery down unexpectedly. Also, select the “Wake the computer to run this task” if you generally put your PC to sleep when not using it. With this option enabled, Windows can wake the PC, run the scan, and then put the PC back to sleep. When you’re done setting the options you want, click OK.
“條件”選項卡上還有兩個其他有用的選項。 如果您使用的是筆記本電腦,則可能需要選擇“僅在計算機使用交流電源時才啟動任務”和“在計算機切換至電池電源時停止”選項,以防止任務意外耗盡電池電量。 另外,如果您通常在不使用PC時使其進入睡眠狀態,請選擇“喚醒計算機以運行此任務”。 啟用此選項后,Windows可以喚醒PC,運行掃描,然后使PC進入睡眠狀態。 完成所需選項的設置后,單擊“確定”。
You can now exit Task Scheduler and rely on Windows Defender to run its scans according to the schedule you set.
現在,您可以退出Task Scheduler,并依靠Windows Defender根據您設置的時間表運行其掃描。
翻譯自: https://www.howtogeek.com/192874/how-to-setup-windows-8-defender-to-automatically-scan-on-a-schedule/


)
)


