
word標尺灰色
Word’s rulers let you control the margins of your page and the indentation of paragraphs. They’re great for precisely lining up images, text, and other elements. If you’re printing a document, the rulers can help ensure that?what you see on your screen translates into what you’ll get on the printed page.
Word的標尺使您可以控制頁面的邊距和段落的縮進。 它們非常適合精確排列圖像,文本和其他元素。 如果您要打印文檔,則標尺可以幫助確保您在屏幕上看到的內容轉換為您將在打印頁面上看到的內容。
The trouble is, rulers aren’t even visible by default in Word anymore. Here’s how to turn them on, and how to make the most out of them.
問題是,默認情況下,Word中甚至不再顯示標尺。 這是打開它們的方法,以及如何充分利用它們的方法。
Note: We’re working with Office 2016 in this article. The rulers have been around pretty much forever, though, and work similarly in previous versions of Word.
注意:本文將使用Office 2016。 不過,統治者已經存在了很長時間,并且在Word的早期版本中也是如此。
激活標尺 (Activate the Rulers)
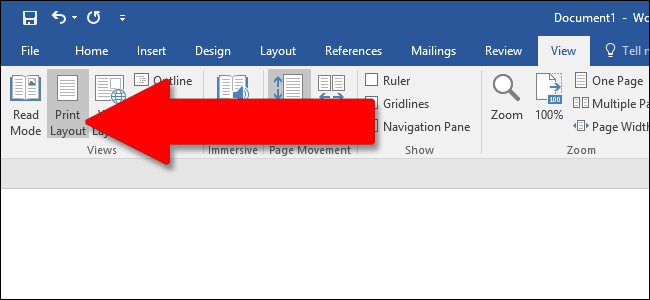
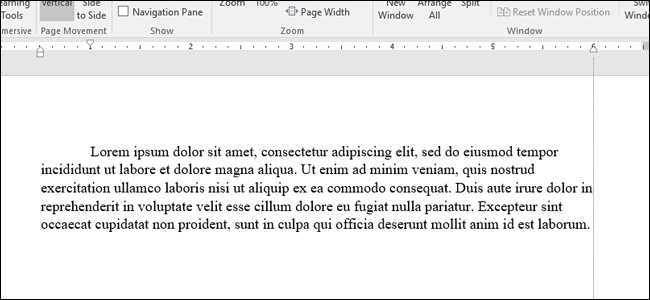
First, make sure you’re in Print Layout view. On the Ribbon, switch to the “View” tab (all the way on the right). If “Print Layout” isn’t already highlighted, click it now.
首先,請確保您處于“打印版式”視圖中。 在功能區上,切換到“查看”選項卡(一直在右側)。 如果“打印布局”尚未突出顯示,請立即單擊它。
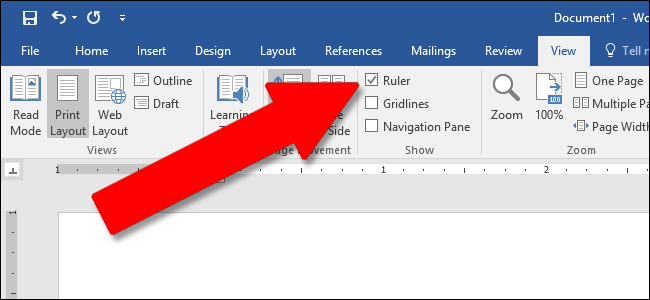
Now look towards the center of the Ribbon. In the “Show” section, enable the “Rulers” option. You should immediately see the horizontal ruler above your document and the vertical ruler to its left.
現在朝功能區的中心看。 在“顯示”部分中,啟用“規則”選項。 您應該立即看到文檔上方的水平標尺和左側的垂直標尺。
Note: The horizontal ruler is also visible in Web Layout and Draft view. The vertical ruler is not.
注意:水平標尺在“ Web版式”和“草稿”視圖中也可見。 垂直標尺不是。
訪問頁面設置窗口 (Access the Page Setup Window)
Double-click any empty space on the ruler to open the Page Setup window. This is the same window you can open from the Layout tab on the Ribbon.
雙擊標尺上的任何空白區域以打開“頁面設置”窗口。 這是可以從功能區上的“布局”選項卡打開的窗口。
The “Page Setup” window shows you most of the physical layout properties of the document. The “Margins” tab lets you set the margins for the top, bottom, left, and right, which you can verify with the markers on the ruler (see below). The Gutter is extra space on the page, usually used as an extra blank space for things like comb binding (those little plastic corkscrews that make a cheap notebook). It’s set as blank by default. You can also use this tab to control page orientation.
“頁面設置”窗口顯示了文檔的大多數物理布局屬性。 “頁邊距”選項卡允許您設置頂部,底部,左側和右側的頁邊距,您可以使用標尺上的標記進行校驗(請參見下文)。 裝訂線是頁面上的多余空間,通常用作梳齒裝訂(那些做成便宜筆記本的塑料開瓶器)之類的額外空白。 默認情況下設置為空白。 您也可以使用此選項卡控制頁面方向。
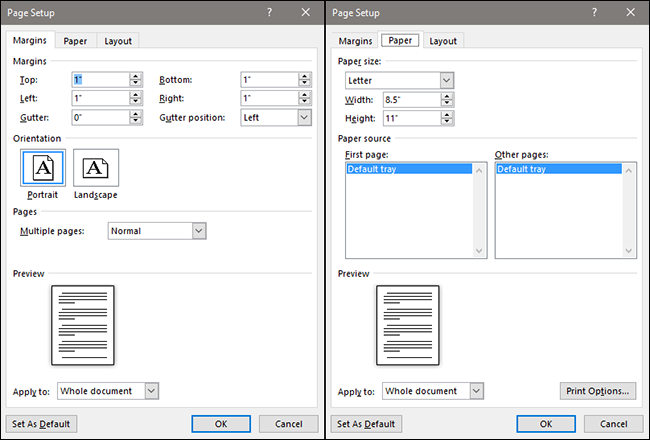
If you’re printing your document, the “Paper” tab lets you can change the physical size of the paper to match different paper sizes in your printer. The default is 8.5 inches by 11 inches, the standard “Letter” size for US paper printing (215.9 x 279.4mm). You can see the result of this setting in the digital rulers on the page, with the default 1-inch margins resulting in a 7.5-inch horizontal ruler and a 10-inch vertical ruler. If you’re planning on printing via a standard home printer or you’re using the primary tray in your office printer, leave this as is.
如果您要打印文檔,則可以使用“紙張”選項卡更改紙張的物理尺寸,以匹配打印機中不同的紙張尺寸。 默認值為8.5英寸乘11英寸,這是美國紙張打印的標準“信紙”尺寸(215.9 x 279.4mm)。 您可以在頁面的數字標尺中看到此設置的結果,默認的1英寸頁邊距產生了7.5英寸的水平標尺和10英寸的垂直標尺。 如果您打算通過標準家用打印機進行打印,或者正在使用辦公室打印機中的主紙盤,請保持原樣。
即時更改保證金 (Change Margins On the Fly)
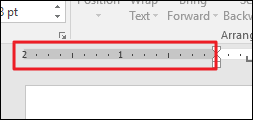
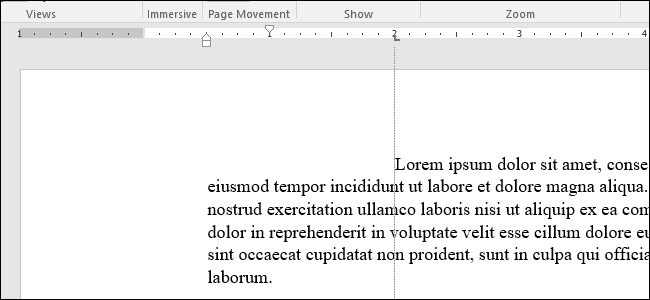
Margins are indicated on the ruler by the gray and white areas. The gray areas at either end of the ruler represent your margin; the white areas the active page. The scaling of the rulers seems a little strange at first. It actually starts on the far left (or top for the vertical ruler) with a number indicating the size of your margin and then counts down. When it reaches the white, active area, it starts counting up again. You can see this in the image below, where I’ve set the margin to two inches.
邊距在標尺上用灰色和白色區域指示。 標尺兩端的灰色區域代表您的邊距; 活動頁面的白色區域。 首先,標尺的縮放似乎有些奇怪。 它實際上從最左邊(或垂直標尺的頂部)開始,并帶有一個數字,該數字指示邊距的大小,然后倒數。 到達白色的活動區域時,它將再次開始計數。 您可以在下面的圖片中看到這一點,在這里我將邊距設置為兩英寸。

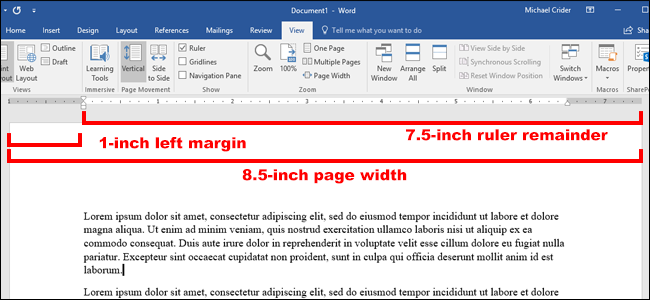
In Word’s default 8.5 by 11-inch page setup, the horizontal ruler starts at 1 (indicating a one-inch margin), then resets at zero where the margin ends, then counts up to 7.5 for the remaining horizontal space. Ditto for the vertical ruler: starts at one for a one-inch margin, restarts at zero at the white space, and only goes up to ten.
在Word的默認8.5 x 11英寸頁面設置中,水平標尺從1(表示一英寸的頁邊距)開始,然后在頁邊距結束處重置為零,然后為剩余的水平空間計數到7.5。 垂直標尺的同上:從1英寸到1英寸的空白,在空白處從零開始,直到10。
Note: Word’s rulers show whatever measurement you have set in File > Options > Advanced > Show Measurements In Units Of. You can change measurements to centimeters, millimeters, points, or picas. Be aware, though, that this settings controls the units of measurement used throughout Word—not just the ruler.
注意:Word的標尺顯示您在文件>選項>高級>以單位顯示度量中設置的任何度量。 您可以將測量值更改為厘米,毫米,點或皮卡。 但是請注意,此設置控制整個Word中使用的度量單位,而不僅僅是標尺。
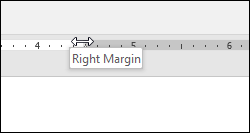
You can also quickly adjust margins right from the ruler. Hold your mouse over the line separating the white and gray area. You’ll see the pointer turn to a double arrow and will likely see a tooltip letting you know you’re point at the margin.?Now, just click and drag that line left or right to adjust that margin.
您也可以直接從標尺快速調整邊距。 將鼠標懸停在分隔白色和灰色區域的線上。 您會看到指針變成雙箭頭,并且可能會看到一個工具提示,讓您知道自己正指向空白處。 現在,只需單擊并向左或向右拖動該線即可調整該邊距。
即時更改縮進 (Change Indents on the Fly)
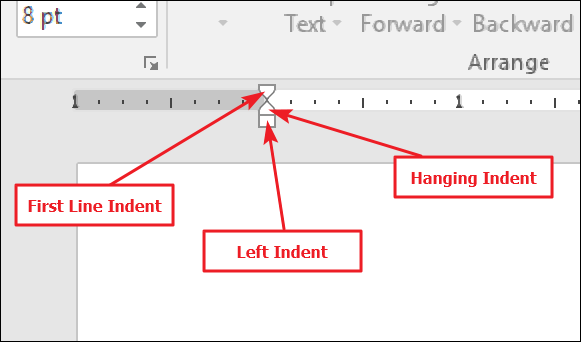
Those little triangle- and box-shaped markers on the ruler are quite handy. They control the indenting of individual paragraphs. Just position your cursor in the paragraph you want to adjust and slide them around. If you want to change multiple paragraphs, select the paragraphs you want to change. And if you want to change indents throughout the whole document, just hit Ctrl+A (to select everything), and then adjust the sliders.
標尺上的那些小三角形和盒形標記非常方便。 它們控制各個段落的縮進。 只需將光標放在要調整的段落中,然后將其滑動即可。 如果要更改多個段落,請選擇要更改的段落。 如果要更改整個文檔的縮進量,只需按Ctrl + A(選擇所有內容),然后調整滑塊即可。
Here’s how each indent works.
這是每個縮進的工作方式。
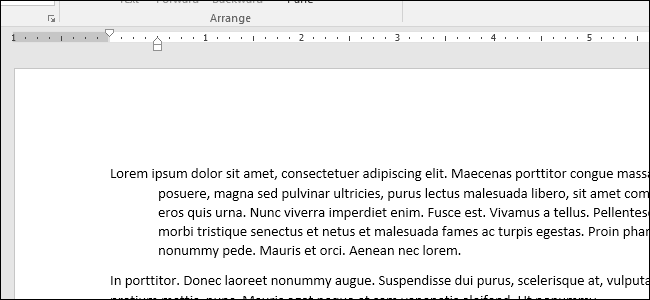
Dragging the Left Indent marker changes the indentation for all lines of a paragraph. As you slide it, the other two indent markers move as well.?Here, I’m moving the Left Indent half an inch in from the left margin.
拖動“左縮進”標記會更改段落所有行的縮進。 滑動時,其他兩個縮進標記也會移動。 在這里,我將左縮進距離左邊緣半英寸。
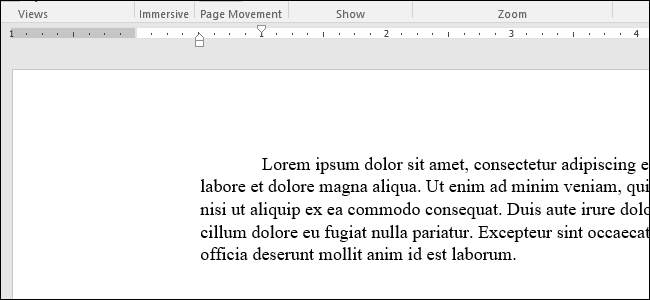
Dragging the First Line Indent marker changes indentation for only the first line of a paragraph.
拖動“第一行縮進”標記只會更改段落的第一行的縮進。
Dragging the Hanging Indent marker changes the indentation of all lines except the first line.
拖動“懸掛縮進”標記會更改除第一行外的所有其他行的縮進。
On the right end of the ruler, you’ll find only one marker: the Right Indent marker. Drag it to constrain the paragraph on the right side.
在標尺的右端,您只會找到一個標記:Right Indent標記。 拖動它以約束右側的段落。
添加制表位 (Add Tab Stops)
A tab stop is the location your cursor moves to when you hit the Tab key. A default Word document has no tab stops, so each time you hit the Tab key, the cursor jumps ahead about eight characters. Setting tab stops lets you better control and line up text.
制表位是按Tab鍵時光標移動到的位置。 默認的Word文檔沒有制表符停止,因此,每當您按下Tab鍵時,光標就會向前跳大約8個字符。 設置制表位可以使您更好地控制和排列文本。
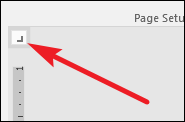
Of course, Word offers enough options that things get a little more complicated than that. If you look all the way to the left edge of your document, just above the vertical ruler, you’ll see the Tab Stop button.
當然,Word提供了足夠的選擇,使事情變得比這復雜得多。 如果您一直看到文檔的左邊緣,就在垂直標尺的上方,您會看到“制表位停止”按鈕。
Clicking this button lets you cycle through the different types of tab stops Word makes available. Here they are:
單擊此按鈕可以讓您循環瀏覽不同類型的選項卡停止點,Word可用。 他們來了:
Left:?Left tabs are Word’s default tap stop. They’re what most people think of when they think of tab stops, and what you’ll likely use most of the time. Text is aligned against the left edge of the tab stop.
左:左選項卡是Word的默認點擊停止。 他們是大多數人在想到制表位時想到的,也是大多數時候您可能會用到的東西。 文本與制表位的左邊緣對齊。
Center:?Center tabs align the text around the center of the tab stop.
居中:居中的制表符使文本在制表位的中心附近對齊。
Right:?Right tabs align text against the tab stop’s right edge and are a great way to align the rightmost digits of lengthy lists of numbers as you enter them.
右:右制表符使文本與制表符的右邊緣對齊,這是一種在輸入數字時將長數字列表的最右邊數字對齊的一種好方法。
Decimal:?Decimal tabs align numbers (or text) based on decimal points. They are great for aligning currency figures. Be careful, though. Text is also aligned on decimals, so if you type a sentence with a period, the period will align on the tab stop.
十進制:十進制選項卡根據小數點對齊數字(或文本)。 它們非常適合調整貨幣數據。 不過要小心。 文本也以小數點對齊,因此,如果鍵入帶句點的句子,則句點將在制表位上對齊。
Bar Tab:?Bar tabs do not create an actual tab stop. Instead, they create a vertical line wherever you insert them. You could use these for putting vertical lines between tabbed columns in instances where you’d rather not use a table.
欄選項卡:欄選項卡不會創建實際的制表位。 相反,無論您在哪里插入它們,它們都會創建一條垂直線。 在不希望使用表的情況下,您可以使用它們在選項卡式列之間放置垂直線。
Indents:?Select first line and hanging indent options and then click anywhere in the active ruler space (the white area) to place the indent there. This works the same as dragging the indent markers the way we discussed in the previous section.
縮進:選擇第一行并懸掛縮進選項,然后在活動標尺空間(白色區域)中的任意位置單擊以將縮進放置在此處。 這與我們在上一節中討論的方式拖動縮進標記相同。
A little tip for you. If you’re cycling through tab stops and don’t remember what each symbol means, move your mouse away from the button and then back to activate a tool tip describing that tab stop.
給您的小提示。 如果您在制表符停靠點之間循環,并且不記得每個符號的含義,請將鼠標從按鈕上移開,然后移回以激活描述該制表符停靠點的工具提示。
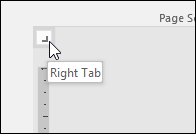
To insert a tab stop, just use the button to select the type of stop you want.?Now, point your mouse anywhere on the white portion of the horizontal ruler (toward the bottom of the ruler line), and then click. A symbol appears indicating the type of tab stop you’ve placed. This is a tab marker, showing where the text will jump to if you press the Tab button on your keyboard.
要插入制表位,只需使用按鈕選擇所需的停止類型即可。 現在,將鼠標指向水平標尺的白色部分(靠近標尺線的底部),然后單擊。 出現一個符號,指示您放置的制表位的類型。 這是一個標簽標記,顯示如果您按鍵盤上的“ Tab”按鈕,文本將跳轉到的位置。
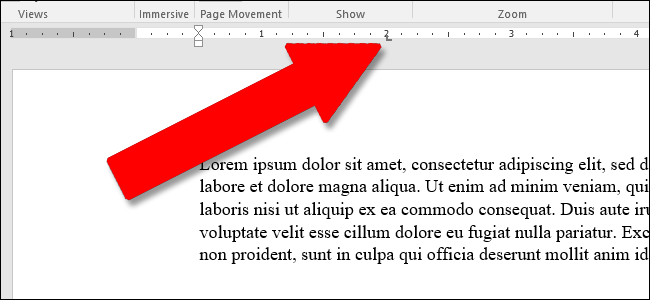
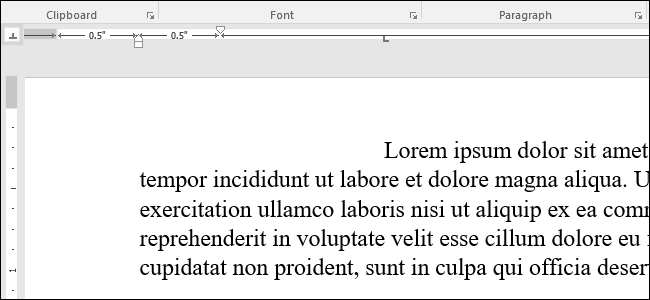
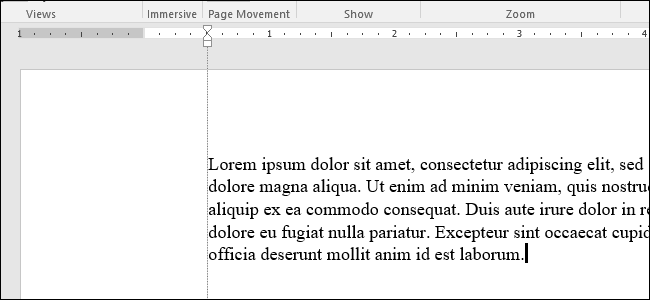
Here’s an example. In this paragraph, the Left Indent is half an inch from the left margin, the First Line indent is another half inch further in, and I’ve set a tab stop at two inches. I pressed the Tab button with my cursor in front of “Lorem,” so the text jumped to my manually-set tab point.
這是一個例子。 在本段中,左縮進距離左頁邊距為半英寸,第一行縮進距離又為半英寸,我將制表位設置為兩英寸。 我將光標放在“ Lorem”前面時按下了Tab鍵,因此文本跳到了我手動設置的Tab點。
You can insert multiple tab markers if you want, and you can click and drag them around to reposition them on the fly.
您可以根據需要插入多個選項卡標記,也可以單擊并拖動它們以即時調整它們的位置。

To get rid of a tab marker, just drag it down (away from the ruler) and release the mouse button.
要擺脫標簽標記,只需將其向下拖動(遠離標尺)并釋放鼠標按鈕即可。
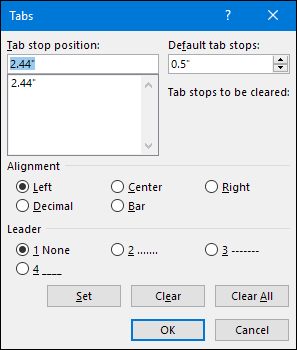
And, if you prefer to set up your tab stops manually (and a little more precisely), double-click any tab marker to open the “Tabs” window.
并且,如果您希望手動設置制表位(更精確一點),請雙擊任何制表符標記以打開“制表符”窗口。
The ruler is just one of the little features in Word that packs a whole lot more functionality than most people realize. It provides a quick way to control margins, set various indents for a paragraph, and keep things in line using tab stops. Why Word leaves it turned off by default is beyond us, but at least now you know how to turn it back on and put it to use.
標尺只是Word中的小功能之一,它比大多數人意識到的功能要多得多。 它提供了一種快速的方法來控制頁邊距,設置段落的各種縮進量以及使用制表位使行保持一致。 為什么Word默認使它保持關閉狀態已超出我們的范圍,但是至少現在您知道如何重新打開它并使用它。
翻譯自: https://www.howtogeek.com/338956/how-to-use-rulers-in-microsoft-word/
word標尺灰色


)


)


 實現負載均衡)
