The new Windows Home Server Beta is available to the public for testing, and you might not have an extra machine to install it on. Here we take a look at using the free VMware Player to install it so you can test it out.
新的Windows Home Server Beta可供公眾測試,您可能沒有多余的計算機可以安裝它。 在這里,我們看一下如何使用免費的VMware Player安裝它,以便您可以對其進行測試。
In our final article on the series of installing WHS Vail in VMware products, today we look at installing it in the free VMware Player. So fare we have covered how to install Vail in VMware Workstation which offers a free 30 day trial, but requires a license after that. We also took a look at installing Vail on VMware Server which is completely free for personal use. Installing WHS Vail on VMware Player is pretty straight-forward, though you need to make sure to follow the correct steps and settings.
在有關在VMware產品中安裝WHS Vail的系列的最后一篇文章中,今天我們將介紹如何在免費的VMware Player中安裝它。 到目前為止,我們已經介紹了如何在VMware Workstation中安裝Vail,該軟件提供30天的免費試用期,但此后需要許可證。 我們還看了在VMware Server上安裝Vail的過程,該版本完全免費供個人使用。 在VMware Player上安裝WHS Vail非常簡單,盡管您需要確保遵循正確的步驟和設置。
Getting Started
入門
You’ll need the following items to get started.
您需要以下各項才能開始。
- The latest version of VMware Player 最新版本的VMware Player
- WHS Vail Beta ISO WHS Vail Beta ISO
- 64-bit Windows Computer Capable of Hardware Virtualization 具有硬件虛擬化功能的64位Windows計算機
- Enough Hard Drive space on the Host computer to create a 160GB virtual hard drive which is the minimum system requirements 主機上有足夠的硬盤驅動器空間,可以創建160GB虛擬硬盤驅動器,這是最低系統要求
- At least 2GB of RAM or more on the Host computer – The minimum amount of RAM to allocate for Vail is 1GB 主機上的RAM至少為2GB或更多–為Vail分配的RAM的最小數量為1GB
For this article we used a machine with a Core i3 processor and 8GB of RAM? running Windows 7 Ultimate x64 and VMware Player 3.1.
在本文中,我們使用了一臺具有Core i3處理器和8GB RAM的計算機,該計算機運行Windows 7 Ultimate x64和VMware Player 3.1。
Verify Hardware Virtualization
驗證硬件虛擬化
You will need to make sure your machine is capable of Hardware Virtualization and can use either SecurAble…
您將需要確保您的計算機能夠進行硬件虛擬化并且可以使用SecurAble …
![sshot-2010-07-26-[19-56-34]](https://img-blog.csdnimg.cn/img_convert/2c3451e850b29624b7ac5081ce9812a0.png "sshot-2010-07-26-[19-56-34]")
Or Microsoft Hardware-Assisted Virtualization Detection Tool. If your machine isn’t capable of Hardware Virtualization, it might be turned off so check your BIOS settings. Also you can update the BIOS and find the setting to enable it.
或Microsoft硬件輔助的虛擬化檢測工具。 如果您的計算機不支持硬件虛擬化,則可能已將其關閉,因此請檢查BIOS設置。 您也可以更新BIOS并找到啟用它的設置。
![sshot-2010-07-26-[20-03-00]](https://img-blog.csdnimg.cn/img_convert/4d30d4bc81db3ae173c985bec8e5cb5f.png "sshot-2010-07-26-[20-03-00]")
Install VMware Player
安裝VMware Player
If you don’t already have it, you’ll need to download and install the latest version of VMware Player (link below) where registration is required.
如果尚未安裝,則需要下載并安裝需要注冊的最新版本的VMware Player(下面的鏈接)。
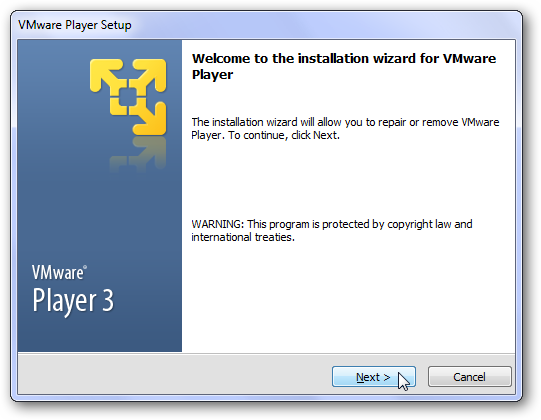
First, download and install VMware Player (link below).? It’s a free download, but requires registration. Install it following the install wizard and accepting the defaults.
首先,下載并安裝VMware Player(下面的鏈接)。 它是免費下載,但需要注冊。 按照安裝向導并接受默認設置進行安裝。
After it’s finished, a restart will be required to complete the setup.
完成后,將需要重新啟動以完成設置。
![sshot-2010-02-16-[19-14-34]](https://img-blog.csdnimg.cn/img_convert/cd2ffa78553b2f618e18a125b782340a.png)
Setup VMware Player for WHS Vail
為WHS Vail設置VMware Player
The trick to getting it to install successfully is to make sure to go through the correct steps and not use the Easy Install Wizard. Open VMware Player and click on Create a New Virtual Machine.
成功安裝它的技巧是確保執行正確的步驟而不使用“簡易安裝向導”。 打開VMware Player,然后單擊“創建新的虛擬機”。
![sshot-2010-07-28-[01-14-48]](https://img-blog.csdnimg.cn/img_convert/d05f497f7739f099d54f8f7fda39e587.png "sshot-2010-07-28-[01-14-48]")
When the New Virtual Machine Wizard starts, select I will install the operating system later.
當“新建虛擬機向導”啟動時,選擇“我稍后將安裝操作系統” 。
![sshot-2010-07-28-[05-12-53]](https://img-blog.csdnimg.cn/img_convert/6e77895543bdbc8b111bfae24d954fb9.png "sshot-2010-07-28-[05-12-53]")
For the Guest Operating System select Windows Server 2008 x64 and click Next.
對于來賓操作系統,選擇Windows Server 2008 x64,然后單擊下一步。
![sshot-2010-07-28-[02-32-40]](https://img-blog.csdnimg.cn/img_convert/ada397e864a500e5f3c6186f465ead2a.png "sshot-2010-07-28-[02-32-40]")
Give the VM a name…
給虛擬機起個名字...
![sshot-2010-07-28-[02-33-01]](https://img-blog.csdnimg.cn/img_convert/85b77d8a33a5c5166df31592e22e48a0.png "sshot-2010-07-28-[02-33-01]")
Now you need to Specify Disk Capacity where the minimum for Vail is 160GB. We had best results creating the disk as a single file versus splitting them into multiple files.
現在,您需要指定磁盤容量,其中Vail的最小值為160GB。 與將磁盤拆分為多個文件相比,將磁盤創建為單個文件的效果最佳。
![sshot-2010-07-28-[02-33-32]](https://img-blog.csdnimg.cn/img_convert/590812200a5d590492339b68781f4a93.png "sshot-2010-07-28-[02-33-32]")
Look over everything and make sure it looks correct, if not you can go back and make adjustments. You can click Finish and customize the hardware later or go ahead and make the selections now.
查看所有內容并確保它看起來正確,否則請返回并進行調整。 您可以單擊“完成”,稍后再自定義硬件,或者現在繼續進行選擇。
![sshot-2010-07-28-[02-33-45]](https://img-blog.csdnimg.cn/img_convert/b048f2908b968496bc90d90cdbad8d9b.png "sshot-2010-07-28-[02-33-45]")
When customizing the hardware select Network Adapter and for the network connection select Bridged and check Replicate physical network connection state. This will make the server act as if it were a separate physical machine on your network.
自定義硬件時,選擇“網絡適配器”,對于網絡連接,選擇“橋接”,然后選中“復制物理網絡連接狀態” 。 這將使服務器像在網絡上單獨的物理計算機一樣工作。
![sshot-2010-07-30-[00-30-04]](https://img-blog.csdnimg.cn/img_convert/79d4ddcb268730f75b64afd063ef3d78.png "sshot-2010-07-30-[00-30-04]")
For memory the minimum requirement is 1GB but if you have extra RAM you might want to bump it up a bit.
對于內存,最低要求為1GB,但是如果您有額外的RAM,則可能需要將其增加一點。
![sshot-2010-07-28-[02-35-19]](https://img-blog.csdnimg.cn/img_convert/003fae9fb295f23e0de8d328b94c05fe.png "sshot-2010-07-28-[02-35-19]")
For the CD/DVD select to use an ISO and browse to the location of your VailInstallDVD.iso file.
對于CD / DVD,選擇使用ISO并瀏覽到VailInstallDVD.iso文件的位置。
![sshot-2010-07-30-[00-30-04]](https://img-blog.csdnimg.cn/img_convert/aaa94793abde8a96769f812b55282395.png "sshot-2010-07-30-[00-30-04]")
Review your settings and if everything looks good click Finish.
查看您的設置,如果一切正常,請單擊“完成”。
![sshot-2010-07-28-[02-36-05]](https://img-blog.csdnimg.cn/img_convert/317ba2115897f239b5d130ba5af79059.png "sshot-2010-07-28-[02-36-05]")
Now that everything is setup you can start the VM.
現在已經完成了所有設置,您可以啟動VM。
![sshot-2010-07-28-[02-39-45]](https://img-blog.csdnimg.cn/img_convert/feef85c3a7e14cb538335247869d9412.png "sshot-2010-07-28-[02-39-45]")
If you get a hardware devices message just check Do not show this hint again then click OK.
如果收到硬件設備消息,請選中“不再顯示此提示”,然后單擊“確定”。
![sshot-2010-07-28-[02-40-24]](https://img-blog.csdnimg.cn/img_convert/4f04b11be7a7d1e25b0618840c0ba693.png "sshot-2010-07-28-[02-40-24]")
Also, if you get an Software Update message click on Remind Me Later.
另外,如果收到軟件更新消息,請單擊稍后提醒我。
![sshot-2010-07-29-[19-25-44]](https://img-blog.csdnimg.cn/img_convert/bde281af3d0fdb44012ed80865c7701c.png "sshot-2010-07-29-[19-25-44]")
Now you can start the installation process of WHS Vail.
現在,您可以開始WHS Vail的安裝過程。
![sshot-2010-07-28-[02-40-43]](https://img-blog.csdnimg.cn/img_convert/c1e2a21823de407a5c6d9dfaed35259e.png "sshot-2010-07-28-[02-40-43]")
During the installation a message will come up at the bottom of Player prompting you to run VMware Tools. We don’t need to install that now while we have Vail installing, so click Remind me later.
在安裝過程中,播放器底部會出現一條消息,提示您運行VMware Tools。 在安裝Vail時,我們現在不需要安裝它,因此請單擊“以后提醒我”。
![sshot-2010-07-29-[00-39-57]](https://img-blog.csdnimg.cn/img_convert/f26791683bd01dcb35f74eb8163f0e3e.png "sshot-2010-07-29-[00-39-57]")
The message will leave the screen and the Vail installation will continue.
該消息將離開屏幕,并且Vail安裝將繼續。
![sshot-2010-07-28-[02-44-24]](https://img-blog.csdnimg.cn/img_convert/625aaa461d1a35ac87ca721fc192b88f.png "sshot-2010-07-28-[02-44-24]")
The amount of time it takes to install will vary based on your hardware. On our Core i3 system with 8GB of RAM the install took about a half hour. Remember that the VM will restart multiple times, there isn’t much interaction you need to do while Vail installs. For more details check out our article on how to install WHS Vail.?
安裝所需的時間會因您的硬件而異。 在具有8GB RAM的Core i3系統上,安裝過程耗時約半小時。 請記住,虛擬機將多次重啟,因此在安裝Vail時無需進行太多交互。 有關更多詳細信息,請查看有關如何安裝WHS Vail的文章。
![sshot-2010-07-28-[03-34-44]](https://img-blog.csdnimg.cn/img_convert/b59b2cfc77fd8e12fee72252b025cd4b.png "sshot-2010-07-28-[03-34-44]")
After several restarts and entering in the correct data, you can start using your new Virtual Vail Server! At the CTRL+ALT+DELETE screen to log on screen click Virtual Machine and Send Ctrl+Alt+Del.
重新啟動幾次并輸入正確的數據后,您就可以開始使用新的Virtual Vail Server了! 在CTRL + ALT + DELETE屏幕登錄屏幕上,單擊虛擬機,然后發送Ctrl + Alt + Del 。
![sshot-2010-07-28-[03-51-21]](https://img-blog.csdnimg.cn/img_convert/6ab3dc8f4ea30820f72fad99d4fc90b2.png "sshot-2010-07-28-[03-51-21]")
Now you can login to Vail with the credentials you entered in during the install.
現在,您可以使用在安裝過程中輸入的憑據登錄到Vail。
![sshot-2010-07-28-[03-51-51]](https://img-blog.csdnimg.cn/img_convert/0f0d1241e265e111d40dc60cbc11d480.png "sshot-2010-07-28-[03-51-51]")
Success! Now we can start exploring what the new version of WHS has to offer, and can connect other VM’s or physical machines on your network to it. We will be covering how to do that in future articles.
成功! 現在,我們可以開始探索WHS新版本所提供的功能,并可以將網絡上的其他VM或物理機連接到它。 我們將在以后的文章中介紹如何做到這一點。
![sshot-2010-07-28-[03-36-31]](https://img-blog.csdnimg.cn/img_convert/083f0e0acb2596875567e96b055db729.png "sshot-2010-07-28-[03-36-31]")
Keep in mind that you won’t be able to connect to it if your machine already has the WHS Version 1 connector software installed.
請記住,如果您的計算機已經安裝了WHS版本1連接器軟件,則將無法與其連接。

Install VMware Tools
安裝VMware Tools
The final thing we need to do is install VMware Tools for a more fluid experience while testing it out. Click on Virtual Machine and Install VMware Tools.
我們需要做的最后一件事是安裝VMware Tools,以便在測試時獲得更流暢的體驗。 單擊虛擬機,然后安裝VMware Tools。
![sshot-2010-07-28-[03-37-27]](https://img-blog.csdnimg.cn/img_convert/2f7b268df82084d0ec02f15c394cb4d9.png "sshot-2010-07-28-[03-37-27]")
When AutoPlay comes up click on Run setup.exe.
當自動播放出現時,單擊“運行setup.exe” 。
![sshot-2010-07-28-[03-38-18]](https://img-blog.csdnimg.cn/img_convert/162b1f1a9912449657bf5a6c958f308c.png "sshot-2010-07-28-[03-38-18]")
Just follow the install wizard using the Typical Setup Type.
只需使用“典型安裝類型”遵循安裝向導即可。
![sshot-2010-07-28-[03-39-25]](https://img-blog.csdnimg.cn/img_convert/63ceddef0c9d0342a903b36f7d4cf5d7.png "sshot-2010-07-28-[03-39-25]")
A restart of the VM will be required to complete the installation process.
需要重新啟動VM才能完成安裝過程。
![sshot-2010-07-28-[03-42-01]](https://img-blog.csdnimg.cn/img_convert/dd58303bbf8c000fe7055389546d1aa8.png "sshot-2010-07-28-[03-42-01]")
Test Vail Out
測試有效性
If you go to another machine on your network, you will see the WHS Vail server listed under Network…just like it were a real machine. You will be able to RDP into it and use the Dashboard which is replacing the Console from version 1.
如果您轉到網絡上的另一臺計算機,則將在“網絡”下看到WHS Vail服務器,就像它是一臺真實計算機一樣。 您將能夠將RDP放入其中,并使用儀表板代替從版本1開始的控制臺。
![sshot-2010-07-29-[01-23-00]](https://img-blog.csdnimg.cn/img_convert/e9f117d8901223023b7302a10504bbd2.png "sshot-2010-07-29-[01-23-00]")
You should be able to double click on the virtual Vail server, enter user name and password then have access to it’s shared folders from other machines.
您應該能夠雙擊虛擬Vail服務器,輸入用戶名和密碼,然后可以從其他計算機訪問它的共享文件夾。
![sshot-2010-07-30-[01-13-48]](https://img-blog.csdnimg.cn/img_convert/ef6870aab5fd98ca1f051e803cd08014.png "sshot-2010-07-30-[01-13-48]")
Here we are using the Dashboard on a physical machine and backing it up to the virtual Vail server. You can use it just like you would use it if it were on an actual box on your network.
在這里,我們在物理機上使用儀表板并將其備份到虛擬Vail服務器。 您可以像在網絡上的實際盒子上一樣使用它。
![sshot-2010-07-28-[217-30-16]](https://img-blog.csdnimg.cn/img_convert/62401351a97f85d7ce027d9a7ce9fdef.png "sshot-2010-07-28-[217-30-16]")
Conclusion
結論
There is a lot to explore in the new version of Home Server and using it on a VM is a great way to test it, without having to worry about crashing an actual box. If you’re a home server enthusiast or just curious about trying it out, installing Vail as a virtual machine is a great way to do it, without the need for an extra physical machine. Also, the Vail beta and VMware Player are both free which is always cool.
在新版本的Home Server中有很多值得探索的地方,并且在VM上使用它是測試它的好方法,而不必擔心會導致實際包裝盒崩潰。 如果您是家庭服務器狂熱者或只是想嘗試一下,將Vail作為虛擬機安裝是一種很好的方法,而無需額外的物理機。 此外,Vail beta和VMware Player都是免費的,這總是很酷的。
Download VMware Player – Registration Required
下載VMware Player –需要注冊
Download Windows Home Server Vail from Microsoft Connect
從Microsoft Connect下載Windows Home Server Vail
翻譯自: https://www.howtogeek.com/howto/23870/how-to-setup-and-install-windows-home-server-vail-in-vmware-player/


