Have you ever wished you had a laser pointer to focus attention on a key point in a PowerPoint slideshow? Today, we’ll take a look at how can use use your mouse as a laser pointer in PowerPoint 2010.
您是否曾經希望激光指示器能將注意力集中在PowerPoint幻燈片中的關鍵點上? 今天,我們來看看如何在PowerPoint 2010中使用鼠標作為激光筆。
Getting Started
入門
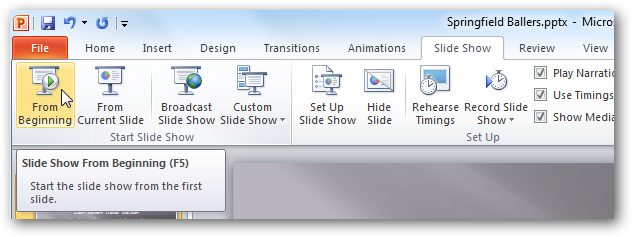
Begin your slideshow by pressing the F5 key, or by selecting From Beginning or From Current Slide in the Start Slide Show group on the Slide Show tab.
通過按F5鍵或在“幻燈片放映”選項卡上的“開始幻燈片放映”組中選擇“從開始”或“從當前幻燈片”開始幻燈片放映。
During the slideshow, hold down the Ctrl key and the left mouse pointer to make the laser pointer appear on the screen.
在幻燈片放映期間,按住Ctrl鍵和鼠標左鍵,使激光筆出現在屏幕上。

Drag your mouse to move the pointer across the screen.
拖動鼠標以在屏幕上移動指針。

Change Colors
改變顏色
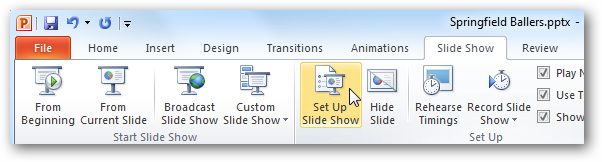
You can change the Laser pointer color by selecting Set Up Slide Show in the Set Up group of the Slide Show tab.
您可以通過在“幻燈片放映”選項卡的“設置”組中選擇“設置幻燈片放映”來更改激光指示器的顏色。
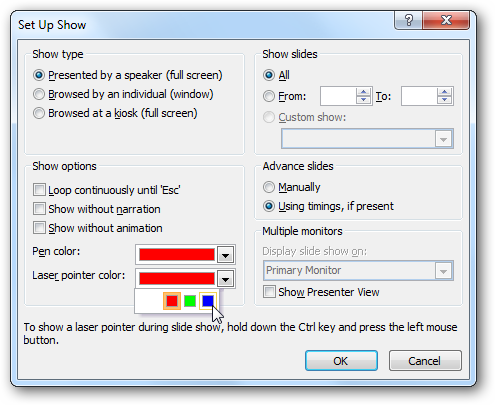
You can select from red, green, or blue from the Laser pointer color dropdown, then click OK.
您可以從激光筆顏色下拉菜單中選擇紅色,綠色或藍色,然后單擊確定。
The Laser pointer is a very simple, but neat little feature added to PowerPoint 2010. Looking for more PowerPoint 2010 tips? Check out our earlier posts on how to animate text and objects, and how to add video from the web.
激光指示器是PowerPoint 2010中添加的非常簡單但整潔的小功能。是否需要更多PowerPoint 2010提示? 查閱我們先前的文章,了解如何為文本和對象設置動畫以及如何從網絡添加視頻。
翻譯自: https://www.howtogeek.com/howto/19924/use-your-mouse-as-a-laser-pointer-in-powerpoint-2010/


)


