按鈕 交互
Microinteractions have become increasingly important in a world with a dizzying number of digital platforms and an ocean of content. While microinteractions used to be considered an interesting resource in the early days of digital design, in today’s hypercompetitive digital space they have become a crucial element in the overall user experience.
在擁有令人眼花number亂的數字平臺和無數內容的世界中,微交互變得越來越重要。 盡管微交互在數字設計的早期曾被視為一種有趣的資源,但在當今競爭激烈的數字空間中,微交互已成為整個用戶體驗中的關鍵要素。
Basically, a microinteraction is a particular moment of a user’s interaction with a product in order to complete a specific task. For example, when someone presses a “Like” button (whatever it looks like) and sees that their action produced feedback — the number has changed, the color of the button has changed or it has become inactive, the text on the button reported that the action was done and so on — this is a case of microinteraction.
基本上,微交互是用戶與產品進行交互以完成特定任務的特定時刻。 例如,當某人按下“贊”按鈕(無論其外觀如何)并看到他們的動作產生了反饋-數字已更改,按鈕的顏色已更改或已變為無效狀態時,該按鈕上的文字會報告操作已完成,依此類推-這是微交互的情況。
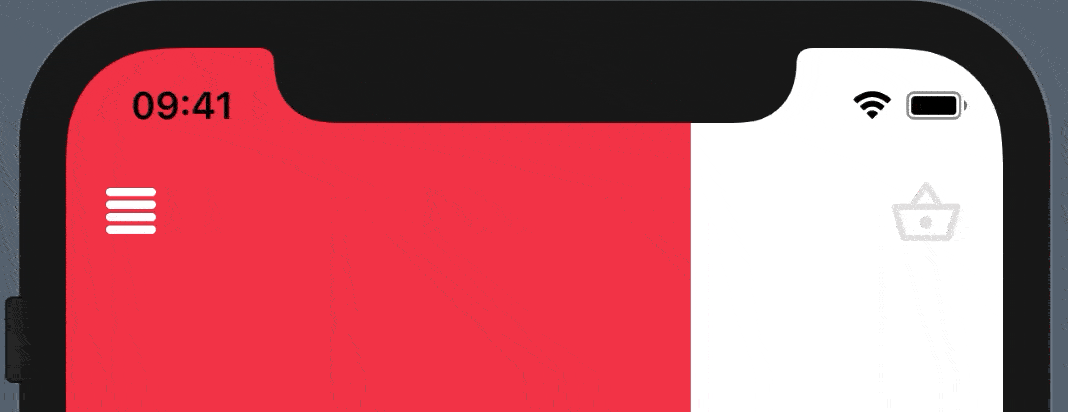
The idea here is to present a menu button with 4 horizontal lines, and, when the user taps on the button, it animates into an ‘x’ shape, to represent the option of closing the menu.
這里的想法是呈現一個帶有4條水平線的菜單按鈕,當用戶點擊該按鈕時,它會動畫化為“ x”形,以表示關閉菜單的選項。

I began with an empty project, enabling SwiftUI. Then I created a file with two views, like this:
我從一個空項目開始,啟用了SwiftUI。 然后,我創建了一個具有兩個視圖的文件,如下所示:
I defined a fixed frame for it, and for my purposes it can be a square shaped button. There’s a state property isAnimating, that the animations will respond to.
我為此定義了一個固定框架,出于我的目的,它可以是方形按鈕。 有一個狀態屬性isAnimating ,動畫將對其進行響應。
For the button body the action is simply to toggle the isAnimating property, and its label closure calls the createMenu method. Let's take a look at it.
對于按鈕主體,操作僅是切換isAnimating屬性,其標簽閉合調用createMenu方法。 讓我們來看看它。
There’s a lot going on here, but I’ll break it down. First, the method returns a type eraser view AnyView, and contains two properties, the count, which is the number of rows for the button, and the configuration of the menu.
這里有很多事情,但我會分解。 首先,該方法返回一個類型的橡皮擦視圖AnyView ,并包含兩個屬性: count (按鈕的行數)和菜單的配置。
In menu the geometry reader is used, so that we can access the width and height we have available, and, therefore, calculate the properties we need. So, 4 views are grouped, and we calculate availableHeight, spacing, height and width.
在menu ,使用了幾何圖形讀取器,以便我們可以訪問可用的寬度和高度,從而計算所需的屬性。 因此,對4個視圖進行了分組,然后我們計算了availableHeight , spacing , height和width 。

Then, the rectangles are created with the height and width, and we can finally configure them. Each rectangle is overlapping the other ones, so we’ll use the offset modifier and multiply the index by the available height. This way they get positioned correctly along the y axis.
然后,使用高度和寬度創建矩形,最后我們可以對其進行配置。 每個矩形都與其他矩形重疊,因此我們將使用offset修飾符并將索引乘以可用高度。 這樣,它們就可以正確地沿y軸定位。
Then I configured the animations, which are custom modifiers. I’ll get to them in a second. Finally I used the animation modifier, with a small delay and the easeInOut option, and return the menu.
然后,我配置了動畫,它們是自定義修改器。 一會兒,我會去找他們。 最后,我使用了animation修改器( easeInOut延遲)和easeInOut選項,然后返回菜單。
配置動畫 (Configuring the Animations)
The MiddleMenuRect is a custom modifier that handles the second and third rectangles (index '1' and '2'). Both of them need to rotate, on opposite directions.
MiddleMenuRect是一個自定義修飾符,用于處理第二個和第三個矩形(索引“ 1”和“ 2”)。 它們都需要沿相反的方向旋轉。
Here’s how the code look like:
代碼如下所示:
In the body function, two modifiers are being called: rotate and offset. That's because when the rect is rotated there's a slight difference in position, so they need to me adjusted in order to form the 'x'.
在body函數中,調用了兩個修飾符: rotate和offset 。 這是因為當旋轉rect時,位置略有不同,因此需要對它們進行調整以形成“ x”。
The modifiers return a value based on a condition of being the middle indexes and the isAnimating boolean.
修飾符基于成為中間索引和isAnimating布爾值的條件返回值。
For the MarginMenuRect the setup is very similar, but this time, the first and last indexes are placed as conditions and the modifiers opacity and offset are applied. While the rectangles are moved through the 'x' axis in different directions, the opacity is reduced, giving the idea that they were 'removed'. Check out the code:
對于MarginMenuRect的設置非常相似,但是這次,第一個和最后一個索引作為條件放置,并且應用了修飾符opacity和offset 。 當矩形沿“ x”軸沿不同方向移動時,不透明度降低了,從而產生了“已刪除”的想法。 簽出代碼:
For better readability, the MiddleMenuRect and the MarginMenuRect view modifiers were added to an extension:
為了提高可讀性,在擴展中添加了MiddleMenuRect和MarginMenuRect視圖修飾符:
That’s it! We have a nice menu button, that when tapped turns into an ‘x’. Here’s how it looks in action:
而已! 我們有一個不錯的菜單按鈕,當您點擊它時,它會變成一個“ x”。 實際效果如下:
Nice, isn’t it?
很好,不是嗎?
Utilising microinteractions can enrich usability. The features of an app attract a user to the product, but the details more then often make a huge difference. This was an example of how a microinteraction can be implemented in SwiftUI and give a nice touch to your apps.
利用微交互可以豐富可用性。 應用程序的功能吸引了用戶使用該產品,但是更多的細節通常會帶來巨大的不同。 這是一個示例,說明了如何在SwiftUI中實現微交互并為您的應用程序提供良好的體驗。
Developing it was fun, and it was pleasant to see the animation in place. If you want to see the full code, here’s the gist. Thanks for reading!
開發它很有趣,并且很高興看到動畫到位。 如果您想查看完整的代碼,這是要點 。 謝謝閱讀!
Originally published at https://vinileal.com on April 11, 2020.
最初于 2020年4月11日 發布在 https://vinileal.com 上。
翻譯自: https://uxdesign.cc/microinteractions-in-swiftui-menu-button-animation-5d60f802fe5d
按鈕 交互
本文來自互聯網用戶投稿,該文觀點僅代表作者本人,不代表本站立場。本站僅提供信息存儲空間服務,不擁有所有權,不承擔相關法律責任。 如若轉載,請注明出處:http://www.pswp.cn/news/275011.shtml 繁體地址,請注明出處:http://hk.pswp.cn/news/275011.shtml 英文地址,請注明出處:http://en.pswp.cn/news/275011.shtml
如若內容造成侵權/違法違規/事實不符,請聯系多彩編程網進行投訴反饋email:809451989@qq.com,一經查實,立即刪除!相關文章

JavaScript邏輯運算符的使用技巧

如何接觸到最新的前端動態、最前沿的前端技術

選擇控件— UI組件系列

linux -- Linux diff與patch的深入分析

shell命令之---sed

SEE Conf: Umi 4 設計思路文字稿

用戶體驗改善案例_改善用戶體驗研究的5種習慣

一場賽跑引起的并發知識

oracle中使用子查詢為何取到大于自然數1 rownum 淺度解析

巴克萊對沖_“巴克萊的財政預算案”:使金錢管理對心理健康有效—用戶體驗案例研究

6 個對所有 Web 開發者都有用的 GitHub 倉庫

快速刪除數據庫中所有表中的數據
)
openfiler的iSCSI配置(二)

送你一份用Electron開發桌面應用的避坑指南【送3本書,含犀牛書】

)
nginx修改upstream不重啟的方法(ngx_http_dyups_module模塊)

c# 設計原則需要學習嗎_向最好的學習:產品設計原則


Node.js 2021年開發者報告解讀
