Istio Gateway提供多個自定義入口網關的支持能力,通過開放一系列端口用于承載網格邊緣的進入連接,同時可以使用不同loadbalancer來隔離不同的入口流量。cert-manager可用于使用存儲在Kubernetes Secret資源中的任意簽名密鑰對來獲取證書。本文提供了手動創建自定義入口網關的步驟說明,以及在該網關中如何使用cert-manager實現自動配置證書。
生成簽名密鑰對
CA Issuer不會自動創建和管理簽名密鑰對,要么用戶自己提供,要么通過諸如OpenSSL的工具生成一個自簽名CA的新簽名密鑰對。例如,通過如下命令可以生成x509類型的密鑰和證書:
# Generate a CA private key
$ docker run -it -v $(pwd):/export frapsoft/openssl genrsa -out /export/ca.key 2048
# Create a self signed Certificate, valid for 10yrs with the 'signing' option set
$ docker run -it -v $(pwd):/export frapsoft/openssl req -x509 -new -nodes -key /export/ca.key -subj "/CN=${COMMON_NAME}" -days 3650 -reqexts v3_req -extensions v3_ca -out /export/ca.crt
這些命令的輸出將是兩個文件,ca.key以及ca.crt簽名密鑰對的密鑰和證書。如果你已經有了自己的密鑰對,你應該將私鑰和證書分別命名為ca.key與ca.crt。
將簽名密鑰對保存為Secret
我們將創建一個將使用此密鑰對生成簽名證書的頒發者Issuer,為了允許頒發者Issuer引用我們的密鑰對,我們將其存儲在Kubernetes Secret資源中。
頒發者Issuer是命名空間資源,因此他們只能在自己的命名空間中引用Secrets。因此,我們將密鑰對放入與Issuer相同的名稱空間中。當然也可以創建一個面向集群范圍版本的ClusterIssuer。
以下命令將在默認命名空間中創建包含簽名密鑰對的Secret:
kubectl create secret tls ca-key-pair \--cert=ca.crt \--key=ca.key \--namespace=default準備K8s+Istio環境
阿里云容器服務Kubernetes 1.11.5目前已經支持 Istio 1.0.5的一鍵部署,可以通過容器服務管理控制臺非常方便地快速創建 Kubernetes 集群以及部署Istio。具體過程可以參考創建Kubernetes集群、部署Istio。
請注意,當前部署Istio之后并不會創建IngressGateway。
部署Istio-init
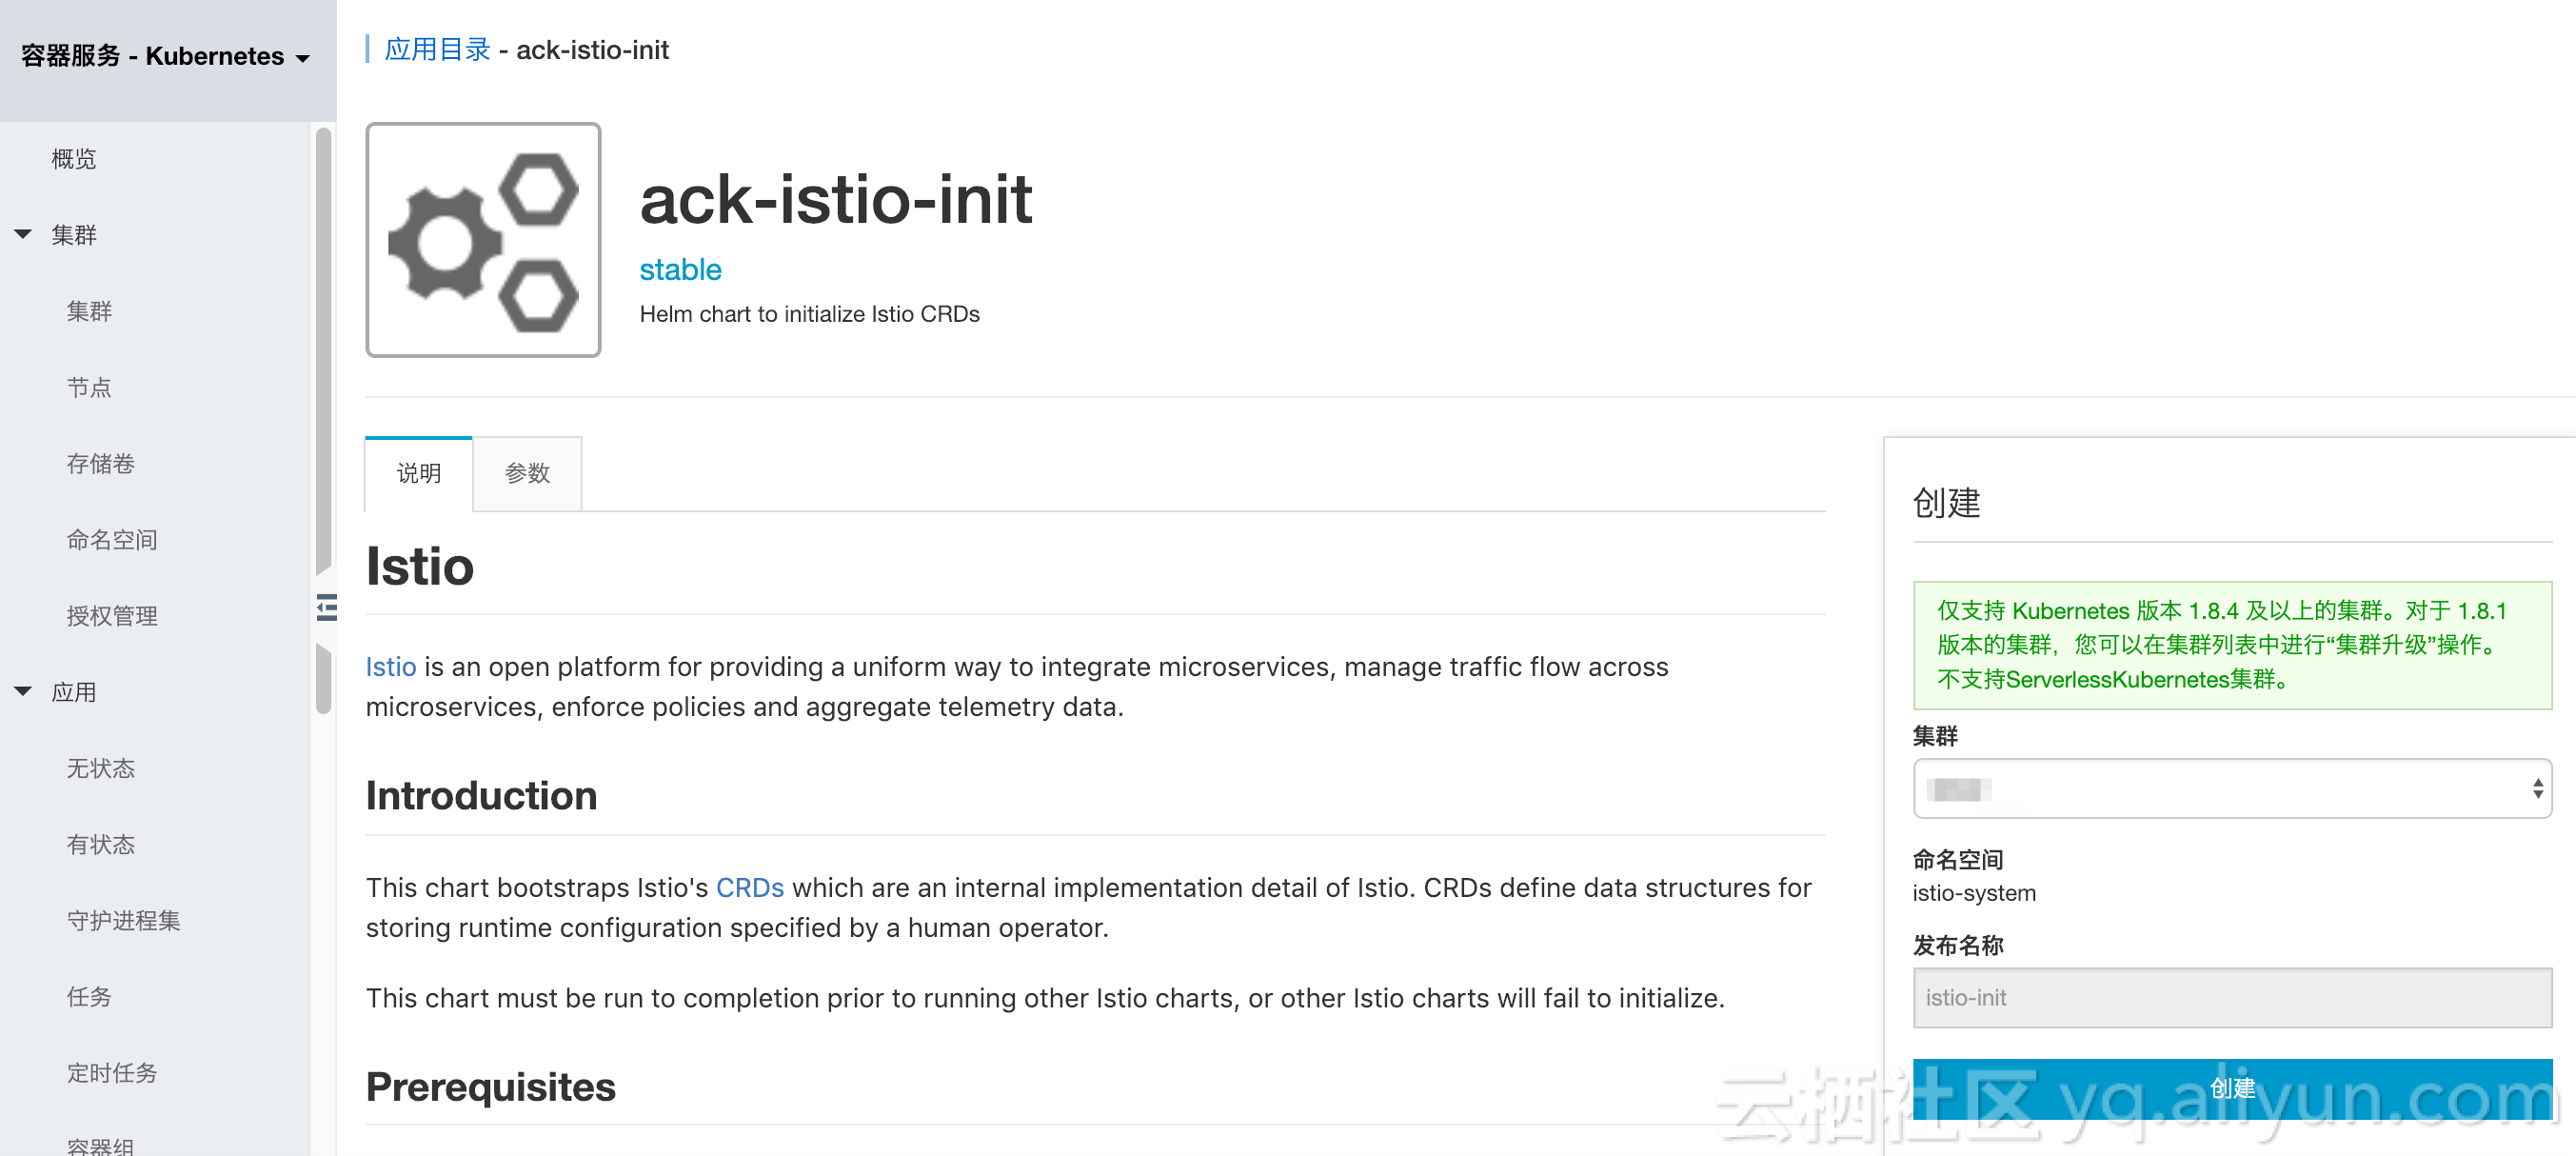
點擊左側的應用目錄,在右側選中ack-istio-init,在右側選擇對應的集群,同時可以看到命名空間已設定為 istio-system ,發布名稱已設定為istio-init,然后點擊部署。幾秒鐘之后,Istio CRD在集群中被創建出來。
通過應用目錄簡便部署Istio certmanager
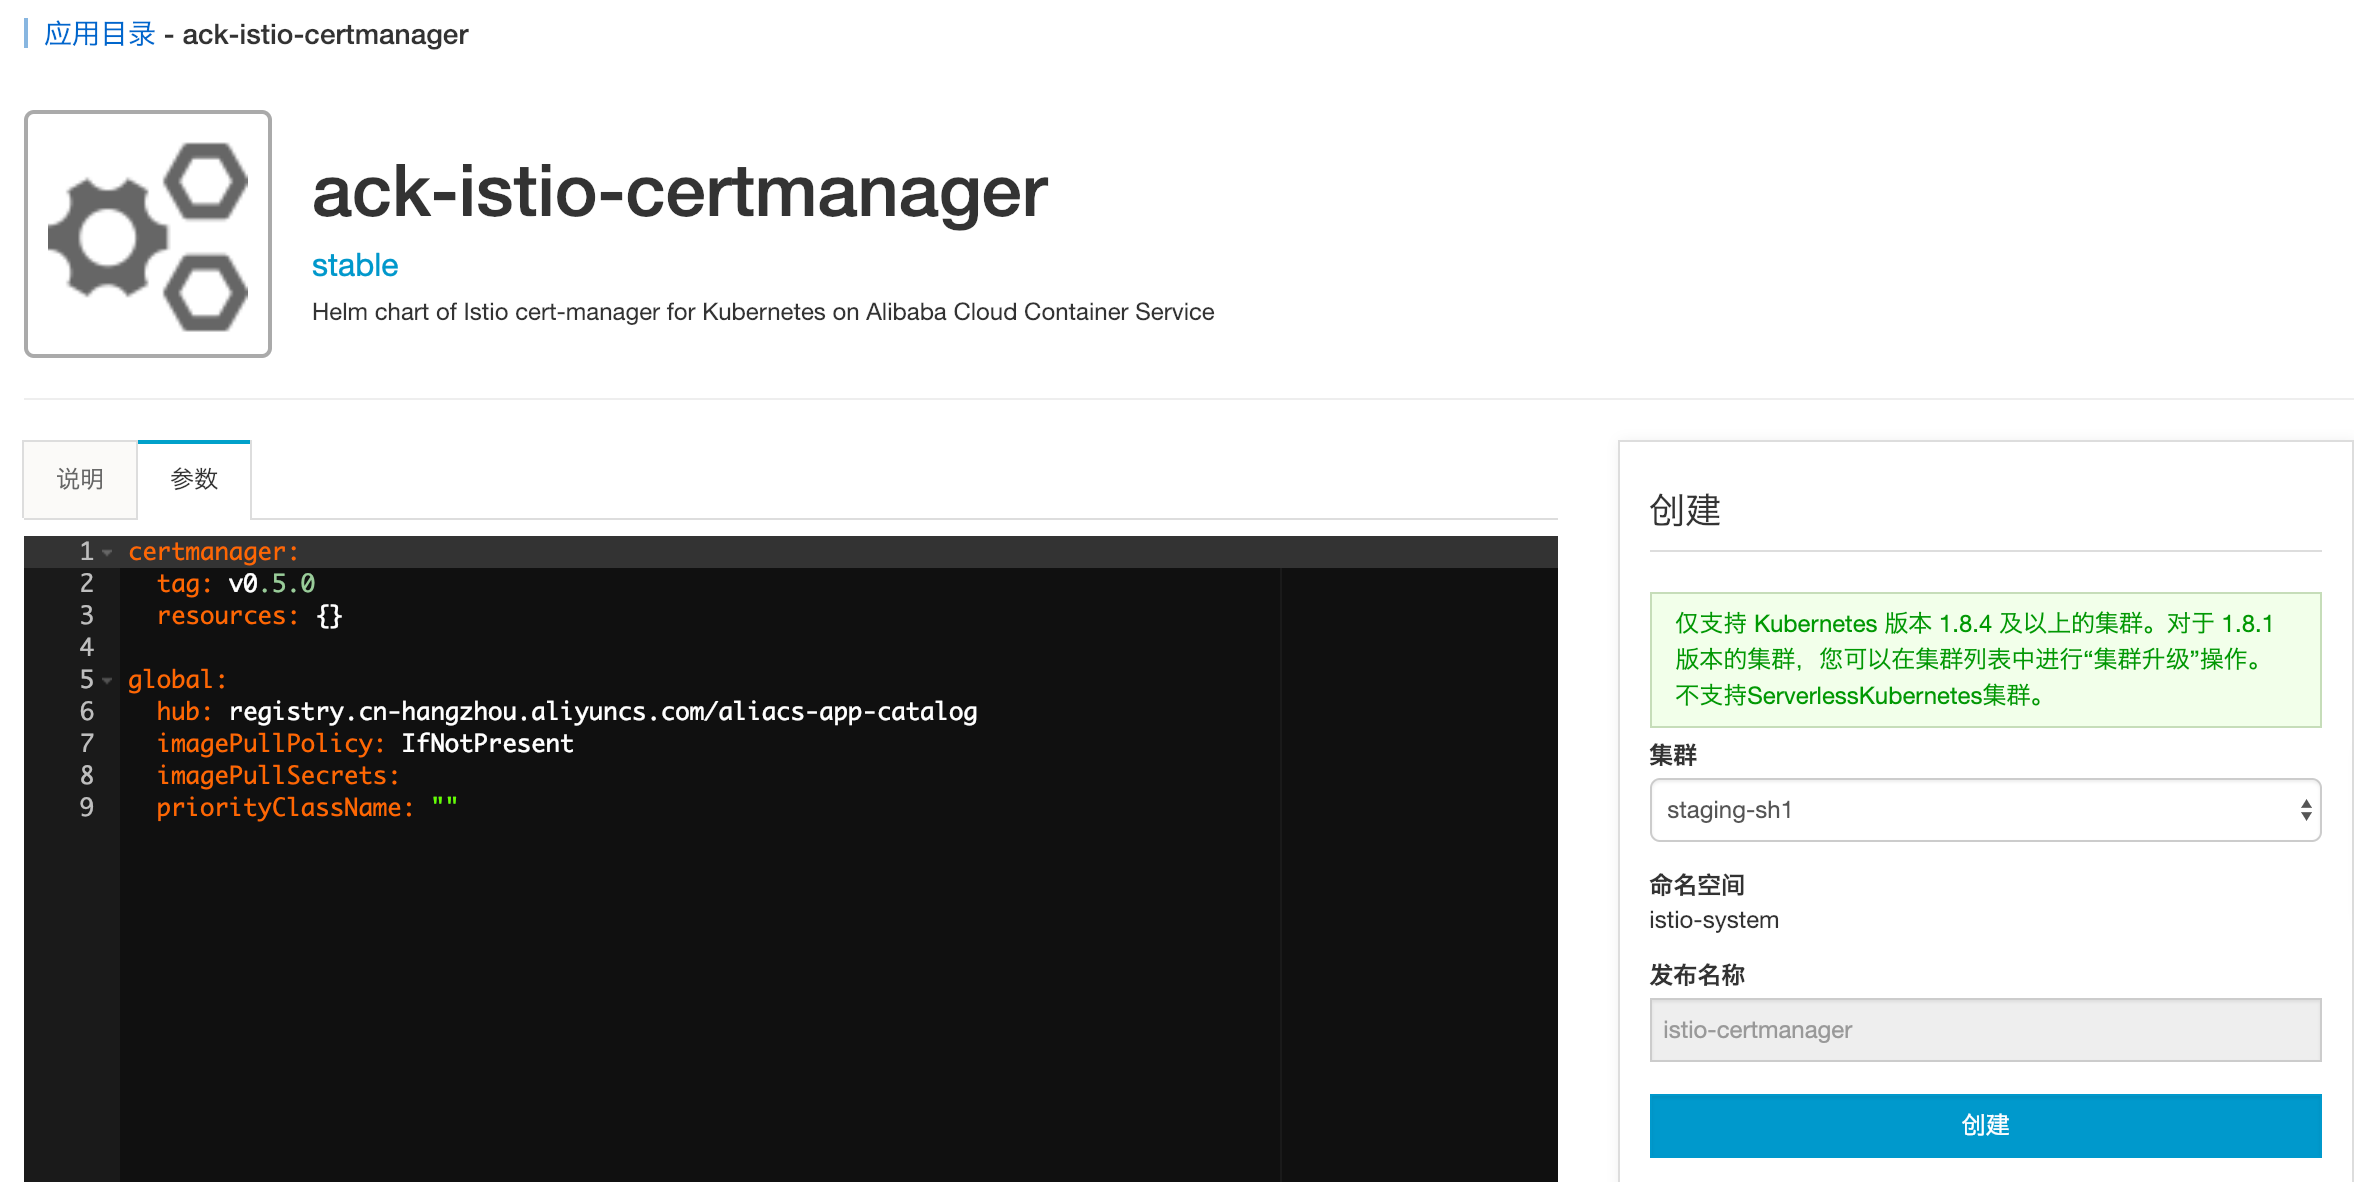
點擊左側的應用目錄,在右側選中ack-istio-certmanager,在打開的頁面中點擊參數, 可以通過修改參數配置進行定制化(當前不需要進行額外修改,保持默認值即可),如下所示:
在右側選擇對應的集群,同時可以看到命名空間已設定為 istio-system ,發布名稱已設定為istio-certmanager,然后點擊部署。幾秒鐘之后,Istio certmanager發布就可以創建出來,如下圖所示容器組certmanager的啟動日志:
可以看到certmanager已經成功啟動。
創建引用Secret的Issuer
現在可以創建一個引用我們剛剛創建的Secret資源的頒發者Issuer:
kubectl apply -f - <<EOF
apiVersion: certmanager.k8s.io/v1alpha1
kind: Issuer
metadata:name: ca-issuernamespace: default
spec:ca:secretName: ca-key-pair
EOF
接下來準備獲得證書!
獲得簽名證書
現在可以創建以下證書資源,該資源指定所需的證書。為了使用Issuer獲取證書,我們必須在與Issuer相同的命名空間中創建Certificate資源,因為Issuer是命名空間資源,如本例所示。如果我們想要跨多個名稱空間重用簽名密鑰對,那么就可以使用一個集群ClusterIssuer。
首先通過以下命令為域名myexample.com創建證書:
kubectl apply -f - <<EOF
apiVersion: certmanager.k8s.io/v1alpha1
kind: Certificate
metadata:name: myexample-certificatenamespace: default
spec:secretName: istio-myexample-customingressgateway-certsissuerRef:name: ca-issuer# 可以通過引用ClusterIssuer類型的頒發者Issuer;默認情況使用只適用于命名空間的Issuerkind: IssuercommonName: myexample.comorganization:- MyExample CAdnsNames:- myexample.com- www.myexample.com
EOF
記下secretName因為接下來的步驟會需要引用它。
創建證書資源后,cert-manager將嘗試使用頒發者ca-issuer獲取證書。如果成功,證書將存儲在與證書資源相同的命名空間(default)中的Secret資源istio-myexample-customingressgateway-certs中。
檢查證書與密鑰
由于我們已指定commonName字段,因此myexample.com將是證書的通用名稱,并且通用名稱和dnsNames陣列的所有元素都將是主題備用名稱 (SAN)。如果我們沒有指定公共名稱,那么dnsNames列表的第一個元素 將用作公共名稱,dnsNames列表的所有元素 也將是SAN。
創建上述證書后,我們可以檢查是否已成功獲取,如下所示查看了證書myexample-certificate:
kubectl describe certificate myexample-certificate
Name:         myexample-certificate
Namespace:    default
Labels:       <none>
Annotations:  kubectl.kubernetes.io/last-applied-configuration:{"apiVersion":"certmanager.k8s.io/v1alpha1","kind":"Certificate","metadata":{"annotations":{},"name":"myexample-certificate","namespace":"...
API Version:  certmanager.k8s.io/v1alpha1
Kind:         Certificate
Metadata:Creation Timestamp:  2019-01-14T08:38:20ZGeneration:          1Resource Version:    19727Self Link:           /apis/certmanager.k8s.io/v1alpha1/namespaces/default/certificates/myexample-certificateUID:                 bf47b776-17d7-11e9-bafe-00163e069e12
Spec:Common Name:  myexample.comDns Names:myexample.comwww.myexample.comIssuer Ref:Kind:  IssuerName:  ca-issuerOrganization:MyExample CASecret Name:  istio-myexample-customingressgateway-certs
Status:Conditions:Last Transition Time:  2019-01-14T08:38:22ZMessage:               Certificate issued successfullyReason:                CertIssuedStatus:                TrueType:                  Ready
Events:Type    Reason      Age   From          Message----    ------      ----  ----          -------Normal  IssueCert   80s   cert-manager  Issuing certificate...Normal  CertIssued  80s   cert-manager  Certificate issued successfully
最后一行顯示了證書成功被創建。
您還可以檢查Issuer是否成功,應該看到base64編碼的簽名TLS密鑰對。
kubectl get secret istio-myexample-customingressgateway-certs -oyaml獲得證書后,cert-manager將繼續檢查其有效性,并在接近到期時嘗試更新。當證書上的“Not After”字段小于當前時間之后30天時,cert-manager認為證書即將到期。對于基于CA的頒發者,cert-manager將頒發證書,其中“Not After”字段設置為當前時間加上365天。
部署自定義網關
Gateway描述了在網格邊緣操作的負載均衡器,用于接收傳入或傳出的HTTP / TCP連接。
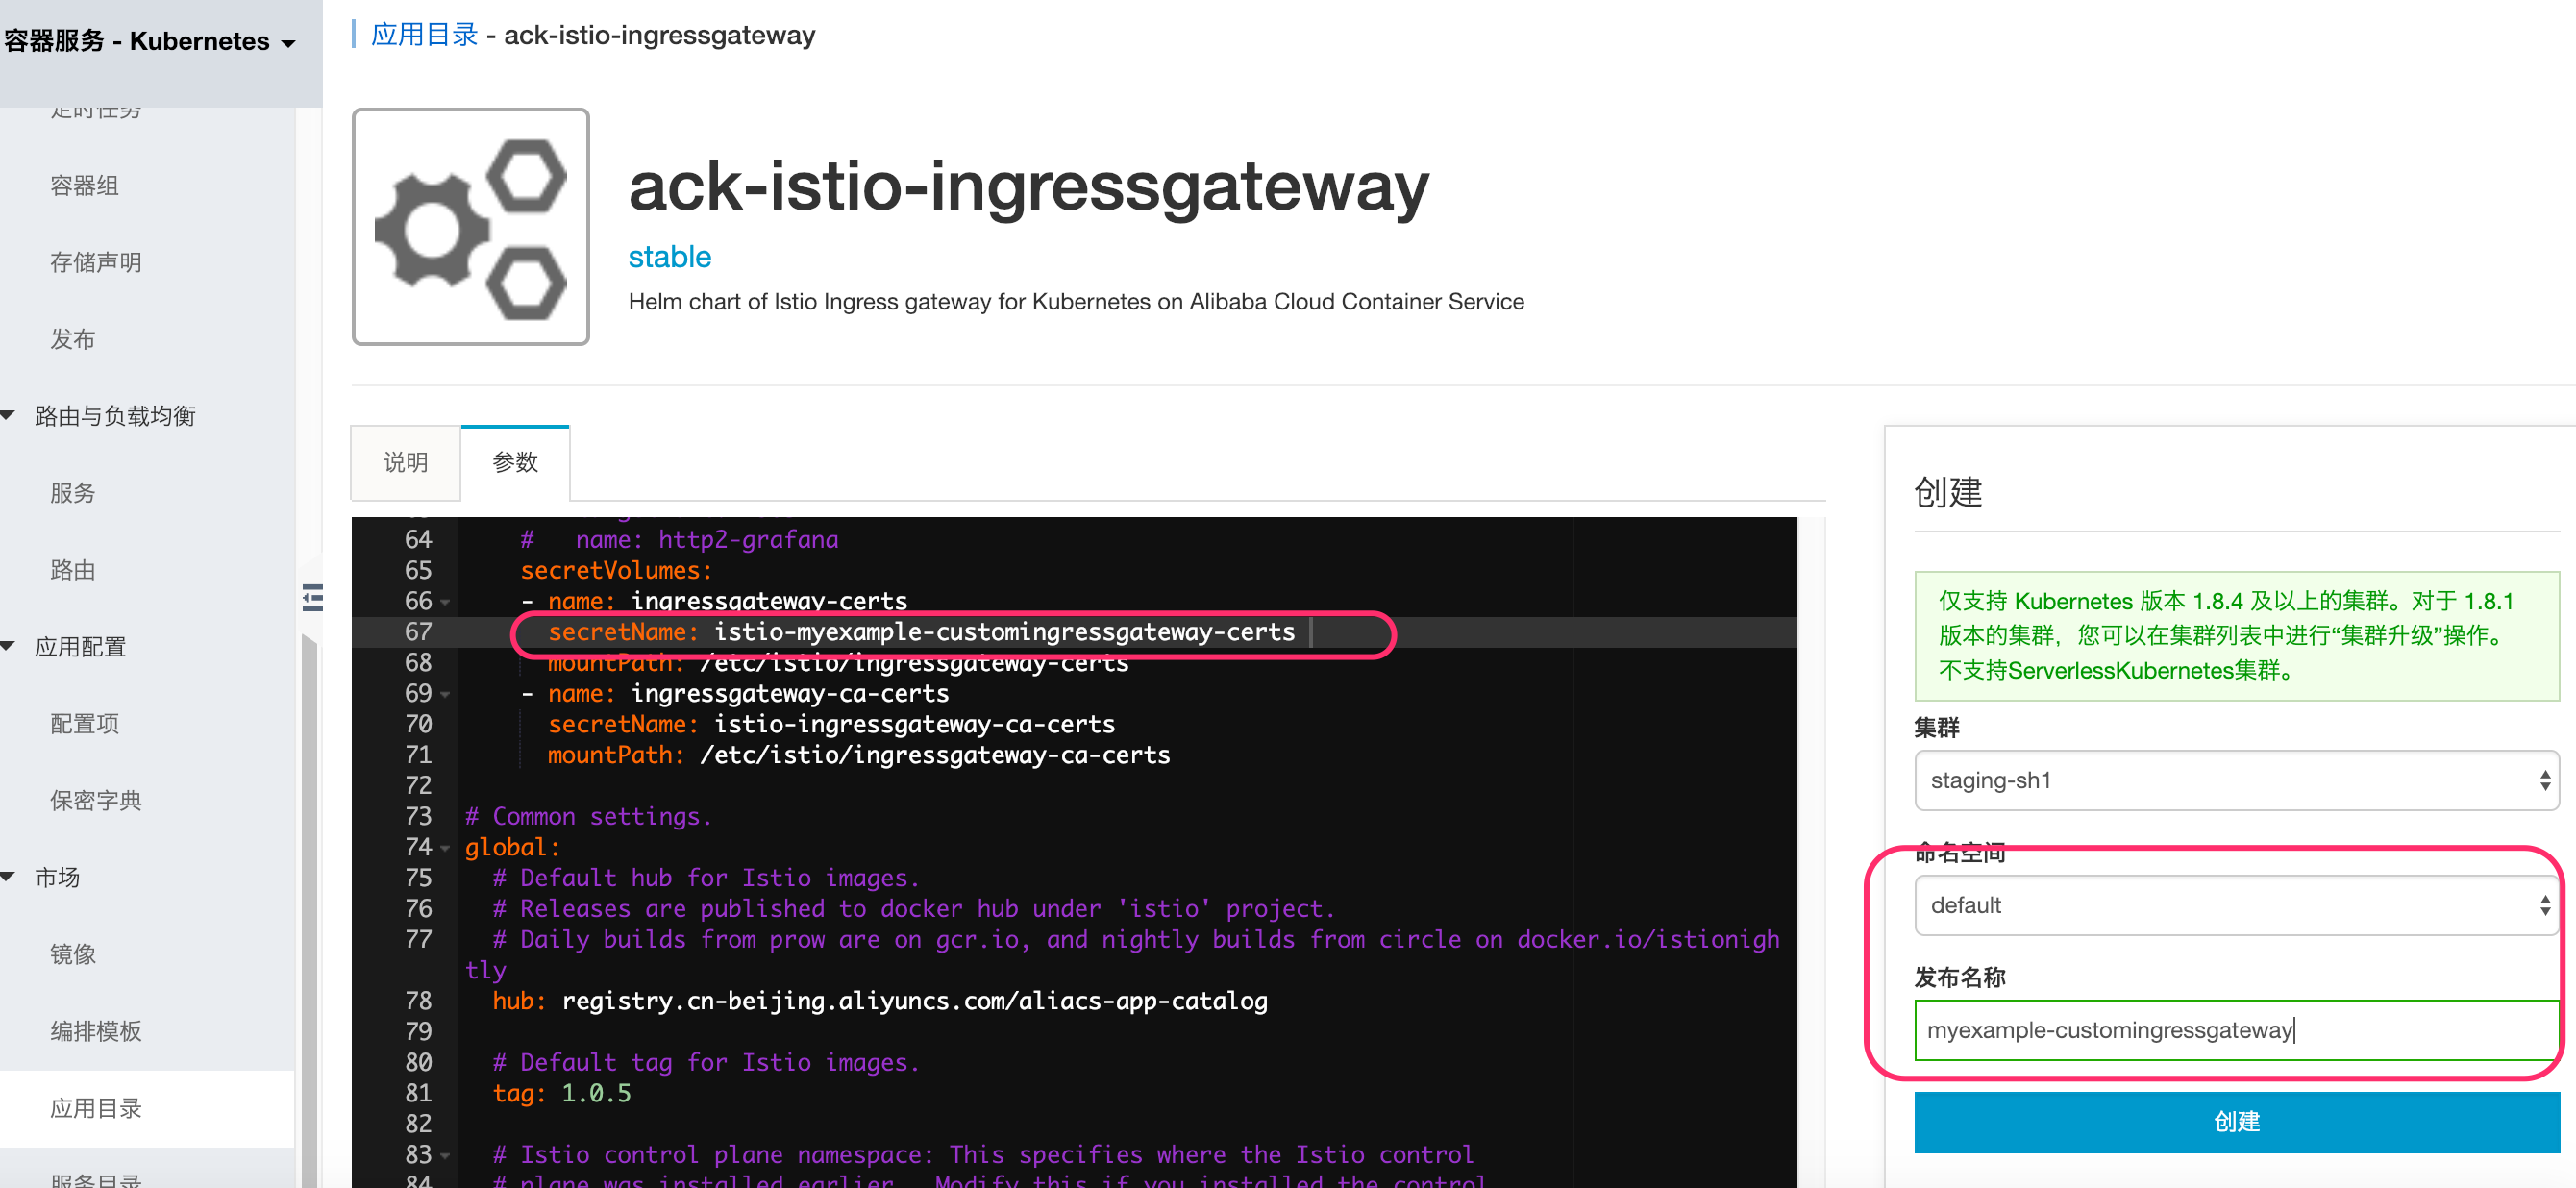
點擊左側的應用目錄,在右側選中ack-istio-ingressgateway,在打開的頁面中點擊參數, 將在67行附近的名為istio-ingressgateway-certs的secretName修改為上述創建出的 istio-myexample-customingressgateway-certs 。修改如下如下所示:
在右側選擇對應的集群,同時選擇與保密字典istio-myexample-customingressgateway-certs相同的命名空間即上文中設定的default ,發布名稱設定為myexample-customingressgateway,然后點擊部署。幾秒鐘之后,自定義的Istio 網關發布就可以創建出來。其中網關配置設置代理以充當負載平衡器,為入口公開端口80和443(https)。如下圖所示:
定義內部服務
本示例中的內部服務是基于nginx實現的,首先為 NGINX 服務器創建配置文件。以域名myexample.com的內部服務為例,定義請求根路徑直接返回字樣"Welcome to myexample.com! This is one custom Istio Ingress Gateway powered by cert-manager!"及狀態碼200。
myexample-nginx.conf的具體內容如下:
events {
}http {log_format main '$remote_addr - $remote_user [$time_local]  $status ''"$request" $body_bytes_sent "$http_referer" ''"$http_user_agent" "$http_x_forwarded_for"';access_log /var/log/nginx/access.log main;error_log  /var/log/nginx/error.log;server {listen 80;location / {return 200 'Welcome to myexample.com! This is one custom Istio Ingress Gateway powered by cert-manager!';add_header Content-Type text/plain;}}
}
創建 Kubernetes ConfigMap 存儲 NGINX 服務器的配置:
kubectl create configmap myexample-nginx-configmap --from-file=nginx.conf=./myexample-nginx.conf設置命名空間default,啟用sidecar自動注入:
kubectl label namespace default istio-injection=enabled注意: 確保該sidecar自動注入的Label需要在IngressGateway創建之后再進行標注,以確保IngressGateway不會自動注入。或者不啟用自動注入,通過手工注入完成,具體參見手工注入。
部署 NGINX 服務器,創建域名myexample.com的內部服務:
kubectl apply -f - <<EOF
apiVersion: v1
kind: Service
metadata:name: myexampleapplabels:app: myexampleapp
spec:ports:- port: 80protocol: TCPselector:app: myexampleapp
---
apiVersion: apps/v1
kind: Deployment
metadata:name: myexampleapp
spec:selector:matchLabels:app: myexampleappreplicas: 1template:metadata:labels:app: myexampleappspec:containers:- name: nginximage: nginxports:- containerPort: 80volumeMounts:- name: nginx-configmountPath: /etc/nginxreadOnly: truevolumes:- name: nginx-configconfigMap:name: myexample-nginx-configmapEOF
創建自定義網關配置對象
以域名myexample.com為例,創建Istio自定義網關配置對象,如下所示:
kubectl apply -f - <<EOF
apiVersion: networking.istio.io/v1alpha3
kind: Gateway
metadata:annotations:name: istio-myexample-customingressgatewaynamespace: default
spec:selector:istio: ingressgatewayservers:- hosts:- '*.myexample.com'port:name: httpnumber: 80protocol: HTTPtls:httpsRedirect: true- hosts:- '*.myexample.com'port:name: httpsnumber: 443protocol: HTTPStls:mode: SIMPLEprivateKey: /etc/istio/ingressgateway-certs/tls.keyserverCertificate: /etc/istio/ingressgateway-certs/tls.crt
EOF
創建VirtualService
同樣地,接下來以域名myexample.com為例,創建鏈接到istio-myexample-customingressgateway的VirtualService:
kubectl apply -f - <<EOF
apiVersion: networking.istio.io/v1alpha3
kind: VirtualService
metadata:name: istio-myexample-customvirtualservice
spec:hosts:- "www.myexample.com"gateways:- istio-myexample-customingressgatewayhttp:- route:- destination:host: myexampleappport:number: 80
EOF
通過網關訪問服務
以域名myexample.com為例,獲取對應的自定義網關服務的公網IP地址,執行以下命令獲取:
kubectl get svc -l istio=ingressgateway
NAME                   TYPE           CLUSTER-IP     EXTERNAL-IP     PORT(S)                      AGE
istio-ingressgateway   LoadBalancer   172.19.12.75   106.14.48.121   80:31144/TCP,443:30441/TCP   11m
設置INGRESS_HOST 以及 SECURE_INGRESS_PORT 這兩個環境變量,確定它們的正確取值,即替換成你實際環境的地址值:
INGRESS_HOST=106.14.48.121
SECURE_INGRESS_PORT=443
檢查 istio-ingressgateway Pod 是否正確的加載了證書和私鑰:
kubectl exec -it -n default $(kubectl -n default get pods -l istio=ingressgateway -o jsonpath='{.items[0].metadata.name}') -- ls -al /etc/istio/ingressgateway-certstls.crt 和 tls.key 都應該保存在這個目錄中。
檢查 Ingress gateway 證書中的 Subject 字段的正確性:
kubectl exec -i -n default $(kubectl get pod -l istio=ingressgateway -n default -o jsonpath='{.items[0].metadata.name}') -- cat /etc/istio/ingressgateway-certs/tls.crt | openssl x509 -text -noout | grep 'Subject:'Subject: O=MyExample CA, CN=myexample.com檢查 Ingress gateway 的代理能夠正確訪問證書:
kubectl exec -ti $(kubectl get po -l istio=ingressgateway -n default -o jsonpath={.items[0]..metadata.name}) -n default -- curl  127.0.0.1:15000/certs
{"ca_cert": "","cert_chain": "Certificate Path: /etc/istio/ingressgateway-certs/tls.crt, Serial Number: c181438895a781c98759fb56b9cc1508, Days until Expiration: 364"
}
至此,使用cert-manager部署自定義入口網關的所有步驟已完成。通過 HTTPS 協議訪問 myexample.com 服務,即curl 發送 https 請求到istio-myexample-customingressgateway:
curl -k -HHost:www.myexample.com --resolve www.myexample.com:443:106.14.48.121  https://www.myexample.com
Welcome to myexample.com! This is one custom Istio Ingress Gateway powered by cert-manager!
回顧一下,獲得證書后cert-manager將繼續檢查其有效性,并在接近到期時嘗試更新。當證書上的“Not After”字段小于當前時間之后30天時,cert-manager認為證書即將到期。對于基于CA的頒發者,cert-manager將頒發證書,其中“Not After”字段設置為當前時間加上365天。

![[bzoj3625][Codeforces 250 E]The Child and Binary Tree(生成函數+多項式運算+FFT)](http://pic.xiahunao.cn/[bzoj3625][Codeforces 250 E]The Child and Binary Tree(生成函數+多項式運算+FFT))


 集成druid+mybatis)


