慢品人間煙火色,閑觀萬事歲月長
一,基本使用
關于databinding的基本使用請看之前的文章
Android--Jetpack--Databinding詳解-CSDN博客
二,xml布局解析
分析源碼呢,主要就是從兩方面入手,一個是使用,一個是APT生成的代碼。
我們看一下上一篇文章我們的布局xml文件:
<?xml version="1.0" encoding="utf-8"?>
<layout xmlns:android="http://schemas.android.com/apk/res/android"xmlns:app="http://schemas.android.com/apk/res-auto"xmlns:tools="http://schemas.android.com/tools"><data class="MyDataBing"><import type="com.yuanzhen.lifecycledemo.databing.YuanZhen"/><variablename="yuanzhen"type="YuanZhen"/></data><RelativeLayoutandroid:layout_width="match_parent"android:layout_height="match_parent"tools:context=".MainActivity"><TextViewandroid:id="@+id/txt_name"android:layout_width="wrap_content"android:layout_height="wrap_content"android:text="@{yuanzhen.name}"android:textSize="40sp"app:layout_constraintBottom_toBottomOf="parent"app:layout_constraintEnd_toEndOf="parent"app:layout_constraintStart_toStartOf="parent"app:layout_constraintTop_toTopOf="parent" /><TextViewandroid:id="@+id/txt_age"android:layout_width="wrap_content"android:layout_height="wrap_content"android:textSize="40sp"android:text="@{String.valueOf(yuanzhen.age)}"app:layout_constraintBottom_toBottomOf="parent"app:layout_constraintEnd_toEndOf="parent"app:layout_constraintStart_toStartOf="parent"app:layout_constraintTop_toTopOf="parent"android:layout_below="@+id/txt_name"/><EditTextandroid:layout_width="wrap_content"android:layout_height="wrap_content"android:layout_below="@+id/txt_age"android:textSize="40sp"android:text="@={yuanzhen.name}"/></RelativeLayout>
</layout>
然后我們看一下APT生成的代碼:
打開之后,格式化一下,看看代碼:
<?xml version="1.0" encoding="utf-8" standalone="yes"?>
<Layout bindingClass="MyDataBing" directory="layout"filePath="app\src\main\res\layout\activity_main.xml" isBindingData="true"isMerge="false" layout="activity_main" modulePackage="com.yuanzhen.lifecycledemo"rootNodeType="android.widget.RelativeLayout"><ClassNameLocation endLine="5" endOffset="26" startLine="5" startOffset="17" /><Variables name="yuanzhen" declared="true" type="YuanZhen"><location endLine="9" endOffset="28" startLine="7" startOffset="8" /></Variables><Imports name="YuanZhen" type="com.yuanzhen.lifecycledemo.databing.YuanZhen"><location endLine="6" endOffset="68" startLine="6" startOffset="8" /></Imports><Targets><Target tag="layout/activity_main_0" view="RelativeLayout"><Expressions /><location endLine="48" endOffset="20" startLine="12" startOffset="4" /></Target><Target id="@+id/txt_name" tag="binding_1" view="TextView"><Expressions><Expression attribute="android:text" text="yuanzhen.name"><Location endLine="21" endOffset="42" startLine="21" startOffset="12" /><TwoWay>false</TwoWay><ValueLocation endLine="21" endOffset="40" startLine="21" startOffset="28" /></Expression></Expressions><location endLine="26" endOffset="55" startLine="17" startOffset="8" /></Target><Target id="@+id/txt_age" tag="binding_2" view="TextView"><Expressions><Expression attribute="android:text" text="String.valueOf(yuanzhen.age)"><Location endLine="33" endOffset="57" startLine="33" startOffset="12" /><TwoWay>false</TwoWay><ValueLocation endLine="33" endOffset="55" startLine="33" startOffset="28" /></Expression></Expressions><location endLine="38" endOffset="49" startLine="28" startOffset="8" /></Target><Target tag="binding_3" view="EditText"><Expressions><Expression attribute="android:text" text="yuanzhen.name"><Location endLine="44" endOffset="43" startLine="44" startOffset="12" /><TwoWay>true</TwoWay><ValueLocation endLine="44" endOffset="41" startLine="44" startOffset="29" /></Expression></Expressions><location endLine="44" endOffset="45" startLine="39" startOffset="8" /></Target></Targets>
</Layout>
我們發現每個view都包裝了一個Targets標簽,對應了一個tag。
比如RelativeLayout對應的是layout/activity_main_0
然后看看我們的textview:
<Target id="@+id/txt_name" tag="binding_1" view="TextView"><Expressions><Expression attribute="android:text" text="yuanzhen.name"><Location endLine="21" endOffset="42" startLine="21" startOffset="12" /><TwoWay>false</TwoWay><ValueLocation endLine="21" endOffset="40" startLine="21" startOffset="28" /></Expression></Expressions><location endLine="26" endOffset="55" startLine="17" startOffset="8" />
</Target>
?通過text將yuanzhen.name賦值給了textview
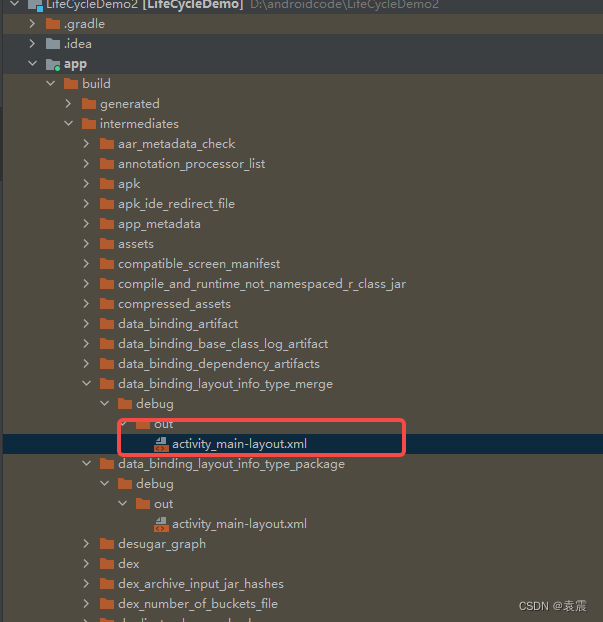
然后在打開另一個APT生成的文件:

看看它的代碼:
<?xml version="1.0" encoding="utf-8"?><RelativeLayoutandroid:layout_width="match_parent"android:layout_height="match_parent"tools:context=".MainActivity" android:tag="layout/activity_main_0" xmlns:android="http://schemas.android.com/apk/res/android" xmlns:app="http://schemas.android.com/apk/res-auto" xmlns:tools="http://schemas.android.com/tools"><TextViewandroid:id="@+id/txt_name"android:layout_width="wrap_content"android:layout_height="wrap_content"android:tag="binding_1" android:textSize="40sp"app:layout_constraintBottom_toBottomOf="parent"app:layout_constraintEnd_toEndOf="parent"app:layout_constraintStart_toStartOf="parent"app:layout_constraintTop_toTopOf="parent" /><TextViewandroid:id="@+id/txt_age"android:layout_width="wrap_content"android:layout_height="wrap_content"android:textSize="40sp"android:tag="binding_2" app:layout_constraintBottom_toBottomOf="parent"app:layout_constraintEnd_toEndOf="parent"app:layout_constraintStart_toStartOf="parent"app:layout_constraintTop_toTopOf="parent"android:layout_below="@+id/txt_name"/><EditTextandroid:layout_width="wrap_content"android:layout_height="wrap_content"android:layout_below="@+id/txt_age"android:textSize="40sp"android:tag="binding_3" /></RelativeLayout>上面空了一大塊,把布局文件的layout去掉了,其余的和我們的布局文件一樣,除此之外,它給每個view都增加了一個tag,這個tag與上面的tag一一對應,這就是布局的解析。
三,xml代碼解析
首先我們看一下上一章我們的使用代碼:
public class MainActivity extends AppCompatActivity {private MyDataBing dataBinding;@Overrideprotected void onCreate(Bundle savedInstanceState) {super.onCreate(savedInstanceState);dataBinding = DataBindingUtil.setContentView(this, R.layout.activity_main);YuanZhen yuanZhen =new YuanZhen("袁震",18);dataBinding.setYuanzhen(yuanZhen);new Thread(new Runnable() {@Overridepublic void run() {for (int i = 0; i < 10; i++) {try {Thread.sleep(1000);yuanZhen.setName(yuanZhen.getName()+i);yuanZhen.setAge(18+i);} catch (InterruptedException e) {e.printStackTrace();}}}}).start();}}首先,我們看一下dataBinding = DataBindingUtil.setContentView(this, R.layout.activity_main)這句代碼的實現,它會走到DataBindingUtil的setContentView():
public static <T extends ViewDataBinding> T setContentView(@NonNull Activity activity,int layoutId) {return setContentView(activity, layoutId, sDefaultComponent);
}
繼續往里面看:
public static <T extends ViewDataBinding> T setContentView(@NonNull Activity activity,int layoutId, @Nullable DataBindingComponent bindingComponent) {activity.setContentView(layoutId);View decorView = activity.getWindow().getDecorView();ViewGroup contentView = (ViewGroup) decorView.findViewById(android.R.id.content);return bindToAddedViews(bindingComponent, contentView, 0, layoutId);
}
前三行代碼我們應該都能看懂
獲取到了conetntView,并傳入了方法bindToAddedViews(bindingComponent, contentView, 0, layoutId)中,我們接著看該方法:
private static <T extends ViewDataBinding> T bindToAddedViews(DataBindingComponent component,ViewGroup parent, int startChildren, int layoutId) {final int endChildren = parent.getChildCount();final int childrenAdded = endChildren - startChildren;if (childrenAdded == 1) {final View childView = parent.getChildAt(endChildren - 1);return bind(component, childView, layoutId);} else {final View[] children = new View[childrenAdded];for (int i = 0; i < childrenAdded; i++) {children[i] = parent.getChildAt(i + startChildren);}return bind(component, children, layoutId);}
}
該方法會調用bind(component, children, layoutId)方法:
static <T extends ViewDataBinding> T bind(DataBindingComponent bindingComponent, View root,int layoutId) {return (T) sMapper.getDataBinder(bindingComponent, root, layoutId);
}
然后會調用??sMapper.getDataBinder(bindingComponent, root, layoutId):
public abstract class DataBinderMapper {public abstract ViewDataBinding getDataBinder(DataBindingComponent bindingComponent, View view,int layoutId);public abstract ViewDataBinding getDataBinder(DataBindingComponent bindingComponent,View[] view, int layoutId);public abstract int getLayoutId(String tag);public abstract String convertBrIdToString(int id);@NonNullpublic List<DataBinderMapper> collectDependencies() {// default implementation for backwards compatibility.return Collections.emptyList();}
}
然后查看getDataBinder的引用,會找到APT生成的DataBinderMapperImpl類的getDataBinder方法:
public class DataBinderMapperImpl extends DataBinderMapper {。。。@Overridepublic ViewDataBinding getDataBinder(DataBindingComponent component, View view, int                 layoutId) {int localizedLayoutId = INTERNAL_LAYOUT_ID_LOOKUP.get(layoutId);if(localizedLayoutId > 0) {final Object tag = view.getTag();if(tag == null) {throw new RuntimeException("view must have a tag");}switch(localizedLayoutId) {case  LAYOUT_ACTIVITYMAIN: {if ("layout/activity_main_0".equals(tag)) {return new MyDataBingImpl(component, view);}throw new IllegalArgumentException("The tag for activity_main is invalid. Received: " + tag);}}}return null;
}
。。。}
這里比較關鍵的代碼是:如果我們傳過來的tag是layout/activity_main_0,就是前面生成的xml里面的根節點的tag,那么就創建我們自定義命名的MyDataBingImpl。
然后我們查看MyDataBingImpl的構造函數:
public MyDataBingImpl(@Nullable androidx.databinding.DataBindingComponent bindingComponent, @NonNull View root) {this(bindingComponent, root, mapBindings(bindingComponent, root, 4, sIncludes, sViewsWithIds));
}
會發現這里有個4,4的意思就是xml文件里面的4個view節點。
繼續往下看mapBindings源碼:
protected static Object[] mapBindings(DataBindingComponent bindingComponent, View root,int numBindings, IncludedLayouts includes, SparseIntArray viewsWithIds) {Object[] bindings = new Object[numBindings];mapBindings(bindingComponent, root, bindings, includes, viewsWithIds, true);return bindings;
}
?創建了一個大小為4的對象數組,然后調用mapBindings:
private static void mapBindings(DataBindingComponent bindingComponent, View view,Object[] bindings, IncludedLayouts includes, SparseIntArray viewsWithIds,boolean isRoot) {final int indexInIncludes;final ViewDataBinding existingBinding = getBinding(view);if (existingBinding != null) {return;}Object objTag = view.getTag();final String tag = (objTag instanceof String) ? (String) objTag : null;boolean isBound = false;if (isRoot && tag != null && tag.startsWith("layout")) {final int underscoreIndex = tag.lastIndexOf('_');if (underscoreIndex > 0 && isNumeric(tag, underscoreIndex + 1)) {final int index = parseTagInt(tag, underscoreIndex + 1);if (bindings[index] == null) {bindings[index] = view;}indexInIncludes = includes == null ? -1 : index;isBound = true;} else {indexInIncludes = -1;}} else if (tag != null && tag.startsWith(BINDING_TAG_PREFIX)) {int tagIndex = parseTagInt(tag, BINDING_NUMBER_START);if (bindings[tagIndex] == null) {bindings[tagIndex] = view;}isBound = true;indexInIncludes = includes == null ? -1 : tagIndex;} else {// Not a bound viewindexInIncludes = -1;}if (!isBound) {final int id = view.getId();if (id > 0) {int index;if (viewsWithIds != null && (index = viewsWithIds.get(id, -1)) >= 0 &&bindings[index] == null) {bindings[index] = view;}}}if (view instanceof  ViewGroup) {final ViewGroup viewGroup = (ViewGroup) view;final int count = viewGroup.getChildCount();int minInclude = 0;for (int i = 0; i < count; i++) {final View child = viewGroup.getChildAt(i);boolean isInclude = false;if (indexInIncludes >= 0 && child.getTag() instanceof String) {String childTag = (String) child.getTag();if (childTag.endsWith("_0") &&childTag.startsWith("layout") && childTag.indexOf('/') > 0) {// This *could* be an include. Test against the expected includes.int includeIndex = findIncludeIndex(childTag, minInclude,includes, indexInIncludes);if (includeIndex >= 0) {isInclude = true;minInclude = includeIndex + 1;final int index = includes.indexes[indexInIncludes][includeIndex];final int layoutId = includes.layoutIds[indexInIncludes][includeIndex];int lastMatchingIndex = findLastMatching(viewGroup, i);if (lastMatchingIndex == i) {bindings[index] = DataBindingUtil.bind(bindingComponent, child,layoutId);} else {final int includeCount =  lastMatchingIndex - i + 1;final View[] included = new View[includeCount];for (int j = 0; j < includeCount; j++) {included[j] = viewGroup.getChildAt(i + j);}bindings[index] = DataBindingUtil.bind(bindingComponent, included,layoutId);i += includeCount - 1;}}}}if (!isInclude) {mapBindings(bindingComponent, child, bindings, includes, viewsWithIds, false);}}}
}
這段源碼主要是通過tag解析出view,放到數組里面。
這樣我們在使用的時候,就能拿到xml里面的view了:
這樣xml的代碼解析就完成了。
四,核心原理
databinding的核心邏輯就是更新數據的同時自動更新UI。那么我們可以判斷出它的整體實際上肯定是一個觀察者模式。首先被觀察者肯定是數據類,就是我們的YuanZhen這個類:
public class YuanZhen extends BaseObservable {public YuanZhen(String name, int age) {this.name = name;this.age = age;}private String name;private int age;public void setName(String name) {this.name = name;notifyPropertyChanged(BR.name);}public void setAge(int age) {this.age = age;notifyPropertyChanged(BR.age);}@Bindablepublic String getName() {return name;}@Bindablepublic int getAge() {return age;}
}
它繼承了BaseObservable并且在數據發生變化的時候調用了notify方法,通知觀察者去更新UI。
?所以觀察者肯定是更新ui的類,就是我們APT生成的MyDataBingImpl這個類。
中間肯定會有注冊和反注冊觀察者的邏輯。下面我們還是先從使用入手分析:
我們來看下這句代碼:dataBinding.setYuanzhen(yuanZhen) ,它是初始化的代碼,直接點擊是找不到的,它是在APT生成的MyDataBingImpl類里面:
@SuppressWarnings("unchecked")
public class MyDataBingImpl extends MyDataBing  {。。。。public void setYuanzhen(@Nullable com.yuanzhen.lifecycledemo.databing.YuanZhen Yuanzhen) {updateRegistration(0, Yuanzhen);this.mYuanzhen = Yuanzhen;synchronized(this) {mDirtyFlags |= 0x1L;}notifyPropertyChanged(BR.yuanzhen);super.requestRebind();}}
先來看updateRegistration(0, Yuanzhen):
protected boolean updateRegistration(int localFieldId, Observable observable) {return updateRegistration(localFieldId, observable, CREATE_PROPERTY_LISTENER);
}先看看第三個參數:?CREATE_PROPERTY_LISTENER,從名字可以看出,它是創建Property監聽器的,看看它的源碼:
private static final CreateWeakListener CREATE_PROPERTY_LISTENER = new CreateWeakListener() {@Overridepublic WeakListener create(ViewDataBinding viewDataBinding,int localFieldId,ReferenceQueue<ViewDataBinding> referenceQueue) {return new WeakPropertyListener(viewDataBinding, localFieldId, referenceQueue).getListener();}
};果然是創建了一個WeakPropertyListener,看看它的源碼:
private static class WeakPropertyListener extends Observable.OnPropertyChangedCallbackimplements ObservableReference<Observable> {final WeakListener<Observable> mListener;public WeakPropertyListener(ViewDataBinding binder,int localFieldId,ReferenceQueue<ViewDataBinding> referenceQueue) {mListener = new WeakListener<Observable>(binder, localFieldId, this, referenceQueue);}@Overridepublic WeakListener<Observable> getListener() {return mListener;}@Overridepublic void addListener(Observable target) {target.addOnPropertyChangedCallback(this);}@Overridepublic void removeListener(Observable target) {target.removeOnPropertyChangedCallback(this);}@Overridepublic void setLifecycleOwner(LifecycleOwner lifecycleOwner) {}@Overridepublic void onPropertyChanged(Observable sender, int propertyId) {ViewDataBinding binder = mListener.getBinder();if (binder == null) {return;}Observable obj = mListener.getTarget();if (obj != sender) {return; // notification from the wrong object?}binder.handleFieldChange(mListener.mLocalFieldId, sender, propertyId);}
}從源碼大致可以看出,這個監聽器內部創建了WeakListener? ?并且將WeakListenter和?ViewDataBinding,localFieldId進行綁定,并在調用onPropertyChanged方法時,調用ViewDataBinding的handleFieldChange方法,并將WeakListenter的mLocalFieldId傳給后者。
然后看下WeakListener? ?的源碼:
@RestrictTo(RestrictTo.Scope.LIBRARY_GROUP)
class WeakListener<T> extends WeakReference<ViewDataBinding> {private final ObservableReference<T> mObservable;protected final int mLocalFieldId;private T mTarget;public WeakListener(ViewDataBinding binder,int localFieldId,ObservableReference<T> observable,ReferenceQueue<ViewDataBinding> referenceQueue) {super(binder, referenceQueue);mLocalFieldId = localFieldId;mObservable = observable;}public void setLifecycleOwner(LifecycleOwner lifecycleOwner) {mObservable.setLifecycleOwner(lifecycleOwner);}public void setTarget(T object) {unregister();mTarget = object;if (mTarget != null) {mObservable.addListener(mTarget);}}public boolean unregister() {boolean unregistered = false;if (mTarget != null) {mObservable.removeListener(mTarget);unregistered = true;}mTarget = null;return unregistered;}public T getTarget() {return mTarget;}@Nullableprotected ViewDataBinding getBinder() {ViewDataBinding binder = get();if (binder == null) {unregister(); // The binder is dead}return binder;}
}?在WeakListener? ?里面主要是將ViewDataBinding和localFieldId進行了綁定
然后我們再繼續看updateRegistration的源碼:
@RestrictTo(RestrictTo.Scope.LIBRARY_GROUP)
protected boolean updateRegistration(int localFieldId, Object observable,CreateWeakListener listenerCreator) {if (observable == null) {return unregisterFrom(localFieldId);}WeakListener listener = mLocalFieldObservers[localFieldId];if (listener == null) {registerTo(localFieldId, observable, listenerCreator);return true;}if (listener.getTarget() == observable) {return false;//nothing to do, same object}unregisterFrom(localFieldId);registerTo(localFieldId, observable, listenerCreator);return true;
}
mLocalFieldObservers[localFieldId]:看看它是什么時候創建的
private WeakListener[] mLocalFieldObservers;
protected ViewDataBinding(DataBindingComponent bindingComponent, View root, int localFieldCount) {mBindingComponent = bindingComponent;mLocalFieldObservers = new WeakListener[localFieldCount];this.mRoot = root;if (Looper.myLooper() == null) {throw new IllegalStateException("DataBinding must be created in view's UI Thread");}if (USE_CHOREOGRAPHER) {mChoreographer = Choreographer.getInstance();mFrameCallback = new Choreographer.FrameCallback() {@Overridepublic void doFrame(long frameTimeNanos) {mRebindRunnable.run();}};} else {mFrameCallback = null;mUIThreadHandler = new Handler(Looper.myLooper());}
}
原來是在我們上面講的xml代碼解析里面初始化ViewDataBinding的時候創建的:
public MyDataBingImpl(@Nullable androidx.databinding.DataBindingComponent bindingComponent, @NonNull View root) {this(bindingComponent, root, mapBindings(bindingComponent, root, 4, sIncludes, sViewsWithIds));
}
并且數組的大小是4。這個4是怎么來的呢?
繼續返回MyDataBingImpl的setYuanzhen方法往下看:
notifyPropertyChanged(BR.yuanzhen);看一下BR這個類,也是APT生成的:
public class BR {public static final int _all = 0;public static final int age = 1;public static final int name = 2;public static final int yuanzhen = 3;
}
主要就是將屬性用數字定義了。數組的大小 就是這個類的屬性的數量。
再返回頭來看updateRegistration:如果WeakLister不存在,就走registerTo(localFieldId, observable, listenerCreator);方法:
protected void registerTo(int localFieldId, Object observable,CreateWeakListener listenerCreator) {if (observable == null) {return;}WeakListener listener = mLocalFieldObservers[localFieldId];if (listener == null) {listener = listenerCreator.create(this, localFieldId, sReferenceQueue);mLocalFieldObservers[localFieldId] = listener;if (mLifecycleOwner != null) {listener.setLifecycleOwner(mLifecycleOwner);}}listener.setTarget(observable);
}
這個方法主要是通過上面創建的CreateWeakListener來創建WeakListener,并將WeakListener放入mLocalFieldObservers數組中它對應的位置。
看完了初始化綁定關系,再來看看被觀察者BaseObservable:
public class BaseObservable implements Observable {private transient PropertyChangeRegistry mCallbacks;public BaseObservable() {}@Overridepublic void addOnPropertyChangedCallback(@NonNull OnPropertyChangedCallback callback) {synchronized (this) {if (mCallbacks == null) {mCallbacks = new PropertyChangeRegistry();}}mCallbacks.add(callback);}@Overridepublic void removeOnPropertyChangedCallback(@NonNull OnPropertyChangedCallback callback) {synchronized (this) {if (mCallbacks == null) {return;}}mCallbacks.remove(callback);}/*** Notifies listeners that all properties of this instance have changed.*/public void notifyChange() {synchronized (this) {if (mCallbacks == null) {return;}}mCallbacks.notifyCallbacks(this, 0, null);}/*** Notifies listeners that a specific property has changed. The getter for the property* that changes should be marked with {@link Bindable} to generate a field in* <code>BR</code> to be used as <code>fieldId</code>.** @param fieldId The generated BR id for the Bindable field.*/public void notifyPropertyChanged(int fieldId) {synchronized (this) {if (mCallbacks == null) {return;}}mCallbacks.notifyCallbacks(this, fieldId, null);}
}
首先看mCallbacks的源碼:
public class PropertyChangeRegistry extendsCallbackRegistry<Observable.OnPropertyChangedCallback, Observable, Void> {private static final CallbackRegistry.NotifierCallback<Observable.OnPropertyChangedCallback, Observable, Void> NOTIFIER_CALLBACK = new CallbackRegistry.NotifierCallback<Observable.OnPropertyChangedCallback, Observable, Void>() {@Overridepublic void onNotifyCallback(Observable.OnPropertyChangedCallback callback, Observable sender,int arg, Void notUsed) {callback.onPropertyChanged(sender, arg);}};public PropertyChangeRegistry() {super(NOTIFIER_CALLBACK);}/*** Notifies registered callbacks that a specific property has changed.** @param observable The Observable that has changed.* @param propertyId The BR id of the property that has changed or BR._all if the entire*                   Observable has changed.*/public void notifyChange(@NonNull Observable observable, int propertyId) {notifyCallbacks(observable, propertyId, null);}
}
可以看出它主要是用來通知觀察者更新消息的。
我們調用notifyPropertyChanged就會調用PropertyChangeRegistry的notifyChange方法。
然后依次往下調用:
public synchronized void notifyCallbacks(T sender, int arg, A arg2) {mNotificationLevel++;notifyRecurse(sender, arg, arg2);mNotificationLevel--;if (mNotificationLevel == 0) {if (mRemainderRemoved != null) {for (int i = mRemainderRemoved.length - 1; i >= 0; i--) {final long removedBits = mRemainderRemoved[i];if (removedBits != 0) {removeRemovedCallbacks((i + 1) * Long.SIZE, removedBits);mRemainderRemoved[i] = 0;}}}if (mFirst64Removed != 0) {removeRemovedCallbacks(0, mFirst64Removed);mFirst64Removed = 0;}}
}之后notifyRecurse:
private void notifyRecurse(T sender, int arg, A arg2) {final int callbackCount = mCallbacks.size();final int remainderIndex = mRemainderRemoved == null ? -1 : mRemainderRemoved.length - 1;// Now we've got all callbakcs that have no mRemainderRemoved value, so notify the// others.notifyRemainder(sender, arg, arg2, remainderIndex);// notifyRemainder notifies all at maxIndex, so we'd normally start at maxIndex + 1// However, we must also keep track of those in mFirst64Removed, so we add 2 instead:final int startCallbackIndex = (remainderIndex + 2) * Long.SIZE;// The remaining have no bit setnotifyCallbacks(sender, arg, arg2, startCallbackIndex, callbackCount, 0);
}
然后:
private void notifyCallbacks(T sender, int arg, A arg2, final int startIndex,final int endIndex, final long bits) {long bitMask = 1;for (int i = startIndex; i < endIndex; i++) {if ((bits & bitMask) == 0) {mNotifier.onNotifyCallback(mCallbacks.get(i), sender, arg, arg2);}bitMask <<= 1;}
}然后看看NotifierCallback:
public abstract static class NotifierCallback<C, T, A> {/*** Called by CallbackRegistry during* {@link CallbackRegistry#notifyCallbacks(Object, int, Object)}} to notify the callback.** @param callback The callback to notify.* @param sender The opaque sender object.* @param arg The opaque notification parameter.* @param arg2 An opaque argument passed in*        {@link CallbackRegistry#notifyCallbacks}* @see CallbackRegistry#CallbackRegistry(CallbackRegistry.NotifierCallback)*/public abstract void onNotifyCallback(C callback, T sender, int arg, A arg2);
}
之后又回到了PropertyChangeRegistry的回調里面:

public class PropertyChangeRegistry extends CallbackRegistry<Observable.OnPropertyChangedCallback, Observable, Void> {private static final CallbackRegistry.NotifierCallback<Observable.OnPropertyChangedCallback, Observable, Void> NOTIFIER_CALLBACK = new CallbackRegistry.NotifierCallback<Observable.OnPropertyChangedCallback, Observable, Void>() {public void onNotifyCallback(Observable.OnPropertyChangedCallback callback, Observable sender, int arg, Void notUsed) {callback.onPropertyChanged(sender, arg);}};public PropertyChangeRegistry() {super(NOTIFIER_CALLBACK);}public void notifyChange(@NonNull Observable observable, int propertyId) {this.notifyCallbacks(observable, propertyId, (Object)null);}
}?然后繼續往下走onPropertyChanged:
public interface Observable {/*** Adds a callback to listen for changes to the Observable.* @param callback The callback to start listening.*/void addOnPropertyChangedCallback(OnPropertyChangedCallback callback);/*** Removes a callback from those listening for changes.* @param callback The callback that should stop listening.*/void removeOnPropertyChangedCallback(OnPropertyChangedCallback callback);/*** The callback that is called by Observable when an observable property has changed.*/abstract class OnPropertyChangedCallback {/*** Called by an Observable whenever an observable property changes.* @param sender The Observable that is changing.* @param propertyId The BR identifier of the property that has changed. The getter*                   for this property should be annotated with {@link Bindable}.*/public abstract void onPropertyChanged(Observable sender, int propertyId);}
}
?
@Override
public void onPropertyChanged(Observable sender, int propertyId) {ViewDataBinding binder = mListener.getBinder();if (binder == null) {return;}Observable obj = mListener.getTarget();if (obj != sender) {return; // notification from the wrong object?}binder.handleFieldChange(mListener.mLocalFieldId, sender, propertyId);
}繼續requestRebind():
protected void requestRebind() {if (mContainingBinding != null) {mContainingBinding.requestRebind();} else {final LifecycleOwner owner = this.mLifecycleOwner;if (owner != null) {Lifecycle.State state = owner.getLifecycle().getCurrentState();if (!state.isAtLeast(Lifecycle.State.STARTED)) {return; // wait until lifecycle owner is started}}synchronized (this) {if (mPendingRebind) {return;}mPendingRebind = true;}if (USE_CHOREOGRAPHER) {mChoreographer.postFrameCallback(mFrameCallback);} else {mUIThreadHandler.post(mRebindRunnable);}}
}然后看看mRebindRunnable里面:
private final Runnable mRebindRunnable = new Runnable() {@Overridepublic void run() {synchronized (this) {mPendingRebind = false;}processReferenceQueue();if (VERSION.SDK_INT >= VERSION_CODES.KITKAT) {// Nested so that we don't get a lint warning in IntelliJif (!mRoot.isAttachedToWindow()) {// Don't execute the pending bindings until the View// is attached again.mRoot.removeOnAttachStateChangeListener(ROOT_REATTACHED_LISTENER);mRoot.addOnAttachStateChangeListener(ROOT_REATTACHED_LISTENER);return;}}executePendingBindings();}
};之后executePendingBindings:
private void executeBindingsInternal() {if (mIsExecutingPendingBindings) {requestRebind();return;}if (!hasPendingBindings()) {return;}mIsExecutingPendingBindings = true;mRebindHalted = false;if (mRebindCallbacks != null) {mRebindCallbacks.notifyCallbacks(this, REBIND, null);// The onRebindListeners will change mPendingHaltedif (mRebindHalted) {mRebindCallbacks.notifyCallbacks(this, HALTED, null);}}if (!mRebindHalted) {executeBindings();if (mRebindCallbacks != null) {mRebindCallbacks.notifyCallbacks(this, REBOUND, null);}}mIsExecutingPendingBindings = false;
}看看executeBindings():
protected abstract void executeBindings();然后在MyDataBingImpl里面找到它的實現:
@Overrideprotected void executeBindings() {long dirtyFlags = 0;synchronized(this) {dirtyFlags = mDirtyFlags;mDirtyFlags = 0;}java.lang.String yuanzhenName = null;com.yuanzhen.lifecycledemo.databing.YuanZhen yuanzhen = mYuanzhen;int yuanzhenAge = 0;java.lang.String stringValueOfYuanzhenAge = null;if ((dirtyFlags & 0xfL) != 0) {if ((dirtyFlags & 0xbL) != 0) {if (yuanzhen != null) {// read yuanzhen.nameyuanzhenName = yuanzhen.getName();}}if ((dirtyFlags & 0xdL) != 0) {if (yuanzhen != null) {// read yuanzhen.ageyuanzhenAge = yuanzhen.getAge();}// read String.valueOf(yuanzhen.age)stringValueOfYuanzhenAge = java.lang.String.valueOf(yuanzhenAge);}}// batch finishedif ((dirtyFlags & 0xbL) != 0) {// api target 1androidx.databinding.adapters.TextViewBindingAdapter.setText(this.mboundView3, yuanzhenName);androidx.databinding.adapters.TextViewBindingAdapter.setText(this.txtName, yuanzhenName);}if ((dirtyFlags & 0x8L) != 0) {// api target 1androidx.databinding.adapters.TextViewBindingAdapter.setTextWatcher(this.mboundView3, (androidx.databinding.adapters.TextViewBindingAdapter.BeforeTextChanged)null, (androidx.databinding.adapters.TextViewBindingAdapter.OnTextChanged)null, (androidx.databinding.adapters.TextViewBindingAdapter.AfterTextChanged)null, mboundView3androidTextAttrChanged);}if ((dirtyFlags & 0xdL) != 0) {// api target 1androidx.databinding.adapters.TextViewBindingAdapter.setText(this.txtAge, stringValueOfYuanzhenAge);}}看到上面的最終數據的改變也是通過調用setText等方法來實現的。


)
移植LVGL官方的例程(還沒寫完,有問題 排查中))

)


)


----ADC)