
監控生命周期
1.服務器上架到機柜2.基礎設施監控
服務器溫度,風扇轉速 ipmitool命令,只能用在物理機上
存儲的監控(df, fdisk, iotop)
cpu(lscpu, uptime, top, htop, glances)
內存情況(free)
網絡(iftop)3.應用監控
mysql redis
nginx
php-fpm
python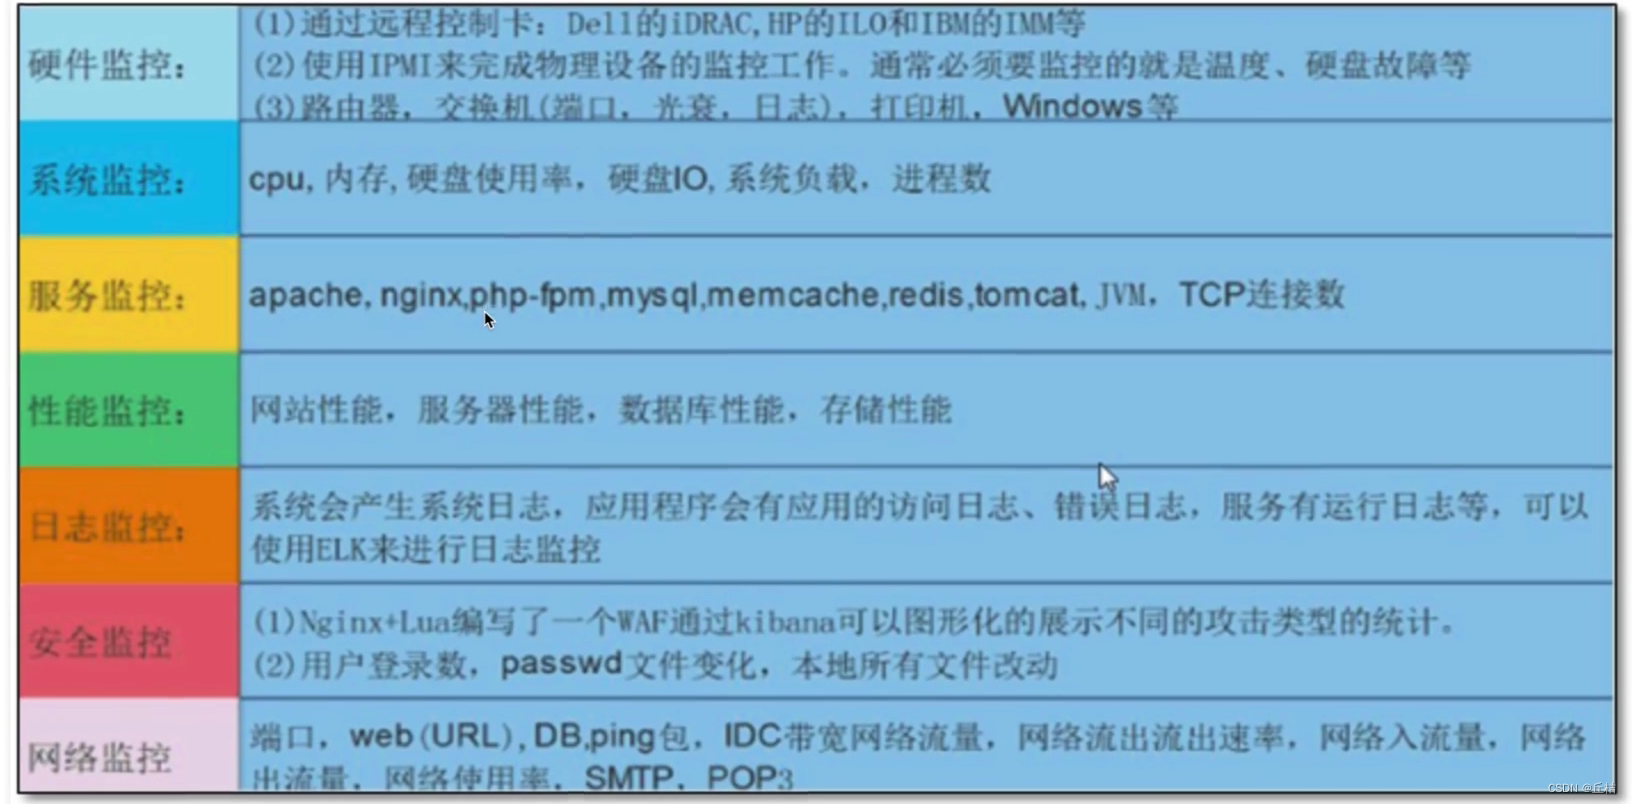
如何選擇監控軟件?
?

zabbix程序組件

安裝Zabbix5.0
zabbix5.0對基礎環境的要求:php最低7.2.0版本
官方文檔:2 Requirements
準備好1臺linux服務器、ip地址、設置
#查看主機名和ip地址
[root@zabbix-server01 ~]# hostname
zabbix-server01
[root@zabbix-server01 ~]# ifconfig ens33 | awk 'NR==2{print$2}'
192.168.xxx.128#關閉防火墻
sed -i 's/SELINUX=enforcing/SELINUX=disabled/' /etc/selinux/config
systemctl disable --now firewalld
reboot#zabbix-server內存盡量給大點,4G為好
?安裝zabbix服務端配置
#獲取zabbix官方源
rpm -Uvh https://mirrors.aliyun.com/zabbix/zabbix/5.0/rhel/7/x86_64/zabbix-release-5.0-1.el7.noarch.rpm#更換zabbix.repo源為阿里的
sed -i 's#http://repo.zabbix.com#https://mirrors.aliyun.com/zabbix#' /etc/yum.repos.d/zabbix.repo#清空緩存,下載zabbix服務器
yum clean all
yum install zabbix-server-mysql zabbix-agent -y#安裝Software Collections(作用:可以讓你在同一個操作系統上,安裝和使用多個版本的軟件,而不會影響整個系統的安裝包)
yum install centos-release-scl -y#修改zabbix-front前端源,把enable=0改成enable=1

#安裝zabbix前端環境,并且是安裝到scl環境下
yum install zabbix-web-mysql-scl zabbix-apache-conf-scl -y#安裝zabbix所需的數據庫,直接用centos7自帶的mariadb
yum install mariadb-server -y#配置數據庫,開機啟動
systemctl enable --now mariadb#初始化數據庫,設置密碼
mysql_secure_installation#添加數據庫用戶,以及zabbix所需的數據庫信息
create database zabbix character set utf8 collate utf8_bin;
create user zabbix@localhost identified by '密碼';
grant all privileges on zabbix.* to zabbix@localhost;
flush privileges;
quit;#使用zabbix-mysql命令,導入數據庫信息
#mysql -u用戶名 -p數據庫名
zcat /usr/share/doc/zabbix-server-mysql*/create.sql.gz | mysql -uzabbix -p zabbix#修改zabbix配置文件
vim /etc/zabbix/zabbix_server.conf
#修改zabbix的php配置文件
vim /etc/opt/rh/rh-php72/php-fpm.d/zabbix.conf
修改內容:php_value[date.timezone] = Asia/Shanghai(這行前面的;號要去掉)#啟動zabbix相關服務器
systemctl restart zabbix-server zabbix-agent httpd rh-php72-php-fpm
systemctl enable zabbix-server zabbix-agent httpd rh-php72-php-fpm
然后在瀏覽器訪問 你的ip地址/zabbix 頁面就可以了,輸入密碼之后一直下一步
安裝成功后,默認賬號是Admin(注意首字母大寫),默認密碼是zabbix

修改zabbix語言
在http://192.168.186.128/zabbix/?的左邊欄的UserSettings中修改
部署zabbix客戶端
agent2默認用10050,也就是zabbix客戶端的端口
- 舊版本的客戶端:zabbix-agent
- go語言新版客戶端:zabbix-agent2
機器環境準備:
#2臺zabbix客戶端
192.168.xxx.129    zabbix-server02
192.168.xxx.130    zabbix-server03#關閉防火墻
systemctl stop firewalld.service#注意時間正確(服務端zabbix-server01和客戶端zabbix-server02/zabbix-server03都要做)
yum install ntpdate -y
ntpdate -u ntp.aliyun.com#時區統一配置(服務端和客戶端都要)
mv /etc/localtime{,.bak}
ln -s /usr/share/zoneinfo/Asia/Shanghai /etc/localtime
具體的zabbix-agent2部署流程
#獲取zabbix官方源
rpm -Uvh https://mirrors.aliyun.com/zabbix/zabbix/5.0/rhel/7/x86_64/zabbix-release-5.0-1.el7.noarch.rpm#更換zabbix.repo源為阿里的
sed -i 's#http://repo.zabbix.com#https://mirrors.aliyun.com/zabbix#' /etc/yum.repos.d/zabbix.repo#安裝agent2
yum install zabbix-agent2 -y#查看配置文件
/etc/zabbix/zabbix_agent2.conf#啟動命令
ls -l /usr/sbin/zabbix_agent2#啟動客戶端
systemctl enable --now zabbix-agent2#檢查端口
netstat -tunlp|grep zabbix#查看systemctl管理的單元文件
cat /lib/systemd/system/zabbix-agent2.service#修改angent2配置文件
#修改文件中的Server和ServerActive的值,改為服務端的ip地址:192.168.xxx.128
#修改文件中的Hostname的值為當前客戶端的主機名:zabbix-server02或者zabbix-server03
vim /etc/zabbix/zabbix_agent2.conf#改了配置文件之后,要重啟angent2
systemctl restart zabbix-agent2
驗證zabbix-agent2的連通性
#在服務端上通過命令,主動獲取數據
yum install zabbix-get -y
zabbix_get -s '192.168.xxx.129' -p 10050 -k 'agent.ping'
解決zabbix-server亂碼問題
訪問http://192.168.xxx.128/zabbix/頁面,點擊 監測 --> 主機 ---> 圖形
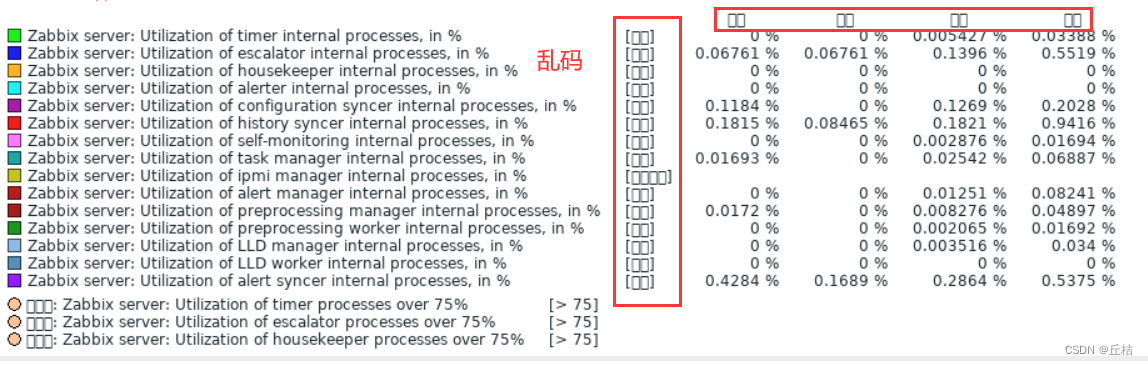
#在服務端安裝字體yum -y install wqy-microhei-fonts#復制字體\cp /usr/share/fonts/wqy-microhei/wqy-microhei.ttc /usr/share/fonts/dejavu/DejaVuSans.ttf
?
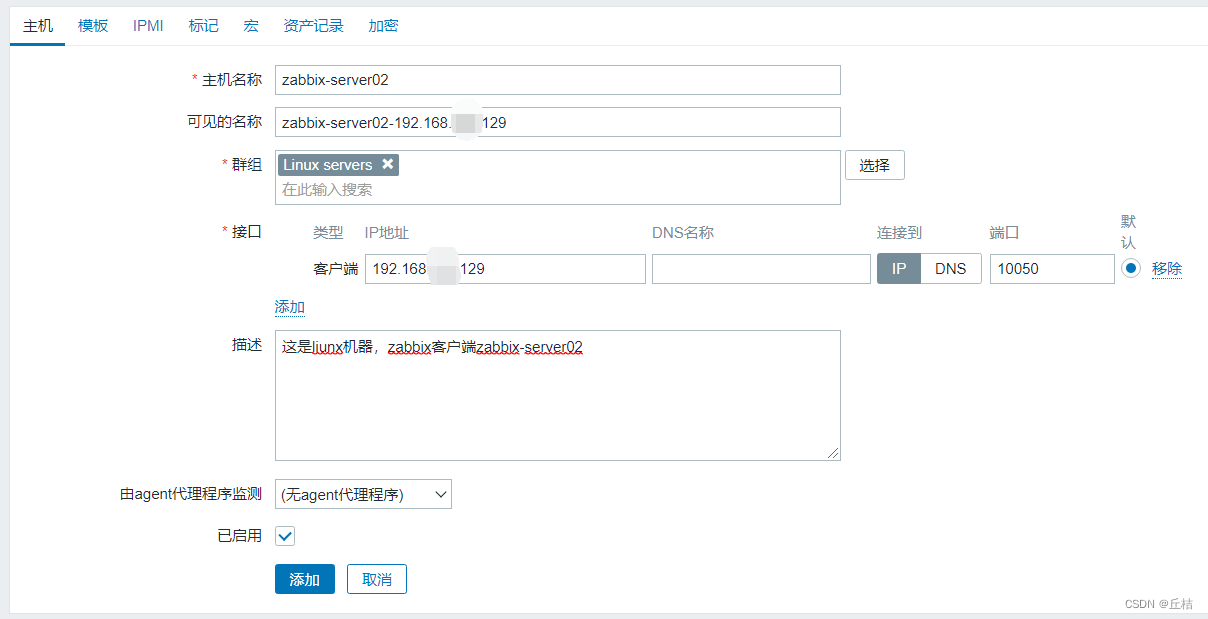
添加zabbix-agent主機
訪問http://192.168.xxx.128/zabbix/頁面,點擊 配置 --> 主機 ---> 創建主機 --> 主機

只出現一次的數字I--異或)


總結)


)

)

