----------------------- 🎈API 相關直達 🎈--------------------------
🚀Gradio:?實用篇 | 關于Gradio快速構建人工智能模型實現界面,你想知道的都在這里-CSDN博客
🚀Streamlit :實用篇 | 一文快速構建人工智能前端展示streamlit應用-CSDN博客
🚀Flask:?實用篇 | 一文學會人工智能中API的Flask編寫(內含模板)-CSDN博客

Streamlit是一個用于機器學習、數據可視化的 Python 框架,它能幾行代碼就構建出一個精美的在線 app 應用。相比于Gradio,能展示更多的功能~
目錄
1.Streamlit的安裝
2.Streamlit的語法
2.1.基本語法
2.2.進階語法
2.2.1.圖片,語音,視頻
2.2.2.進程提示
2.3.高級語法
2.3.1.@st.cache_data
2.3.2.st.cache_resource
3.創建一個簡單的app
實時讀取數據并作圖
4.人工智能深度學習項目Streamlit實例
4.1.實例1:文本生成
4.1.1ChatGLM的交互
4.1.2.OpenAI的交互
4.2.圖像類
4.2.1.圖像分類
4.2.2.圖片生成
4.3.語音類
4.3.1.語音合成
?4.3.2.語音轉文本
參考文獻
官網:Get started - Streamlit Docs
1.Streamlit的安裝
# 安裝
pip install streamlit
pip install streamlit-chat# 測試
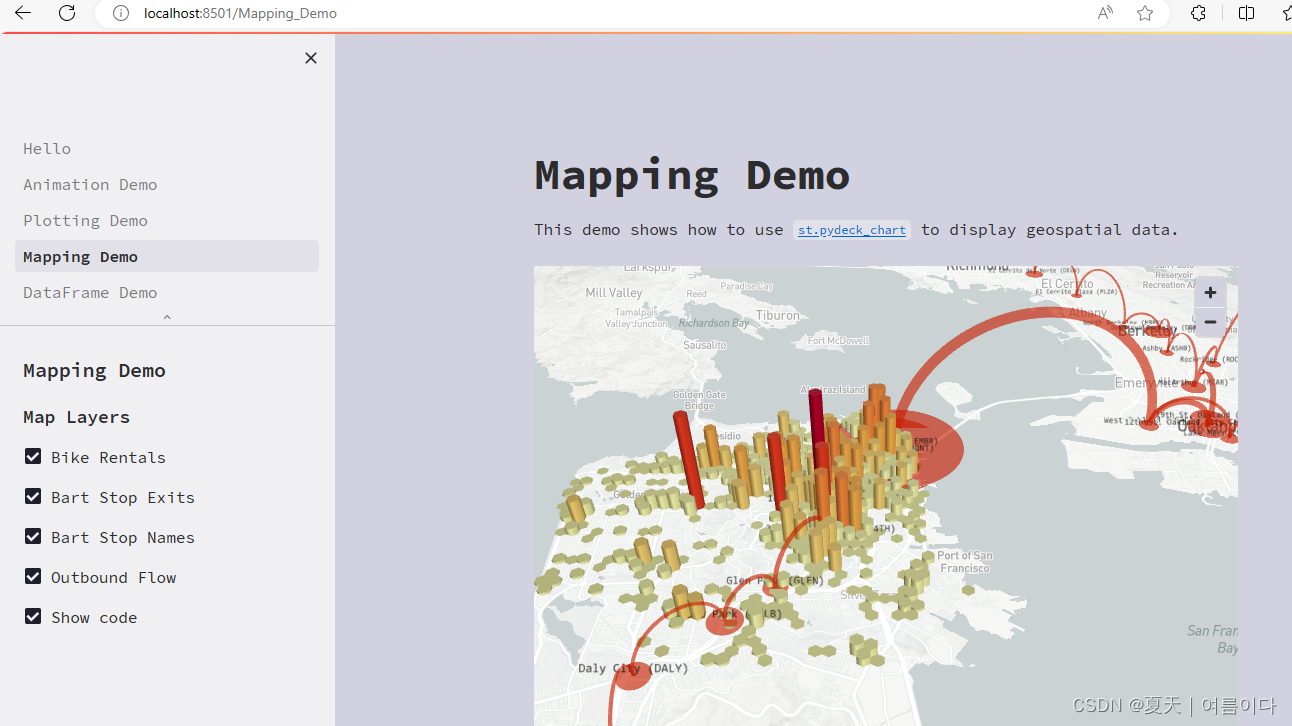
streamlit hello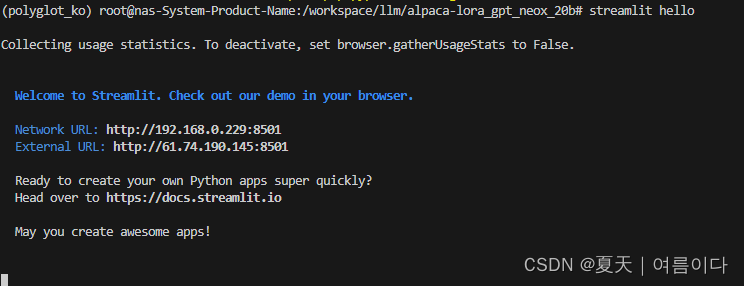
會出現一些案例
2.Streamlit的語法
2.1.基本語法
import streamlit as st
最常用的幾種
- 標題st.title() : st.title("標題")
- 寫入st.write(): st.write("Hello world?")
- 文本st.text():單行文本
- 多行文本框st.text_area():st.text_area("文本框",value=''key=None)
- 滑動條st.slider():st.slider(““)
- 按鈕st.button():st.button(“按鈕“)
- 輸入文本st.text_input():st.text_input(“請求用戶輸入“)
- 單選框組件st.radio()
2.2.進階語法
2.2.1.圖片,語音,視頻
都可以輸入向量值,比特值,加載文件,文件路徑
- st.image()
- st.audio()
- st.video()
2.2.2.進程提示
- st.progress() 顯示進度
- st.spinner()顯示執行狀態
- st.error()顯示錯誤信息
- st.warning - 顯示警告信息
2.3.高級語法
2.3.1.@st.cache_data
當使用 Streamlit 的緩存注釋標記函數時,它會告訴 Streamlit 每當調用函數時,它應該檢查兩件事:
- 用于函數調用的輸入參數
- 函數內部的代碼
2.3.2.st.cache_resource
用于緩存返回全局資源(例如數據庫連接、ML 模型)的函數的裝飾器。
緩存的對象在所有用戶、會話和重新運行之間共享。他們 必須是線程安全的,因為它們可以從多個線程訪問 同時。如果線程安全是一個問題,請考慮改用?st.session_state?來存儲每個會話的資源。
默認情況下,cache_resource函數的所有參數都必須是可哈希的。 名稱以?_?開頭的任何參數都不會進行哈希處理。
3.創建一個簡單的app
實時讀取數據并作圖
import streamlit as st
import pandas as pd
import numpy as npst.title('Uber pickups in NYC')DATA_COLUMN = 'data/time'
DATA_URL = ('https://s3-us-west-2.amazonaws.com/''streamlit-demo-data/uber-raw-data-sep14.csv.gz')# 增加緩存
@st.cache_data
# 下載數據函數
def load_data(nrows):# 讀取csv文件data = pd.rea_csv(data_url,nrows=nrows)# 轉換小寫字母lowercase = lambda x:tr(x).lower()# 將數據重命名 data.rename(lowercase,axis='columns',inplace=True)# 將數據以panda的數據列的形式展示出來data[DATA_COLUMN] = pd.to_datatime(data[DATA_COLUMN])# 返回最終數據return data# 直接打印文本信息
data_load_state = st.text('正在下載')
# 下載一萬條數據中的數據
data = load_data(10000)
# 最后輸出文本顯示
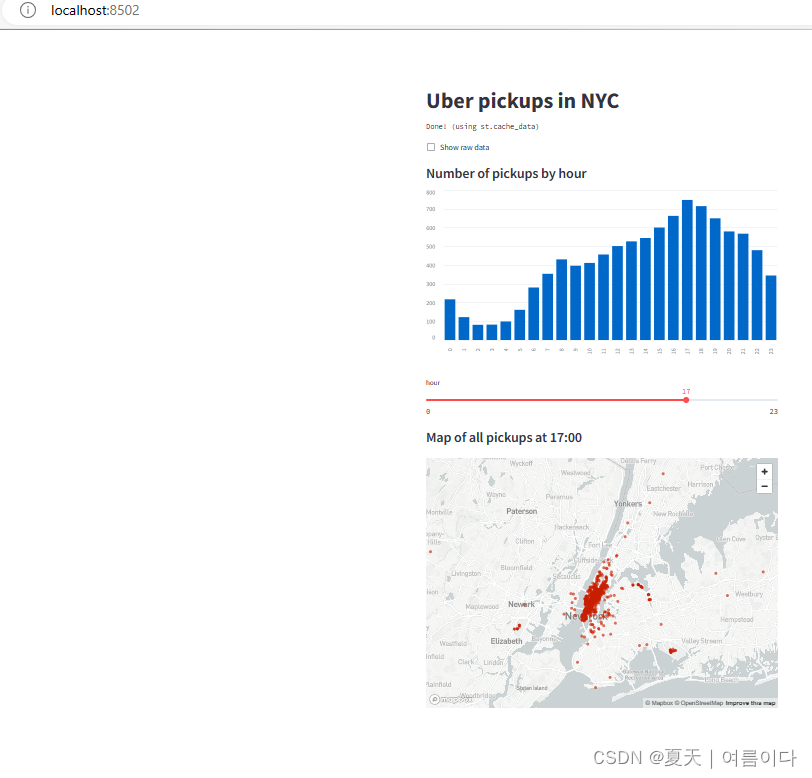
data_load_state.text("完成!(using st.cache_data)")# 檢查原始數據
if st.checkbox('Show raw data'):st.subheader('Raw data')st.write(data)# 繪制直方圖
# 添加一個子標題
st.subheader('Number of pickups by hour')# 使用numpy生成一個直方圖,按小時排列
hist_values = np.histogram(data[DATE_COLUMN].dt.hour, bins=24, range=(0,24))[0]
# 使用Streamlit 的 st.bar_chart() 方法來繪制直方圖
st.bar_chart(hist_values)# 使用滑動塊篩選結果
hour_to_filter = st.slider('hour', 0, 23, 17)
# 實時更新
filtered_data = data[data[DATE_COLUMN].dt.hour == hour_to_filter]# 為地圖添加一個副標題
st.subheader('Map of all pickups at %s:00' % hour_to_filter)
# 使用st.map()函數繪制數據
st.map(filtered_data)
運行
streamlit run demo.py
4.人工智能深度學習項目Streamlit實例
4.1.實例1:文本生成
4.1.1ChatGLM的交互
from transformers import AutoModel, AutoTokenizer
import streamlit as st
from streamlit_chat import messagest.set_page_config(page_title="ChatGLM-6b 演示",page_icon=":robot:"
)@st.cache_resource
def get_model():tokenizer = AutoTokenizer.from_pretrained("THUDM/chatglm-6b", trust_remote_code=True)model = AutoModel.from_pretrained("THUDM/chatglm-6b", trust_remote_code=True).half().cuda()model = model.eval()return tokenizer, modelMAX_TURNS = 20
MAX_BOXES = MAX_TURNS * 2def predict(input, max_length, top_p, temperature, history=None):tokenizer, model = get_model()if history is None:history = []with container:if len(history) > 0:if len(history)>MAX_BOXES:history = history[-MAX_TURNS:]for i, (query, response) in enumerate(history):message(query, avatar_style="big-smile", key=str(i) + "_user")message(response, avatar_style="bottts", key=str(i))message(input, avatar_style="big-smile", key=str(len(history)) + "_user")st.write("AI正在回復:")with st.empty():for response, history in model.stream_chat(tokenizer, input, history, max_length=max_length, top_p=top_p,temperature=temperature):query, response = history[-1]st.write(response)return historycontainer = st.container()# create a prompt text for the text generation
prompt_text = st.text_area(label="用戶命令輸入",height = 100,placeholder="請在這兒輸入您的命令")max_length = st.sidebar.slider('max_length', 0, 4096, 2048, step=1
)
top_p = st.sidebar.slider('top_p', 0.0, 1.0, 0.6, step=0.01
)
temperature = st.sidebar.slider('temperature', 0.0, 1.0, 0.95, step=0.01
)if 'state' not in st.session_state:st.session_state['state'] = []if st.button("發送", key="predict"):with st.spinner("AI正在思考,請稍等........"):# text generationst.session_state["state"] = predict(prompt_text, max_length, top_p, temperature, st.session_state["state"])
4.1.2.OpenAI的交互
from openai import OpenAI
import streamlit as stwith st.sidebar:openai_api_key = st.text_input("OpenAI API Key", key="chatbot_api_key", type="password")"[Get an OpenAI API key](https://platform.openai.com/account/api-keys)""[View the source code](https://github.com/streamlit/llm-examples/blob/main/Chatbot.py)""[](https://codespaces.new/streamlit/llm-examples?quickstart=1)"st.title("💬 Chatbot")
st.caption("🚀 A streamlit chatbot powered by OpenAI LLM")
if "messages" not in st.session_state:st.session_state["messages"] = [{"role": "assistant", "content": "How can I help you?"}]for msg in st.session_state.messages:st.chat_message(msg["role"]).write(msg["content"])if prompt := st.chat_input():if not openai_api_key:st.info("Please add your OpenAI API key to continue.")st.stop()client = OpenAI(api_key=openai_api_key)st.session_state.messages.append({"role": "user", "content": prompt})st.chat_message("user").write(prompt)response = client.chat.completions.create(model="gpt-3.5-turbo", messages=st.session_state.messages)msg = response.choices[0].message.contentst.session_state.messages.append({"role": "assistant", "content": msg})st.chat_message("assistant").write(msg)4.2.圖像類
4.2.1.圖像分類
import streamlit as stst.markdown('<h1 style="color:black;">Vgg 19 Image classification model</h1>', unsafe_allow_html=True)
st.markdown('<h2 style="color:gray;">The image classification model classifies image into following categories:</h2>', unsafe_allow_html=True)
st.markdown('<h3 style="color:gray;"> street,  buildings, forest, sea, mountain, glacier</h3>', unsafe_allow_html=True)# 背景圖片background image to streamlit@st.cache(allow_output_mutation=True)
# 以base64的方式傳輸文件
def get_base64_of_bin_file(bin_file):with open(bin_file, 'rb') as f:data = f.read()return base64.b64encode(data).decode()
#設置背景圖片,顏色等
def set_png_as_page_bg(png_file):bin_str = get_base64_of_bin_file(png_file) page_bg_img = '''<style>.stApp {background-image: url("data:image/png;base64,%s");background-size: cover;background-repeat: no-repeat;background-attachment: scroll; # doesn't work}</style>''' % bin_strst.markdown(page_bg_img, unsafe_allow_html=True)returnset_png_as_page_bg('/content/background.webp')# 上傳png/jpg的照片
upload= st.file_uploader('Insert image for classification', type=['png','jpg'])
c1, c2= st.columns(2)
if upload is not None:im= Image.open(upload)img= np.asarray(im)image= cv2.resize(img,(224, 224))img= preprocess_input(image)img= np.expand_dims(img, 0)c1.header('Input Image')c1.image(im)c1.write(img.shape)# 下載預訓練模型# 輸入尺寸input_shape = (224, 224, 3)# 定義優化器optim_1 = Adam(learning_rate=0.0001)# 分類數n_classes=6# 定義模型vgg_model = model(input_shape, n_classes, optim_1, fine_tune=2)# 下載權重vgg_model.load_weights('/content/drive/MyDrive/vgg/tune_model19.weights.best.hdf5')#預測vgg_preds = vgg_model.predict(img)vgg_pred_classes = np.argmax(vgg_preds, axis=1)c2.header('Output')c2.subheader('Predicted class :')c2.write(classes[vgg_pred_classes[0]] )
4.2.2.圖片生成
import streamlit as st
from dotenv import load_dotenv
import os
import openai
from diffusers import StableDiffusionPipeline
import torchload_dotenv()
openai.api_key = os.getenv("OPENAI_API_KEY")#function to generate AI based images using OpenAI Dall-E
def generate_images_using_openai(text):response = openai.Image.create(prompt= text, n=1, size="512x512")image_url = response['data'][0]['url']return image_url#function to generate AI based images using Huggingface Diffusers
def generate_images_using_huggingface_diffusers(text):pipe = StableDiffusionPipeline.from_pretrained("runwayml/stable-diffusion-v1-5", torch_dtype=torch.float16)pipe = pipe.to("cuda")prompt = textimage = pipe(prompt).images[0] return image#Streamlit Code
choice = st.sidebar.selectbox("Select your choice", ["Home", "DALL-E", "Huggingface Diffusers"])if choice == "Home":st.title("AI Image Generation App")with st.expander("About the App"):st.write("This is a simple image generation app that uses AI to generates images from text prompt.")elif choice == "DALL-E":st.subheader("Image generation using Open AI's DALL-E")input_prompt = st.text_input("Enter your text prompt")if input_prompt is not None:if st.button("Generate Image"):image_url = generate_images_using_openai(input_prompt)st.image(image_url, caption="Generated by DALL-E")elif choice == "Huggingface Diffusers":st.subheader("Image generation using Huggingface Diffusers")input_prompt = st.text_input("Enter your text prompt")if input_prompt is not None:if st.button("Generate Image"):image_output = generate_images_using_huggingface_diffusers(input_prompt)st.info("Generating image.....")st.success("Image Generated Successfully")st.image(image_output, caption="Generated by Huggingface Diffusers")
4.3.語音類
4.3.1.語音合成
import torch
import streamlit as st
# 這里使用coqui-tts,直接pip install tts就可以
from TTS.api import TTS
import tempfile
import osdevice = "cuda" if torch.cuda.is_available() else "cpu"
# 模型選擇
model_name = 'tts_models/en/jenny/jenny'
tts = TTS(model_name).to(device)st.title('Coqui TTS')# 輸入文本
text_to_speak = st.text_area('Entire article text here:', '')# 點擊按鈕監聽
if st.button('Listen'):if text_to_speak:# temp path needed for audio to listen to# 定義合成語音文件名稱temp_audio_path = './temp_audio.wav'# 使用tts庫中的tts_to_file函數tts.tts_to_file(text=text_to_speak, file_path=temp_audio_path)#輸出語音st.audio(temp_audio_path, format='audio/wav')os.unlink(temp_audio_path)
?4.3.2.語音轉文本
import logging
import logging.handlers
import queue
import threading
import time
import urllib.request
import os
from collections import deque
from pathlib import Path
from typing import Listimport av
import numpy as np
import pydub
import streamlit as st
from twilio.rest import Clientfrom streamlit_webrtc import WebRtcMode, webrtc_streamerHERE = Path(__file__).parentlogger = logging.getLogger(__name__)# This code is based on https://github.com/streamlit/demo-self-driving/blob/230245391f2dda0cb464008195a470751c01770b/streamlit_app.py#L48  # noqa: E501
def download_file(url, download_to: Path, expected_size=None):# Don't download the file twice.# (If possible, verify the download using the file length.)if download_to.exists():if expected_size:if download_to.stat().st_size == expected_size:returnelse:st.info(f"{url} is already downloaded.")if not st.button("Download again?"):returndownload_to.parent.mkdir(parents=True, exist_ok=True)# These are handles to two visual elements to animate.weights_warning, progress_bar = None, Nonetry:weights_warning = st.warning("Downloading %s..." % url)progress_bar = st.progress(0)with open(download_to, "wb") as output_file:with urllib.request.urlopen(url) as response:length = int(response.info()["Content-Length"])counter = 0.0MEGABYTES = 2.0 ** 20.0while True:data = response.read(8192)if not data:breakcounter += len(data)output_file.write(data)# We perform animation by overwriting the elements.weights_warning.warning("Downloading %s... (%6.2f/%6.2f MB)"% (url, counter / MEGABYTES, length / MEGABYTES))progress_bar.progress(min(counter / length, 1.0))# Finally, we remove these visual elements by calling .empty().finally:if weights_warning is not None:weights_warning.empty()if progress_bar is not None:progress_bar.empty()# This code is based on https://github.com/whitphx/streamlit-webrtc/blob/c1fe3c783c9e8042ce0c95d789e833233fd82e74/sample_utils/turn.py
@st.cache_data  # type: ignore
def get_ice_servers():"""Use Twilio's TURN server because Streamlit Community Cloud has changedits infrastructure and WebRTC connection cannot be established without TURN server now.  # noqa: E501We considered Open Relay Project (https://www.metered.ca/tools/openrelay/) too,but it is not stable and hardly works as some people reported like https://github.com/aiortc/aiortc/issues/832#issuecomment-1482420656  # noqa: E501See https://github.com/whitphx/streamlit-webrtc/issues/1213"""# Ref: https://www.twilio.com/docs/stun-turn/apitry:account_sid = os.environ["TWILIO_ACCOUNT_SID"]auth_token = os.environ["TWILIO_AUTH_TOKEN"]except KeyError:logger.warning("Twilio credentials are not set. Fallback to a free STUN server from Google."  # noqa: E501)return [{"urls": ["stun:stun.l.google.com:19302"]}]client = Client(account_sid, auth_token)token = client.tokens.create()return token.ice_serversdef main():st.header("Real Time Speech-to-Text")st.markdown("""
This demo app is using [DeepSpeech](https://github.com/mozilla/DeepSpeech),
an open speech-to-text engine.A pre-trained model released with
[v0.9.3](https://github.com/mozilla/DeepSpeech/releases/tag/v0.9.3),
trained on American English is being served.
""")# https://github.com/mozilla/DeepSpeech/releases/tag/v0.9.3MODEL_URL = "https://github.com/mozilla/DeepSpeech/releases/download/v0.9.3/deepspeech-0.9.3-models.pbmm"  # noqaLANG_MODEL_URL = "https://github.com/mozilla/DeepSpeech/releases/download/v0.9.3/deepspeech-0.9.3-models.scorer"  # noqaMODEL_LOCAL_PATH = HERE / "models/deepspeech-0.9.3-models.pbmm"LANG_MODEL_LOCAL_PATH = HERE / "models/deepspeech-0.9.3-models.scorer"download_file(MODEL_URL, MODEL_LOCAL_PATH, expected_size=188915987)download_file(LANG_MODEL_URL, LANG_MODEL_LOCAL_PATH, expected_size=953363776)lm_alpha = 0.931289039105002lm_beta = 1.1834137581510284beam = 100sound_only_page = "Sound only (sendonly)"with_video_page = "With video (sendrecv)"app_mode = st.selectbox("Choose the app mode", [sound_only_page, with_video_page])if app_mode == sound_only_page:app_sst(str(MODEL_LOCAL_PATH), str(LANG_MODEL_LOCAL_PATH), lm_alpha, lm_beta, beam)elif app_mode == with_video_page:app_sst_with_video(str(MODEL_LOCAL_PATH), str(LANG_MODEL_LOCAL_PATH), lm_alpha, lm_beta, beam)def app_sst(model_path: str, lm_path: str, lm_alpha: float, lm_beta: float, beam: int):webrtc_ctx = webrtc_streamer(key="speech-to-text",mode=WebRtcMode.SENDONLY,audio_receiver_size=1024,rtc_configuration={"iceServers": get_ice_servers()},media_stream_constraints={"video": False, "audio": True},)status_indicator = st.empty()if not webrtc_ctx.state.playing:returnstatus_indicator.write("Loading...")text_output = st.empty()stream = Nonewhile True:if webrtc_ctx.audio_receiver:if stream is None:from deepspeech import Modelmodel = Model(model_path)model.enableExternalScorer(lm_path)model.setScorerAlphaBeta(lm_alpha, lm_beta)model.setBeamWidth(beam)stream = model.createStream()status_indicator.write("Model loaded.")sound_chunk = pydub.AudioSegment.empty()try:audio_frames = webrtc_ctx.audio_receiver.get_frames(timeout=1)except queue.Empty:time.sleep(0.1)status_indicator.write("No frame arrived.")continuestatus_indicator.write("Running. Say something!")for audio_frame in audio_frames:sound = pydub.AudioSegment(data=audio_frame.to_ndarray().tobytes(),sample_width=audio_frame.format.bytes,frame_rate=audio_frame.sample_rate,channels=len(audio_frame.layout.channels),)sound_chunk += soundif len(sound_chunk) > 0:sound_chunk = sound_chunk.set_channels(1).set_frame_rate(model.sampleRate())buffer = np.array(sound_chunk.get_array_of_samples())stream.feedAudioContent(buffer)text = stream.intermediateDecode()text_output.markdown(f"**Text:** {text}")else:status_indicator.write("AudioReciver is not set. Abort.")breakdef app_sst_with_video(model_path: str, lm_path: str, lm_alpha: float, lm_beta: float, beam: int
):frames_deque_lock = threading.Lock()frames_deque: deque = deque([])async def queued_audio_frames_callback(frames: List[av.AudioFrame],) -> av.AudioFrame:with frames_deque_lock:frames_deque.extend(frames)# Return empty frames to be silent.new_frames = []for frame in frames:input_array = frame.to_ndarray()new_frame = av.AudioFrame.from_ndarray(np.zeros(input_array.shape, dtype=input_array.dtype),layout=frame.layout.name,)new_frame.sample_rate = frame.sample_ratenew_frames.append(new_frame)return new_frameswebrtc_ctx = webrtc_streamer(key="speech-to-text-w-video",mode=WebRtcMode.SENDRECV,queued_audio_frames_callback=queued_audio_frames_callback,rtc_configuration={"iceServers": get_ice_servers()},media_stream_constraints={"video": True, "audio": True},)status_indicator = st.empty()if not webrtc_ctx.state.playing:returnstatus_indicator.write("Loading...")text_output = st.empty()stream = Nonewhile True:if webrtc_ctx.state.playing:if stream is None:from deepspeech import Modelmodel = Model(model_path)model.enableExternalScorer(lm_path)model.setScorerAlphaBeta(lm_alpha, lm_beta)model.setBeamWidth(beam)stream = model.createStream()status_indicator.write("Model loaded.")sound_chunk = pydub.AudioSegment.empty()audio_frames = []with frames_deque_lock:while len(frames_deque) > 0:frame = frames_deque.popleft()audio_frames.append(frame)if len(audio_frames) == 0:time.sleep(0.1)status_indicator.write("No frame arrived.")continuestatus_indicator.write("Running. Say something!")for audio_frame in audio_frames:sound = pydub.AudioSegment(data=audio_frame.to_ndarray().tobytes(),sample_width=audio_frame.format.bytes,frame_rate=audio_frame.sample_rate,channels=len(audio_frame.layout.channels),)sound_chunk += soundif len(sound_chunk) > 0:sound_chunk = sound_chunk.set_channels(1).set_frame_rate(model.sampleRate())buffer = np.array(sound_chunk.get_array_of_samples())stream.feedAudioContent(buffer)text = stream.intermediateDecode()text_output.markdown(f"**Text:** {text}")else:status_indicator.write("Stopped.")breakif __name__ == "__main__":import osDEBUG = os.environ.get("DEBUG", "false").lower() not in ["false", "no", "0"]logging.basicConfig(format="[%(asctime)s] %(levelname)7s from %(name)s in %(pathname)s:%(lineno)d: ""%(message)s",force=True,)logger.setLevel(level=logging.DEBUG if DEBUG else logging.INFO)st_webrtc_logger = logging.getLogger("streamlit_webrtc")st_webrtc_logger.setLevel(logging.DEBUG)fsevents_logger = logging.getLogger("fsevents")fsevents_logger.setLevel(logging.WARNING)main()
參考文獻
【1】API Reference - Streamlit Docs
【2】andfanilo/streamlit-lottie: Streamlit component to render Lottie animations (github.com)turner-anderson/streamlit-cropper: A simple image cropper for Streamlit (github.com)andfanilo/streamlit-lottie: Streamlit component to render Lottie animations (github.com)?
【3】awetomate/text-to-speech-streamlit: Text-to-Speech solution using Google's Cloud TTS API and a Streamlit front end (github.com)?【4】Using streamlit for an STT / TTS model demo? - 🧩 Streamlit Components - Streamlit
【5】AI-App/Streamlit-TTS (github.com)
【6】Building a Voice Assistant using ChatGPT API | Vahid's ML-Blog (vahidmirjalili.com)?
【7】streamlit/llm-examples: Streamlit LLM app examples for getting started (github.com)?
【8】whitphx/streamlit-stt-app: Real time web based Speech-to-Text app with Streamlit (github.com)


)
)

)

)

