目錄
- 前言
- 訓練腳本(train_mobilenetv2.py)
- 自定義數據集(my_dataset.py)
前言
Faster R-CNN 是經典的two-stage目標檢測模型, 原理上并不是很復雜,也就是RPN+Fast R-CNN,但是在代碼的實現上確實有很多細節,并且源碼也非常的多,所以看源碼的時候也會遇到某些問題,網上完完整整從頭到尾講解的也很少,下面我將會為小伙伴們講解嗶哩嗶哩上一個up主簡單修改后的fast r-cnn源碼,大家可以去看他的視頻(源碼解析),原理以及源代碼真的非常詳細易懂,大家也可以去學習,爆贊!!我主要是記錄有些自己認為不太明白up主又沒有細講的部分(本人比較笨哈哈)以及梳理整個代碼流程,由于很多源碼還有debug的圖片我都寫在博客里,可能看起來會比較多,但是大家一定盡量看看,真的保姆級講解,大家跟著我走一定能弄懂的!!
下面奉上源碼鏈接(faster r-cnn源碼)
訓練腳本(train_mobilenetv2.py)
大家看源碼之前,可以先看文件里面的README.md文件,看一下需要的配置環境以及如何使用有些指令
源碼有兩個三個訓練腳本,我們不用管多GPU訓練的腳本,以train_mobilenetv2.py為例,這個是以mobilenetv2為backbone,另一個是resnet50+FPN(特征金字塔)為backbone的腳本,大差不大,只是結構不同,參數量不同,話不多說,我們直接看main()函數
def main():device = torch.device("cuda:0" if torch.cuda.is_available() else "cpu")print("Using {} device training.".format(device.type))# 用來保存coco_info的文件results_file = "results{}.txt".format(datetime.datetime.now().strftime("%Y%m%d-%H%M%S"))# 檢查保存權重文件夾是否存在,不存在則創建if not os.path.exists("save_weights"):os.makedirs("save_weights")data_transform = {"train": transforms.Compose([transforms.ToTensor(),transforms.RandomHorizontalFlip(0.5)]),"val": transforms.Compose([transforms.ToTensor()])}VOC_root = r"F:\AI\deep-learning-for-image-processing-master\pytorch_object_detection\faster_rcnn" # VOCdevkitaspect_ratio_group_factor = 3batch_size = 8# check voc rootif os.path.exists(os.path.join(VOC_root, "VOCdevkit")) is False:raise FileNotFoundError("VOCdevkit dose not in path:'{}'.".format(VOC_root))# load train data set# VOCdevkit -> VOC2012 -> ImageSets -> Main -> train.txttrain_dataset = VOCDataSet(VOC_root, "2012", data_transform["train"], "train.txt")train_sampler = None# 是否按圖片相似高寬比采樣圖片組成batch# 使用的話能夠減小訓練時所需GPU顯存,默認使用if aspect_ratio_group_factor >= 0:train_sampler = torch.utils.data.RandomSampler(train_dataset)# 統計所有圖像高寬比例在bins區間中的位置索引group_ids = create_aspect_ratio_groups(train_dataset, k=aspect_ratio_group_factor)# 每個batch圖片從同一高寬比例區間中取train_batch_sampler = GroupedBatchSampler(train_sampler, group_ids, batch_size)nw = min([os.cpu_count(), batch_size if batch_size > 1 else 0, 8]) # number of workers# nw = 0print('Using %g dataloader workers' % nw)# 注意這里的collate_fn是自定義的,因為讀取的數據包括image和targets,不能直接使用默認的方法合成batchif train_sampler:# 如果按照圖片高寬比采樣圖片,dataloader中需要使用batch_samplertrain_data_loader = torch.utils.data.DataLoader(train_dataset,batch_sampler=train_batch_sampler,pin_memory=True,num_workers=nw,collate_fn=train_dataset.collate_fn)else:train_data_loader = torch.utils.data.DataLoader(train_dataset,batch_size=batch_size,shuffle=True,pin_memory=True,num_workers=nw,collate_fn=train_dataset.collate_fn)# load validation data set# VOCdevkit -> VOC2012 -> ImageSets -> Main -> val.txtval_dataset = VOCDataSet(VOC_root, "2012", data_transform["val"], "val.txt")val_data_loader = torch.utils.data.DataLoader(val_dataset,batch_size=1,shuffle=False,pin_memory=True,num_workers=nw,collate_fn=val_dataset.collate_fn)# create model num_classes equal background + 20 classesmodel = create_model(num_classes=21)# print(model)model.to(device)train_loss = []learning_rate = []val_map = []# # # # # # # # # # # # # # # # # # # # # # # # # # # # # # # ## first frozen backbone and train 5 epochs ## 首先凍結前置特征提取網絡權重(backbone),訓練rpn以及最終預測網絡部分 ## # # # # # # # # # # # # # # # # # # # # # # # # # # # # # # #for param in model.backbone.parameters():param.requires_grad = False# define optimizerparams = [p for p in model.parameters() if p.requires_grad]optimizer = torch.optim.SGD(params, lr=0.005,momentum=0.9, weight_decay=0.0005)init_epochs = 5for epoch in range(init_epochs):# train for one epoch, printing every 10 iterationsmean_loss, lr = utils.train_one_epoch(model, optimizer, train_data_loader,device, epoch, print_freq=50, warmup=True)train_loss.append(mean_loss.item())learning_rate.append(lr)# evaluate on the test datasetcoco_info = utils.evaluate(model, val_data_loader, device=device)# write into txtwith open(results_file, "a") as f:# 寫入的數據包括coco指標還有loss和learning rateresult_info = [str(round(i, 4)) for i in coco_info + [mean_loss.item()]] + [str(round(lr, 6))]txt = "epoch:{} {}".format(epoch, ' '.join(result_info))f.write(txt + "\n")val_map.append(coco_info[1]) # pascal mAPtorch.save(model.state_dict(), "./save_weights/pretrain.pth")# # # # # # # # # # # # # # # # # # # # # # # # # # # ## second unfrozen backbone and train all network ## 解凍前置特征提取網絡權重(backbone),接著訓練整個網絡權重 ## # # # # # # # # # # # # # # # # # # # # # # # # # # ## 凍結backbone部分底層權重for name, parameter in model.backbone.named_parameters():split_name = name.split(".")[0]if split_name in ["0", "1", "2", "3"]:parameter.requires_grad = Falseelse:parameter.requires_grad = True# define optimizerparams = [p for p in model.parameters() if p.requires_grad]optimizer = torch.optim.SGD(params, lr=0.005,momentum=0.9, weight_decay=0.0005)# learning rate schedulerlr_scheduler = torch.optim.lr_scheduler.StepLR(optimizer,step_size=3,gamma=0.33)num_epochs = 20for epoch in range(init_epochs, num_epochs+init_epochs, 1):# train for one epoch, printing every 50 iterationsmean_loss, lr = utils.train_one_epoch(model, optimizer, train_data_loader,device, epoch, print_freq=50, warmup=True)train_loss.append(mean_loss.item())learning_rate.append(lr)# update the learning ratelr_scheduler.step()# evaluate on the test datasetcoco_info = utils.evaluate(model, val_data_loader, device=device)# write into txtwith open(results_file, "a") as f:# 寫入的數據包括coco指標還有loss和learning rateresult_info = [str(round(i, 4)) for i in coco_info + [mean_loss.item()]] + [str(round(lr, 6))]txt = "epoch:{} {}".format(epoch, ' '.join(result_info))f.write(txt + "\n")val_map.append(coco_info[1]) # pascal mAP# save weights# 僅保存最后5個epoch的權重if epoch in range(num_epochs+init_epochs)[-5:]:save_files = {'model': model.state_dict(),'optimizer': optimizer.state_dict(),'lr_scheduler': lr_scheduler.state_dict(),'epoch': epoch}torch.save(save_files, "./save_weights/mobile-model-{}.pth".format(epoch))# plot loss and lr curveif len(train_loss) != 0 and len(learning_rate) != 0:from plot_curve import plot_loss_and_lrplot_loss_and_lr(train_loss, learning_rate)# plot mAP curveif len(val_map) != 0:from plot_curve import plot_mapplot_map(val_map)
代碼可能看起來會有點多,數據集用的是PASCAL VOC2012,了解數據集的目錄和結構之后,第一個要講解的是圖像增強部分(data_transform),這部分的圖像增強方法是自己封裝的,我們知道目標檢測之前會事先把數據集的每一張圖片的ground truth(真實框)通過人工標注出來,但是RandomHorizontalFlip(隨機水平翻轉)這個操作的時候,對應的真實框(左上x,左上y,右下x,右下y)的坐標也會變,所以需要自己封裝進行處理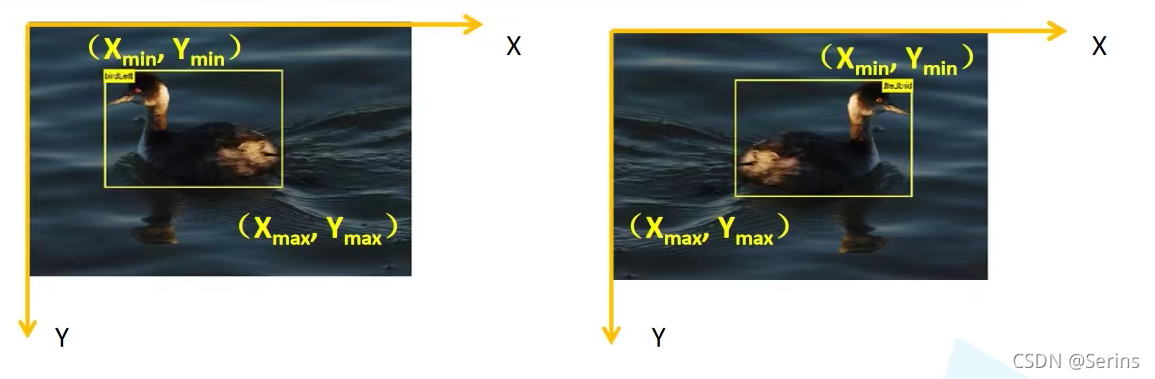
class RandomHorizontalFlip(object):"""隨機水平翻轉圖像以及bboxes"""def __init__(self, prob=0.5):self.prob = probdef __call__(self, image, target):if random.random() < self.prob:height, width = image.shape[-2:]image = image.flip(-1) # 水平翻轉圖片bbox = target["boxes"]# bbox: xmin, ymin, xmax, ymaxbbox[:, [0, 2]] = width - bbox[:, [2, 0]] # 翻轉對應bbox坐標信息target["boxes"] = bboxreturn image, target
prob就是隨機水平翻轉的概率,bbox就是保存的所有真實框的坐標信息,一張圖片可能不止一個目標,所以bbox應該是[N, 4]的形狀, 通過bbox[:, [0, 2]] = width - bbox[:, [2, 0]]就實現了圖像翻轉的同時坐標也改變了,注意:上圖右邊翻轉后的坐標位置應該還是對應左上和右下,圖上標的右上和左下是不對的,其他的圖像增強方式都很簡單,看看就明白了,關于自定義數據集VOCDataSet類,后面會單獨將,將數據集加載到設備內存后,DataLoader中有個collate_fn參數,這是一個將圖片打包的操作,很簡單:
def collate_fn(batch):return tuple(zip(*batch))
比如說我們一個batch設置8張圖片,debug到這個地方可以看看
這就是傳入的八張圖片,*batch代表取列表里面的所有元素,zip進行打包并轉成元組,加載數據后需要實例化模型,Pascal VOC2012只有20個類別,傳入21是因為還多了一個背景
def create_model(num_classes):# https://download.pytorch.org/models/vgg16-397923af.pth# 如果使用vgg16的話就下載對應預訓練權重并取消下面注釋,接著把mobilenetv2模型對應的兩行代碼注釋掉# vgg_feature = vgg(model_name="vgg16", weights_path="./backbone/vgg16.pth").features# backbone = torch.nn.Sequential(*list(vgg_feature._modules.values())[:-1]) # 刪除features中最后一個Maxpool層# backbone.out_channels = 512# https://download.pytorch.org/models/mobilenet_v2-b0353104.pthbackbone = MobileNetV2(weights_path="./backbone/mobilenet_v2.pth").featuresbackbone.out_channels = 1280 # 設置對應backbone輸出特征矩陣的channelsanchor_generator = AnchorsGenerator(sizes=((32, 64, 128, 256, 512),),aspect_ratios=((0.5, 1.0, 2.0),))roi_pooler = torchvision.ops.MultiScaleRoIAlign(featmap_names=['0'], # 在哪些特征層上進行roi poolingoutput_size=[7, 7], # roi_pooling輸出特征矩陣尺寸sampling_ratio=2) # 采樣率model = FasterRCNN(backbone=backbone,num_classes=num_classes,rpn_anchor_generator=anchor_generator,box_roi_pool=roi_pooler)return model
將所有寫好的類都在這里實例化,MobileNetV2可以看這個(MobileNetV2),AnchorsGenerator后面會詳細講,MultiScaleRoIAlign是torchvision封裝的類,傳入特征層的名字,MobileNetV2特征提取后只會產生一個特征層,名字也是自己取的,所以傳入了一個值,output_size就是通過roipooling(Region Of Interest)后輸出的特征矩陣尺寸,最后組成FasterRCNN。
這里的訓練方式和以往訓練圖像分類模型的方式有所不同,這里首先凍結前置特征提取網絡權重(backbone),訓練rpn以及最終預測網絡部分,然后解凍前置特征提取網絡權重(backbone),接著訓練整個網絡權重,將訓練后的各個指標寫入到文件中,以及最終保存權重和畫圖。大致的話訓練流程大家應該都了解了吧,后面再細講訓練時封裝的方法,大家先有個體系結構,知道整個大概流程。
自定義數據集(my_dataset.py)
在這一部分開始之前,小伙伴們需要先了解PASCAL VOC2012數據集噢(必須要了解,不然后面看不懂),了解數據集后,我們清楚了數據集的目錄結構,再來看這部分代碼
class VOCDataSet(Dataset):"""讀取解析PASCAL VOC2007/2012數據集"""def __init__(self, voc_root, year="2012", transforms=None, txt_name: str = "train.txt"):assert year in ["2007", "2012"], "year must be in ['2007', '2012']"self.root = os.path.join(voc_root, "VOCdevkit", f"VOC{year}")self.img_root = os.path.join(self.root, "JPEGImages")self.annotations_root = os.path.join(self.root, "Annotations")# read train.txt or val.txt filetxt_path = os.path.join(self.root, "ImageSets", "Main", txt_name)assert os.path.exists(txt_path), "not found {} file.".format(txt_name)with open(txt_path) as read:self.xml_list = [os.path.join(self.annotations_root, line.strip() + ".xml")for line in read.readlines() if len(line.strip()) > 0]# check fileassert len(self.xml_list) > 0, "in '{}' file does not find any information.".format(txt_path)for xml_path in self.xml_list:assert os.path.exists(xml_path), "not found '{}' file.".format(xml_path)# read class_indictjson_file = './pascal_voc_classes.json'assert os.path.exists(json_file), "{} file not exist.".format(json_file)json_file = open(json_file, 'r')self.class_dict = json.load(json_file)json_file.close()self.transforms = transforms
傳入的參數
voc_root:數據集根目錄
year: 哪一年的Pascal VOC數據集
transform:圖像增強
txt_name: 根據訓練需求傳入VOCdevkit//VOC2012//ImageSets//Main文件夾中的txt文件
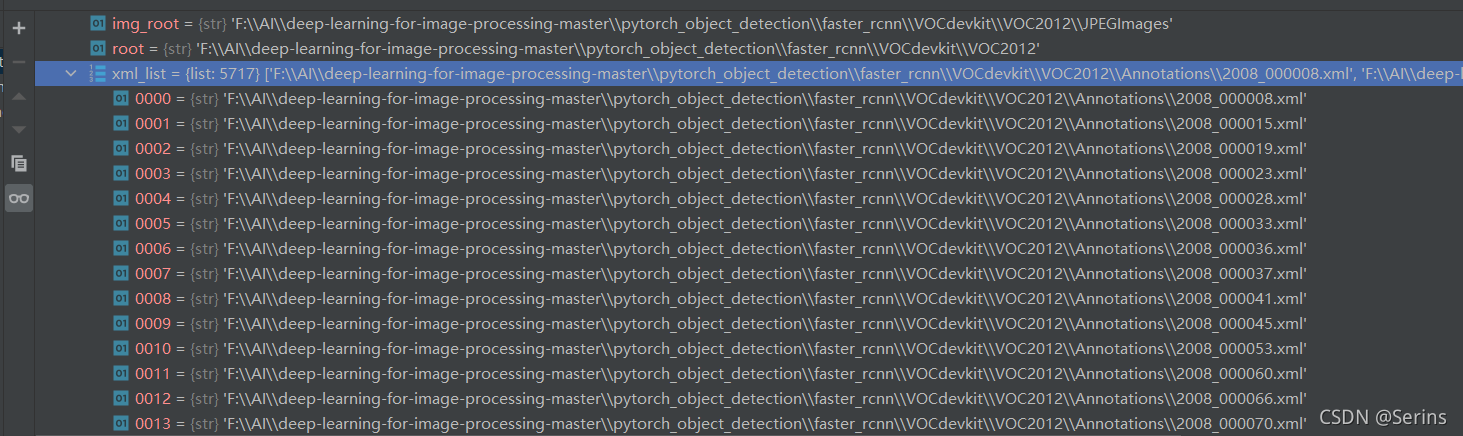
前面幾行os.path.join()代碼都是拼接需要的文件路徑,方便后面使用,這里我們以train.txt為例,拿到訓練集的txt文件,里面是所有訓練集圖片的編號,讀取里面的編號并拼接為xml后綴的形式,方便在Annotations文件夾中打開,拼接完后我們debug發現txt文件的編號對應我們最后得到的xml路徑下的編號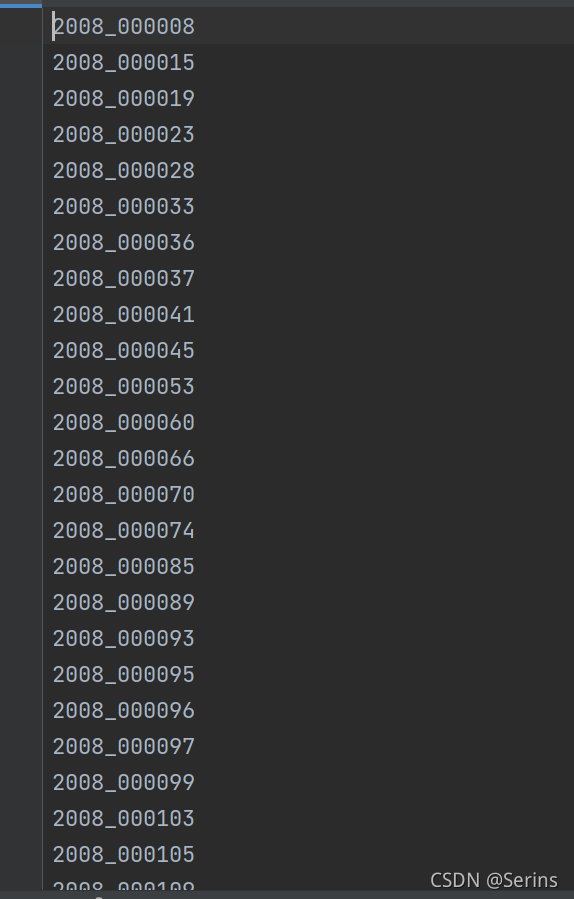
一直到這部分:
json_file = './pascal_voc_classes.json'assert os.path.exists(json_file), "{} file not exist.".format(json_file)json_file = open(json_file, 'r')self.class_dict = json.load(json_file)json_file.close()
pascal_voc_classes.json這個json文件就是以字典的形式保存了Pascal VOC2012數據集的20個類別并用索引表示: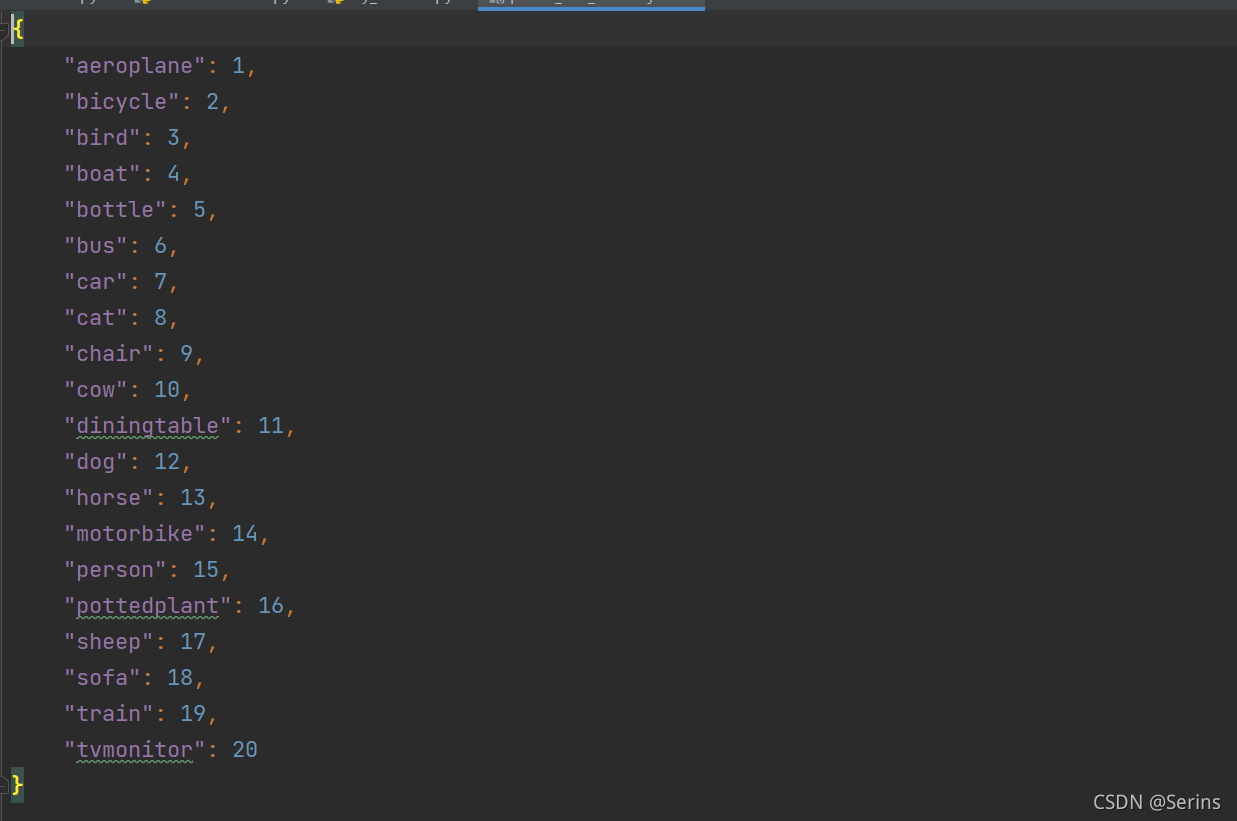
打開這個文件并讀取賦值給類變量(加載后記得close關閉文件),后面會用到。
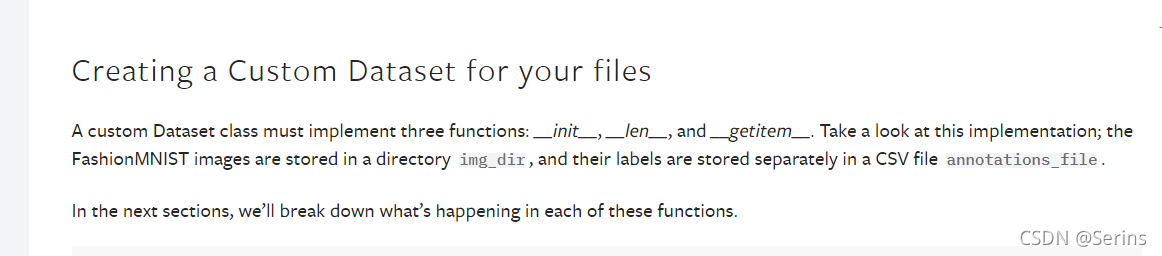
注意:上面是官方的說明,因為是自定義的數據集方法,繼承來自pytorch的DataSet類,要求所有的子類必須繼承__len__和__getitem__方法,所以這里是必不可少的,__len__就是返回當前數據集的長度,__getitem__用于返回處理后的圖片以及標簽,下面再細講。
def __getitem__(self, idx):# read xmlxml_path = self.xml_list[idx]with open(xml_path) as fid:xml_str = fid.read()xml = etree.fromstring(xml_str)data = self.parse_xml_to_dict(xml)["annotation"]img_path = os.path.join(self.img_root, data["filename"])image = Image.open(img_path)if image.format != "JPEG":raise ValueError("Image '{}' format not JPEG".format(img_path))boxes = []labels = []iscrowd = []assert "object" in data, "{} lack of object information.".format(xml_path)for obj in data["object"]:xmin = float(obj["bndbox"]["xmin"])xmax = float(obj["bndbox"]["xmax"])ymin = float(obj["bndbox"]["ymin"])ymax = float(obj["bndbox"]["ymax"])# 進一步檢查數據,有的標注信息中可能有w或h為0的情況,這樣的數據會導致計算回歸loss為nanif xmax <= xmin or ymax <= ymin:print("Warning: in '{}' xml, there are some bbox w/h <=0".format(xml_path))continueboxes.append([xmin, ymin, xmax, ymax])labels.append(self.class_dict[obj["name"]])if "difficult" in obj:iscrowd.append(int(obj["difficult"]))else:iscrowd.append(0)# convert everything into a torch.Tensorboxes = torch.as_tensor(boxes, dtype=torch.float32)labels = torch.as_tensor(labels, dtype=torch.int64)iscrowd = torch.as_tensor(iscrowd, dtype=torch.int64)image_id = torch.tensor([idx])area = (boxes[:, 3] - boxes[:, 1]) * (boxes[:, 2] - boxes[:, 0])target = {}target["boxes"] = boxestarget["labels"] = labelstarget["image_id"] = image_idtarget["area"] = areatarget["iscrowd"] = iscrowdif self.transforms is not None:image, target = self.transforms(image, target)return image, target
該方法通過索引參數 idx 載入每張圖片,因為類變量xml_list里面保存了所有的訓練集圖片的xml文件路徑,打開對應的xml文件,這里我debug得到的是這個xml文件(每次debug都可能不一樣,因為圖片是打亂了的)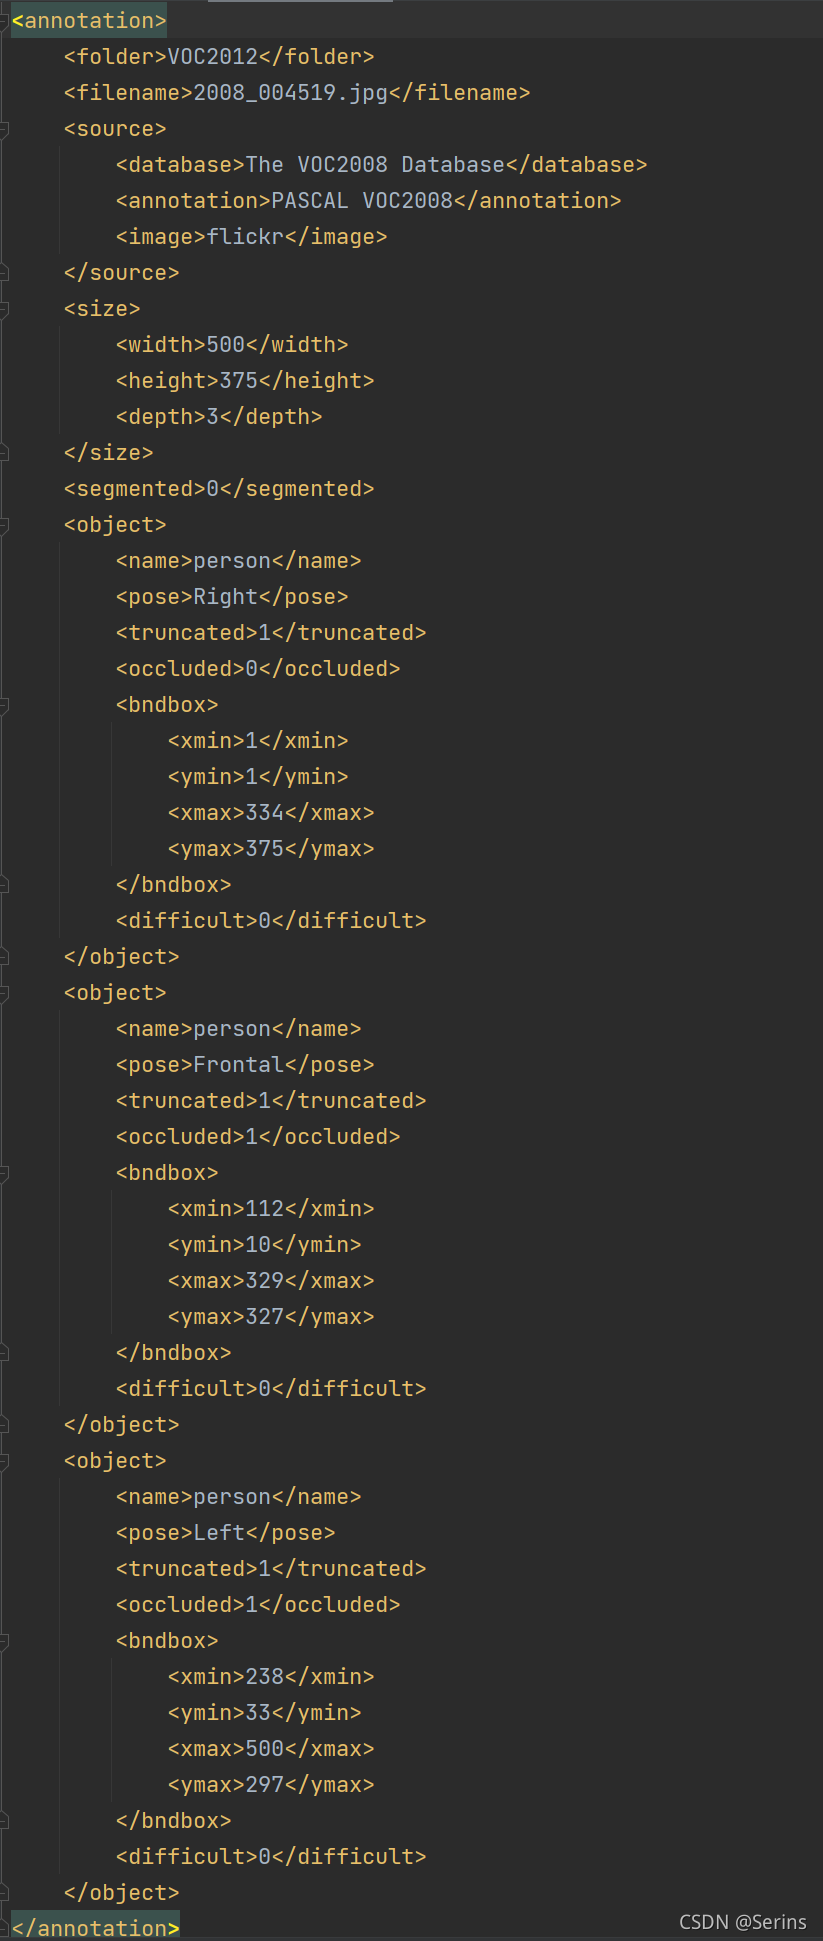
讓我們再看看原圖片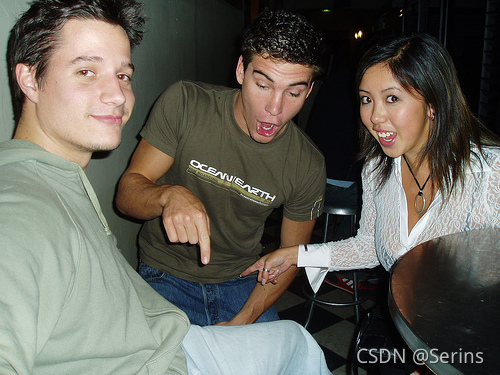
xml文件里面標注的很清楚,三個真實框的坐標以及類別,我們通過lxml.etree.fromstring先展成數再換成string的格式,調用類方法parse_xml_to_dict(),傳入xml的內容,通過遞歸的方式循環遍歷每一層,得到最后的文件內容,
我們可以看看data = self.parse_xml_to_dict(xml)[“annotation”]的debug結果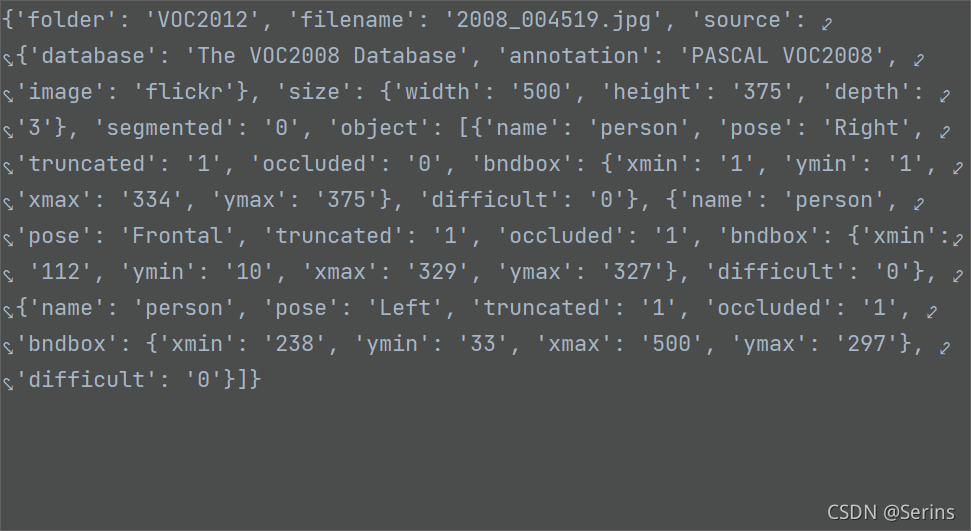
這里我們也順利拿出了xml文件的所有內容,接下來打開圖片并判斷是不是JPEG格式的,不是就會報錯(原數據集都是jpeg的格式,報錯說明數據集有問題),再看上面解析xml后的內容,object是我們的目標,通過列表包裹了多個字典,通過循環列表以及字典的key拿到對應的value,后面一系列操作都是將需要的內容取出來用列表存儲,我解釋一下這幾個列表儲存的都是什么:
boxes 存儲的所有真實框的坐標
labels存儲的真實類別的索引,也就是上面加載的json文件中的類別索引
iscrowd儲存的是圖片是否難以檢測,0就是不難,非0就是比較難檢測
再將上述三個列表以及當前圖片的索引 idx 轉成tensor的形式,area是計算了所有真實框的面積,后面也會用到,最最最后在用一個字典target保存上述所有的信息,debug看一下結果:
最后圖像增強一下就好了,其他的部分都差不多,自己看看就好了,至此我們第一部分的代碼就講解完了


)


)