SpringMVC中的視圖是View接口,視圖的作用渲染數據,將模型Model中的數據展示給用戶
SpringMVC視圖的種類很多,默認有轉發視圖(InternalResourceView)和重定向視圖(RedirectView)
當工程引入jstl的依賴,轉發視圖會自動轉換為JstlView
若使用的視圖技術為Thymeleaf,在SpringMVC的配置文件中配置了Thymeleaf的視圖解析器,由此視圖解析器解析之后所得到的是ThymeleafView
1.1ThymeleafVIew
當控制器方法中所設置的視圖名稱沒有任何前綴時,此時的視圖名稱會被SpringMVC配置文件中所配置的視圖解析器(ThymeleafViewResolver)解析,視圖名稱拼接視圖前綴和視圖。
我們當前的解析器為:
<?xml version="1.0" encoding="UTF-8"?>
<beans xmlns="http://www.springframework.org/schema/beans"xmlns:xsi="http://www.w3.org/2001/XMLSchema-instance" xmlns:context="http://www.springframework.org/schema/c"xsi:schemaLocation="http://www.springframework.org/schema/beans http://www.springframework.org/schema/beans/spring-beans.xsd"><!--掃描控制層組件--><context:component-scan base-package="com.rgf.controller"></context:component-scan><!--配置Thymeleaf視圖解析器--><bean id="viewResolver" class="org.thymeleaf.spring5.view.ThymeleafViewResolver"><property name="order" value="1"/><property name="characterEncoding" value="UTF-8"/><property name="templateEngine"><!--模板引擎--><bean class="org.thymeleaf.spring5.SpringTemplateEngine"><property name="templateResolver"><!--模板解析器--><bean class="org.thymeleaf.spring5.templateresolver.SpringResourceTemplateResolver"><!--/WEB-INF/templates/index.html--><!--視圖前綴+邏輯視圖+視圖后綴就是我們完整的物理視圖,即訪問index.html,不用完整路徑,即index即可進行訪問--><!--視圖前綴--><property name="prefix" value="/WEB-INF/templates/"/><!--視圖后綴--><property name="suffix" value=".html"/><property name="templateMode" value="HTML5"/><property name="characterEncoding" value="UTF-8" /></bean></property></bean></property></bean>
</beans>
使用的視圖解析器為:ThymeleafViewResolver,被該解析器解析之后為:ThymeleafView
我們在控制方法進行debug:
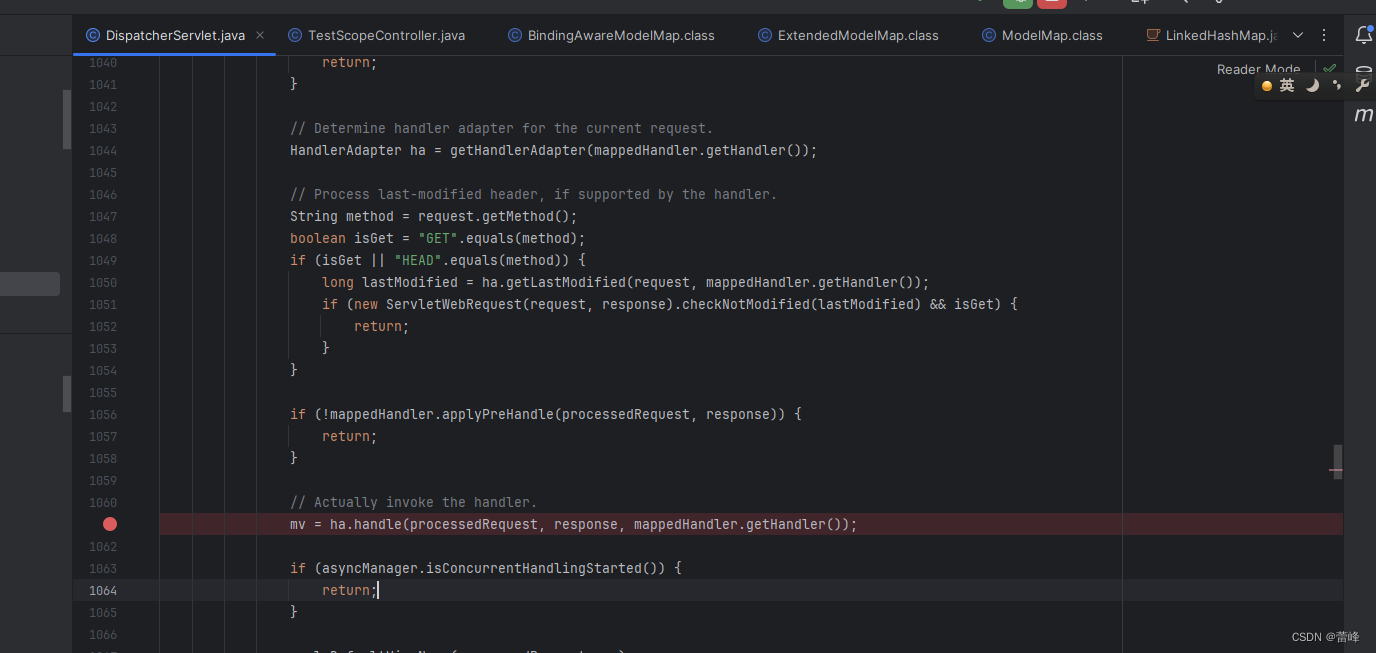
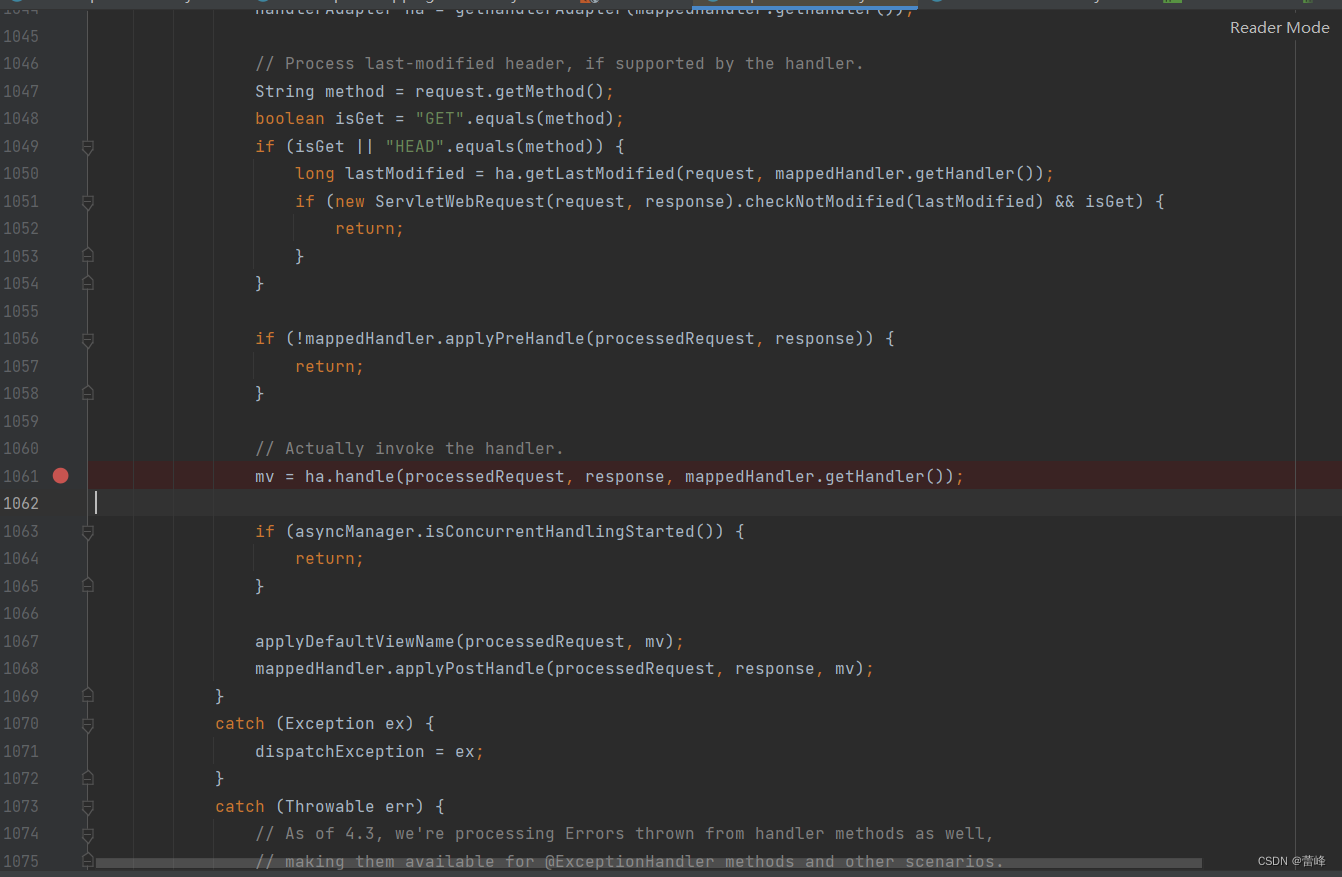
我們在debug的一個框里面會展示我們當前的一個方法棧,當前方法處于該窗口中,?我們發現DispatcherServlet,找到對應行數:1061行。
存在于方法棧中的方法,在該框中越往上的方法跟當前所要執行的方法的斷點所在的位置越近。
越往下,跟當前斷點所對應的位置越遠。從該方法棧里面從最下面一步步調用到當前所打得斷點的位置。
此時我們查看到:
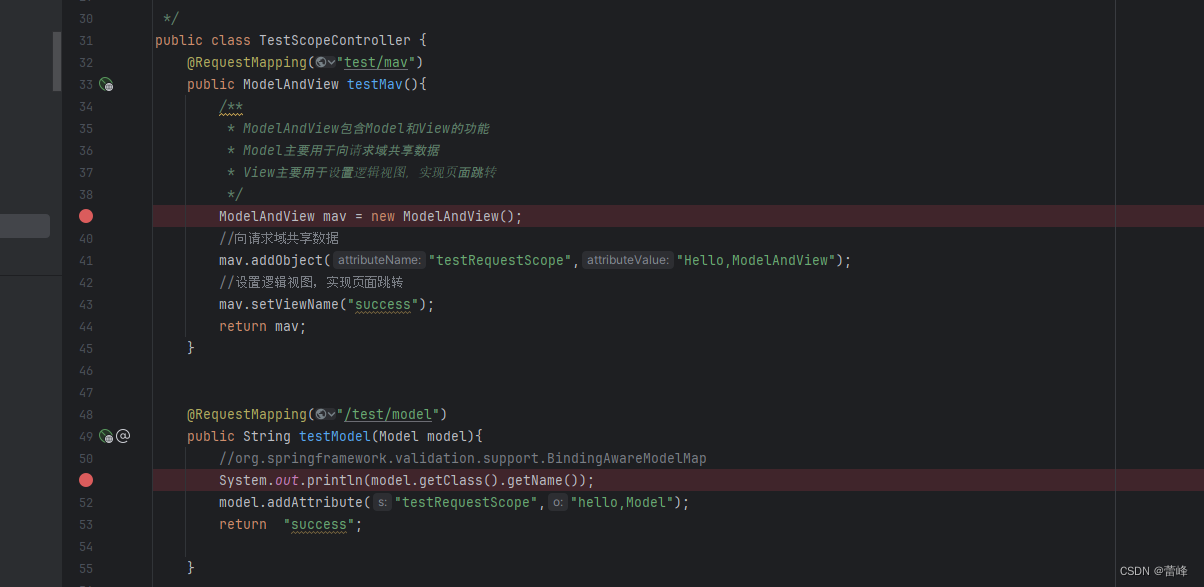
?我們所獲取的是一個ModelAndView對象。
再次打斷點的位置的作用為執行當前的我們的一個的轉發結果?,此時跳過斷點之后我們就已經獲取到ModelAndVIew。
此時我們跳過斷點之后,我們會發現:
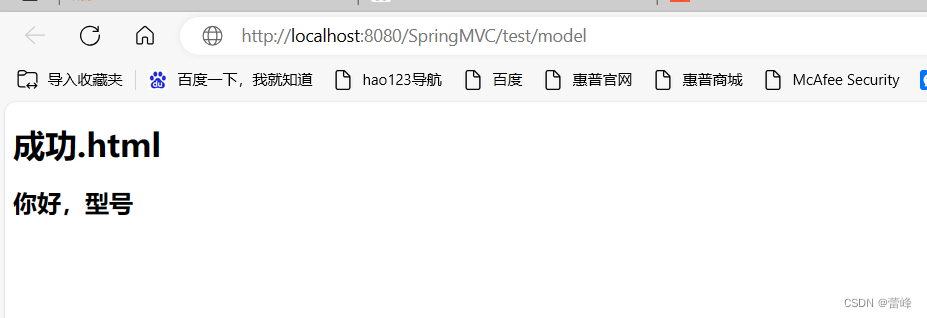
此時的mv已經獲取數據: “ModelAndView? ["view="success"? ;model={testRequestScope="Hello,ModelAndView"}。
箭頭依次為:下一步(F8)、進入某個方法中(F7)、強制進入某個方法(ALT+Shift+F7)、從某個方法中跳出(shift+F8)、跳過斷點(ALT+F9)。
CTRL+G,查找指定行。
我們在進行debug的時候,可以點擊下面的紅點進行管理斷點所在的位置。
?我們選中某一個,點擊上端的-即可。
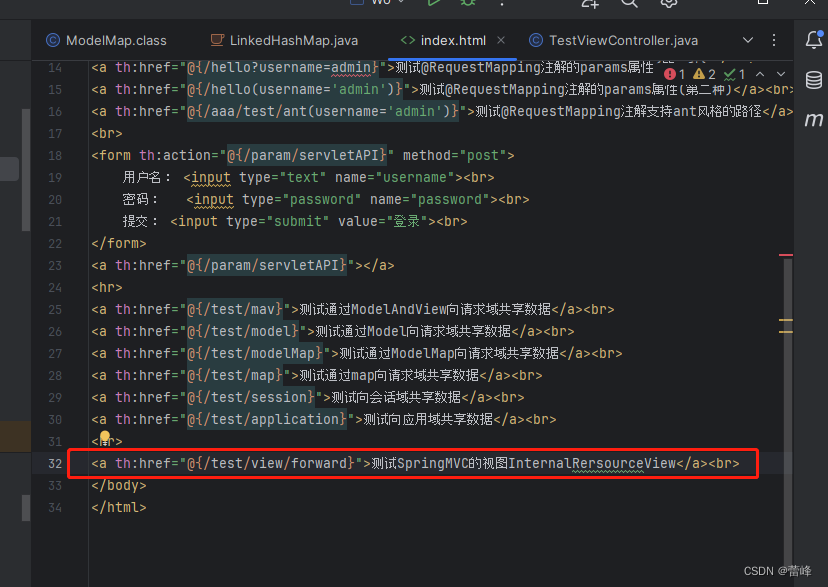
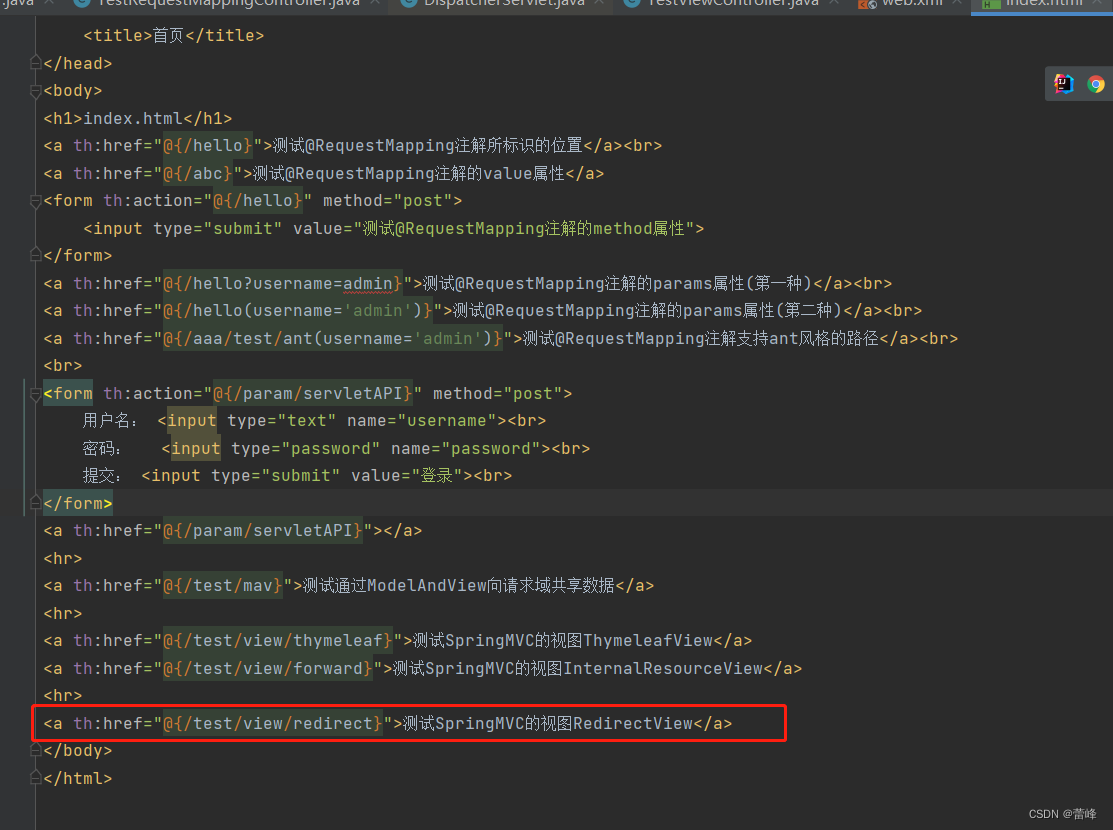
我們創建一個新的controller之后,先在我們的index.html新建一個超鏈接:
<!DOCTYPE html>
<html lang="en" xmlns:th="http://www.thymeleaf.org">
<head><meta charset="UTF-8"><title>首頁</title>
</head>
<body>
<h1>index.html</h1>
<a th:href="@{/hello}">測試@RequestMapping注解所標識的位置</a><br>
<a th:href="@{/abc}">測試@RequestMapping注解的value屬性</a>
<form th:action="@{/hello}" method="post"><input type="submit" value="測試@RequestMapping注解的method屬性">
</form>
<a th:href="@{/hello?username=admin}">測試@RequestMapping注解的params屬性(第一種)</a><br>
<a th:href="@{/hello(username='admin')}">測試@RequestMapping注解的params屬性(第二種)</a><br>
<a th:href="@{/aaa/test/ant(username='admin')}">測試@RequestMapping注解支持ant風格的路徑</a><br>
<br>
<form th:action="@{/param/servletAPI}" method="post">用戶名: <input type="text" name="username"><br>密碼:   <input type="password" name="password"><br>提交: <input type="submit" value="登錄"><br>
</form>
<a th:href="@{/param/servletAPI}"></a>
<hr>
<a th:href="@{/test/mav}">測試通過ModelAndView向請求域共享數據</a>
<hr>
<a th:href="@{/test/view/thymeleaf}">測試SpringMVC的視圖ThymeleafView</a>
</body>
</html>
我們在新建的controller里面定義新的方法,我們進行打斷點如下所示:
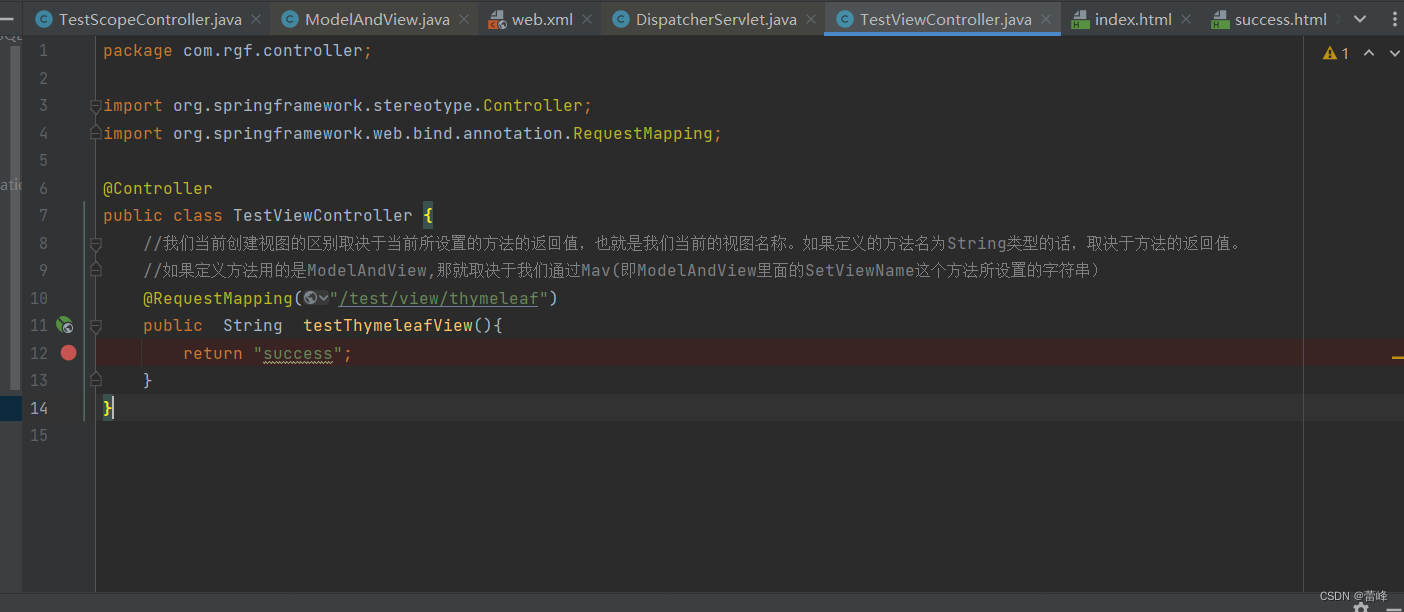
?我們點擊頁面我們所測試的ThymeleafView:
我們發現首先進入?
我們跳過之后進入如下所示:
?
繼續跳過之后進入:
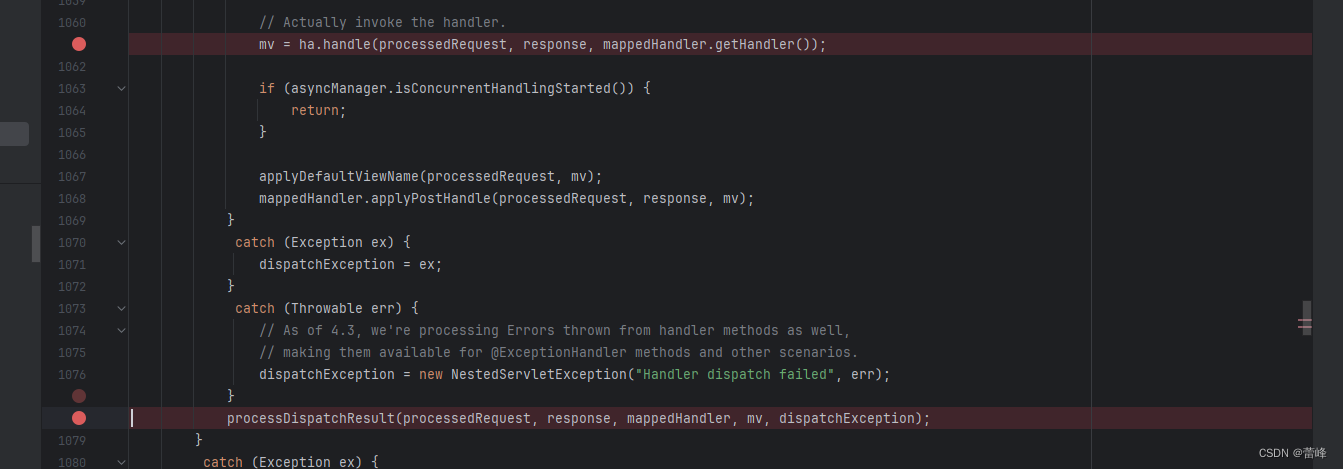
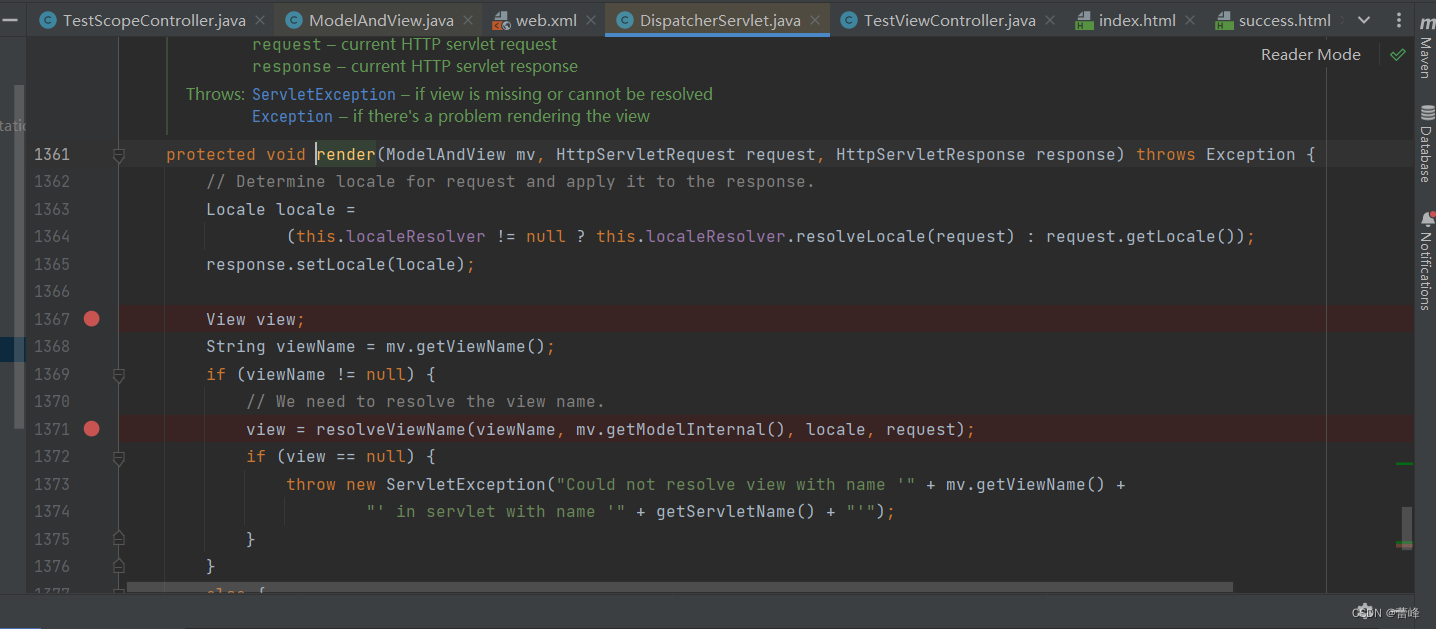
?此方法為執行處理我們轉發的結果。我們進入該方法進行查看:
我們進去之后,在該處也打一個斷點,此處為渲染的意思。此時即可處理我們當前的ModelAndView,然后把我們Model當中的數據共享在我們的請求域中,把我們所設置的邏輯視圖創建相對應的視圖對象,然后去找到我們相對應的視圖。即為頁面,然后進行跳轉。
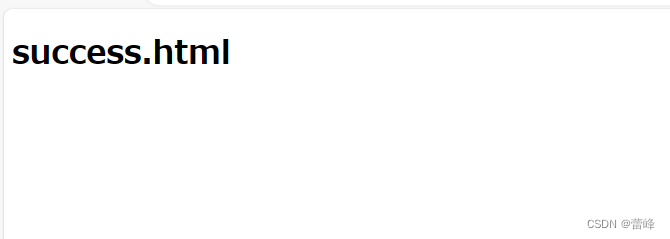
此時里面的viewName即為我們設置的success.
此處的
?resolveViewName,解析我們當前的視圖名稱來得到一個視圖。所以我們當前所創建的視圖只跟我們的視圖名稱有關。只跟我們當前方法的字符串類型的返回值有關系。
此時,我們的view為
ThymeleafView.
ThymeleafView創建過程中沒有任何的前綴。


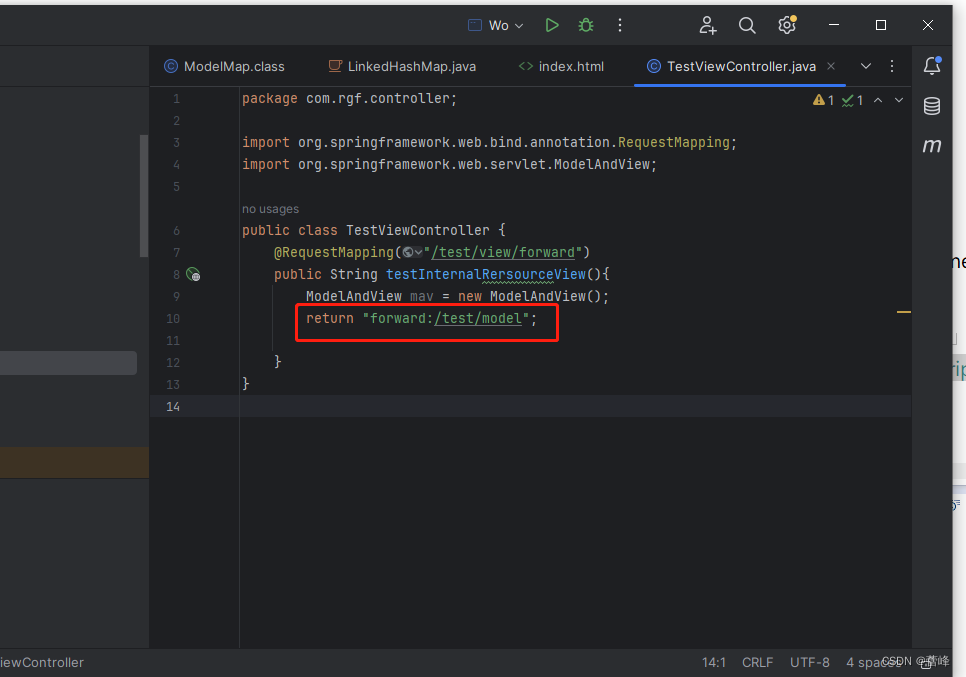
2.InternalRersourceView
SpringMVC中默認的轉發視圖是InternalResourceView
SpringMVC中創建轉發視圖的情況:
當控制器方法中所設置的視圖名稱以"forward:"為前綴時,創建InternalResourceView視圖,此時的視圖名稱不會被SpringMVC配置文件中所配置的視圖解析器解析,而是會將前綴”forward:"去掉,剩余部分作為最終路徑通過轉發的方式實現跳轉
我們新建如下鏈接:
我們創建新的方法:
我們將其轉發到:
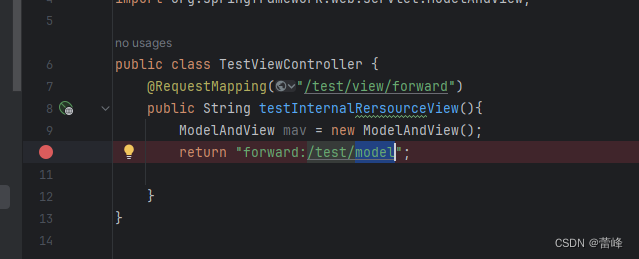
?我們在此處進行打斷點:
運行之后,點擊超鏈接:
點擊之后進入斷點:
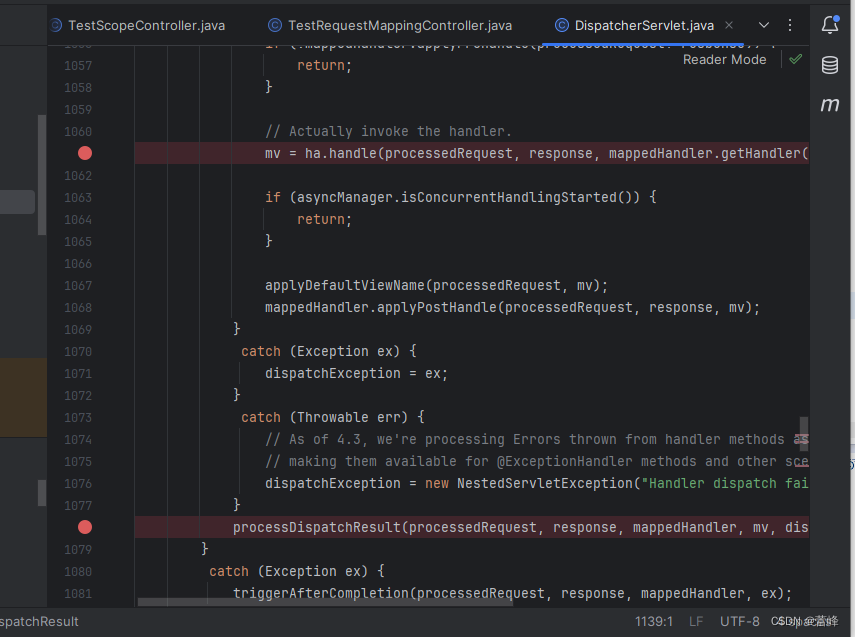
跳過之后繼續查看進入:
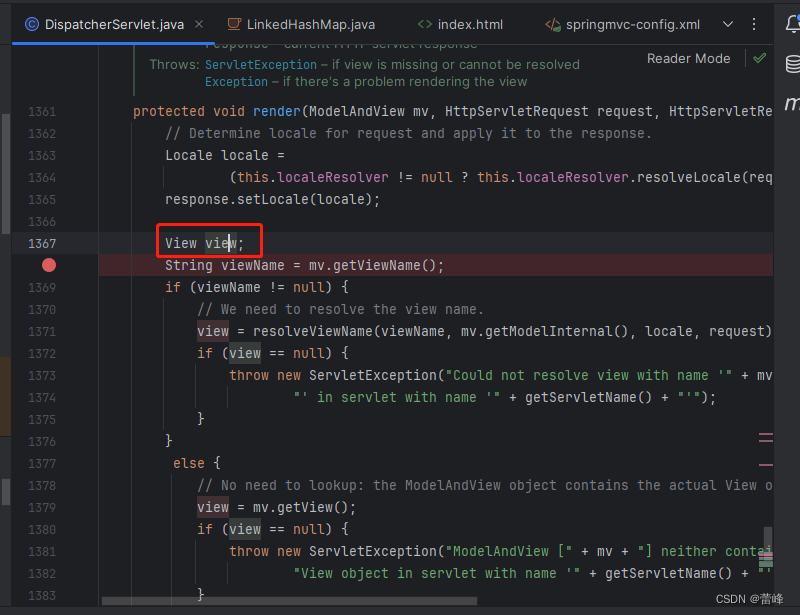
?其中的render為渲染視圖,來處理ModelAndView.
我們繼續進入里面:
此時我們的mv:"ModelAndView[view="forward:.test/model";此時的視圖名稱如下所示。
跳轉完之后,我們查看View里面的值:
?此時的view為InternalResourceView,url為/test/model;將其轉發到該url.
此時會創建兩個視圖,首先轉發前會創建InternalResourceView這個視圖,跳轉成功之后,dispatcherServlet會進行處理forward:.test/model這個請求,即會進入另一個視圖。而另一個視圖默認為ThymeleafView。
此時我們將斷點跳過之后,會再次進入如下斷點:
我們繼續向下執行的時候,我們的視圖名稱為success.即可進行跳轉到該頁面。此時創建出來的視圖為ThymeleafView。
此時的過程為點擊鏈接之后,進行跳轉到forward:/test/model,攜帶hello,Model,跳轉到success界面。如下所示:
我們比較常用的是ThymeleafView,我們并不是直接跳轉頁面,而是通過ThymeleafView的視圖解析器ThymeleafViewResolver來解析當前的視圖,去解析當前頁面中ThymeleafView中的語法,才能去渲染頁面,看到一個動態數據。
當我們使用
界面是會被Thymeleaf進行渲染的,但是我們使用如下方式進行轉發到該界面的時候
界面是不會被Thymeleaf所渲染的,僅僅是一個簡單的轉發。
如果我們所使用的是一種jsp視圖的話:我們需要在配置文件中配置的視圖解析器為:InternalResourceViewResolver
此時創建的轉發視圖也是InternalResourceViewResolver。但是通InternalResourceViewResolver進行轉發的是無法進行頁面渲染的,ThymeleafView的語法無法被解析,但是ThymeleafView的這種視圖是可以進行頁面渲染的。


?3.RedirectView
SpringMVC中默認的重定向視圖是RedirectView
當控制器方法中所設置的視圖名稱以"redirect:"為前綴時,創建RedirectView視圖,此時的視圖名稱不會被SpringMVC配置文件中所配置的視圖解析器解析,而是會將前綴”redirect:"去掉,剩余部分作為最終路徑通過重定向的方式實現跳轉
我們創建如下鏈接:
?我們創建新的方法:
@RequestMapping("/test/view/redirect")public String testRedirectView(){return "redirect:/test/model";}此時我們將項目進行運行:
我們點擊如下所示:
我們發現繼續進入斷點:
我們繼續將斷點往下走:
我們繼續進入里面:
此時我們的mv:"ModelAndView[view="redirect:.test/model";此時的視圖名稱如此所示。
跳轉完之后,我們查看View里面的值:
?此時的view為RedirectView。此時跳轉過之后,會繼續訪問test/model,斷點會繼續進入該方法:
此時再次創建的視圖名稱為ThymeleafView。?
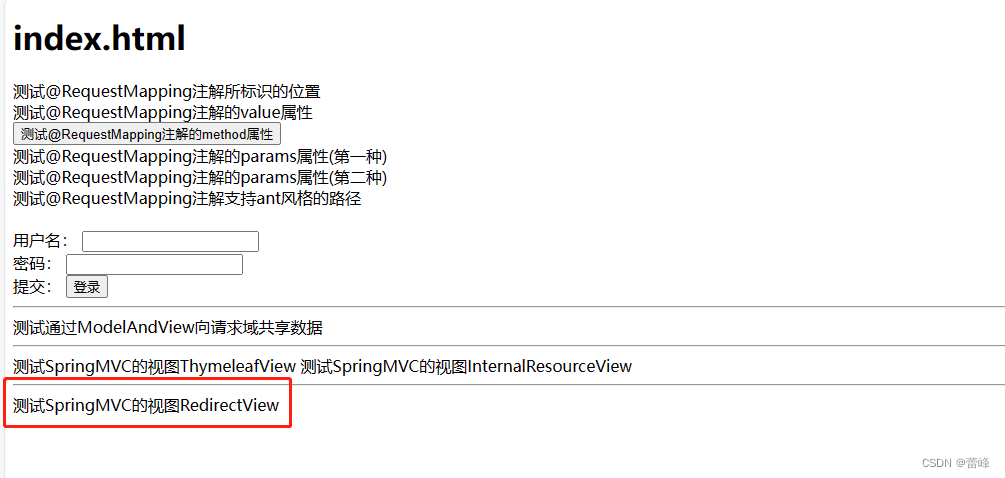
此時查看我們所跳轉的界面的地址攔:
一般而言,當我們的業務邏輯處理成功的時候用轉發,處理失敗的時候用重定向。登錄成功用轉發,登錄失敗用重定向。?
重定向所跳轉到的絕對路徑就會被瀏覽器所解析,而瀏覽器解析的絕對路徑是把/解析為localhost:8080.而我們當前設置的重定向的路徑,都可以成功進行跳轉,說明在跳轉過程中會自動在絕對路徑前面加一個上下文路徑。
4.視圖控制器view-controller
當控制器方法中,僅僅用來實現頁面跳轉,即只需要設置視圖名稱時,可以將處理器方法使用view-controller標簽進行表示。
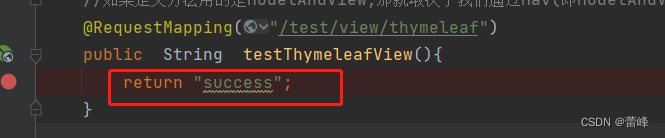
例如我們要進行跳轉到首頁:
我們必須要有這個方法才能跳轉到index.html首頁。
我們利用view-controller,在配置文件里面進行配置如下:
<?xml version="1.0" encoding="UTF-8"?>
<beans xmlns="http://www.springframework.org/schema/beans"xmlns:xsi="http://www.w3.org/2001/XMLSchema-instance" xmlns:context="http://www.springframework.org/schema/c"xmlns:mvc="http://www.springframework.org/schema/mvc"xsi:schemaLocation="http://www.springframework.org/schema/beans http://www.springframework.org/schema/beans/spring-beans.xsd http://www.springframework.org/schema/mvc https://www.springframework.org/schema/mvc/spring-mvc.xsd"><!--掃描控制層組件--><context:component-scan base-package="com.rgf.controller"></context:component-scan><!--配置Thymeleaf視圖解析器--><bean id="viewResolver" class="org.thymeleaf.spring5.view.ThymeleafViewResolver"><property name="order" value="1"/><property name="characterEncoding" value="UTF-8"/><property name="templateEngine"><!--模板引擎--><bean class="org.thymeleaf.spring5.SpringTemplateEngine"><property name="templateResolver"><!--模板解析器--><bean class="org.thymeleaf.spring5.templateresolver.SpringResourceTemplateResolver"><!--/WEB-INF/templates/index.html--><!--視圖前綴+邏輯視圖+視圖后綴就是我們完整的物理視圖,即訪問index.html,不用完整路徑,即index即可進行訪問--><!--視圖前綴--><property name="prefix" value="/WEB-INF/templates/"/><!--視圖后綴--><property name="suffix" value=".html"/><property name="templateMode" value="HTML5"/><property name="characterEncoding" value="UTF-8" /></bean></property></bean></property></bean><!--視圖控制器:為當前的請求直接設置視圖名稱實現頁面跳轉--><mvc:view-controller path="/" view-name="index"></mvc:view-controller>
</beans>
我們即可直接進行跳轉該頁面。
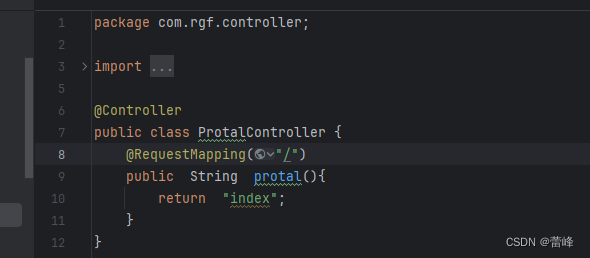
我們將該方法進行注掉:
package com.rgf.controller;import org.springframework.stereotype.Controller;
import org.springframework.web.bind.annotation.RequestMapping;@Controller
public class ProtalController {@RequestMapping("/")public  String  protal(){return  "index";}
}
進行重新部署,我們回到首頁,進行刷新:
仍然可以訪問首頁。
此時點擊其他鏈接,發現出現了:404
?如果我們在當前配置文件中使用了view-controller視圖控制器,當前只有視圖控制器所設置的請求才能被處理。此時要在配置文件里再加一個標簽:<mvc:annotation-driver/>,開啟mvc的注解驅動
<?xml version="1.0" encoding="UTF-8"?>
<beans xmlns="http://www.springframework.org/schema/beans"xmlns:xsi="http://www.w3.org/2001/XMLSchema-instance" xmlns:context="http://www.springframework.org/schema/c"xmlns:mvc="http://www.springframework.org/schema/mvc"xsi:schemaLocation="http://www.springframework.org/schema/beans http://www.springframework.org/schema/beans/spring-beans.xsd http://www.springframework.org/schema/mvc https://www.springframework.org/schema/mvc/spring-mvc.xsd"><!--掃描控制層組件--><context:component-scan base-package="com.rgf.controller"></context:component-scan><!--配置Thymeleaf視圖解析器--><bean id="viewResolver" class="org.thymeleaf.spring5.view.ThymeleafViewResolver"><property name="order" value="1"/><property name="characterEncoding" value="UTF-8"/><property name="templateEngine"><!--模板引擎--><bean class="org.thymeleaf.spring5.SpringTemplateEngine"><property name="templateResolver"><!--模板解析器--><bean class="org.thymeleaf.spring5.templateresolver.SpringResourceTemplateResolver"><!--/WEB-INF/templates/index.html--><!--視圖前綴+邏輯視圖+視圖后綴就是我們完整的物理視圖,即訪問index.html,不用完整路徑,即index即可進行訪問--><!--視圖前綴--><property name="prefix" value="/WEB-INF/templates/"/><!--視圖后綴--><property name="suffix" value=".html"/><property name="templateMode" value="HTML5"/><property name="characterEncoding" value="UTF-8" /></bean></property></bean></property></bean><!--開啟mvc的注解驅動--><mvc:annotation-driver/><!--視圖控制器:為當前的請求直接設置視圖名稱實現頁面跳轉若設置視圖控制器,則只有視圖控制器所設置的請求會被處理,其他的請求將全部404此時必須再配置一個標簽 <mvc:annotation-driver/>,從而開啟mvc的注解驅動<mvc:annotation-driver/>,在好多功能里面都要使用這個標簽,(在處理靜態資源的時候,處理ajax請求,處理json數據的時候),都是要加上這個標簽。--><mvc:view-controller path="/" view-name="index"></mvc:view-controller>
</beans>
此時設置之后,我們的鏈接都可以進行點擊。即視圖解析器和@RequestMapping實現的界面跳轉都可以實現。此時我們再次訪問首頁,其他界面都可以進行點擊。
?點擊其他的也可以成功進行跳轉:


)


)