如何去開發一個springboot starter
我們在平時用 Java 開發的時候,在 pom.xml 文件中引入一個依賴就可以很方便的使用了,但是你們知道這是如何實現的嗎。
現在我們就來解決這一個問題!
創建 SpringBoot 項目
首先我們要做的就是把你想要給別人方便使用的內容自己的寫好
我這里直接另外創建了一個 springboot 的 web 項目,在這個 web 項目中我用 controller 寫了幾個簡單的接口,用于后面的調用,然后再創建一個 springboot 項目,這個新的 springboot 項目就是用來開發 starter 的方便使用者更好、更方便使用。
現在是具體流程:
springboot 的 web 項目創建
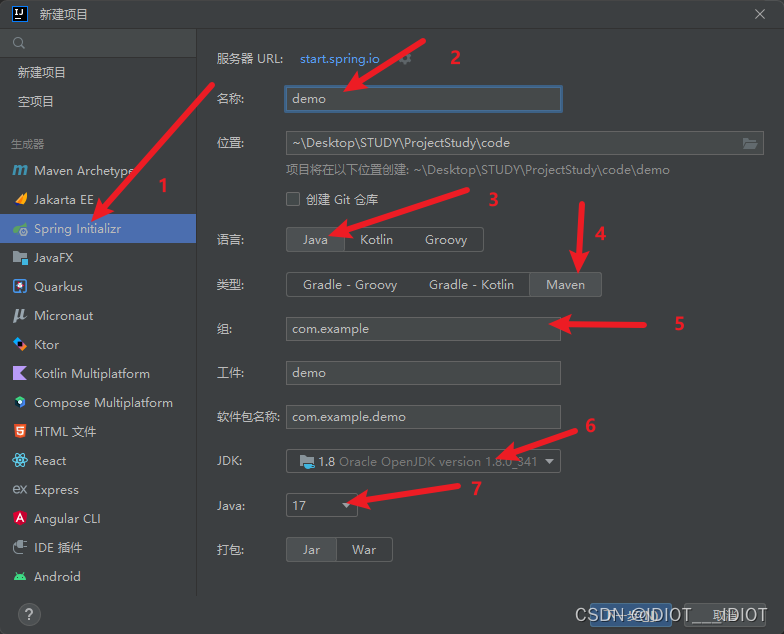
用 IDEA 快速創建一個 springboot 項目,創建方法如下:
- 選擇 spring Initializer
- 自己寫一個項目的名稱
- 語言選擇 Java
- 包管理工具選擇 Maven
- 組這個可以自己寫 例如我的昵稱 xwhking 就可以寫
com.xwkhing - jdk 選擇1.8
- Java 選擇8
- 然后就是下一步
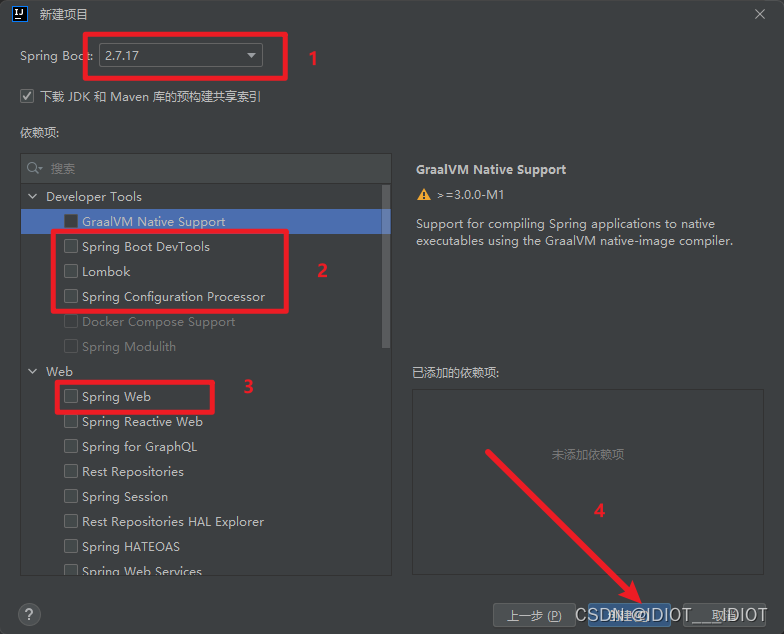
進入下一步后
-
選擇 springboot 的版本,我一般選擇2.7左右的
-
然后選擇開發工具
- Spring Boot Devtools
- Spring COnfiguration Processor 主要用于后面我們在工程中使用的使用在 yml 中寫配置時能夠自動提示配置
- Lombok 通過使用 annotation 快速的生成主要的 getter 和 setter
- Spring Web 加上也沒事
-
然后就是創建了。
創建好了以后就進入寫代碼環節,寫一個簡單的 web 請求的 Demo
我這里的目錄結構如下:

UserController的代碼如下:
package com.xwhking.interface_test.controller;import com.xwhking.interface_test.entity.User;
import org.springframework.web.bind.annotation.GetMapping;
import org.springframework.web.bind.annotation.RequestMapping;
import org.springframework.web.bind.annotation.RequestParam;
import org.springframework.web.bind.annotation.RestController;import javax.servlet.http.HttpServletRequest;
import java.util.Date;import static com.xwhking.interface_test.utils.GenSign.genSign;@RestController
@RequestMapping("/user")
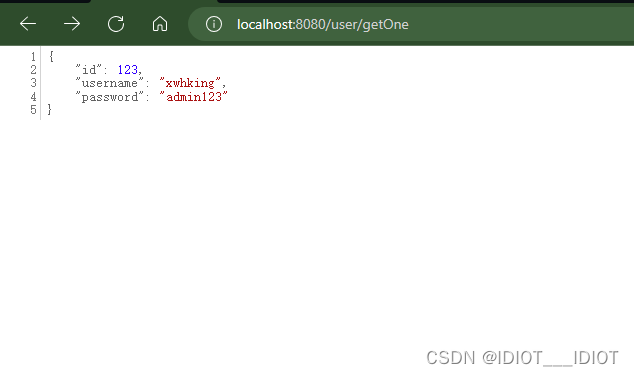
public class UserController {@GetMapping("/name")public String getName(@RequestParam String name , HttpServletRequest request){System.out.println("請求參數名字為 : " + name);return "GET 請求參數名字為 : " + name;}@GetMapping("/getOne")public User getUser(HttpServletRequest request){User user = new User();user.setId(123l);user.setUsername("xwhking");user.setPassword("admin123");System.out.println(user);return user ;}
}
User代碼
package com.xwhking.interface_test.entity;import lombok.Data;@Data
public class User {private Long id;private String username;private String password;@Overridepublic String toString(){return "User { " +"id: " + id + "," +"name:" + username + ","+"password: " + password + "}";}
}
這些完成以后就可以啟動這一個項目了。
可以用瀏覽器試試
starter開發
以同樣的方式創建一個springboot項目,需要特別注意的就是,我們需要把 pom.xml 文件中的 build 部分代碼全部去掉。
pom.xml 文件
注意這里引入了 Hutool 工具庫,用于后面開發,并且文件里面是沒有 build 模塊的,這里還需要注意把版本的snapshot去掉
<?xml version="1.0" encoding="UTF-8"?>
<project xmlns="http://maven.apache.org/POM/4.0.0" xmlns:xsi="http://www.w3.org/2001/XMLSchema-instance"xsi:schemaLocation="http://maven.apache.org/POM/4.0.0 https://maven.apache.org/xsd/maven-4.0.0.xsd"><modelVersion>4.0.0</modelVersion><parent><groupId>org.springframework.boot</groupId><artifactId>spring-boot-starter-parent</artifactId><version>2.7.10</version><relativePath/> <!-- lookup parent from repository --></parent><groupId>com.xwhking</groupId><artifactId>InterfaceStarter</artifactId><version>0.0.1</version><name>InterfaceStarter</name><description>InterfaceStarter</description><properties><java.version>8</java.version></properties><dependencies><dependency><groupId>org.springframework.boot</groupId><artifactId>spring-boot-starter-web</artifactId></dependency><dependency><groupId>org.springframework.boot</groupId><artifactId>spring-boot-devtools</artifactId><scope>runtime</scope><optional>true</optional></dependency><dependency><groupId>org.springframework.boot</groupId><artifactId>spring-boot-configuration-processor</artifactId><optional>true</optional></dependency><dependency><groupId>org.projectlombok</groupId><artifactId>lombok</artifactId><optional>true</optional></dependency><dependency><groupId>org.springframework.boot</groupId><artifactId>spring-boot-starter-test</artifactId><scope>test</scope></dependency><dependency><groupId>cn.hutool</groupId><artifactId>hutool-all</artifactId><version>5.8.16</version></dependency></dependencies>
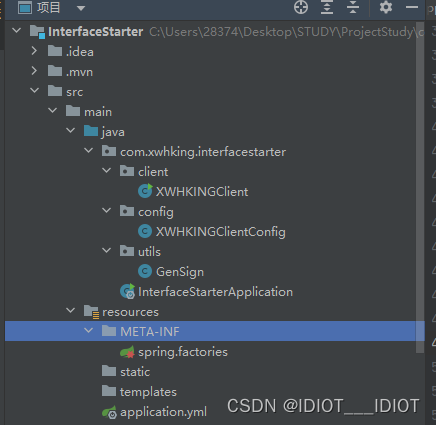
</project>目錄結構
- client 目錄 這里就是真正使用的類,對對應的功能進行了封裝。
- config 目錄 這里對 client 進行配置,并且把 client 包裝成一個 Bean 返回
- utils 工具類,這里用來生成簽名的工具
- META-INF.spring.factories 這個非常重要,用于別人調用的時候,在寫配置的之后能夠進行提示與自動裝配
client 代碼
package com.xwhking.interfacestarter.client;import cn.hutool.http.HttpRequest;
import cn.hutool.http.HttpUtil;
import lombok.Data;import java.time.LocalDateTime;
import java.util.Date;
import java.util.HashMap;import static com.xwhking.interfacestarter.utils.GenSign.genSign;/*** 發起請求時候一定要注意,不要把secretKey直接傳送,只需要進行一個簽名傳送就好了,然后后端通過同樣的方式進行簽名* 的生成,進行對比,驗證身份。*/
@Data
public class XWHKINGClient {private String accessKey;private String secretKey;private Long userId;public XWHKINGClient(String accessKey,String secretKey,Long userId){this.userId = userId;this.accessKey = accessKey;this.secretKey = secretKey;}public String getName(String name){//可以單獨傳入http參數,這樣參數會自動做URL編碼,拼接在URL中HashMap<String, Object> paramMap = new HashMap<>();paramMap.put("name", name);HashMap<String,String> headerMap = new HashMap<>();headerMap.put("accessKey",accessKey);headerMap.put("userId",userId.toString());headerMap.put("sign", genSign(accessKey,secretKey,userId));headerMap.put("timestamp",Long.toString(new Date().getTime()));String result1= HttpRequest.get("http://localhost:8080/user/name").addHeaders(headerMap).form(paramMap).execute().body();System.out.println(result1);return result1;}public String GetUser(){HashMap<String,String> headerMap = new HashMap<>();headerMap.put("accessKey",accessKey);headerMap.put("userId",userId.toString());headerMap.put("sign", genSign(accessKey,secretKey,userId));headerMap.put("timestamp",Long.toString(new Date().getTime()));String result1= HttpRequest.get("http://localhost:8080/user/getOne").addHeaders(headerMap).execute().body();System.out.println(result1);return result1;}public static void main(String[] args) {new XWHKINGClient("xwhking","admin123",123123l).getName("XWHKING");}
}
這里都加了請求頭,加請求頭的目的是為了,進行簽名認證。
為什么要進行簽名認證
- 保證安全性,一個人不能隨便調用,如果隨便調用的話,自己的服務器資源會收到壓迫,以及資源的損失。
- 適用于無需保存登錄態。只認簽名,不關注用戶登錄態。
如何進行簽名認證
通過 http request header 頭傳遞參數
這里主要傳遞的參數
- accessKey: 調用的標識, 需要復雜、 無序、無規律,這里我沒有實現,只是簡單的模擬,如果需要實現的話可以使用現成的簽名實現工具包,例如 hutool
- secretKey: 調用的密鑰,需要復雜、 無序、無規律,該參數一定一定不能放到請求頭中,不然可能會被別人抓包,以及可能造成泄露。
- 用戶請求的參數
- sign: 簽名,由 accessKey 和 secretKey 以及 userId 等信息生成,用于傳遞信息。然后后端通過同樣的方式進行生成對比驗證權限。
- 上述問題滿足了,可能還抵擋不了別人的攻擊,例如別人用重放就可以再次調用 API 了,限制重放的方法:
- 加隨機數,只能使用一次,服務端要保存使用過的隨機數
- 加 timestamp 時間戳,檢驗時間戳是否過期,我這里就是通過時間戳,超過10s就失效。
對web中的UserController進行更新
更新就是為了校驗,然后如果更新了,項目記得重啟
package com.xwhking.interface_test.controller;import com.xwhking.interface_test.entity.User;
import org.springframework.web.bind.annotation.GetMapping;
import org.springframework.web.bind.annotation.RequestMapping;
import org.springframework.web.bind.annotation.RequestParam;
import org.springframework.web.bind.annotation.RestController;import javax.servlet.http.HttpServletRequest;
import java.util.Date;import static com.xwhking.interface_test.utils.GenSign.genSign;@RestController
@RequestMapping("/user")
public class UserController {/*** 校驗簽名,以及其他信息,注意這里的 secretKey 是模擬的一般用戶的 secretKey 是需要去從數據庫取出來,* 然后進行驗證。* @param request*/private void verifyRequest(HttpServletRequest request){String sign = request.getHeader("sign");String accessKey = request.getHeader("accessKey");String secretKey = "admin123";String userId = request.getHeader("userId");String requestTime = request.getHeader("timestamp");long oldTime = Long.parseLong(requestTime);long newTime = new Date().getTime();if(newTime - oldTime > 10000){throw new RuntimeException("檢測到請求異常");}String newSign = genSign(accessKey,secretKey,Long.parseLong(userId));if(!newSign.equals(sign)){throw new RuntimeException("簽名錯誤");}}@GetMapping("/name")public String getName(@RequestParam String name , HttpServletRequest request){verifyRequest(request);System.out.println("請求參數名字為 : " + name);return "GET 請求參數名字為 : " + name;}@GetMapping("/getOne")public User getUser(HttpServletRequest request){verifyRequest(request);User user = new User();user.setId(123l);user.setUsername("xwhking");user.setPassword("admin123");System.out.println(user);return user ;}
}
config 代碼
要注意其中的注解
package com.xwhking.interfacestarter.config;import com.xwhking.interfacestarter.client.XWHKINGClient;
import lombok.Data;
import org.springframework.boot.context.properties.ConfigurationProperties;
import org.springframework.context.annotation.Bean;
import org.springframework.context.annotation.ComponentScan;
import org.springframework.context.annotation.Configuration;
@Configuration
@ConfigurationProperties(prefix = "xwhking.client")
@Data
@ComponentScan
public class XWHKINGClientConfig {private String accessKey;private String secretKey;private String userId;@Beanpublic XWHKINGClient xwhkingClient(){return new XWHKINGClient(accessKey,secretKey,Long.parseLong(userId));}
}
生成簽名代碼
這里直接使用了 Hutool 工具庫中的 sh256 的生成方法
package com.xwhking.interfacestarter.utils;import cn.hutool.crypto.SecureUtil;
import lombok.Data;@Data
public class GenSign {public static String genSign(String accessKey,String secretKey,Long userId){String key = "xwhking" + "." + accessKey + "." + secretKey + "."  + userId;return SecureUtil.sha256(key);}
}
META-INF 中文件的內容
通過看內容就可以看出,你需要把后面的內容進行替換,寫入你的地址。
org.springframework.boot.autoconfigure.EnableAutoConfiguration = com.xwhking.interfacestarter.XWHKINGClientConfig
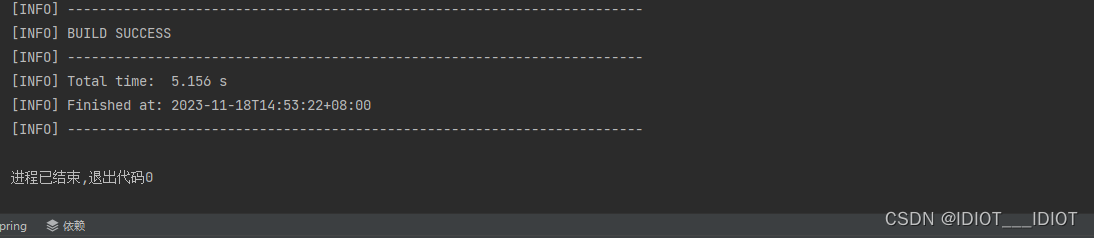
到這里 Starter 就完了,然后使用 maven 進行打包(調用install)。這里的打包會把包直接放入你的 maven 倉庫,打包成功就會出現 BUILD SUCCESS
在其他項目中使用
首先復制這段代碼
<groupId>com.xwhking</groupId>
<artifactId>InterfaceStarter</artifactId>
<version>0.0.1</version>
然后在你的其他項目中添加進依賴
<dependency><groupId>com.xwhking</groupId><artifactId>InterfaceStarter</artifactId><version>0.0.1</version>
</dependency>
刷新 maven 倉庫
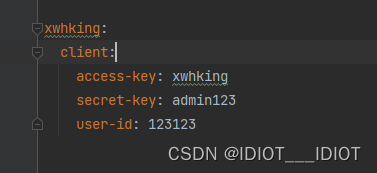
然后再 yml 配置中加入配置
在 config中的prefix 可以設置前綴,也就是可以更改xwhking.client
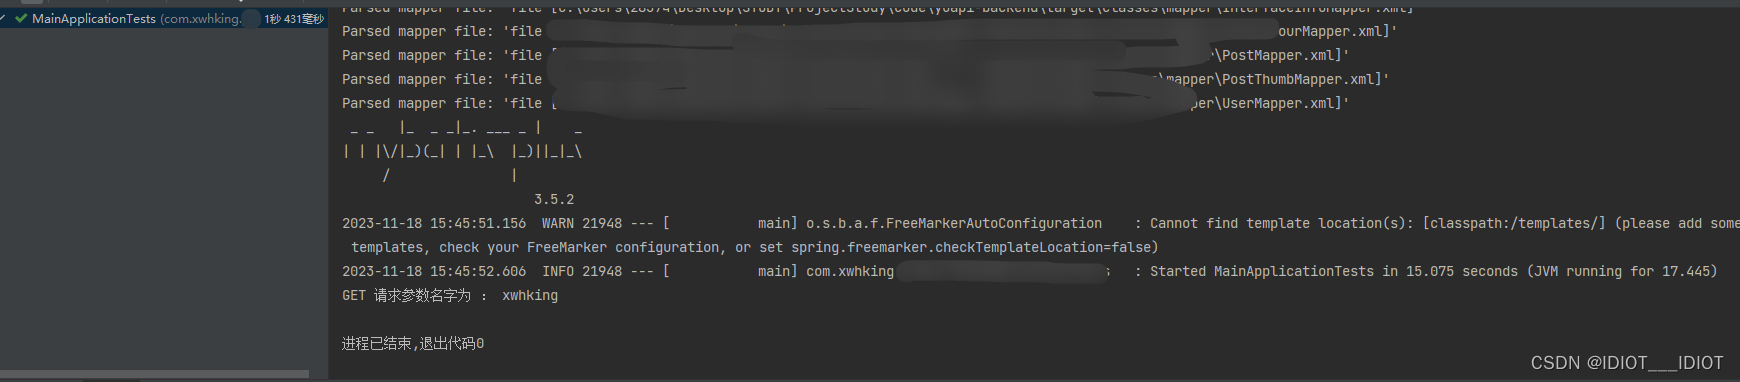
然后在你的代碼中使用 Test 進行測試
@SpringBootTest
class MainApplicationTests {@Resourceprivate XWHKINGClient xwhkingClient;@Testvoid testClient(){xwhkingClient.getName("xwhking") ;}}
調用結果:
出來了 xwhking 結果成功。
這樣開發一個starter 就結束了


)
![vue3的兩個提示[Vue warn]: 關于組件渲染和函數外部使用](http://pic.xiahunao.cn/vue3的兩個提示[Vue warn]: 關于組件渲染和函數外部使用)

)


】變量和簡單數據類型)


