提示:本人長期接收外包任務。
前言
本文詳細介紹應用源碼進行pgsql的安裝步驟,本文以postgresql-12.0為例。
一、下載并解壓安裝包
☆下載地址:https://ftp.postgresql.org/pub/source/
解壓安裝包,創建安裝路徑:
[root@localhost ~]# tar -zvxf postgresql-12.0.tar.gz
[root@localhost ~]# mkdir -p /export/servers/app/postgresql-12.0?
二、配置并安裝
?進入解壓文件,執行pgsql編譯安裝:
[root@localhost ~]# cd postgresql-12.0
[root@localhost postgresql-12.0]# ./configure?--prefix=/export/servers/app/postgresql-12.0 && make && make install?
如果命令窗中提示“PostgreSQL installation complete.”,則表示安裝成功。
如果出現“readline library”等相關錯誤,則需要進行依賴庫安裝?:
[root@localhost postgresql-12.0]# sudo apt install libreadline-dev三、添加環境變量
在系統環境變量文件中添加pgsql相關路徑,并刷新配置。
[root@localhost postgresql-12.0]#vim /etc/profileexport PGHOME=/export/servers/app/postgresql-12.5
export PGDATA=/export/servers/data/pgsql/
export PATH=$PGHOME/bin:$PATH
export LANG=en_US.utf8
export LD_LIBRARY_PATH=$PGHOME/lib:$LD_LIBRARY_PATH
?[root@localhost postgresql-12.0]#source /etc/profile四、初始化數據庫
1.創建用戶和數據中心,并設置文件所有權。
?[root@localhost postgresql-12.0]#useradd postgres[root@localhost postgresql-12.0]#mkdir -p /export/servers/data/pgsql/[root@localhost postgresql-12.0]#chown postgres:postgres /export/servers/data/pgsql/2.初始化數據庫
以postgres的身份進行數據庫初始化:
[root@localhost postgresql-12.0]#su - postgres?
[postgres@localhost bin]$/export/servers/app/postgresql-12.0/bin/initdb -D /export/servers/data/pgsql/
?如果命令窗中提示“Success.You can now start the database server using...”,則表示初始化成功。
?五、數據庫連接配置
1.修改監聽地址
將postgresql.conf文件中的配置項修改為listen_addresses='*',若主機有多張網卡,也可將其修改為指定網卡的IP。
[postgres@localhost bin]$?vim /export/servers/data/pgsql/postgresql.conf2.允許遠程連接
在pg_hba.conf文件末尾處添加一行“host? ? ? ? all? ? ? ? all? ? ? ? 0.0.0.0/0? ? ? ? md5”。修改配置文件后需要重啟服務。
[postgres@localhost bin]$vim /export/servers/data/pgsql/pg_hba.conf
[postgres@localhost bin]$/export/servers/app/postgresql-12.0/bin/pg_ctl -D /export/servers/data/pgsql/ -l logfile restart
?注意:最后一項如果設置為“md5”,表示使用密碼登錄。如果為“trust”,則表示無密碼登錄。

?六、啟動數據庫服務
先后執行如下兩條指令來啟動數據庫服務:
[postgres@localhost bin]$/export/servers/app/postgresql-12/bin/pg_ctl -D /export/servers/data/pgsql/ -l logfile start
waiting?for?server?to?start..../bin/sh: logfile: Permission denied
stopped waiting
pg_ctl: could?not?start server
Examine the log?output.[postgres@localhost bin]$ pg_ctl start
waiting for server to start....2023-03-03 11:27:58.887 CST [41939] LOG: starting PostgreSQL 12.5 on x86_64-pc-linux-gnu, compiled by gcc (GCC) 7.3.0, 64-bit
2023-03-03 11:27:58.888 CST [41939] LOG: listening on IPv4 address "0.0.0.0", port 5432
2023-03-03 11:27:58.888 CST [41939] LOG: listening on IPv6 address "::", port 5432
2023-03-03 11:27:58.890 CST [41939] LOG: listening on Unix socket "/tmp/.s.PGSQL.5432"
2023-03-03 11:27:58.908 CST [41940] LOG: database system was shut down at 2023-03-03 11:12:37 CST
2023-03-03 11:27:58.911 CST [41939] LOG: database system is ready to accept connections
done
server started
?驗證5432端口是否開啟:
[postgres@localhost bin]$netstat -anp | grep 5432如下圖所示,則表示成功開啟。?

?七、登錄并修改postgres密碼
?1.將postgres的密碼修改為postgres。建議賬號和密碼設置為一致,方便記憶。
[postgres@localhost pgsql]# psql?
postgres=#alter?user?postgres?with?password?'postgres';?
ALTER ROLE
postgres=#exit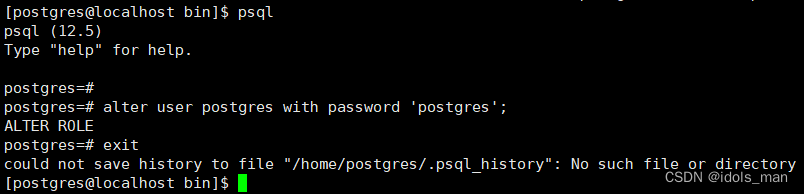
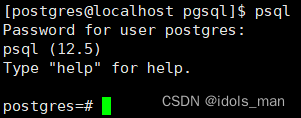
?2.驗證密碼是否修改成功
[postgres@localhost pgsql]$ psql
Password?for?user?postgres:??????? # 輸入修改的密碼:這里是postgres
輸入正確密碼后命令窗如下所示:
八、執行SQL語句
至此,pgsql數據庫安裝完畢。在上圖中的postgres=#處即可執行SQL語句。?
總結
銀河麒麟系統安裝程序比較繁瑣,潛在問題比較多,個人建議均通過源碼自定義編譯安裝。
國產系統還需努力啊!

)
![【python】[subprocess庫] 優雅的并發模板:并發,多進程管理與交互](http://pic.xiahunao.cn/【python】[subprocess庫] 優雅的并發模板:并發,多進程管理與交互)
)
)


)


dami CMS)
