通過網盤分享的文件:Nginx
鏈接: https://pan.baidu.com/s/1dCc7FoND90H_x7rvRUXJqg 提取碼: yyds
通過網盤分享的文件:Tomcat
鏈接: https://pan.baidu.com/s/1nj_5j_66gS_YHUAX1C25jg 提取碼: yyds
Nginx安裝、啟動
- 安裝依賴庫
#安裝C編譯器
yum install -y gcc gcc-c++
- 安裝pcre 、zlib、openssl
mkdir /soft
cd /soft
將安裝包上傳到Linux
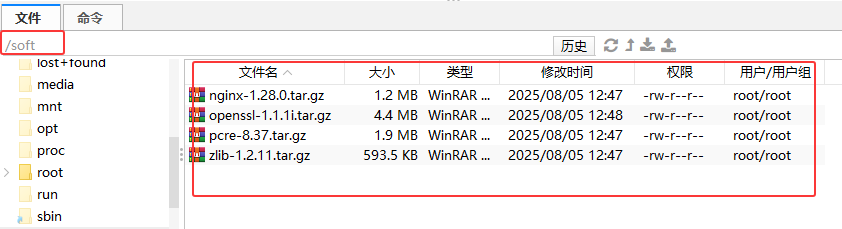
cd /soft
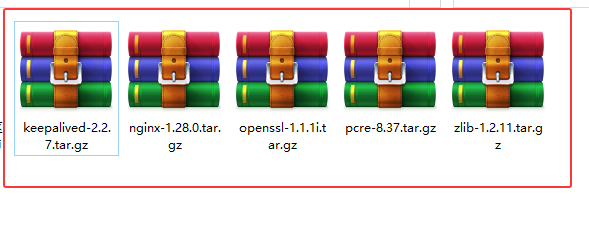
tar -zxvf nginx-1.28.0.tar.gz
tar -zxvf openssl-1.1.1i.tar.gz
tar -zxvf pcre-8.37.tar.gz
tar -zxvf zlib-1.2.11.tar.gz
tar -zxvf keepalived-2.2.7.tar.gz解壓之后:
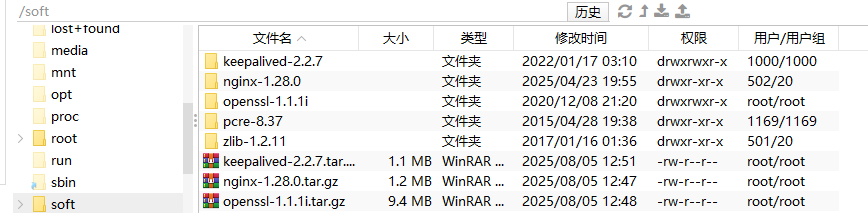
- 解壓Nginx包,并安裝
cd  /soft
cd  /soft/pcre-8.37/
./configure
make && make installcd  /soft/zlib-1.2.11/
./configure
make && make installcd /soft/openssl-1.1.1i/
./configure
make && make installln -s /usr/local/lib64/libssl.so.1.1  /usr/lib64/libssl.so.1.1
ln -s /usr/local/lib64/libcrypto.so.1.1 /usr/lib64/libcrypto.so.1.1cd /soft/nginx-1.28.0/
./configure
make && make install- 進入
nginx所在目錄
# 關閉防火墻
systemctl stop firewalldcd /usr/local/nginx/sbin
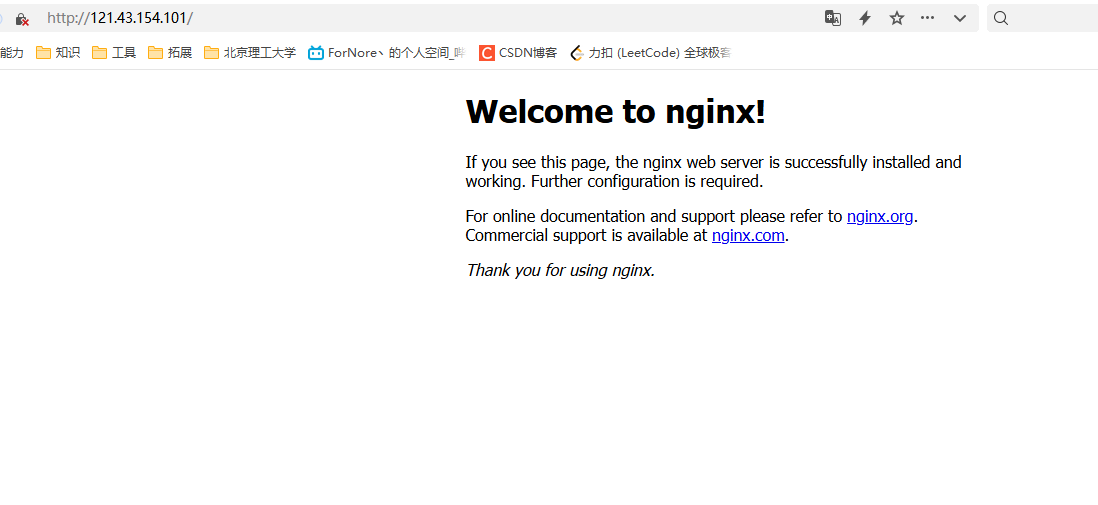
./nginx # 啟動nginx服務# 查看nginx狀態
ps -ef|grep nginx訪問Nginx:
- 補充Nginx命令
./nginx -s stop #快速停止
./nginx -s quit #完成已接受的請求后,停止
./nginx -s reload #重新加載配置
./nginx -t #檢查nginx配置是否正確
#查看nginx狀態
ps -ef|grep nginx

- 注冊系統服務
在這之前最好
停止nginx
通過系統服務的方式啟動nginx
cd /usr/local/nginx/sbin
./nginx -s stop #快速停止
vim /usr/lib/systemd/system/nginx.service
注冊系統服務:
[Unit]
Description=nginx
After=network.target remote-fs.target nss-lookup.target[Service]
Type=forking
PIDFile=/usr/local/nginx/logs/nginx.pid
ExecStartPre=/usr/local/nginx/sbin/nginx -t -c /usr/local/nginx/conf/nginx.conf
ExecStart=/usr/local/nginx/sbin/nginx -c /usr/local/nginx/conf/nginx.conf
ExecReload=/usr/local/nginx/sbin/nginx -s reload
ExecStop=/usr/local/nginx/sbin/nginx -s stop
ExecQuit=/usr/local/nginx/sbin/nginx -s quit
PrivateTmp=true[Install]
WantedBy=multi-user.target  # 多用戶
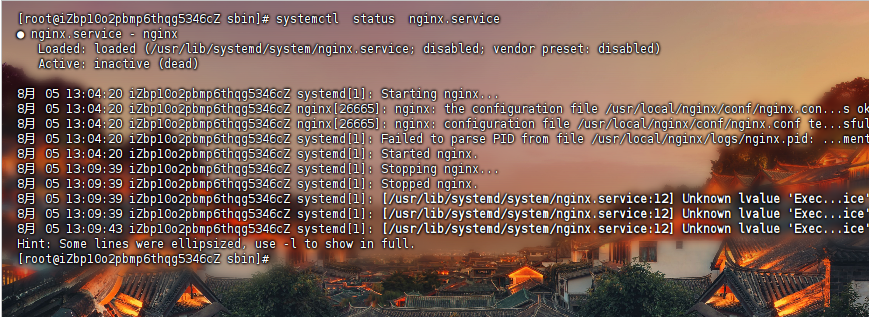
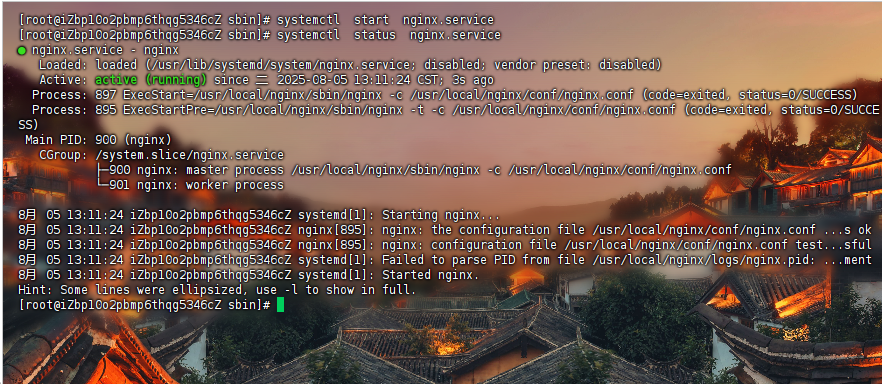
以系統服務啟動:
systemctl  status  nginx.service
systemctl  stop   nginx.service
systemctl  start  nginx.service
systemctl restart  nginx.service
Nginx 目錄
conf #配置文件|-nginx.conf # 主配置文件|-其他配置文件,都被引入到了nginx.conf
html #靜態頁面
logs|-access.log #訪問日志(每次訪問都會記錄)|-error.log #錯誤日志|-nginx.pid #進程號
sbin|-nginx #主進程文件
*_temp #運行時,生成臨時文件

Nginx的location規則詳解
=
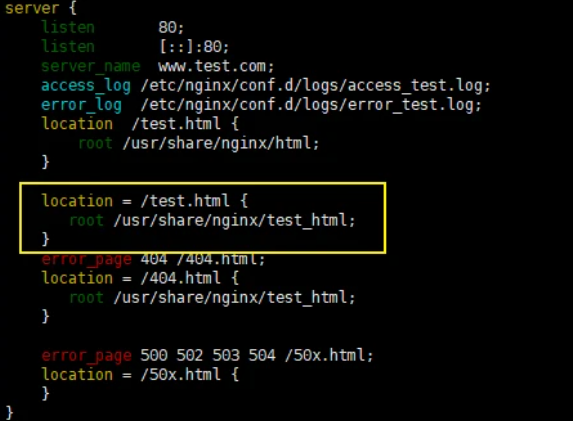
通過域名和路徑訪問后的內容如下
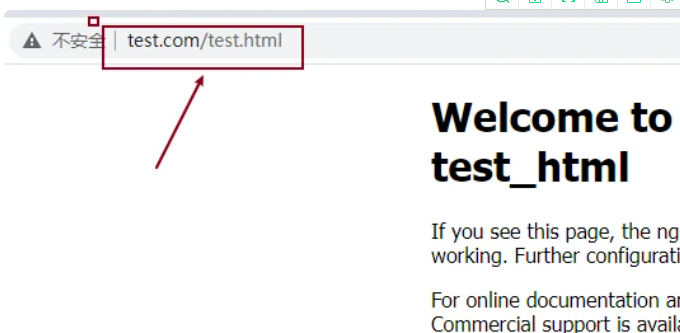
注意:
/usr/share/nginx/test_html文件夾下需要有test.html才可以正常訪問
root與alias
請求的條件為test.html
通過root指定的路徑為/usr/share/nginx/test_html,因此在匹配的時候,這個路徑下就必須要有test.html這個文件才可以,否則就會找不到而報錯,
如果用alias,那么通過瀏覽器進行請求的時候,alias也是指定到/usr/share/nginx/test_htm路徑下,但是會匹配默認的index.html,而無須強制匹配test.html,但是此時就不能使用”=”來進行精確匹配,現在將root改為alias,如圖:
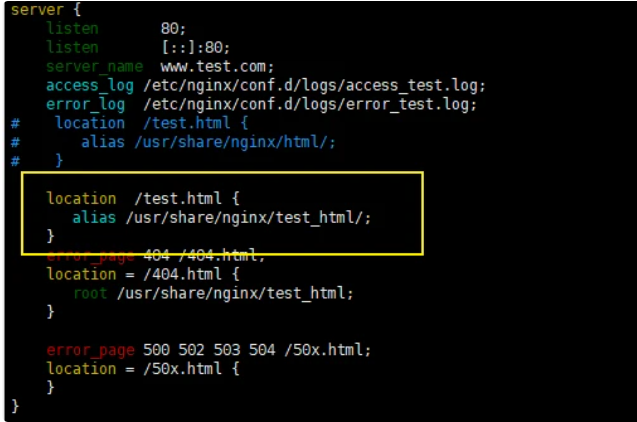
location / {alias /app/html/;index index.html index.htm;}兩者區別:
alias是目錄別名,root是最上層目錄的定義
alias后必須用"/"結束,不然找不到文件,root可有可無
注意:alias指定的路徑結尾要
加”/”
^~
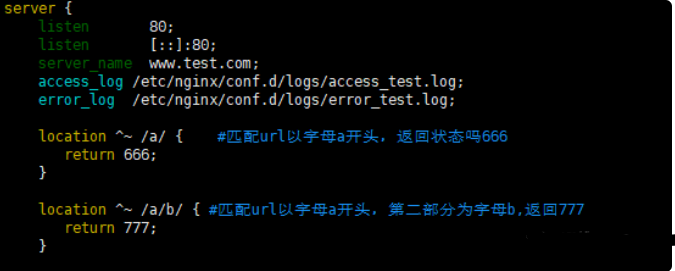
發起同樣的請求,觀察返回狀態碼,如圖
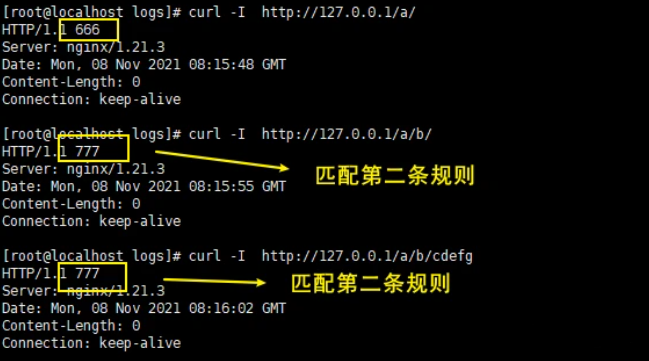
注意:如果
^~匹配成功了,那么表示阻斷正則表達式,不再進行正則匹配
Nginx配置
指令
- ① listen

listen 127.0.0.1:8000; # 監聽localhost:8000  監聽指定的IP和端口
listen 127.0.0.1;	#監聽指定IP的所有端口
listen 8000;	#監聽指定端口上的連接
listen *:8000;	#監聽指定端口上的連接
default_server屬性是標識符,用來將此虛擬主機設置成默認主機。所謂的默認主機指的是如果沒有匹配到對應的address:port,則會默認執行的。如果不指定默認使用的是第一個server。
server{listen 8080 default_server;server_name localhost;default_type text/plain;return 444 'This is a error request';
}
- ② server_name
~ : 用于表示當前uri中包含了正則表達式,并且區分大小寫
~*: 用于表示當前uri中包含了正則表達式,并且不區分大小寫
^~: 用于不包含正則表達式的uri前綴,功能和不加符號的一致,唯一不同的是,如果模式匹配,那么就停止搜索其他模式了
關于
server_name的配置方式有三種,分別是:
精確匹配
通配符匹配
正則表達式匹配
server {listen 80;#server_name www.dhy.cn www.xpy.cn; 精確匹配#server_name *.itcast.cn www.itheima.*; 通配符匹配#server_name ~^www\.(\w+)\.com$; #正則表達式匹配, \是把后面的.轉義:讓.不做匹配, ^開始$結束,()代表一個正則表達式}
匹配順序分別為
#	準確的server_name匹配
#	以通配符開始的字符串
#	以通配符結束的字符串
# 匹配正則表達式- ③ location
location:用來設置請求的URI
不帶符號,要求必須以指定模式開始
server {listen 80;server_name 127.0.0.1; # 等同localhostlocation /abc{default_type text/plain;return 200 "access success";}
}
#以下訪問都是正確的
#http://192.168.200.133/abc
#http://192.168.200.133/abc?p1=TOM
#http://192.168.200.133/abc/
#http://192.168.200.133/abcdef
= : 用于
不包含正則表達式的uri前,必須與指定的模式精確匹配
server {listen 80;server_name 127.0.0.1;location =/abc{default_type text/plain;return 200 "access success";}
}
#可以匹配到
#http://192.168.200.133/abc #代表/資源下
#http://192.168.200.133/abc?p1=TOM 帶參數
#匹配不到
#http://192.168.200.133/abc/ #代表abc這個資源下
#http://192.168.200.133/abcdef
- ④ error_page
(1)可以指定具體跳轉的地址
server {error_page 404 http://www.dhy.cn;
}
(2)可以指定重定向地址
server{error_page 404 /50x.html;error_page 500 502 503 504 /50x.html;location =/50x.html{root html;}
}
簡化版的nginx.conf
worker_processes  1; # 啟動的worker進程數events{#設置Nginx網絡連接序列化accept_mutex on;#設置Nginx的worker進程是否可以同時接收多個請求multi_accept on;#設置Nginx的worker進程最大的連接數worker_connections 1024;#設置Nginx使用的事件驅動模型use epoll;
}http {include       mime.types;#include是引入關鍵字,這里引入了mime.types這個配置文件(同在conf目錄下,mime.types是用來定義,求返回的content-type)default_type  application/octet-stream; #mime.types未定義的,使用默認格式application/octet-streamsendfile on; # 開啟 高效文件傳輸模式。tcp_nopush on; #需要在 sendfile開啟模式才有效,防止網路阻塞,積極的減少網絡報文段的數量。將響應頭和正文的開始部分一起發送,而不一個接一個的發送tcp_nodelay on;keepalive_timeout  65; #長鏈接超時時間#一個nginx可以啟用多個server(虛擬服務器)server {listen       80;#監聽端口80server_name  localhost;  #接收的域名location / { root   html; #根目錄指向html目錄,看下圖index  index.html index.htm; #域名/index 指向 index.html index.htm文件,看下圖}error_page   500 502 503 504  /50x.html; # 服務器錯誤碼為500 502 503 504,轉到"域名/50x.html"location = /50x.html {# 指定到html文件夾下找/50x.htmroot   html;#根目錄指向html目錄,看下圖}}
}


sendfile
打開sendfile,用戶請求的數據不用再加載到nginx的內存中,而是直接發送

Nginx配置使用場景
修改nginx配置文件后,記得
重新加載nginx==>./nginx -s reload
不同二級域名,映射到不同靜態網頁
可以寫多個server字段,從前向后匹配,先匹配到哪個就用哪個
用戶訪問pro.hedaodao.ltd,就會走到第一個server配置;test.hedaodao.ltd走到第二個配置
http {#....其他屬性server {listen       80;server_name  pro.hedaodao.ltd;location / { root   html/pro; index  index.html index.htm;}error_page   500 502 503 504  /50x.html;location = /50x.html {root   html;}}server {listen       80;server_name  test.hedaodao.ltd;location / { root   html/test; index  index.html index.htm;}error_page   500 502 503 504  /50x.html;location = /50x.html {root   html;}}
}
不同域名,映射到同一靜態頁面
server_name
- 可以寫多個,用空格分開
- 使用通配符(*)
- 使用正則表達式(https://blog.csdn.net/yangyelin/article/details/112976539)
http{ 		server {listen       80;server_name  *.hedaodao.ltd  ~^[0-9]+\.hedaodao\.ltd$; # "\."是轉譯"."location / { root   html/test; index  index.html index.htm;}error_page   500 502 503 504  /50x.html;location = /50x.html {root   html;}}
}
Nginx命令配置到系統環境
(1)修改/etc/profile文件
vim /etc/profile
#在最后一行添加
export PATH=$PATH:/usr/local/nginx/sbin
source /etc/profile #使之立即生效
nginx -v #檢測是否配置成功
正則表達式

反向代理與負載均衡
反向代理:這種代理方式叫做,隧道代理。有性能瓶頸,因為所有的數據都經過Nginx,所以Nginx服務器的性能至關重要

負載均衡:把請求,按照一定算法規則,分配給多臺業務服務器(即使其中一個壞了/維護升級,還有其他服務器可以繼續提供服務)

反向代理
啟用proxy_pass,root和index字段就會失效
proxy_pass后的地址必須寫完整 http://xxx,不支持https
當訪問localhost時(Nginx服務器),網頁打開的是http://xxx(應用服務器),網頁地址欄寫的還是localhost
http{ 		server {listen       80;server_name  localhost;location / { proxy_pass http://xxx; #配置后root和index失效#root   html/test; #index  index.html index.htm;}error_page   500 502 503 504  /50x.html;location = /50x.html {root   html;}}
}
編寫proxy_pass的時候,后面的值要不要加"/"?
server {listen 80;server_name localhost;location /{#proxy_pass http://192.168.200.146;proxy_pass http://192.168.200.146/;}
}
# 當客戶端訪問 http://localhost/index.html,效果是一樣的
server{listen 80;server_name localhost;location /server{#proxy_pass http://192.168.200.146;proxy_pass http://192.168.200.146/;}
}
當客戶端訪問 http://localhost/server/index.html
這個時候,第一個proxy_pass就變成了http://localhost/server/index.html
第二個proxy_pass就變成了http://localhost/index.html效果就不一樣了。
結論:
不加了/,拼接location的uri,
加了/,不拼接
負載均衡
使用upstream定義一組地址【在server字段下】
服務端設置
這里不準備三臺虛擬機,充當真實服務器,而使用端口進行區分
server {listen   9001;server_name localhost;default_type text/html;location /{return 200 '<h1>192.168.111.101:9001</h1>';}
}server {listen   9002;server_name localhost;default_type text/html;location /{return 200 '<h1>192.168.111.101:9002</h1>';}
}
server {listen   9003;server_name localhost;default_type text/html;location /{return 200 '<h1>192.168.111.101:9003</h1>';}
}
負載均衡器設置
upstream backend{server 192.168.111.101:9091;server 192.168.111.101:9092;server 192.168.111.101:9093;
}
server {listen 80;server_name localhost;location /{proxy_pass http://backend;}
}
① 負載均衡狀態
代理服務器在負責均衡調度中的狀態有以下幾個:

down
down:將該服務器標記為永久不可用,那么該代理服務器將不參與負載均衡
upstream backend{server 192.168.111.101:9001 down;server 192.168.111.101:9002;server 192.168.111.101:9003;
}
server {listen 80;server_name localhost;location /{proxy_pass http://backend;}
}
該狀態一般會對需要停機維護的服務器進行設置。
backup
backup:將該服務器標記為備份服務器,當主服務器不可用時,將用來傳遞請求。
當主服務器恢復時,會使用主服務器來處理請求
upstream backend{server 192.168.111.101:9001 ;server 192.168.111.101:9002 backup;server 192.168.111.101:9003;
}
server {listen 80;server_name localhost;location /{proxy_pass http://backend;}
}
介紹一個工具firewall-cmd,該工具是Linux提供的專門用來操作firewall的。
- 查詢防火墻中指定的端口是否開放
firewall-cmd --query-port=9001/tcp
- 如何開放一個指定的端口
firewall-cmd --permanent --add-port=9002/tcp
- 批量添加開發端口
firewall-cmd --permanent --add-port=9001-9003/tcp
- 如何移除一個指定的端口
firewall-cmd --permanent --remove-port=9003/tcp
- 重新加載
firewall-cmd --reload
其中:
-
? --permanent表示設置為持久
-
? --add-port表示添加指定端口
-
? --remove-port表示移除指定端口
max_conns
max_conns=number:用來設置代理服務器同時活動鏈接的最大數量,默認為0,表示不限制,使用該配置可以根據后端服務器處理請求的并發量來進行設置,防止后端服務器被壓垮。
upstream backend{server 192.168.111.101:9001 ;server 192.168.111.101:9002 ;server 192.168.111.101:9003 max_conns=100 ;
}
server {listen 80;server_name localhost;location /{proxy_pass http://backend;}
}
max_fails和fail_timeout
max_fails=number:設置允許請求代理服務器失敗的次數,默認為1。
fail_timeout=time:設置經過max_fails失敗后,服務暫停的時間,默認是10秒
upstream backend{server 192.168.111.101:9001 ;server 192.168.111.101:9002 ;server 192.168.111.101:9003  max_fails=3 fail_timeout=15;
}
server {listen 80;server_name localhost;location /{proxy_pass http://backend;}
}
② 負載均衡策略
weight加權[加權輪詢]
訪問使用哪個地址的權重
upstream backend{server 192.168.111.101:9001 weight=10;server 192.168.111.101:9002 weight=5;server 192.168.111.101:9003 weight=3;
}
server {listen 80;server_name localhost;location /{proxy_pass http://backend;}
}
ip hash
可以解決session共享問題
upstream backend{ip_hash;server 192.168.111.101:9001 ;server 192.168.111.101:9002 ;server 192.168.111.101:9003 ;
}
server {listen 80;server_name localhost;location /{proxy_pass http://backend;}
}
url_hash
upstream backend{hash &request_uri;server 192.168.111.101:9001 ;server 192.168.111.101:9002 ;server 192.168.111.101:9003 ;
}
server {listen 80;server_name localhost;location /{proxy_pass http://backend;}
}
least_conn
最少連接,把請求轉發給連接數較少的后端服務器。輪詢算法是把請求平均的轉發給各個后端,使它們的負載大致相同;但是,有些請求占用的時間很長,會導致其所在的后端負載較高。這種情況下,
least_conn這種方式就可以達到更好的負載均衡效果
upstream backend{least_conn;server 192.168.111.101:9001 ;server 192.168.111.101:9002 ;server 192.168.111.101:9003 ;
}
server {listen 80;server_name localhost;location /{proxy_pass http://backend;}
}
動靜分離
當用戶請求時,
動態請求分配到Tomcat業務服務器,靜態資源請求放在Nginx服務器中
例子:
圖片目錄

Nginx配置

index.html引入兩個圖片

訪問

URL重寫
rewrite是URL重寫的關鍵指令,根據regex(正則表達式)部分內容,重定向到replacement,結尼是flag標記。rewrite    <regex>   <replacement>  [flag];
關鍵字				正則				替代內容     flagt標記正則:per1森容正則表達式語句進行規則匹配
替代內容:將正則匹配的內容替換成replacementflag標記說明:
last  #本條規則匹配完成后,繼續向下匹配新的1ocation URI規則
break #本條規則匹配完成即終止,不再匹配后面的任何規則redirect #返回302臨重定向,游覽器地址會顯示跳轉后的URL地址
permanent #返回301永久重定向,測覽器地址欄會顯示跳轉后的URL地址
瀏覽器地址欄訪問 http://localhost/123.html實際上是訪問http://localhost//index.jsp?pageNum=123
server {listen       80;server_name  localhost;location / { rewrite ^/([0-9]+).html$ /index.jsp?pageNum=$1  break; #$1 代表第一個正則表達式的結果proxy_pass http://xxx;}error_page   500 502 503 504  /50x.html;location = /50x.html {root   html;}
}
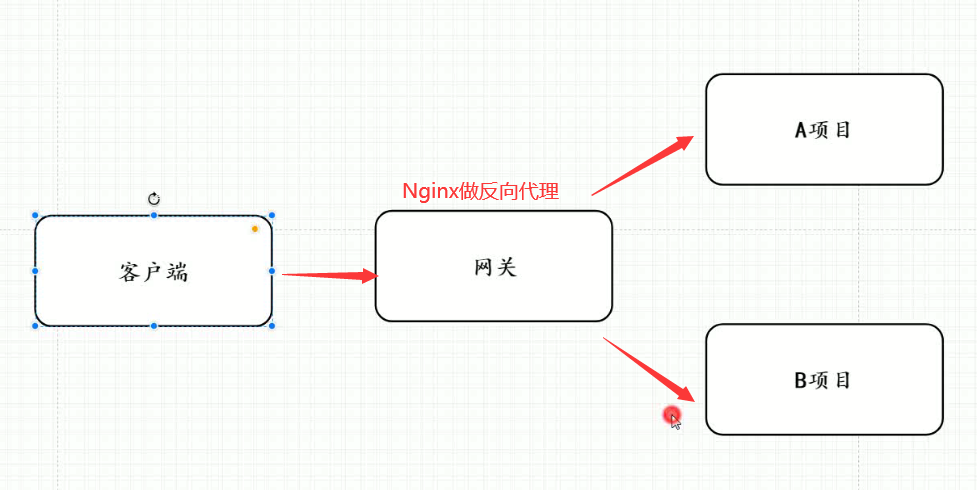
網關服務器

上圖中,應用服務器,不能直接被外網訪問到,只能通過Nginx服務器進行訪問(
使用proxy_pass),這時候這臺Nginx服務器就成為了網關服務器(承擔入口的功能)
所以,我們啟動應用服務器的防火墻,設置其只能接受這臺Nginx服務器的請求
啟動防火墻
systemctl start firewalld.service
不讓外網直接訪問的加上rich規則

例:在
192.168.111.102上加
- ① 添加rich規則
firewall-cmd --permanent --add-rich-rule="rule family="ipv4" source address="192.168.111.101" port protocol="tcp" port="8080" accept" #配置意思:外網不能訪問,但是讓192.168.111.101這個地址可以訪問8080端口- ② 移除rich規則
firewall-cmd --permanent --remove-rich-rule="rule family="ipv4" source address="192.168.111.101" port port="8080" protocol="tcp" accept"
- ③ 重啟
移除和添加規則都要重啟才能生效
firewall-cmd --reload查看所有規則
firewall-cmd --list-all #所有開啟的規則

- ④ 配置Nginx
在
192.168.111.101
查看指定端口的進程號
netstat -tanlp |grep 端口號 #即可查到占用該端口號的進程
nginx配置,訪問該主機的80端口,可以跳到
192.168.111.102:8080

- ⑤ 訪問

防盜鏈
當我們請求到一個頁面后,這個頁面一般會再去請求其中的靜態資源,這時候請求頭中,會有一個
referer字段,表示當前這個請求的來源,我們可以限制指定來源的請求才返回,否則就不返回,這樣可以節省資源

valid_referers none|server_name
設置有效的referer值
- none:檢測地址
沒有referer,則有效 - server_name:檢測主機地址,
referer顯示是從這個地址來的,則有效(server_name必須是完整的http://xxxx)
注意:if ($invalid_referer)中if后有個空格,不寫就會報錯
nginx: [emerg] unknown directive "if($invalid_referer)" in /usr/local/nginx/conf/nginx.conf:27- ① Nginx配置
例子:這里設置nginx服務器中的img目錄下的圖片必須referer為http:192.168.174/133才能訪問
server {listen       80;server_name  localhost;location / { proxy_pass http://xxx;}location /img{valid_referers http:192.168.174/133;if ($invalid_referer){#無效的return 403;#返回狀態碼403}root html;index  index.html index.htm;}error_page   500 502 503 504  /50x.html;location = /50x.html {root   html;}
}
如果引用這張圖片的頁面且
referer并沒有被設置,圖片無法加載出來
如果直接訪問圖片地址,因為沒有refer字段指向來源,會直接顯示Nginx的頁面

- ② 設置盜鏈圖片
將提示圖片放在html/img/x.png,訪問設置防盜鏈圖片時,就返回這x.png張圖
location /img{valid_referers http:192.168.174/133;if ($invalid_referer){#無效的rewrite ^/  /img/x.png break;}root html;index  index.html index.htm;
}
跨域問題解決
- ① 同源策略
瀏覽器的同源策略:是一種約定,是瀏覽器最核心也是最基本的安全功能,如果瀏覽器少了同源策略,則瀏覽器的正常功能可能都會受到影響
同源: 協議、域名(IP)、端口相同即為同源
http://192.168.200.131/user/1
https://192.168.200.131/user/1
不http://192.168.200.131/user/1
http://192.168.200.132/user/1
不http://192.168.200.131/user/1
http://192.168.200.131:8080/user/1
不http://www.nginx.com/user/1
http://www.nginx.org/user/1
不http://192.168.200.131/user/1
http://192.168.200.131:8080/user/1
不http://www.nginx.org:80/user/1
http://www.nginx.org/user/1
滿足- ② 跨域問題
簡單描述下:
有兩臺服務器分別為A,B,如果從服務器A的頁面發送異步請求到服務器B獲取數據,
如果服務器A和服務器B不滿足同源策略,則就會出現跨域問題。
案例演示

1)nginx的html目錄下新建一個a.html
<html><head><meta charset="utf-8"><title>跨域問題演示</title><script src="jquery.js"></script><script>$(function(){$("#btn").click(function(){$.get('http://192.168.200.133:8080/getUser',function(data){alert(JSON.stringify(data));}); });});</script></head><body><input type="button" value="獲取數據" id="btn"/></body>
</html>
2)在nginx.conf配置如下內容
server{listen  8080;server_name localhost;location /getUser{default_type application/json;return 200 '{"id":1,"name":"TOM","age":18}';}
}
server{listen 	80;server_name localhost;location /{root html;index index.html;}
}
3)通過瀏覽器訪問測試

- ③ 解決方案
使用add_header指令,該指令可以用來添加一些頭信息
Access-Control-Allow-Origin: 直譯過來是允許跨域訪問的源地址信息,可以配置多個(多個用逗號分隔),也可以使用*代表所有源
Access-Control-Allow-Methods:直譯過來是允許跨域訪問的請求方式,值可以為 GET POST PUT DELETE…,可以全部設置,也可以根據需要設置,多個用逗號分隔
具體配置方式
location /getUser{
#可以跨域請求,并設置跨域請求的請求方式add_header Access-Control-Allow-Origin *;add_header Access-Control-Allow-Methods GET,POST,PUT,DELETE;default_type application/json;return 200 '{"id":1,"name":"TOM","age":18}';
}
高可用場景

用戶訪問時,
訪問的是一個虛擬IP,keepalived會選定一個主服務器使用這個虛擬IP
每臺機器上的keepalived會相互通信,根據其他機器上的keepalived進程是否存在,判斷服務器狀態,如果默認的Master停止了,就會在剩下的Backup機器中,競選出一臺Nginx服務器作為Master
安裝keepalived
yum install -y keepalived
修改keepalived配置
- 配置文件在
/etc/keepalived/keepalived.conf vrrp_instance、authentication、virtual_router_id、virtual_ipaddress這幾個一樣的機器,才算是同一個組里。這個組才會選出一個作為Master機器
這里我們設置兩臺機器,分別下載好keepalived,然后進行配置
vim /etc/keepalived/keepalived.conf #進行配置
機器一:
! Configuration File for keepalivedglobal_defs {router_id lb # 名字與其他配置了keepalive的機器不重復就行
}
vrrp_script chk_http_port { script "/usr/local/src/nginx_check.sh" interval 2      #(檢測腳本執行的間隔) weight 2 }
vrrp_instance dingchao {#vrrp實例名可以隨意取state MASTER #只能有一個默認的Master,其他寫BACKUPinterface ens33 # ifconfig 或ipaddr查看下網卡名,默認時ens33virtual_router_id 51 # 主、備機的 virtual_router_id 必須相同  priority 100 # 多臺安裝了keepalived的機器競爭成為Master的優先級,BACKUP 優先級低于MASTER advert_int 1 #通信時間authentication {auth_type PASSauth_pass 1111}virtual_ipaddress {192.168.111.110 #虛擬IP}
}
機器二:
! Configuration File for keepalivedglobal_defs {router_id lb2 # 名字與其他配置了keepalive的機器不重復就行
}
vrrp_script chk_http_port { script "/usr/local/src/nginx_check.sh" interval 2      #(檢測腳本執行的間隔) weight 2 }
vrrp_instance dingchao {#vrrp實例名可以隨意取state BACKUP #只能有一個默認的Master,其他寫BACKUPinterface ens33 # ip addr查看下網卡名,默認時ens33virtual_router_id 51 # 主、備機的 virtual_router_id 必須相同  priority 50# 多臺安裝了keepalived的機器競爭成為Master的優先級advert_int 1 #通信時間authentication {auth_type PASSauth_pass 1111}virtual_ipaddress {192.168.111.110 #虛擬IP}
}
添加檢測腳本
vim /usr/local/src/nginx_check.sh #將腳本添加進去
chmod +x /usr/local/src/nginx_check.sh #添加執行權限
#!/bin/bash
A=`ps -C nginx –no-header |wc -l`
if [ $A -eq 0 ];then/usr/local/nginx/sbin/nginxsleep 2if [ `ps -C nginx --no-header |wc -l` -eq 0 ];thenkillall keepalivedfi
fi
啟動
cd /usr/local/sbin
./keepalived # 啟動
Nginx 限流
控制速率
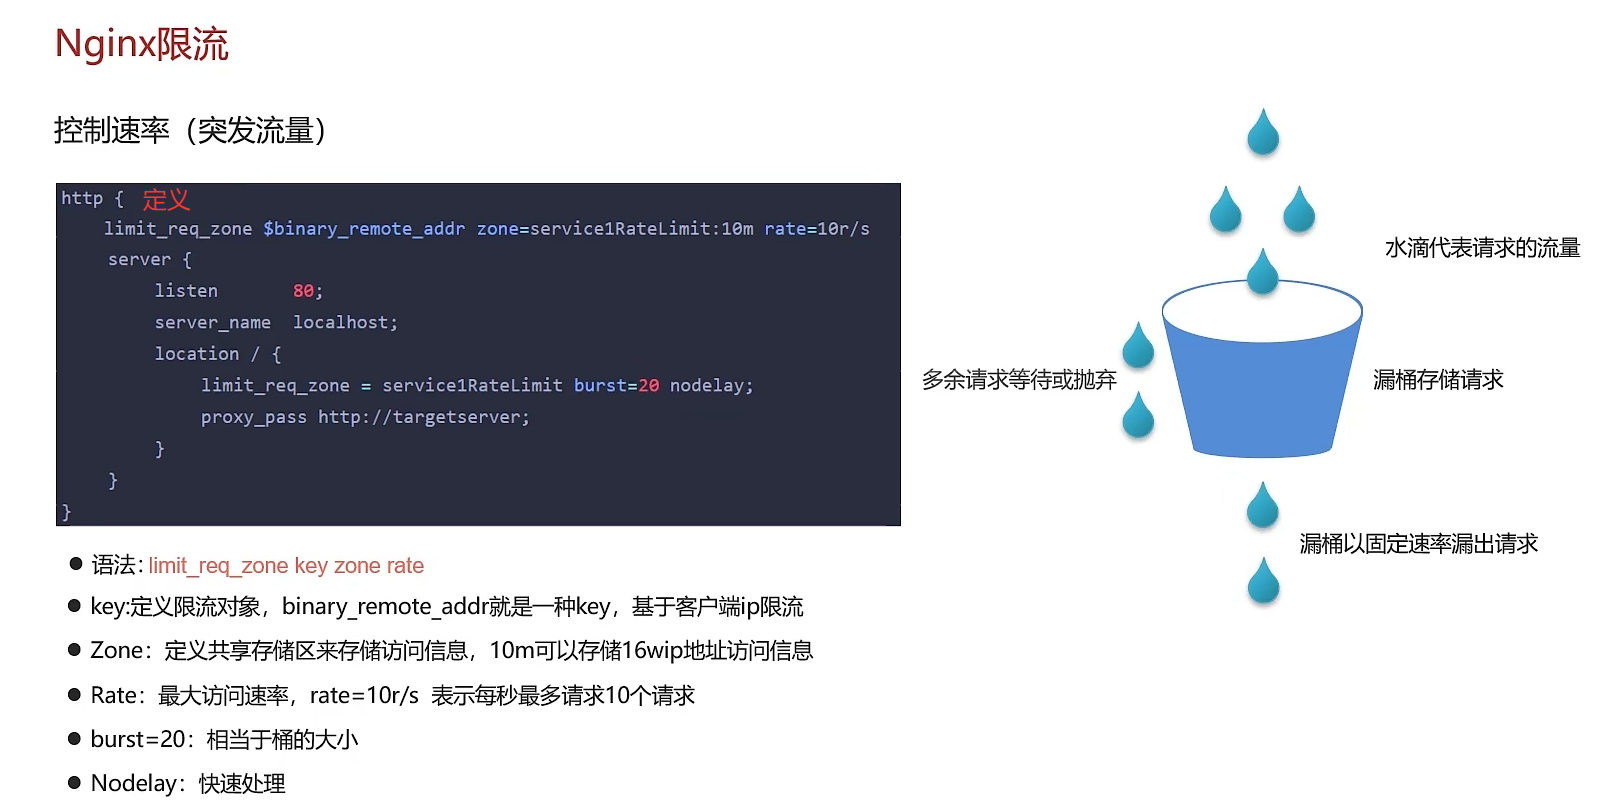
- nodelay 針對的是 burst 參數,burst=20 nodelay
配置 server,使用 limit_req 指令應用限流
server {location / {limit_req zone=service1RateLimit;proxy_pass http://my_upstream;}
}- key :定義限流對象,binary_remote_addr 是一種key,表示基于 remote_addr(客戶端IP) 來做限流,binary_ 的目的是壓縮內存占用量
- zone:定義共享內存區來存儲訪問信息, myRateLimit:10m 表示一個大小為10M,名字為myRateLimit的內存區域。1M能存儲16000 IP地址的訪問信息,10M可以存儲16W IP地址訪問信息。
- rate 用于設置最大訪問速率,rate=10r/s 表示每秒最多處理10個請求。Nginx 實際上以毫秒為粒度來跟蹤請求信息,因此 10r/s 實際上是限制:每100毫秒處理一個請求。這意味著,自上一個請求處理完后,若后續100毫秒內又有請求到達,將拒絕處理該請求。
控制并發
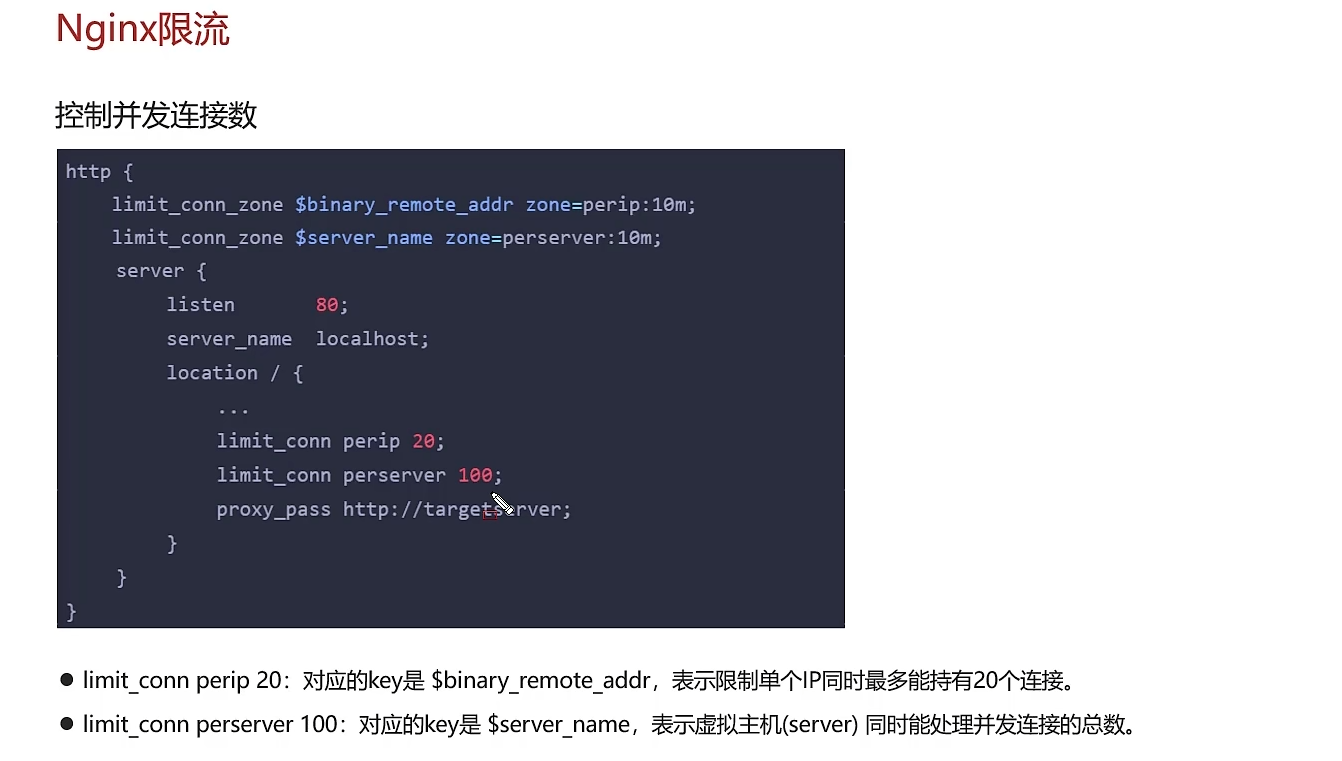
需要注意的是:只有當 request header 被后端server處理后,這個連接才進行計數
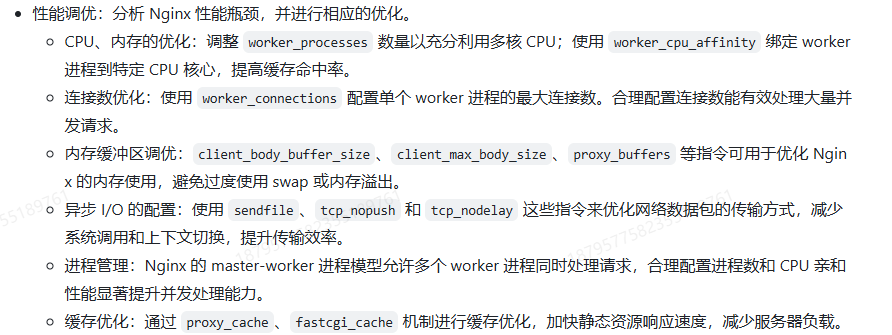
Nginx 優化
Nginx UI
https://nginxui.com/zh_CN/guide/getting-started.html#%E4%BD%BF%E7%94%A8-docker
Nginx應用場景
- 負載均衡、反向代理
- 跨域問題解決
- 網關 服務器
- 封禁IP
- 防盜鏈
- 動靜分離
- 限流等
基本配置優化
查看CPU核數
cat /proc/cpuinfo| grep "cpu cores"| uniq

worker_processes 4 ; # 設為cpu核數 啟動的worker進程數events{#設置Nginx網絡連接序列化accept_mutex on;#設置Nginx的worker進程是否可以同時接收多個請求multi_accept on;#設置Nginx的worker進程最大的連接數worker_connections 1024;#設置Nginx使用的事件驅動模型use epoll;
}http {include       mime.types;#include是引入關鍵字,這里引入了mime.types這個配置文件(同在conf目錄下,mime.types是用來定義,求返回的content-type)default_type  application/octet-stream; #mime.types未定義的,使用默認格式application/octet-streamsendfile on; # 開啟 高效文件傳輸模式。tcp_nopush on; #需要在 sendfile開啟模式才有效,防止網路阻塞,積極的減少網絡報文段的數量。將響應頭和正文的開始部分一起發送,而不一個接一個的發送tcp_nodelay on; #有數據隨時發送keepalive_timeout  65; #長鏈接超時時間#一個nginx可以啟用多個server(虛擬服務器)server {listen       80;#監聽端口80server_name  localhost;  #接收的域名location / { root   html; #根目錄指向html目錄,看下圖index  index.html index.htm; #域名/index 指向 index.html index.htm文件,看下圖}error_page   500 502 503 504  /50x.html; # 服務器錯誤碼為500 502 503 504,轉到"域名/50x.html"location = /50x.html {# 指定到html文件夾下找/50x.htmroot   html;#根目錄指向html目錄,看下圖}}
}
keepalive、worker_connections
轉發請求 提高效率
upstream backend{server 192.168.111.101:9001;server 192.168.111.101:9002;server 192.168.111.101:9003;keepalive 300; # 300個長連接,轉發請求效率大大提高!
}
server {listen 80;server_name localhost;location /{proxy_pass http://backend;}
}
緩存優化
# 代理緩存配置# meitecache:256m,大小256m,失效時間1天 inactive=1dproxy_cache_path "./meite_cachedata" levels=1:2 keys_zone=meitecache:256m inactive=1d max_size=1000g; server {listen 80;server_name localhost;location /details {#使用緩存名稱proxy_cache meitecache;#對以下狀態碼實現緩存~~~~proxy_cache_valid 200 206 304 301 302 1d;# 緩存的key--》請求路徑proxy_cache_key $request_uri;add_header X-Cache-Status $upstream_cache_status;proxy_pass http://127.0.0.1:8080;index index.html index.htm;} }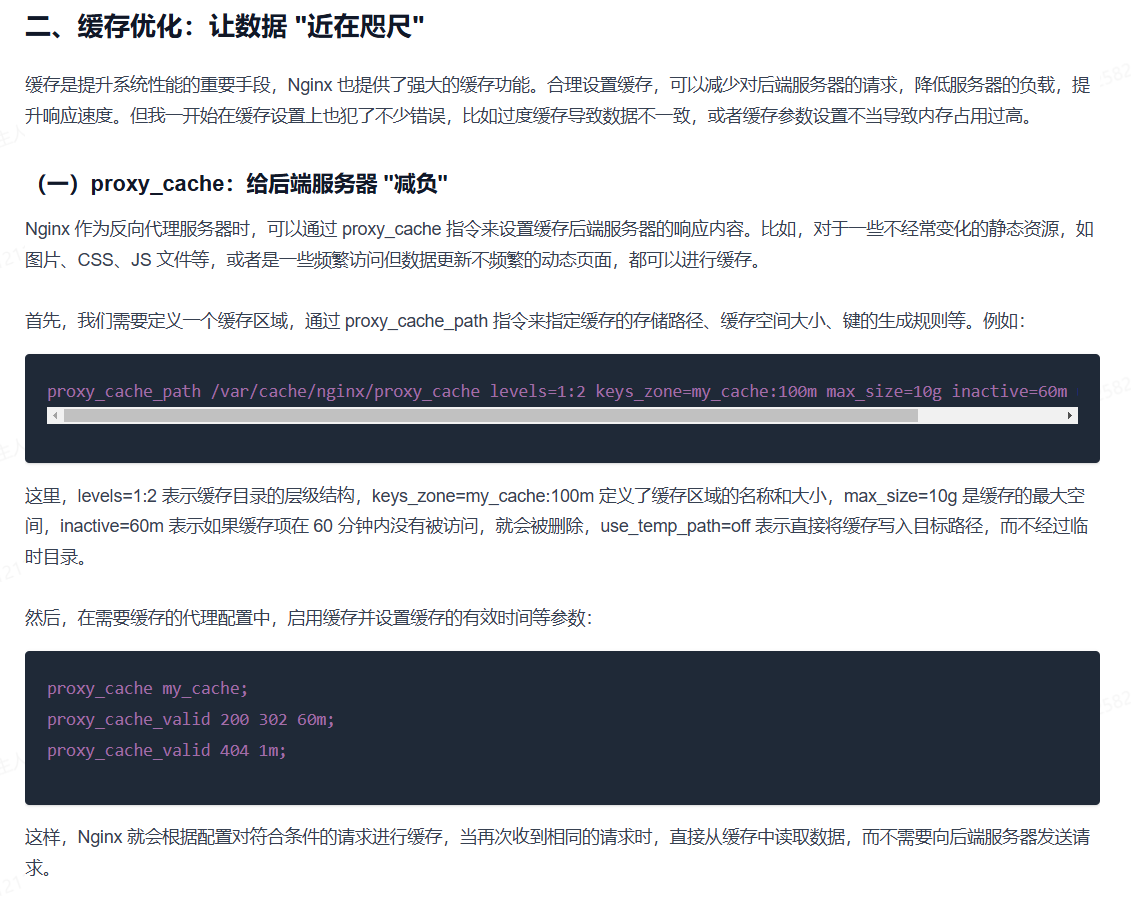
開啟gzip壓縮
server {listen 80;server_name localhost;gzip on;gzip_buffers 32 4K;gzip_comp_level 6;gzip_min_length 100;gzip_types application/javascript text/css text/xml application/json;gzip_disable "MSIE [1-6]\."; #配置禁用gzip條件,支持正則。此處表示ie6及以下不啟用gzip(因為ie低版本不支持)gzip_vary on; #accept-encodinggzip_static on; #如果有壓縮好的,直接使用location / {proxy_pass http://127.0.0.1:8080; }}配置文件內容詳細介紹:
gzip配置的常用參數
gzip on|off; #是否開啟gzipgzip_buffers32 4K| 16 8K #緩沖(壓縮在內存中緩沖幾塊? 每塊多大?)gzip_comp_level[1-9] #推薦6 壓縮級別(級別越高,壓的越小,越浪費CPU計算資源)gzip_disable#正則匹配UA 什么樣的Uri不進行gzipgzip_min_length200 # 開始壓縮的最小長度(再小就不要壓縮了,意義不在)gzip_http_version1.0|1.1 # 開始壓縮的http協議版本(可以不設置,目前幾乎全是1.1協議)gzip_proxied# 設置請求者代理服務器,該如何緩存內容gzip_typestext/plain application/xml # 對哪些類型的文件用壓縮 如txt,xml,html ,cssgzip_vary on|off# 是否傳輸gzip壓縮標志
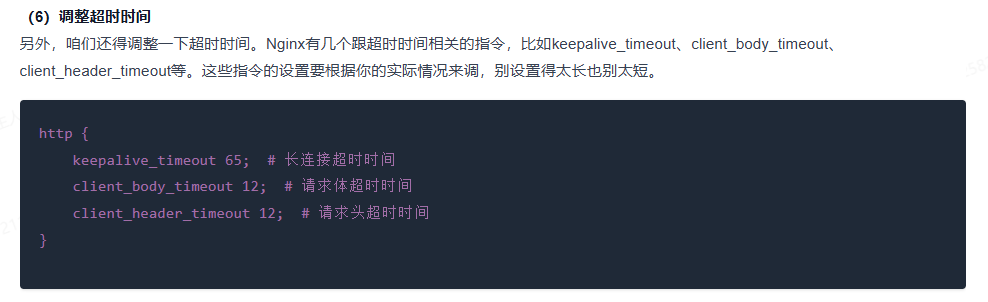
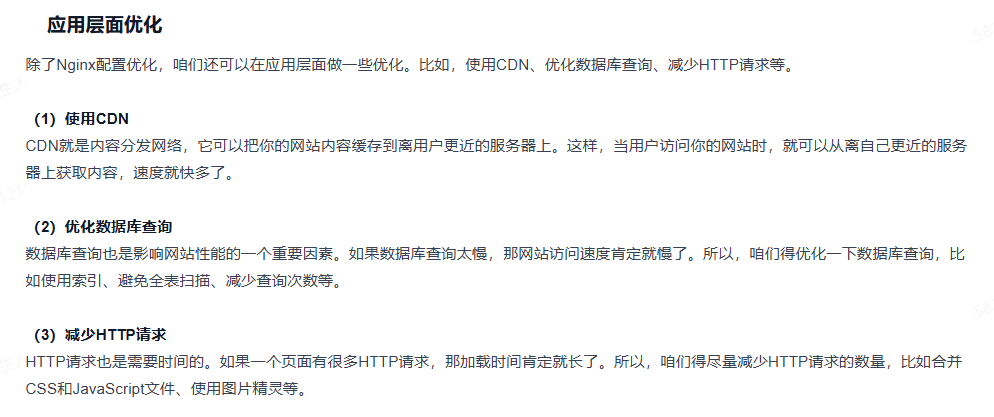
應用層面優化
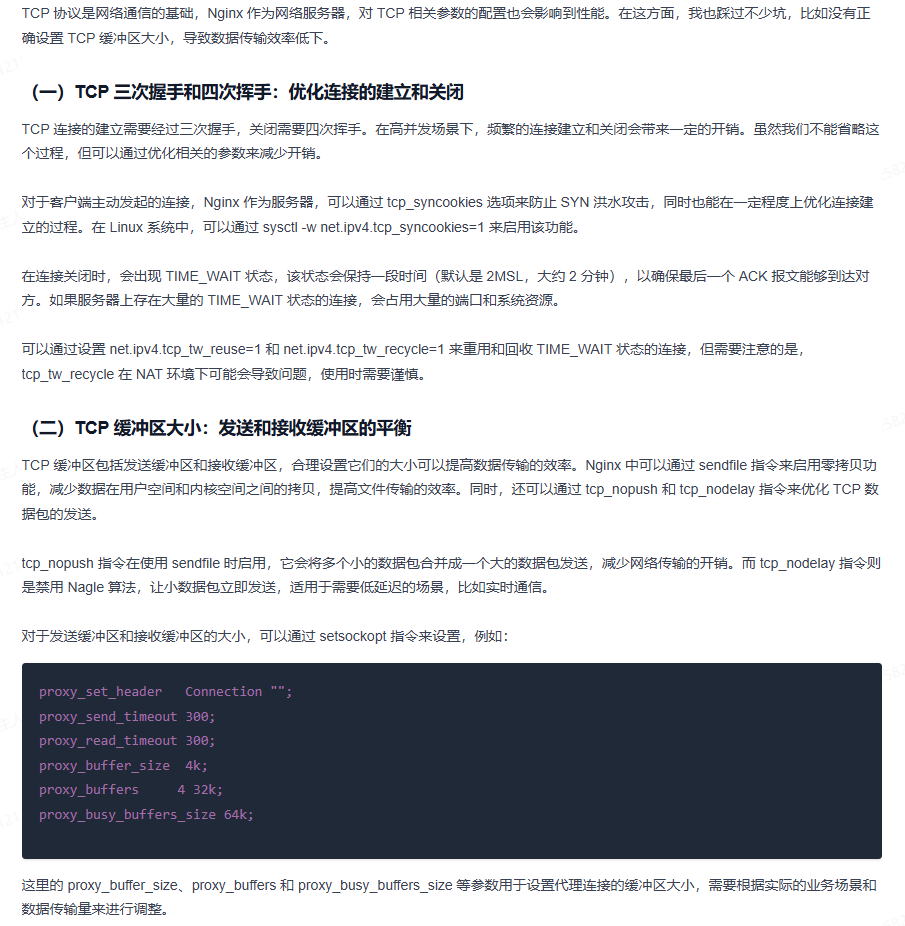
TCP優化
vi /etc/sysctl.conf
配置內容
# 防止一個套接字過多連接到達時引起負載
net.ipv4.tcp_syncookies=1
#默認128,socket的監聽隊列,微調大
net.core.somaxconn=1024
# timeout的超時時間,調小,tcp握手時間
net.ipv4.tcp_fin_timeout=10
#os直接使用timewait的連接
net.ipv4.tcp_tw_reuse=1
#回收禁用,若開啟---》快速回收處于 TIME_WAIT狀態的socket
net.ipv4.tcp_tw_recycle=0
加載配置!
sysctl -p
監控

調優


 ls2k1000 openwrt)


安裝及使用:多臺電腦共用鼠標鍵盤)


——社區人臉識別出入管理系統設計與實現)