歡迎來到我的UniApp技術專欄!🎉 在這里,我將與大家分享關于UniApp開發的實用技巧、最佳實踐和項目經驗。
專欄特色:
📱 跨平臺開發一站式解決方案
🚀 從入門到精通的完整學習路徑
💡 實戰項目經驗分享
🔍 常見問題深度解析
無論你是剛接觸UniApp的新手,還是有一定經驗的開發者,都能在這里找到有價值的內容。我將持續更新最新技術動態和開發技巧,幫助大家提升開發效率,打造高質量的跨平臺應用。如果文章對你有幫助,別忘了點贊收藏🌟,也歡迎在評論區留言交流,我會及時回復大家的問題!
讓我們一起探索UniApp的無限可能!💪
目錄
一.使用defineExpose暴露子組件的屬性和方法
1.子組件代碼
2.父組件代碼
3.運行效果
二.頁面生命周期onLoad和onReady的使用
1.onLoad的使用
舉例
2.onReady的使用
舉例
一.使用defineExpose暴露子組件的屬性和方法
1.子組件代碼
<template><view>子組件count值:{{count}}</view>
</template><script setup>
import {ref} from "vue";
const count = ref(100);
const updateCount = ()=>{count.value ++;
}//暴露子組件的屬性、方法
defineExpose({count,str:"咸蝦米",updateCount
})</script><style lang="scss"></style>
2.父組件代碼
<template><view class=""><child01 ref="myChild"></child01><view>-------</view><button @click="update">點擊修改子值</button></view>
</template><script setup>
import { ref,onMounted } from 'vue';
const myChild = ref(null);
const update = ()=>{//在此處,調用子組件暴露的方法myChild.value.updateCount();
}onMounted(()=>{console.log(myChild.value);
})</script><style lang="scss" scoped></style>
3.運行效果
運行父組件,效果如下
代碼解析:子組件通過defineExpose暴露出屬性和方法,然后父組件就能直接使用(先通過ref獲取子組件dom元素,然后直接訪問即可)。
二.頁面生命周期onLoad和onReady的使用
1.onLoad的使用
運行的時機:

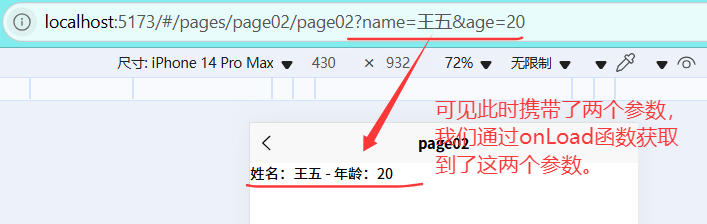
使用場景:當頁面1跳轉到頁面2時(攜帶參數),頁面2可以通過onLoad函數接收頁面1傳來的參數。
舉例
頁面page01的代碼
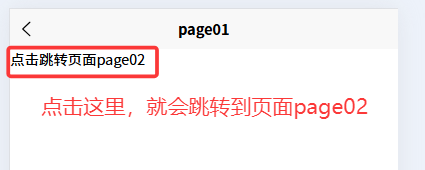
<template><view class=""><!-- 點擊跳轉頁面,并攜帶兩個參數 --><navigator url="/pages/page02/page02?name=王五&age=20">點擊跳轉頁面page02</navigator></view>
</template><script setup></script><style lang="scss" scoped>
</style>
頁面page02的代碼
<template><view class="">姓名:{{name}} - 年齡:{{age}}</view>
</template><script setup>
import {ref} from "vue";
/* 導入onLoad生命周期函數 */
import {onLoad} from "@dcloudio/uni-app";
const name = ref();
const age = ref();
//使用onLoad接收頁面跳轉時傳遞過來的參數,并賦值給相關變量
onLoad((e)=>{name.value = e.name;age.value = e.age;
})</script><style lang="scss" scoped>
</style>
運行效果
2.onReady的使用
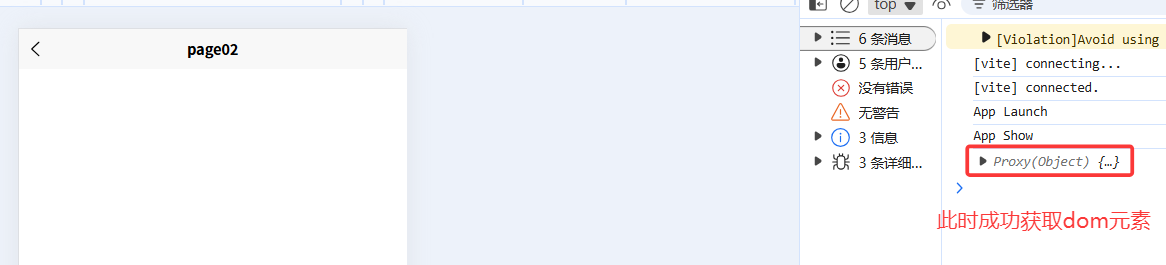
onReady和之前學過的onMounted生命周期函數一樣,都是用來獲取dom元素的。
只不過,onReady屬于uniapp,而onMounted屬于vue3。
舉例
代碼
<template><view class="" ref="myView01"></view>
</template><script setup>
import {ref} from "vue";
/* 導入onReady生命周期函數 */
import {onReady} from "@dcloudio/uni-app";
const myView01 = ref(null);//在onReady函數中,獲取dom元素
onReady(()=>{console.log(myView01.value);
})</script><style lang="scss" scoped>
</style>
運行結果
以上就是本篇文章的全部內容,喜歡的話可以留個免費的關注呦~~~~~~~
)


)


上安裝SVN Server和庫權限設置問題)