
本章來學習下漫游相機。
路徑動畫與相機漫游
本屆內容比較簡單,其實就是實現物體的運動和相機的運動
當然這兩個要一起執行。
貝塞爾曲線
貝塞爾曲線(Bézier curve)是一種在計算機圖形學、動畫制作、工業設計等領域廣泛應用的參數曲線,它由法國工程師皮埃爾?貝塞爾(Pierre Bézier)在 20 世紀 60 年代為汽車工業設計而提出。
大致類似這樣:
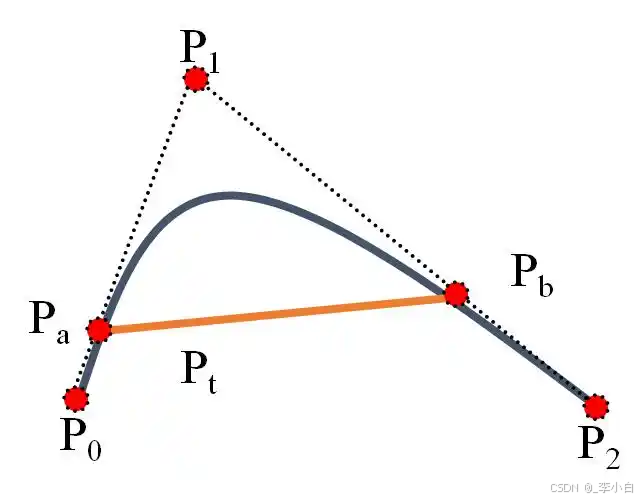
通過控制一些點來定義整個曲線。
實戰
使用OpenSceneGraph(OSG)實現沿貝塞爾曲線移動模型以及錄制相機路徑的示例代碼。
代碼實現了在OSG中創建一個模型,并讓它沿著貝塞爾曲線移動,同時也記錄相機的路徑。
#include <osg/Group>
#include <osg/Node>
#include <osg/Geometry>
#include <osg/Geode>
#include <osgViewer/Viewer>
#include <osgGA/TrackballManipulator>
#include <osg/MatrixTransform>
#include <osg/AnimationPath>
#include <osg/Quat>
#include <iostream>
#include <vector>// 計算貝塞爾曲線上的點
osg::Vec3 bezierPoint(const std::vector<osg::Vec3>& controlPoints, double t) {int n = controlPoints.size() - 1;osg::Vec3 result(0.0, 0.0, 0.0);for (int i = 0; i <= n; ++i) {double binomial = 1.0;for (int j = 0; j < i; ++j) {binomial *= (n - j) / (i - j);}binomial *= pow(1 - t, n - i) * pow(t, i);result += binomial * controlPoints[i];}return result;
}int main() {// 創建一個場景組osg::ref_ptr<osg::Group> root = new osg::Group;// 創建一個簡單的模型(這里以一個立方體為例)osg::ref_ptr<osg::Geometry> geom = osg::createTexturedCubeGeometry(osg::Vec3(0, 0, 0), 1.0);osg::ref_ptr<osg::Geode> geode = new osg::Geode;geode->addDrawable(geom);root->addChild(geode);// 貝塞爾曲線的控制點std::vector<osg::Vec3> controlPoints = {osg::Vec3(-5, 0, 0),osg::Vec3(-2, 5, 0),osg::Vec3(2, -5, 0),osg::Vec3(5, 0, 0)};// 創建動畫路徑osg::ref_ptr<osg::AnimationPath> animationPath = new osg::AnimationPath;animationPath->setLoopMode(osg::AnimationPath::LOOP);// 采樣貝塞爾曲線生成動畫路徑的關鍵幀const int numSamples = 100;for (int i = 0; i < numSamples; ++i) {double t = static_cast<double>(i) / (numSamples - 1);osg::Vec3 position = bezierPoint(controlPoints, t);osg::Quat orientation; // 這里簡單設置為無旋轉osg::Vec3 scale(1, 1, 1);osg::AnimationPath::ControlPoint cp(static_cast<double>(i) * 0.1, position, orientation, scale);animationPath->insert(cp);}// 創建一個矩陣變換節點來應用動畫路徑osg::ref_ptr<osg::MatrixTransform> mt = new osg::MatrixTransform;mt->addChild(geode);osg::ref_ptr<osg::AnimationPathCallback> callback = new osg::AnimationPathCallback(animationPath);mt->setUpdateCallback(callback);root->addChild(mt);// 創建相機路徑記錄器osg::ref_ptr<osg::Group> cameraPathGroup = new osg::Group;osg::ref_ptr<osg::Vec3Array> cameraPathVertices = new osg::Vec3Array;osg::ref_ptr<osg::Geometry> cameraPathGeom = new osg::Geometry;cameraPathGeom->setVertexArray(cameraPathVertices);osg::ref_ptr<osg::Geode> cameraPathGeode = new osg::Geode;cameraPathGeode->addDrawable(cameraPathGeom);cameraPathGroup->addChild(cameraPathGeode);root->addChild(cameraPathGroup);// 創建查看器osgViewer::Viewer viewer;viewer.setSceneData(root);viewer.setCameraManipulator(new osgGA::TrackballManipulator);// 記錄相機路徑bool recording = false;osg::Vec3 lastCameraPosition;viewer.setCameraManipulator(new osgGA::TrackballManipulator);viewer.realize();while (!viewer.done()) {osg::Matrix cameraMatrix = viewer.getCamera()->getViewMatrix();osg::Vec3 cameraPosition = osg::Vec3(cameraMatrix.getTrans());if (recording) {cameraPathVertices->push_back(cameraPosition);osg::ref_ptr<osg::DrawArrays> drawArrays = new osg::DrawArrays(osg::PrimitiveSet::LINE_STRIP, 0, cameraPathVertices->size());cameraPathGeom->setDrawArray(drawArrays);}// 簡單的按鍵控制記錄開始和結束const osgGA::GUIEventAdapter& ea = viewer.getEventQueue()->getCurrentEvent();if (ea.getEventType() == osgGA::GUIEventAdapter::KEYDOWN && ea.getKey() == osgGA::GUIEventAdapter::KEY_R) {recording =!recording;if (recording) {lastCameraPosition = cameraPosition;}}viewer.frame();}return 0;
}
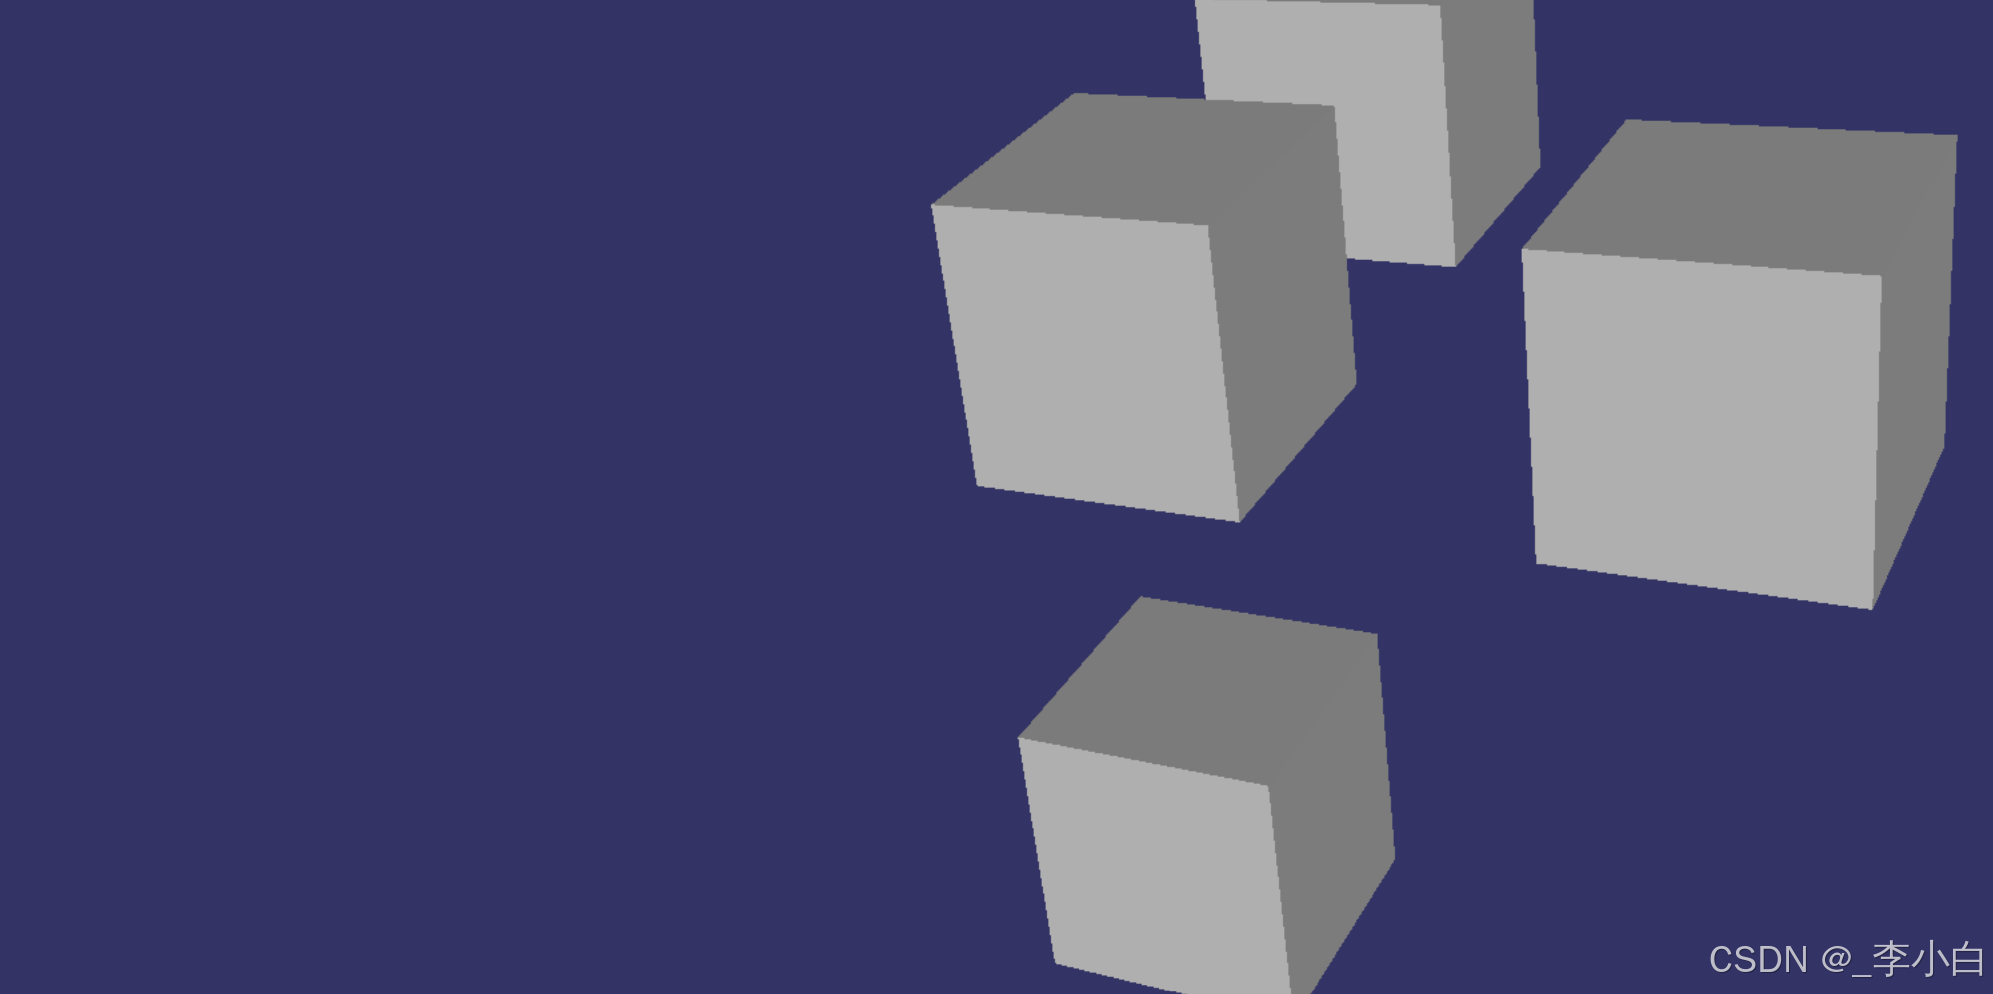
執行效果
ok,今天就到這里。明天繼續!


到底訓練優化的什么部位)


MySQL學習筆記(6):分組查詢,正則表達式)
)


