鴻蒙版Flutter庫torch_light手電筒功能深度適配:跨平臺開發者的光明之路
本項目作者:kirk/堅果
適配倉庫地址
作者倉庫:https://github.com/svprdga/torch_light#
在數字化浪潮的推動下,跨平臺開發框架如 Flutter 憑借其高效、便捷的特性,成為了開發者們的寵兒。而鴻蒙系統的崛起,更是為跨平臺開發注入了新的活力。為了助力開發者在鴻蒙生態中快速實現 torch_light來處理設備手電筒的插件功能,本文將深入淺出地為大家解析如何適配 torch_light 三方庫至鴻蒙平臺。
一、適配鴻蒙版 torch_light 三方庫
(一)版本選擇與倉庫簡介
我們先去 pub 上查看最新版本,我們選擇以 0.0.10版本為基礎進行適配。torch_light 是一個簡單的 Flutter 插件來處理設備手電筒的插件,其 GitHub 倉庫為https://github.com/svprdga/torch_light#,我們的目標是將這個插件適配到鴻蒙平臺。
(二)引入背景與使用場景
在 OpenHarmony 北向生態的發展過程中,許多已經適配了 Flutter 的廠商在接入 OpenHarmony 時,都希望能夠繼續使用 torch_light 來實現手電筒功能。因此,我們提供了這個適配方案,采用插件化的適配器模式,幫助生態伙伴快速實現產品化。
本方案適用于已經支持 Flutter 框架的設備在移植到 OpenHarmony 系統過程中,作為一個備選方案。
(三)使用文檔與插件庫使用
適配 OpenHarmony 平臺的詳細使用指導可以參考:Flutter使用指導文檔
在項目中使用該插件庫時,只需在 pubspec.yaml 文件的 dependencies 中新增如下配置:
dependencies:torch_light:git:url: "git@gitcode.com:nutpi/flutter_torch_light.git"path: ""
然后在項目根目錄運行 flutter pub get,即可完成依賴添加
接下來是具體的適配過程。
二、適配過程詳解
(一)準備工作
確保已經配置好了 Flutter 開發環境,具體可參考 Flutter 配置指南。同時,從 官方插件庫 下載待適配的三方插件。本指導書, 以適配 torch_light 為例

(二)插件目錄結構
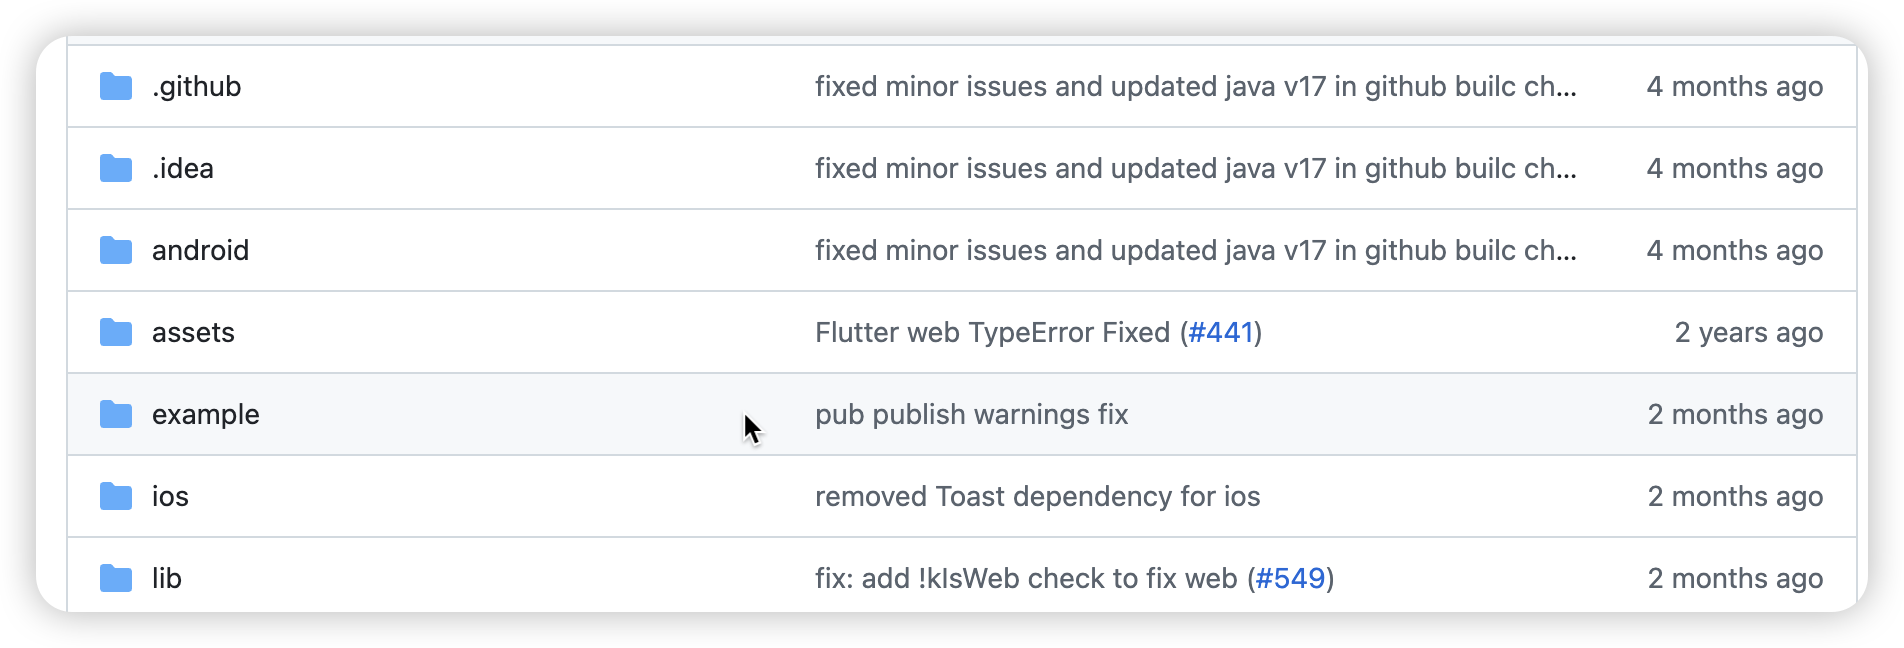
下載并解壓插件后,我們會看到以下目錄結構:
- lib :對接 Dart 端代碼的入口,由此文件接收到參數后,通過 channel 將數據發送到原生端。
- android :安卓端代碼實現目錄。
- ios :iOS 原生端實現目錄。
- example :一個依賴于該插件的 Flutter 應用程序,用于說明如何使用它。
- README.md :介紹包的文件。
- CHANGELOG.md :記錄每個版本中的更改。
- LICENSE :包含軟件包許可條款的文件。
(三)創建插件的鴻蒙模塊
在插件目錄下,打開 Terminal,執行以下命令來創建一個鴻蒙平臺的 Flutter 模塊:
flutter create . --org com.svprdga.torchlight --template=plugin --platforms=ohos
步驟:
-
用vscode/trae打開剛剛下載好的插件。
-
打開Terminal,cd到插件目錄下。
-
執行命令
flutter create . --template=plugin --platforms=ohos創建一個ohos平臺的flutter模塊。
第一個問題,修改sdk的版本,適配舊版本。
我們做好修改就好。
(四)在根目錄下添加鴻蒙平臺配置
在項目根目錄的 pubspec.yaml 文件中,添加鴻蒙平臺的相關配置:
name: torch_light
description: A Flutter plugin to check if the device has a torch / flashlight, and to turn it on and off.
version: 1.1.0
homepage: https://davidserrano.io/
repository: https://github.com/svprdga/torch_lightenvironment:sdk: ">=2.17.5 <4.0.0"flutter: ">=2.3.0"dependencies:flutter:sdk: flutterdev_dependencies:flutter_test:sdk: flutterlint: 2.3.0flutter:plugin:platforms:android:package: com.svprdga.torchlightpluginClass: TorchLightPluginios:pluginClass: TorchLightPluginohos:package: com.svprdga.torchlightpluginClass: TorchLightPlugin
(五)編寫鴻蒙插件的原生 ArkTS模塊
1. 創建鴻蒙插件模塊
使用 DevEco Studio 打開鴻蒙項目。
2. 修改相關配置文件
在 ohos 目錄內的 oh-package.json5 文件中添加 libs/flutter.har 依賴,并創建 .gitignore 文件,添加以下內容以忽略 libs 目錄:
/node_modules
/oh_modules
/local.properties
/.preview
/.idea
/build
/libs
*.har
/.cxx
/.test
/BuildProfile.ets
/oh-package-lock.json5
oh-package.json5 文件內容如下:
{"name": "torch_light","version": "1.0.0","description": "Please describe the basic information.","main": "index.ets","author": "","license": "Apache-2.0","dependencies": {"@ohos/flutter_ohos": "file:./har/flutter.har"}
}
在 ohos 目錄下創建 index.ets 文件,導出配置:
import TorchLightPlugin from './src/main/ets/components/plugin/TorchLightPlugin';
export default TorchLightPlugin;
3. 編寫 ETS 代碼
文件結構和代碼邏輯可以參考安卓或 iOS 的實現,鴻蒙的 API 文檔可以參考 :https://gitcode.com/openharmony-sig/flutter_packages/tree/master/packages/path_provider/path_provider_android
ohos的api可以參考:https://gitcode.com/openharmony/docs
以下是 TorchLightPlugin.ets 文件的代碼示例:
private channel: MethodChannel | null = null;private nativeEventIsTorchAvailable: string = "torch_available";private errorIsTorchAvailable: string = "torch_available_error";private nativeEventEnableTorch: string = "enable_torch";private errorEnableTorchExistentUser: string = "enable_torch_error_existent_user";private errorEnableTorch: string = "enable_torch_error";private errorEnableTorchNotAvailable: string = "enable_torch_not_available";private nativeEventDisableTorch: string = "disable_torch";private errorDisableTorchExistentUser: string = "disable_torch_error_existent_user";private errorDisableTorch: string = "disable_torch_error";private errorDisableTorchNotAvailable: string = "disable_torch_not_available";這里我主要參考的是
三、手電筒使用
手電筒模式的使用是通過操作手機啟用手電筒功能,使設備的手電筒功能持續保持常亮狀態。
在使用相機應用并操作手電筒功能時,存在以下幾種情況說明:
- 當使用后置攝像頭并設置閃光燈模式FlashMode關閉時,手電筒功能無法啟用。
- 當使用前置攝像頭時,手電筒可以正常啟用并保持常亮狀態。
- 從前置攝像頭切換至后置攝像頭時,如果手電筒原本處于開啟狀態,它將會被自動關閉。
詳情請參考Camera API參考。
開發步驟
導入camera接口,接口中提供了相機相關的屬性和方法,導入方法如下。
import { camera } from '@kit.CameraKit';
import { BusinessError } from '@kit.BasicServicesKit';
通過CameraManager類中的isTorchSupported方法,檢測當前設備是否支持手電筒功能。
function isTorchSupported(cameraManager: camera.CameraManager) : boolean {let torchSupport: boolean = false;try {torchSupport = cameraManager.isTorchSupported();} catch (error) {let err = error as BusinessError;console.error('Failed to torch. errorCode = ' + err.code);}console.info('Returned with the torch support status:' + torchSupport);return torchSupport;
}
通過CameraManager類中的isTorchModeSupported方法,檢測是否支持指定的手電筒模式TorchMode。
function isTorchModeSupported(cameraManager: camera.CameraManager, torchMode: camera.TorchMode) : boolean {let isTorchModeSupport: boolean = false;try {isTorchModeSupport = cameraManager.isTorchModeSupported(torchMode);} catch (error) {let err = error as BusinessError;console.error('Failed to set the torch mode. errorCode = ' + err.code);}return isTorchModeSupport;
}
通過CameraManager類中的setTorchMode方法,設置當前設備的手電筒模式。以及通過CameraManager類中的getTorchMode方法,獲取當前設備的手電筒模式。
在使用getTorchMode方法前,需要先注冊監聽手電筒的狀態變化,請參考狀態監聽。
function setTorchModeSupported(cameraManager: camera.CameraManager, torchMode: camera.TorchMode) : void {cameraManager.setTorchMode(torchMode);let isTorchMode = cameraManager.getTorchMode();console.info(`Returned with the torch mode supportd mode: ${isTorchMode}`);
}
狀態監聽
在相機應用開發過程中,可以隨時監聽手電筒狀態,包括手電筒打開、手電筒關閉、手電筒不可用、手電筒恢復可用。手電筒狀態發生變化,可通過回調函數獲取手電筒模式的變化。
通過注冊torchStatusChange事件,通過回調返回監聽結果,callback返回TorchStatusInfo參數,參數的具體內容可參考相機管理器回調接口實例TorchStatusInfo。
function onTorchStatusChange(cameraManager: camera.CameraManager): void {cameraManager.on('torchStatusChange', (err: BusinessError, torchStatusInfo: camera.TorchStatusInfo) => {if (err !== undefined && err.code !== 0) {console.error(`Callback Error, errorCode: ${err.code}`);return;}console.info(`onTorchStatusChange, isTorchAvailable: ${torchStatusInfo.isTorchAvailable}, isTorchActive: ${torchStatusInfo.isTorchActive}, level: ${torchStatusInfo.torchLevel}`);});
}
完整的代碼
import {FlutterPlugin,FlutterPluginBinding,MethodCall,MethodCallHandler,MethodChannel,MethodResult,
} from '@ohos/flutter_ohos';
import { camera } from '@kit.CameraKit';
import { BusinessError } from '@kit.BasicServicesKit';/** TorchLightPlugin **/
export default class TorchLightPlugin implements FlutterPlugin, MethodCallHandler {private channel: MethodChannel | null = null;private channelName = "com.svprdga.torchlight/main";private NATIVE_EVENT_TORCH_AVAILABLE = "torch_available";private NATIVE_EVENT_ENABLE_TORCH = "enable_torch";private NATIVE_EVENT_DISABLE_TORCH = "disable_torch";private cameraManager: camera.CameraManager | undefined = undefined;constructor() {}getUniqueClassName(): string {return "TorchLightPlugin"}onAttachedToEngine(binding: FlutterPluginBinding): void {this.channel = new MethodChannel(binding.getBinaryMessenger(), this.channelName);this.channel.setMethodCallHandler(this)}onDetachedFromEngine(binding: FlutterPluginBinding): void {if (this.channel != null) {this.channel.setMethodCallHandler(null)}}onMethodCall(call: MethodCall, result: MethodResult): void {this.cameraManager=camera.getCameraManager(getContext());switch (call.method) {case this.NATIVE_EVENT_TORCH_AVAILABLE : this.isTorchAvailable(result);      break;case this.NATIVE_EVENT_ENABLE_TORCH :  this.enableTorch(result);      break;case this.NATIVE_EVENT_DISABLE_TORCH :  this.disableTorch(result);      break;}}//檢查設備是否有可用的手電筒isTorchAvailable(result: MethodResult){if(this.cameraManager!==null){registerTorchStatusChange(this.cameraManager!)}result.success(this.cameraManager!==null?isTorchSupported(this.cameraManager!):false);}//啟用手電筒enableTorch(result: MethodResult){if(this.cameraManager!==null){if(isTorchSupported(this.cameraManager!)&&isTorchModeSupported(this.cameraManager!,camera.TorchMode.ON)){setTorchMode(this.cameraManager!,camera.TorchMode.ON)}}result.success(null)}//禁用手電筒disableTorch(result: MethodResult){if(this.cameraManager!==null){if(isTorchSupported(this.cameraManager!)&&isTorchModeSupported(this.cameraManager!,camera.TorchMode.ON)){setTorchMode(this.cameraManager!,camera.TorchMode.OFF)unregisterTorchStatusChange(this.cameraManager!)}}result.success(null)}}
///檢測是否支持手電筒
function isTorchSupported(cameraManager: camera.CameraManager) : boolean {let torchSupport: boolean = false;try {torchSupport = cameraManager.isTorchSupported();} catch (error) {let err = error as BusinessError;console.error('Failed to torch. errorCode = ' + err.code);}console.info('Returned with the torch support status:' + torchSupport);return torchSupport;
}
///檢測是否支持指定的手電筒模式TorchMode
function isTorchModeSupported(cameraManager: camera.CameraManager, torchMode: camera.TorchMode) : boolean {let isTorchModeSupport: boolean = false;try {isTorchModeSupport = cameraManager.isTorchModeSupported(torchMode);} catch (error) {let err = error as BusinessError;console.error('Failed to set the torch mode. errorCode = ' + err.code);}return isTorchModeSupport;
}
//返回設備當前手電筒模式
function getTorchMode(cameraManager: camera.CameraManager): camera.TorchMode | undefined {let torchMode: camera.TorchMode | undefined = undefined;torchMode = cameraManager.getTorchMode();return torchMode;
}function onTorchStatusChange(cameraManager: camera.CameraManager): void {cameraManager.on('torchStatusChange', (err: BusinessError, torchStatusInfo: camera.TorchStatusInfo) => {if (err !== undefined && err.code !== 0) {console.error(`Callback Error, errorCode: ${err.code}`);return;}console.info(`onTorchStatusChange, isTorchAvailable: ${torchStatusInfo.isTorchAvailable}, isTorchActive: ${torchStatusInfo.isTorchActive}, level: ${torchStatusInfo.torchLevel}`);});
}
///設置手電筒模式
function setTorchMode(cameraManager: camera.CameraManager, torchMode: camera.TorchMode): void {try {cameraManager.setTorchMode(torchMode);} catch (error) {// 失敗返回錯誤碼error.code并處理let err = error as BusinessError;console.error(`The setTorchMode call failed. error code: ${err.code}`);}
}
function callback(err: BusinessError, torchStatusInfo: camera.TorchStatusInfo): void {if (err !== undefined && err.code !== 0) {console.error(`Callback Error, errorCode: ${err.code}`);return;}console.info(`onTorchStatusChange, isTorchAvailable: ${torchStatusInfo.isTorchAvailable}, isTorchActive: ${torchStatusInfo.isTorchActive}, level: ${torchStatusInfo.torchLevel}`);
}function registerTorchStatusChange(cameraManager: camera.CameraManager): void {cameraManager.on('torchStatusChange', callback);
}
function unregisterTorchStatusChange(cameraManager: camera.CameraManager): void {cameraManager.off('torchStatusChange');
}
四、編寫 Example
1. 創建 Example 應用
在插件根目錄下創建一個名為 example 的文件夾,用于存放示例應用。在 example 文件夾中,創建一個鴻蒙平臺的 Flutter 應用,用于驗證插件功能。
2. 簽名與運行
使用 Deveco Studio 打開 example > ohos 目錄,單擊 File > Project Structure > Project > Signing Configs,勾選 Automatically generate signature,等待自動簽名完成。然后運行以下命令:
flutter pub getflutter build hap --debug
如果應用正常啟動,說明插件適配成功。如果沒有,歡迎大家聯系堅果派一起支持。
五、總結
通過以上步驟,我們成功地將 torch_light 三方庫適配到了鴻蒙平臺。這個過程涉及到了解插件的基本信息、配置開發環境、創建鴻蒙模塊、編寫原生代碼以及測試驗證等多個環節。希望這篇博客能夠幫助到需要進行 torch_light 鴻蒙適配的開發者們,讓大家在鴻蒙生態的開發中更加得心應手。
六、參考
- [如何使用Flutter與OpenHarmony通信 FlutterChannel](https://gitcode.com/openharmony-sig/flutter_samples/blob/master/ohos/docs/04_development/如何使用Flutter與OpenHarmony通信 FlutterChannel.md)
- [開發module](https://gitcode.com/openharmony-sig/flutter_samples/blob/master/ohos/docs/04_development/如何使用混合開發 module.md)
- 開發package
- 開發plugin
- [開發FFI plugin](https://gitcode.com/openharmony-sig/flutter_samples/blob/master/ohos/docs/04_development/開發FFI plugin.md)
- developing-packages
- 適配倉庫地址
- 手電筒


之InnoDB的Buffer Pool(三))
:Netty重要組件詳解(Future、ByteBuf、Bootstrap))


)


