- 繪制軌跡路線
- 軌跡路線描邊
- 增加起點終點圖標
- 繪制仿高德方向箭頭
- 模仿車輛動態運動動畫
車輛運行軌跡
車輛軌跡經緯度坐標
const linePoints = [new Point([123.676031, 43.653421]),new Point([123.824347, 43.697124]),new Point([124.197882, 43.946811]),new Point([124.104498, 43.744764]),new Point([124.752692, 43.701096]),new Point([124.598883, 43.808225]),new Point([124.692267, 43.832006]),new Point([124.911993, 43.847854]),new Point([124.999884, 43.855777]),new Point([125.170172, 43.867658]),new Point([125.280035, 43.930989]),new Point([125.604132, 43.91912]),new Point([125.933722, 43.927033]),];
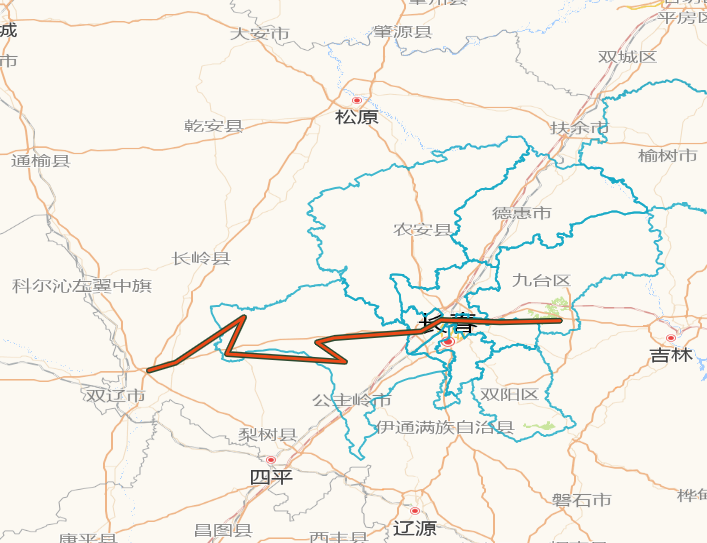
繪制軌跡路徑&增加描邊效果
就是繪制兩邊LineString,外邊框比內邊框寬一些,并通過控制zIndex控制在最下面即可
const drawDynamicCarLine = (linePoints: Array<Point>) => {// 內部軌跡線const innerLineFeature = new Feature(new LineString(linePoints.map((item) => item.getCoordinates())));innerLineFeature.setStyle(new Style({stroke: new Stroke({color: "rgb(237,73,23)",width: 3,}),zIndex: 3,}));// 外部邊框線const outLineFeature = new Feature(new LineString(linePoints.map((item) => item.getCoordinates())));outLineFeature.setStyle(new Style({stroke: new Stroke({color: "rgba(44,74,48,1)",width: 6,}),zIndex: 1,}));const lineSource = new VectorSource({features: [innerLineFeature, outLineFeature],});const lineLayer = new VectorLayer({source: lineSource,});debugger;map.addLayer(lineLayer);
};
效果如下
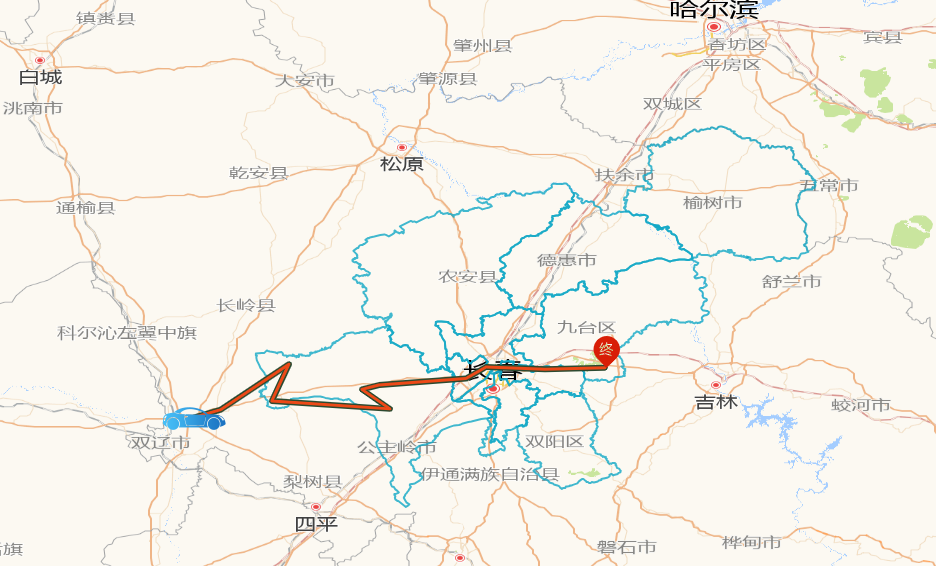
增加起點終點圖標
const addStartEndPoint = (startPoint: Point, endPoint: Point) => {const startPointFeature = new Feature({geometry: startPoint,});startPointFeature.setStyle(new Style({image: new Icon({src: new URL("/src/assets/imgs/car/move_car_icon.png", import.meta.url).href,}),zIndex: 3,}));const endPointFeature = new Feature({geometry: endPoint,});endPointFeature.setStyle(new Style({image: new Icon({src: new URL("/src/assets/imgs/car/end_point_icon.png", import.meta.url).href,// 調整圖標中心點位置anchor: [0.4, 1],rotateWithView: true,rotation: 0,}),zIndex: 8,}));const startAndEndIconSource = new VectorSource({features: [startPointFeature, endPointFeature],});const startAndEndIconLayer = new VectorLayer({source: startAndEndIconSource,});map.addLayer(startAndEndIconLayer);
};
效果如下:
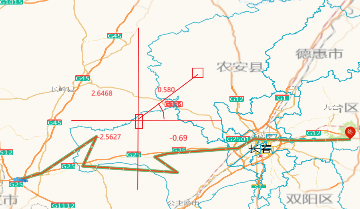
繪制仿高德方向箭頭
參考了很多文章,算是把原理弄通了,簡單的描述一下
-
首先計算路徑長度,按照路徑長度除以固定寬度分割,計算需要顯示箭頭的位置
舉個例子
a. 當前坐標[0,0] 下一個坐標是[1,2]
b. 計算這倆個坐標之間的距離,假設100米,每50米顯示一個箭頭,也就是需要三個箭頭
c. Math.atan2 可以計算[0,0]和[1,2] 之間旋轉的角度,這三個箭頭旋轉都是這個角度 -
按照當前點位和下一個點位計算出箭頭的方向,主要通過js 提供的函數
-
那知道需要繪制箭頭的地方就簡單了,直接增加Point即可
// Math.atan2 是 JavaScript 中的一個數學函數,用于計算平面坐標中從原點 (0, 0) 到指定點 (x, y) 的有符號弧度角。它返回的角度范圍是從 -π 到 π(即 -180° 到 180°)
Math.atan2(y: number, x: number): number;
const drawDynamicCarLine = (linePoints: Array<Point>) => {// 內部軌跡線lineFeature = new Feature(new LineString(linePoints.map((item) => item.getCoordinates())));lineFeature.setStyle(new Style({stroke: new Stroke({color: "rgb(237,73,23)",width: 3,}),zIndex: 4,}));// 外部邊框線const outLineFeature = new Feature(new LineString(linePoints.map((item) => item.getCoordinates())));outLineFeature.setStyle(new Style({stroke: new Stroke({color: "rgb(107,179,117)",width: 8,}),zIndex: 1,}));// 新增箭頭繪制邏輯const arrowPoints = [];const arrowSpacing = 0.1; // 箭頭間距,單位為線段長度的百分比const geometry = lineFeature.getGeometry() as LineString;const coordinates = geometry.getCoordinates();for (let i = 0; i < coordinates.length - 1; i++) {const start = coordinates[i];const end = coordinates[i + 1];const dx = end[0] - start[0];const dy = end[1] - start[1];const length = Math.sqrt(dx * dx + dy * dy); // 計算路徑總長度const numArrows = Math.ceil(length / arrowSpacing); // 這個長度需要幾個箭頭for (let j = 1; j < numArrows; j++) {const fraction = j / numArrows;const arrowX = start[0] + dx * fraction;const arrowY = start[1] + dy * fraction;const arrowAngle = Math.atan2(dy, dx); // 計算箭頭旋轉角度const arrowFeature = new Feature({geometry: new Point([arrowX, arrowY]),});arrowFeature.setStyle(new Style({image: new Icon({src: new URL("/src/assets/imgs/car/arrow-right-bold.png",import.meta.url).href,rotation: -arrowAngle, scale: 0.5, // 調整箭頭大小anchor: [0.5, 0.5], // 確保箭頭中心點對齊rotateWithView: true, // 確保箭頭隨地圖旋轉}),}));arrowPoints.push(arrowFeature);}}const arrowSource = new VectorSource({features: arrowPoints,});const arrowLayer = new VectorLayer({source: arrowSource,zIndex: 5, // 確保箭頭在軌跡線上方});map.addLayer(arrowLayer);const lineSource = new VectorSource({features: [lineFeature, outLineFeature],});lineLayer = new VectorLayer({source: lineSource,});map.addLayer(lineLayer);
};
模仿車輛動態運動動畫
其實原理是和繪制箭頭類似的,只不過需要一直觸發重復繪制,讓小車這個點位圖標看起來在運動
lineLayer.on(“postrender”, ()=>{});
昨天還在吐槽官網,對于我們后端來說,這個圖層可以綁定事件,那么事件的種類是不是可以列在后面,結果指向EventType,但是EventType 里面有什么都沒有,感覺這個文檔不是很友好,這個函數是通過別人的博客看來的,猜想是地圖繪制或者類似的,就是可以一直觸發,所學有限,但是感覺一直觸發是不是有點影響性能呀,先實現吧,后續了解更多了在補充。
let animating = false; // 動畫狀態
let distance = 0;
let lastTime: any;
let speedInput = 50; // 速度輸入
let lastPoint;
let currentPoint;const startMoveCartEvent = (event: RenderEvent) => {if (!animating) return; // 如果動畫未啟動,則不執行const speed = Number(speedInput);const time = (event as any).frameState.time;const elapsedTime = time - lastTime;distance = (distance + (speed * elapsedTime) / 1e6) % 2;lastTime = time;const currentCoordinate = lineFeature.getGeometry()?.getCoordinateAt(distance > 1 ? 2 - distance : distance);const position = startPointMarker.getGeometry()?.clone();lastPoint = position?.getCoordinates();currentPoint = currentCoordinate;// 計算車頭旋轉角度let dx = currentPoint[0] - lastPoint[0];let dy = currentPoint[1] - lastPoint[1];let rotation = Math.atan2(dy, dx); // 直接使用弧度值,無需轉換為角度position.setCoordinates(currentCoordinate);const vectorContext = getVectorContext(event);const carStyle = startPointMarker.getStyle();carStyle.getImage().setRotation(-rotation); // 設置車頭旋轉角度vectorContext.setStyle(carStyle);vectorContext.drawGeometry(position);// 判斷是否到達終點并停止動畫if (distance >= 1) {stopAnimation(); // 調用停止動畫函數}// 告訴 OpenLayers 繼續渲染動畫map.render();
};


)