論文提出的模型主要基于對傳統DenseNet架構的改進和復興,通過一系列創新設計,旨在提升模型性能并優化其計算效率,提出了RDNet模型。該模型的主要特點和改進點:
1. 強調并優化連接操作(Concatenation)
論文首先強調了DenseNet中連接操作(Concatenation)的重要性,并通過廣泛的實驗驗證了連接操作在性能上能夠超越傳統的加法快捷連接(Additive Shortcut)。這一發現促使研究者們重新審視并優化DenseNet的連接機制。
2. 擴大中間通道維度
為了進一步提升模型性能,論文提出通過調整擴展比(Expansion Ratio, ER)來增大中間張量(Tensor)的尺寸,使其超過輸入維度。傳統方法中,ER主要用于調整輸入和輸出維度,但在這篇論文中,ER被重新設計為與輸入維度成比例,即ER與增長率(Growth Rate, GR)解耦。這種設計使得在非線性處理之前能夠更充分地豐富特征,同時為了管理由此產生的計算需求,將GR減半(例如從120減少到60),從而在不影響準確性的前提下控制計算量。
3. 記憶高效的DenseNet設計
為了優化DenseNet的架構設計,論文采用了更加內存高效的設計策略,通過丟棄無效組件并增強架構和塊設計,同時保持DenseNet的核心連接機制不變。這種設計使得模型在保持高性能的同時,也減少了內存占用,提升了處理大規模數據集的能力。

本文使用RDNet模型實現圖像分類任務,模型選擇rdnet_tiny,在植物幼苗分類任務ACC達到了97%+。


通過這篇文章能讓你學到:
- 如何使用數據增強,包括transforms的增強、CutOut、MixUp、CutMix等增強手段?
- 如何實現RDNet模型實現訓練?
- 如何使用pytorch自帶混合精度?
- 如何使用梯度裁剪防止梯度爆炸?
- 如何使用DP多顯卡訓練?
- 如何繪制loss和acc曲線?
- 如何生成val的測評報告?
- 如何編寫測試腳本測試測試集?
- 如何使用余弦退火策略調整學習率?
- 如何使用AverageMeter類統計ACC和loss等自定義變量?
- 如何理解和統計ACC1和ACC5?
- 如何使用EMA?
如果基礎薄弱,對上面的這些功能難以理解可以看我的專欄:經典主干網絡精講與實戰
這個專欄,從零開始時,一步一步的講解這些,讓大家更容易接受。
安裝包
安裝timm
使用pip就行,命令:
pip install timm
mixup增強和EMA用到了timm
數據增強Cutout和Mixup
為了提高成績我在代碼中加入Cutout和Mixup這兩種增強方式。實現這兩種增強需要安裝torchtoolbox。安裝命令:
pip install torchtoolbox
Cutout實現,在transforms中。
from torchtoolbox.transform import Cutout
# 數據預處理
transform = transforms.Compose([transforms.Resize((224, 224)),Cutout(),transforms.ToTensor(),transforms.Normalize([0.5, 0.5, 0.5], [0.5, 0.5, 0.5])])
需要導入包:from timm.data.mixup import Mixup,
定義Mixup,和SoftTargetCrossEntropy
mixup_fn = Mixup(mixup_alpha=0.8, cutmix_alpha=1.0, cutmix_minmax=None,prob=0.1, switch_prob=0.5, mode='batch',label_smoothing=0.1, num_classes=12)criterion_train = SoftTargetCrossEntropy()
Mixup 是一種在圖像分類任務中常用的數據增強技術,它通過將兩張圖像以及其對應的標簽進行線性組合來生成新的數據和標簽。
參數詳解:
mixup_alpha (float): mixup alpha 值,如果 > 0,則 mixup 處于活動狀態。
cutmix_alpha (float):cutmix alpha 值,如果 > 0,cutmix 處于活動狀態。
cutmix_minmax (List[float]):cutmix 最小/最大圖像比率,cutmix 處于活動狀態,如果不是 None,則使用這個 vs alpha。
如果設置了 cutmix_minmax 則cutmix_alpha 默認為1.0
prob (float): 每批次或元素應用 mixup 或 cutmix 的概率。
switch_prob (float): 當兩者都處于活動狀態時切換cutmix 和mixup 的概率 。
mode (str): 如何應用 mixup/cutmix 參數(每個’batch’,‘pair’(元素對),‘elem’(元素)。
correct_lam (bool): 當 cutmix bbox 被圖像邊框剪裁時應用。 lambda 校正
label_smoothing (float):將標簽平滑應用于混合目標張量。
num_classes (int): 目標的類數。
EMA
EMA(Exponential Moving Average)是指數移動平均值。在深度學習中的做法是保存歷史的一份參數,在一定訓練階段后,拿歷史的參數給目前學習的參數做一次平滑。具體實現如下:
import logging
from collections import OrderedDict
from copy import deepcopy
import torch
import torch.nn as nn_logger = logging.getLogger(__name__)class ModelEma:def __init__(self, model, decay=0.9999, device='', resume=''):# make a copy of the model for accumulating moving average of weightsself.ema = deepcopy(model)self.ema.eval()self.decay = decayself.device = device  # perform ema on different device from model if setif device:self.ema.to(device=device)self.ema_has_module = hasattr(self.ema, 'module')if resume:self._load_checkpoint(resume)for p in self.ema.parameters():p.requires_grad_(False)def _load_checkpoint(self, checkpoint_path):checkpoint = torch.load(checkpoint_path, map_location='cpu')assert isinstance(checkpoint, dict)if 'state_dict_ema' in checkpoint:new_state_dict = OrderedDict()for k, v in checkpoint['state_dict_ema'].items():# ema model may have been wrapped by DataParallel, and need module prefixif self.ema_has_module:name = 'module.' + k if not k.startswith('module') else kelse:name = knew_state_dict[name] = vself.ema.load_state_dict(new_state_dict)_logger.info("Loaded state_dict_ema")else:_logger.warning("Failed to find state_dict_ema, starting from loaded model weights")def update(self, model):# correct a mismatch in state dict keysneeds_module = hasattr(model, 'module') and not self.ema_has_modulewith torch.no_grad():msd = model.state_dict()for k, ema_v in self.ema.state_dict().items():if needs_module:k = 'module.' + kmodel_v = msd[k].detach()if self.device:model_v = model_v.to(device=self.device)ema_v.copy_(ema_v * self.decay + (1. - self.decay) * model_v)
加入到模型中。
#初始化
if use_ema:model_ema = ModelEma(model_ft,decay=model_ema_decay,device='cpu',resume=resume)# 訓練過程中,更新完參數后,同步update shadow weights
def train():optimizer.step()if model_ema is not None:model_ema.update(model)# 將model_ema傳入驗證函數中
val(model_ema.ema, DEVICE, test_loader)
針對沒有預訓練的模型,容易出現EMA不上分的情況,這點大家要注意啊!
項目結構
RDNet_Demo
├─data1
│  ├─Black-grass
│  ├─Charlock
│  ├─Cleavers
│  ├─Common Chickweed
│  ├─Common wheat
│  ├─Fat Hen
│  ├─Loose Silky-bent
│  ├─Maize
│  ├─Scentless Mayweed
│  ├─Shepherds Purse
│  ├─Small-flowered Cranesbill
│  └─Sugar beet
├─models
│  └─rdnet.py
├─mean_std.py
├─makedata.py
├─train.py
└─test.py
mean_std.py:計算mean和std的值。
makedata.py:生成數據集。
train.py:訓練RDNet模型
models:來源官方代碼。
計算mean和std
為了使模型更加快速的收斂,我們需要計算出mean和std的值,新建mean_std.py,插入代碼:
from torchvision.datasets import ImageFolder
import torch
from torchvision import transformsdef get_mean_and_std(train_data):train_loader = torch.utils.data.DataLoader(train_data, batch_size=1, shuffle=False, num_workers=0,pin_memory=True)mean = torch.zeros(3)std = torch.zeros(3)for X, _ in train_loader:for d in range(3):mean[d] += X[:, d, :, :].mean()std[d] += X[:, d, :, :].std()mean.div_(len(train_data))std.div_(len(train_data))return list(mean.numpy()), list(std.numpy())if __name__ == '__main__':train_dataset = ImageFolder(root=r'data1', transform=transforms.ToTensor())print(get_mean_and_std(train_dataset))
數據集結構:
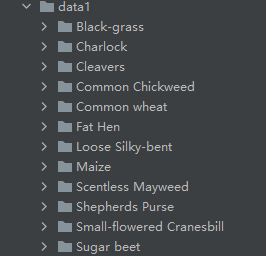
運行結果:
([0.3281186, 0.28937867, 0.20702125], [0.09407319, 0.09732835, 0.106712654])
把這個結果記錄下來,后面要用!
生成數據集
我們整理還的圖像分類的數據集結構是這樣的
data
├─Black-grass
├─Charlock
├─Cleavers
├─Common Chickweed
├─Common wheat
├─Fat Hen
├─Loose Silky-bent
├─Maize
├─Scentless Mayweed
├─Shepherds Purse
├─Small-flowered Cranesbill
└─Sugar beet
pytorch和keras默認加載方式是ImageNet數據集格式,格式是
├─data
│  ├─val
│  │   ├─Black-grass
│  │   ├─Charlock
│  │   ├─Cleavers
│  │   ├─Common Chickweed
│  │   ├─Common wheat
│  │   ├─Fat Hen
│  │   ├─Loose Silky-bent
│  │   ├─Maize
│  │   ├─Scentless Mayweed
│  │   ├─Shepherds Purse
│  │   ├─Small-flowered Cranesbill
│  │   └─Sugar beet
│  └─train
│      ├─Black-grass
│      ├─Charlock
│      ├─Cleavers
│      ├─Common Chickweed
│      ├─Common wheat
│      ├─Fat Hen
│      ├─Loose Silky-bent
│      ├─Maize
│      ├─Scentless Mayweed
│      ├─Shepherds Purse
│      ├─Small-flowered Cranesbill
│      └─Sugar beet
新增格式轉化腳本makedata.py,插入代碼:
import glob
import os
import shutilimage_list=glob.glob('data1/*/*.png')
print(image_list)
file_dir='data'
if os.path.exists(file_dir):print('true')#os.rmdir(file_dir)shutil.rmtree(file_dir)#刪除再建立os.makedirs(file_dir)
else:os.makedirs(file_dir)from sklearn.model_selection import train_test_split
trainval_files, val_files = train_test_split(image_list, test_size=0.3, random_state=42)
train_dir='train'
val_dir='val'
train_root=os.path.join(file_dir,train_dir)
val_root=os.path.join(file_dir,val_dir)
for file in trainval_files:file_class=file.replace("\\","/").split('/')[-2]file_name=file.replace("\\","/").split('/')[-1]file_class=os.path.join(train_root,file_class)if not os.path.isdir(file_class):os.makedirs(file_class)shutil.copy(file, file_class + '/' + file_name)for file in val_files:file_class=file.replace("\\","/").split('/')[-2]file_name=file.replace("\\","/").split('/')[-1]file_class=os.path.join(val_root,file_class)if not os.path.isdir(file_class):os.makedirs(file_class)shutil.copy(file, file_class + '/' + file_name)
完成上面的內容就可以開啟訓練和測試了。


![[TypeScript]手擼LFU](http://pic.xiahunao.cn/[TypeScript]手擼LFU)
)


