Meilisearch 是一個搜索引擎,主程序完全開源,除了使用官方提供的美麗云服務(收費)進行對接之外,還可以通過自建搜索引擎來實現完全獨立的搜索服務。
由于成本問題,本博客采用自建的方式,本文就講講怎么搭建。
?
本文主要參考:
- meilisearch 全接入指南 | 二丫講梵:講了怎么使用官方提供的服務,也講了怎么自建
- Meilisearch Documentation:官網文檔
?
前置工作
- 博客已配置 sitemap 功能,參考 VuePress 博客之 SEO 優化(一)之 sitemap 與搜索引擎收錄 - 知乎
- 自建時要用到自定義的域名,因此額外購買了一個二級域名的 SSL 證書,例如我用的是 search.peterjxl.com
?
?
安裝和啟動美麗云
首先需要在服務器上安裝美麗云搜索:
curl -L https://install.meilisearch.com | sh
?
?
我在用 curl 安裝的時候,發現有報錯,推測是 GFW 的問題,改為用 Docker 安裝(有很多安裝方式,參考安裝指南):
docker pull getmeili/meilisearch:v1.6
?
然后啟動命令格式為:
docker run -itd --name meilisearch -p 7700:7700 \-e MEILI_ENV="production" -e MEILI_NO_ANALYTICS=true \-e MEILI_MASTER_KEY="自定義一個不少于16字節的秘鑰" \-v $(pwd)/meili_data:/meili_data \getmeili/meilisearch:v1.6
注意修改 master-key,該密鑰用于爬蟲抓取使用(就是爬取你的博客內容并做好分詞、索引等)。
啟動后可以用 docker ps 查看容器狀態,或者用 telnet 檢查端口是否被監聽。
?
配置 Nginx
首先去阿里云上配置 DNS 解析記錄:

?
?
這個結合自身情況添加配置(例如我用的是 Nginx):
server {listen 80;listen 443 ssl;server_name search.peterjxl.com;ssl_certificate /conf/search.peterjxl.com.pem;ssl_certificate_key /conf/search.peterjxl.com.key;ssl_ciphers ECDHE-RSA-AES128-GCM-SHA256:ECDHE:ECDH:AES:HIGH:!NULL:!aNULL:!MD5:!ADH:!RC4;ssl_protocols TLSv1 TLSv1.1 TLSv1.2;ssl_prefer_server_ciphers on;location / {proxy_set_header Host $host;proxy_set_header X-Forwarded-Proto $scheme;proxy_set_header X-Real-IP $remote_addr;proxy_pass http://127.0.0.1:7700;}}
?
配置后記得重啟 Nginx,并且記得開通防火墻,然后嘗試訪問子域名,可以看到正常轉發了請求:

?
?
建立索引
接下來,我們通過美麗云提供的爬蟲功能,將博客數據創建成索引,相關文檔請見:Integrate a relevant search bar to your documentation — Meilisearch documentation。
其中,提供了一個關于 VuePress 的配置文件模板:
If you use VuePress for your documentation, you can check out the configuration file we use in production. In our case, the main container is
theme-default-content? and the selector titles and subtitles areh1?,h2?…
{"index_uid": "docs","sitemap_urls": ["https://docs.meilisearch.com/sitemap.xml"],"start_urls": ["https://docs.meilisearch.com"],"selectors": {"lvl0": {"selector": ".sidebar-heading.open","global": true,"default_value": "Documentation"},"lvl1": ".theme-default-content h1","lvl2": ".theme-default-content h2","lvl3": ".theme-default-content h3","lvl4": ".theme-default-content h4","lvl5": ".theme-default-content h5","text": ".theme-default-content p, .theme-default-content li, .theme-default-content td"},"strip_chars": " .,;:#","scrap_start_urls": true,"custom_settings": {"synonyms": {"relevancy": ["relevant", "relevance"],"relevant": ["relevancy", "relevance"],"relevance": ["relevancy", "relevant"]}}
}
?
注意如上的配置內容很重要,如果你的博客不是常規默認的,那么需要根據自己的情況對元素進行辨別,詳細配置項說明,參考官方文檔:更多可選字段 。
?
我用的配置如下:
{"index_uid": "VuePressBlog","sitemap_urls": ["https://www.peterjxl.com/sitemap.xml"],"start_urls": ["https://www.peterjxl.com"],"selectors": {"lvl0": {"selector": "h1","global": true,"default_value": "Documentation"},  "lvl1": ".theme-vdoing-content h2","lvl2": ".theme-vdoing-content h3","lvl3": ".theme-vdoing-content h4","lvl4": ".theme-vdoing-content h5","lvl5": ".theme-vdoing-content h6","text": ".theme-vdoing-content p, .theme-vdoing-content li"},  "strip_chars": " .,;:#","scrap_start_urls": true,"selectors_exclude": ["iframe", ".katex-block", ".md-flowchart", ".md-mermaid", ".md-presentation.reveal.reveal-viewport", ".line-numbers-mode", ".code
-group", ".footnotes", "footer.page-meta", ".page-nav", ".comments-wrapper"]
?
index_uid? :為索引名稱,如果服務端沒有,則會自動創建。接下來我們將這個配置文件放到服務器上,然后通過如下命令運行爬蟲對內容進行抓取(注意修改相關參數):
docker run -t --rm \--network=host \-e MEILISEARCH_HOST_URL='二級域名,例如我的是search.peterjxl.com' \-e MEILISEARCH_API_KEY='剛剛創建的Master Key' \-v 配置文件完整路徑:/docs-scraper/config.json \getmeili/docs-scraper:v0.12.7 pipenv run ./docs_scraper config.json
?
?
執行過程中可以看到每個頁面都進行了抓取(爬取過程會比較久,這取決于博客的內容數量):

?
?
?
創建搜索用的 key
在美麗云中,有兩種密鑰:
- master-key:權限很大,例如創建,更新,刪除索引。
- API Key:權限很小,一般只用于搜索,可以有多個
更多說明可以參考官網文檔:Master key and API keys — Meilisearch documentation。
由于 master-key 權限很大,不宜暴露,因此我們可以創建一個只有搜索權限的 API Key(用來搜索),命令格式:
curl \-X POST 'http://localhost:7700/keys' \-H 'Content-Type: application/json' \-H 'Authorization: Bearer 剛剛自定義的master-key' \--data-binary '{"description": "peterjxl.com search_key","actions": ["search"],"indexes": ["剛剛創建的index_id"],"expiresAt": "2099-01-01T00:00:00Z"}'?
然后會返回一串 JSON,其中的 key 就是我們需要的(已脫敏):
{"name": null,"description": "peterjxl.com search_key","key": "xxxx","uid": "xxxx","actions": ["search"],"indexes": ["wiki"],"expiresAt": "2099-01-01T00:00:00Z","createdAt": "2024-01-17T12:54:42.357819802Z","updatedAt": "2024-01-17T12:54:42.357819802Z"
}
?
?
測試搜索
我們可以使用 Postman 來測試搜索效果(如果使用了美麗云的服務,可以在其官網進行搜索測試)
相關文檔:Postman collection for Meilisearch — Meilisearch documentation (圖片需科學上網后看到)
配置好后,可以進行搜索,效果如下:

?
配置 VuePress
接下來就是在 VuePress 中集成美麗云了。
客戶端的配置相對簡單,因為 meilisearch 的官方文檔用的也是 Vuepress,因此官方也維護了一個 Vuepress 的插件,安裝:
npm install vuepress-plugin-meilisearch
?
然后在配置插件的部分添加相關配置:
// 全文搜索插件 meilisearch['vuepress-plugin-meilisearch',{hostUrl: 'https://search.peterjxl.com', // meilisearch 服務端域名apiKey: "剛剛創建的搜索key", // 只有搜索權限的 keyindexUid: 'VuePressBlog',placeholder: '支持全文搜索', // 在搜索欄中顯示的占位符maxSuggestions: 9, // 最多顯示幾個搜索結果cropLength: 30, // 每個搜索結果最多顯示多少個字符},],
?
?
然后本地運行,試試效果:

?
?
?
配置 GitHub Action
如果每次更新了博客,都重新運行建立索引的命令,也太麻煩了。我們可以腳本化,或者使用 GitHub Action。例如,添加如下配置:
scrape-docs:needs: test_websiteruns-on: ubuntu-20.04steps:- uses: actions/checkout@v2- uses: actions/setup-node@v2with:node-version: 14registry-url: https://registry.npmjs.org/- name: Run docs-scraperenv:API_KEY: ${{ secrets.MEILISEARCH_API_KEY }}CONFIG_FILE_PATH: ${{ github.workspace }}/docs/.vuepress/public/data/docs-scraper-config.jsonrun: |docker run -t --rm \-e MEILISEARCH_HOST_URL="https://search.peterjxl.com" \-e MEILISEARCH_API_KEY=$API_KEY \-v $CONFIG_FILE_PATH:/docs-scraper/config.json \getmeili/docs-scraper:v0.12.7 pipenv run ./docs_scraper config.json
?
注意這 3 個配置:
secrets.MEILISEARCH_API_KEY?:就是 Master keyCONFIG_FILE_PATH?:爬蟲抓取時的配置文件,可以選擇放在項目源碼的某個指定目錄(例如我的是?docs/.vuepress/config/?)MEILISEARCH_HOST_URL?:美麗云的域名,例如我的是?https://search.peterjxl.com?
?
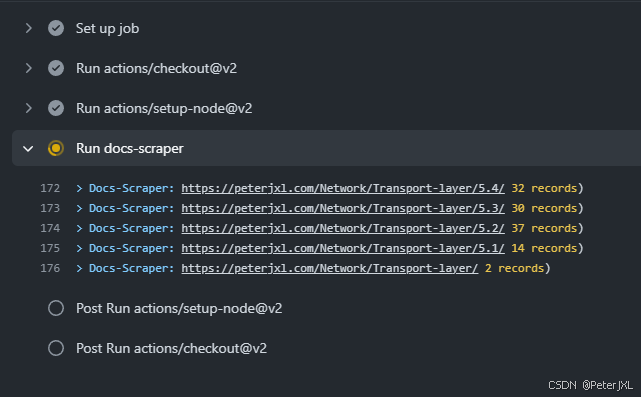
配置完后,當我們提交了新的代碼,就會自動爬取博客數據并更新索引了,GitHub Action 執行情況:
?
?
?
(完)

docker-compose實戰 (9)部署多項目環境(LAMP+react+vue+redis+mysql+nginx))
: LLM Prompts--p-tuning、LoRA)
![詳解[USACO07OPEN] Cheapest Palindrome G(洛谷PP2890)(區間DP經典題)](http://pic.xiahunao.cn/詳解[USACO07OPEN] Cheapest Palindrome G(洛谷PP2890)(區間DP經典題))


)


