摘要:
一、作業目標:使用只有2層transformer的GPT-2,生成完整寶可夢圖像。
二、源碼&解析:使用提供的Transformer模型(GPT-2)進行訓練,FID Score: 96.3425
一、作業目標
1)目標
使用Transformer Decoder-only模型進行Next-token Prediction。
訓練目標是基于部分圖像(前60%)預測剩余部分(后40%),生成完整的寶可夢圖像。
2)評價指標
FID(Fréchet Inception Distance):衡量生成圖像與真實圖像之間的分布差異,越低越好。
3)數據集
圖像數量:共792張寶可夢圖像。
圖像尺寸:20×20像素,共400個像素點。
像素顏色類別:167種。
數據劃分:
訓練集:632張
驗證集:80張
測試集:80張
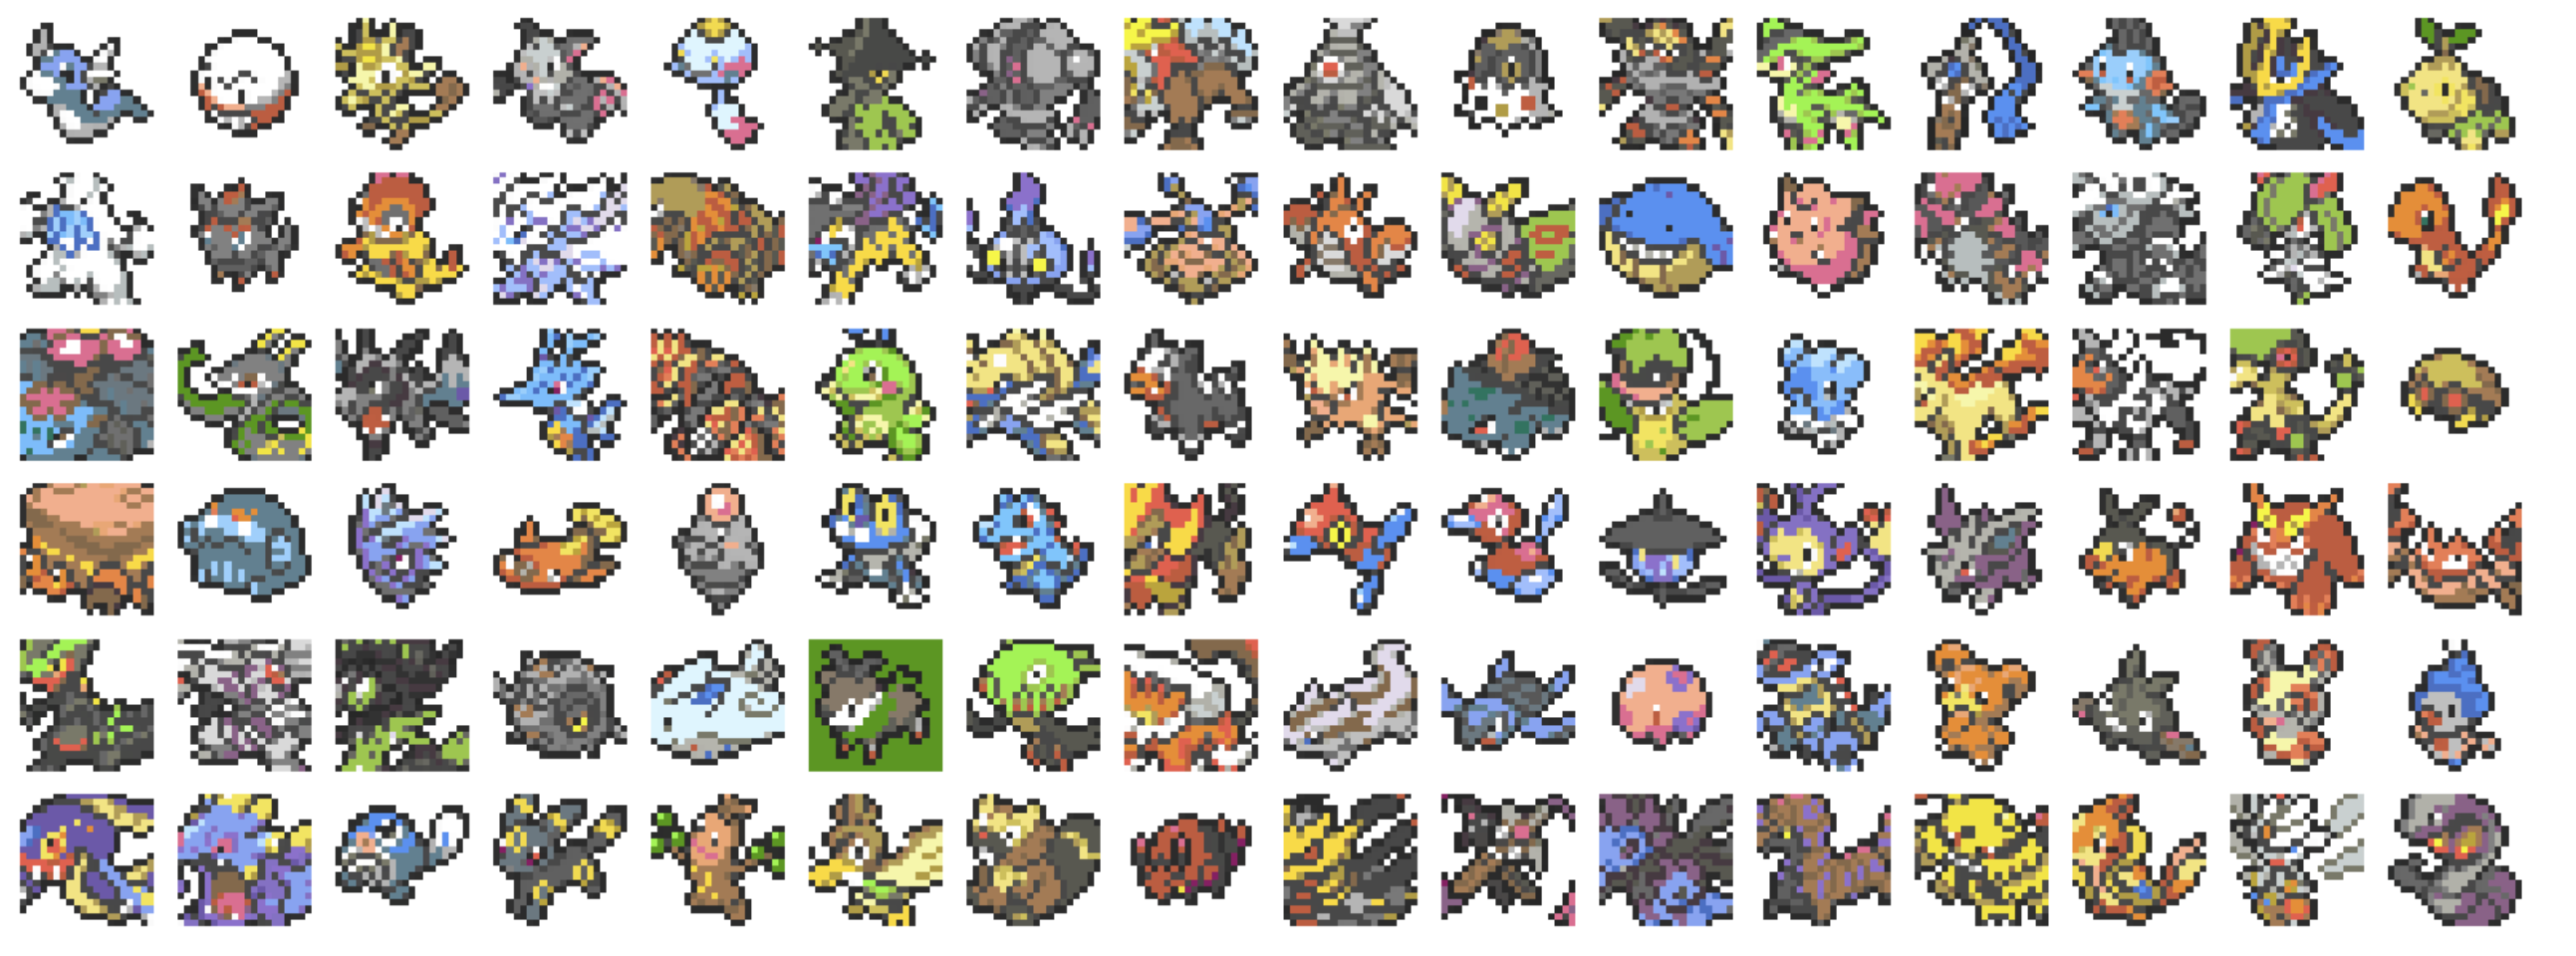
訓練集樣例
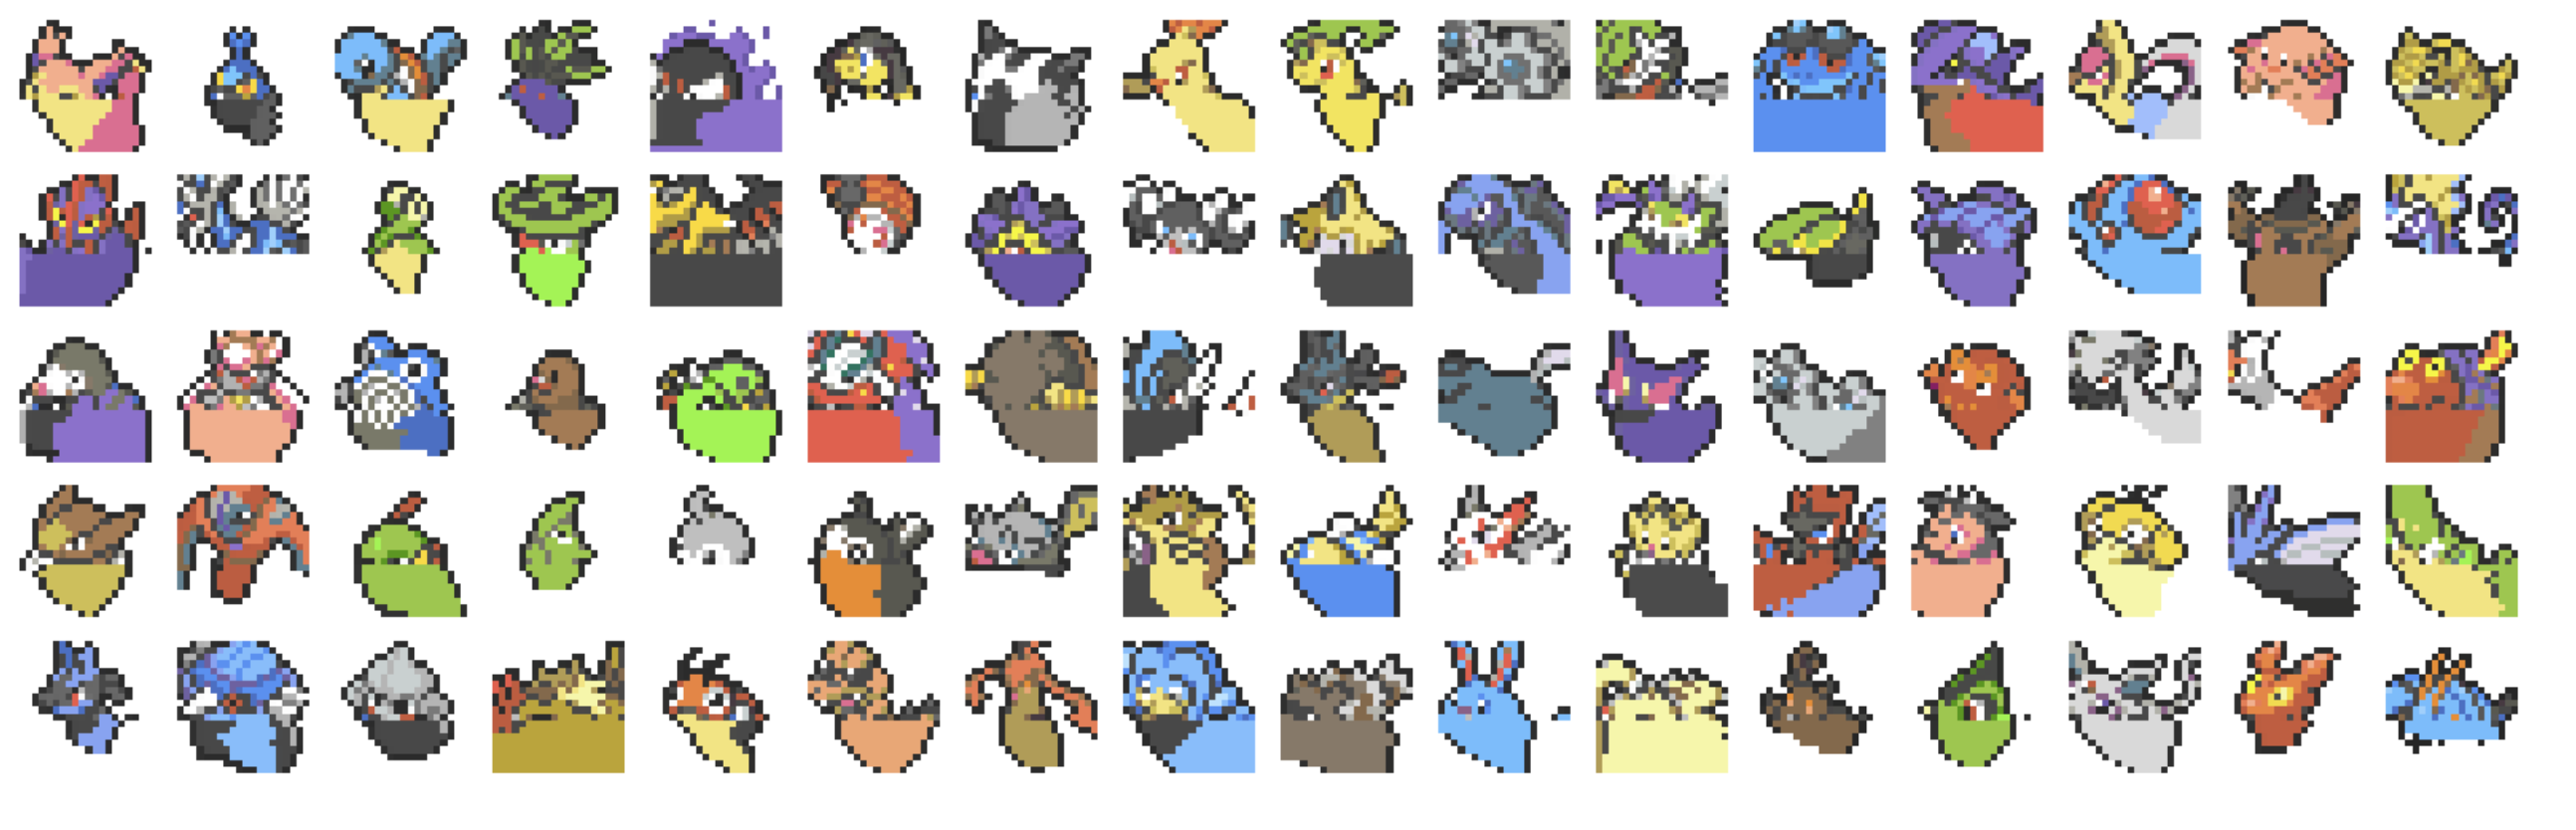
測試集樣例
二、源碼 & 解析
1、項目整體架構
1)數據處理部分 (第56-144行)
PixelSequenceDataset 類:
繼承自 PyTorch Dataset,專門處理像素序列數據
支持三種模式:train(自回歸訓練)、dev(驗證最后160像素)、test(推理)
將像素顏色索引轉換為 PyTorch 張量
數據加載:
從 Hugging Face Hub 加載 Pokemon 數據集和顏色映射表
創建訓練、驗證、測試三個 DataLoader
批次大小設為 16
2)圖像可視化工具?
pixel_to_image 函數:
將像素索引序列轉換為 20x20 RGB 圖像
使用顏色映射表將索引映射到實際 RGB 值
返回 PIL Image 對象
show_images 函數:
在 6x16 網格中顯示最多 96 張圖像
使用 matplotlib 進行可視化
3)模型配置與創建
GPT-2 配置:
gpt2_config = {"n_layer": 2,        # 2層 Transformer"n_head": 2,         # 2個注意力頭"n_embd": 64,        # 64維嵌入"vocab_size": 167,   # 167個顏色類別"n_ctx": 128,        # 上下文長度128"n_positions": 400,  # 最大位置400# ... 其他配置
}模型創建結果:
總參數量:136,384
輕量級設計,適合快速訓練和實驗
4)訓練過程?
訓練配置:
50個 epoch
學習率:1e-3
AdamW 優化器,權重衰減 0.1
CrossEntropyLoss 損失函數
訓練循環:
每個 epoch 進行訓練和驗證
保存最佳損失的模型檢查點
驗證時評估重建準確率
5)推理與結果生成
推理過程:
加載最佳模型檢查點
對測試集進行批量推理
生成完整的 400 像素序列
保存結果到文件并可視化
6)訓練過程表現
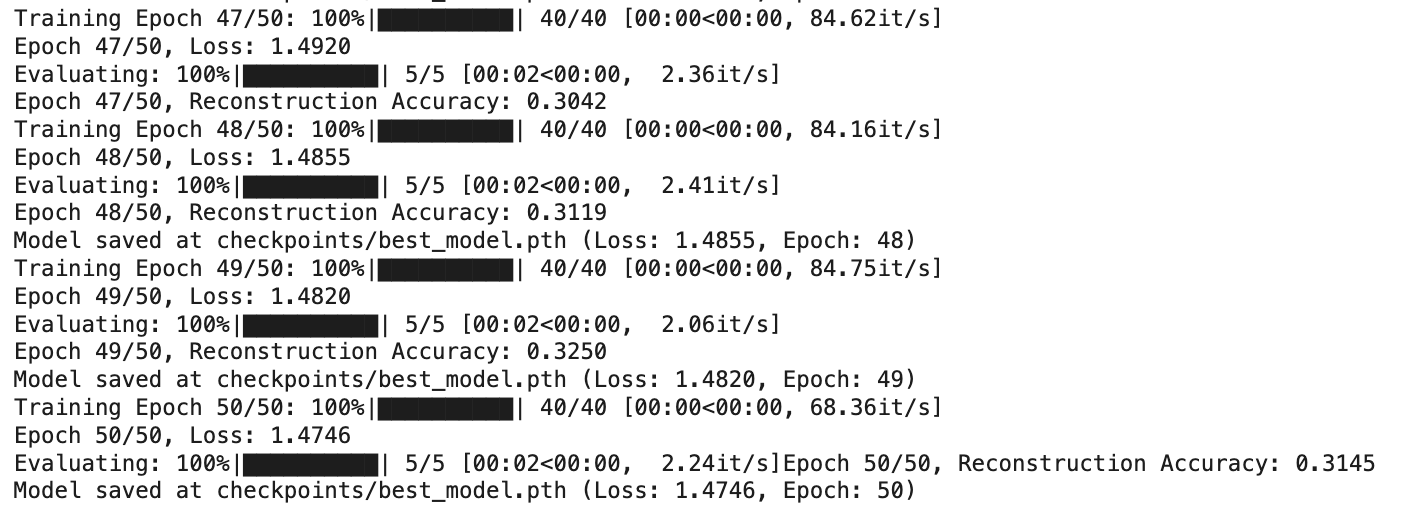
損失下降趨勢:
Epoch 47: Loss 1.4920
Epoch 48: Loss 1.4855
Epoch 49: Loss 1.4820
Epoch 50: Loss 1.4746
重建準確率:
在驗證集上的重建準確率約為 0.31-0.32
表示模型能正確預測約 31% 的像素
7)生成結果質量
第一張截圖 - 生成的測試圖像:
顯示了模型生成的 Pokemon 像素圖像
圖像具有明顯的 Pokemon 特征和顏色模式
雖然不夠精細,但能識別出基本的形狀和顏色分布
8)FID分數
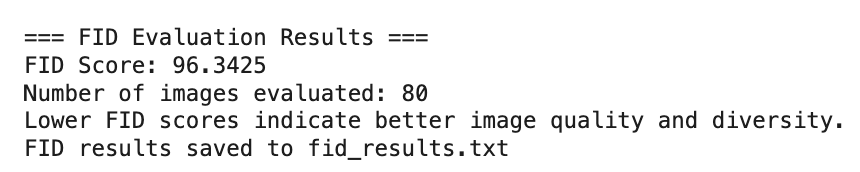
評估指標解讀:
- FID分數越低越好 :表示生成圖像與真實圖像的分布越相似
- 典型FID分數范圍:0-500+,優秀的生成模型通常FID < 50
- 該實現會輸出詳細的評估結果和保存到文件
# -*- coding: utf-8 -*-Automatically generated by Colab.Original file is located athttps://colab.research.google.com/drive/1EIggOm6u7Giu3RiT5Bhyke1OjsiV-kCX# Training Transformer# Utilities### Download packages
"""
# jupyter用戶需要安裝
# !pip install datasets==3.3.2"""### Import Packages"""import os
import matplotlib.pyplot as plt
import numpy as np
import torch
import torch.optim as optim
from PIL import Image
from torch import nn
from torch.utils.data import DataLoader, Dataset
from tqdm import tqdm
from transformers import AutoModelForCausalLM, GPT2Config, set_seed
from datasets import load_dataset
from typing import Dict, Any, Optional"""### Check Devices"""
# jupyter用戶需要檢查 是否啟用GPU
# !nvidia-smi"""### Set Random Seed"""set_seed(0)"""# Prepare Data### Define Dataset
"""from typing import List, Tuple, Union
import torch
from torch.utils.data import Datasetclass PixelSequenceDataset(Dataset):def __init__(self, data: List[List[int]], mode: str = "train"):"""A dataset class for handling pixel sequences.Args:data (List[List[int]]): A list of sequences, where each sequence is a list of integers.mode (str): The mode of operation, either "train", "dev", or "test".- "train": Returns (input_ids, labels) where input_ids are sequence[:-1] and labels are sequence[1:].- "dev": Returns (input_ids, labels) where input_ids are sequence[:-160] and labels are sequence[-160:].- "test": Returns only input_ids, as labels are not available."""self.data = dataself.mode = modedef __len__(self) -> int:"""Returns the total number of sequences in the dataset."""return len(self.data)def __getitem__(self, idx: int) -> Union[Tuple[torch.Tensor, torch.Tensor], torch.Tensor]:"""Fetches a sequence from the dataset and processes it based on the mode.Args:idx (int): The index of the sequence.Returns:- If mode == "train": Tuple[torch.Tensor, torch.Tensor] -> (input_ids, labels)- If mode == "dev": Tuple[torch.Tensor, torch.Tensor] -> (input_ids, labels)- If mode == "test": torch.Tensor -> input_ids"""sequence = self.data[idx]if self.mode == "train":input_ids = torch.tensor(sequence[:-1], dtype=torch.long)labels = torch.tensor(sequence[1:], dtype=torch.long)return input_ids, labelselif self.mode == "dev":input_ids = torch.tensor(sequence[:-160], dtype=torch.long)labels = torch.tensor(sequence[-160:], dtype=torch.long)return input_ids, labelselif self.mode == "test":input_ids = torch.tensor(sequence, dtype=torch.long)return input_idsraise ValueError(f"Invalid mode: {self.mode}. Choose from 'train', 'dev', or 'test'.")"""### Download Dataset & Prepare Dataloader"""# Load the pokemon dataset from Hugging Face Hub
pokemon_dataset = load_dataset("lca0503/ml2025-hw4-pokemon")# Load the colormap from Hugging Face Hub
colormap = list(load_dataset("lca0503/ml2025-hw4-colormap")["train"]["color"])# Define number of classes
num_classes = len(colormap)# Define batch size
batch_size = 16# === Prepare Dataset and DataLoader for Training ===
train_dataset: PixelSequenceDataset = PixelSequenceDataset(pokemon_dataset["train"]["pixel_color"], mode="train"
)
train_dataloader: DataLoader = DataLoader(train_dataset, batch_size=batch_size, shuffle=True
)# === Prepare Dataset and DataLoader for Validation ===
dev_dataset: PixelSequenceDataset = PixelSequenceDataset(pokemon_dataset["dev"]["pixel_color"], mode="dev"
)
dev_dataloader: DataLoader = DataLoader(dev_dataset, batch_size=batch_size, shuffle=False
)# === Prepare Dataset and DataLoader for Testing ===
test_dataset: PixelSequenceDataset = PixelSequenceDataset(pokemon_dataset["test"]["pixel_color"], mode="test"
)
test_dataloader: DataLoader = DataLoader(test_dataset, batch_size=batch_size, shuffle=False
)pokemon_datasetlen(pokemon_dataset['train']['pixel_color'][0])len(colormap)"""### Visualization"""def pixel_to_image(pixel_color: List[int], colormap: List[List[int]]) -> Image.Image:"""Converts a list of pixel indices into a 20x20 RGB image using a colormap.Args:pixel_color (List[int]): A list of pixel indices representing colors.colormap (List[List[int]]): A list where each index maps to an RGB color [R, G, B].Returns:Image.Image: A PIL Image object representing the reconstructed image."""# Ensure the pixel_color list has at least 400 elements (pad with 0s if needed)while len(pixel_color) < 400:pixel_color.append(0)# Map pixel indices to actual RGB colors using the colormappixel_data = [colormap[pixel] for pixel in pixel_color]# Convert to numpy array and reshape to 20x20x3 (RGB image)image_array = np.array(pixel_data, dtype=np.uint8).reshape(20, 20, 3)# Create a PIL Image from the arrayimage = Image.fromarray(image_array)return imagedef show_images(images: List[Image.Image]) -> None:"""Displays a grid of up to 96 images using Matplotlib.Args:images (List[Image.Image]): A list of PIL Image objects to display.Returns:None"""num_images = min(96, len(images))  # Limit to 96 images# Set up the figure size and grid layout (6 rows, 16 columns)fig, axes = plt.subplots(6, 16, figsize=(16, 6))axes = axes.flatten()  # Flatten to make iteration easier# Loop through images and display each one in the gridfor i, ax in enumerate(axes):if i < num_images:ax.imshow(images[i])ax.axis('off')  # Hide axiselse:ax.axis('off')  # Hide unused subplotsplt.tight_layout()  # Adjust layout to prevent overlapplt.show()# Visualize train images
train_images = [pixel_to_image(data["pixel_color"], colormap) for data in pokemon_dataset["train"]]
show_images(train_images)# Visualize test images
test_images = [pixel_to_image(data["pixel_color"], colormap) for data in pokemon_dataset["test"]]
show_images(test_images)"""# Prepare Model### Model Configuration
Here, we define the model configuration, including the architecture and key hyperparameters such as the number of attention heads, layers, embedding size, and more.
*   Hint 1: Adjust hyperparameters here for improved performance.
*   Hint 2: Experiment with different model architectures, such as Llama, Mistral, or Qwen, to enhance performance.* [LlamaConfig](https://huggingface.co/docs/transformers/model_doc/llama#transformers.LlamaConfig)* [MistralConfig](https://huggingface.co/docs/transformers/model_doc/mistral#transformers.MistralConfig)* [Qwen2Config](https://huggingface.co/docs/transformers/model_doc/qwen2#transformers.Qwen2Config)
"""# Define GPT-2 model configuration as a dictionary
gpt2_config = {"activation_function": "gelu_new",    # Activation function used in the model"architectures": ["GPT2LMHeadModel"],  # Specifies the model type"attn_pdrop": 0.1,            # Dropout rate for attention layers"embd_pdrop": 0.1,            # Dropout rate for embeddings"initializer_range": 0.02,        # Standard deviation for weight initialization"layer_norm_epsilon": 1e-05,       # Small constant to improve numerical stability in layer norm"model_type": "gpt2",           # Type of model"n_ctx": 128,               # Context size (maximum sequence length)"n_embd": 64,              # Embedding size"n_head": 2,               # Number of attention heads"n_layer": 2,              # Number of transformer layers"n_positions": 400,           # Maximum number of token positions"resid_pdrop": 0.1,           # Dropout rate for residual connections"vocab_size": num_classes,       # Number of unique tokens in vocabulary"pad_token_id": None,          # Padding token ID (None means no padding token)"eos_token_id": None,          # End-of-sequence token ID (None means not explicitly defined)
}# Load GPT-2 model configuration from dictionary
config = GPT2Config.from_dict(gpt2_config)"""### Load Model"""# Load the model using the configuration defined above
model = AutoModelForCausalLM.from_config(config)print(model)# Count trainable parameters
trainable_params = sum(p.numel() for p in model.parameters() if p.requires_grad)print(f"Trainable Parameters: {trainable_params:,}")"""# Train and Inference### Training Arguments
Here, we define the number of epochs for training, the learning rate, the optimizer, and the loss function.
*   Hint 3: Adjust the number of epochs and learning rate here to improve performance.
"""# Training Parameters
epochs = 50                                      # Number of training epochs
learning_rate = 1e-3                                 # Learning rate for optimizer
device = torch.device("cuda" if torch.cuda.is_available() else "cpu")     # Check if CUDA is available for GPU
save_dir = "checkpoints"                               # Directory to save model checkpoints# Loss function and optimizer
criterion = nn.CrossEntropyLoss()                          # Loss function for classification tasks
optimizer = optim.AdamW(model.parameters(), lr=learning_rate, weight_decay=0.1) # AdamW optimizer with weight decay"""### Save Model Function"""def save_model(model: torch.nn.Module, optimizer: torch.optim.Optimizer, epoch: int, loss: float, save_dir: str, filename: str = "best_model.pth") -> None:"""Saves the model state, optimizer state, current epoch, and loss to a specified directory.Args:model (torch.nn.Module): The PyTorch model to be saved.optimizer (torch.optim.Optimizer): The optimizer whose state will be saved.epoch (int): The current epoch number (used for checkpointing).loss (float): The current loss value to track model performance.save_dir (str): The directory where the model checkpoint will be saved.filename (str, optional): The name of the file to save the model. Defaults to "best_model.pth".Returns:None"""# Construct the full path for saving the model checkpointsave_path = os.path.join(save_dir, filename)# Save the model, optimizer state, and additional metadata (epoch and loss)torch.save({'epoch': epoch + 1,                # Save epoch + 1 for easier tracking'model_state_dict': model.state_dict(),       # Save model weights'optimizer_state_dict': optimizer.state_dict(),  # Save optimizer state (important for resuming training)'loss': loss                     # Save the current loss value}, save_path)# Print a confirmation message indicating the model has been savedprint(f"Model saved at {save_path} (Loss: {loss:.4f}, Epoch: {epoch + 1})")"""### TrainWe save the checkpoint with the lowest training loss since validation set reconstruction accuracy doesn't directly reflect the model's image generation quality.
*   Hint 4: Train a classifier to check if an image looks like a Pokémon or not. (Optional)
"""# Create save directory if it doesn't exist
os.makedirs(save_dir, exist_ok=True)
# Initialize best loss as positive infinity for comparison during model checkpointing
best_loss: float = float('inf')
# Move model to the appropriate device (GPU or CPU)
model.to(device)# Training Loop
for epoch in range(epochs):model.train()  # Set the model to training modeepoch_loss = 0  # Initialize the epoch loss# Iterate over training data batchesfor input_ids, labels in tqdm(train_dataloader, desc=f"Training Epoch {epoch + 1}/{epochs}"):input_ids, labels = input_ids.to(device), labels.to(device)  # Move data to the same device as the model# Forward pass through the model to get logits (output probabilities)outputs = model(input_ids=input_ids).logits.view(-1, config.vocab_size)labels = labels.view(-1)  # Flatten labels to match logits shape# Calculate loss using CrossEntropyLossloss = criterion(outputs, labels)# Backpropagation and optimizer stepoptimizer.zero_grad()  # Reset gradients to zeroloss.backward()     # Compute gradientsoptimizer.step()     # Update model weights# Accumulate the loss for the epochepoch_loss += loss.item()# Compute average epoch lossavg_epoch_loss = epoch_loss / len(train_dataloader)print(f"Epoch {epoch + 1}/{epochs}, Loss: {avg_epoch_loss:.4f}")# Evaluation Loop (Validation)model.eval()      # Set the model to evaluation mode (disables dropout, etc.)total_accuracy = 0  # Initialize total accuracynum_batches = 0   # Initialize batch counterwith torch.no_grad():  # Disable gradient calculation for validation# Iterate over validation data batchesfor inputs, labels in tqdm(dev_dataloader, desc="Evaluating"):inputs, labels = inputs.to(device), labels.to(device)  # Move validation data to deviceattention_mask = torch.ones_like(inputs)          # Attention mask to ensure valid token positions# Perform batch inference using the modelgenerated_outputs = model.generate(inputs, attention_mask=attention_mask, max_length=400)# Extract the last 160 tokens from generated outputs and labelsgenerated_outputs = generated_outputs[:, -160:]# Calculate accuracy for the batchaccuracy = (generated_outputs == labels).float().mean().item()total_accuracy += accuracynum_batches += 1# Compute average reconstruction accuracy for the epochavg_accuracy = total_accuracy / num_batchesprint(f"Epoch {epoch + 1}/{epochs}, Reconstruction Accuracy: {avg_accuracy:.4f}")# If the current epoch loss is better (lower) than the best loss, save the modelif avg_epoch_loss < best_loss:best_loss = avg_epoch_loss                   # Update best losssave_model(model, optimizer, epoch, best_loss, save_dir)  # Save the model with the best loss"""### Inference"""# Load the best model from the saved checkpoint
best_model_path = os.path.join(save_dir, "best_model.pth")              # Path to the best model checkpoint
checkpoint = torch.load(best_model_path, weights_only=True, map_location=device)  # Load checkpoint from the file
model.load_state_dict(checkpoint["model_state_dict"])                  # Load the model weights from checkpoint
model.eval()                                        # Set the model to evaluation mode (disables dropout, etc.)# Testing Loop with Batch Inference
results: list = []  # List to store the generated sequences from the modelwith torch.no_grad():  # Disable gradient calculations for inference# Iterate over test data in batchesfor inputs in tqdm(test_dataloader, desc="Generating Outputs"):inputs = inputs.to(device)         # Move model to the appropriate device (GPU or CPU)attention_mask = torch.ones_like(inputs)  # Attention mask (ensure valid token positions)# Generate predictions for the entire batchgenerated_outputs = model.generate(inputs, attention_mask=attention_mask, max_length=400)# Convert batch outputs to a list and append to resultsbatch_results = generated_outputs.cpu().numpy().tolist()results.extend(batch_results)  # Extend the results list with batch results# Save the results to a file
output_file: str = "reconstructed_results.txt"  # File to save the output sequences
with open(output_file, "w") as f:# Write each sequence to the filefor seq in results:f.write(" ".join(map(str, seq)) + "\n")print(f"Reconstructed results saved to {output_file}")  # Confirmation message# Visualize generated test images
predicted_images = [pixel_to_image(sequence, colormap) for sequence in results]
show_images(predicted_images)"""# FID"""# === FID Evaluation Implementation ===
import numpy as np
from scipy import linalg
import torchvision.transforms as transforms
from torchvision.models import inception_v3
import torch.nn.functional as F
from PIL import Image
import warnings
warnings.filterwarnings('ignore')class FIDCalculator:def __init__(self, device='cuda' if torch.cuda.is_available() else 'cpu'):"""Initialize FID calculator with Inception v3 model.Args:device: Device to run calculations on"""self.device = device# Load pre-trained Inception v3 modelself.inception_model = inception_v3(pretrained=True, transform_input=False)self.inception_model.fc = torch.nn.Identity()  # Remove final classification layerself.inception_model.eval()self.inception_model.to(device)# Define image preprocessing transformsself.transform = transforms.Compose([transforms.Resize((299, 299)),  # Inception v3 expects 299x299 imagestransforms.ToTensor(),transforms.Normalize(mean=[0.485, 0.456, 0.406], std=[0.229, 0.224, 0.225])])def preprocess_images(self, images):"""Preprocess images for Inception v3.Args:images: List of PIL ImagesReturns:Preprocessed tensor batch"""processed_images = []for img in images:# Convert to RGB if neededif img.mode != 'RGB':img = img.convert('RGB')# Apply transformsprocessed_img = self.transform(img)processed_images.append(processed_img)return torch.stack(processed_images)def extract_features(self, images, batch_size=32):"""Extract features from images using Inception v3.Args:images: List of PIL Imagesbatch_size: Batch size for processingReturns:Feature vectors as numpy array"""features = []with torch.no_grad():for i in range(0, len(images), batch_size):batch_images = images[i:i + batch_size]# Preprocess batchbatch_tensor = self.preprocess_images(batch_images).to(self.device)# Extract featuresbatch_features = self.inception_model(batch_tensor)features.append(batch_features.cpu().numpy())return np.concatenate(features, axis=0)def calculate_statistics(self, features):"""Calculate mean and covariance matrix of features.Args:features: Feature vectors as numpy arrayReturns:Tuple of (mean, covariance matrix)"""mu = np.mean(features, axis=0)sigma = np.cov(features, rowvar=False)return mu, sigmadef calculate_frechet_distance(self, mu1, sigma1, mu2, sigma2, eps=1e-6):"""Calculate Fréchet distance between two multivariate Gaussians.Args:mu1, mu2: Mean vectorssigma1, sigma2: Covariance matriceseps: Small value for numerical stabilityReturns:Fréchet distance"""mu1 = np.atleast_1d(mu1)mu2 = np.atleast_1d(mu2)sigma1 = np.atleast_2d(sigma1)sigma2 = np.atleast_2d(sigma2)assert mu1.shape == mu2.shape, "Mean vectors have different lengths"assert sigma1.shape == sigma2.shape, "Covariance matrices have different dimensions"diff = mu1 - mu2# Calculate sqrt of product of covariance matricescovmean, _ = linalg.sqrtm(sigma1.dot(sigma2), disp=False)# Handle numerical errorsif not np.isfinite(covmean).all():msg = ('fid calculation produces singular product; ''adding %s to diagonal of cov estimates') % epsprint(msg)offset = np.eye(sigma1.shape[0]) * epscovmean = linalg.sqrtm((sigma1 + offset).dot(sigma2 + offset))# Numerical error might give slight imaginary componentif np.iscomplexobj(covmean):if not np.allclose(np.diagonal(covmean).imag, 0, atol=1e-3):m = np.max(np.abs(covmean.imag))raise ValueError('Imaginary component {}'.format(m))covmean = covmean.realtr_covmean = np.trace(covmean)return (diff.dot(diff) + np.trace(sigma1) + np.trace(sigma2) - 2 * tr_covmean)def compute_fid(self, real_images, generated_images):"""Compute FID score between real and generated images.Args:real_images: List of PIL Images (real images)generated_images: List of PIL Images (generated images)Returns:FID score"""print("Extracting features from real images...")real_features = self.extract_features(real_images)print("Extracting features from generated images...")generated_features = self.extract_features(generated_images)print("Calculating statistics...")mu_real, sigma_real = self.calculate_statistics(real_features)mu_generated, sigma_generated = self.calculate_statistics(generated_features)print("Computing FID score...")fid_score = self.calculate_frechet_distance(mu_real, sigma_real,mu_generated, sigma_generated)return fid_score# === FID Evaluation Usage ===# Initialize FID calculator
fid_calculator = FIDCalculator(device=device)# Get real test images for comparison
real_test_images = [pixel_to_image(data["pixel_color"], colormap) for data in pokemon_dataset["test"]]# Use the generated images from your model
generated_test_images = predicted_images  # These are already generated from your model# Ensure we have the same number of images for fair comparison
min_images = min(len(real_test_images), len(generated_test_images))
real_test_images = real_test_images[:min_images]
generated_test_images = generated_test_images[:min_images]print(f"Evaluating FID with {min_images} images...")# Calculate FID score
fid_score = fid_calculator.compute_fid(real_test_images, generated_test_images)print(f"\n=== FID Evaluation Results ===")
print(f"FID Score: {fid_score:.4f}")
print(f"Number of images evaluated: {min_images}")
print(f"Lower FID scores indicate better image quality and diversity.")# Optional: Save FID results to file
with open("fid_results.txt", "w") as f:f.write(f"FID Score: {fid_score:.4f}\n")f.write(f"Number of images: {min_images}\n")f.write(f"Model configuration: {gpt2_config}\n")print(f"FID results saved to fid_results.txt")

![[iOS] 折疊 cell](http://pic.xiahunao.cn/[iOS] 折疊 cell)
高可用集群搭建)

、正宗分(雙“門”)和流通分(統一的通行表達式) 之3 “自明性”(騰訊元寶 之2))
--環境準備)


