環境信息
1、Y9000筆記本
2、1T空白硬盤
3、ubunut24.04桌面版
一、環境初始化
第一部分:系統初始化
1、安裝基礎軟件
apt-get update
apt-get -y install openssh-server openssh-client apt-utils freeipmi ipmitool sshpass  ethtool zip unzip nano less git netplan.io iputils-ping mtr ipvsadm smartmontools python3-pip socat conntrack libvirt-clients libnuma-dev ctorrent nvme-cli gcc-12 g++-12
apt-get -y install vim wget apt git unzip zip ntp ntpdate lrzsz lftp tree bash-completion  elinks dos2unix tmux jq
apt-get -y install  nmap net-tools  mtr traceroute tcptraceroute aptitude htop iftop hping3 fping nethogs sshuttle tcpdump figlet  stress iperf iperf3 dnsutils curl
apt install -y linux-tools-generic linux-cloud-tools-genericcurl -s https://packagecloud.io/install/repositories/github/git-lfs/script.deb.sh | sudo bash
sudo apt-get install git-lfs
git lfs installsudo update-alternatives --install /usr/bin/gcc gcc /usr/bin/gcc-12 12
sudo update-alternatives --install /usr/bin/g++ g++ /usr/bin/g++-12 12sudo update-alternatives --config gcc
sudo update-alternatives --config g++
2、調整文件描述符
echo "ulimit -SHn 655350" >>/etc/profile
echo "fs.file-max = 655350" >>/etc/sysctl.conf
echo "root soft nofile 655350" >>/etc/security/limits.conf
echo "root hard nofile 655350" >>/etc/security/limits.conf
echo "* soft nofile 655350" >>/etc/security/limits.conf
echo "* hard nofile 655350" >>/etc/security/limits.conf
echo "session required pam_limits.so" >>/etc/pam.d/common-session
source /etc/profile
3、優化history
cat /etc/profile
export HISTTIMEFORMAT="%Y-%m-%d %H:%M:%S  `whoami` "
export HISTFILESIZE=50000
export HISTSIZE=50000
source /etc/profile
4、檢查防火墻和設置journalctl日志大小避免把系統盤占滿
apt list --installed | grep ufw
如果ufw默認安裝則需要關閉
ufw disablejournalctl 命令自動維護文件大小
只保留近一周的日志
journalctl --vacuum-time=1w只保留500MB的日志
journalctl --vacuum-size=500M
5、優化內核參數
cp /etc/sysctl.conf /etc/sysctl.conf.bakvi /etc/sysctl.conf
net.ipv4.tcp_syncookies = 1
net.ipv4.tcp_abort_on_overflow = 1
net.ipv4.tcp_max_tw_buckets = 6000
net.ipv4.tcp_sack = 1
net.ipv4.tcp_window_scaling = 1
net.ipv4.tcp_rmem = 4096        87380  4194304
net.ipv4.tcp_wmem = 4096        66384  4194304
net.ipv4.tcp_mem = 94500000 915000000 927000000
net.core.optmem_max = 81920
net.core.wmem_default = 8388608
net.core.wmem_max = 16777216
net.core.rmem_default = 8388608
net.core.rmem_max = 16777216
net.ipv4.tcp_max_syn_backlog = 1020000
net.core.netdev_max_backlog = 862144
net.core.somaxconn = 262144
net.ipv4.tcp_max_orphans = 327680
net.ipv4.tcp_timestamps = 0
net.ipv4.tcp_synack_retries = 1
net.ipv4.tcp_syn_retries = 1
net.ipv4.tcp_tw_reuse = 1
net.ipv4.tcp_fin_timeout = 15
net.ipv4.tcp_keepalive_time = 30
net.ipv4.ip_local_port_range = 1024    65535
net.netfilter.nf_conntrack_tcp_timeout_established = 180
net.netfilter.nf_conntrack_max = 1048576
net.nf_conntrack_max = 1048576
fs.file-max = 655350
modprobe nf_conntrack
sysctl -p /etc/sysctl.conf
sysctl -w net.ipv4.route.flush=1
6、關閉ubuntu更新
rm -rf /etc/apt/apt.conf.d/20auto-upgrades
cat << EOF > /etc/apt/apt.conf.d/20auto-upgrades
APT::Periodic::Update-Package-Lists "0";
APT::Periodic::Download-Upgradeable-Packages "0";
APT::Periodic::AutocleanInterval "0";
APT::Periodic::Unattended-Upgrade "0";
EOFsed -i "/^Unattended-Upgrade::Allowed-Origins {/,/^};/s/^/\/\//" /etc/apt/apt.conf.d/50unattended-upgrades
systemctl restart unattended-upgrades
systemctl status unattended-upgradesmv /etc/update-motd.d /etc/update-motd.d.backup
mkdir -p /etc/update-motd.d
7、關閉swap
swapoff -a
刪除 /etc/fstab內swap的行systemctl list-unit-files|grep swap
systemctl disable dev-nvme0n1p2.swap
systemctl status dev-nvme0n1p2.swapsystemctl status swap.target
systemctl stop swap.target//防止 systemd-gpt-auto-generator 在啟動時自動激活 Swap。需要在 /etc/fstab 中添加一個 noauto 選項的 swap 行
cat /etc/fstab
/dev/nvme0n1p2 none swap noauto
8、開啟root 用戶ssh并優化ssh
sed -i 's/#PermitRootLogin prohibit-password/PermitRootLogin yes/g' /etc/ssh/sshd_config
sed -i 's/#ClientAliveInterval 0/ClientAliveInterval 15/g' /etc/ssh/sshd_config
sed -i 's/#ClientAliveCountMax 3/ClientAliveCountMax 30/g' /etc/ssh/sshd_config
systemctl enable ssh.service
systemctl restart sshd
9、配置時區并同步時間
timedatectl set-timezone Asia/Shanghaintpdate ntp1.aliyun.com
systemctl restart ntp
systemctl enable ntp
10、配置pip源
mkdir -p /root/.pip
cat /root/.pip/pip.conf
[global]
timeout = 60
index-url = http://pypi.douban.com/simple
trusted-host = pypi.douban.compip3 install virtualenv
11、配置靜態IP地址
cp /etc/netplan/01-network-manager-all.yaml /etc/netplan/01-network-manager-all.yaml.bakroot@ubuntu:~# nmcli device show wlp0s20f3
GENERAL.DEVICE:                         wlp0s20f3
GENERAL.TYPE:                           wifi
GENERAL.HWADDR:                         BC:6E:E2:36:D2:1A
GENERAL.MTU:                            1500
GENERAL.STATE:                          100(已連接)
GENERAL.CONNECTION:                     CCTV-2
GENERAL.CON-PATH:                       /org/freedesktop/NetworkManager/ActiveConnection/4
IP4.ADDRESS[1]:                         192.168.31.187/24
IP4.GATEWAY:                            192.168.31.1
IP4.ROUTE[1]:                           dst = 192.168.31.0/24, nh = 0.0.0.0, mt = 600
IP4.ROUTE[2]:                           dst = 0.0.0.0/0, nh = 192.168.31.1, mt = 600
IP4.DNS[1]:                             192.168.31.1
IP6.ADDRESS[1]:                         fe80::d1a8:4024:59cf:d295/64
IP6.GATEWAY:                            --
IP6.ROUTE[1]:                           dst = fe80::/64, nh = ::, mt = 1024root@ubuntu:/etc/netplan# cat /etc/netplan/01-network-manager-all.yaml
network:ethernets:wlp0s20f3:   # 配置的網卡的名稱addresses: [192.168.31.187/24]   # 配置的靜態ip地址和掩碼dhcp4: false   # 關閉dhcp4optional: trueroutes:- to: defaultvia: 192.168.31.1/24nameservers:addresses: [192.168.31.1,114.114.114.114]  # DNS服務器地址,多個DNS服務器地址需要用英文逗號分>隔開,可不配置version: 2renderer: NetworkManagerroot@ubuntu:~# netplan apply
第二部分:顯卡驅動、cuda等部署
1、禁用ubuntu自帶的nouveau驅動
cat << EOF >  /etc/modprobe.d/blacklist-nouveau.conf
blacklist nouveau
blacklist lbm-nouveau
options nouveau modeset=0
alias nouveau off
alias lbm-nouveau off
EOF
執行如下指令關閉nouveau
echo options nouveau modeset=0 | tee -a /etc/modprobe.d/nouveau-kms.conf
update-initramfs -u
必須重啟服務器
lsmod | grep nouveau(重啟成功后打開終端輸入如下,如果什么都不顯示,說明正面上面禁用nouveau的流程正確)
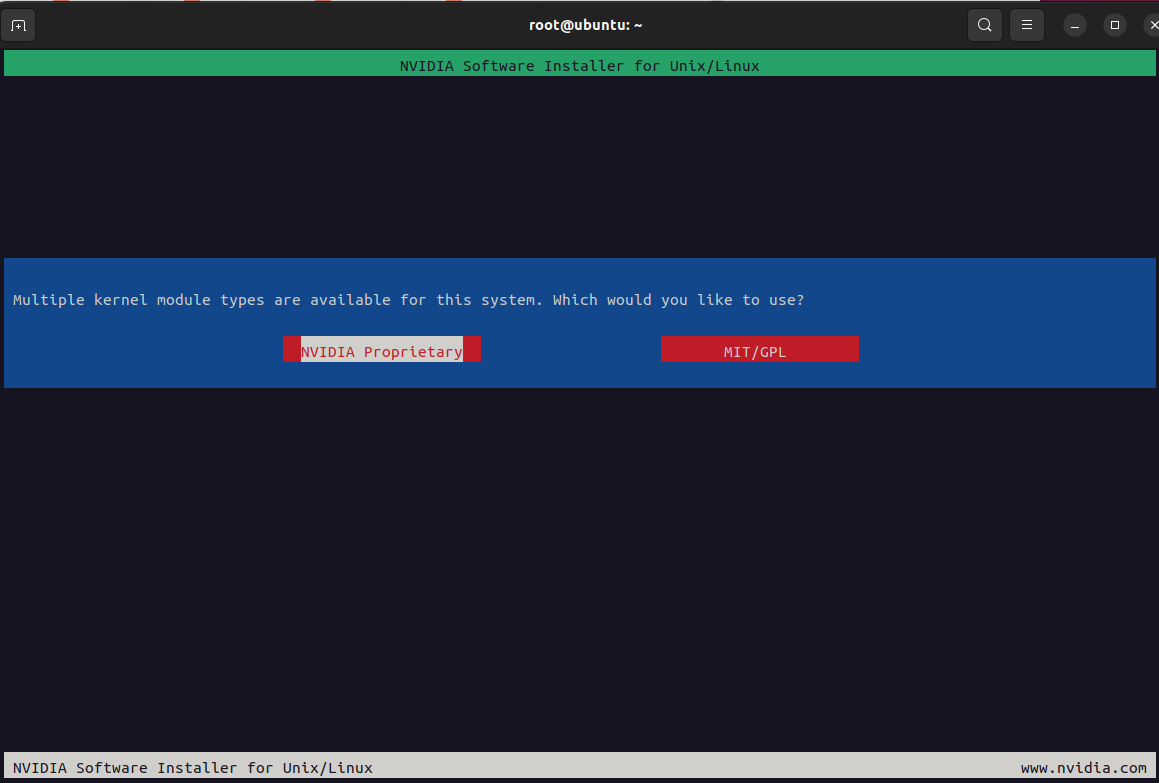
2、安裝nvidia驅動(https://download.nvidia.com/XFree86/Linux-x86_64)
獲取推薦安裝版本
add-apt-repository ppa:graphics-drivers/ppa
apt-get update
ubuntu-drivers devices
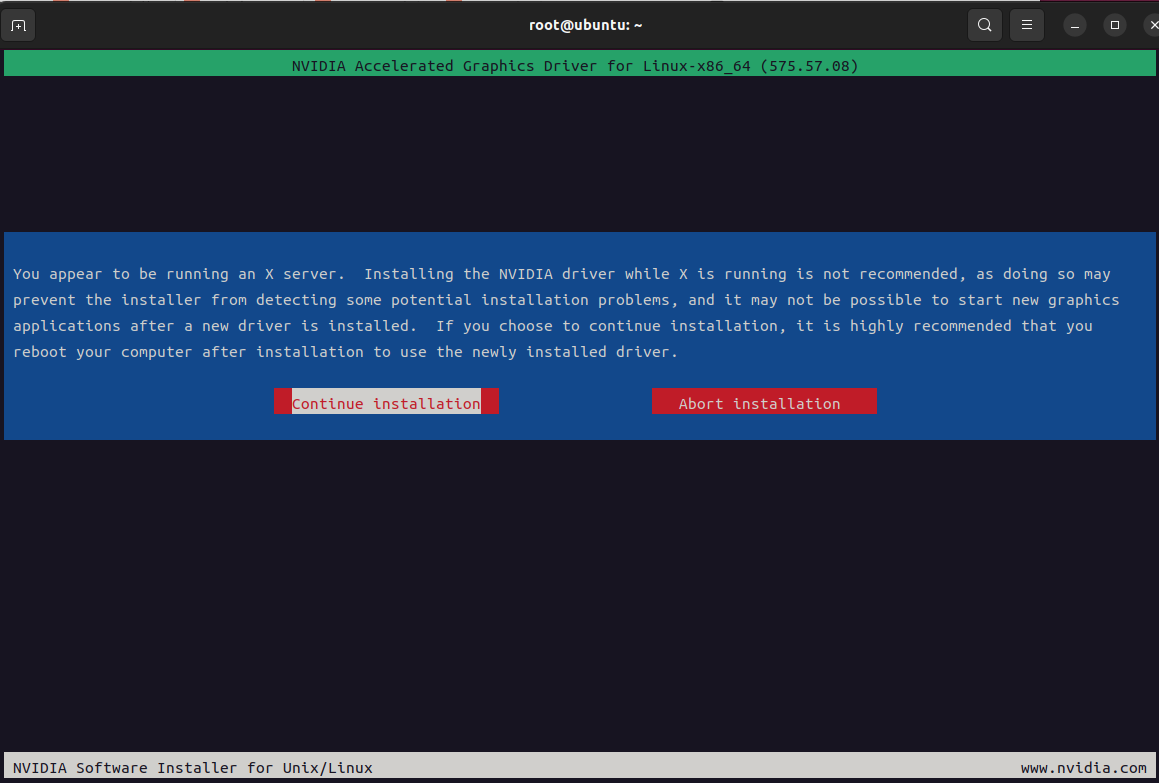
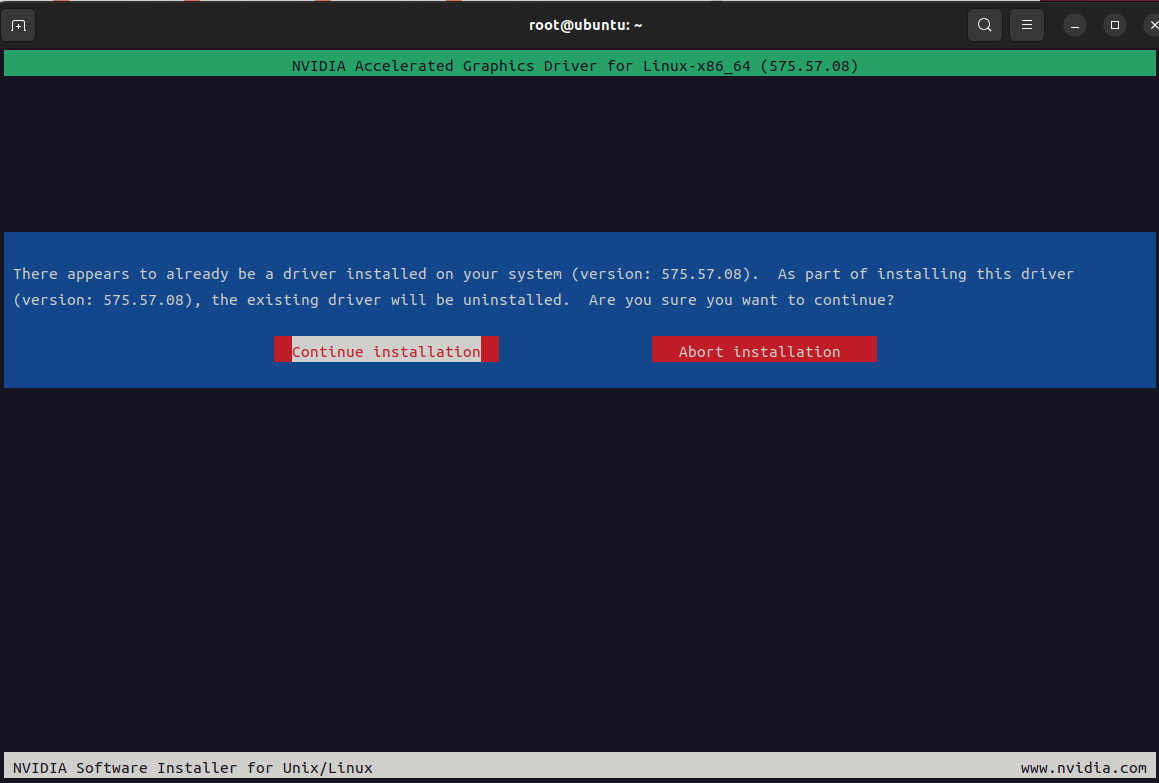
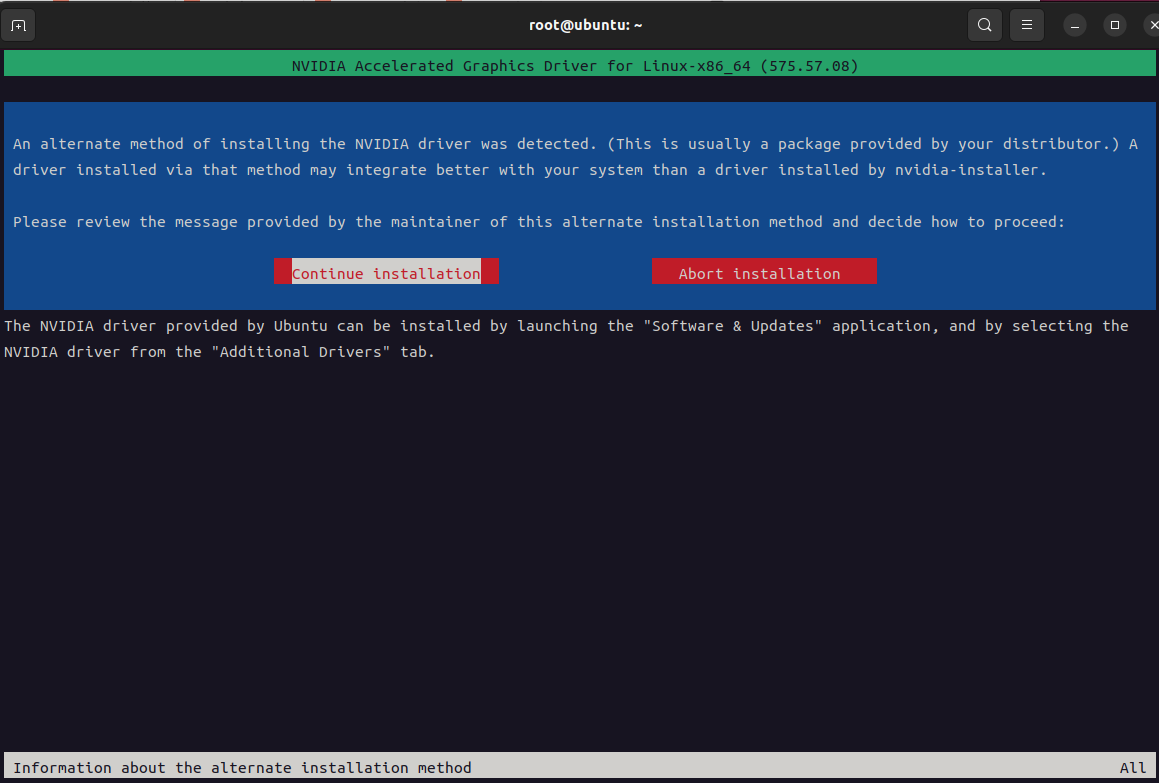
顯示推薦版本(recommended那項)wget https://download.nvidia.com/XFree86/Linux-x86_64/575.57.08/NVIDIA-Linux-x86_64-575.57.08.run
chmod +x NVIDIA-Linux-x86_64-575.57.08.run
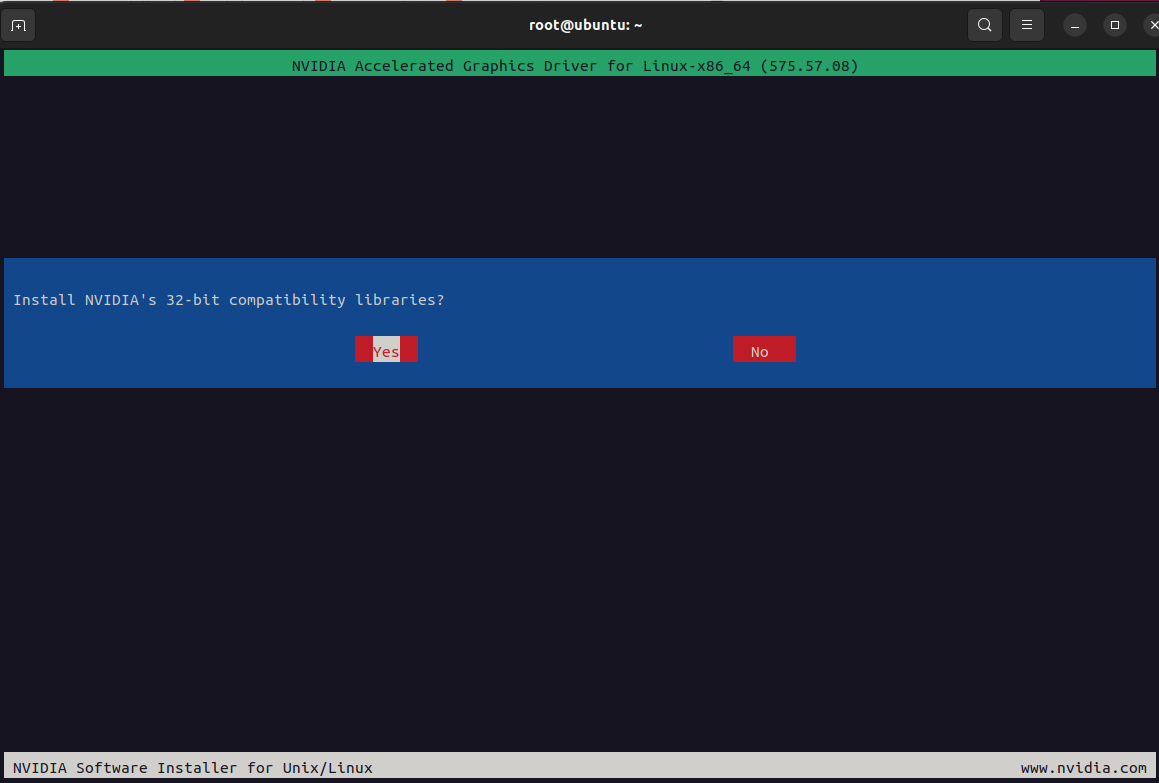
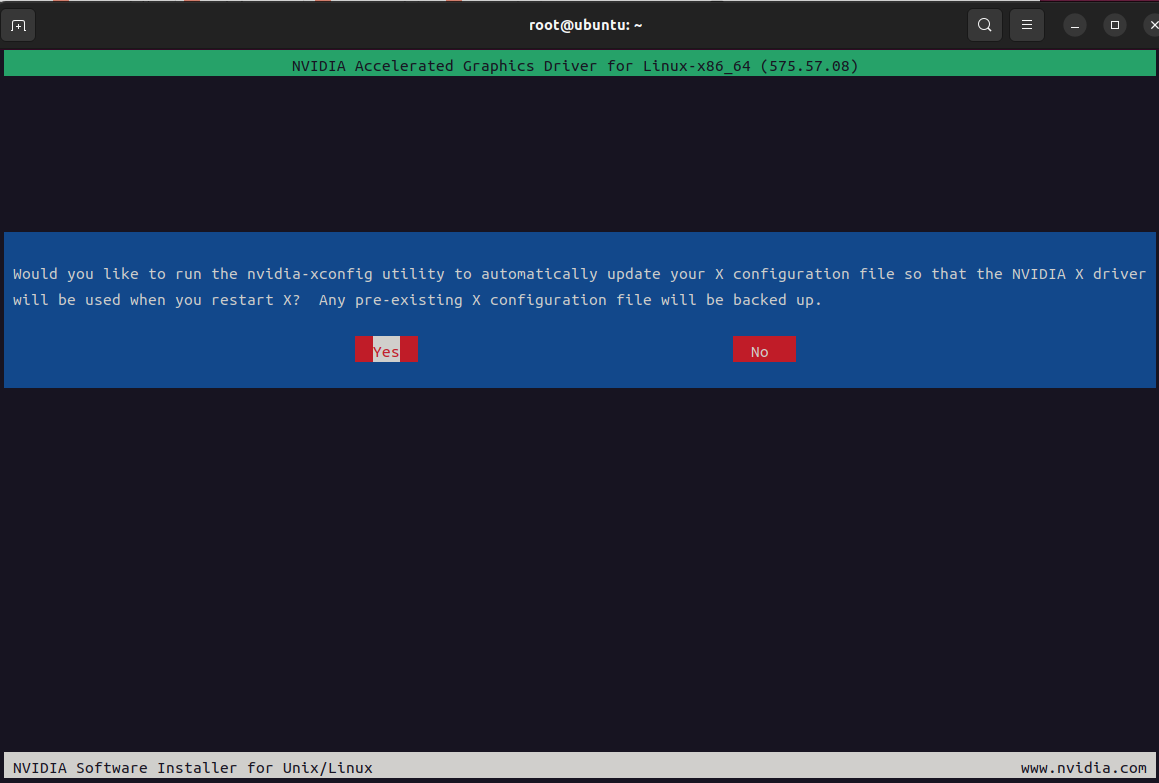
bash NVIDIA-Linux-x86_64-575.57.08.runroot@ubuntu:~# nvidia-smi
Sat Aug 2 22:58:58 2025
+-----------------------------------------------------------------------------------------+
| NVIDIA-SMI 575.57.08 Driver Version: 575.57.08 CUDA Version: 12.9 |
|-----------------------------------------+------------------------+----------------------+
| GPU Name Persistence-M | Bus-Id Disp.A | Volatile Uncorr. ECC |
| Fan Temp Perf Pwr:Usage/Cap | Memory-Usage | GPU-Util Compute M. |
| | | MIG M. |
|=========================================+========================+======================|
| 0 NVIDIA GeForce RTX 3060 ... Off | 00000000:01:00.0 On | N/A |
| N/A 64C P5 18W / 80W | 453MiB / 6144MiB | 0% Default |
| | | N/A |
+-----------------------------------------+------------------------+----------------------++-----------------------------------------------------------------------------------------+
| Processes: |
| GPU GI CI PID Type Process name GPU Memory |
| ID ID Usage |
|=========================================================================================|
| 0 N/A N/A 2053 G /usr/lib/xorg/Xorg 154MiB |
| 0 N/A N/A 2196 G /usr/bin/gnome-shell 35MiB |
| 0 N/A N/A 4048 G .../6565/usr/lib/firefox/firefox 226MiB |
+-----------------------------------------------------------------------------------------+以下為執行bash NVIDIA-Linux-x86_64-575.57.08.run之后操作
3、安裝cuda
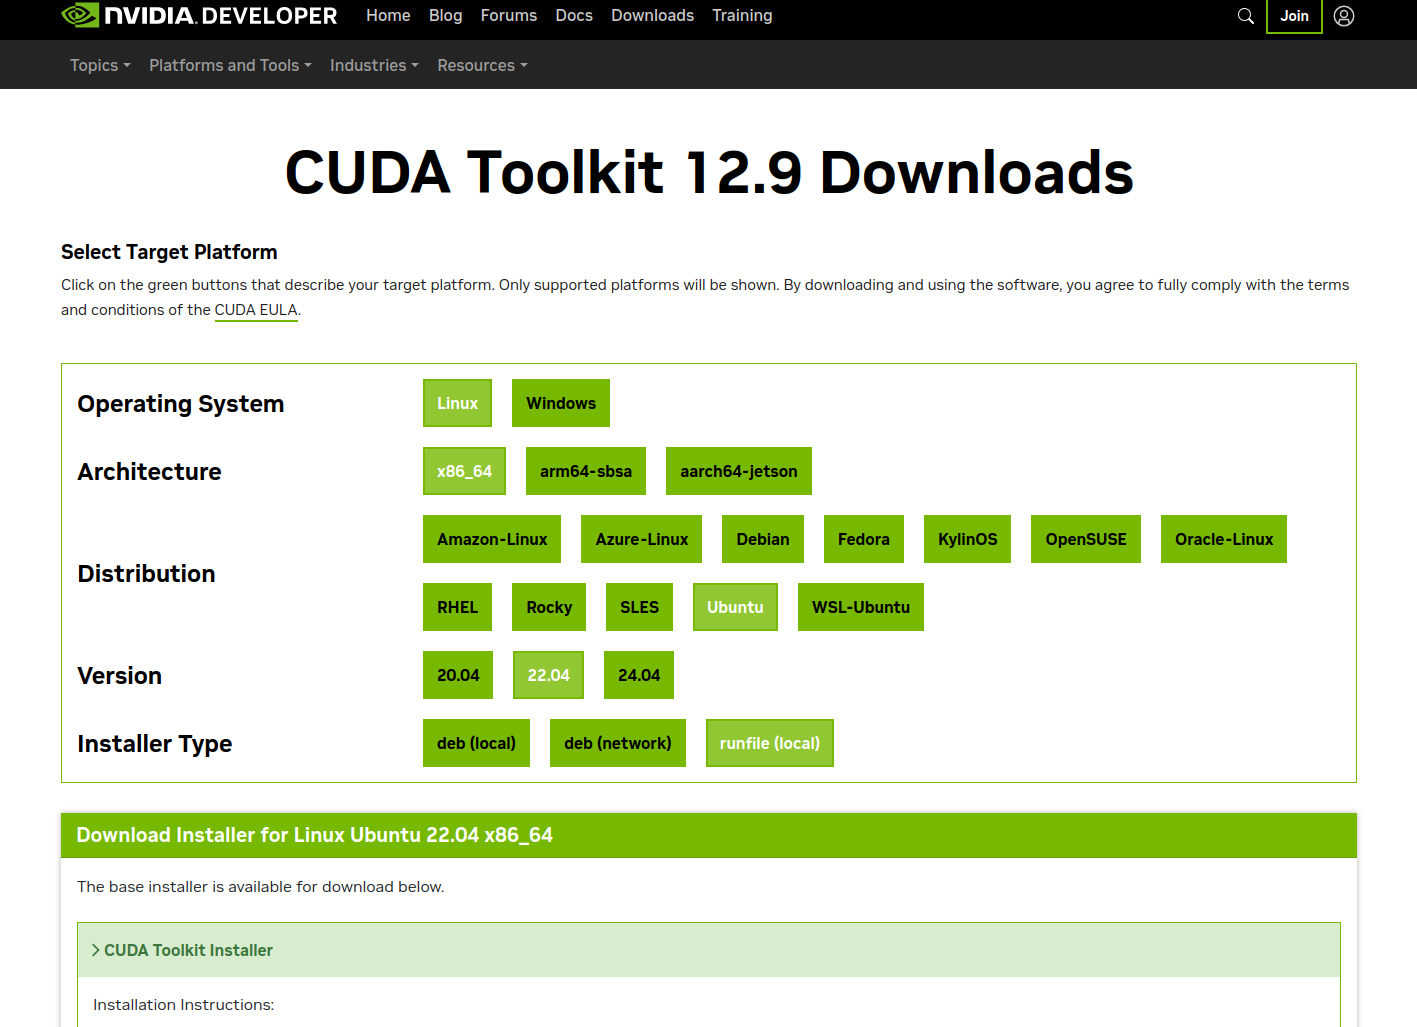
根據上面步驟可以看到cuda支持最新可用的cuda版本是12.9,登錄訪問https://developer.nvidia.com/cuda-toolkit-archive 并下載12.9版本的cuda
wget https://developer.download.nvidia.com/compute/cuda/12.9.0/local_installers/cuda_12.9.0_575.51.03_linux.run
chmoad a+x cuda_12.9.0_575.51.03_linux.run
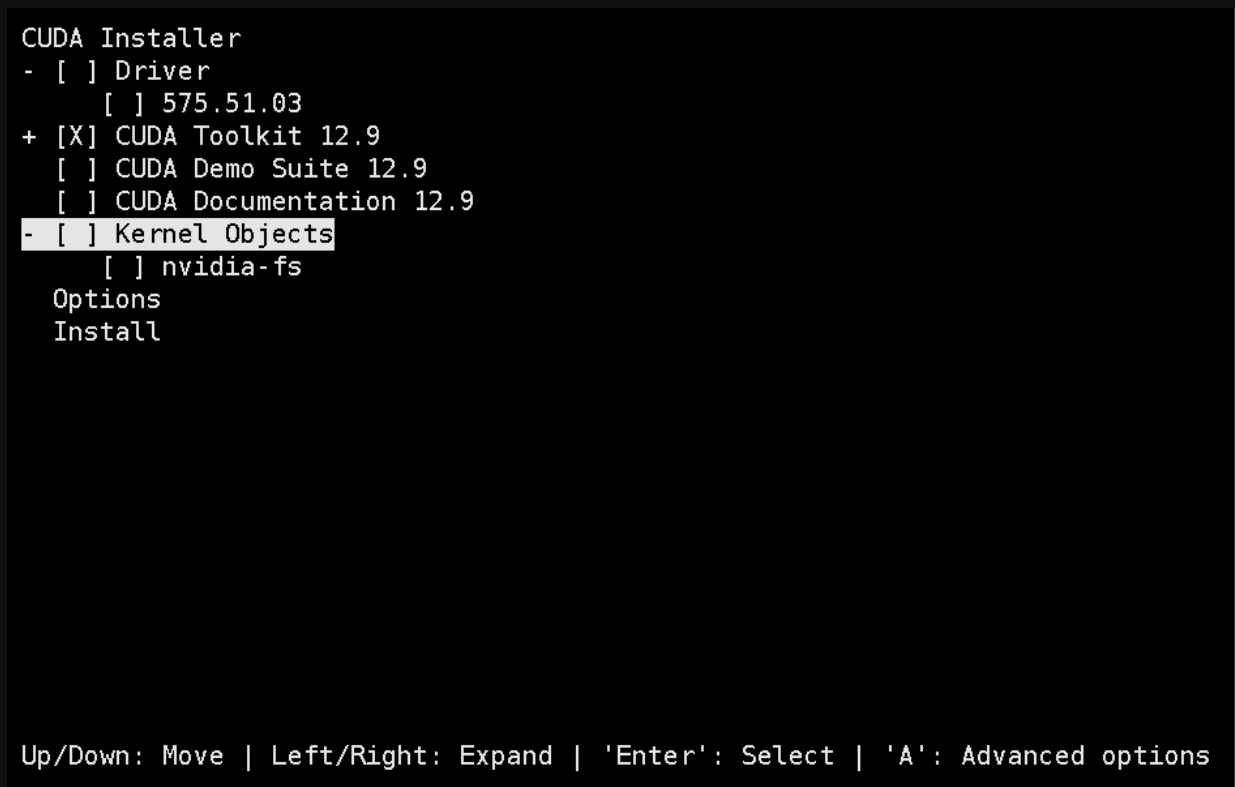
bash cuda_12.9.0_575.51.03_linux.run選擇continue->accept-->取消Driver安裝-->Install在pofile內添加cuda環境變量
cat /etc/profile
export PATH=$PATH:/usr/local/cuda/bin
export LD_LIBRARY_PATH=$LD_LIBRARY_PATH:/usr/local/cuda/lib64
export LIBRARY_PATH=$LIBRARY_PATH:/usr/local/cuda/lib64source /etc/profile
nvcc -V 驗證
4、安裝docker
wget https://download.docker.com/linux/static/stable/x86_64/docker-28.3.0.tgztar xf docker-28.3.0.tgz
cp docker/* /usr/bin/
vi /etc/systemd/system/docker.service
[Unit]
Description=Docker Application Container Engine
Documentation=https://docs.docker.com
After=network-online.target firewalld.service
Wants=network-online.target
[Service]
Type=notify
ExecStart=/usr/bin/dockerd --selinux-enabled=false
ExecReload=/bin/kill -s HUP $MAINPID
LimitNOFILE=infinity
LimitNPROC=infinity
LimitCORE=infinity
TimeoutStartSec=0
Delegate=yes
KillMode=process
Restart=on-failure
StartLimitBurst=3
StartLimitInterval=60s
[Install]
WantedBy=multi-user.targetchmod 777 /etc/systemd/system/docker.service
systemctl daemon-reload && systemctl enable docker.service
systemctl restart docker
docker info
mkdir -p /etc/dockervi /etc/docker/daemon.json
{"registry-mirrors": ["https://t3xbrfwz.mirror.aliyuncs.com","https://docker.unsee.tech","https://dockerpull.org","https://docker.1panel.live","https://dockerhub.icu","https://docker.m.daocloud.io","https://docker.nju.edu.cn"],"exec-opts": ["native.cgroupdriver=systemd"],"log-driver": "json-file","log-opts": {"max-size": "100m"},"max-concurrent-downloads": 30,"max-concurrent-uploads": 15,"live-restore": true
}
5、安裝nvidiaDocker
使用中科大鏡像源安裝 NVIDIA Container Toolkit
1. 下載 GPG 密鑰并保存
curl -fsSL https://mirrors.ustc.edu.cn/libnvidia-container/gpgkey | \sudo gpg --dearmor -o /usr/share/keyrings/nvidia-container-toolkit-keyring.gpg2. 配置 APT 源列表
curl -s -L https://mirrors.ustc.edu.cn/libnvidia-container/stable/deb/nvidia-container-toolkit.list | \sed 's#deb https://nvidia.github.io#deb [signed-by=/usr/share/keyrings/nvidia-container-toolkit-keyring.gpg] https://mirrors.ustc.edu.cn#g' | \sudo tee /etc/apt/sources.list.d/nvidia-container-toolkit.list3. 更新包列表并安裝
sudo apt-get update
sudo apt-get install -y nvidia-container-toolkit4. 驗證安裝
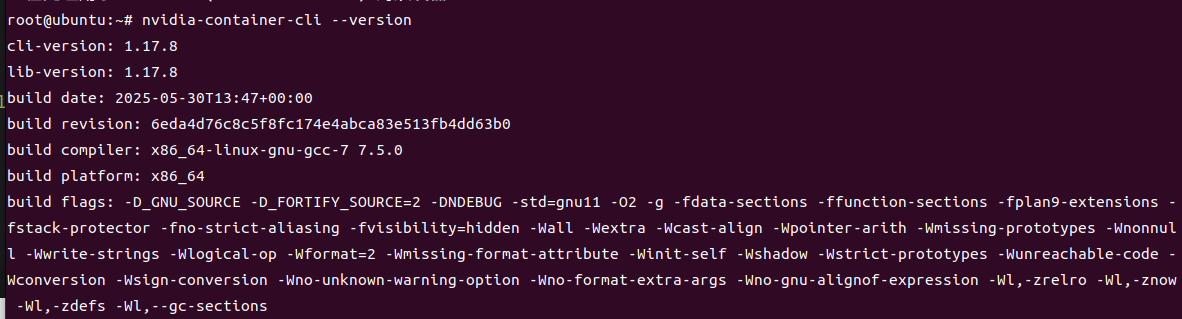
nvidia-container-cli --versiondocker-nvidia json加速配置
cat /etc/docker/daemon.json
{"runtimes": {"nvidia": { "path": "/usr/bin/nvidia-container-runtime","runtimeArgs": []}}
}
第三部分:GPU相關優化
1、固定軟件版本
#固定nvidia相關包的版本
dpkg -l | awk '{print $2}' | grep -E '^nvidia-'|xargs -n 1 apt-mark hold
#固化系統內核版本
dpkg -l | awk '{print $2}' | grep -E '^linux-'|xargs -n 1 apt-mark holddpkg-query -W --showformat='${Package} ${Status}\n' | \
grep -v deinstall | \
awk '{ print $1 }' | \
grep -E 'nvidia.*-[0-9]+$' | \
xargs -r -L 1 sudo apt-mark hold
2、開啟Persistence Mode模式
作用:將 NVIDIA GPU 卡的 Persistence Mode 設置為 enable 狀態。Persistence mode 被設計為在 GPU 長時間無活動時,把 GPU 驅動保持在活動狀態。開啟這個模式可以提高例如 CUDA 內核的啟動時間,因為不需要在每次執行 CUDA 應用時再去喚醒 GPU。nvidia-smi -pm 13、允許ECC內存模式下模擬錯誤
作用:允許 GPU 在 ECC(Error Correction Code)內存模式下模擬錯誤。但是請注意,這個選項只在某些特定型號的 Tesla 和 Quadro 設備上有效命令:
nvidia-smi -e ENABLED
4、CPU鎖頻

# 鎖定CPU頻率可提升性能,部分機型可能會設置失敗先忽略其報錯
sudo apt install -y linux-tools-6.14.0-27-generic linux-cloud-tools-6.14.0-27-generic
cpupower idle-set -D 0 || true
cpupower -c all frequency-set -g performance || true
5、GPU鎖頻
# 鎖定GPU頻率1410
nvidia-smi -lgc 1410 || true
6、PCI設備中查支持ACS設備并關閉ACS
遍歷系統中的所有PCI設備,并嘗試禁用那些支持ACS功能的設備的ACS特性。禁用ACS通常是為了避免在多GPU系統中可能出現的帶寬限制問題,確保所有GPU間能更有效地共享總線資源
lspci -vvv | grep "PCI bridge" | cut -d" " -f 1 | xargs -I{} setpci -s {} ECAP_ACS+06.w=0000
7、cpu性能模式
cpupower frequency-set -g performance
cpupower idle-set -D 0
8、安裝nvidia-fabricmanager(必須和驅動版本保持一致),非必需需要有NVSwitch硬件支持
1、查看nvidia驅動版本
root@ubuntu:~# nvidia-smi|grep 'Driver Version'
| NVIDIA-SMI 575.57.08              Driver Version: 575.57.08      CUDA Version: 12.9     |
2、下載并安裝
wget https://developer.download.nvidia.cn/compute/cuda/repos/ubuntu2004/x86_64/nvidia-fabricmanager-575_575.57.08-1_amd64.debdpkg -i nvidia-fabricmanager-575_575.57.08-1_amd64.deb systemctl enable nvidia-fabricmanager.service
systemctl restart nvidia-fabricmanager.service
systemctl status nvidia-fabricmanager.service
9、啟用 GPU P2P 功能(未測試)
echo "nvidia_peermem" >>/etc/modules-load.d/nvidia.conf
modprobe nvidia_peermem && lsmod | grep nvidia_peermem
nvidia-smi nvlink --status
10、部署HPC-X(https://developer.nvidia.com/networking/hpc-x 頁面最下選擇下載版本)
apt-get -y install lbzip2wget https://content.mellanox.com/hpc/hpc-x/v2.20/hpcx-v2.20-gcc-inbox-ubuntu24.04-cuda12-x86_64.tbztar -xf hpcx-v2.20-gcc-inbox-ubuntu24.04-cuda12-x86_64.tbz -C /opt/ln -s /opt/hpcx-v2.20-gcc-inbox-ubuntu24.04-cuda12-x86_64 /opt/hpcx#激活hpc-x
export HPCX_HOME=/opt/hpcx
. $HPCX_HOME/hpcx-init.sh
hpcx_load
11、安裝nccl(靜態編譯)
mkdir -p /root/nccl/ && cd /root/nccl
git clone https://github.com/NVIDIA/nccl.git
cd nccl
make src.build CUDA_HOME=/usr/local/cuda PATH=$PATH:/usr/local/cuda/bin LD_LIBRARY_PATH=/usr/local/cuda/lib64:$LD_LIBRARY_PATH
12、安裝nccl-test (靜態編譯)
mkdir -p /root/nccl/ && cd /root/nccl
git clone https://github.com/NVIDIA/nccl-tests.git
cd nccl-tests
which mpirun
# /opt/hpcx/ompi/bin/mpirun 截取 MPI_HOME=/opt/hpcx/ompiPATH=$PATH:/usr/local/cuda/bin LD_LIBRARY_PATH=$LD_LIBRARY_PATH:/usr/local/cuda/lib64 LIBRARY_PATH=$LIBRARY_PATH:/usr/local/cuda/lib64 make -j 8 CUDA_HOME=/usr/local/cuda NCCL_HOME=/root/nccl/nccl/build NCCL_LIBDIR=/root/nccl/nccl/build/lib NCCL_STATIC=1以MPI方式構建
PATH=$PATH:/usr/local/cuda/bin LD_LIBRARY_PATH=$LD_LIBRARY_PATH:/usr/local/cuda/lib64 LIBRARY_PATH=$LIBRARY_PATH:/usr/local/cuda/lib64 make -j 32  MPI=1  MPI_HOME=/opt/hpcx/ompi CUDA_HOME=/usr/local/cuda NCCL_HOME=/root/nccl/nccl/build NCCL_LIBDIR=/root/nccl/nccl/build/lib NCCL_STATIC=1多機MPI方式運行, 在hostfile內添加對應文件,并且在同一個目錄存放nccl、nccl-test、mpi這些文件,需要多機保持一致
mpirun --allow-run-as-root --hostfile /root/hostfile -oversubscribe -map-by ppr:8:node -mca pml ob1 -mca btl ^openib -x OMPI_MCA_btl_tcp_if_include="eth0" -x NCCL_NET_GDR_LEVEL=4 -x NCCL_PXN_DISABLE=1 -x NCCL_IB_GID_INDEX=3 -x NCCL_NVLS_ENABLE=1 -x LD_LIBRARY_PATH=$LD_LIBRARY_PATH:/root/nccl/nccl/build/lib -x NCCL_DEBUG=VERSION /root/nccl/nccl-tests/build/all_reduce_perf -b 128M -e 8G -g 1 -f 2 -i 0cat /root/hostfile #要求node01和node02免密ssh,包括ssh 自己
node01 slots=8
node02 slots=8
13、測試
 export LD_LIBRARY_PATH=$LD_LIBRARY_PATH:/root/nccl/nccl/build/lib./build/all_reduce_perf -b 8 -e 128M -f 2 -g 1#以MPI方式執行
mpirun --allow-run-as-root --host localhost -oversubscribe -map-by ppr:8:node -mca pml ob1 -mca btl ^openib -x OMPI_MCA_btl_tcp_if_include="eth0" -x NCCL_NET_GDR_LEVEL=4 -x NCCL_PXN_DISABLE=1 -x NCCL_IB_GID_INDEX=3 -x NCCL_NVLS_ENABLE=1 -x NCCL_DEBUG=INFO /root/nccl/nccl-tests/build/all_reduce_perf -b 4G -e 4G -g 1 -f 2 -i 0mpirun --allow-run-as-root --host localhost -oversubscribe -map-by ppr:8:node -mca pml ob1 -mca btl ^openib -x OMPI_MCA_btl_tcp_if_include="eth0" -x NCCL_NET_GDR_LEVEL=4 -x NCCL_PXN_DISABLE=1 -x NCCL_IB_GID_INDEX=3 -x NCCL_NVLS_ENABLE=1 /root/nccl/nccl-tests/build/reduce_scatter_perf -b 4G -e 4G -g 1 -f 2 -i 0
以MPI方式測試(未測試)
#查找libnccl.so.2位置
find / -name "libnccl.so.2" 2>/dev/nullexport LD_LIBRARY_PATH=/root/backup/nccl/nccl/build/lib:$LD_LIBRARY_PATH#運行測試用例
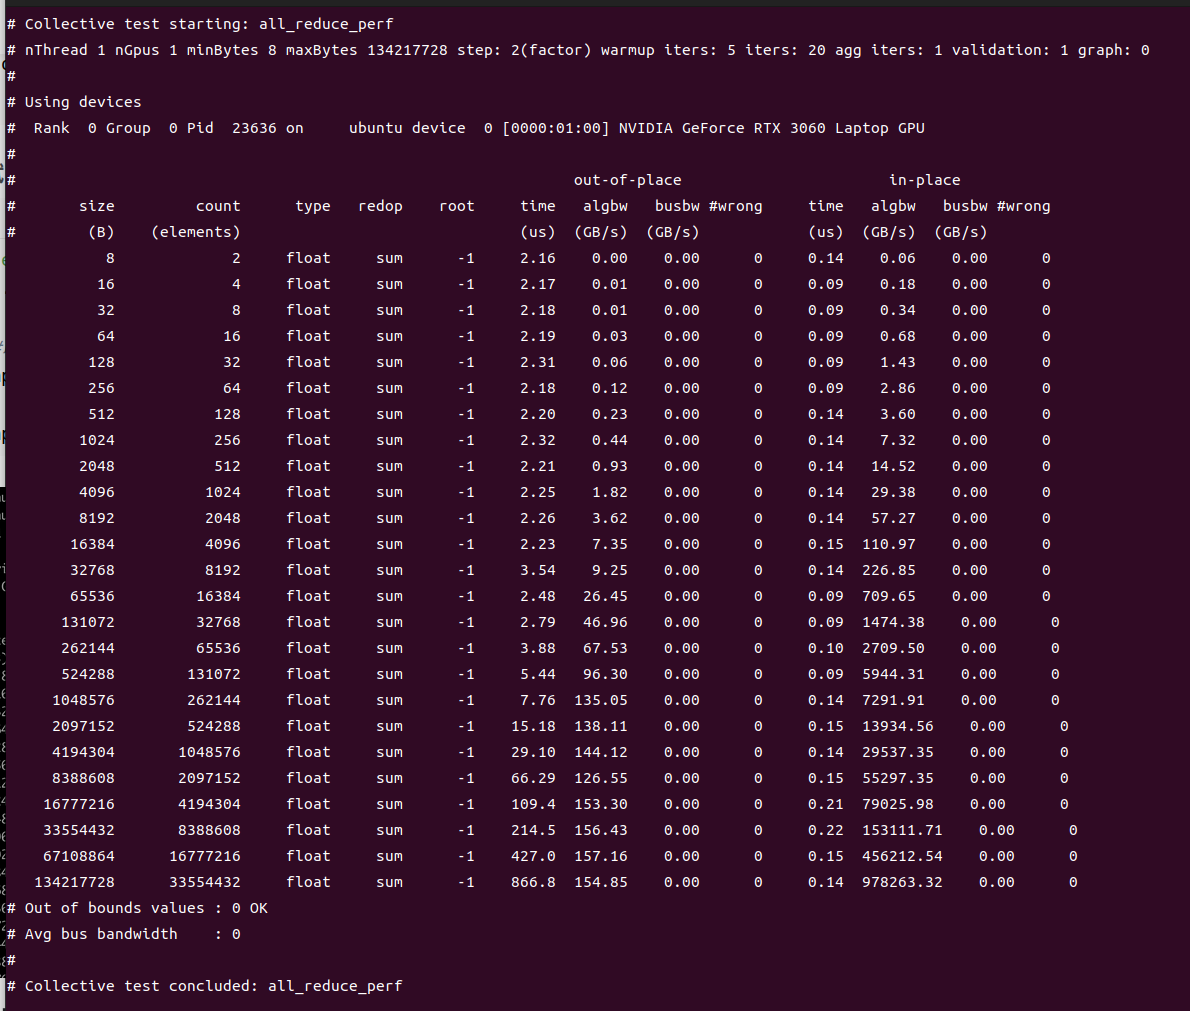
mpirun --allow-run-as-root --host 192.168.31.45 -np 1 --mca btl_tcp_if_include wlp0s20f3 --mca oob_tcp_if_include wlp0s20f3 -x NCCL_IB_GID_INDEX=3 -x NCCL_DEBUG=INFO -x NCCL_DEBUG_SUBSYS=INIT,NET,GRAPH -x LD_LIBRARY_PATH=/usr/local/lib:$LD_LIBRARY_PATH -x NCCL_PXN_DISABL=0 -x NCCL_NET_PLUGIN=none /root/backup/nccl/nccl-tests/build/alltoall_perf -b 256 -e 4G -g 1 -i 104857600這個輸出信息表示NCCL alltoall_perf 測試用例已經成功運行。開始的部分是 NCCL 初始化過程的調試信息,最后的部分表示執行結果。本次性能測試主要進行了浮點數的各種具有不同大小的全交換(alltoall)操作,首先進行了一個 out-of-place 操作,然后進行了一個 in-place 操作。下面是這些輸出結果的一些解釋:size:數據包的字節大小;
count:需要進行傳輸的元素數;
type:數據類型,這里都是 float;
redop:歸約運算類型,這里都是 'none' 表示無歸約運算;
root:歸約運算的根節點,這里都是 '-1' 表示無對應的根節點;
time:操作完成的時間,單位是微秒;
algbw:“算法帶寬”,即傳輸數據的帶寬;
busbw:跨 GPU 或者跨節點間接口數據傳輸帶寬;
#wrong:錯誤數,0 表示沒有錯誤。
從這里可以看出,所有的全交換測試都成功完成,沒有任何錯誤,并且測試的帶寬值可以被算出來。輸出的最后幾行表明,所有的測試參數都未超出預期范圍,總的平均帶寬是 0(這個應該會在測試多個節點時有其他值,單節點測試為0),且整個測試流程結束后已經清理完所有資源。
all_reduce_perf測試(未測試)
mpirun --allow-run-as-root --host 192.168.31.45 -np 1 -oversubscribe -map-by ppr:8:node -mca pml ob1 -mca btl ^openib -x OMPI_MCA_btl_tcp_if_include="eth0" -x NCCL_IB_GID_INDEX=3 -x NCCL_ALGO=RING -x NCCL_COLLNET_ENABLE=0 -x LD_LIBRARY_PATH=/usr/local/lib:$LD_LIBRARY_PATH /root/backup/nccl/nccl-tests//build/all_reduce_perf -b 1G -e 2G -g 1 -f 2 -i 0以下是上述測試命令的具體解釋:1. `mpirun`:這是一個用于在分布式系統上啟動 MPI 程序的命令。
2. `--allow-run-as-root`:這個選項允許作為 root 用戶運行 mpi 程序。
3. `--host 192.168.31.45 -np 1`:這表示在 IP 地址為 192.168.31.45 的節點上啟動 1 個進程。
4. `-oversubscribe`:允許在一個進程上運行的 MPI 進程數超過內核數。
5. `-map-by ppr:8:node`:設置每個節點上進程的分布模式。這里表示,每個節點上有 8 個進程進行循環放置。
6. `-mca pml ob1 -mca btl ^openib`:選擇 MPI 的通信模式和傳輸層。這里表示,使用 `ob1` 這種點對點的通信模式,使用除了 'openib' 以外的所有可用傳輸層協議。
7. `-x OMPI_MCA_btl_tcp_if_include="eth0" -x NCCL_IB_GID_INDEX=3`:指定運行環境變量。這里表示,MPI 通信使用 'eth0' 這個網絡接口,并將 InfiniBand 的 GID 索引設置為 3。
8. `-x NCCL_ALGO=RING -x NCCL_COLLNET_ENABLE=0`:指定 NCCL 的環境變量。這里表示,使用 'RING' 這種算法,并關閉 Collective 跨網絡功能。
9. `-x LD_LIBRARY_PATH=/usr/local/lib:$LD_LIBRARY_PATH`:添加運行庫的搜索路徑。
10. `/root/backup/nccl/nccl-tests//build/all_reduce_perf -b 1G -e 2G -g 1 -f 2 -i 0`:運行的 NCCL 性能測試和參數。輸出結果中,先記錄了基本參數信息,然后記錄了 NCCL 使用的設備信息。接下來,程序提示最大字節數由于內存限制被自動減小到 1708916736。然后是性能測試結果,表明了 out-of-place 和 in-place 測試在 1GB 數據包下的性能表現。在這次測試結束后,沒有任何錯誤提示,不過由于迭代次數 `-i` 參數設為了0,因此這個測試實際上沒有進行任何數據傳輸,只是進行了創建連接和相應的資源準備。總的來說,這次的 NCCL 性能測試在設備的硬件和配置條件下運行正常,沒有出現任何錯誤。
二、部署模型
三、部署kubernetes
第一部分:系統初始化
參考第一部中的系統初始化
第二部分:集群初始化
1、安裝nvidia-container-toolkit(未測試)
curl -s -L https://nvidia.github.io/nvidia-container-runtime/gpgkey | sudo apt-key add -
distribution=$(. /etc/os-release;echo $ID$VERSION_ID)
curl -s -L https://nvidia.github.io/nvidia-container-runtime/$distribution/nvidia-container-runtime.list | sudo tee /etc/apt/sources.list.d/nvidia-container-runtime.list
apt update
2、安裝nvidia-container-runtime
apt-get -y install nvidia-container-runtime runc
3、安裝containerd
#步驟一:下載并安裝containerd二進制文件
wget https://github.com/containerd/containerd/releases/download/v1.7.8/containerd-1.7.8-linux-amd64.tar.gz
tar -xf containerd-1.7.8-linux-amd64.tar.gz -C /usr/local/bin/cat  /etc/containerd/config.toml |grep sandbox_imagesandbox_image = "registry.cn-hangzhou.aliyuncs.com/google_containers/pause:3.10"
cat  /etc/containerd/config.toml |grep SystemdCgroupSystemdCgroup = true
#修改sandbox_image為阿里云的sandbox_image步驟二:創建systemd服務文件
mkdir -p /etc/containerd
containerd config default > /etc/containerd/config.toml# 如果需要對配置文件做自定義修改,請在此時編輯/etc/containerd/config.toml
# 注意:在配置文件中確保正確設置插件、日志路徑等選項# 創建systemd unit文件
sudo tee /etc/systemd/system/containerd.service <<-'EOF'
[Unit]
Description=containerd container runtime
Documentation=https://containerd.io
After=network.target[Service]
ExecStart=/usr/local/bin/containerd
Restart=always
RestartSec=5
Delegate=yes
KillMode=process
OOMScoreAdjust=-999[Install]
WantedBy=multi-user.target
EOFsystemctl enable containerd && systemctl start containerd
#安裝crictl
wget https://ghfast.top/https://github.com/kubernetes-sigs/cri-tools/releases/download/v1.25.0/crictl-v1.25.0-linux-amd64.tar.gz
tar -zxvf  crictl-*-linux-amd64.tar.gz  -C /usr/local/bin/cat <<EOF > /etc/crictl.yaml
runtime-endpoint: unix:///run/containerd/containerd.sock
image-endpoint: unix:///run/containerd/containerd.sock
timeout: 10
debug: false
EOF
containerd對接nvidia-container-toolkit
cat /etc/containerd/config.toml
disabled_plugins = []
imports = []
oom_score = 0
plugin_dir = ""
required_plugins = []
root = "/var/lib/containerd"
state = "/run/containerd"
temp = ""
version = 2[cgroup]path = ""[debug]address = ""format = ""gid = 0level = ""uid = 0[grpc]address = "/run/containerd/containerd.sock"gid = 0max_recv_message_size = 16777216max_send_message_size = 16777216tcp_address = ""tcp_tls_ca = ""tcp_tls_cert = ""tcp_tls_key = ""uid = 0[metrics]address = ""grpc_histogram = false[plugins][plugins."io.containerd.gc.v1.scheduler"]deletion_threshold = 0mutation_threshold = 100pause_threshold = 0.02schedule_delay = "0s"startup_delay = "100ms"[plugins."io.containerd.grpc.v1.cri"]cdi_spec_dirs = ["/etc/cdi", "/var/run/cdi"]device_ownership_from_security_context = falsedisable_apparmor = falsedisable_cgroup = falsedisable_hugetlb_controller = truedisable_proc_mount = falsedisable_tcp_service = trueenable_cdi = trueenable_selinux = falseenable_tls_streaming = falseenable_unprivileged_icmp = falseenable_unprivileged_ports = falseignore_image_defined_volumes = falseimage_pull_progress_timeout = "6m0s"max_concurrent_downloads = 30max_container_log_line_size = 16384netns_mounts_under_state_dir = falserestrict_oom_score_adj = falsesandbox_image = "sealos.hub:5000/pause:3.9"selinux_category_range = 1024stats_collect_period = 10stream_idle_timeout = "4h0m0s"stream_server_address = "127.0.0.1"stream_server_port = "0"systemd_cgroup = falsetolerate_missing_hugetlb_controller = trueunset_seccomp_profile = ""[plugins."io.containerd.grpc.v1.cri".cni]bin_dir = "/opt/cni/bin"conf_dir = "/etc/cni/net.d"conf_template = ""ip_pref = ""max_conf_num = 1setup_serially = false[plugins."io.containerd.grpc.v1.cri".containerd]default_runtime_name = "nvidia"disable_snapshot_annotations = truediscard_unpacked_layers = falseignore_blockio_not_enabled_errors = falseignore_rdt_not_enabled_errors = falseno_pivot = falsesnapshotter = "overlayfs"[plugins."io.containerd.grpc.v1.cri".containerd.default_runtime]base_runtime_spec = ""cni_conf_dir = ""cni_max_conf_num = 0container_annotations = []pod_annotations = []privileged_without_host_devices = falseprivileged_without_host_devices_all_devices_allowed = falseruntime_engine = ""runtime_path = ""runtime_root = ""runtime_type = ""sandbox_mode = ""snapshotter = ""[plugins."io.containerd.grpc.v1.cri".containerd.default_runtime.options][plugins."io.containerd.grpc.v1.cri".containerd.runtimes][plugins."io.containerd.grpc.v1.cri".containerd.runtimes.nvidia]privileged_without_host_devices = falseruntime_engine = ""runtime_root = ""runtime_type = "io.containerd.runc.v2"[plugins."io.containerd.grpc.v1.cri".containerd.runtimes.nvidia.options]BinaryName = "/usr/bin/nvidia-container-runtime"SystemdCgroup = true[plugins."io.containerd.grpc.v1.cri".containerd.runtimes.runc]base_runtime_spec = ""cni_conf_dir = ""cni_max_conf_num = 0container_annotations = []pod_annotations = []privileged_without_host_devices = falseprivileged_without_host_devices_all_devices_allowed = falseruntime_engine = ""runtime_path = ""runtime_root = ""runtime_type = "io.containerd.runc.v2"sandbox_mode = "podsandbox"snapshotter = ""[plugins."io.containerd.grpc.v1.cri".containerd.runtimes.runc.options]BinaryName = ""CriuImagePath = ""CriuPath = ""CriuWorkPath = ""IoGid = 0IoUid = 0NoNewKeyring = falseNoPivotRoot = falseRoot = ""ShimCgroup = ""SystemdCgroup = true[plugins."io.containerd.grpc.v1.cri".containerd.untrusted_workload_runtime]base_runtime_spec = ""cni_conf_dir = ""cni_max_conf_num = 0container_annotations = []pod_annotations = []privileged_without_host_devices = falseprivileged_without_host_devices_all_devices_allowed = falseruntime_engine = ""runtime_path = ""runtime_root = ""runtime_type = ""sandbox_mode = ""snapshotter = ""[plugins."io.containerd.grpc.v1.cri".containerd.untrusted_workload_runtime.options][plugins."io.containerd.grpc.v1.cri".image_decryption]key_model = "node"[plugins."io.containerd.grpc.v1.cri".registry]config_path = "/etc/containerd/certs.d"[plugins."io.containerd.grpc.v1.cri".registry.auths][plugins."io.containerd.grpc.v1.cri".registry.configs][plugins."io.containerd.grpc.v1.cri".registry.headers][plugins."io.containerd.grpc.v1.cri".registry.mirrors][plugins."io.containerd.grpc.v1.cri".x509_key_pair_streaming]tls_cert_file = ""tls_key_file = ""[plugins."io.containerd.internal.v1.opt"]path = "/opt/containerd"[plugins."io.containerd.internal.v1.restart"]interval = "10s"[plugins."io.containerd.internal.v1.tracing"]sampling_ratio = 1.0service_name = "containerd"[plugins."io.containerd.metadata.v1.bolt"]content_sharing_policy = "shared"[plugins."io.containerd.monitor.v1.cgroups"]no_prometheus = false[plugins."io.containerd.nri.v1.nri"]disable = truedisable_connections = falseplugin_config_path = "/etc/nri/conf.d"plugin_path = "/opt/nri/plugins"plugin_registration_timeout = "5s"plugin_request_timeout = "2s"socket_path = "/var/run/nri/nri.sock"[plugins."io.containerd.runtime.v1.linux"]no_shim = falseruntime = "runc"runtime_root = ""shim = "containerd-shim"shim_debug = false[plugins."io.containerd.runtime.v2.task"]platforms = ["linux/amd64"]sched_core = false[plugins."io.containerd.service.v1.diff-service"]default = ["walking"][plugins."io.containerd.service.v1.tasks-service"]blockio_config_file = ""rdt_config_file = ""[plugins."io.containerd.snapshotter.v1.aufs"]root_path = ""[plugins."io.containerd.snapshotter.v1.btrfs"]root_path = ""[plugins."io.containerd.snapshotter.v1.devmapper"]async_remove = falsebase_image_size = ""discard_blocks = falsefs_options = ""fs_type = ""pool_name = ""root_path = ""[plugins."io.containerd.snapshotter.v1.native"]root_path = ""[plugins."io.containerd.snapshotter.v1.overlayfs"]root_path = ""upperdir_label = false[plugins."io.containerd.snapshotter.v1.zfs"]root_path = ""[plugins."io.containerd.tracing.processor.v1.otlp"]endpoint = ""insecure = falseprotocol = ""[plugins."io.containerd.transfer.v1.local"][proxy_plugins][stream_processors][stream_processors."io.containerd.ocicrypt.decoder.v1.tar"]accepts = ["application/vnd.oci.image.layer.v1.tar+encrypted"]args = ["--decryption-keys-path", "/etc/containerd/ocicrypt/keys"]env = ["OCICRYPT_KEYPROVIDER_CONFIG=/etc/containerd/ocicrypt/ocicrypt_keyprovider.conf"]path = "ctd-decoder"returns = "application/vnd.oci.image.layer.v1.tar"[stream_processors."io.containerd.ocicrypt.decoder.v1.tar.gzip"]accepts = ["application/vnd.oci.image.layer.v1.tar+gzip+encrypted"]args = ["--decryption-keys-path", "/etc/containerd/ocicrypt/keys"]env = ["OCICRYPT_KEYPROVIDER_CONFIG=/etc/containerd/ocicrypt/ocicrypt_keyprovider.conf"]path = "ctd-decoder"returns = "application/vnd.oci.image.layer.v1.tar+gzip"[timeouts]"io.containerd.timeout.bolt.open" = "0s""io.containerd.timeout.metrics.shimstats" = "2s""io.containerd.timeout.shim.cleanup" = "5s""io.containerd.timeout.shim.load" = "5s""io.containerd.timeout.shim.shutdown" = "3s""io.containerd.timeout.task.state" = "2s"[ttrpc]address = ""gid = 0uid = 0重啟containerd、kubelet
systemctl restart containerd.service
systemctl restart kubelet.service
4、安裝kubeadm、kubectl、kubelet等二進制文件
下載文件
wget https://storage.googleapis.com/kubernetes-release/release/v1.28.4/bin/linux/amd64/kubeadm
wget https://storage.googleapis.com/kubernetes-release/release/v1.28.4/bin/linux/amd64/kubelet
wget https://storage.googleapis.com/kubernetes-release/release/v1.28.4/bin/linux/amd64/kubectl
chmod a+x kube*
cp kube* /usr/bin/
創建配置文件
cat /lib/systemd/system/kubelet.service
[Unit]
Description=kubelet: The Kubernetes Node Agent
Documentation=https://kubernetes.io/docs/
Wants=network-online.target
After=network-online.target[Service]
ExecStart=/usr/bin/kubelet
Restart=always
StartLimitInterval=0
RestartSec=10[Install]
WantedBy=multi-user.target
mkdir -p /usr/lib/systemd/system/kubelet.service.d/
cat /usr/lib/systemd/system/kubelet.service.d/10-kubeadm.conf
# Note: This dropin only works with kubeadm and kubelet v1.11+
[Service]
Environment="KUBELET_KUBECONFIG_ARGS=--bootstrap-kubeconfig=/etc/kubernetes/bootstrap-kubelet.conf --kubeconfig=/etc/kubernetes/kubelet.conf"
Environment="KUBELET_CONFIG_ARGS=--config=/var/lib/kubelet/config.yaml"
# This is a file that "kubeadm init" and "kubeadm join" generates at runtime, populating the KUBELET_KUBEADM_ARGS variable dynamically
EnvironmentFile=-/var/lib/kubelet/kubeadm-flags.env
# This is a file that the user can use for overrides of the kubelet args as a last resort. Preferably, the user should use
# the .NodeRegistration.KubeletExtraArgs object in the configuration files instead. KUBELET_EXTRA_ARGS should be sourced from this file.
EnvironmentFile=-/etc/default/kubelet
ExecStart=
ExecStart=/usr/bin/kubelet $KUBELET_KUBECONFIG_ARGS $KUBELET_CONFIG_ARGS $KUBELET_KUBEADM_ARGS $KUBELET_EXTRA_ARGScat /etc/sysctl.d/99-kubernetes-cri.conf
net.bridge.bridge-nf-call-iptables  = 1
net.ipv4.ip_forward                 = 1
net.bridge.bridge-nf-call-ip6tables = 1sysctl --system
modprobe br_netfilter
systemctl enable kubelet
5、安裝nerdctl
wget https://github.com/containerd/nerdctl/releases/download/v1.7.5/nerdctl-full-1.7.5-linux-amd64.tar.gz
tar -xf nerdctl-full-1.7.5-linux-amd64.tar.gz -C /usr/local/
第三部分:集群初始化
1、配置解析
echo 192.168.31.187 k8s.disallow.cn>>/etc/hosts
2、生成kubeadm配置文件
cat kubeadm.yaml
---
apiVersion: kubeadm.k8s.io/v1beta3
kind: InitConfiguration
localAPIEndpoint:advertiseAddress: "192.168.31.187"bindPort: 6443
---
# kubeadm.yaml
apiServer:extraArgs:authorization-mode: Node,RBACmax-mutating-requests-inflight: "1000"max-requests-inflight: "2000"watch-cache-sizes: node#2000,pod#10000timeoutForControlPlane: 4m0s
apiVersion: kubeadm.k8s.io/v1beta3
certificatesDir: /etc/kubernetes/pki
clusterName: kubernetes
controlPlaneEndpoint: 192.168.31.187:6443
# controlPlaneEndpoint: k8s.disallow.cn:6443
controllerManager: {}
dns: {}
etcd:local:dataDir: /var/lib/etcdextraArgs:"pre-vote": "true""auto-compaction-retention": "1""auto-compaction-mode": "periodic""quota-backend-bytes": "8589934592""heartbeat-interval": "500""election-timeout": "3000""snapshot-count": "50000""max-request-bytes": "31457280"
imageRepository: registry.cn-hangzhou.aliyuncs.com/google_containers
kind: ClusterConfiguration
kubernetesVersion: v1.28.4
networking:dnsDomain: cluster.localpodSubnet: 10.42.0.0/16serviceSubnet: 10.96.0.0/12
scheduler: {}
3、執行初始化
kubeadm config images pull --config kubeadm.yaml
kubeadm init --config kubeadm.yamlmkdir -p $HOME/.kube
sudo cp -i /etc/kubernetes/admin.conf $HOME/.kube/config
sudo chown $(id -u):$(id -g) $HOME/.kube/configkubectl get node
若初始化失敗
# 刪除 Kubernetes 配置目錄
sudo rm -rf /etc/kubernetes/*
sudo rm -rf ~/.kube/*# 刪除 kubelet 配置
sudo rm -rf /var/lib/kubelet/*# 刪除 etcd 數據
sudo rm -rf /var/lib/etcd/*# 刪除 CNI 配置
sudo rm -rf /etc/cni/net.d/*
sudo rm -rf /opt/cni/bin/*# 刪除容器運行時相關文件
sudo rm -rf /var/run/kubernetes/*
sudo rm -rf /var/lib/containerd/*# 停止 kubelet
sudo systemctl stop kubelet# 重啟 containerd
sudo systemctl restart containerd# 重啟 kubelet
sudo systemctl start kubelet# 檢查端口 10250 是否被占用
sudo ss -tulpn | grep 10250# 如果被占用,終止占用該端口的進程
sudo kill -9 <PID># 重新初始化 Kubernetes 集群
sudo kubeadm init --config kubeadm.yaml
4、安裝calico
下載 Tiger Operator:
wget https://raw.githubusercontent.com/projectcalico/calico/v3.27.2/manifests/tigera-operator.yaml
sed -i 's/quay.io\/tigera\/operator/quay.m.daocloud.io\/tigera\/operator/g' tigera-operator.yaml
創建配置 custom-resources.yaml
cat custom-resources.yaml
apiVersion: operator.tigera.io/v1
kind: Installation
metadata:name: default
spec:calicoNetwork:bgp: EnabledcontainerIPForwarding: EnabledhostPorts: EnabledipPools:- blockSize: 26cidr: 10.42.0.0/16disableBGPExport: falseencapsulation: IPIPnatOutgoing: EnablednodeSelector: all()linuxDataplane: IptablesmultiInterfaceMode: NonenodeAddressAutodetectionV4:kubernetes: NodeInternalIPcni:ipam:type: Calicotype: CalicocontrolPlaneReplicas: 2flexVolumePath: /usr/libexec/kubernetes/kubelet-plugins/volume/exec/kubeletVolumePluginPath: /var/lib/kubeletlogging:cni:logFileMaxAgeDays: 30logFileMaxCount: 10logFileMaxSize: 1024MilogSeverity: InfonodeUpdateStrategy:rollingUpdate:maxUnavailable: 1type: RollingUpdatenonPrivileged: Disabledregistry: docker.m.daocloud.iovariant: Calico
kubectl create -f tigera-operator.yaml
kubectl create -f  custom-resources.yaml
若無法無網絡插件則執行以下操作
wget https://docs.projectcalico.org/manifests/calico.yaml -O calico.yaml
sed -i 's#docker.io/calico/#registry.aliyuncs.com/calico/#' calico.yaml
# 替換為國內鏡像
kubectl apply -f calico.yaml
5、解除master污點
kubectl taint node ubuntu(節點名稱) node-role.kubernetes.io/control-plane:NoSchedule-
6、部署 metrics-server插件
kubectl -n kube-system apply -f metrics-server-components.yaml
cat metrics-server-components.yaml
apiVersion: v1
kind: ServiceAccount
metadata:labels:k8s-app: metrics-servername: metrics-servernamespace: kube-system
---
apiVersion: rbac.authorization.k8s.io/v1
kind: ClusterRole
metadata:labels:k8s-app: metrics-serverrbac.authorization.k8s.io/aggregate-to-admin: "true"rbac.authorization.k8s.io/aggregate-to-edit: "true"rbac.authorization.k8s.io/aggregate-to-view: "true"name: system:aggregated-metrics-reader
rules:
- apiGroups:- metrics.k8s.ioresources:- pods- nodesverbs:- get- list- watch
---
apiVersion: rbac.authorization.k8s.io/v1
kind: ClusterRole
metadata:labels:k8s-app: metrics-servername: system:metrics-server
rules:
- apiGroups:- ""resources:- nodes/metricsverbs:- get
- apiGroups:- ""resources:- pods- nodesverbs:- get- list- watch
---
apiVersion: rbac.authorization.k8s.io/v1
kind: RoleBinding
metadata:labels:k8s-app: metrics-servername: metrics-server-auth-readernamespace: kube-system
roleRef:apiGroup: rbac.authorization.k8s.iokind: Rolename: extension-apiserver-authentication-reader
subjects:
- kind: ServiceAccountname: metrics-servernamespace: kube-system
---
apiVersion: rbac.authorization.k8s.io/v1
kind: ClusterRoleBinding
metadata:labels:k8s-app: metrics-servername: metrics-server:system:auth-delegator
roleRef:apiGroup: rbac.authorization.k8s.iokind: ClusterRolename: system:auth-delegator
subjects:
- kind: ServiceAccountname: metrics-servernamespace: kube-system
---
apiVersion: rbac.authorization.k8s.io/v1
kind: ClusterRoleBinding
metadata:labels:k8s-app: metrics-servername: system:metrics-server
roleRef:apiGroup: rbac.authorization.k8s.iokind: ClusterRolename: system:metrics-server
subjects:
- kind: ServiceAccountname: metrics-servernamespace: kube-system
---
apiVersion: v1
kind: Service
metadata:labels:k8s-app: metrics-servername: metrics-servernamespace: kube-system
spec:ports:- name: httpsport: 443protocol: TCPtargetPort: httpsselector:k8s-app: metrics-server
---
apiVersion: apps/v1
kind: Deployment
metadata:labels:k8s-app: metrics-servername: metrics-servernamespace: kube-system
spec:selector:matchLabels:k8s-app: metrics-serverstrategy:rollingUpdate:maxUnavailable: 0template:metadata:labels:k8s-app: metrics-serverspec:tolerations:- operator: "Exists"containers:- args:- --cert-dir=/tmp- --secure-port=10250- --kubelet-preferred-address-types=InternalIP,ExternalIP,Hostname- --kubelet-use-node-status-port- --metric-resolution=15s- --kubelet-insecure-tlsimage: k8s.m.daocloud.io/metrics-server/metrics-server:v0.7.0imagePullPolicy: IfNotPresentlivenessProbe:failureThreshold: 3httpGet:path: /livezport: httpsscheme: HTTPSperiodSeconds: 10name: metrics-serverports:- containerPort: 10250name: httpsprotocol: TCPreadinessProbe:failureThreshold: 3httpGet:path: /readyzport: httpsscheme: HTTPSinitialDelaySeconds: 20periodSeconds: 10resources:requests:cpu: 100mmemory: 200MisecurityContext:allowPrivilegeEscalation: falsecapabilities:drop:- ALLreadOnlyRootFilesystem: truerunAsNonRoot: truerunAsUser: 1000seccompProfile:type: RuntimeDefaultvolumeMounts:- mountPath: /tmpname: tmp-dirnodeSelector:kubernetes.io/os: linuxpriorityClassName: system-cluster-criticalserviceAccountName: metrics-servervolumes:- emptyDir: {}name: tmp-dir
---
apiVersion: apiregistration.k8s.io/v1
kind: APIService
metadata:labels:k8s-app: metrics-servername: v1beta1.metrics.k8s.io
spec:group: metrics.k8s.iogroupPriorityMinimum: 100insecureSkipTLSVerify: trueservice:name: metrics-servernamespace: kube-systemversion: v1beta1versionPriority: 100
第四部分:安裝gpu-operator
1、安裝helm
wget https://get.helm.sh/helm-v3.14.2-linux-amd64.tar.gz
tar -xf helm-v3.14.2-linux-amd64.tar.gz
mv linux-amd64/helm /usr/bin/
2、使用 helm 安裝 NVIDIA GPU Operator
helm repo add nvidia https://helm.ngc.nvidia.com/nvidia
helm repo updatehelm install --wait gpu-operator -n gpu-operator --create-namespace nvidia/gpu-operator --set driver.enabled=false --set toolkit.enabled=false --set dcgmExporter.config.name=dcgm-exporter --set dcgmExporter.enabled=true
3、GPU分時共享
# https://docs.nvidia.com/datacenter/cloud-native/gpu-operator/latest/gpu-sharing.html
apiVersion: v1
kind: ConfigMap
metadata:name: time-slicing-config-allnamespace: gpu-operator
data:any: |-version: v1flags:migStrategy: nonesharing:timeSlicing:resources:- name: nvidia.com/gpureplicas: 32# kubectl patch clusterpolicy/cluster-policy -n gpu-operator --type merge -p '{"spec": {"devicePlugin": {"config": {"name": "time-slicing-config-all", "default": "any"}}}}'
)


、gdb調試指令、時間復雜度(概念、大O符號法、分類))


)


的標準圖標常量及其對應的圖標)


)

