1. 準備工作
- 登錄阿里云服務器:使用 SSH 工具(如?
ssh?命令)登錄到你的阿里云 Linux 服務器。確保服務器已安裝并能正常運行,且網絡連接正常。 - 更新系統軟件包:執行以下命令更新系統軟件包到最新版本。
bash
sudo apt update
sudo apt upgrade -y
2. 安裝依賴
Home Assistant 是基于 Python 的應用,需要安裝 Python 及其相關依賴。
bash
sudo apt install -y python3 python3-dev python3-venv python3-pip libffi-dev libssl-dev libjpeg-dev zlib1g-dev autoconf build-essential libopenjp2-7 libtiff5 tk8.6-dev tcl8.6-dev
3. 創建 Python 虛擬環境
為了隔離 Home Assistant 的依賴,建議創建一個 Python 虛擬環境。
bash
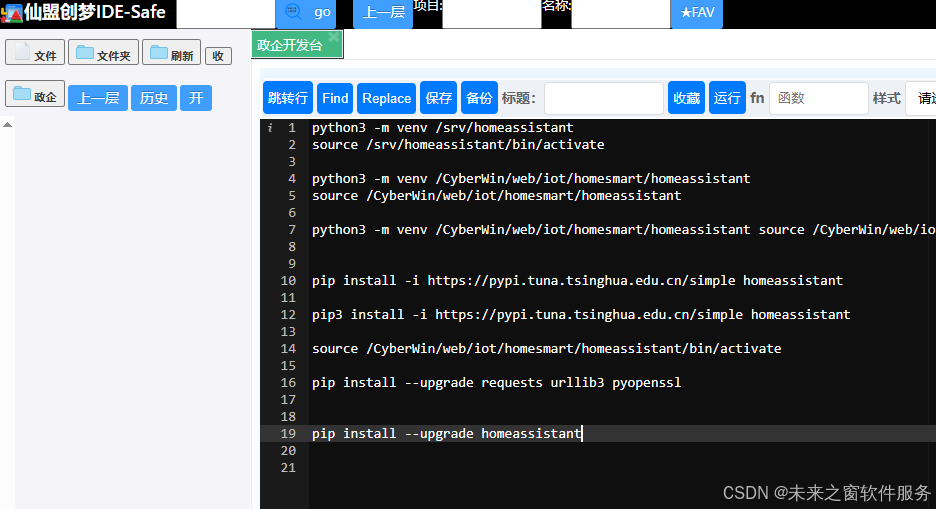
python3 -m venv /srv/homeassistant
source /srv/homeassistant/bin/activate
4. 安裝 Home Assistant
在激活的虛擬環境中,使用?pip?安裝 Home Assistant。
bash
pip3 install homeassistant
5. 啟動 Home Assistant
安裝完成后,可以啟動 Home Assistant 服務。
bash
hass
首次啟動時,Home Assistant 會進行一些初始化操作,可能需要一些時間。啟動成功后,你可以通過瀏覽器訪問?http://<你的服務器 IP 地址>:8123?來訪問 Home Assistant 的 Web 界面。
6. 配置 Home Assistant 作為系統服務(可選但推薦)
為了確保 Home Assistant 在服務器重啟后能自動啟動,可以將其配置為系統服務。
6.1 創建服務文件
bash
sudo nano /etc/systemd/system/home-assistant@homeassistant.service
6.2 編輯服務文件內容
plaintext
[Unit]
Description=Home Assistant
After=network-online.target[Service]
Type=simple
User=root
ExecStart=/srv/homeassistant/bin/hass -c "/root/.homeassistant"[Install]
WantedBy=multi-user.target
保存并退出文件。
6.3 重新加載 systemd 管理器配置
bash
sudo systemctl daemon-reload
6.4 啟動并設置開機自啟
bash
sudo systemctl start home-assistant@homeassistant
sudo systemctl enable home-assistant@homeassistant
7. 防火墻配置
如果服務器啟用了防火墻,需要開放 Home Assistant 使用的端口(默認是 8123)。
bash
sudo ufw allow 8123
8. 驗證部署
通過瀏覽器訪問?http://<你的服務器 IP 地址>:8123,如果能看到 Home Assistant 的初始設置界面,則說明部署成功。
注意事項
- 以上步驟假設你使用的是基于 Debian 或 Ubuntu 的 Linux 發行版。如果使用其他發行版,部分命令可能需要調整。
- 確保服務器有足夠的資源(CPU、內存、磁盤空間)來運行 Home Assistant。
- 建議定期更新 Home Assistant 以獲取最新的功能和安全補丁。可以在 Home Assistant 的 Web 界面中進行更新操作。
home-assistant/core
.core_files.yaml
ollecting importlib-metadata==0.23 (from homeassistant) HTTP error 502 while getting https://mirrors.aliyun.com/pypi/packages/f6/d2/40b3fa882147719744e6aa50ac39cf7a22a913cbcba86a0371176c425a3b/importlib_metadata-0.23-py2.py3-none-any.whl#sha256=d5f18a79777f3aa179c145737780282e27b508fc8fd688cb17c7a813e8bd39af (from Links for importlib-metadata) (requires-python:>=2.7,!=3.0,!=3.1,!=3.2,!=3.3) Could not install requirement importlib-metadata==0.23 from https://mirrors.aliyun.com/pypi/packages/f6/d2/40b3fa882147719744e6aa50ac39cf7a22a913cbcba86a0371176c425a3b/importlib_metadata-0.23-py2.py3-none-any.whl#sha256=d5f18a79777f3aa179c145737780282e27b508fc8fd688cb17c7a813e8bd39af (from homeassistant) because of error 502 Server Error: Bad Gateway for url: https://mirrors.aliyun.com/pypi/packages/f6/d2/40b3fa882147719744e6aa50ac39cf7a22a913cbcba86a0371176c425a3b/importlib_metadata-0.23-py2.py3-none-any.whl Could not install requirement importlib-metadata==0.23 from https://mirrors.aliyun.com/pypi/packages/f6/d2/40b3fa882147719744e6aa50ac39cf7a22a913cbcba86a0371176c425a3b/importlib_metadata-0.23-py2.py3-none-any.whl#sha256=d5f18a79777f3aa179c145737780282e27b508fc8fd688cb17c7a813e8bd39af (from homeassistant) because of HTTP error 502 Server Error: Bad Gateway for url: https://mirrors.aliyun.com/pypi/packages/f6/d2/40b3fa882147719744e6aa50ac39cf7a22a913cbcba86a0371176c425a3b/importlib_metadata-0.23-py2.py3-none-any.whl for URL https://mirrors.aliyun.com/pypi/packages/f6/d2/40b3fa882147719744e6aa50ac39cf7a22a913cbcba86a0371176c425a3b/importlib_metadata-0.23-py2.py3-none-any.whl#sha256=d5f18a79777f3aa179c145737780282e27b508fc8fd688cb17c7a813e8bd39af (from Links for importlib-metadata) (requires-python:>=2.7,!=3.0,!=3.1,!=3.2,!=3.3) [root@iZ2vcbr09kxsytmlhp8egbZ homeassistant]# hass -bash: hass: command not found
從你給出的錯誤信息來看,在安裝?importlib-metadata==0.23?這個依賴時,因為阿里云鏡像源返回了 502 錯誤(Bad Gateway),導致安裝失敗,并且后續嘗試運行?hass?命令時系統提示找不到該命令。下面為你提供相應的解決辦法:
1. 更換 PyPI 鏡像源
阿里云鏡像源臨時出現問題,你可以暫時更換為其他鏡像源,例如清華大學的鏡像源。
臨時更換
在使用?pip?安裝依賴時,通過?-i?參數指定鏡像源:
bash
pip install -i https://pypi.tuna.tsinghua.edu.cn/simple homeassistant
永久更換
你也可以把鏡像源永久配置為清華大學的鏡像源,具體操作如下:
bash
mkdir ~/.pip
cat << EOF > ~/.pip/pip.conf
[global]
index-url = https://pypi.tuna.tsinghua.edu.cn/simple
[install]
trusted-host = pypi.tuna.tsinghua.edu.cn
EOF
之后再重新安裝 Home Assistant:
bash
pip install homeassistant
2. 檢查 Python 虛擬環境
確保你處于正確的 Python 虛擬環境中,因為?hass?命令是在虛擬環境里可用的。你可以使用以下命令激活虛擬環境:
bash
source /srv/homeassistant/bin/activate
激活虛擬環境之后,再次嘗試運行?hass?命令:
bash
hass
3. 手動安裝依賴
如果更換鏡像源之后仍然無法安裝?importlib-metadata,可以嘗試手動安裝這個依賴:
bash
pip install importlib-metadata==0.23
若手動安裝成功,再嘗試安裝 Home Assistant:
bash
pip install homeassistant
4. 檢查系統路徑
要是?hass?命令依舊無法找到,你可以檢查虛擬環境的?bin?目錄是否已經添加到系統的?PATH?環境變量中。可以使用以下命令查看?PATH?變量:
bash
echo $PATH
確保?/srv/homeassistant/bin?在其中。如果不在,可以臨時添加:
阿雪技術觀
在科技發展浪潮中,我們不妨積極投身技術共享。不滿足于做受益者,更要主動擔當貢獻者。無論是分享代碼、撰寫技術博客,還是參與開源項目維護改進,每一個微小舉動都可能蘊含推動技術進步的巨大能量。東方仙盟是匯聚力量的天地,我們攜手在此探索硅基生命,為科技進步添磚加瓦。
Hey folks, in this wild tech - driven world, why not dive headfirst into the whole tech - sharing scene? Don't just be the one reaping all the benefits; step up and be a contributor too. Whether you're tossing out your code snippets, hammering out some tech blogs, or getting your hands dirty with maintaining and sprucing up open - source projects, every little thing you do might just end up being a massive force that pushes tech forward. And guess what? The Eastern FairyAlliance is this awesome place where we all come together. We're gonna team up and explore the whole silicon - based life thing, and in the process, we'll be fueling the growth of technology.


之ForwardAdd(簡化版))


行為型:模板方法模式詳解)


