首先,我使用的是 v1.0 版本,宇樹最近發力了更新的很快:xr_teleoperate-1.0
teleop_hand_and_arm.py 支持通過 XR 設備(比如手勢或手柄)來控制實際機器人動作,也支持在虛擬仿真中運行。可以根據需要,通過命令行參數來配置運行方式
啟動參數說明:
?1. 基礎控制參數
| ?? 參數 | 📜 說明 | 🔘 目前可選值 | 📌 默認值 |
|---|---|---|---|
| --xr-mode | 選擇 XR 輸入模式(通過什么方式控制機器人) | hand(手勢跟蹤) controller(手柄跟蹤) | hand |
| --arm | 選擇機器人設備類型 | G1_29 G1_23 H1_2 H1 | G1_29 |
| --ee | 選擇手臂的末端執行器設備類型 | dex1 dex3 inspire1 | 無默認值 |
?2. 模式開關參數
| ?? 參數 | 📜 說明 |
|---|---|
| --record | 【啟用數據錄制模式】 按?r?鍵進入遙操后,按?s?鍵可開啟數據錄制,再次按?s?鍵可結束錄制并保存本次 episode 數據 繼續按下?s?鍵可重復前述過程 |
| --motion | 【啟用運動控制模式】 開啟本模式后,可在機器人運控程序運行下進行遙操作程序 手勢跟蹤模式下,可使用?R3遙控器?控制機器人正常行走;手柄跟蹤模式下,也可使用手柄搖桿控制機器人行走 |
| --headless | 【啟用無圖形界面模式】 適用于本程序部署在開發計算單元(PC2)等無顯示器情況 |
| --sim | 【啟用仿真模式】 |
選擇手勢跟蹤來控制 G1(29 DoF) + inspire1 靈巧手設備,同時開啟數據錄制模式,則啟動命令如下所示(建議在 terminal 中運行):
python teleop_hand_and_arm.py --xr-mode=hand --arm=G1_29 --ee=inspire1 --record --motion接下來詳細分析一下這個腳本,這個腳本高度模塊化,可擴展性極好,并且采用并發設計,可以做很多二開
目錄
1 腳本解析
1.1?導入依賴及路徑配置
1.2?仿真控制輔助函數
1.3?全局狀態管理與鍵盤監聽回調
1.4?主函數入口與參數解析
1.5?圖像通道配置與共享內存初始化
1.6 XR/手勢與機器人運動控制綁定
1.7 仿真與運動客戶端初始化
1.8?主循環 - 控制、記錄與交互核心
1.9?異常處理與資源清理
2 相機適配與腳本測試
2.1 相機適配
2.2 腳本測試
2.1?圖像服務
2.2 主控腳本測試
1 腳本解析
1.1?導入依賴及路徑配置
import numpy as np  # 科學計算庫,主要用于矩陣、圖像等數據處理
import time         # 提供時間和延遲函數
import argparse     # 用于命令行參數解析
import cv2          # OpenCV,常用于圖像處理和顯示
from multiprocessing import shared_memory, Value, Array, Lock  # 多進程數據共享和同步
import threading    # 多線程,用于異步任務如鍵盤監聽、圖像接收
import logging_mp   # 自定義多進程日志模塊,便于跨進程日志收集
logging_mp.basic_config(level=logging_mp.INFO)  # 設置日志等級為INFO
logger_mp = logging_mp.get_logger(__name__)     # 獲取當前模塊的日志實例import os           # 操作系統相關
import sys          # 系統參數和函數
current_dir = os.path.dirname(os.path.abspath(__file__))  # 當前腳本所在目錄
parent_dir = os.path.dirname(current_dir)                 # 上級目錄(項目根目錄)
sys.path.append(parent_dir)                               # 把根目錄加入模塊搜索路徑,便于import自定義模塊# 導入自定義功能模塊
from televuer import TeleVuerWrapper    # XR/VR交互與手勢、相機接口
from teleop.robot_control.robot_arm import G1_29_ArmController, G1_23_ArmController, H1_2_ArmController, H1_ArmController   # 手臂控制器
from teleop.robot_control.robot_arm_ik import G1_29_ArmIK, G1_23_ArmIK, H1_2_ArmIK, H1_ArmIK   # 手臂逆解算器
from teleop.robot_control.robot_hand_unitree import Dex3_1_Controller, Gripper_Controller      # Unitree手/夾爪控制器
from teleop.robot_control.robot_hand_inspire import Inspire_Controller                         # Inspire手控制器
from teleop.image_server.image_client import ImageClient    # 遠程圖像采集客戶端
from teleop.utils.episode_writer import EpisodeWriter       # episode數據記錄器
from sshkeyboard import listen_keyboard, stop_listening     # 跨平臺鍵盤監聽,非阻塞# 仿真相關:Isaac通信話題
from unitree_sdk2py.core.channel import ChannelPublisher    # DDS通信話題發布器
from unitree_sdk2py.idl.std_msgs.msg.dds_ import String_ # 通用字符串消息類型- televuer:XR/VR端的手勢、頭顯追蹤數據與畫面交互橋
- robot_control:控制不同型號手臂和末端執行器
- episode_writer:用于實驗數據記錄和存檔
- ImageClient:用于與遠端攝像頭畫面服務器通信
- sshkeyboard:跨平臺鍵盤監聽
1.2?仿真控制輔助函數
def publish_reset_category(category: int, publisher): # 發布仿真場景重置信號msg = String_(data=str(category)) # 構造消息publisher.Write(msg) # 發布logger_mp.info(f"published reset category: {category}")# 日志記錄向 Isaac 仿真環境發布場景重置信號,便于環境回溯、重新初始化
1.3?全局狀態管理與鍵盤監聽回調
# 全局運行狀態變量
start_signal = False        # 標志是否開始主循環(r鍵觸發)
running = True              # 主循環運行標志
should_toggle_recording = False   # 是否切換錄制狀態(s鍵觸發)
is_recording = False        # 當前是否處于錄制狀態def on_press(key):          # 鍵盤按下回調global running, start_signal, should_toggle_recordingif key == 'r':                  # 'r'鍵:啟動主循環start_signal = Truelogger_mp.info("Program start signal received.")elif key == 'q':                # 'q'鍵:退出主循環stop_listening()running = Falseelif key == 's':                # 's'鍵:切換錄制should_toggle_recording = Trueelse:logger_mp.info(f"{key} was pressed, but no action is defined for this key.")# 啟動鍵盤監聽線程,監聽過程中不會阻塞主線程
listen_keyboard_thread = threading.Thread(target=listen_keyboard, kwargs={"on_press": on_press, "until": None, "sequential": False,},daemon=True
)
listen_keyboard_thread.start() # 啟動監聽- 維護主狀態機(是否運行、是否錄制等),通過鍵盤控制流程轉移(r:開始;q:退出;s:切換錄制)
- listen_keyboard_thread:監聽線程,用于實現用戶無阻塞交互
1.4?主函數入口與參數解析
if __name__ == '__main__': # 程序主入口parser = argparse.ArgumentParser() # 創建參數解析器parser.add_argument('--task_dir', type=str, default='./utils/data', help='path to save data') # 數據保存路徑parser.add_argument('--frequency', type=float, default=90.0, help="save data's frequency") # 采樣頻率parser.add_argument('--xr-mode', type=str, choices=['hand', 'controller'], default='hand', help='Select XR device tracking source') # XR輸入模式parser.add_argument('--arm', type=str, choices=['G1_29', 'G1_23', 'H1_2', 'H1'], default='G1_29', help='Select arm controller') # 選用手臂parser.add_argument('--ee', type=str, choices=['dex3', 'gripper', 'inspire1'], help='Select end effector controller') # 末端類型parser.add_argument('--record', action='store_true', help='Enable data recording') # 是否錄制數據parser.add_argument('--motion', action='store_true', help='Enable motion control mode') # 是否開啟運動模式parser.add_argument('--headless', action='store_true', help='Enable headless mode (no display)') # 是否無頭(無窗口)模式parser.add_argument('--sim', action='store_true', help='Enable isaac simulation mode') # 是否仿真args = parser.parse_args() # 解析參數logger_mp.info(f"args: {args}") # 輸出參數配置命令行參數管理,支持靈活配置,如:數據路徑、幀率、手臂類型、末端類型、是否仿真、是否錄制、是否無頭模式等
1.5?圖像通道配置與共享內存初始化
# -------- 圖像客戶端/共享內存配置 --------if args.sim: # 仿真配置img_config = {'fps': 30,'head_camera_type': 'opencv','head_camera_image_shape': [480, 640], # 頭部相機分辨率'head_camera_id_numbers': [0],'wrist_camera_type': 'opencv','wrist_camera_image_shape': [480, 640], # 腕部相機分辨率'wrist_camera_id_numbers': [2, 4],}else: # 實機配置img_config = {'fps': 30,'head_camera_type': 'opencv','head_camera_image_shape': [480, 1280], # 頭部相機分辨率(1280更寬,可能雙目)'head_camera_id_numbers': [0],'wrist_camera_type': 'opencv','wrist_camera_image_shape': [480, 640],'wrist_camera_id_numbers': [2, 4],}ASPECT_RATIO_THRESHOLD = 2.0 # 判別雙目/單目的分辨率閾值# 判斷是否為雙目頭相機if len(img_config['head_camera_id_numbers']) > 1 or (img_config['head_camera_image_shape'][1] / img_config['head_camera_image_shape'][0] > ASPECT_RATIO_THRESHOLD):BINOCULAR = Trueelse:BINOCULAR = False# 是否有腕部相機if 'wrist_camera_type' in img_config:WRIST = Trueelse:WRIST = False# 設置頭部相機的共享內存圖像shapeif BINOCULAR and not (img_config['head_camera_image_shape'][1] / img_config['head_camera_image_shape'][0] > ASPECT_RATIO_THRESHOLD):tv_img_shape = (img_config['head_camera_image_shape'][0], img_config['head_camera_image_shape'][1] * 2, 3)else:tv_img_shape = (img_config['head_camera_image_shape'][0], img_config['head_camera_image_shape'][1], 3)# 申請頭部相機的共享內存,并映射為numpy數組tv_img_shm = shared_memory.SharedMemory(create=True, size=np.prod(tv_img_shape) * np.uint8().itemsize)tv_img_array = np.ndarray(tv_img_shape, dtype=np.uint8, buffer=tv_img_shm.buf)# 腕部相機同理,判斷WRIST和仿真,創建對應的共享內存和客戶端if WRIST and args.sim:wrist_img_shape = (img_config['wrist_camera_image_shape'][0], img_config['wrist_camera_image_shape'][1] * 2, 3)wrist_img_shm = shared_memory.SharedMemory(create=True, size=np.prod(wrist_img_shape) * np.uint8().itemsize)wrist_img_array = np.ndarray(wrist_img_shape, dtype=np.uint8, buffer=wrist_img_shm.buf)img_client = ImageClient(tv_img_shape=tv_img_shape, tv_img_shm_name=tv_img_shm.name, wrist_img_shape=wrist_img_shape, wrist_img_shm_name=wrist_img_shm.name, server_address="127.0.0.1")elif WRIST and not args.sim:wrist_img_shape = (img_config['wrist_camera_image_shape'][0], img_config['wrist_camera_image_shape'][1] * 2, 3)wrist_img_shm = shared_memory.SharedMemory(create=True, size=np.prod(wrist_img_shape) * np.uint8().itemsize)wrist_img_array = np.ndarray(wrist_img_shape, dtype=np.uint8, buffer=wrist_img_shm.buf)img_client = ImageClient(tv_img_shape=tv_img_shape, tv_img_shm_name=tv_img_shm.name, wrist_img_shape=wrist_img_shape, wrist_img_shm_name=wrist_img_shm.name)else: # 沒有腕部相機,僅頭部相機img_client = ImageClient(tv_img_shape=tv_img_shape, tv_img_shm_name=tv_img_shm.name)# 圖像接收線程,持續將遠程圖像寫入共享內存image_receive_thread = threading.Thread(target=img_client.receive_process, daemon=True)image_receive_thread.daemon = Trueimage_receive_thread.start()-
兼容多相機(頭、腕)、多分辨率與雙目/單目場景
-
用共享內存高效實現多進程(如圖像采集與主控)之間的數據高速傳遞,保證零拷貝
-
圖像客戶端單獨線程異步接收,保證主線程不卡頓
1.6 XR/手勢與機器人運動控制綁定
# XR橋接實例,負責手勢/動作/圖像數據交互tv_wrapper = TeleVuerWrapper(binocular=BINOCULAR, use_hand_tracking=args.xr_mode == 'hand',img_shape=tv_img_shape, img_shm_name=tv_img_shm.name, return_state_data=True, return_hand_rot_data=False)# -------- 機器人臂、末端控制器與逆運動學模塊加載 --------if args.arm == 'G1_29':arm_ctrl = G1_29_ArmController(motion_mode=args.motion, simulation_mode=args.sim)arm_ik = G1_29_ArmIK()elif args.arm == 'G1_23':arm_ctrl = G1_23_ArmController(simulation_mode=args.sim)arm_ik = G1_23_ArmIK()elif args.arm == 'H1_2':arm_ctrl = H1_2_ArmController(simulation_mode=args.sim)arm_ik = H1_2_ArmIK()elif args.arm == 'H1':arm_ctrl = H1_ArmController(simulation_mode=args.sim)arm_ik = H1_ArmIK()# -------- 末端執行器控制器/數據區初始化 --------if args.ee == "dex3": # 雙Dex3機械手left_hand_pos_array = Array('d', 75, lock=True) # 左手輸入 75維right_hand_pos_array = Array('d', 75, lock=True) # 右手輸入 75維dual_hand_data_lock = Lock() # 雙手輸入鎖dual_hand_state_array = Array('d', 14, lock=False) # 輸出當前左右手statedual_hand_action_array = Array('d', 14, lock=False) # 輸出當前左右手actionhand_ctrl = Dex3_1_Controller(left_hand_pos_array, right_hand_pos_array, dual_hand_data_lock,dual_hand_state_array, dual_hand_action_array)elif args.ee == "gripper": # 雙夾爪left_gripper_value = Value('d', 0.0, lock=True) # 左夾爪輸入right_gripper_value = Value('d', 0.0, lock=True) # 右夾爪輸入dual_gripper_data_lock = Lock() # 夾爪同步鎖dual_gripper_state_array = Array('d', 2, lock=False) # 輸出當前左右夾爪statedual_gripper_action_array = Array('d', 2, lock=False)# 輸出當前左右夾爪actiongripper_ctrl = Gripper_Controller(left_gripper_value, right_gripper_value, dual_gripper_data_lock,dual_gripper_state_array, dual_gripper_action_array, simulation_mode=args.sim)elif args.ee == "inspire1": # Inspire手left_hand_pos_array = Array('d', 75, lock=True) # Inspire手輸入right_hand_pos_array = Array('d', 75, lock=True)dual_hand_data_lock = Lock()dual_hand_state_array = Array('d', 12, lock=False)dual_hand_action_array = Array('d', 12, lock=False)hand_ctrl = Inspire_Controller(left_hand_pos_array, right_hand_pos_array, dual_hand_data_lock,dual_hand_state_array, dual_hand_action_array)else:pass # 沒選末端則跳過- XR 設備(如 Apple Vision)追蹤的數據,通過?tv_wrapper 進行抽象和接口化,統一管理
- 根據參數,靈活加載目標機器人的運動學與執行器控制(如 7/6軸、Dex3、夾爪等)
1.7 仿真與運動客戶端初始化
# -------- 仿真相關初始化 --------if args.sim:reset_pose_publisher = ChannelPublisher("rt/reset_pose/cmd", String_) # 創建仿真重置話題reset_pose_publisher.Init() # 初始化from teleop.utils.sim_state_topic import start_sim_state_subscribe # 仿真狀態訂閱sim_state_subscriber = start_sim_state_subscribe()# -------- 控制器運動模式初始化 --------if args.xr_mode == 'controller' and args.motion:from unitree_sdk2py.g1.loco.g1_loco_client import LocoClientsport_client = LocoClient()sport_client.SetTimeout(0.0001) # 設置通信超時sport_client.Init()# -------- 數據錄制器初始化 --------if args.record and args.headless:recorder = EpisodeWriter(task_dir=args.task_dir, frequency=args.frequency, rerun_log=False) # 無頭模式:不復現elif args.record and not args.headless:recorder = EpisodeWriter(task_dir=args.task_dir, frequency=args.frequency, rerun_log=True) # GUI模式:可復現-
仿真/實機自適應
-
數據記錄支持無頭與 GUI 兩種模式(適配遠程部署/本地實驗)
-
LocoClient 用于高層次運動控制
1.8?主循環 - 控制、記錄與交互核心
try:logger_mp.info("Please enter the start signal (enter 'r' to start the subsequent program)")# 等待用戶按下 'r' 啟動程序while not start_signal:time.sleep(0.01)arm_ctrl.speed_gradual_max() # 啟動時速度梯度最大化,安全啟動while running: # 主循環,按frequency頻率循環start_time = time.time()if not args.headless: # 非無頭模式,顯示主畫面tv_resized_image = cv2.resize(tv_img_array, (tv_img_shape[1] // 2, tv_img_shape[0] // 2))cv2.imshow("record image", tv_resized_image)key = cv2.waitKey(1) & 0xFFif key == ord('q'):stop_listening()running = Falseif args.sim:publish_reset_category(2, reset_pose_publisher)elif key == ord('s'):should_toggle_recording = Trueelif key == ord('a'):if args.sim:publish_reset_category(2, reset_pose_publisher)if args.record and should_toggle_recording:should_toggle_recording = Falseif not is_recording:if recorder.create_episode():is_recording = Trueelse:logger_mp.error("Failed to create episode. Recording not started.")else:is_recording = Falserecorder.save_episode()if args.sim:publish_reset_category(1, reset_pose_publisher)# 獲取XR/VR動作輸入tele_data = tv_wrapper.get_motion_state_data()# 不同末端/輸入模式下的輸入數據賦值if (args.ee == 'dex3' or args.ee == 'inspire1') and args.xr_mode == 'hand':with left_hand_pos_array.get_lock():left_hand_pos_array[:] = tele_data.left_hand_pos.flatten()with right_hand_pos_array.get_lock():right_hand_pos_array[:] = tele_data.right_hand_pos.flatten()elif args.ee == 'gripper' and args.xr_mode == 'controller':with left_gripper_value.get_lock():left_gripper_value.value = tele_data.left_trigger_valuewith right_gripper_value.get_lock():right_gripper_value.value = tele_data.right_trigger_valueelif args.ee == 'gripper' and args.xr_mode == 'hand':with left_gripper_value.get_lock():left_gripper_value.value = tele_data.left_pinch_valuewith right_gripper_value.get_lock():right_gripper_value.value = tele_data.right_pinch_valueelse:pass # 高級運動控制(如遙控器模式)if args.xr_mode == 'controller' and args.motion:# 右A鍵退出if tele_data.tele_state.right_aButton:running = False# 左右搖桿共同按下,減震模式(緊急停止)if tele_data.tele_state.left_thumbstick_state and tele_data.tele_state.right_thumbstick_state:sport_client.Damp()# 運動控制,速度限制在0.3以內sport_client.Move(-tele_data.tele_state.left_thumbstick_value[1] * 0.3,-tele_data.tele_state.left_thumbstick_value[0] * 0.3,-tele_data.tele_state.right_thumbstick_value[0] * 0.3)# 獲取當前雙臂關節狀態和速度current_lr_arm_q = arm_ctrl.get_current_dual_arm_q()current_lr_arm_dq = arm_ctrl.get_current_dual_arm_dq()# 求逆解得到目標關節和力矩time_ik_start = time.time()sol_q, sol_tauff = arm_ik.solve_ik(tele_data.left_arm_pose, tele_data.right_arm_pose,current_lr_arm_q, current_lr_arm_dq)time_ik_end = time.time()logger_mp.debug(f"ik:\t{round(time_ik_end - time_ik_start, 6)}")# 控制機械臂arm_ctrl.ctrl_dual_arm(sol_q, sol_tauff)# ------ 數據錄制流程 ------if args.record:# 各種末端/模式下狀態和動作的收集與組織if args.ee == "dex3" and args.xr_mode == 'hand':with dual_hand_data_lock:left_ee_state = dual_hand_state_array[:7]right_ee_state = dual_hand_state_array[-7:]left_hand_action = dual_hand_action_array[:7]right_hand_action = dual_hand_action_array[-7:]current_body_state = []current_body_action = []elif args.ee == "gripper" and args.xr_mode == 'hand':with dual_gripper_data_lock:left_ee_state = [dual_gripper_state_array[1]]right_ee_state = [dual_gripper_state_array[0]]left_hand_action = [dual_gripper_action_array[1]]right_hand_action = [dual_gripper_action_array[0]]current_body_state = []current_body_action = []elif args.ee == "gripper" and args.xr_mode == 'controller':with dual_gripper_data_lock:left_ee_state = [dual_gripper_state_array[1]]right_ee_state = [dual_gripper_state_array[0]]left_hand_action = [dual_gripper_action_array[1]]right_hand_action = [dual_gripper_action_array[0]]current_body_state = arm_ctrl.get_current_motor_q().tolist()current_body_action = [-tele_data.tele_state.left_thumbstick_value[1] * 0.3,-tele_data.tele_state.left_thumbstick_value[0] * 0.3,-tele_data.tele_state.right_thumbstick_value[0] * 0.3]elif args.ee == "inspire1" and args.xr_mode == 'hand':with dual_hand_data_lock:left_ee_state = dual_hand_state_array[:6]right_ee_state = dual_hand_state_array[-6:]left_hand_action = dual_hand_action_array[:6]right_hand_action = dual_hand_action_array[-6:]current_body_state = []current_body_action = []else:left_ee_state = []right_ee_state = []left_hand_action = []right_hand_action = []current_body_state = []current_body_action = []# 圖像采集current_tv_image = tv_img_array.copy()if WRIST:current_wrist_image = wrist_img_array.copy()# 關節狀態/動作left_arm_state = current_lr_arm_q[:7]right_arm_state = current_lr_arm_q[-7:]left_arm_action = sol_q[:7]right_arm_action = sol_q[-7:]if is_recording:colors = {}depths = {}# 多相機/雙目數據分流if BINOCULAR:colors[f"color_{0}"] = current_tv_image[:, :tv_img_shape[1]//2]colors[f"color_{1}"] = current_tv_image[:, tv_img_shape[1]//2:]if WRIST:colors[f"color_{2}"] = current_wrist_image[:, :wrist_img_shape[1]//2]colors[f"color_{3}"] = current_wrist_image[:, wrist_img_shape[1]//2:]else:colors[f"color_{0}"] = current_tv_imageif WRIST:colors[f"color_{1}"] = current_wrist_image[:, :wrist_img_shape[1]//2]colors[f"color_{2}"] = current_wrist_image[:, wrist_img_shape[1]//2:]# 組織各類狀態states = {"left_arm": { "qpos": left_arm_state.tolist(), # 關節角度"qvel": [], "torque": [], }, "right_arm": { "qpos": right_arm_state.tolist(), "qvel": [], "torque": [], }, "left_ee": { "qpos": left_ee_state, "qvel": [], "torque": [], }, "right_ee": { "qpos": right_ee_state, "qvel": [], "torque": [], }, "body": {"qpos": current_body_state,}, }actions = {"left_arm": { "qpos": left_arm_action.tolist(), "qvel": [], "torque": [], }, "right_arm": { "qpos": right_arm_action.tolist(), "qvel": [], "torque": [], }, "left_ee": { "qpos": left_hand_action, "qvel": [], "torque": [], }, "right_ee": { "qpos": right_hand_action, "qvel": [], "torque": [], }, "body": {"qpos": current_body_action,}, }if args.sim: # 仿真狀態同時錄制sim_state = sim_state_subscriber.read_data() recorder.add_item(colors=colors, depths=depths, states=states, actions=actions, sim_state=sim_state)else:recorder.add_item(colors=colors, depths=depths, states=states, actions=actions)# 控制主循環幀率(frequency控制,每周期做sleep補償)current_time = time.time()time_elapsed = current_time - start_timesleep_time = max(0, (1 / args.frequency) - time_elapsed)time.sleep(sleep_time)logger_mp.debug(f"main process sleep: {sleep_time}")-
核心循環依賴于全局狀態管理,控制整體流程啟動、結束、錄制等邏輯
-
通過 XR 設備采集動作/手勢數據,結合當前機器人狀態,實時求逆解控制
-
支持仿真和實機的兼容、數據分流、錄制、UI 預覽等功能
-
按設置頻率同步主循環(保持控制與采樣一致性)
1.9?異常處理與資源清理
except KeyboardInterrupt:logger_mp.info("KeyboardInterrupt, exiting program...") # 捕獲Ctrl+C優雅退出finally:arm_ctrl.ctrl_dual_arm_go_home() # 程序結束時歸位if args.sim:sim_state_subscriber.stop_subscribe()tv_img_shm.close()tv_img_shm.unlink()if WRIST:wrist_img_shm.close()wrist_img_shm.unlink()if args.record:recorder.close()listen_keyboard_thread.join()logger_mp.info("Finally, exiting program...")exit(0)-
保證即使中斷也能自動歸位/釋放機器人
-
關閉所有共享內存、線程、數據記錄器,防止資源泄露
2 相機適配與腳本測試
目前官方給的遙操作是另外一套相機:
宇樹各個模塊參考鏈接:https://github.com/unitreerobotics/xr_teleoperate?tab=readme-ov-file
宇樹相機參考鏈接:[For reference only]?http://e.tb.cn/h.TaZxgkpfWkNCakg?tk=KKz03Kyu04u
為了與官方測試最為相機,我采用的是 “120無畸變”
先記一下這個相機的適配過程
2.1 相機適配
1.?使用 v4l2-ctl 命令預覽設備信息
首先可以確認相機設備確實存在并可以訪問:
v4l2-ctl --list-devices或直接查看格式和分辨率支持:
v4l2-ctl --device=/dev/video6 --list-formats-ext
v4l2-ctl --device=/dev/video7 --list-formats-ext
2. 使用 ffplay 快速查看
ffplay /dev/video6如果沒有 ffplay,先裝一下:sudo apt install ffmpeg
3. 使用 opencv 腳本查看
寫一個簡單的腳本:
'''
#雙目
import cv2cap = cv2.VideoCapture(0)
while True:ret, frame = cap.read()if not ret:break# 雙目拆分(假設1280x480,左右各640x480)left = frame[:, :frame.shape[1]//2]right = frame[:, frame.shape[1]//2:]cv2.imshow('left', left)cv2.imshow('right', right)if cv2.waitKey(1) == ord('q'):break
cap.release()
cv2.destroyAllWindows()
'''#單目
import cv2cap = cv2.VideoCapture(0)
while True:ret, frame = cap.read()if not ret:print("No frame!")breakcv2.imshow("cam6", frame)if cv2.waitKey(1) == ord('q'):break
cap.release()
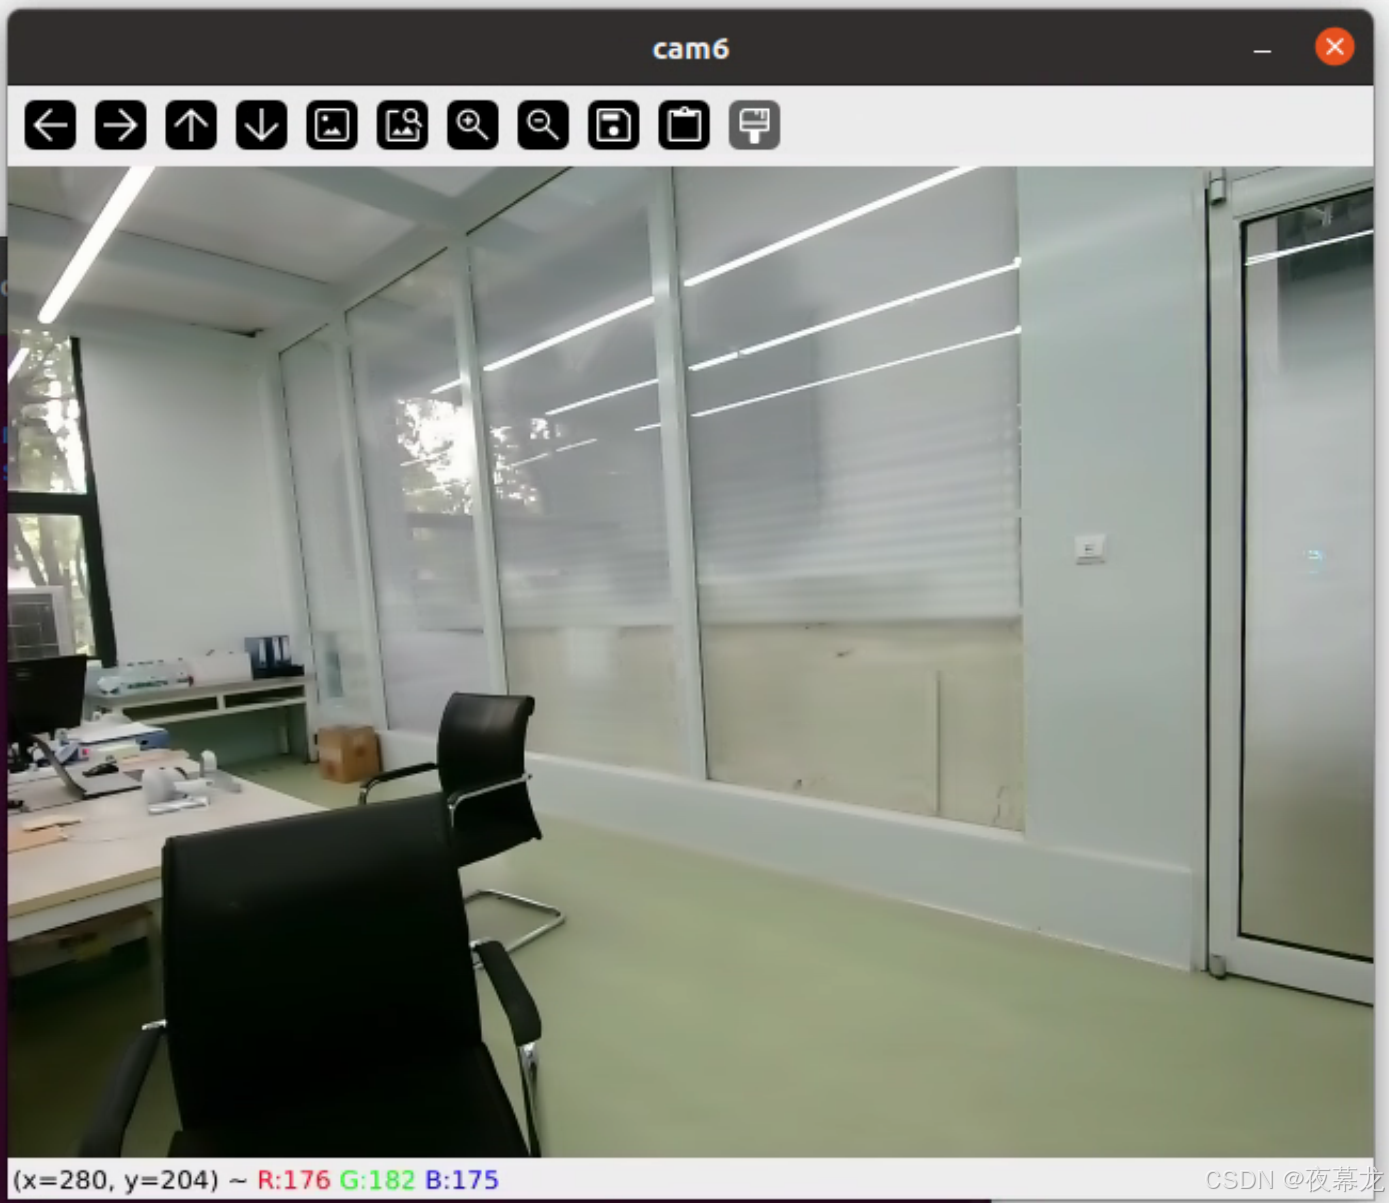
cv2.destroyAllWindows()可以顯示:
2.2 腳本測試
2.1?圖像服務
開啟?image_server.py,只需修改 config:
config = {'fps': 30,'head_camera_type': 'opencv','head_camera_image_shape': [480, 1280], # Head camera resolution'head_camera_id_numbers': [0],}
然后,新開一個 terminal 開啟 image_client.py,只需修改 ip,具體根據 ifconfig 查看:
client = ImageClient(image_show = True, server_address='192.168.8.30', Unit_Test=False) # deployment test
2.2 主控腳本測試
切記:關掉 client!!!開啟server!!!
如果端口占用就:
#查看進程
sudo lsof -i :8012
#kill 占用端口的進程
sudo kill -9 12345
或者:
sudo kill -9 $(sudo lsof -t -i:8012)如果報錯 Segment Fault,那就是 dds 通訊沒起來,就添加 cyclonedds 到 ~/.bashrc,然后?source ~/.bashrc?立即生效
export CYCLONEDDS_HOME="/home/unitree/Documents/unitree_sdk2_python/cyclonedds/install"檢查一下:
echo $CYCLONEDDS_HOME
主控腳本修改 config:
img_config = {'fps': 30,'head_camera_type': 'opencv','head_camera_image_shape': [480, 1280], # Head camera resolution'head_camera_id_numbers': [0],}最后,確保 G1 已經進入?調試模式(L2+R2),并啟動主控腳本:
 ?
?
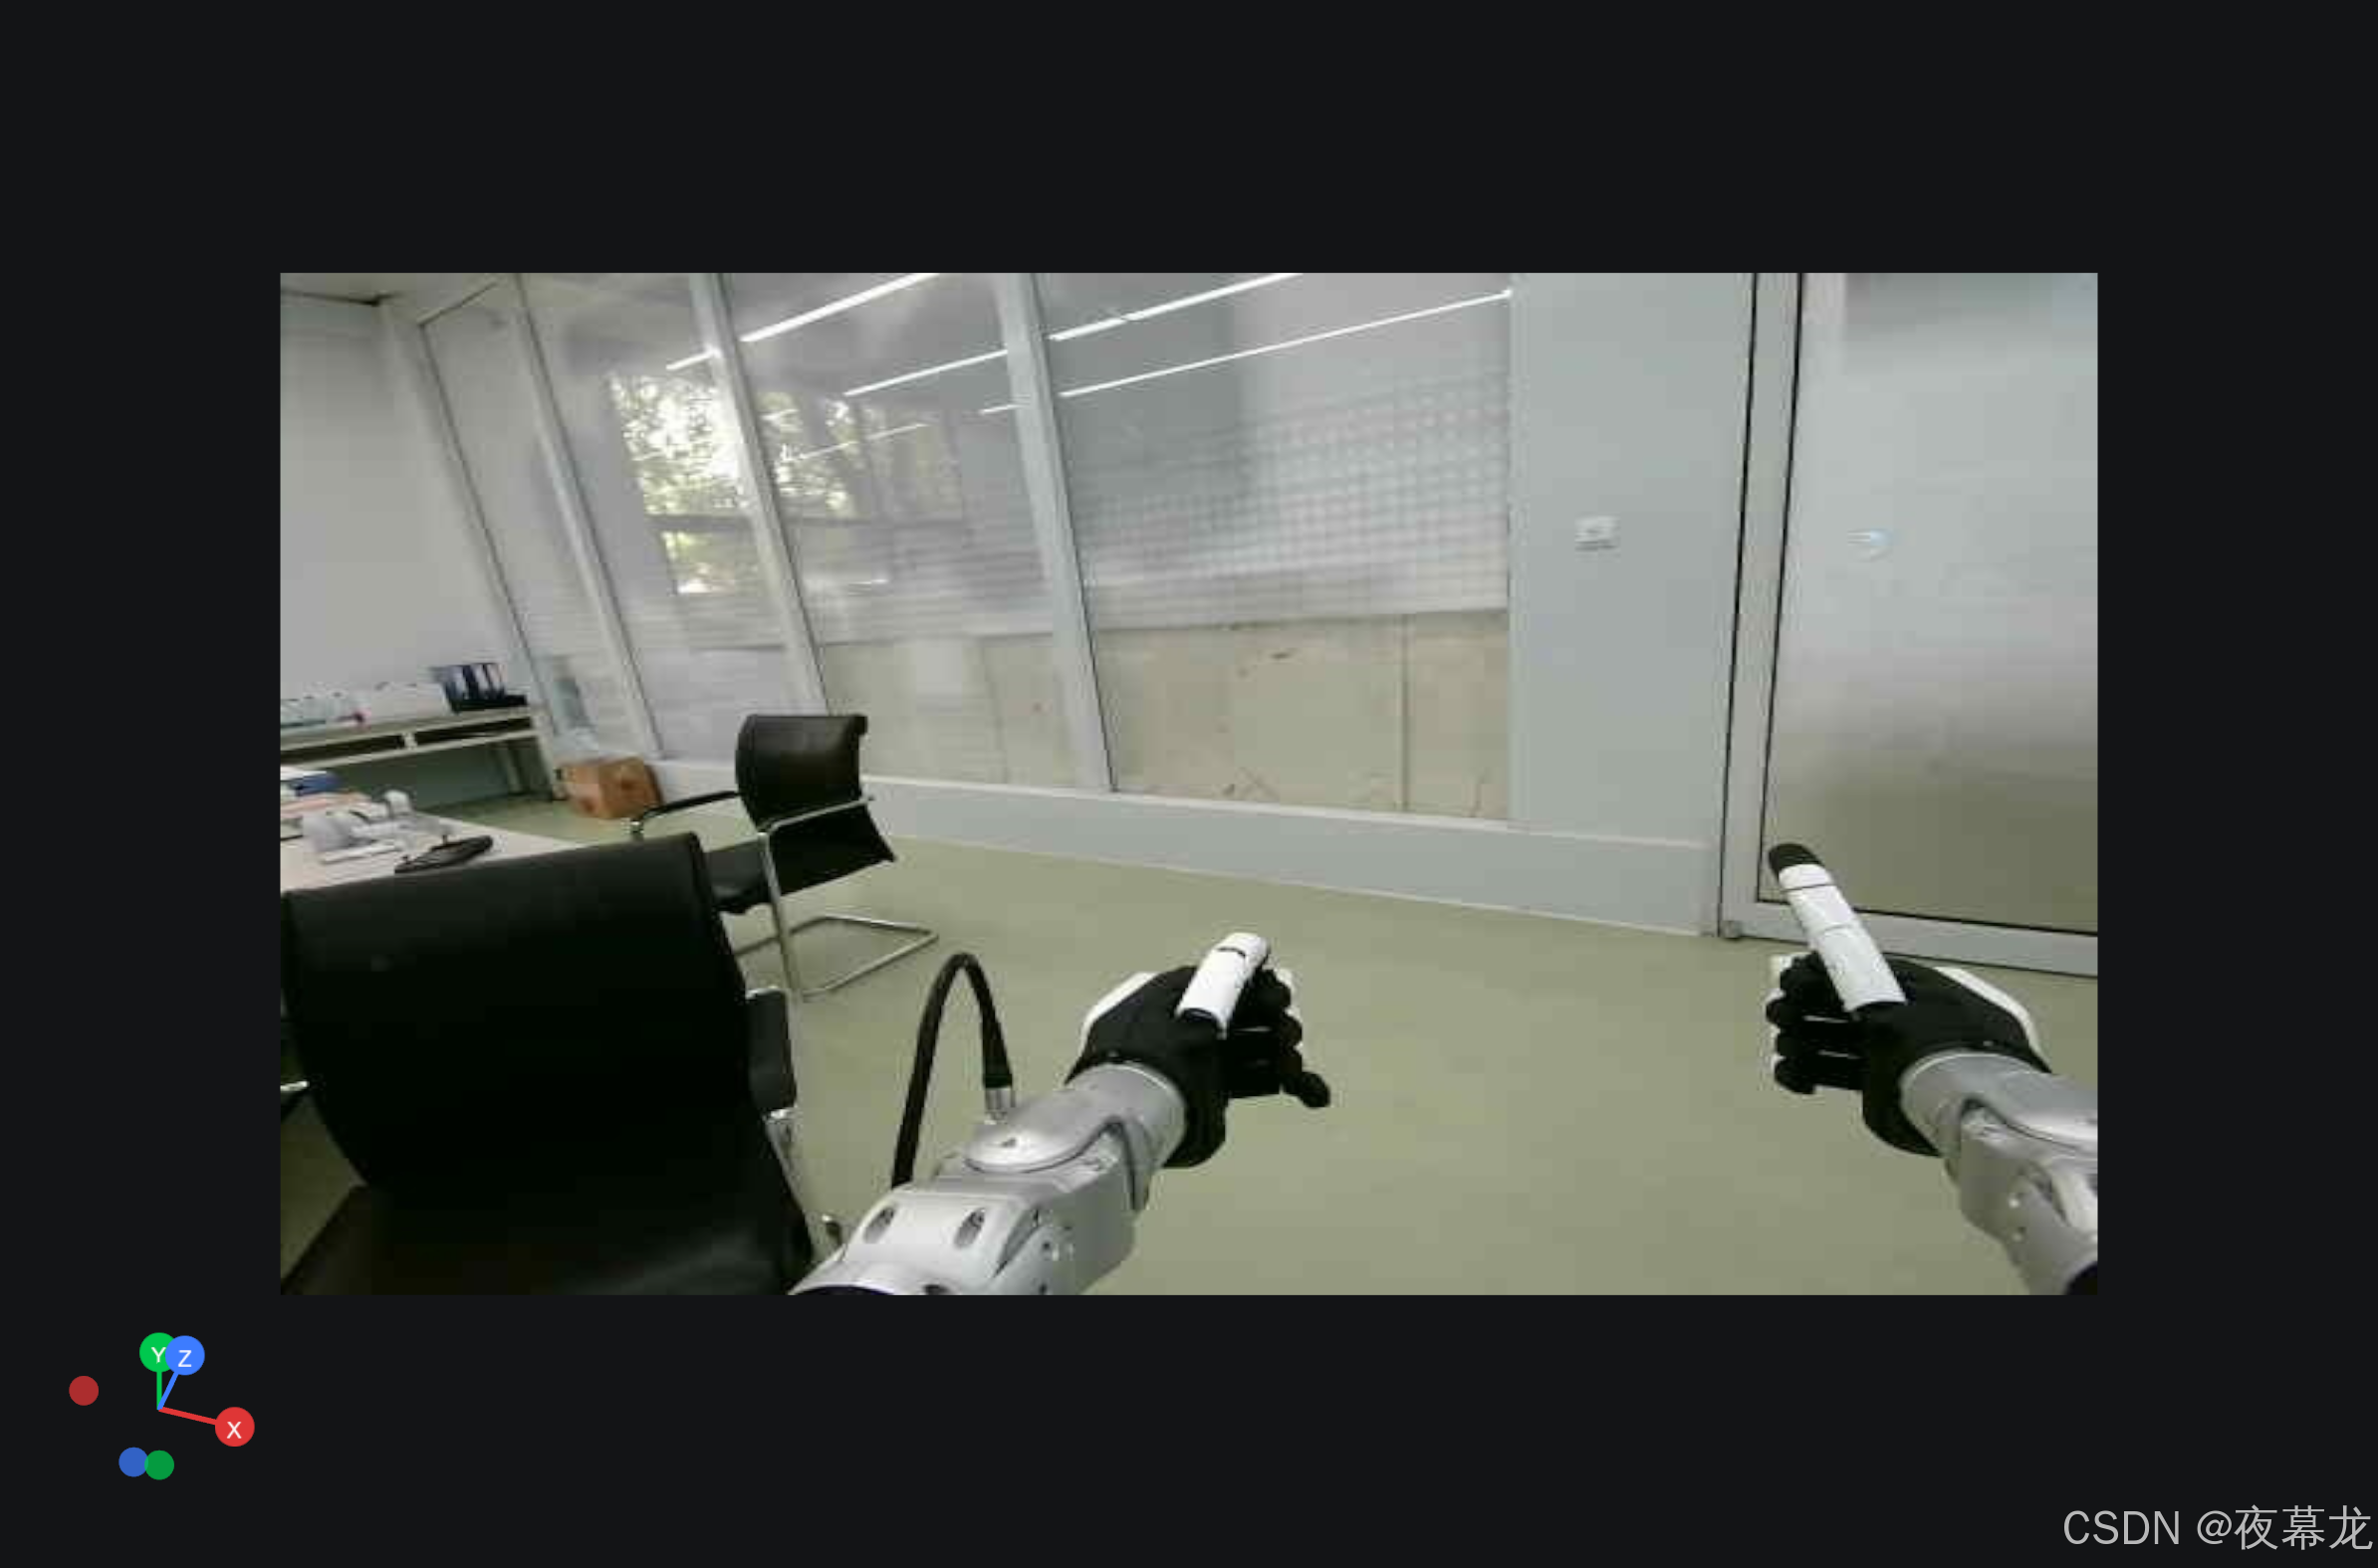
打開瀏覽器應用(ipad Safari 也可以),輸入并訪問網址:https://192.168.8.30:8012?ws=wss://192.168.8.30:8012,可以快樂的遙操作啦
 ?
?


:擴展與生態系統集成)


之Express)


