開發目的
解決漏洞掃描器的痛點
第一就是掃描量太大,對一個站點掃描了大量的無用 POC,浪費時間
指紋識別后還需要根據對應的指紋去進行 payload 掃描,非常的麻煩
開發思路
我們的思路分為大體分為指紋+POC+掃描
所以思路大概從這幾個方面入手
首先就是 POC,我們得尋找一直在更新的 POC,而且是實時更新的,因為自己寫的話有點太費時間了
但是這 POC 的決定是根據我們掃描器來的,因為世面上已經有許多不錯的掃描器了,目前打算使用的是 nuclei 掃描器
https://github.com/projectdiscovery/nuclei
Nuclei 是一種現代、高性能的漏洞掃描程序,它利用基于 YAML 的簡單模板。它使您能夠設計自定義漏洞檢測場景,以模擬真實世界的條件,從而實現零誤報。
目前也在不斷維護更新,當然還有 Xray,Goby 等工具也是不錯的選擇
然后回到指紋識別技術,這個需要大量的指紋樣本,但是世面上的各種工具已經可以做得很好了
指紋識別
這里就的學習一下指紋識別的技術
首先我們需要知道收集指紋目前大概有哪些方法
指紋識別方式
特定文件
比如舉一個例子,我們通常是如何判斷一個框架是 thinkphp 呢?
我們隨便找幾個 thinkphp 的網站
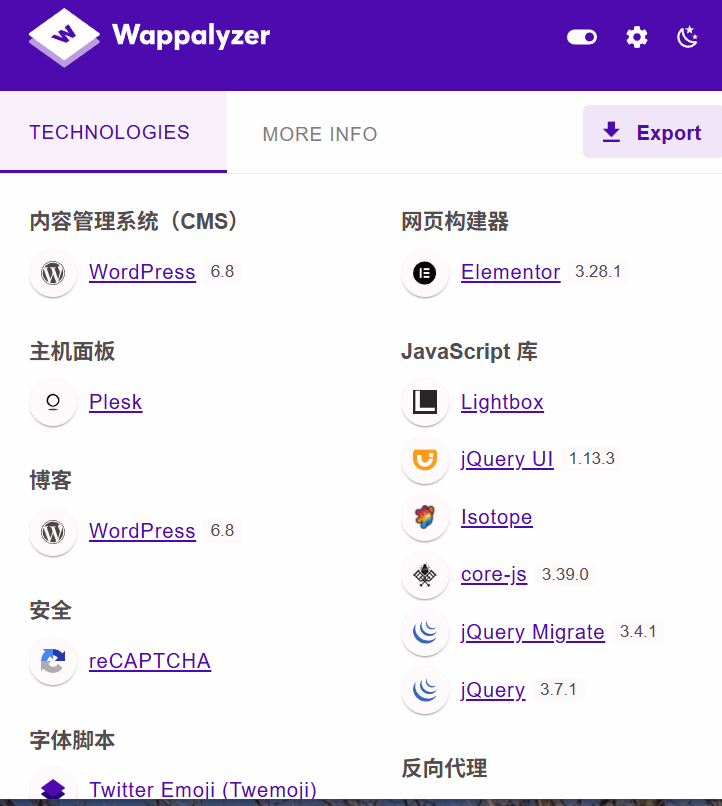
特征就是它的圖標是非常明顯的
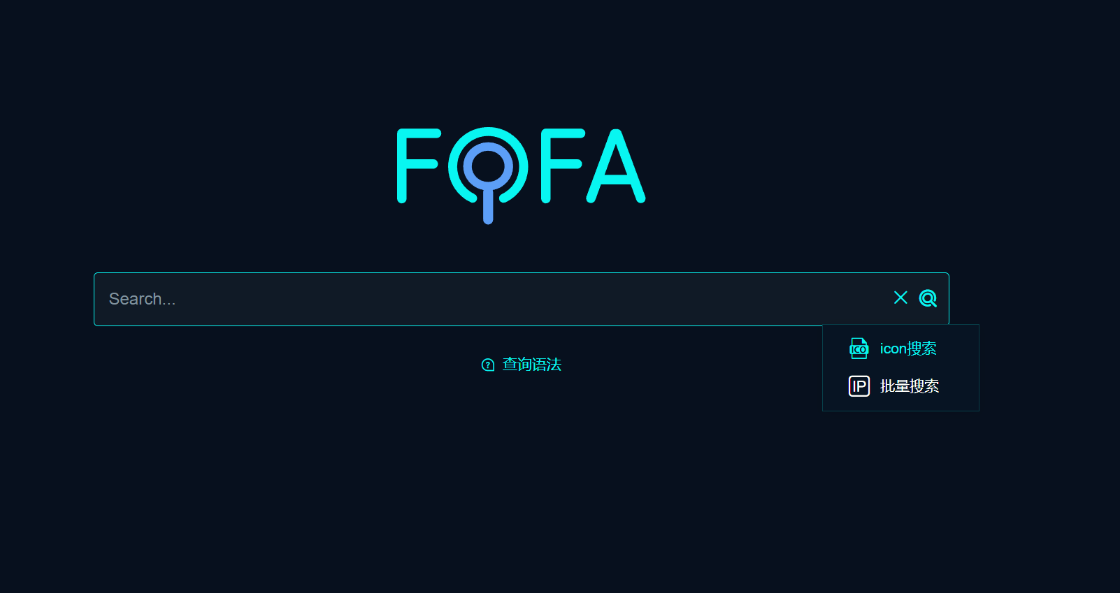
可以看到圖標都是一樣的,目前 fofa 和 hunter 已經有這種查找的方法了,一般都是把我們的圖標換算為我們的 hash 值
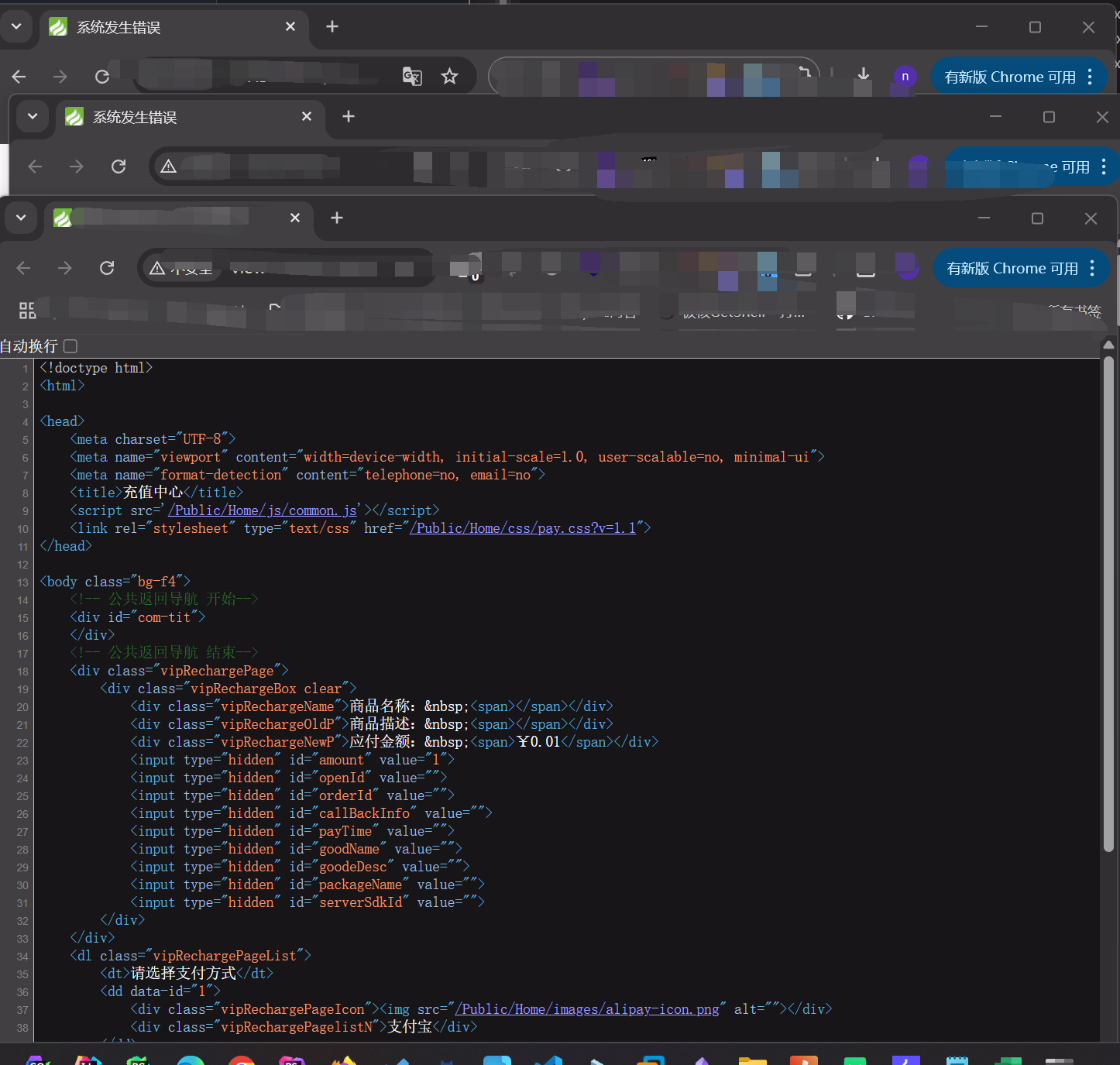
這個就是我們的 favicon.ico 圖標
一般網站是通過在路徑后加入 favicon.ico 比如
http://xxxxxx/favicon.ico
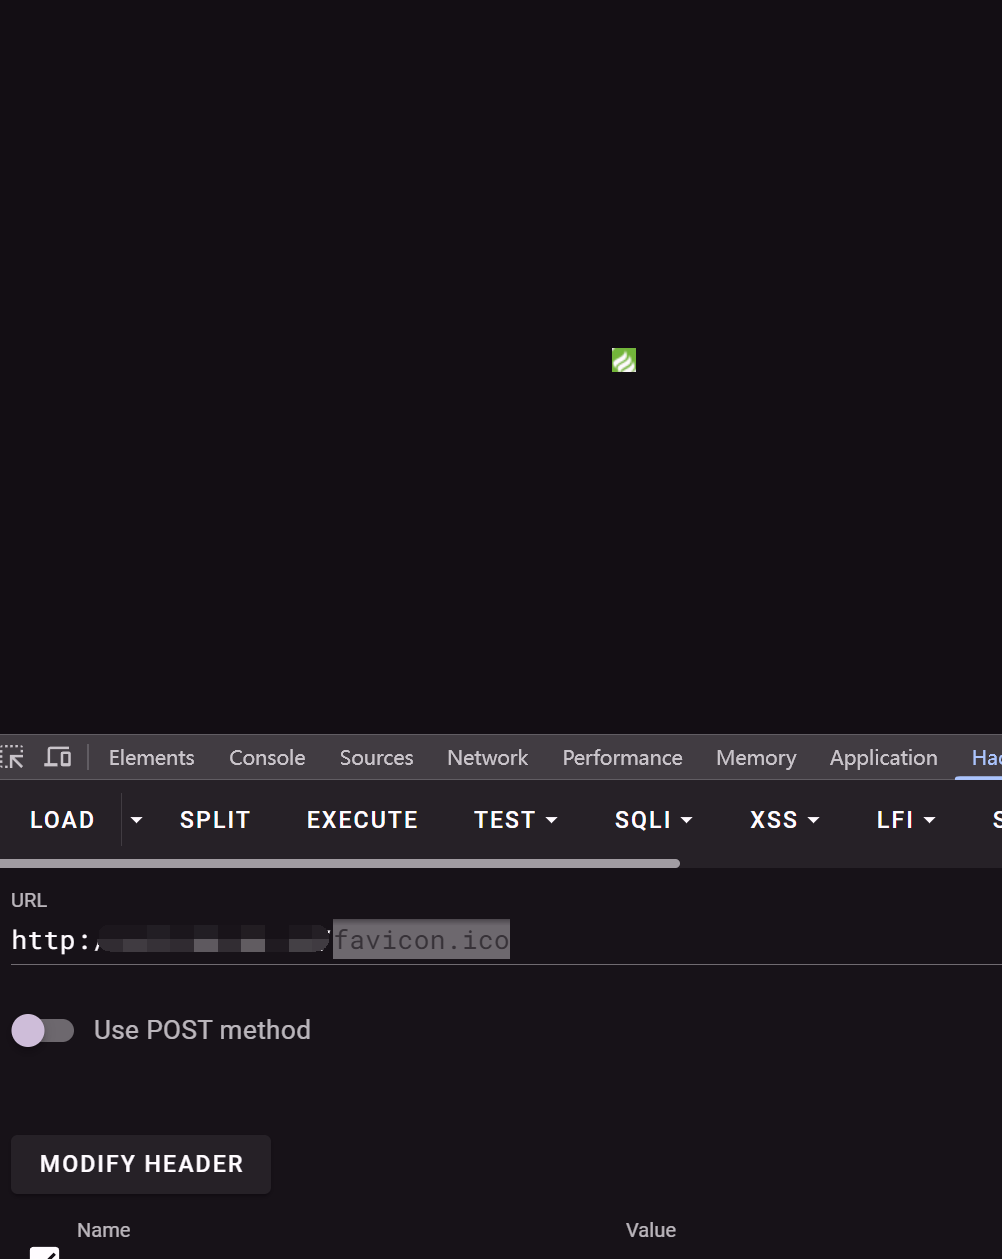
然后就能獲取這個圖標了,而在 fofa 中可以直接拖動查詢了,可以直接算出 hash 值
比如 thinkphp 的
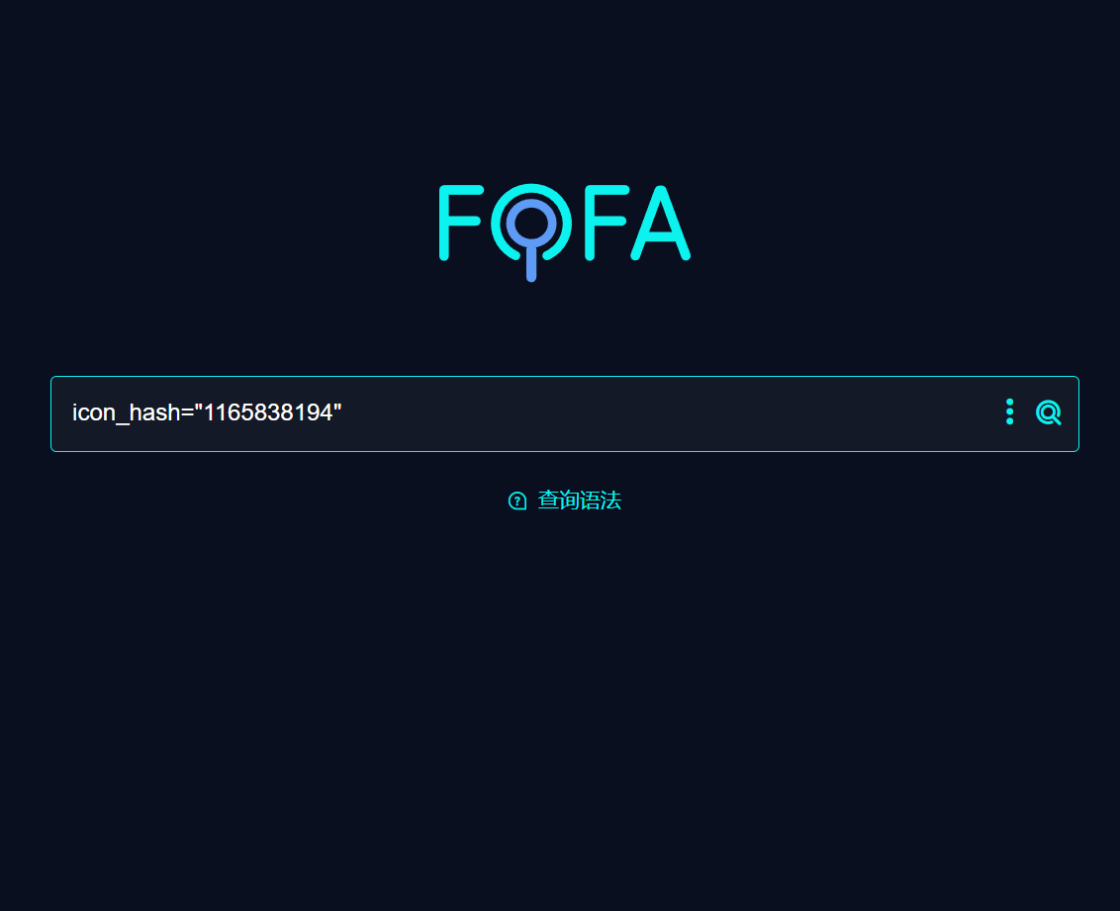
然后再次查詢
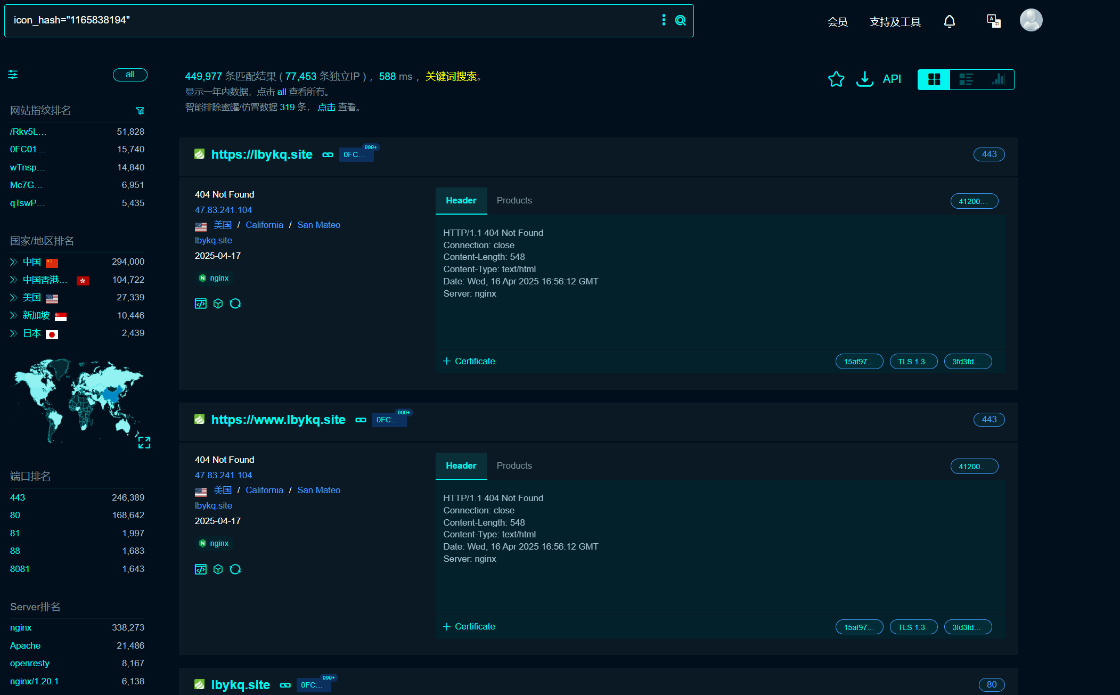
全是 tp 的網站
參考https://github.com/TideSec/TideFinger/blob/master/Web%E6%8C%87%E7%BA%B9%E8%AF%86%E5%88%AB%E6%8A%80%E6%9C%AF%E7%A0%94%E7%A9%B6%E4%B8%8E%E4%BC%98%E5%8C%96%E5%AE%9E%E7%8E%B0.md
當然除了我們的 ico 文件,還有其他很多的文件
幫助網安學習,全套資料S信免費領取:
① 網安學習成長路徑思維導圖
② 60+網安經典常用工具包
③ 100+SRC分析報告
④ 150+網安攻防實戰技術電子書
⑤ 最權威CISSP 認證考試指南+題庫
⑥ 超1800頁CTF實戰技巧手冊
⑦ 最新網安大廠面試題合集(含答案)
⑧ APP客戶端安全檢測指南(安卓+IOS)
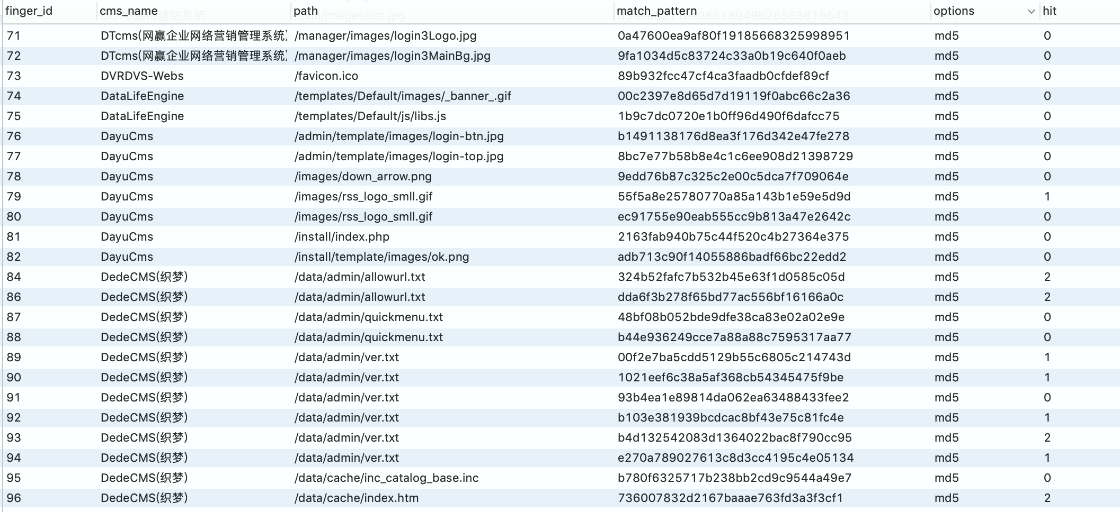
一些網站的特定圖片文件、js 文件、CSS 等靜態文件,如 favicon.ico、css、logo.ico、js 等文件一般不會修改,通過爬蟲對這些文件進行抓取并比對 md5 值,如果和規則庫中的 Md5 一致則說明是同一 CMS。這種方式速度比較快,誤報率相對低一些,但也不排除有些二次開發的 CMS 會修改這些文件。
頁面關鍵字
比如 tp 的錯誤頁面大多數都是
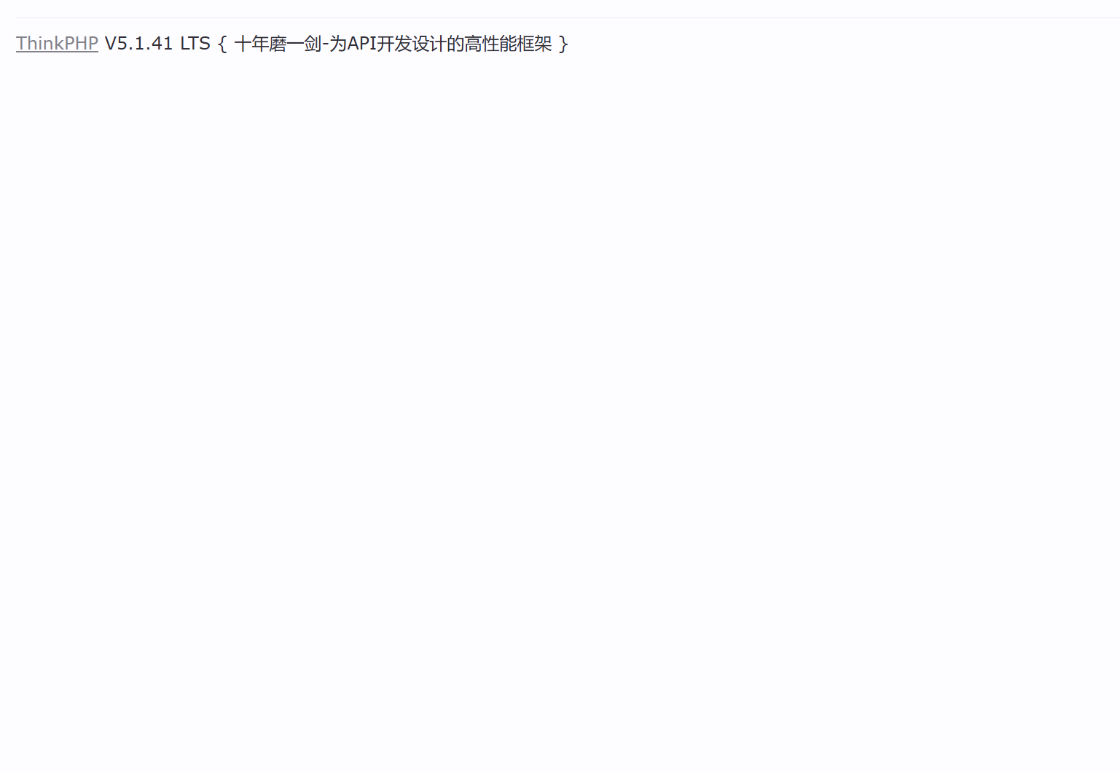
我們 body 就可以包含這個關鍵字了
或者可以構造錯誤頁面,根據報錯信息來判斷使用的 CMS 或者中間件信息,比較常見的如 tomcat 和 spring 的報錯頁面。
根據 response header 一般有以下幾種識別方式:
請求頭關鍵字
根據網站 response 返回頭信息進行關鍵字匹配,這個一般是 ningx 這種
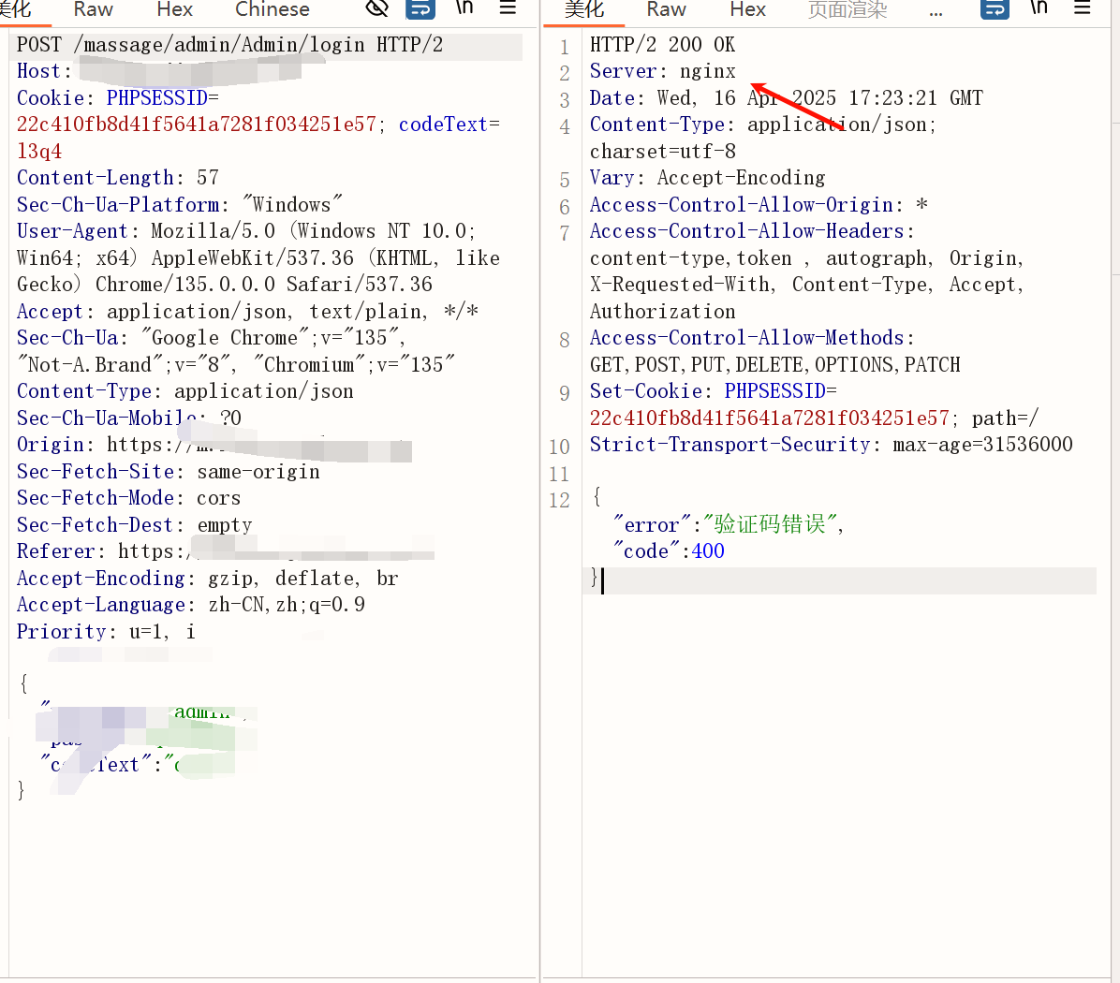
能夠識別我們的服務器
URL 路徑
根據總結
wordpress 默認存在 wp-includes 和 wp-admin 目錄,織夢默認管理后臺為 dede 目錄,solr 平臺可能使用/solr 目錄,weblogic 可能使用 wls-wsat 目錄等。
大部分還是根據我們的 body
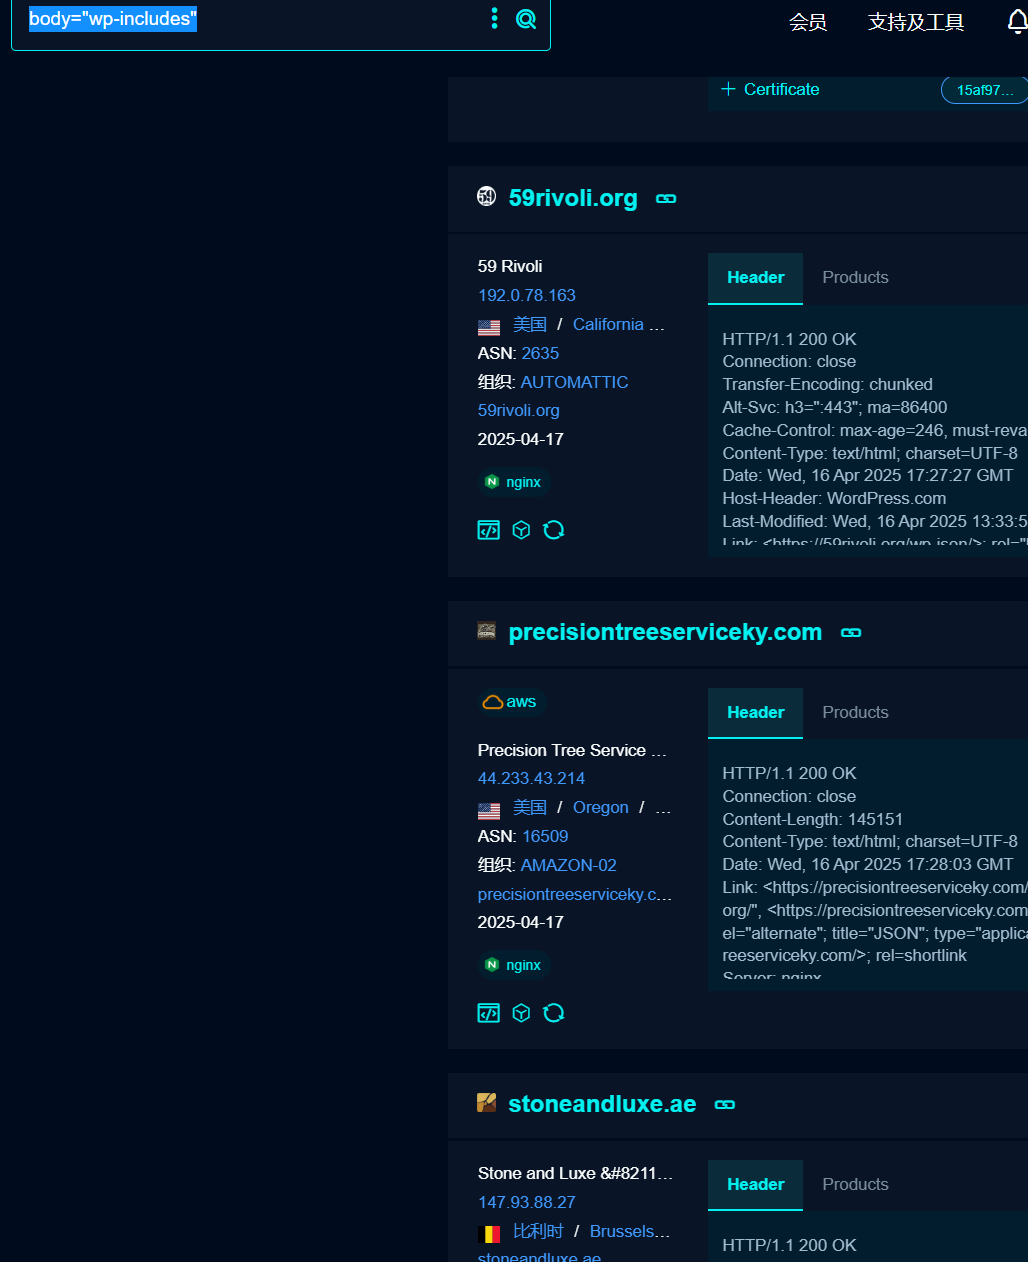
然后點一個進去
可以看到都是我們的 wordPress 的站點
指紋識別方法
有了我們上面的識別技術,那么我們大概是如何來識別一個指紋的呢
首先使用 python 簡單舉一個實現
首先就是需要一個配置文件,這個配置文件就需要包含我們的大體指紋和驗證方法
- name: ThinkPHP
matchers:- type: headerrule: X-Powered-Bykeyword: ThinkPHP- type: bodykeyword: "http://www.thinkphp.cn"- type: bannerkeyword: thinkphp- type: pathpath: /thinkphp/library/think/keyword: class- type: favicon_hashhash: 1165838194
然后就是我們的后端處理邏輯了
import yaml
import requests
import socket
import base64
import mmh3def get_http_response(url, path=""):try:full_url = url.rstrip("/") + pathreturn requests.get(full_url, timeout=5)except:return Nonedef get_tcp_banner(ip, port=80):try:with socket.create_connection((ip, port), timeout=5) as s:banner = s.recv(1024).decode(errors="ignore")return bannerexcept:return ""def get_favicon_hash(url):try:res = requests.get(url.rstrip("/") + "/favicon.ico", timeout=5)favicon = base64.encodebytes(res.content)return mmh3.hash(favicon.decode('utf-8'))except:return Nonedef load_fingerprints(path="fingerprints.yaml"):with open(path, "r", encoding="utf-8") as f:return yaml.safe_load(f)def match_fingerprint(url, ip=None):fingerprints = load_fingerprints()results = []res = get_http_response(url)banner = get_tcp_banner(ip or url.replace("http://", "").replace("https://", ""), 80)favicon_hash = get_favicon_hash(url)for fp in fingerprints:matched = Falsefor matcher in fp["matchers"]:if matcher["type"] == "header" and res:if matcher["rule"] in res.headers and matcher["keyword"].lower() in res.headers[matcher["rule"]].lower():matched = Trueelif matcher["type"] == "body" and res:if matcher["keyword"].lower() in res.text.lower():matched = Trueelif matcher["type"] == "banner":if matcher["keyword"].lower() in banner.lower():matched = Trueelif matcher["type"] == "path":res2 = get_http_response(url, matcher["path"])if res2 and matcher["keyword"].lower() in res2.text.lower():matched = Trueelif matcher["type"] == "favicon_hash":if favicon_hash == matcher["hash"]:matched = Trueif matched:results.append(fp["name"])return results# 示例使用
if __name__ == "__main__":target_url = "http://101.200.50.94:8009/"result = match_fingerprint(target_url)print("識別結果:", result)
大體邏輯就是這樣了
首先就是 yaml 文件為我們的判斷依據,對應不同的判斷方法我們都有對應的后端處理
一個是對 body 的處理,一個是對 hash 文件的處理
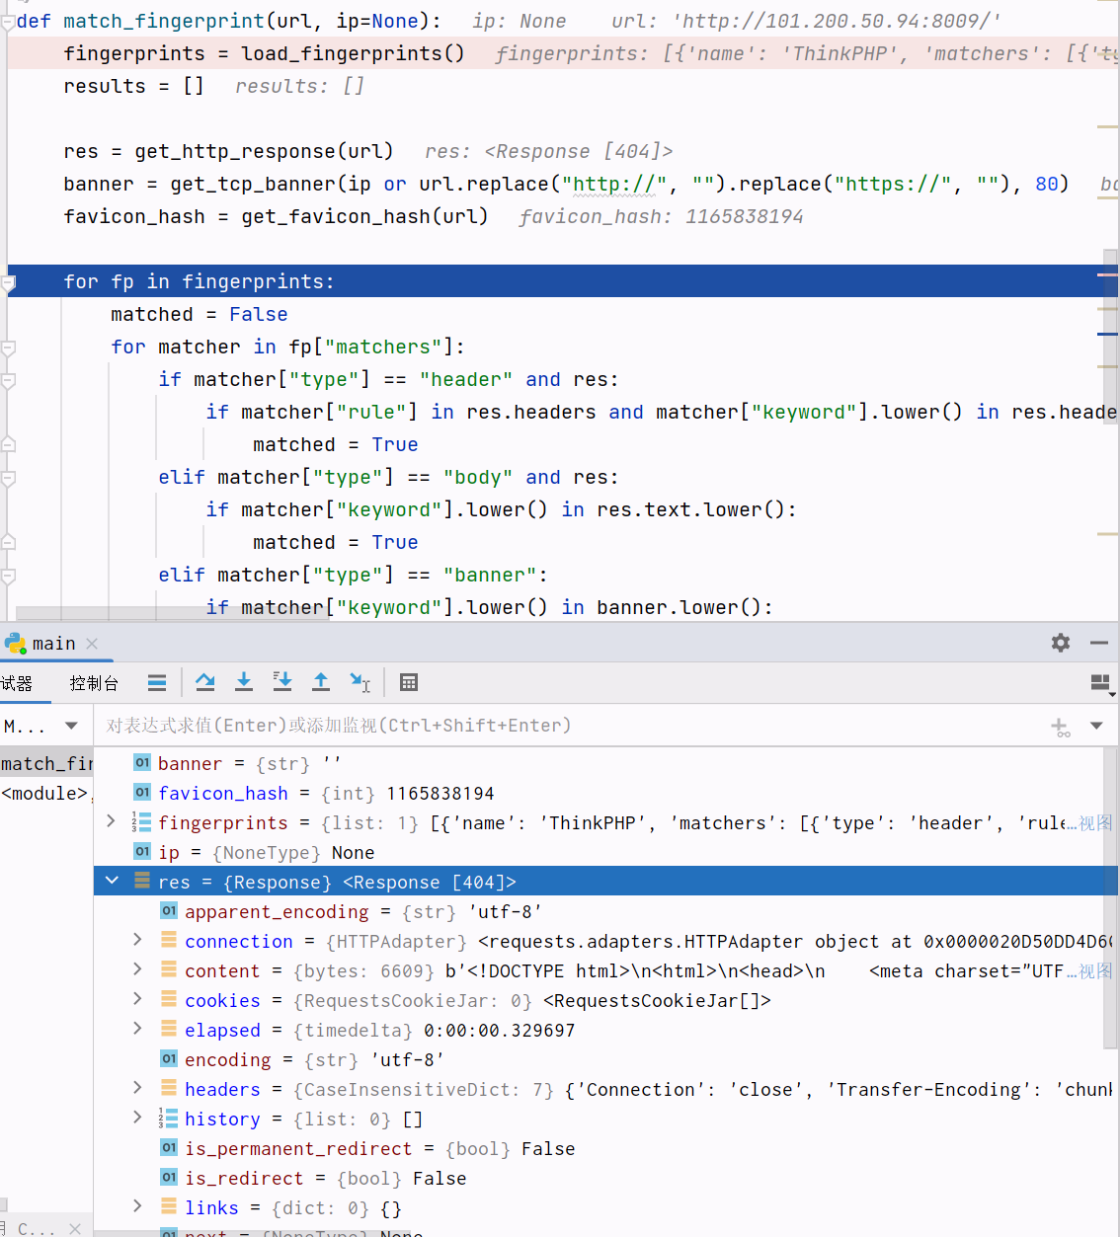
然后再根據規則去匹配
匹配成功輸出結果
當然這只是一個簡單的邏輯,如果需要實現更高高效快捷第一就是指紋庫,第二就是代碼運行的速率,提高線程
最終識別代碼
首先就是指紋庫的獲取,這個的話我們就不直接獲取了,使用的是 EHole 的指紋庫
我們大概看看部分代碼
{
"fingerprint": [{"cms": "seeyon","method": "keyword","location": "body","keyword": ["/seeyon/USER-DATA/IMAGES/LOGIN/login.gif"]
}, {"cms": "seeyon","method": "keyword","location": "body","keyword": ["/seeyon/common/"]
}, {"cms": "Spring env","method": "keyword","location": "body","keyword": ["servletContextInitParams"]
}, {"cms": "微三云管理系統","method": "keyword","location": "body","keyword": ["WSY_logo","管理系統 MANAGEMENT SYSTEM"]
}, {"cms": "Spring env","method": "keyword","location": "body","keyword": ["logback"]
}, {"cms": "Weblogic","method": "keyword","location": "body","keyword": ["Error 404--Not Found"]
}, {"cms": "Weblogic","method": "keyword","location": "body","keyword": ["Error 403--"]
}{"cms": "Atlassian – JIRA","method": "faviconhash","location": "body","keyword": ["981867722"]
}, {"cms": "OpenStack","method": "faviconhash","location": "body","keyword": ["-923088984"]
}, {"cms": "Aplikasi","method": "faviconhash","location": "body","keyword": ["494866796"]
}, {"cms": "Ubiquiti Aircube","method": "faviconhash","location": "body","keyword": ["1249285083"]
}
簡單看了一下邏輯可以發現和我們的指定方法應該差不多,邏輯就是首先根據 method 去選擇方法,一個是 keyword 方法,一個是 faviconhash 方法,是一個大的判斷,然乎下面就是根據具體的比如 body,title 等去識別了
代碼如下
import json
import requests
import hashlib
import base64
from bs4 import BeautifulSoup
from urllib.parse import urljoin
from concurrent.futures import ThreadPoolExecutor, as_completed
import argparse# 加載指紋
def load_fingerprints(file='finger.json'):with open(file, 'r', encoding='utf-8') as f:data = json.load(f)if "fingerprint" in data:return data["fingerprint"]raise ValueError("指紋文件格式不正確,應包含 'fingerprint' 字段。")# 獲取 HTTP 響應
def get_http_response(url):try:headers = {"User-Agent": "Mozilla/5.0"}return requests.get(url, headers=headers, timeout=8, verify=False)except:return None# 計算 favicon hash
def get_favicon_hash(url):try:favicon_url = urljoin(url, '/favicon.ico')res = requests.get(favicon_url, timeout=5, verify=False)if res.status_code == 200:m = hashlib.md5()b64 = base64.b64encode(res.content)m.update(b64)return int(m.hexdigest(), 16)except:return None# 匹配單條指紋
def match_one(fpr, res, fav_hash):method = fpr["method"]loc = fpr.get("location", "body").lower()kws = fpr["keyword"]if method == 'keyword':text_body = res.text or ""text_head = "\n".join(f"{k}: {v}" for k, v in res.headers.items())# 處理 title 和 header 等if loc == 'header':spaces = [text_head, text_body]elif loc == 'title':soup = BeautifulSoup(text_body, "html.parser")title = soup.title.string if soup.title and soup.title.string else ""spaces = [title, text_body]elif loc == 'body':spaces = [text_body]else:spaces = [text_body]for space in spaces:for kw in kws:if kw.lower() in space.lower():return Trueif method == 'faviconhash' and fav_hash is not None:for kw in kws:try:if fav_hash == int(kw):return Trueexcept:continuereturn False# 識別單個 URL 指紋
def match_fingerprint(url, fps=None):fps = fps or load_fingerprints()res = get_http_response(url)fav_hash = get_favicon_hash(url)matched = []for fpr in fps:if 'cms' not in fpr or 'method' not in fpr or 'keyword' not in fpr:continueif match_one(fpr, res, fav_hash):matched.append(fpr['cms'])print(f"[?] {url} 指紋識別結果:{list(set(matched))}")return {url: list(set(matched))}# 多線程執行
def run_multithread(urls, threads):fps = load_fingerprints()results = []with ThreadPoolExecutor(max_workers=threads) as executor:future_to_url = {executor.submit(match_fingerprint, url, fps): url for url in urls}for future in as_completed(future_to_url):results.append(future.result())return results# 主程序入口
def main():parser = argparse.ArgumentParser(description="指紋識別腳本 - 支持多線程")group = parser.add_mutually_exclusive_group(required=True)group.add_argument("-u", "--url", help="單個目標 URL")group.add_argument("-f", "--file", help="包含多個 URL 的文件")parser.add_argument("-t", "--threads", type=int, default=10, help="線程數(默認10)")args = parser.parse_args()if args.url:match_fingerprint(args.url)elif args.file:with open(args.file, 'r', encoding='utf-8') as f:urls = [line.strip() for line in f if line.strip()]results = run_multithread(urls, args.threads)if __name__ == '__main__':main()
加入了支持多線程和支持多目標的思路
結合漏洞掃描
我們光目標識別后,還需要實現精準化打擊,正好 Nuclei 引擎支持根據 tag 去尋找我們的目標,完美了
實現思路就是首先尋找我們的 tag,然后在漏洞庫里面查詢,把有 tag 的和沒有 tag 的分別分開放好,然后根據有 tag 的去精準化識別運行,完成最后的精準化 POC 攻擊
初步的代碼如下
import json
import os
import threading
import time
import base64
import hashlib
import requests
import argparse
from bs4 import BeautifulSoup
from urllib.parse import urljoin
from concurrent.futures import ThreadPoolExecutor, as_completed
from queue import Queuerequests.packages.urllib3.disable_warnings()# ---------- 指紋識別部分 ----------def load_fingerprints(file='finger.json'):with open(file, 'r', encoding='utf-8') as f:data = json.load(f)return data["fingerprint"]def get_http_response(url):try:headers = {"User-Agent": "Mozilla/5.0"}return requests.get(url, headers=headers, timeout=8, verify=False)except:return Nonedef get_favicon_hash(url):try:favicon_url = urljoin(url, '/favicon.ico')res = requests.get(favicon_url, timeout=5, verify=False)if res.status_code == 200:m = hashlib.md5()b64 = base64.b64encode(res.content)m.update(b64)return int(m.hexdigest(), 16)except:return Nonedef match_one(fpr, res, fav_hash):method = fpr["method"]loc = fpr.get("location", "body").lower()kws = fpr["keyword"]if method == 'keyword':text_body = res.text or ""text_head = "\n".join(f"{k}: {v}" for k, v in res.headers.items())if loc == 'header':spaces = [text_head]elif loc == 'title':soup = BeautifulSoup(text_body, "html.parser")title = soup.title.string if soup.title and soup.title.string else ""spaces = [title]else:spaces = [text_body]for space in spaces:for kw in kws:if kw.lower() in space.lower():return Trueelif method == 'faviconhash' and fav_hash is not None:for kw in kws:try:if fav_hash == int(kw):return Trueexcept:continuereturn Falsedef match_fingerprint(url, fps):res = get_http_response(url)fav_hash = get_favicon_hash(url)matched = []for fpr in fps:if 'cms' not in fpr or 'method' not in fpr or 'keyword' not in fpr:continueif match_one(fpr, res, fav_hash):matched.append(fpr['cms'])print(f"[?] {url} 指紋識別結果:{list(set(matched))}")return {"url": url, "cms": list(set(matched))[0] if matched else ""}def run_fingerprint_scan(urls, threads, output='res.json'):fps = load_fingerprints()results = []with ThreadPoolExecutor(max_workers=threads) as executor:future_to_url = {executor.submit(match_fingerprint, url, fps): url for url in urls}for future in as_completed(future_to_url):results.append(future.result())with open(output, 'w', encoding='utf-8') as f:json.dump(results, f, ensure_ascii=False, indent=2)# ---------- Nuclei 掃描部分 ----------class AutoNuclei:def __init__(self, res_file='res.json', tag_file='C:\\Users\\86135\\nuclei-templates\\TEMPLATES-STATS.json', thread_count=5):self.res_file = res_fileself.tag_file = tag_fileself.havetag_file = 'havetag.txt'self.notag_file = 'notag.txt'self.result_dir = 'result'self.thread_count = thread_countself.cms_targets = {}         # {cms: [url1, url2]}self.nuclei_tags = set()self.tagged_targets = {}      # {tag: [url1, url2]}self.untagged_targets = []self.task_queue = Queue()self.load_res_json()self.load_tags()self.classify_targets()self.save_targets()self.start_scan_threads()def load_res_json(self):with open(self.res_file, 'r', encoding='utf-8') as f:data = json.load(f)for entry in data:cms = entry.get("cms", "").lower()url = entry.get("url")if cms and url:self.cms_targets.setdefault(cms, []).append(url)def load_tags(self):with open(self.tag_file, 'r', encoding='utf-8') as f:tags_data = json.load(f)for item in tags_data.get("tags", []):if item["name"]:self.nuclei_tags.add(item["name"].lower())def classify_targets(self):for cms, urls in self.cms_targets.items():if cms in self.nuclei_tags:self.tagged_targets.setdefault(cms, []).extend(urls)else:self.untagged_targets.extend(urls)def save_targets(self):with open(self.havetag_file, 'w', encoding='utf-8') as f:for tag, urls in self.tagged_targets.items():for url in urls:f.write(f"{tag}||{url}\n")with open(self.notag_file, 'w', encoding='utf-8') as f:for url in self.untagged_targets:f.write(url + '\n')if not os.path.exists(self.result_dir):os.makedirs(self.result_dir)def scan_worker(self):while not self.task_queue.empty():try:tag, url = self.task_queue.get(timeout=1)target_file = f"temp_{int(time.time() * 1000)}.txt"with open(target_file, 'w', encoding='utf-8') as f:f.write(url)output_file = os.path.join(self.result_dir, f"{tag}_{int(time.time())}.txt")cmd = f"F:\\gj\\Vulnerability_Scanning\\nuclei\\nuclei.exe -l {target_file} -tags {tag} -o {output_file} -stats"print(f"[+] 掃描任務啟動: {url} -> {tag}")os.system(cmd)os.remove(target_file)except Exception as e:print(f"[!] 線程錯誤: {e}")def start_scan_threads(self):for tag, urls in self.tagged_targets.items():for url in urls:self.task_queue.put((tag, url))threads = []for _ in range(self.thread_count):t = threading.Thread(target=self.scan_worker)t.start()threads.append(t)for t in threads:t.join()print("[?] 所有掃描任務完成!")# ---------- 主程序入口 ----------def main():parser = argparse.ArgumentParser(description="指紋識別 + Nuclei自動化工具")group = parser.add_mutually_exclusive_group(required=True)group.add_argument("-u", "--url", help="目標 URL")group.add_argument("-f", "--file", help="URL列表文件")parser.add_argument("--fp-threads", type=int, default=10, help="指紋識別線程數")parser.add_argument("--scan-threads", type=int, default=5, help="Nuclei 掃描線程數")args = parser.parse_args()urls = []if args.url:urls = [args.url]elif args.file:with open(args.file, 'r', encoding='utf-8') as f:urls = [line.strip() for line in f if line.strip()]print("[*] 正在執行指紋識別...")run_fingerprint_scan(urls, threads=args.fp_threads, output='res.json')print("[*] 指紋識別完成,開始 Nuclei 掃描...")AutoNuclei(res_file='res.json',tag_file=os.path.join(os.environ['USERPROFILE'], 'nuclei-templates', 'TEMPLATES-STATS.json'),thread_count=args.scan_threads)if __name__ == '__main__':main()
?


)
![[C]基礎16.數據在內存中的存儲](http://pic.xiahunao.cn/[C]基礎16.數據在內存中的存儲)


)


