前言
先看一下webpack打包后的bundle.js,前邊的直接掃一眼就過,可以發現這個立即執行函數的形參就是一個,key為引入文件路徑,value為該模塊代碼的函數。
所以比較重要的就是通過webpack的配置文件中的entry的入口文件,遞歸去生成這個modules,并把代碼中require變成__webpack_require__。
(function (modules) { // webpackBootstrap// The module cachevar installedModules = {}// The require functionfunction __webpack_require__ (moduleId) {// Check if module is in cacheif (installedModules[moduleId]) {return installedModules[moduleId].exports}// Create a new module (and put it into the cache)var module = installedModules[moduleId] = {i: moduleId,l: false,exports: {}}// Execute the module functionmodules[moduleId].call(module.exports, module, module.exports, __webpack_require__)// Flag the module as loadedmodule.l = true// Return the exports of the modulereturn module.exports}// expose the modules object (__webpack_modules__)__webpack_require__.m = modules// expose the module cache__webpack_require__.c = installedModules// define getter function for harmony exports__webpack_require__.d = function (exports, name, getter) {if (!__webpack_require__.o(exports, name)) {Object.defineProperty(exports, name, { enumerable: true, get: getter })}}// define __esModule on exports__webpack_require__.r = function (exports) {if (typeof Symbol !== 'undefined' && Symbol.toStringTag) {Object.defineProperty(exports, Symbol.toStringTag, { value: 'Module' })}Object.defineProperty(exports, '__esModule', { value: true })}// create a fake namespace object// mode & 1: value is a module id, require it// mode & 2: merge all properties of value into the ns// mode & 4: return value when already ns object// mode & 8|1: behave like require__webpack_require__.t = function (value, mode) {if (mode & 1) value = __webpack_require__(value)if (mode & 8) return valueif ((mode & 4) && typeof value === 'object' && value && value.__esModule) return valuevar ns = Object.create(null)__webpack_require__.r(ns)Object.defineProperty(ns, 'default', { enumerable: true, value: value })if (mode & 2 && typeof value != 'string') for (var key in value) __webpack_require__.d(ns, key, function (key) { return value[key] }.bind(null, key))return ns}// getDefaultExport function for compatibility with non-harmony modules__webpack_require__.n = function (module) {var getter = module && module.__esModule ?function getDefault () { return module['default'] } :function getModuleExports () { return module }__webpack_require__.d(getter, 'a', getter)return getter}// Object.prototype.hasOwnProperty.call__webpack_require__.o = function (object, property) { return Object.prototype.hasOwnProperty.call(object, property) }// __webpack_public_path____webpack_require__.p = ""// Load entry module and return exportsreturn __webpack_require__(__webpack_require__.s = "./src/app.js")})({"./src/app.js":(function (module, __webpack_exports__, __webpack_require__) {"use strict"__webpack_require__.r(__webpack_exports__)var _module__WEBPACK_IMPORTED_MODULE_0__ = __webpack_require__(/*! ./module */ "./src/module.js")var _module__WEBPACK_IMPORTED_MODULE_0___default = /*#__PURE__*/__webpack_require__.n(_module__WEBPACK_IMPORTED_MODULE_0__)console.log("Hello World")}),"./src/module.js":(function (module, exports) {module.exports = {name: 'module',description: 'module description',version: '1.0.0',dependencies: {'module-a': '1.0.0','module-b': '1.0.0',},devDependencies: {'module-c': '1.0.0','module-d': '1.0.0',},}})});
//# sourceMappingURL=bundle.js.map
實現思路
項目配置如下
-
讀取webpack.config.js文件
-
對入口文件實現編譯生成依賴對象
modules
2.1 根據入口文件遞歸去獲取依賴及其代碼,并通過ast抽象語法書,對require替換成__webpack_require__
2.2 復制webpack打包生成打的bundles.js 將其改造成模板文件(bundlejsTemplate.ejs),通過ejs,把modules插入模板中,生成代碼 -
將替換后的模板代碼生成到webpack.config.js配置的output路徑下
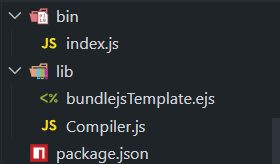
具體實現
index.js
#! /usr/bin/env node
/*
* 實現 webpack 打包功能
* 1. 配置文件的讀取 webpack.config.js
*
* 2. 實現入口文件的編譯,然后生成依賴對象 modules
*
*
* */
// console.log('jdpack打包功能');
// console.log(process.cwd()); // 打印當前命令所處的目錄/*
* 1. 配置文件的讀取 webpack.config.js
* */
const Compiler = require('../lib/Compiler.js');const path = require('path');
const configPath = path.resolve(process.cwd(), 'webpack.config.js');
const configObj = require(configPath);// console.log(configObj); // 配置文件對象/*
* 2. 實現入口文件的編譯,然后生成依賴對象 modules
* */
const compile = new Compiler(configObj);
compile.run();
// console.log(compile.modules); // 模塊依賴對象
Compiler.js (最重要的實現都在這個類里)
/*
* 編譯我們的代碼,生成 打包后的內容
* 1. 根據配置文件 entry 入口文件,讀取入口文件對象的代碼
* 2. 生成依賴對象
* 3. 傳遞給 webpack的 自執行的匿名函數
*
* */
const fs = require('fs');
const ejs = require('ejs');
const path = require('path');/*
* 導入ast相關的模塊
* */
const {parse} = require('@babel/parser');
const generator = require('@babel/generator').default;
const traverse = require('@babel/traverse').default;
const t = require('@babel/types');class Compiler {/** 配置文件* */constructor(config) {this.config = config;// 模塊依賴對象,保存了代碼里面的所有的模塊依賴關系 key 依賴模塊的路徑 value 依賴模塊對應代碼的函數this.modules = {};}run() {// 1. 根據配置文件的入口文件生成依賴對象this.buildModules(this.config.entry);// 編譯后,生成 bundle.jsthis.generatorBundlejs();}/** moduleId 依賴模塊的路徑** 如果在 代碼里面有 require其他的模塊代碼* 1. 先生成模塊依賴對象* 2. 將代碼里面的 require 替換為 __webpack_require__ ast 實現* 3. 將依賴模塊的路徑加載入口文件的目錄** */buildModules(moduleId) {let code = this.getCode(moduleId);let {deps, newCode} = this.parseModule(code);// console.log(deps, newCode);this.modules[moduleId] = newCode;// 針對 deps 里面再次做處理,引入依賴的文件里面還有可能 requiredeps.forEach(item => {this.buildModules(item);})}/** path 依賴模塊的路徑* */getCode(modulePath) {return fs.readFileSync(modulePath, 'utf8');}/** 將代碼里面的依賴做替換* */parseModule(code) {let mainRootPath = path.dirname(this.config.entry);// 存儲了代碼里面所有的依賴路徑let deps = [];const ast = parse(code);/** 1. 對 require 節點做處理,替換 __webpack_require__* */traverse(ast, {CallExpression(NodePath) {let node = NodePath.node;if (node.callee.name === 'require') {node.callee.name = '__webpack_require__';// 2. 對依賴路徑做替換let depPath = node.arguments[0].value;depPath = '.\\' + path.join(mainRootPath, depPath);depPath = depPath.replace(/\\/g, '/');// 利用語法樹將 require 里面依賴路徑做修改node.arguments[0] = t.stringLiteral(depPath);deps.push(depPath);}}});let newCode = generator(ast).code;// console.log(newCode);return {deps, newCode};}/** 先根據生成的入口文件的依賴對象,生成打包文件。然后在 分析入口文件里面的內容,如果有其他的 require 進行再次生成依賴對象,在生成打包的文件* */generatorBundlejs() {/** 使用 ejs 根據依賴對象,生成打包后的 bundle.js 文件* 1. 讀取模板*** */let bundlePath = path.resolve(__dirname, 'bundlejsTemplate.ejs');let bundleTemplate = fs.readFileSync(bundlePath, 'utf-8');/** 2. 使用 ejs 做模板的替換* */let renderCode = ejs.render(bundleTemplate, {moduleId: this.config.entry, modules: this.modules});/** 3. 將打包后的內容根據 webpack.config.js 里面的 output 進行保存* */let outputPath = this.config.output.path;// 判斷打包后的輸出目錄是否存在,如果不存在,則先創建目錄if (!fs.existsSync(outputPath)) {fs.mkdirSync(outputPath);}let outputFilePath = path.resolve(outputPath, this.config.output.filename);fs.writeFileSync(outputFilePath, renderCode);}}module.exports = Compiler;
bundlejsTemplate.ejs
(function(modules) { // webpackBootstrap
// The module cache
var installedModules = {};// The require function
function __webpack_require__(moduleId) {// Check if module is in cache
if(installedModules[moduleId]) {
return installedModules[moduleId].exports;
}
// Create a new module (and put it into the cache)
var module = installedModules[moduleId] = {
i: moduleId,
l: false,
exports: {}
};// Execute the module function
modules[moduleId].call(module.exports, module, module.exports, __webpack_require__);// Flag the module as loaded
module.l = true;// Return the exports of the module
return module.exports;
}// expose the modules object (__webpack_modules__)
__webpack_require__.m = modules;// expose the module cache
__webpack_require__.c = installedModules;// define getter function for harmony exports
__webpack_require__.d = function(exports, name, getter) {
if(!__webpack_require__.o(exports, name)) {
Object.defineProperty(exports, name, { enumerable: true, get: getter });
}
};// define __esModule on exports
__webpack_require__.r = function(exports) {
if(typeof Symbol !== 'undefined' && Symbol.toStringTag) {
Object.defineProperty(exports, Symbol.toStringTag, { value: 'Module' });
}
Object.defineProperty(exports, '__esModule', { value: true });
};// create a fake namespace object
// mode & 1: value is a module id, require it
// mode & 2: merge all properties of value into the ns
// mode & 4: return value when already ns object
// mode & 8|1: behave like require
__webpack_require__.t = function(value, mode) {
if(mode & 1) value = __webpack_require__(value);
if(mode & 8) return value;
if((mode & 4) && typeof value === 'object' && value && value.__esModule) return value;
var ns = Object.create(null);
__webpack_require__.r(ns);
Object.defineProperty(ns, 'default', { enumerable: true, value: value });
if(mode & 2 && typeof value != 'string') for(var key in value) __webpack_require__.d(ns, key, function(key) { return value[key]; }.bind(null, key));
return ns;
};// getDefaultExport function for compatibility with non-harmony modules
__webpack_require__.n = function(module) {
var getter = module && module.__esModule ?
function getDefault() { return module['default']; } :
function getModuleExports() { return module; };
__webpack_require__.d(getter, 'a', getter);
return getter;
};// Object.prototype.hasOwnProperty.call
__webpack_require__.o = function(object, property) { return Object.prototype.hasOwnProperty.call(object, property); };// __webpack_public_path__
__webpack_require__.p = "";// Load entry module and return exports
return __webpack_require__(__webpack_require__.s = "<%- moduleId %>");
})
/************************************************************************/
({
<% for(let key in modules) { %>"<%- key %>": (function(module, exports, __webpack_require__) {<%- modules[key] %>}),
<% } %>});
package.json
{"name": "jdpack","version": "1.0.0","description": "","main": "index.js","scripts": {"test": "echo \"Error: no test specified\" && exit 1"},"bin": {"mypack": "./bin/index.js"},"keywords": [],"author": "","license": "ISC","dependencies": {"@babel/generator": "^7.18.13","@babel/parser": "^7.18.13","@babel/traverse": "^7.18.13","@babel/types": "^7.18.13","ejs": "^3.1.8"}
}


)
)


處理)
)


)

redis)