用戶中心項目搭建筆記
技術棧
前端技術棧
- “react”: “^18.2.0”,
- ant-design-pro
后端技術棧
- SpringBoot 2.6.x
項目源碼地址
- https://gitee.com/szxio/user-center
前端項目搭建
快速搭建一個后端管理系統項目框架
初始化
antDesignPro 官網: https://pro.ant.design/zh-CN。開箱即用的中臺前端/設計解決方案
我們提供了 pro-cli 來快速的初始化腳手架。
# 使用 npm
npm i @ant-design/pro-cli -g
pro create user-center
cd user-center
pnpm install
去除國際化
pnpm i18n-remove
執行這個命令可以去掉項目中的國際化配置,再次啟動可能會報引用錯誤,把多余的引用去掉即可
啟動
pnpm start
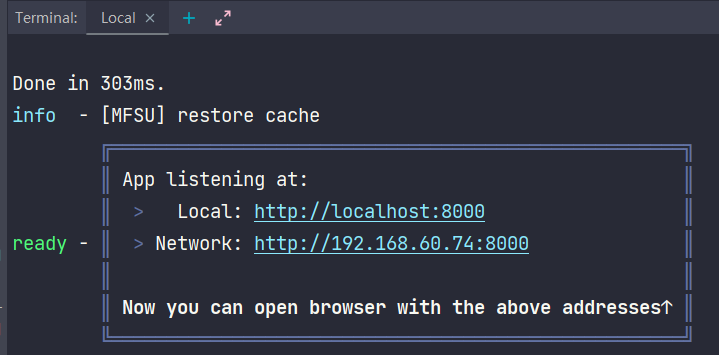
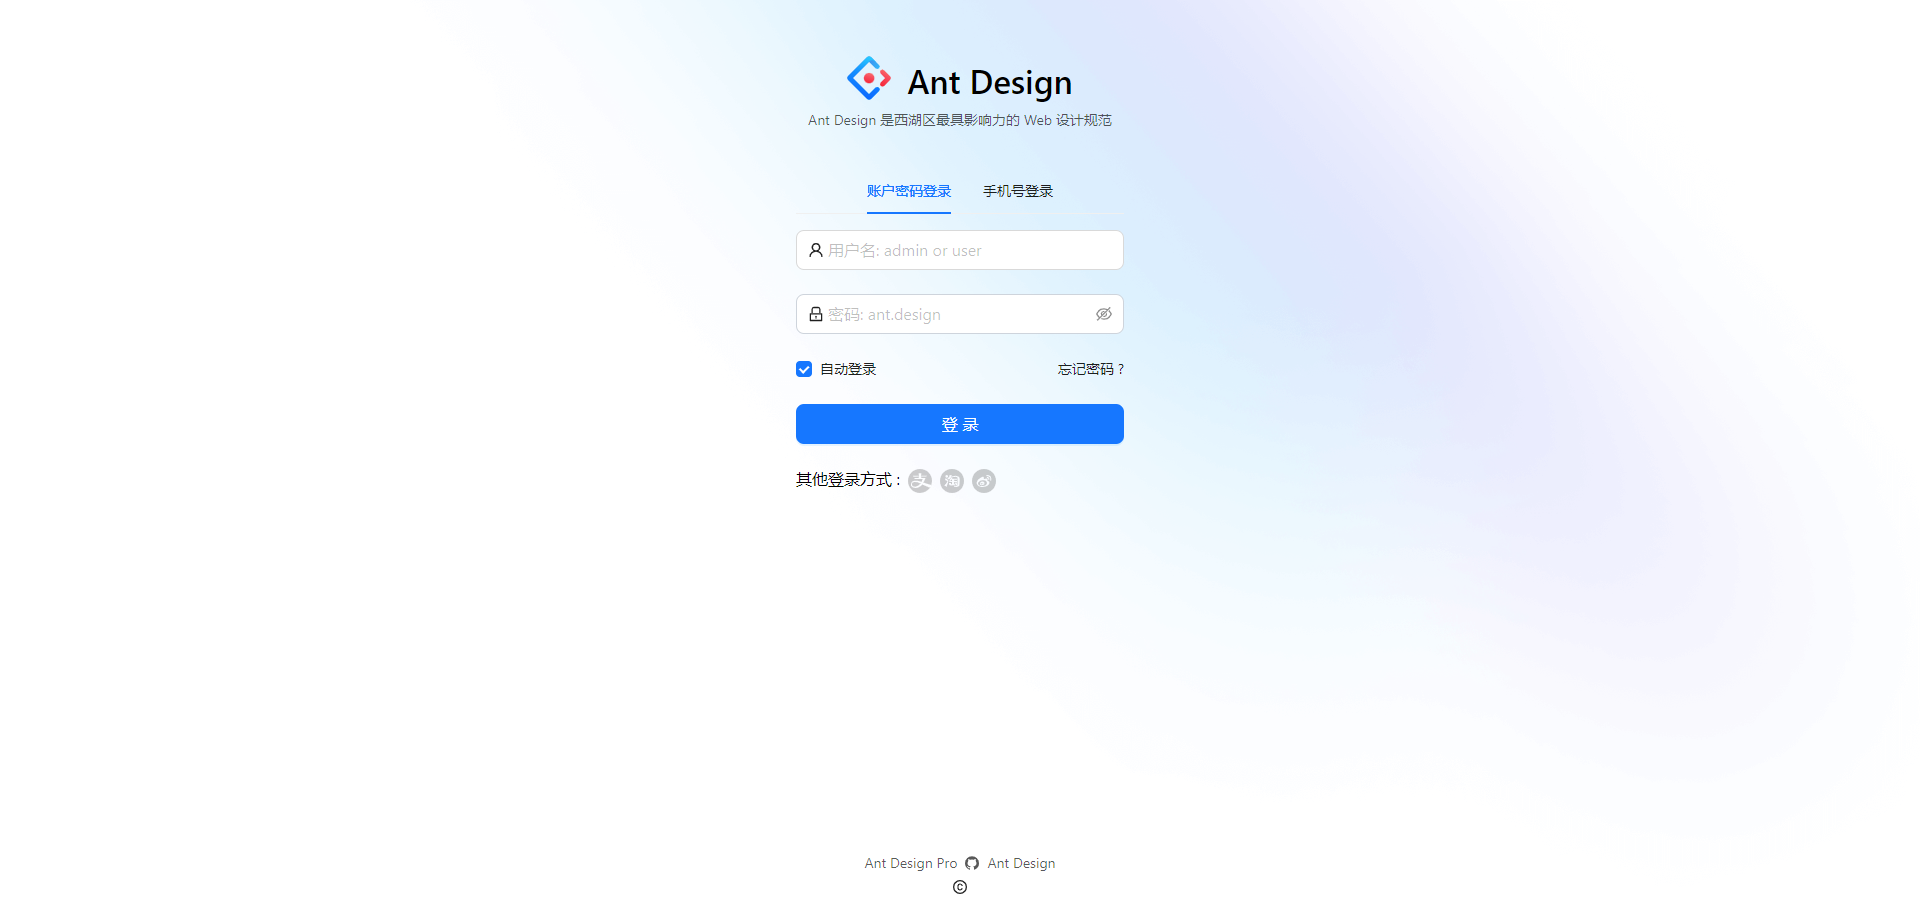
訪問
后端項目搭建
初始化
使用idea開發工具自帶 Spring Initializr 完成項目創建
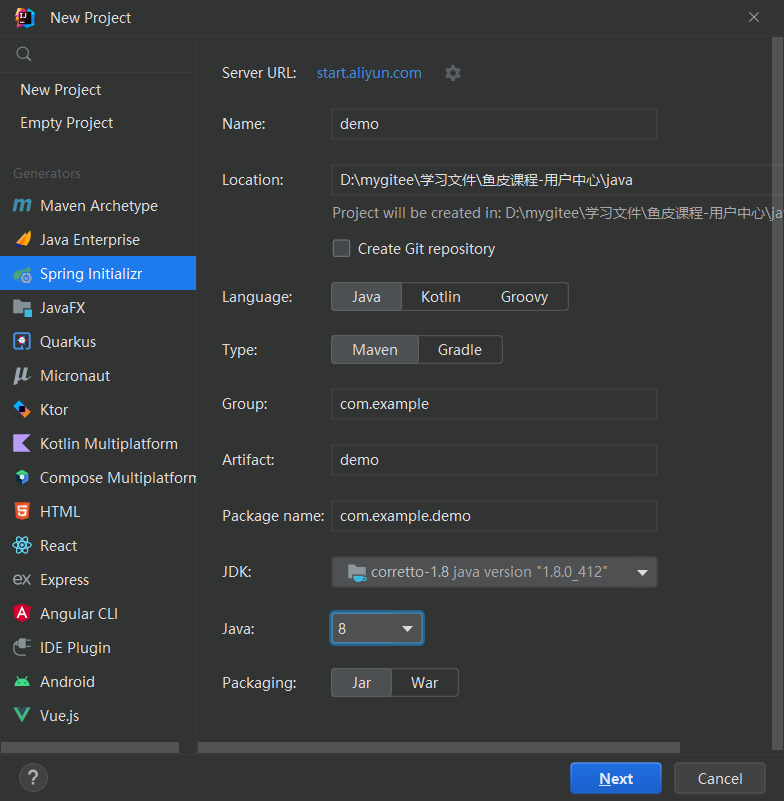
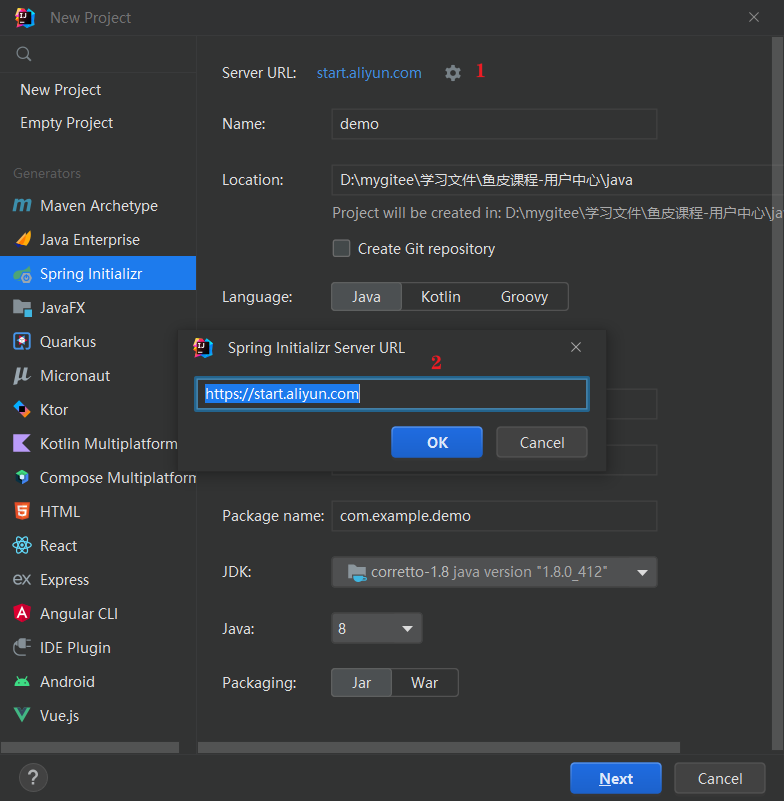
如果Java版本無法選中8,可以切換上面的 Server URL 為阿里的源 https://start.aliyun.com,然后就可以選擇8版本了
接著點擊 Next選擇常用的開發依賴,下面我列出一些基本的依賴
<?xml version="1.0" encoding="UTF-8"?>
<project xmlns="http://maven.apache.org/POM/4.0.0" xmlns:xsi="http://www.w3.org/2001/XMLSchema-instance"xsi:schemaLocation="http://maven.apache.org/POM/4.0.0 https://maven.apache.org/xsd/maven-4.0.0.xsd"><modelVersion>4.0.0</modelVersion><groupId>com.szx</groupId><artifactId>user-center</artifactId><version>0.0.1-SNAPSHOT</version><name>user-center</name><description>user-center</description><properties><java.version>1.8</java.version><project.build.sourceEncoding>UTF-8</project.build.sourceEncoding><project.reporting.outputEncoding>UTF-8</project.reporting.outputEncoding><spring-boot.version>2.6.13</spring-boot.version></properties><dependencies><dependency><groupId>org.springframework.boot</groupId><artifactId>spring-boot-starter-web</artifactId></dependency><dependency><groupId>org.mybatis.spring.boot</groupId><artifactId>mybatis-spring-boot-starter</artifactId><version>2.2.2</version></dependency><dependency><groupId>org.projectlombok</groupId><artifactId>lombok</artifactId><optional>true</optional></dependency><dependency><groupId>mysql</groupId><artifactId>mysql-connector-java</artifactId></dependency><dependency><groupId>com.baomidou</groupId><artifactId>mybatis-plus-boot-starter</artifactId><version>3.4.2</version></dependency><dependency><groupId>junit</groupId><artifactId>junit</artifactId><version>4.12</version></dependency><dependency><groupId>cn.hutool</groupId><artifactId>hutool-all</artifactId><version>5.8.26</version></dependency><!--swagger--><dependency><groupId>io.springfox</groupId><artifactId>springfox-boot-starter</artifactId><version>3.0.0</version></dependency><dependency><groupId>org.springframework.boot</groupId><artifactId>spring-boot-starter-test</artifactId><scope>test</scope></dependency></dependencies><dependencyManagement><dependencies><dependency><groupId>org.springframework.boot</groupId><artifactId>spring-boot-dependencies</artifactId><version>${spring-boot.version}</version><type>pom</type><scope>import</scope></dependency></dependencies></dependencyManagement><build><plugins><plugin><groupId>org.apache.maven.plugins</groupId><artifactId>maven-compiler-plugin</artifactId><version>3.8.1</version><configuration><source>1.8</source><target>1.8</target><encoding>UTF-8</encoding></configuration></plugin><plugin><groupId>org.springframework.boot</groupId><artifactId>spring-boot-maven-plugin</artifactId><version>${spring-boot.version}</version><configuration><mainClass>com.szx.usercenter.UserCenterApplication</mainClass><skip>true</skip></configuration><executions><execution><id>repackage</id><goals><goal>repackage</goal></goals></execution></executions></plugin></plugins></build></project>
配置文件
application.yml
server:port: 8080spring:application:name: user-center# 數據源配置datasource:driver-class-name: com.mysql.cj.jdbc.Driverurl: jdbc:mysql://localhost:3306/user-center?useUnicode=true&characterEncoding=utf-8&useSSL=false&serverTimezone=Asia/Shanghaiusername: rootpassword: abc123# 配置日期返回格式jackson:# 日期格式date-format: yyyy-MM-dd HH:mm:ss# 時區time-zone: GMT+8# 非空的屬性值才會被包含在結果中default-property-inclusion: non_nullmvc:pathmatch:# swagger配置路徑匹配規則matching-strategy: ant_path_matchermybatis-plus:mapper-locations: classpath:/mapper/**.xmlconfiguration:# 開啟控制臺SQL輸出log-impl: org.apache.ibatis.logging.stdout.StdOutImpl
SwaggerUI配置
package com.szx.usercenter.config;import org.springframework.context.annotation.Bean;
import org.springframework.context.annotation.Configuration;
import springfox.documentation.builders.ApiInfoBuilder;
import springfox.documentation.service.ApiInfo;
import springfox.documentation.spi.DocumentationType;
import springfox.documentation.spring.web.plugins.Docket;
import springfox.documentation.swagger2.annotations.EnableSwagger2;/*** @author songzx* @create 2022-09-22 11:21*/
@Configuration
@EnableSwagger2
public class SwaggerConfig {@Beanpublic Docket webApiConfig(){return new Docket(DocumentationType.SWAGGER_2).groupName("webApi").apiInfo(webApiInfo()).select().paths(path -> !path.contains("/error"))  // 過濾掉SwaggerUI自帶的error路徑的api.build();}public ApiInfo webApiInfo(){return new ApiInfoBuilder().title("用戶中心接口文檔").build();}
}
MybatisPlus分頁插件和自動插入當前日期
@Configuration
public class MybatisPlusConfig implements MetaObjectHandler {// 分頁插件@Beanpublic MybatisPlusInterceptor mybatisPlusInterceptor() {MybatisPlusInterceptor interceptor = new MybatisPlusInterceptor();interceptor.addInnerInterceptor(new PaginationInnerInterceptor(DbType.MYSQL));return interceptor;}// 創建日期和更新日期自動更新@Overridepublic void insertFill(MetaObject metaObject) {setFieldValByName("createTime", new Date(),metaObject);setFieldValByName("updateTime",new Date(),metaObject);}// 更新日期自動更新@Overridepublic void updateFill(MetaObject metaObject) {setFieldValByName("updateTime",new Date(),metaObject);}
}
啟動類設置
package com.szx.usercenter;import lombok.extern.log4j.Log4j2;
import org.mybatis.spring.annotation.MapperScan;
import org.springframework.boot.SpringApplication;
import org.springframework.boot.autoconfigure.SpringBootApplication;
import org.springframework.context.ConfigurableApplicationContext;
import org.springframework.core.env.Environment;import java.net.InetAddress;
import java.net.UnknownHostException;@Log4j2
@SpringBootApplication
@MapperScan("com.szx.usercenter.mapper")
public class UserCenterApplication {public static void main(String[] args) throws UnknownHostException {ConfigurableApplicationContext ioc = SpringApplication.run(UserCenterApplication.class, args);Environment env = ioc.getEnvironment();String host = InetAddress.getLocalHost().getHostAddress();String port = env.getProperty("server.port");log.info("\n    ----------------------------------------------------------\n\t" +"Application '{}' 正在運行中... Access URLs:\n\t" +"Local: \t\thttp://localhost:{}\n\t" +"External: \thttp://{}:{}\n\t" +"Doc: \thttp://{}:{}/doc.html\n\t" +"SwaggerDoc: \thttp://{}:{}/swagger-ui/index.html\n\t" +"----------------------------------------------------------",env.getProperty("spring.application.name"),env.getProperty("server.port"),host, port,host, port,host, port);}}
IDEA自帶的代碼生成器
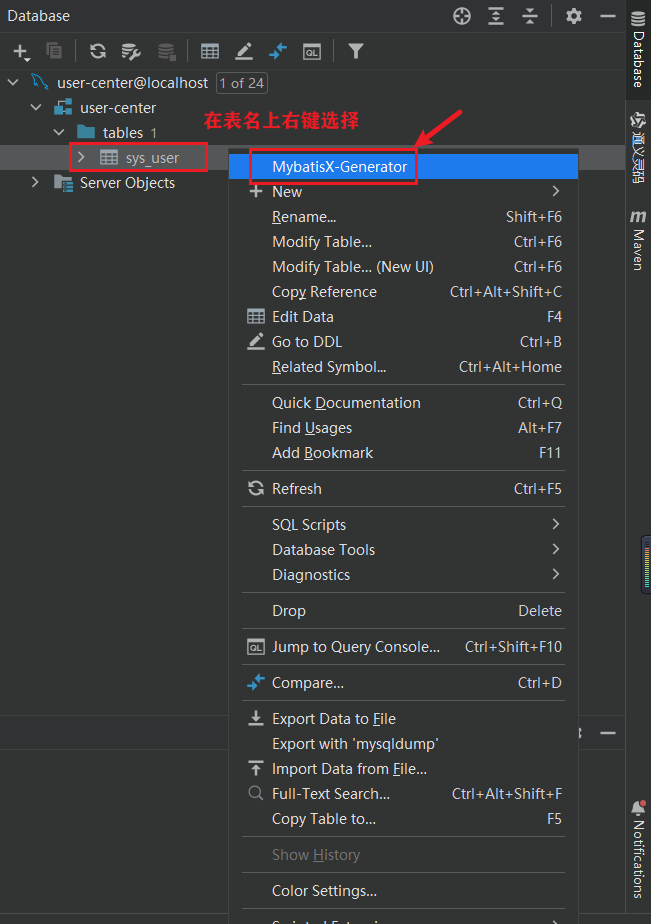
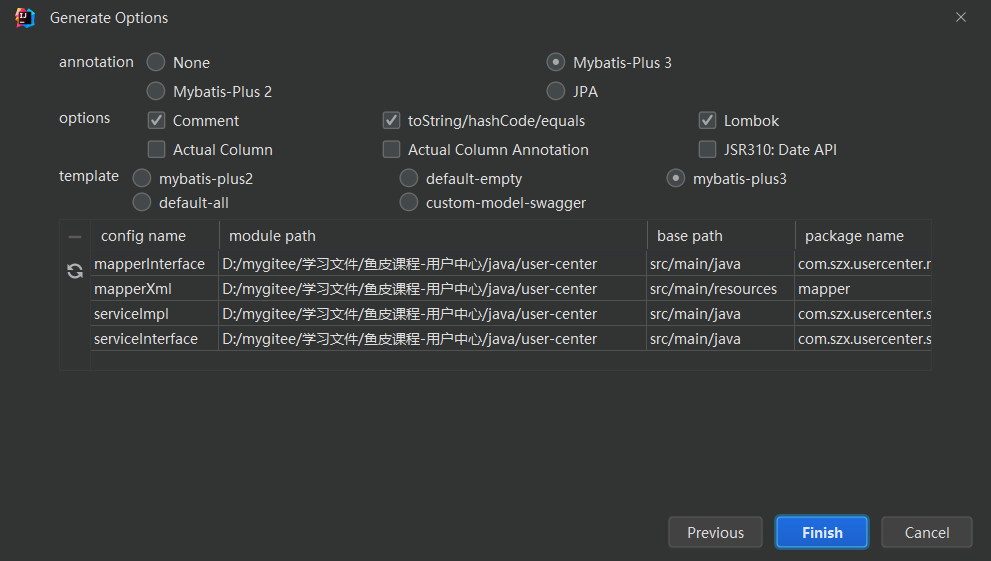
注意:生成的文件會覆蓋原有文件
統一結果返回類
Response
package com.szx.usercenter.util;import com.fasterxml.jackson.annotation.JsonInclude;/*** @author songzx* @date 2023/6/4* @apiNote*/
@JsonInclude(JsonInclude.Include.NON_NULL) // 值等于null的屬性不返回
public class Response<T> {private String code;private String msg;private T data;/*** @title 成功消息* @return*/public static <T> Response<T> success() {return rspMsg(ResponseEnum.SUCCESS);}/*** @title 失敗消息* @return*/public static <T> Response<T> error() {return rspMsg(ResponseEnum.SERVER_INNER_ERR);}/*** @title 自定義消息* @return*/public static <T> Response<T> rspMsg(ResponseEnum responseEnum) {Response<T> message = new Response<T>();message.setCode(responseEnum.getCode());message.setMsg(responseEnum.getMsg());return message;}/*** @title 自定義消息* @return*/public static <T> Response<T> rspMsg(String code , String msg) {Response<T> message = new Response<T>();message.setCode(code);message.setMsg(msg);return message;}/*** @title 返回數據* @param data* @return*/public static <T> Response<T> rspData(T data) {Response<T> responseData = new Response<T>();responseData.setCode(ResponseEnum.SUCCESS.getCode());responseData.setData(data);return responseData;}public static <T> Response<T> error(T data) {Response<T> responseData = new Response<T>();responseData.setCode(ResponseEnum.ERROR.getCode());responseData.setData(data);return responseData;}/*** @title 返回數據-自定義code* @param data* @return*/public static <T> Response<T> rspData(String code , T data) {Response<T> responseData = new Response<T>();responseData.setCode(code);responseData.setData(data);return responseData;}public String getCode() {return code;}public void setCode(String code) {this.code = code;}public String getMsg() {return msg;}public void setMsg(String msg) {this.msg = msg;}public T getData() {return data;}public void setData(T data) {this.data = data;}
}
枚舉類 ResponseEnum
package com.szx.usercenter.util;/*** @author songzx* @create 2023-12-05 14:25*/
public enum ResponseEnum {// 可以根據自己的實際需要增加狀態碼SUCCESS("200", "成功"),ERROR("500","系統異常"),SERVER_INNER_ERR("500","系統繁忙"),LOGIN_EXPIRED("401","登錄過期"),PARAM_LACK("100" , "非法參數"),OPERATION_FAILED("101" ,"操作失敗");private String code;private String msg;ResponseEnum(String code, String msg) {this.code = code;this.msg = msg;}public String getCode() {return code;}public void setCode(String code) {this.code = code;}public String getMsg() {return msg;}public void setMsg(String msg) {this.msg = msg;}
}
編寫測試接口
package com.szx.usercenter.controller;import com.szx.usercenter.domain.SysUser;
import com.szx.usercenter.service.SysUserService;
import com.szx.usercenter.util.Response;
import io.swagger.annotations.Api;
import io.swagger.annotations.ApiOperation;
import org.springframework.web.bind.annotation.*;import javax.annotation.Resource;
import java.util.List;/*** @author songzx* @create 2024-05-11 10:23*/
@RestController
@RequestMapping("/sysUser")
@Api(tags = "用戶管理")
public class SusUserController {@ResourceSysUserService sysUserService;/*** 獲取所有用戶* @return*/@GetMapping("getAllUser")@ApiOperation("獲取所有用戶")public Response<List<SysUser>> getUserList() {return Response.rspData(sysUserService.list());}/*** 登錄* @param sysUser* @return*/@PostMapping("login")@ApiOperation("登錄")public Response login(@RequestBody SysUser sysUser) {SysUser login = sysUserService.login(sysUser);if(login != null){login.setPassword(null);return Response.rspData(login);}else{return Response.error("用戶名或密碼錯誤");}}
}
重啟項目,訪問Swagger頁面試試

至此后端項目搭建完成
打包pom通用配置
<build><plugins><plugin><groupId>org.apache.maven.plugins</groupId><artifactId>maven-compiler-plugin</artifactId><version>3.8.1</version> <!-- 或者你使用的版本 --><configuration><source>1.8</source><target>1.8</target></configuration></plugin><plugin><groupId>org.springframework.boot</groupId><artifactId>spring-boot-maven-plugin</artifactId><version>2.3.7.RELEASE</version><executions><execution><goals><goal>repackage</goal></goals></execution></executions></plugin></plugins>
</build>
SQL建表語句
可以復制若依的表來使用,下面是sql地址
https://gitee.com/y_project/RuoYi-Vue/blob/master/sql/ry_20231130.sql
用戶表 sys_user
drop table if exists sys_user;
create table sys_user (user_id           bigint(20)      not null auto_increment    comment '用戶ID',dept_id           bigint(20)      default null               comment '部門ID',user_name         varchar(30)     not null                   comment '用戶賬號',nick_name         varchar(30)     not null                   comment '用戶昵稱',user_type         varchar(2)      default '00'               comment '用戶類型(00系統用戶)',email             varchar(50)     default ''                 comment '用戶郵箱',phonenumber       varchar(11)     default ''                 comment '手機號碼',sex               char(1)         default '0'                comment '用戶性別(0男 1女 2未知)',avatar            varchar(100)    default ''                 comment '頭像地址',password          varchar(100)    default ''                 comment '密碼',status            char(1)         default '0'                comment '帳號狀態(0正常 1停用)',del_flag          char(1)         default '0'                comment '刪除標志(0代表存在 2代表刪除)',login_ip          varchar(128)    default ''                 comment '最后登錄IP',login_date        datetime                                   comment '最后登錄時間',create_by         varchar(64)     default ''                 comment '創建者',create_time       datetime                                   comment '創建時間',update_by         varchar(64)     default ''                 comment '更新者',update_time       datetime                                   comment '更新時間',remark            varchar(500)    default null               comment '備注',primary key (user_id)
) engine=innodb auto_increment=100 comment = '用戶信息表';
角色表 sys_role
drop table if exists sys_role;
create table sys_role (role_id              bigint(20)      not null auto_increment    comment '角色ID',role_name            varchar(30)     not null                   comment '角色名稱',role_key             varchar(100)    not null                   comment '角色權限字符串',del_flag             char(1)         default '0'                comment '刪除標志(0代表存在 1代表刪除)',create_by            varchar(64)     default ''                 comment '創建者',create_time          datetime                                   comment '創建時間',update_by            varchar(64)     default ''                 comment '更新者',update_time          datetime                                   comment '更新時間',remark               varchar(500)    default null               comment '備注',primary key (role_id)
) engine=innodb auto_increment=100 comment = '角色信息表';
用戶角色表 sys_user_role
drop table if exists sys_user_role;
create table sys_user_role (user_id   bigint(20) not null comment '用戶ID',role_id   bigint(20) not null comment '角色ID',primary key(user_id)
) engine=innodb comment = '用戶和角色關聯表';
角色菜單表 sys_role_menu
drop table if exists sys_role_menu;
create table sys_role_menu (role_id   	 bigint(0) 	not null comment '角色ID',routes    	 text                comment '保存的routes數據',checked_keys   text 				 comment '選中的key',primary key(role_id)
) engine=innodb comment = '角色和菜單關聯表';
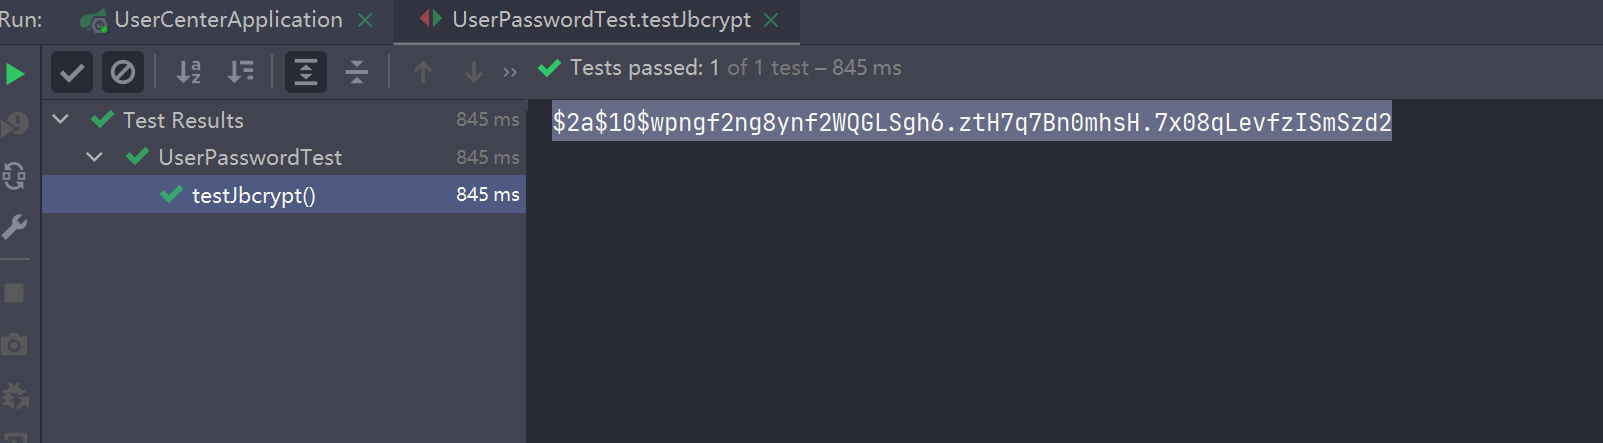
密碼的加密和校驗
用到了hutool包中的BCrypt加密工具類
package com.szx.usercenter;import cn.hutool.crypto.digest.BCrypt;
import org.junit.jupiter.api.Test;
import org.springframework.boot.test.context.SpringBootTest;/*** @author songzx* @date 2024/5/12* @apiNote*/
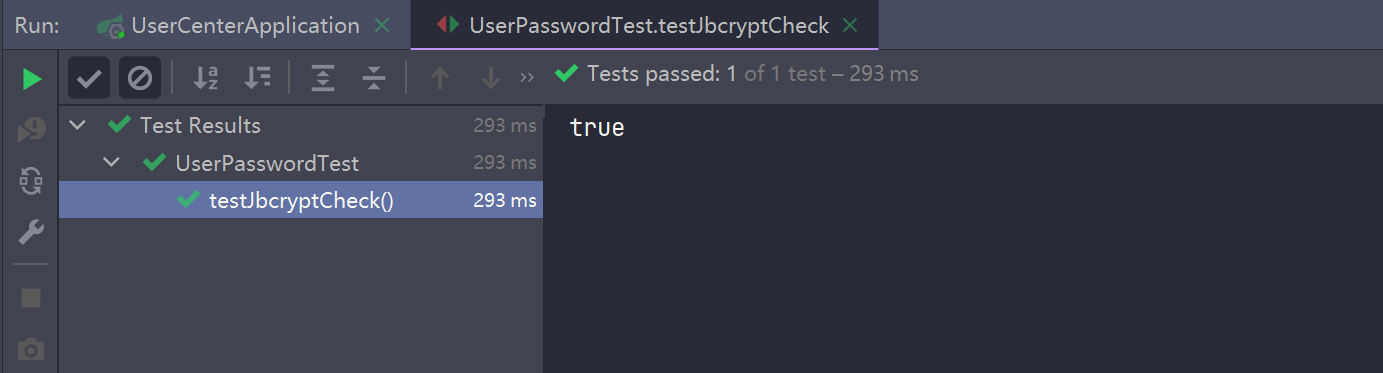
@SpringBootTest
public class UserPasswordTest {/*** 密碼加密*/@Testvoid testJbcrypt() {String passwordToHash = "abc123";// BCrypt.gensalt()會隨機生成一個數作為鹽,因此密碼相同情況下,每次的密文是不一樣String hashedPassword = BCrypt.hashpw(passwordToHash, BCrypt.gensalt());System.out.println(hashedPassword);}/*** 密碼校驗*/@Testvoid testJbcryptCheck() {String passwordToCheck = "abc123";String hashedPassword = "$2a$10$wpngf2ng8ynf2WQGLSgh6.ztH7q7Bn0mhsH.7x08qLevfzISmSzd2";boolean checkpw = BCrypt.checkpw(passwordToCheck, hashedPassword);System.out.println(checkpw);}
}
后端功能開發
注冊邏輯
- 用戶名不能有特殊字符,并且必須超過6位數
- 密碼必須超過6位數
- 用戶名不能重復
- 密碼加密后保存到數據庫中
注冊接口開發
@RestController
@RequestMapping("/sysUser")
@Api(tags = "用戶管理")
public class SusUserController {@ResourceSysUserService sysUserService;/*** 用戶注冊* @param username 用戶名* @param password 密碼* @return*/@ApiOperation("用戶注冊")@PostMapping("register")public Response register(String username, String password){return sysUserService.register(username,password);}
}
實現 register 方法
@Override
public Response register(String username, String password) {// 1.用戶名不能有特殊字符,并且必須超過6位數if(!username.matches("^[a-zA-Z0-9_-]{6,16}$")){return Response.error("用戶名必須超過6位數,并且不能有特殊字符");}// 2.密碼必須超過6位數if(password.length() < 6){return Response.error("密碼必須超過6位數");}// 3.用戶名不能重復if(this.getOne(new LambdaQueryWrapper<SysUser>().eq(SysUser::getUserName, username)) != null){return Response.error("用戶名已存在");}// 4.添加用戶到表中SysUser sysUser = new SysUser();sysUser.setUserName(username);sysUser.setNickName(username);sysUser.setPassword(BCrypt.hashpw(password, BCrypt.gensalt())); // 密碼加密保存boolean isOk = this.save(sysUser);return isOk ? Response.success() : Response.error("注冊失敗");
}
登錄邏輯
- 根據用戶名獲取數據庫表中保存的用戶信息
- 在用傳遞進來的密碼和表中的密碼進行密碼校驗
- 校驗成功返回用戶信息
- 否則登錄失敗
登錄接口開發
@RestController
@RequestMapping("/sysUser")
@Api(tags = "用戶管理")
public class SusUserController {@ResourceSysUserService sysUserService;/*** 登錄* @param sysUser* @return*/@PostMapping("login")@ApiOperation("登錄")public Response login(@RequestBody SysUser sysUser) {return sysUserService.login(sysUser);}
}
login 方法實現
@Override
public Response login(SysUser sysUser) {// 1.獲取用戶填寫的用戶名和密碼String userName = sysUser.getUserName();String password = sysUser.getPassword();// 2.校驗用戶名密碼if(userName == null || password == null){return Response.error("用戶名或密碼不能為空");}SysUser one = this.getOne(new LambdaQueryWrapper<SysUser>().eq(SysUser::getUserName, userName));if(one == null){return Response.error("用戶名不存在");}if(!BCrypt.checkpw(password, one.getPassword())){return Response.error("密碼錯誤");}// 3.返回用戶信息,清空返回體中的密碼one.setPassword(null);return Response.rspData(one);
}
生成Token
給登錄接口返回的內容中添加Token
在 login 實現方法中增加一個行代碼,JwtHelper 的使用方法看的的這個文章,寫的很詳細
/*** 登錄* @param sysUser* @return*/
@Override
public Response login(SysUser sysUser) {// 1.獲取用戶填寫的用戶名和密碼String userName = sysUser.getUserName();String password = sysUser.getPassword();// 2.校驗用戶名密碼if(userName == null || password == null){return Response.error("用戶名或密碼不能為空");}SysUser one = this.getOne(new LambdaQueryWrapper<SysUser>().eq(SysUser::getUserName, userName));if(one == null){return Response.error("用戶名不存在");}if(!BCrypt.checkpw(password, one.getPassword())){return Response.error("密碼錯誤");}// 3.返回用戶信息,清空返回體中的密碼one.setPassword(null);// 生成tokenone.setToken(JwtHelper.createToken(sysUser.getUserId(), sysUser.getUserName()));return Response.rspData(one);
}
添加Token攔截器
編寫 Token 配置類
package com.szx.usercenter.config;import com.szx.usercenter.handle.TokenHandle;
import org.springframework.context.annotation.Configuration;
import org.springframework.web.servlet.config.annotation.InterceptorRegistry;
import org.springframework.web.servlet.config.annotation.WebMvcConfigurer;/*** @author songzx* @date 2024/5/12* @apiNote*/
@Configuration
public class TokenConfig implements WebMvcConfigurer {@Overridepublic void addInterceptors(InterceptorRegistry registry) {registry.addInterceptor(new TokenHandle()).addPathPatterns("/**").excludePathPatterns("/sysUser/login","/sysUser/register","/swagger-ui.html","/swagger-ui/index.html","/swagger-resources","/v2/api-docs","/v2/api-docs-ext","/doc.html","/swagger-resources/configuration/ui","/swagger-resources/configuration/security","/swagger-resources/configuration/ui","/webjars/**","/swagger-resources/**");}
}
TokenHandle 代碼,從請求頭中獲取 X-Token,進行校驗,如果為空或者過期,則拋出自定義全局異常。
package com.szx.usercenter.handle;import cn.hutool.core.util.StrUtil;
import com.szx.usercenter.util.JwtHelper;
import com.szx.usercenter.util.ResponseEnum;
import org.springframework.web.method.HandlerMethod;
import org.springframework.web.servlet.HandlerInterceptor;import javax.servlet.http.HttpServletRequest;
import javax.servlet.http.HttpServletResponse;/*** @author songzx* @date 2024/5/12* @apiNote*/
public class TokenHandle implements HandlerInterceptor {@Overridepublic boolean preHandle(HttpServletRequest request, HttpServletResponse response, Object handler) throws Exception {if(!(handler instanceof HandlerMethod)){return true;}// 從請求頭中獲取tokenString token = request.getHeader("X-Token");// 獲取請求來源String referer = request.getHeader("Referer");boolean fromSwagger = referer.endsWith("swagger-ui/index.html");// 校驗tokenif(!fromSwagger && (StrUtil.isEmpty(token) || JwtHelper.tokenExpired(token))){// 如果token校驗失敗則拋出自定義全局異常throw new CenterExceptionHandler(ResponseEnum.LOGIN_EXPIRED);}return true;}
}
自定義全局異常
新建全局異常處理類
GlobalExceptionHandler
package com.szx.usercenter.handle;import cn.hutool.core.exceptions.ExceptionUtil;
import com.szx.usercenter.util.Response;
import lombok.extern.log4j.Log4j2;
import org.springframework.web.bind.annotation.ExceptionHandler;
import org.springframework.web.bind.annotation.ResponseBody;
import org.springframework.web.bind.annotation.RestControllerAdvice;/*** @author songzx* @date 2024/5/12* @apiNote*/
@RestControllerAdvice
@Log4j2
public class GlobalExceptionHandler {// 全局異常處理@ExceptionHandler(Exception.class)@ResponseBodypublic Response<Object> error(Exception e){log.error(ExceptionUtil.getMessage(e));e.printStackTrace();// 將異常轉成string返回出去return Response.error(e.getMessage());}/*** 處理自定義的異常-CenterExceptionHandler* @param e* @return*/@ExceptionHandler(CenterExceptionHandler.class)@ResponseBodypublic Response<Object>  businessExceptionHandler(CenterExceptionHandler e){log.error("CenterExceptionHandler:" + e.getMessage(),e);return Response.rspMsg(e.getCode(),e.getMessage());}
}
新建自定義異常處理類
CenterExceptionHandler
package com.szx.usercenter.handle;import com.szx.usercenter.util.ResponseEnum;
import lombok.AllArgsConstructor;
import lombok.Data;
import lombok.NoArgsConstructor;/*** 自定義全局異常處理類* @author songzx* @date 2024/5/12* @apiNote*/
@Data
public class CenterExceptionHandler extends RuntimeException{/*** 錯誤碼*/private String code;/*** 業務異常** @param message     信息* @param code        錯誤碼*/public CenterExceptionHandler(String message, String code) {super(message);this.code = code;}/*** 業務異常** @param errorCode 錯誤代碼*/public CenterExceptionHandler(ResponseEnum errorCode) {super(errorCode.getMsg());this.code = errorCode.getCode();}/*** 默認業務異常,狀態默認500** @param message 信息*/public CenterExceptionHandler(String message) {super(message);this.code = ResponseEnum.ERROR.getCode();}/*** 默認業務異常*/public CenterExceptionHandler() {super(ResponseEnum.ERROR.getMsg());this.code = ResponseEnum.ERROR.getCode();}
}
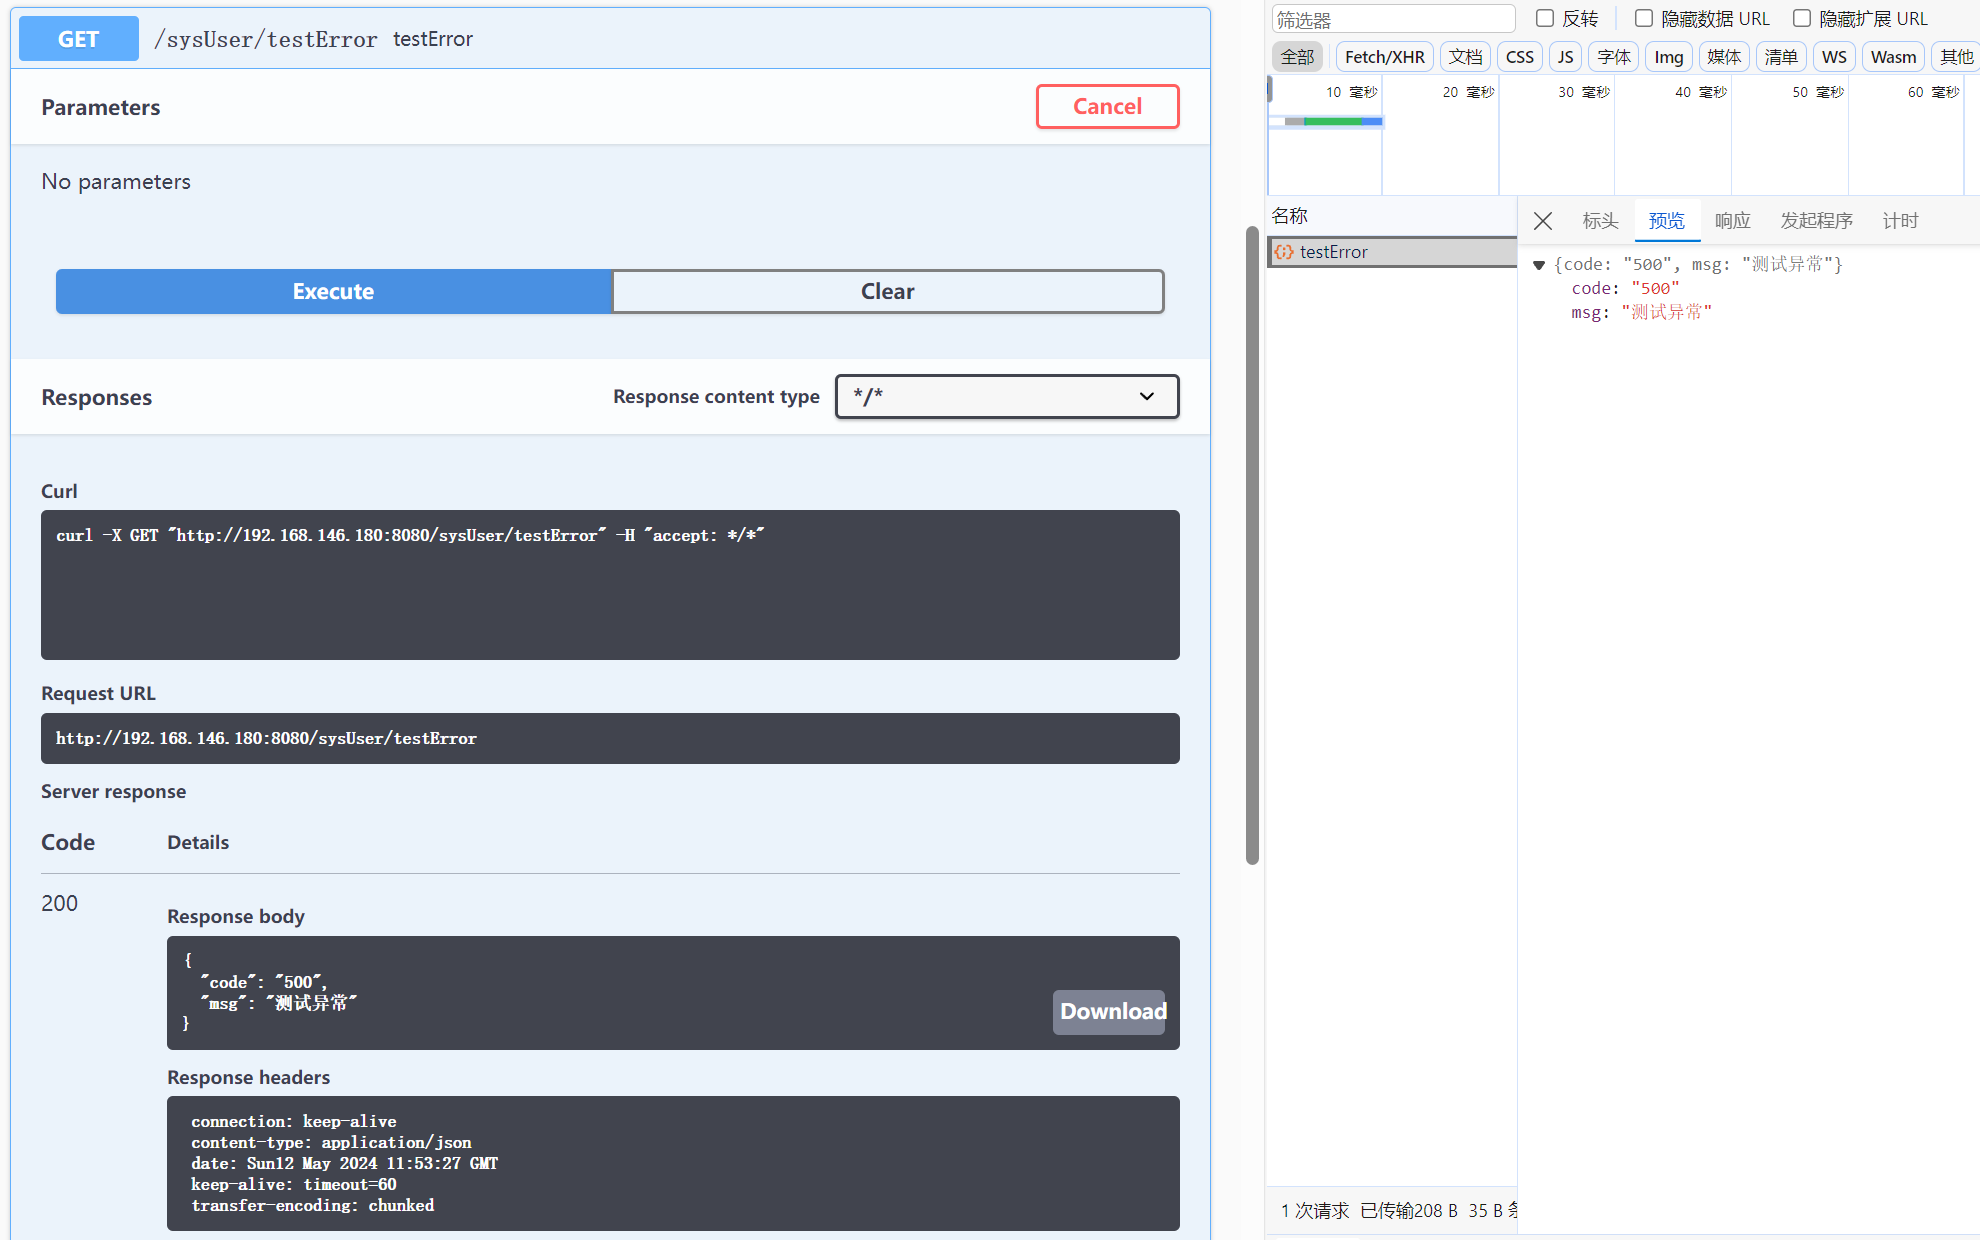
然后再任何需要拋出異常的地方直接使用即可
例如
@GetMapping("testError")
public Response testError(){throw new CenterExceptionHandler("測試異常");
}
查詢接口開發
接口實現類 SysUserServiceImpl 添加方法
// 用戶信息脫敏方法
@Override
public SysUser getSefUser(SysUser user) {SysUser sysUser = ObjUtil.clone(user);sysUser.setPassword(null);return sysUser;
}@Override
public Response getPageUserList(SysUser sysUser) {Page<SysUser> sysUserPage = new Page<>(sysUser.getCurrent(), sysUser.getPageSize());LambdaQueryWrapper<SysUser> qw = new LambdaQueryWrapper<>();// 用戶名稱查詢if (StrUtil.isNotEmpty(sysUser.getUserName())) {qw.like(SysUser::getUserName, sysUser.getUserName());}// 手機號查詢if (StrUtil.isNotEmpty(sysUser.getPhonenumber())) {qw.like(SysUser::getPhonenumber, sysUser.getPhonenumber());}// 創建日期查詢,查詢當天內的所有數據if (ObjectUtil.isNotEmpty(sysUser.getCreateTime())) {Date startDate = DateUtil.beginOfDay(sysUser.getCreateTime()); // 將前端傳來的日期轉換為當天的開始時間Date endDate = DateUtil.endOfDay(startDate);  // 將結束日期設置為當天的結束時間qw.between(SysUser::getCreateTime, startDate, endDate);}this.page(sysUserPage, qw);// 返回的用戶信息脫敏List<SysUser> userList = sysUserPage.getRecords();sysUserPage.setRecords(userList.stream().map(user -> getSefUser(user)).collect(Collectors.toList()));return Response.rspData(sysUserPage);
}
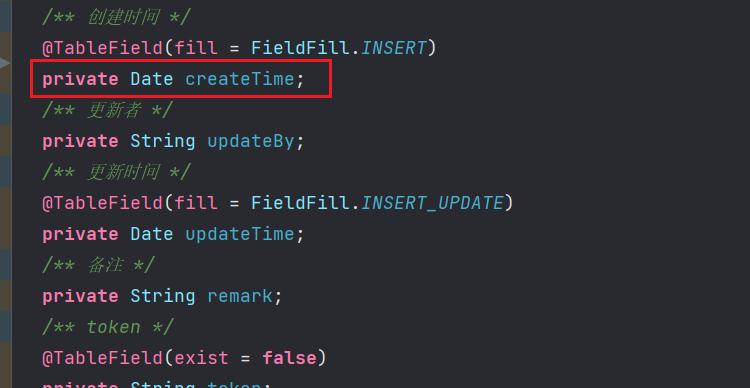
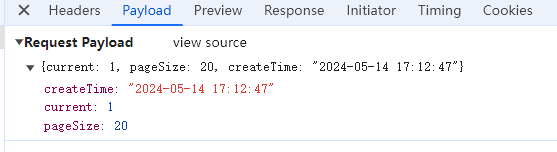
這里前端傳遞過來的日期格式是字符串類型的日期,例如:2024-05-14 17:12:47,但是后端定義的 createTime 字段類型是 Date 類型,默認會出現一個類型轉換錯誤的異常,如下圖
前端傳遞的參數
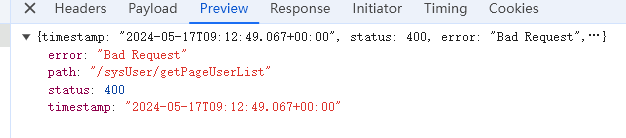
我們可以修改配置文件,增加一個日期轉換格式的配置
spring:# 配置日期返回格式jackson:# 日期格式date-format: yyyy-MM-dd HH:mm:ss# 時區time-zone: GMT+8# 非空的屬性值才會被包含在結果中default-property-inclusion: non_null
重啟項目,再次查詢就不會報錯了

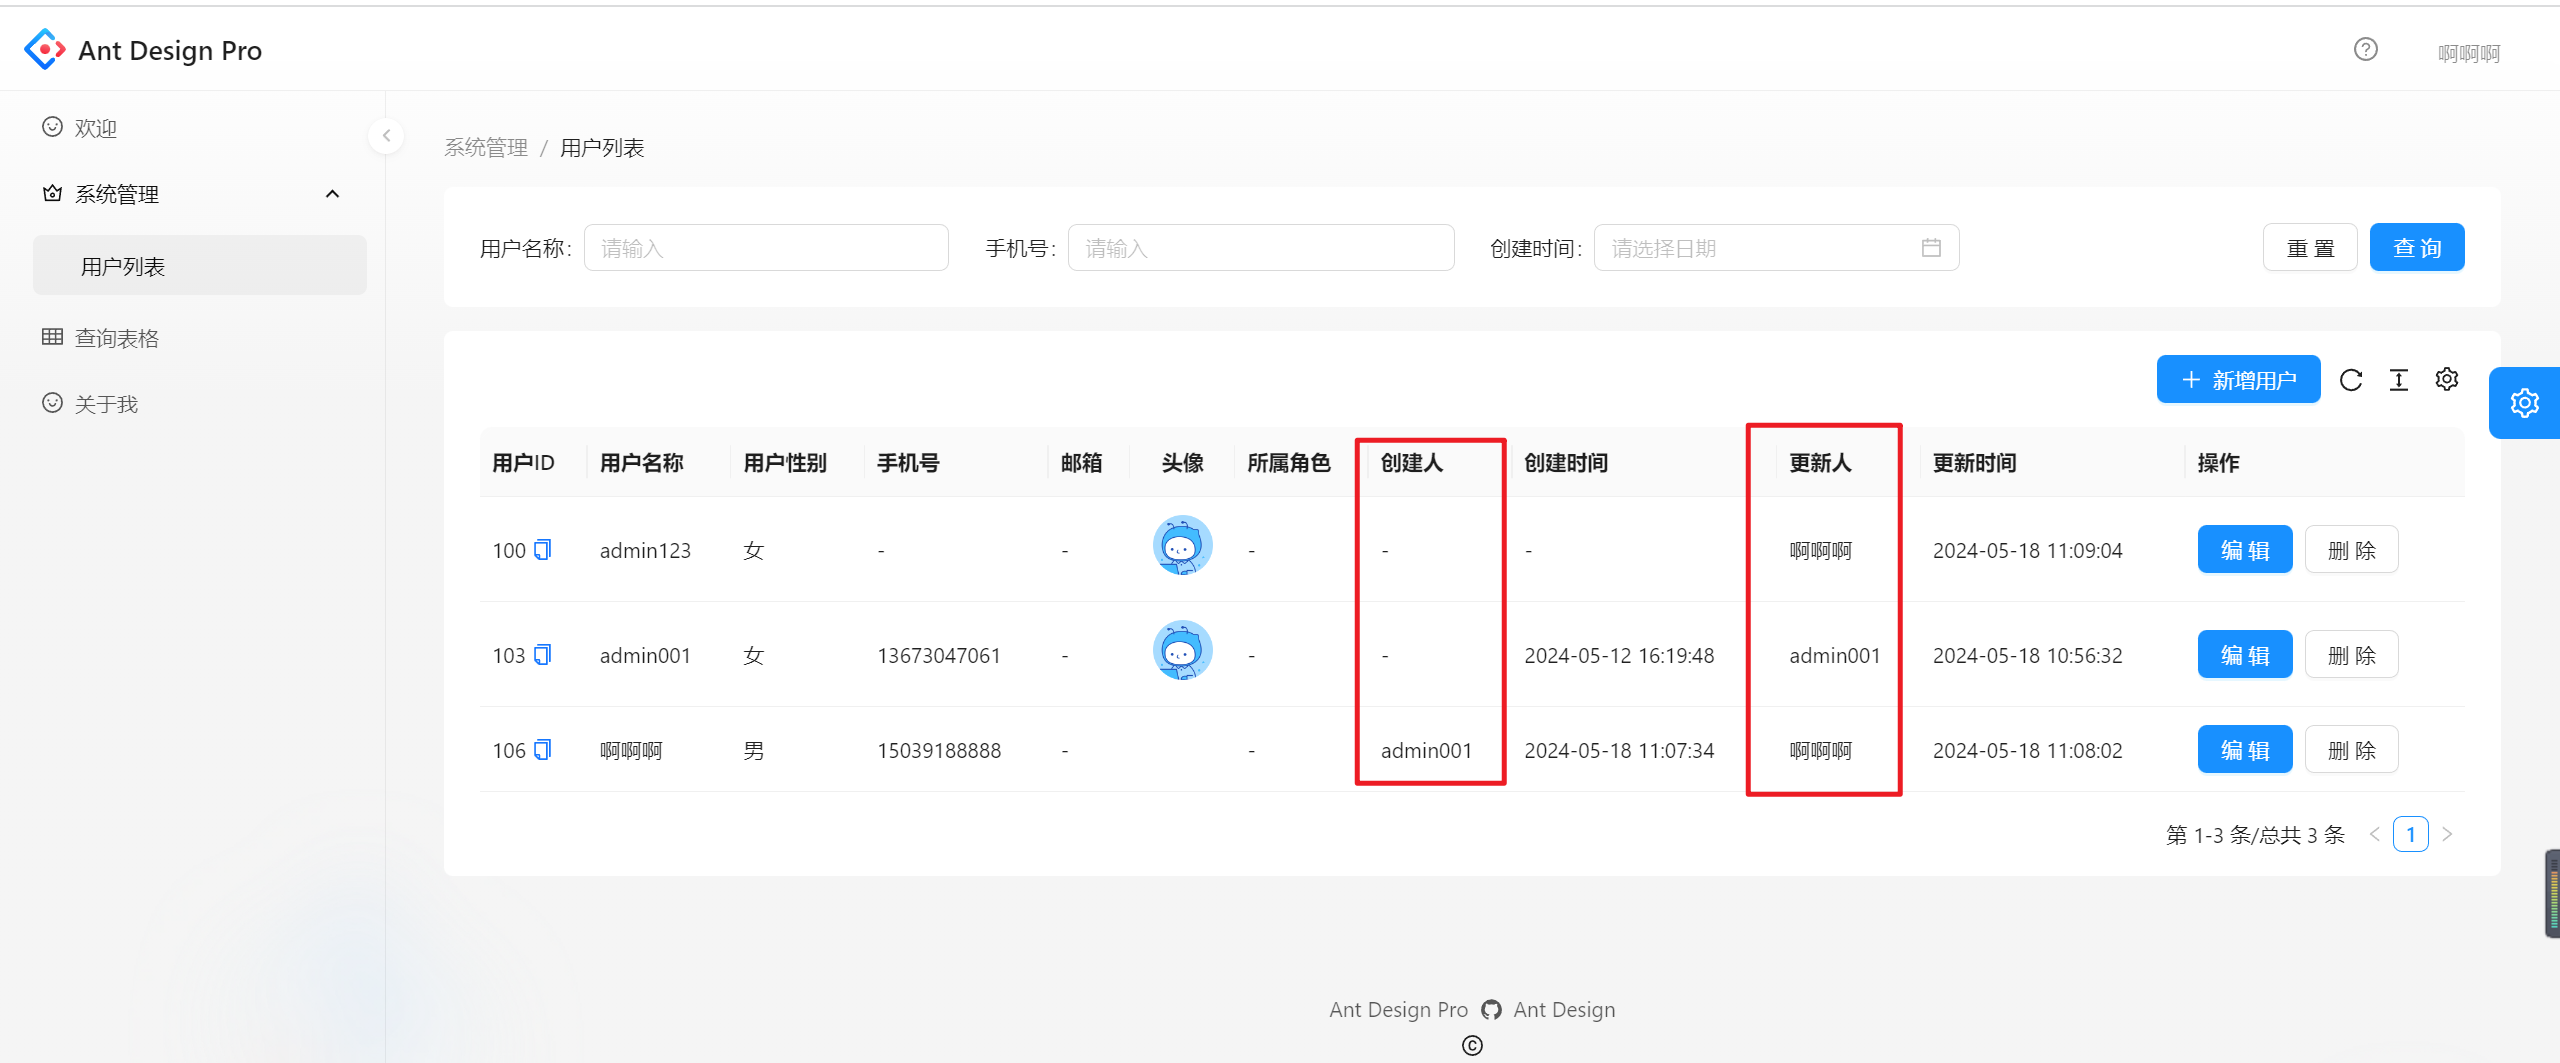
自動填充創建人和更新人
新建一個 BaseUser
package com.szx.usercenter.contance;import lombok.Data;
import org.springframework.stereotype.Component;/*** @author songzx* @date 2024/5/18* @apiNote*/
@Data
@Component // 這里注意添加@Component注解,交給Spring容器管理
public class BaseUser {public static String userName;
}
然后再token攔截器中根據當前請求頭中的tokne獲取當前用戶名,給BaseUser的userName賦值
修改 TokenHandle
package com.szx.usercenter.handle;import cn.hutool.core.util.StrUtil;
import com.szx.usercenter.contance.BaseUser;
import com.szx.usercenter.util.JwtHelper;
import com.szx.usercenter.util.ResponseEnum;
import org.springframework.web.method.HandlerMethod;
import org.springframework.web.servlet.HandlerInterceptor;import javax.servlet.http.HttpServletRequest;
import javax.servlet.http.HttpServletResponse;/*** @author songzx* @date 2024/5/12* @apiNote*/
public class TokenHandle implements HandlerInterceptor {@Overridepublic boolean preHandle(HttpServletRequest request, HttpServletResponse response, Object handler) throws Exception {if (!(handler instanceof HandlerMethod)) {return true;}// 從請求頭中獲取tokenString token = request.getHeader("Authorization");// 獲取請求來源String referer = request.getHeader("Referer");boolean fromSwagger = referer.endsWith("swagger-ui/index.html");// 校驗tokenif (!fromSwagger && (StrUtil.isEmpty(token) || JwtHelper.tokenExpired(token))) {throw new CenterExceptionHandler(ResponseEnum.LOGIN_EXPIRED);}// 獲取用戶名BaseUser.userName = JwtHelper.getUserName(token);return true;}
}
修該 MybatisPlusConfig
package com.szx.usercenter.config;import com.baomidou.mybatisplus.annotation.DbType;
import com.baomidou.mybatisplus.core.handlers.MetaObjectHandler;
import com.baomidou.mybatisplus.extension.plugins.MybatisPlusInterceptor;
import com.baomidou.mybatisplus.extension.plugins.inner.PaginationInnerInterceptor;
import com.szx.usercenter.contance.BaseUser;
import org.apache.ibatis.reflection.MetaObject;
import org.springframework.context.annotation.Bean;
import org.springframework.context.annotation.Configuration;import java.util.Date;/*** @author songzx* @create 2024-05-11 10:08*/
@Configuration
public class MybatisPlusConfig implements MetaObjectHandler {// 分頁插件@Beanpublic MybatisPlusInterceptor mybatisPlusInterceptor() {MybatisPlusInterceptor interceptor = new MybatisPlusInterceptor();interceptor.addInnerInterceptor(new PaginationInnerInterceptor(DbType.MYSQL));return interceptor;}// 創建日期和更新日期自動更新@Overridepublic void insertFill(MetaObject metaObject) {setFieldValByName("createTime", new Date(), metaObject);setFieldValByName("createBy", BaseUser.userName, metaObject);setFieldValByName("updateTime", new Date(), metaObject);setFieldValByName("updateBy", BaseUser.userName, metaObject);}// 更新日期自動更新@Overridepublic void updateFill(MetaObject metaObject) {setFieldValByName("updateTime", new Date(), metaObject);setFieldValByName("updateBy", BaseUser.userName, metaObject);}
}
更新和創建時值自動填充
前端功能開發
登錄邏輯梳理
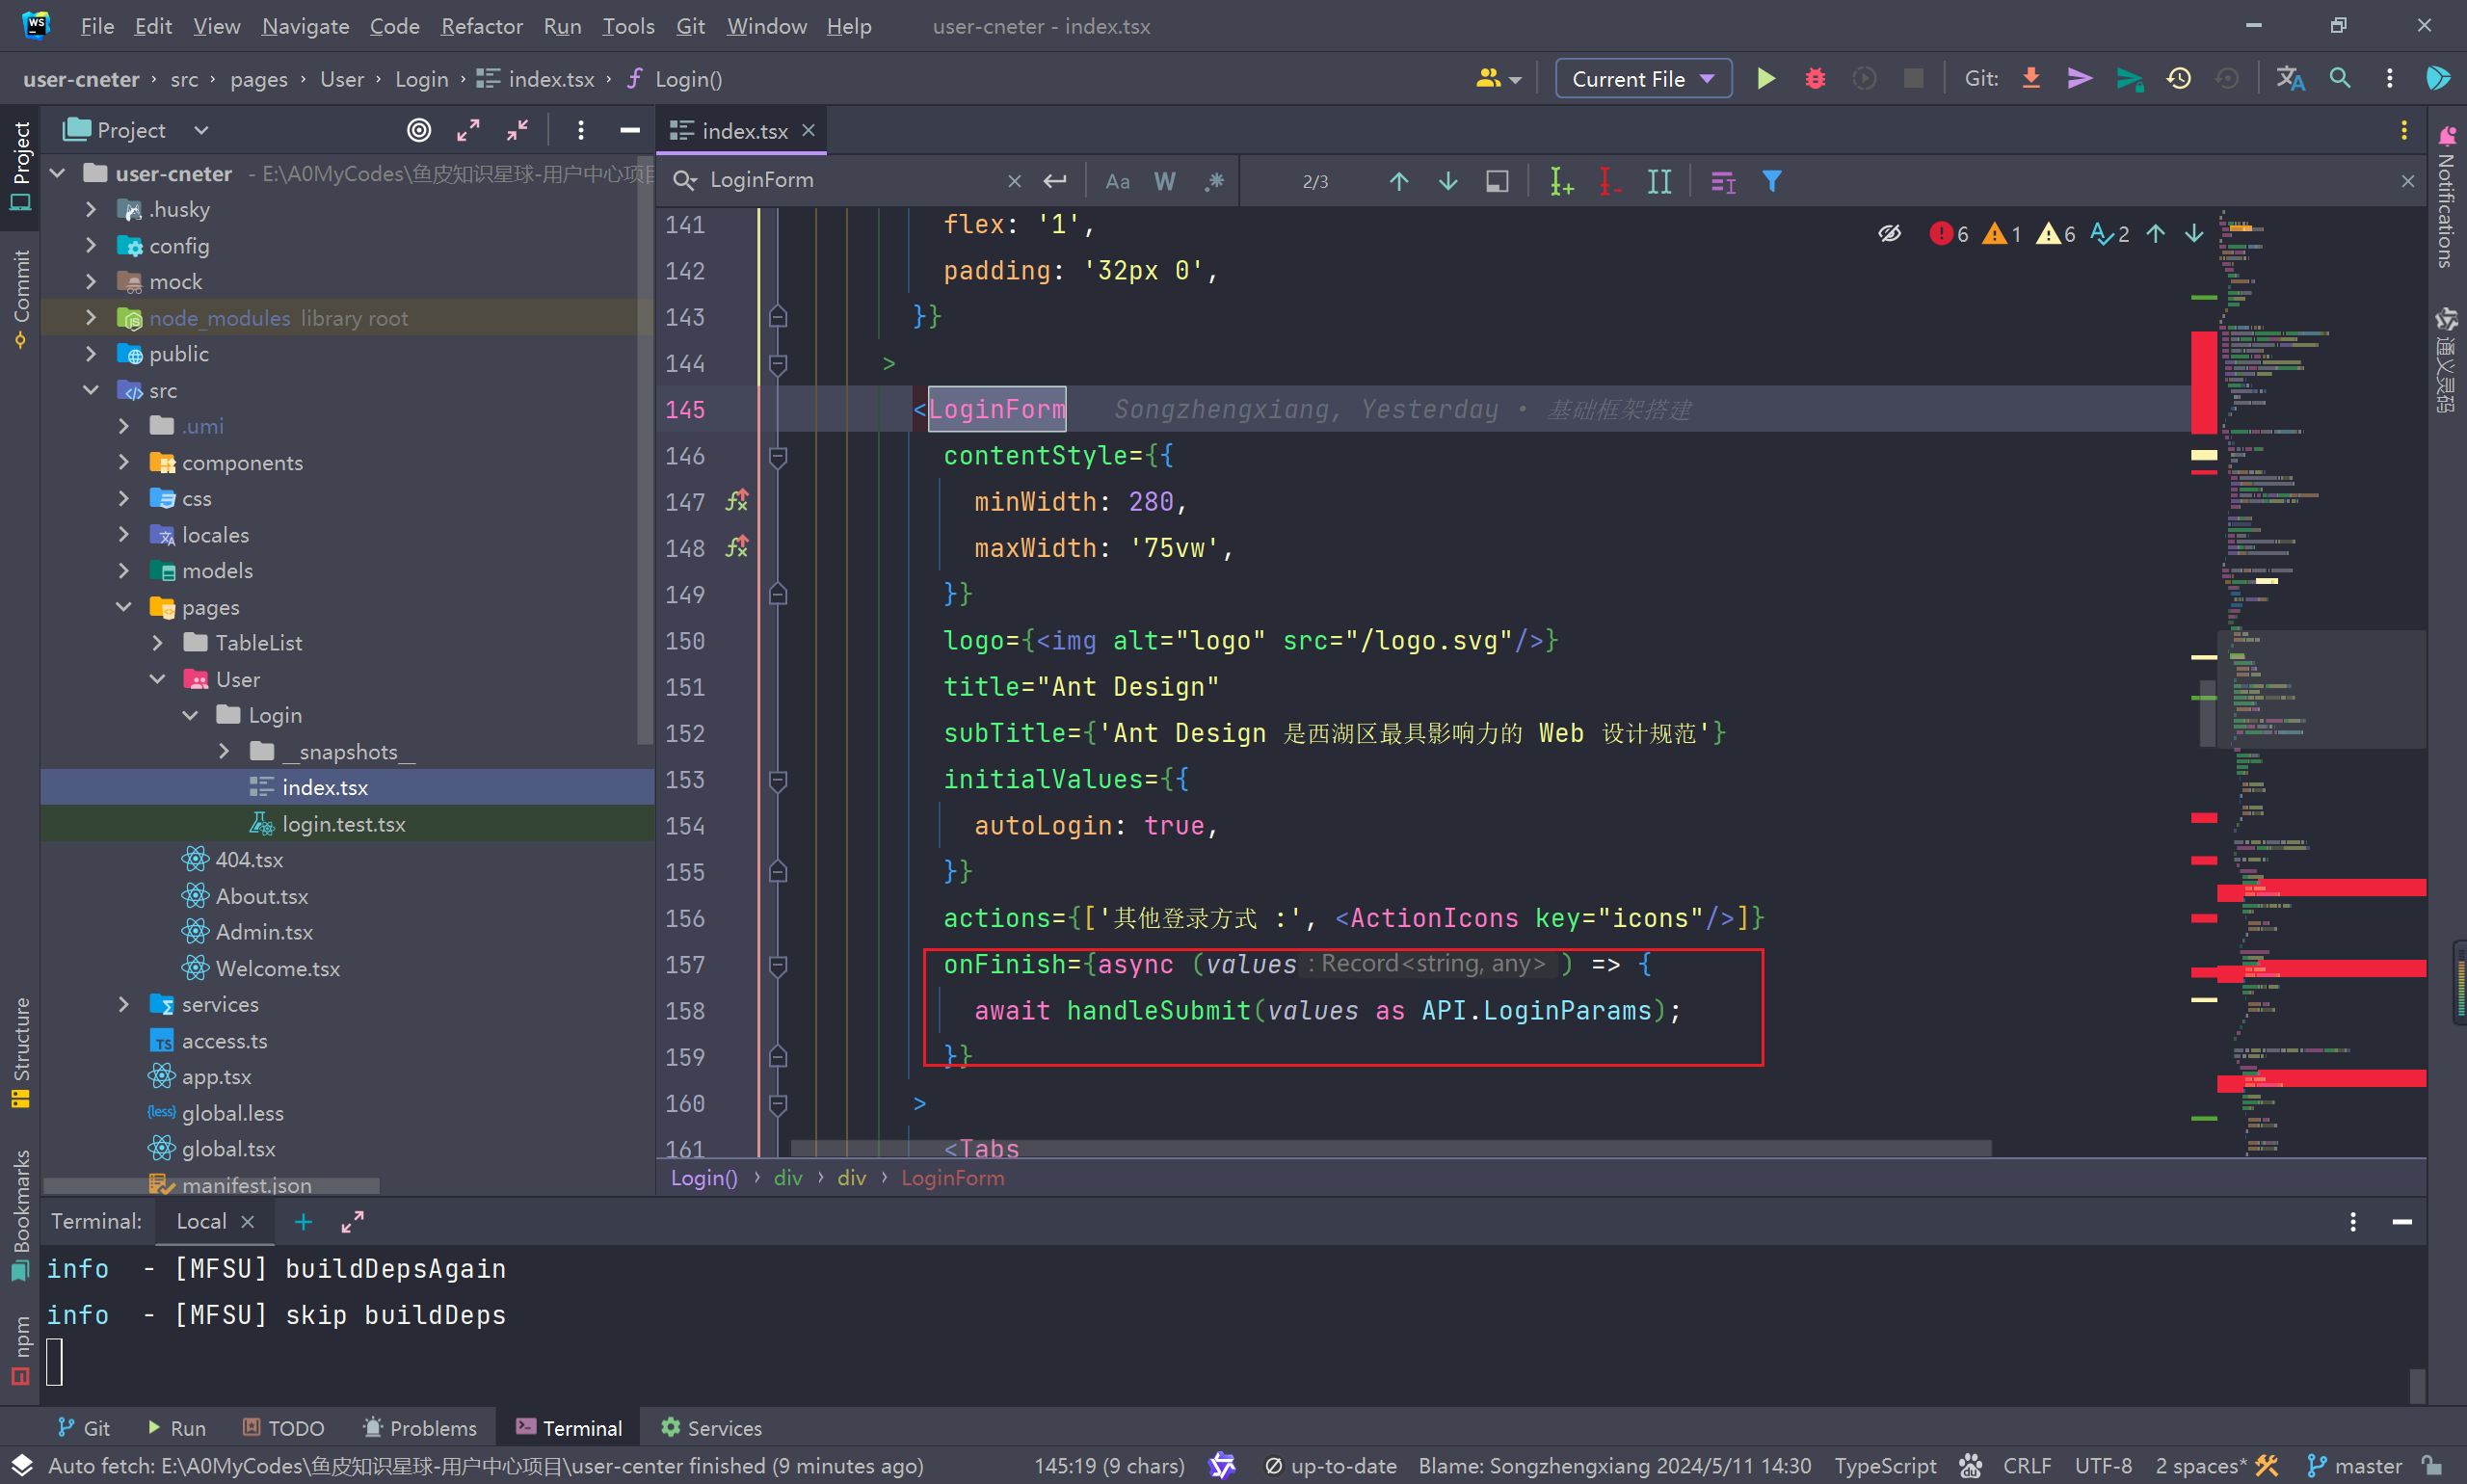
首先找到登錄頁面對應的文件,位置在src/pages/User/Login/index.tsx,然后觀察代碼,發現登錄頁面使用了 LoginForm 組件來實現的登錄表單,LoginForm 是從 @ant-design/pro-components 中導出的,ProComponents 是基于 Ant Design 而開發的模板組件,提供了更高級別的抽象支持,開箱即用。可以顯著地提升制作 CRUD 頁面的效率,更加專注于頁面。

loginForm組件使用文檔:https://pro-components.antdigital.dev/components/form
點擊登錄會觸發onFinish鉤子函數,調用handleSubmit方法

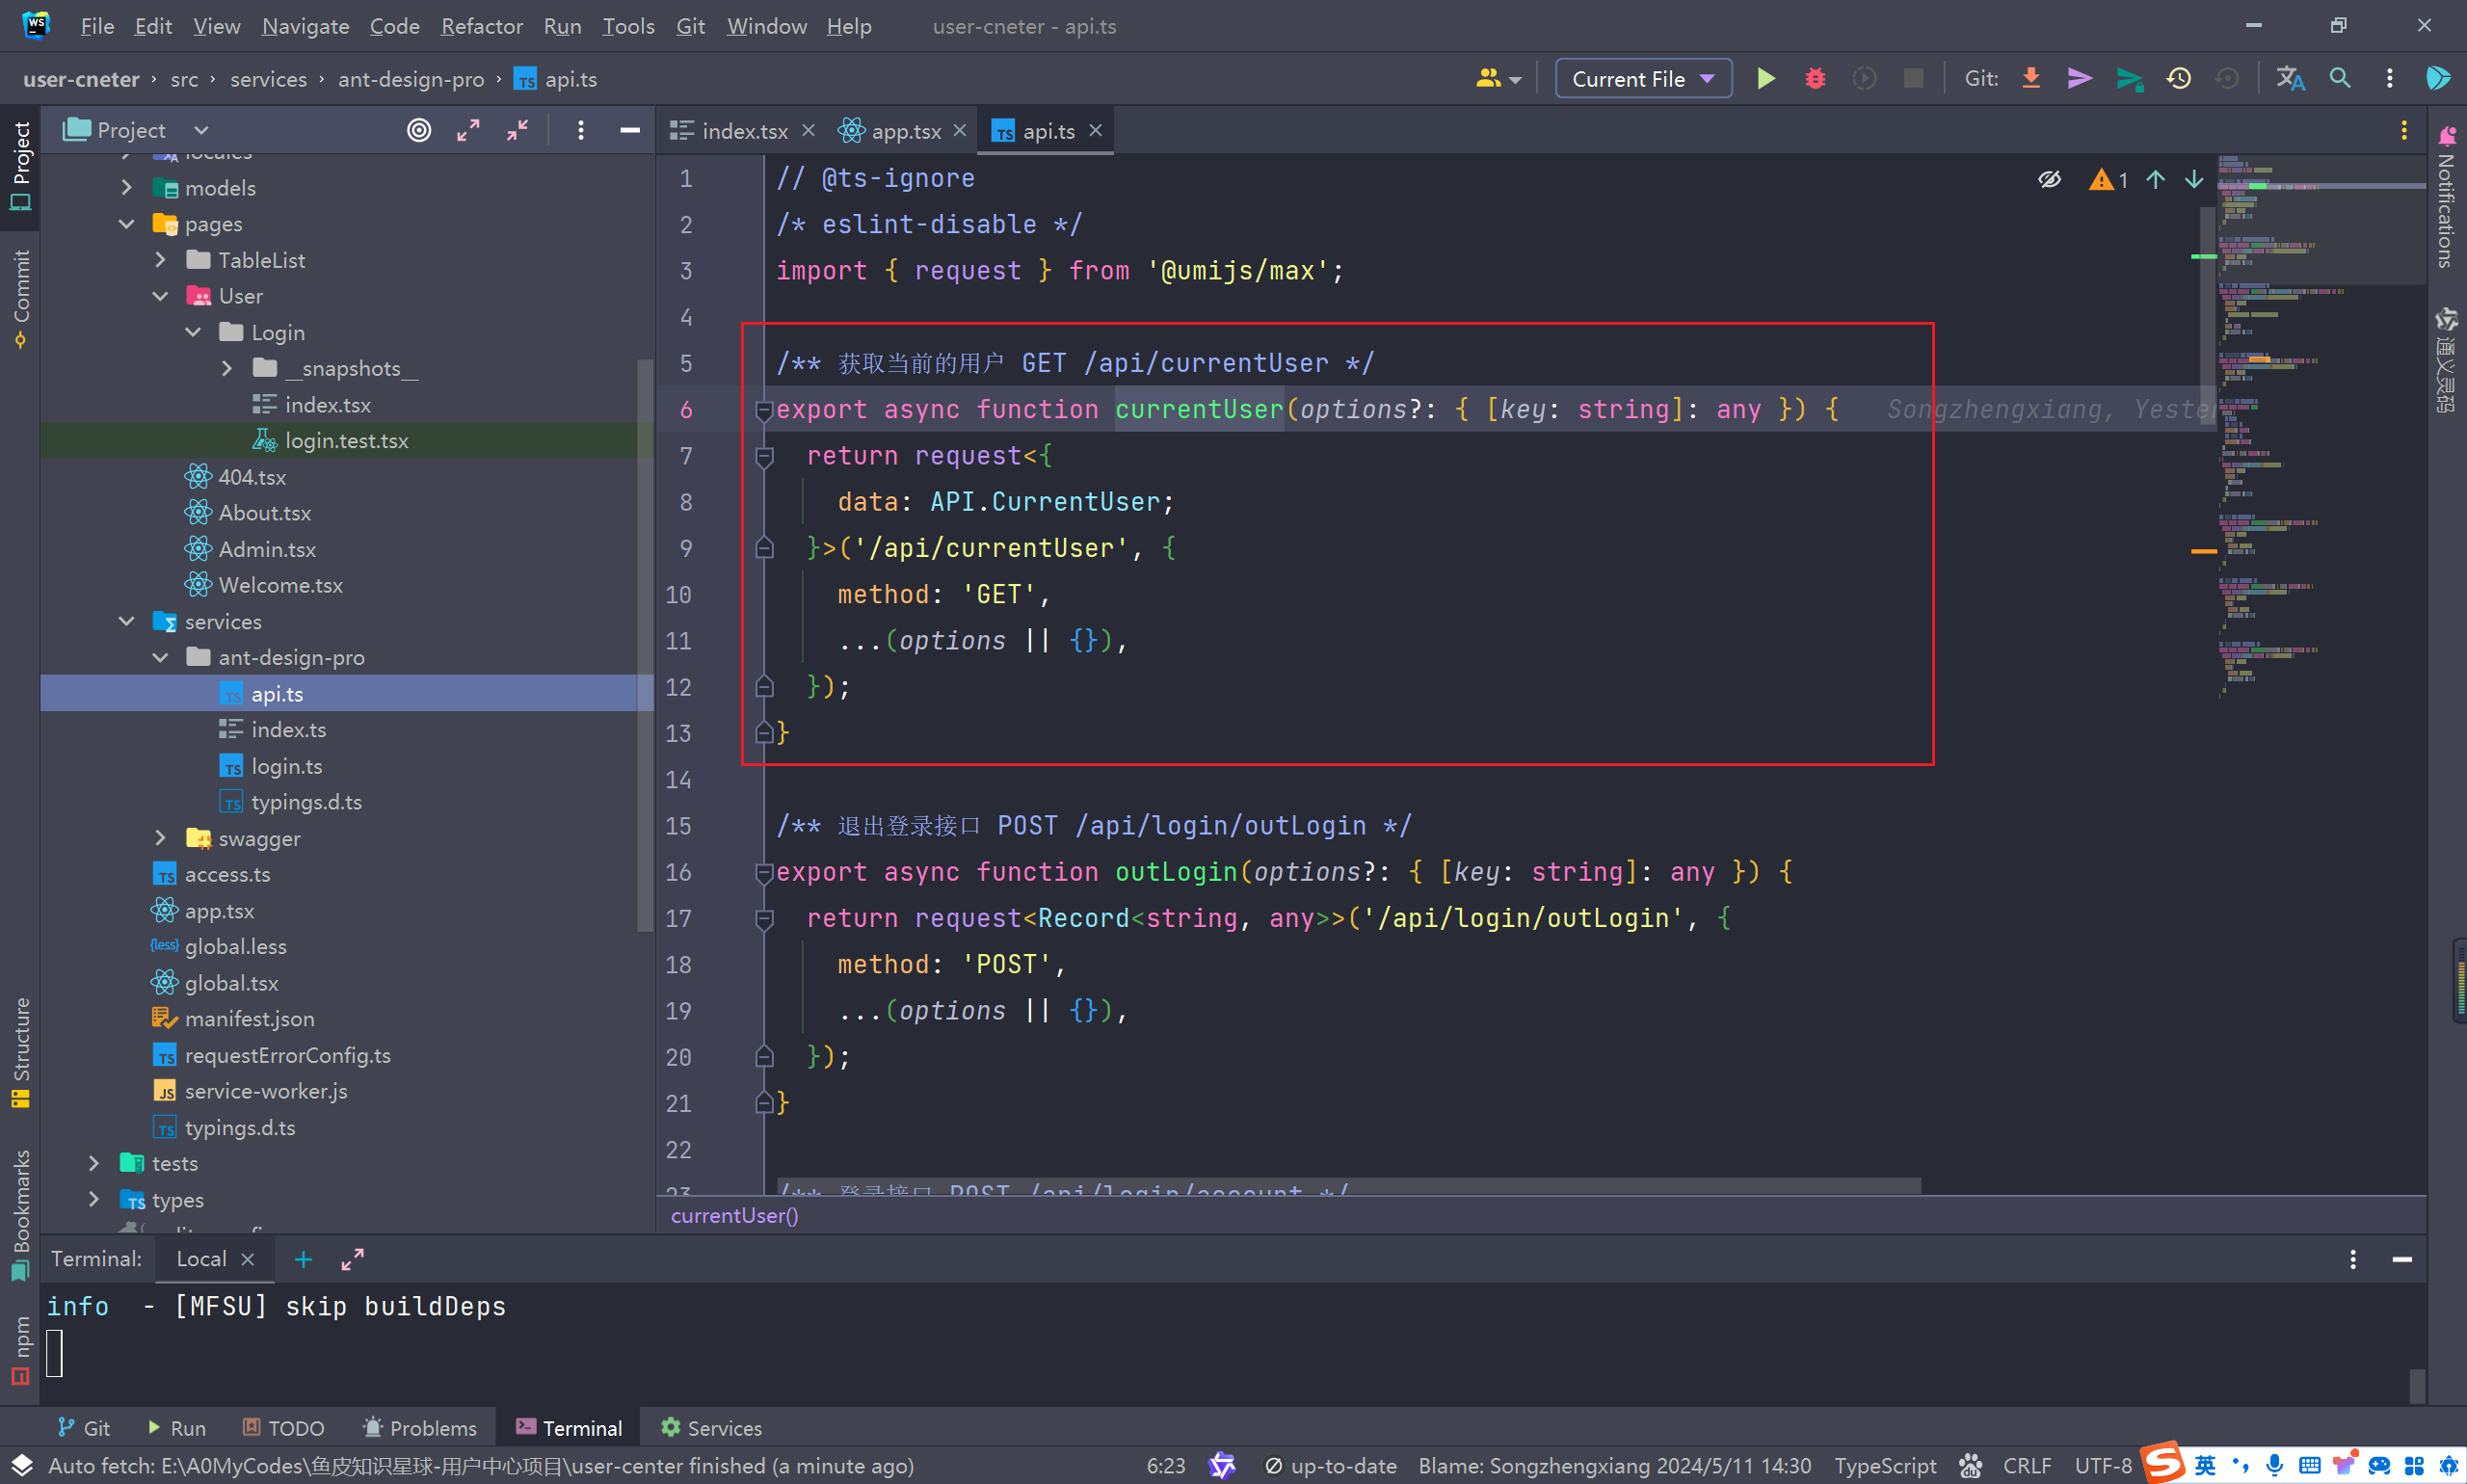
login方法在src/services/ant-design-pro/api.ts 文件中聲明

登錄成功后調用 fetchUserInfo 方法獲取用戶信息

useModel 是 @umi/max 內置的數據流管理插件,它是一種基于 hooks 范式的輕量級數據管理方案,可以在 Umi 項目中管理全局的共享數據。
文檔地址:https://umijs.org/docs/max/data-flow#usemodel
useModel('@@initialState') 表示讀取 app.tsx 文件中的 getInitialState 方法的返回值
const {initialState, setInitialState} = useModel('@@initialState');
app.tsx 文件中的 getInitialState 代碼如下
import {currentUser as queryCurrentUser} from '@/services/ant-design-pro/api';
const loginPath = '/user/login';export async function getInitialState(): Promise<{settings?: Partial<LayoutSettings>;currentUser?: API.CurrentUser;loading?: boolean;fetchUserInfo?: () => Promise<API.CurrentUser | undefined>;
}> {const fetchUserInfo = async () => {try {console.log("獲取用戶信息")const msg = await queryCurrentUser({skipErrorHandler: true,});return msg.data;} catch (error) {history.push(loginPath);}return undefined;};// 如果不是登錄頁面,執行const {location} = history;if (location.pathname !== loginPath) {const currentUser = await fetchUserInfo();return {fetchUserInfo,currentUser,settings: defaultSettings as Partial<LayoutSettings>,};}return {fetchUserInfo,settings: defaultSettings as Partial<LayoutSettings>,};
}
查看 queryCurrentUser 接口地址
找到mock中對應的接口
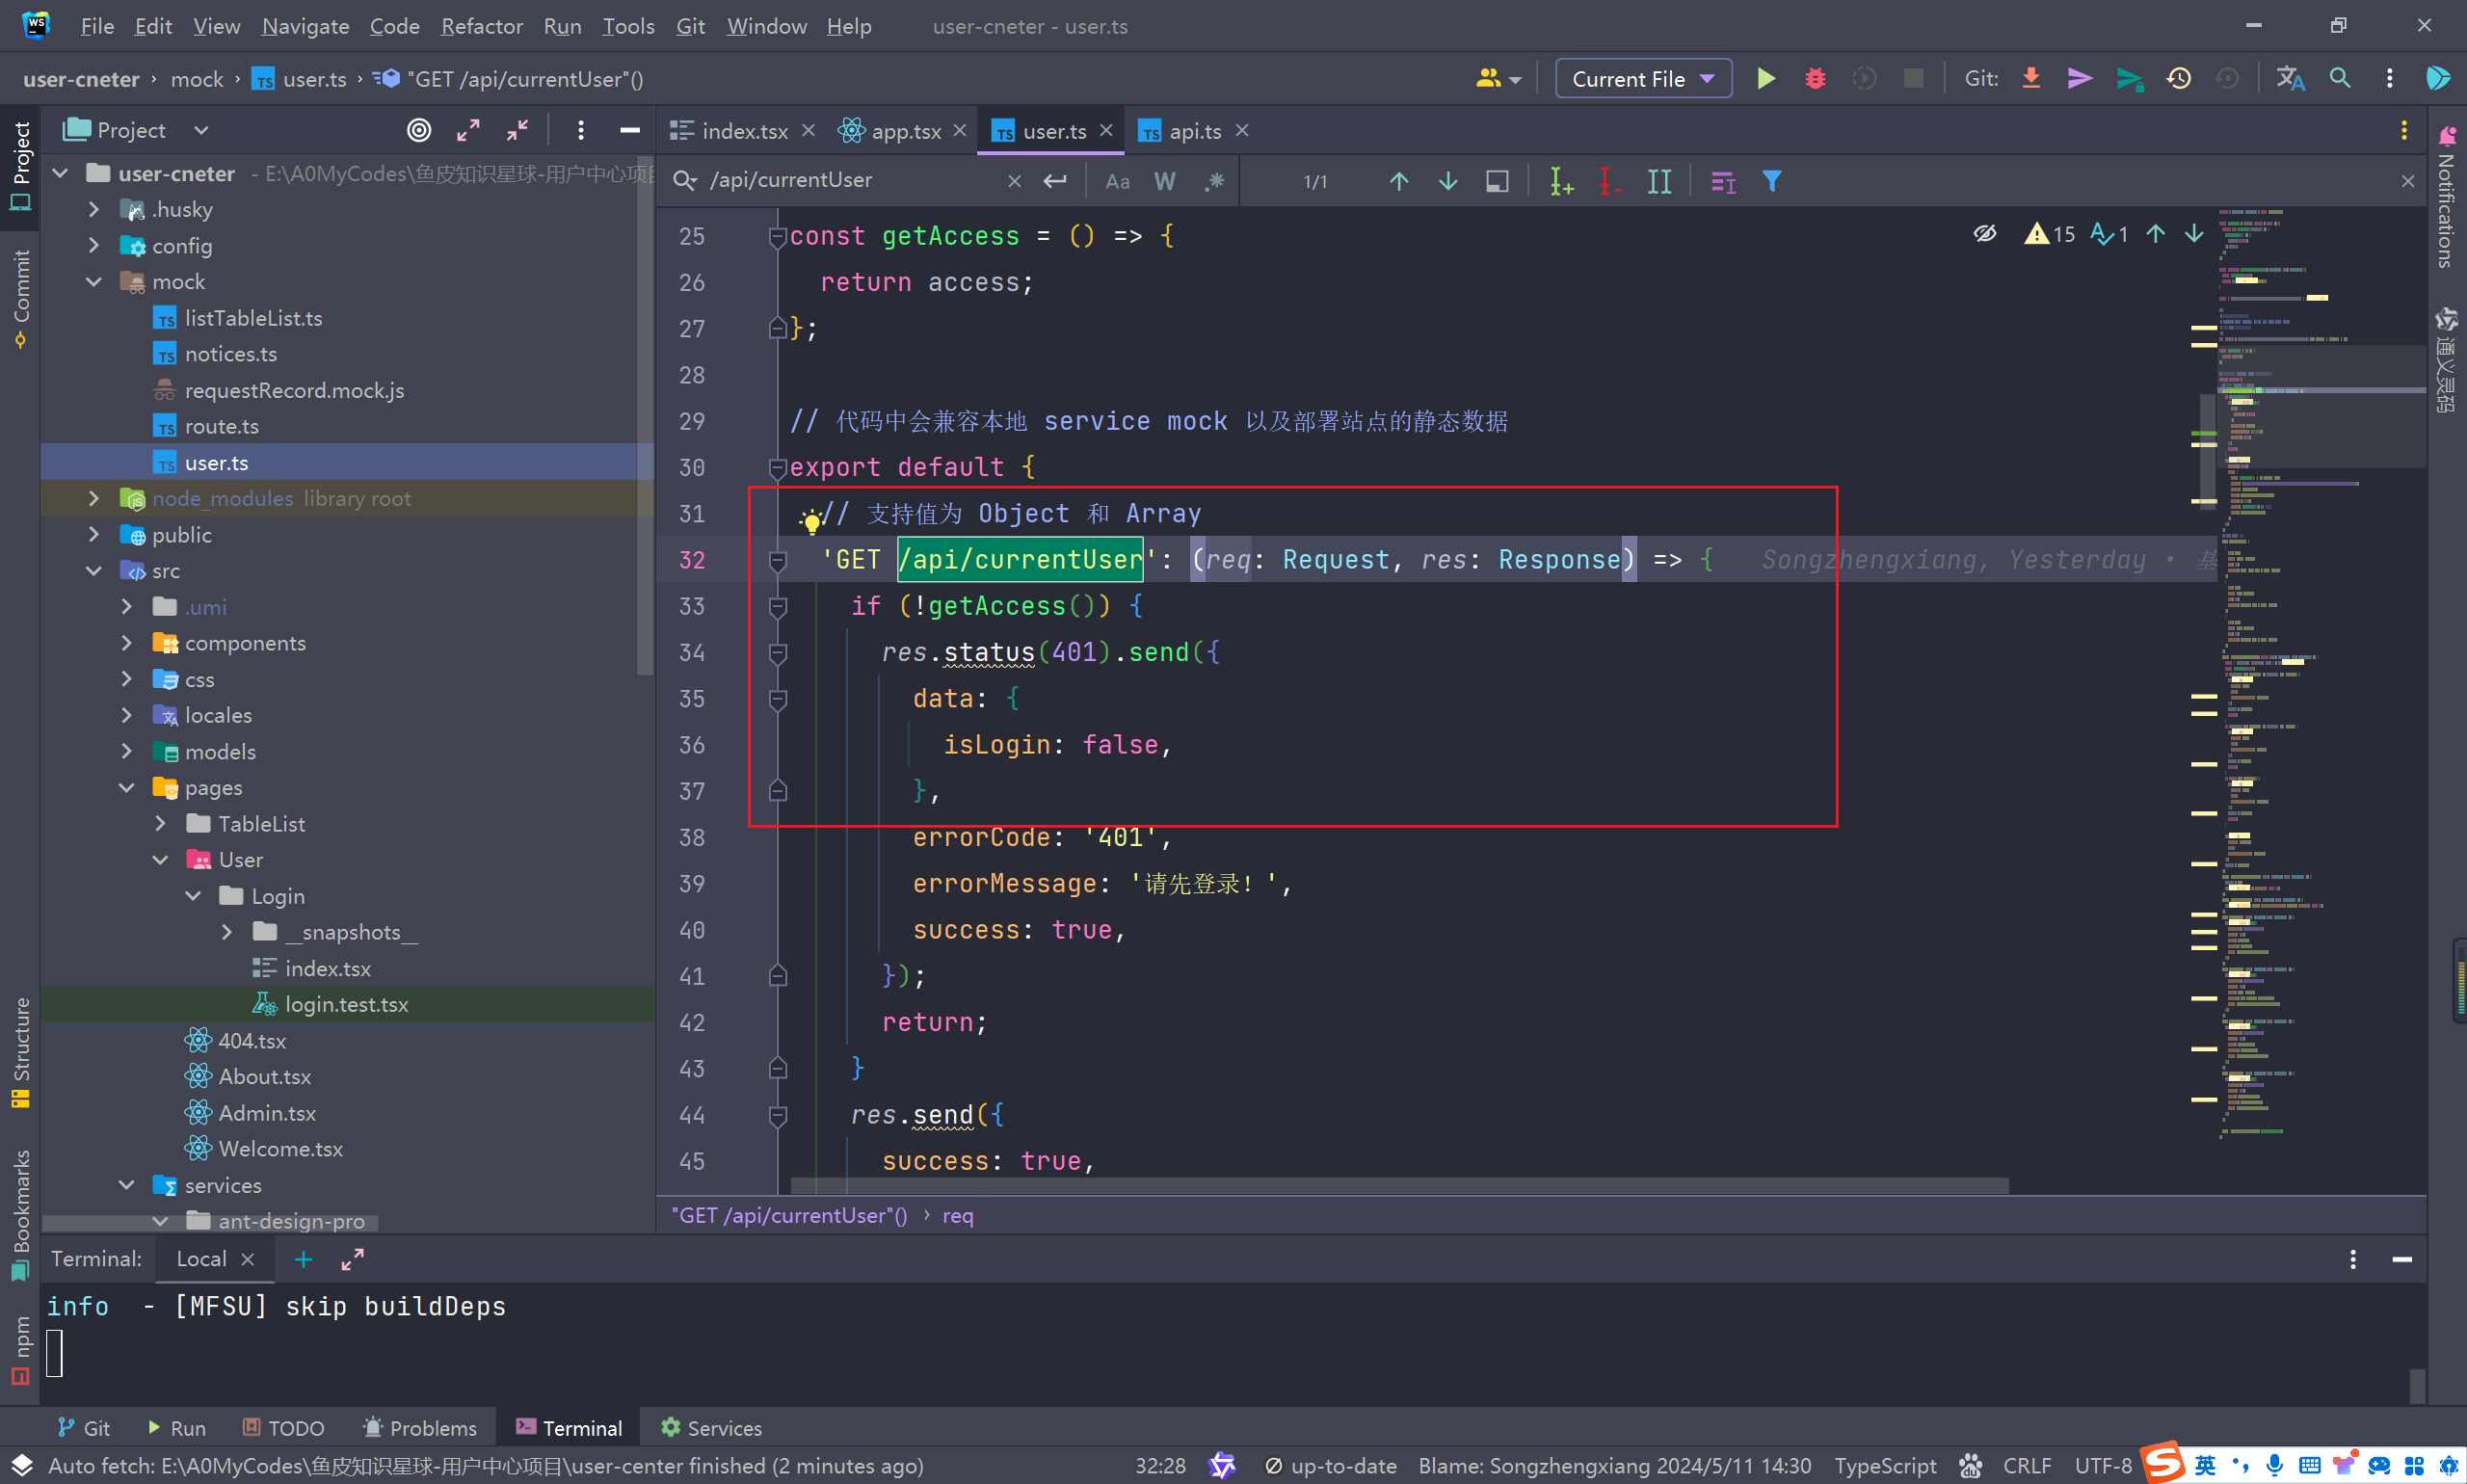
下面我們按照這種格式編寫后端接口即可
修改響應攔截器
找到 src/requestErrorConfig.tss 文件,這個文件中處理請求攔截和響應攔截
需要做的功能
- 給每個請求添加一個基礎路徑,配合代理完成跨域處理
- 給每個請求中添加token請求頭
- 判斷響應結果是否成功,如果不成功彈出錯誤提醒
import type {RequestOptions} from '@@/plugin-request/request';
import type {RequestConfig} from '@umijs/max';
import {message, notification} from 'antd';
import {getToken} from '@/utils';// 錯誤處理方案: 錯誤類型
enum ErrorShowType {SILENT = 0,WARN_MESSAGE = 1,ERROR_MESSAGE = 2,NOTIFICATION = 3,REDIRECT = 9,
}// 與后端約定的響應數據格式
interface ResponseStructure {success: boolean;data: any;errorCode?: number;errorMessage?: string;showType?: ErrorShowType;
}// 請求前綴
const baseURL = '/api';/*** @name 錯誤處理* pro 自帶的錯誤處理, 可以在這里做自己的改動* @doc https://umijs.org/docs/max/request#配置*/
export const errorConfig: RequestConfig = {// 錯誤處理: umi@3 的錯誤處理方案。errorConfig: {// 錯誤拋出errorThrower: (res) => {const { success, data, errorCode, errorMessage, showType } =res as unknown as ResponseStructure;if (!success) {const error: any = new Error(errorMessage);error.name = 'BizError';error.info = { errorCode, errorMessage, showType, data };throw error; // 拋出自制的錯誤}},// 錯誤接收及處理errorHandler: (error: any, opts: any) => {if (opts?.skipErrorHandler) throw error;// 我們的 errorThrower 拋出的錯誤。if (error.name === 'BizError') {const errorInfo: ResponseStructure | undefined = error.info;if (errorInfo) {const { errorMessage, errorCode } = errorInfo;switch (errorInfo.showType) {case ErrorShowType.SILENT:// do nothingbreak;case ErrorShowType.WARN_MESSAGE:message.warning(errorMessage);break;case ErrorShowType.ERROR_MESSAGE:message.error(errorMessage);break;case ErrorShowType.NOTIFICATION:notification.open({description: errorMessage,message: errorCode,});break;case ErrorShowType.REDIRECT:// TODO: redirectbreak;default:message.error(errorMessage);}}} else if (error.response) {// Axios 的錯誤// 請求成功發出且服務器也響應了狀態碼,但狀態代碼超出了 2xx 的范圍message.error(`Response status:${error.response.status}`);} else if (error.request) {// 請求已經成功發起,但沒有收到響應// \`error.request\` 在瀏覽器中是 XMLHttpRequest 的實例,// 而在node.js中是 http.ClientRequest 的實例message.error('None response! Please retry.');} else {// 發送請求時出了點問題message.error(error?.data || error?.msg);}},},// 請求攔截器requestInterceptors: [(config: RequestOptions) => {// 給請求頭中加一個abc參數config.headers.Authorization = getToken();// 攔截請求配置,進行個性化處理。const url = baseURL + config?.url;return { ...config, url };},],// 響應攔截器responseInterceptors: [(response) => {const sucCodes = ['200', 200];// 攔截響應數據,進行個性化處理const { data } = response as unknown as ResponseStructure;if (!sucCodes.includes(data?.code)) {// 返回錯誤信息交給錯誤處理器return Promise.reject(data);}return response;},],
};
用到的 getToken 方法
/*** 設置token* @param token*/
export function setToken(token){localStorage.setItem('token',token)
}/*** 獲取token*/
export function getToken(){return localStorage.getItem('token')
}
設置代理
修改 config/proxy.ts 代碼
/*** @name 代理的配置* @see 在生產環境 代理是無法生效的,所以這里沒有生產環境的配置* -------------------------------* The agent cannot take effect in the production environment* so there is no configuration of the production environment* For details, please see* https://pro.ant.design/docs/deploy** @doc https://umijs.org/docs/guides/proxy*/
export default {// 如果需要自定義本地開發服務器  請取消注釋按需調整dev: {'/api/edu': {target: 'http://123.60.16.27:8101',changeOrigin: true,pathRewrite: { '/api': '' },},// localhost:8000/api/** -> https://preview.pro.ant.design/api/**'/api/': {// 要代理的地址target: 'http://localhost:8080',// 配置了這個可以從 http 代理到 https// 依賴 origin 的功能可能需要這個,比如 cookiechangeOrigin: true,// 去掉真實請求地址中的/apipathRewrite: { '/api': '' },},},/*** @name 詳細的代理配置* @doc https://github.com/chimurai/http-proxy-middleware*/test: {// localhost:8000/api/** -> https://preview.pro.ant.design/api/**'/api/': {target: 'https://proapi.azurewebsites.net',changeOrigin: true,pathRewrite: { '^': '' },},},pre: {'/api/': {target: 'your pre url',changeOrigin: true,pathRewrite: { '^': '' },},},
};
權限管理
找到 src/access.ts 文件
export default function access(initialState: { currentUser?: API.CurrentUser } | undefined) {const {currentUser} = initialState ?? {};return {canAdmin: currentUser && currentUser.access?.includes("admin"),};
}
access 方法的 initialState 參數就是 app.tsx 文件中的 getInitialState 方法的返回值,這里是 Umi 框架幫我們封裝好的
參考文檔:權限管理 - Ant Design Pro
登錄功能實現
修改 src/pages/Login/index.tsx 文件代碼,刪除多余代碼
import { Footer } from '@/components';
import { login } from '@/services/ant-design-pro/api';
import { LockOutlined, UserOutlined } from '@ant-design/icons';
import { LoginForm, ProFormText } from '@ant-design/pro-components';
import { history, useModel, Helmet } from '@umijs/max';
import { message, Tabs } from 'antd';
import Settings from '../../../config/defaultSettings';
import React, { useState } from 'react';
import { flushSync } from 'react-dom';
import { setToken } from '@/utils';
import ForgotPasswordForm from '@/pages/Login/ForgotPasswordForm';
import useStyles from './useStyles.less';const getUserRole = async () => {return ['admin'];
};const Login: React.FC = () => {const [type, setType] = useState<string>('account');const { initialState, setInitialState } = useModel('@@initialState');const [forgotPassword, setForgotPassword] = useState(false);const fetchUserInfo = async (data) => {if (data) {let roles = await getUserRole();flushSync(() => {// 更新全局保存的用戶信息setInitialState((s) => ({...s,currentUser: {...data,access: roles,},}));});}};const handleSubmit = async (values) => {// 登錄let { data } = await login({userName: values.username,password: values.password,});if (data.token) {setToken(data.token);const defaultLoginSuccessMessage = '登錄成功!';message.success(defaultLoginSuccessMessage);await fetchUserInfo(data);const urlParams = new URL(window.location.href).searchParams;history.push(urlParams.get('redirect') || '/');}};const updatePasswordStatus = (flag) => {setForgotPassword(flag);};return (<div className={useStyles.container}><Helmet><title>{'登錄'}- {Settings.title}</title></Helmet>{/*忘記密碼,重置密碼表單*/}{forgotPassword && <ForgotPasswordForm updatePasswordStatus={updatePasswordStatus} />}{!forgotPassword && (<div style={{ marginTop: '5%' }}><LoginFormcontentStyle={{minWidth: 280,maxWidth: '75vw',}}logo={<img alt="logo" src="/logo.svg" />}title="用戶管理中心"initialValues={{autoLogin: false,username: 'admin001',password: 'Abc123',}}onFinish={async (values) => {await handleSubmit(values as API.LoginParams);}}><TabsactiveKey={type}onChange={setType}centereditems={[{key: 'account',label: '賬戶密碼登錄',},]}/><><ProFormTextname="username"fieldProps={{size: 'large',prefix: <UserOutlined />,}}placeholder={'請輸入用戶名'}rules={[{required: true,message: '用戶名是必填項!',},]}/><ProFormText.Passwordname="password"fieldProps={{size: 'large',prefix: <LockOutlined />,}}placeholder={'請輸入密碼'}rules={[{required: true,message: '密碼是必填項!',},]}/></><divstyle={{marginBottom: 24,}}><astyle={{float: 'right',marginBottom: 20,}}onClick={() => updatePasswordStatus(true)}>忘記密碼 ?</a></div></LoginForm></div>)}<Footer /></div>);
};
export default Login;
登錄接口 src/services/ant-design-pro/api.ts
import {request} from '@umijs/max';/** 登錄接口  */
export async function login(body: API.LoginParams, options?: { [key: string]: any }) {return request<API.LoginResult>('/sysUser/login', {method: 'POST',headers: {'Content-Type': 'application/json',},data: body,...(options || {}),});
}
樣式文件 useStyles.less
.container {display: flex;flex-direction: column;height: 100vh;overflow: auto;background-image: url(https://mdn.alipayobjects.com/yuyan_qk0oxh/afts/img/V-_oS6r-i7wAAAAAAAAAAAAAFl94AQBr);background-size: 100% 100%;
}
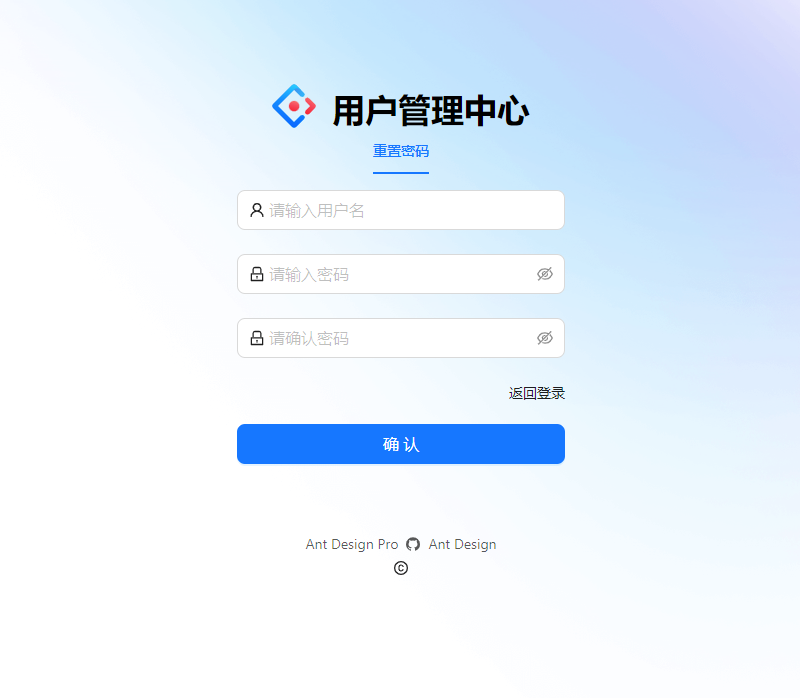
忘記密碼
新建文件 src/pages/Login/ForgotPasswordForm.tsx
import React from "react";
import {Button, Form, Input, message, Tabs} from 'antd';
import {LockOutlined, UserOutlined} from "@ant-design/icons";
import {updatePasswordFun} from "@/services/ant-design-pro/login";/** 組件名: ForgotPasswordForm* 組件用途: 重置密碼表單* 創建日期: 2024/5/14*/
const ForgotPasswordForm = (props) => {const onFinish = (values) => {if (values.password.length < 6) {message.error("密碼長度至少6位")return;}// 密碼必須同時包含數字和大小寫字母if (!/[A-Z]/.test(values.password) || !/[a-z]/.test(values.password) || !/[0-9]/.test(values.password)) {message.error("密碼必須同時包含數字和大小寫字母")return;}// 兩次密碼必須一致if (values.password !== values.newPassword) {message.error("兩次密碼不一致")return;}updatePasswordFun(values.userName, values.newPassword).then(() => {message.success("更新密碼成功,返回登錄")props.updatePasswordStatus(false)})};return (<div className={"ant-pro-form-login-container"} style={{display: "flex",flexDirection: "column",alignItems: "center",flex: "none",height: "auto"}}><div className="ant-pro-form-login-header" style={{marginTop: "5%"}}><span className="ant-pro-form-login-logo "><img alt="logo" src="/logo.svg"/></span><span className="ant-pro-form-login-title ">用戶管理中心</span></div><TabsactiveKey={"account"}centereditems={[{key: 'account',label: '重置密碼',},]}/><Formname="basic"style={{width: 328}}initialValues={{remember: false,}}layout="vertical"onFinish={onFinish}autoComplete="off"><Form.Itemlabel=""name="userName"rules={[{required: true,message: '請輸入用戶名',},]}><Inputsize={'large'}prefix={<UserOutlined/>}placeholder="請輸入用戶名"/></Form.Item><Form.Itemlabel=""name="password"rules={[{required: true,message: '請輸入密碼!',},]}><Input.Password size={'large'} prefix={<LockOutlined/>} placeholder="請輸入密碼"/></Form.Item><Form.Itemlabel=""name="newPassword"rules={[{required: true,message: '請確認密碼!',},]}><Input.Password size={'large'} prefix={<LockOutlined/>} placeholder="請確認密碼"/></Form.Item><divstyle={{marginBottom: 24,}}><astyle={{float: 'right',marginBottom: 20}}onClick={() => props.updatePasswordStatus(false)}>返回登錄</a></div><Button type="primary" htmlType="submit" size="large" block>確認</Button></Form></div>);
};export default ForgotPasswordForm;
動態獲取菜單
官方提供的動態菜單實現方法:菜單的高級用法 - Ant Design Pro
前提說明:實現動態路由時,所有的路由都必須提前在 config/routes.ts 中注冊好,如果動態返回了 routes.ts 中不存在的路由信息,頁面將會無法訪問,具體問題可參考(Issue #11137)。只能動態返回 routes.ts 內的數據
修改 app.tsx 的 layout 方法,在配置中添加 menu 屬性即可實現動態菜單
// ProLayout 支持的api https://procomponents.ant.design/components/layout
export const layout: RunTimeLayoutConfig = ({ initialState, setInitialState }) => {return {// ... 省略其他代碼menu: {// 每當 initialState?.currentUser?.userid 發生修改時重新執行 requestparams: {userId: initialState?.currentUser?.userId,roleIds: initialState?.currentUser?.sysRoleList?.map((item) => item.roleId),},request: async (params, defaultMenuData) => {// 調用接口獲取菜單數據let { data } = await getRoleMenuFun(params.roleIds);if (data.length > 0) {return data;}return defaultMenuData;},},// 手動映射iconmenuDataRender: (menuData) => fixMenuItemIcon(menuData),};
};
接口返回的data菜單格式和 config/routes.ts 中配置的保持一致,更多配置可以參考:Pro 的 Layout 組件 - Ant Design Pro
返回內容示例:
{path: '/user/login',layout: false, // 頁面是否在layout布局樣式下顯示,設置成false會單獨顯示hideInMenu: true, // 是否隱藏菜單,這里只是設置不在左側菜單列表中顯示,仍可以訪問name: '登錄',component: './Login',
},
{path: '/welcome',name: '歡迎',icon: 'smile',component: './Welcome',
},
{path: 'test',name: '一級菜單',routes: [{path: 'test1',name: '二級菜單1',routes: [{path: 'test1-1',name: '三級菜單1-1',component: './Test',},{path: 'test1-2',name: '三級菜單1-2',component: './Test',},],},{path: 'test2',name: '二級菜單2',component: './Test',},],
},
當我們使用了動態返回的菜單時,圖標就不出現了,這時需要手動映射icon圖標,可參考這里
添加 src/utils/fixMenuItemIcon.ts 文件
import React from 'react';
import * as allIcons from '@ant-design/icons';// FIX從接口獲取菜單時icon為string類型
const fixMenuItemIcon = (menus, iconType = 'Outlined') => {menus.forEach((item) => {const { icon, children } = item;if (typeof icon === 'string') {let fixIconName = icon.slice(0, 1).toLocaleUpperCase() + icon.slice(1) + iconType;console.log(fixIconName, 'fixIconName');item.icon = React.createElement(allIcons[fixIconName] || allIcons[icon]);}// eslint-disable-next-line @typescript-eslint/no-unused-expressionschildren && children.length > 0 ? (item.children = fixMenuItemIcon(children)) : null;});return menus;
};export default fixMenuItemIcon;
這里二級菜單的圖標沒有,官方是這樣解釋的
最終實現的效果,先給管理員和普通和用戶分配不同的菜單
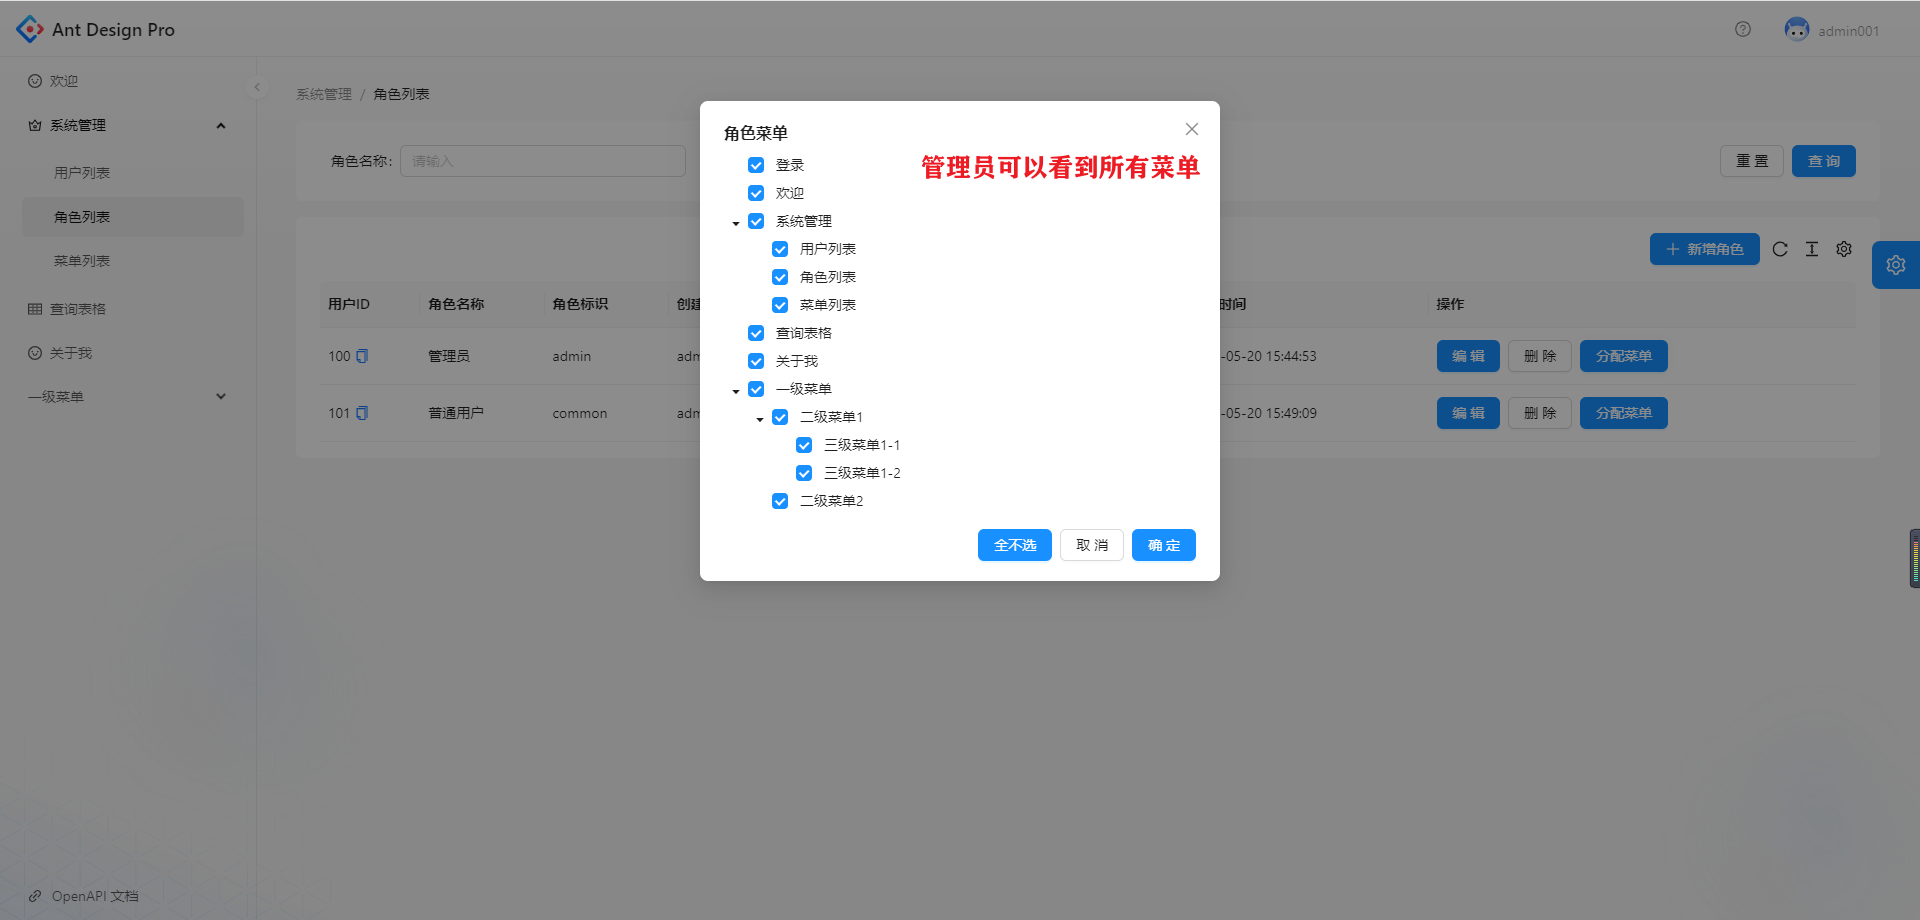
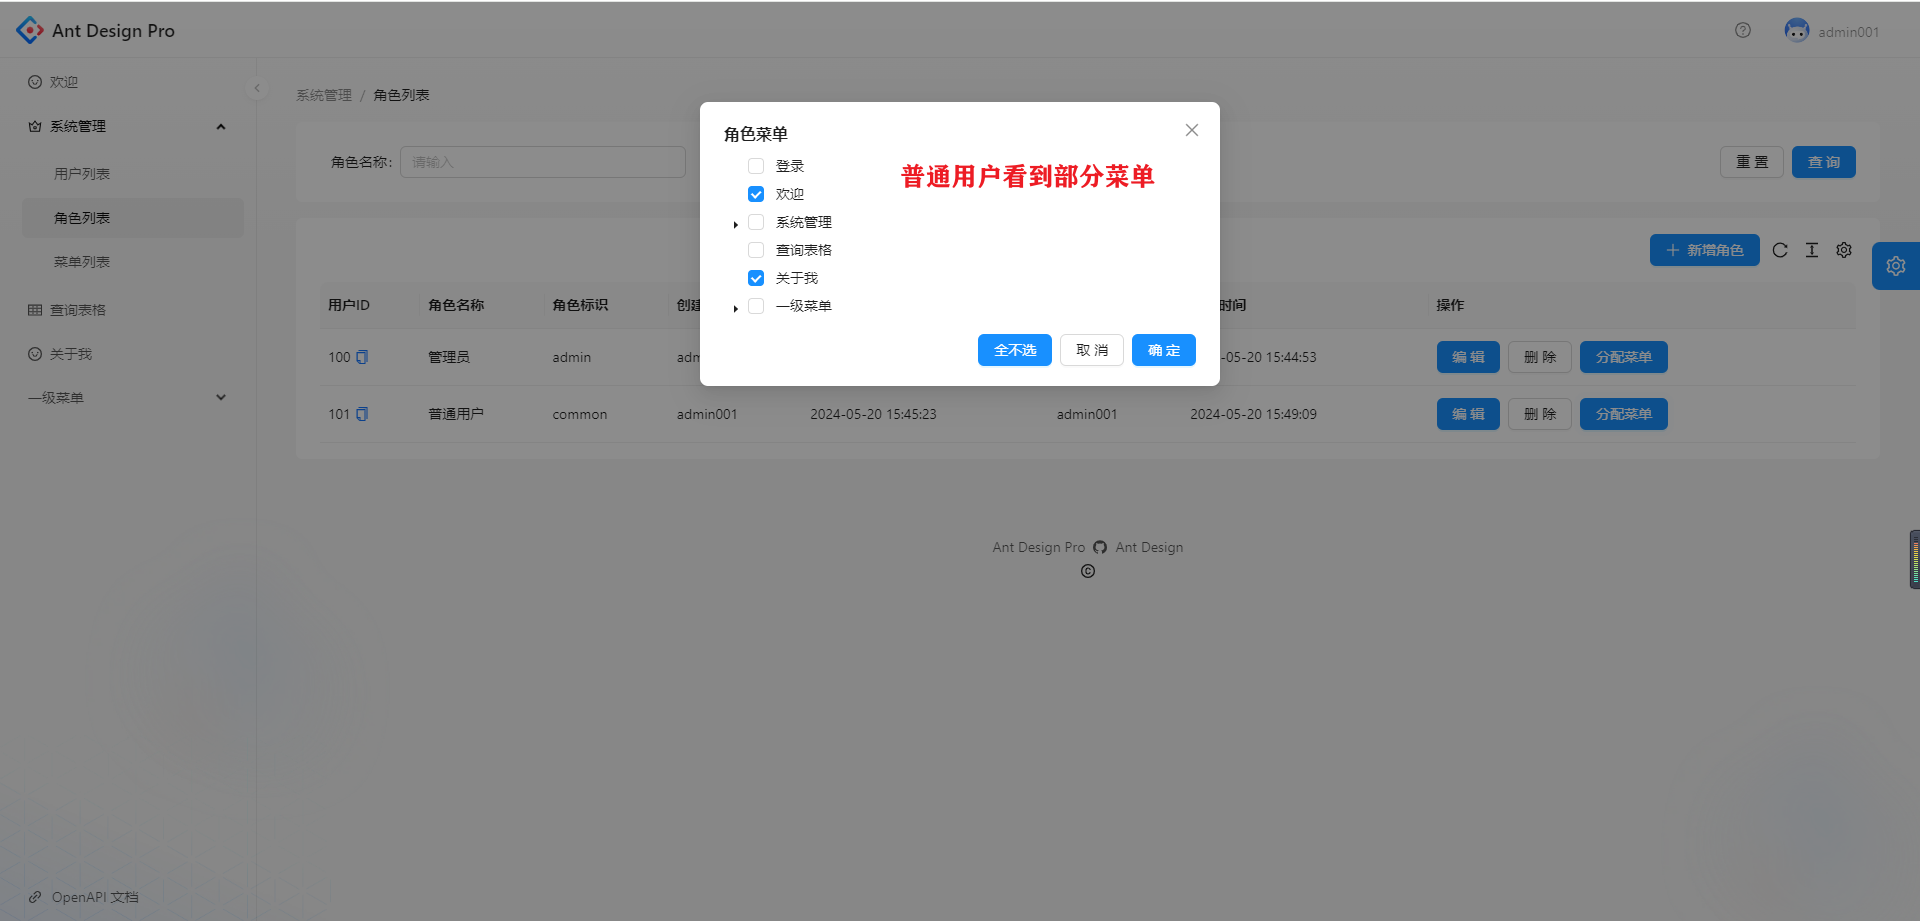
切換登錄不同角色的用戶,會顯示不同的菜單
實現過程中遇到的問題以及解決方法
- 請問菜單從服務端獲取,為什么還要在 routes 配置好全部,否則就不能正常解析 · Issue #11137 · ant-design/ant-design-pro (github.com)
- 動態菜單實現后,路由是全部的,可以通過url跳轉到不顯示的菜單項BUG] · Issue #10728 · ant-design/ant-design-pro (github.com)
實現源碼
https://gitee.com/szxio/user-center
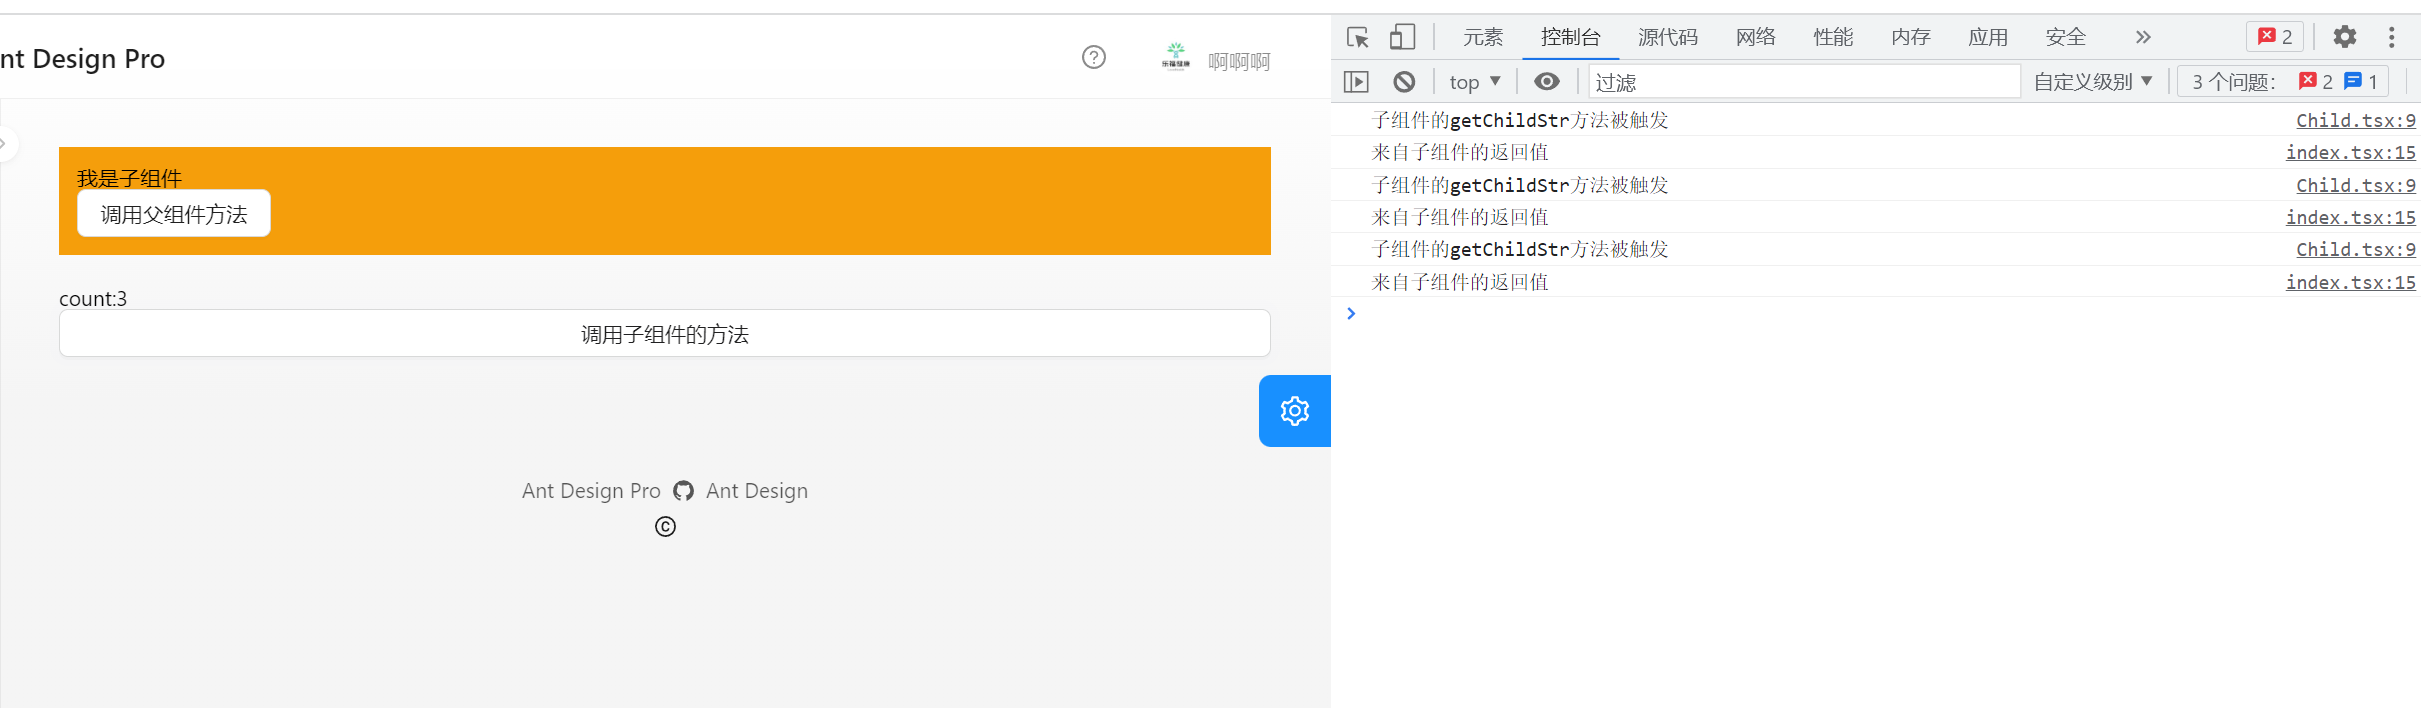
函數式組件的父子組件方法互相調用
編寫子組件 Child
注意:子組件需要使用 forwardRef 函數包裹,然后使用 useImperativeHandle 暴露屬性和方法
import React, {forwardRef, useImperativeHandle} from 'react';
import {Button} from 'antd';// 子組件使用forwardRef函數包裹
// forwardRef函數接收兩個參數,第一個參數是props,第二個參數是ref
const Child = forwardRef((props, ref) => {// 定義方法,將來由父組件調用const getChildStr = () => {console.log('子組件的getChildStr方法被觸發');return '來自子組件的返回值';};const getParentFn = () => {// 調用父組件的方法props?.parentAddCount?.();};// useImperativeHandle函數接收兩個參數,第一個參數是ref,第二個參數是一個函數// 這個函數返回一個對象,這個對象中的屬性和方法會被暴露給父組件useImperativeHandle(ref, () => {return {getChildStr,};});return (<div className={'p-3 bg-amber-500'}><div>我是子組件</div><Button onClick={getParentFn}>調用父組件方法</Button></div>);
});export default Child;
編寫父組件
import React, { useRef } from 'react';
import Child from '@/pages/test/Child';
import { Button } from 'antd';const Index = () => {let [count, setCount] = React.useState(0);let childRef = useRef();// 提供給子組件調用的方法,子組件使用 prop.parentAddCount() 實現調用父組件的方法const addCount = () => {setCount(count + 1);};// 調用子組件方法,使用 childRef.current 獲取子組件暴露的屬性和方法const getChildStr = () => {let childStr = childRef.current?.getChildStr();console.log(childStr);};return (<><Child ref={childRef} parentAddCount={addCount} /><div style={{ marginTop: 20 }}>count:{count}</div><Button onClick={getChildStr}>調用子組件的方法</Button></>);
};export default Index;
效果展示
圖表 Ant Design Charts
官網地址
·可視化組件庫 | AntV (antgroup.com)
快速上手
安裝
我們提供了 Ant Design 的 npm 包,通過下面的命令即可完成安裝:
npm install @ant-design/charts --save#yarn
yarn add @ant-design/charts --save#pnpm
pnpm add @ant-design/charts --save
成功安裝完成之后,即可使用 import 或 require 進行引用:
import { Line } from '@ant-design/charts';
在需求明確的情況下,也可僅引入相關子包
# 統計圖表
npm install @ant-design/plots --save
Java操作Word文檔
poi-tl介紹
官方文檔:https://deepoove.com/poi-tl/
poi-tl(poi template language)是Word模板引擎,使用模板和數據創建很棒的Word文檔。
在文檔的任何地方做任何事情(Do Anything Anywhere)是poi-tl的星辰大海。
| 方案 | 移植性 | 功能性 | 易用性 |
|---|---|---|---|
| Poi-tl | Java跨平臺 | Word模板引擎,基于Apache POI,提供更友好的API | 低代碼,準備文檔模板和數據即可 |
| Apache POI | Java跨平臺 | Apache項目,封裝了常見的文檔操作,也可以操作底層XML結構 | 文檔不全,這里有一個教程:Apache POI Word快速入門 |
| Freemarker | XML跨平臺 | 僅支持文本,很大的局限性 | 不推薦,XML結構的代碼幾乎無法維護 |
| OpenOffice | 部署OpenOffice,移植性較差 | - | 需要了解OpenOffice的API |
| HTML瀏覽器導出 | 依賴瀏覽器的實現,移植性較差 | HTML不能很好的兼容Word的格式,樣式糟糕 | - |
| Jacob、winlib | Windows平臺 | - | 復雜,完全不推薦使用 |
poi-tl是一個基于Apache POI的Word模板引擎,也是一個免費開源的Java類庫,你可以非常方便的加入到你的項目中,并且擁有著讓人喜悅的特性。
| Word模板引擎功能 | 描述 |
|---|---|
| 文本 | 將標簽渲染為文本 |
| 圖片 | 將標簽渲染為圖片 |
| 表格 | 將標簽渲染為表格 |
| 列表 | 將標簽渲染為列表 |
| 圖表 | 條形圖(3D條形圖)、柱形圖(3D柱形圖)、面積圖(3D面積圖)、折線圖(3D折線圖)、雷達圖、餅圖(3D餅圖)、散點圖等圖表渲染 |
| If Condition判斷 | 根據條件隱藏或者顯示某些文檔內容(包括文本、段落、圖片、表格、列表、圖表等) |
| Foreach Loop循環 | 根據集合循環某些文檔內容(包括文本、段落、圖片、表格、列表、圖表等) |
| Loop表格行 | 循環復制渲染表格的某一行 |
| Loop表格列 | 循環復制渲染表格的某一列 |
| Loop有序列表 | 支持有序列表的循環,同時支持多級列表 |
| Highlight代碼高亮 | word中代碼塊高亮展示,支持26種語言和上百種著色樣式 |
| Markdown | 將Markdown渲染為word文檔 |
| Word批注 | 完整的批注功能,創建批注、修改批注等 |
| Word附件 | Word中插入附件 |
| SDT內容控件 | 內容控件內標簽支持 |
| Textbox文本框 | 文本框內標簽支持 |
| 圖片替換 | 將原有圖片替換成另一張圖片 |
| 書簽、錨點、超鏈接 | 支持設置書簽,文檔內錨點和超鏈接功能 |
| Expression Language | 完全支持SpringEL表達式,可以擴展更多的表達式:OGNL, MVEL… |
| 樣式 | 模板即樣式,同時代碼也可以設置樣式 |
| 模板嵌套 | 模板包含子模板,子模板再包含子模板 |
| 合并 | Word合并Merge,也可以在指定位置進行合并 |
| 用戶自定義函數(插件) | 插件化設計,在文檔任何位置執行函數 |
快速上手
Maven
<dependency><groupId>com.deepoove</groupId><artifactId>poi-tl</artifactId><version>1.12.2</version>
</dependency>
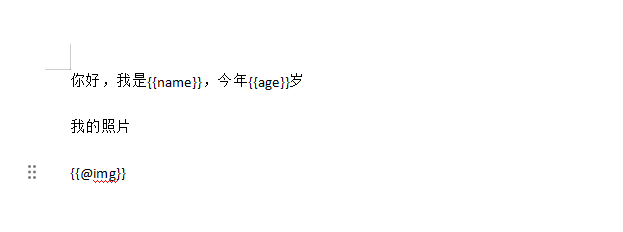
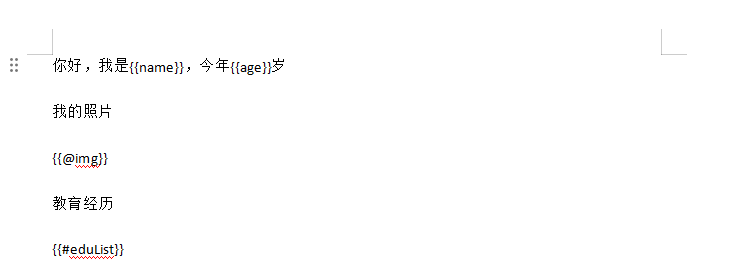
準備一個模板文件,占位符使用雙大括號占位
你好,我是{{name}},今年{{age}}歲
然后將模板放在 resources 目錄下,編寫代碼
@Test
void test1() {// 定義模板對應的數據HashMap<String, Object> data = new HashMap<>();data.put("name", "張三");data.put("age", 18);// 加載本地模板文件InputStream inputStream = getClass().getResourceAsStream("/演示模板1.docx");// 渲染模板XWPFTemplate template = XWPFTemplate.compile(inputStream).render(data);try {// 寫出到文件template.writeAndClose(new FileOutputStream("output.docx"));} catch (IOException e) {throw new RuntimeException(e);}
}
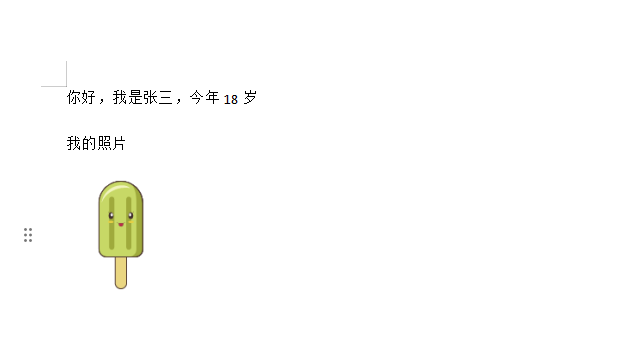
效果展示

加載遠程模板文件
在實際業務場景中,模板可能會有很多,并且不會保存在本地,這時就需要加載遠程模板來進行處理
下面是示例代碼
@Test
void test2() {try {// 加載遠程模板String templateUrl ="https://szx-bucket1.oss-cn-hangzhou.aliyuncs.com/picgo/%E6%BC%94%E7%A4%BA%E6%A8%A1%E6%9D%BF1.docx";URL url = new URL(templateUrl);HttpURLConnection conn = (HttpURLConnection) url.openConnection();InputStream inputStream = conn.getInputStream();// 定義模板對應的數據HashMap<String, Object> data = new HashMap<>();data.put("name", "張三");data.put("age", 18);// 渲染模板XWPFTemplate template = XWPFTemplate.compile(inputStream).render(data);// 寫出到文件template.writeAndClose(new FileOutputStream("output2.docx"));} catch (Exception e) {throw new RuntimeException(e);}
}
編寫接口返回處理后的文件
下面我們來實現編寫一個接口,前端訪問時攜帶參數,后端完成編譯后返回文件給前端下載
@Api(tags = "模板管理")
@RestController
@RequestMapping("/word")
public class WordController {@GetMapping("getWord")public void getWord(String name, Integer age, HttpServletResponse response) {// 定義模板對應的數據HashMap<String, Object> data = new HashMap<>();data.put("name", name);data.put("age", age);// 加載本地模板文件InputStream inputStream = getClass().getResourceAsStream("/演示模板1.docx");// 渲染模板XWPFTemplate template = XWPFTemplate.compile(inputStream).render(data);// 設置響應頭,指定文件類型和內容長度response.setContentType("application/vnd.openxmlformats-officedocument.wordprocessingml.document");response.setHeader("Content-Disposition", "attachment; filename=output.docx");// 將生成的文件直接寫出到HTTP響應輸出流OutputStream outputStream = null;try {outputStream = response.getOutputStream();template.write(outputStream);outputStream.flush();// 關閉資源template.close();outputStream.close();} catch (IOException e) {throw new RuntimeException(e);}}
}
前端代碼編寫
定義接口地址,并且請求中聲明 responseType
import { request } from '@umijs/max';// 下載報告
export async function getWordFun(age, name) {return request(`/word/getWord?age=${age}&name=${name}`, {method: 'get',responseType: 'blob', // 使用blob下載});
}
然后響應攔截器中判斷 responseType
requestErrorConfig.ts
/*** @name 錯誤處理* pro 自帶的錯誤處理, 可以在這里做自己的改動* @doc https://umijs.org/docs/max/request#配置*/
export const errorConfig: RequestConfig = {// 響應攔截器responseInterceptors: [(response) => {// 攔截響應數據,進行個性化處理const res = response as unknown as ResponseStructure;// 判斷流數據if (res.request.responseType === 'blob') {return response;}// 判斷狀態碼if (!sucCodes.includes(res.data?.code)) {return Promise.reject(res.data);}return response;},],
};
編寫頁面代碼
import React from 'react';
import { ProForm, ProFormDigit, ProFormText } from '@ant-design/pro-components';
import { getWordFun } from '@/services/ant-design-pro/reportApi';const Report = () => {const onFinish = async (values) => {let res = await getWordFun(values.age, values.name);// 接收流文件數據并下載const blob = new Blob([res], {type: res.type,});const link = document.createElement('a');link.href = URL.createObjectURL(blob);link.download = 'test.docx';link.click();};return (<><ProForm title="新建表單" onFinish={onFinish}><ProFormText name="name" label="名稱" placeholder="請輸入名稱" /><ProFormDigit type={'number'} name="age" label="年齡" placeholder="請輸入年齡" /></ProForm></>);
};export default Report;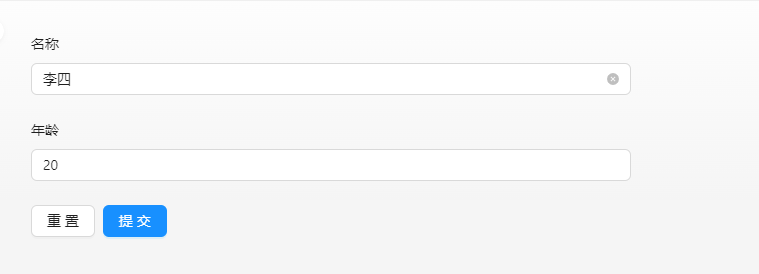
下載的文件內容

圖片
圖片標簽以@開始:{{@var}}
@Test
void test3() {// 定義模板對應的數據HashMap<String, Object> data = new HashMap<>();data.put("name", "張三");data.put("age", 18);data.put("img", Pictures.ofUrl("http://deepoove.com/images/icecream.png").size(100, 100).create());// 加載本地模板文件InputStream inputStream = getClass().getResourceAsStream("/演示模板1.docx");// 渲染模板XWPFTemplate template = XWPFTemplate.compile(inputStream).render(data);try {// 寫出到文件template.writeAndClose(new FileOutputStream("output.docx"));} catch (IOException e) {throw new RuntimeException(e);}
}
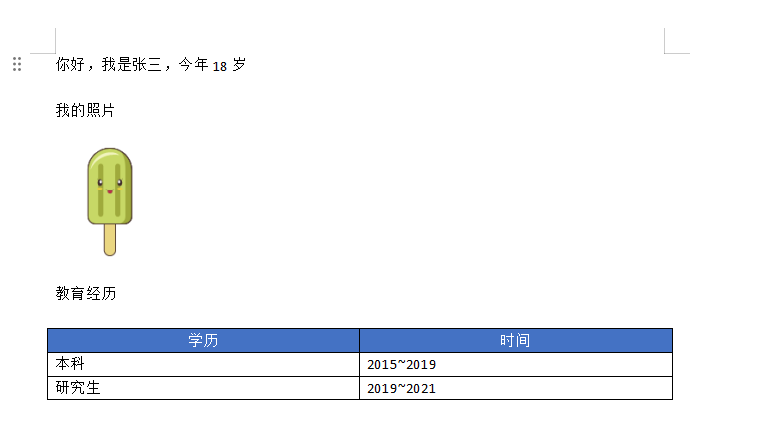
表格
表格標簽以#開始:{{#var}}
// 插入表格
@Test
void test4() {// 定義模板對應的數據HashMap<String, Object> data = new HashMap<>();data.put("name", "張三");data.put("age", 18);data.put("img", Pictures.ofUrl("http://deepoove.com/images/icecream.png").size(100, 100).create());// 第0行居中且背景為藍色的表格RowRenderData row0 =Rows.of("學歷", "時間").textColor("FFFFFF").bgColor("4472C4").center().create();RowRenderData row1 = Rows.create("本科", "2015~2019");RowRenderData row2 = Rows.create("研究生", "2019~2021");data.put("eduList", Tables.create(row0, row1, row2));// 加載本地模板文件InputStream inputStream = getClass().getResourceAsStream("/演示模板1.docx");// 渲染模板XWPFTemplate template = XWPFTemplate.compile(inputStream).render(data);try {// 寫出到文件template.writeAndClose(new FileOutputStream("output.docx"));} catch (IOException e) {throw new RuntimeException(e);}
}
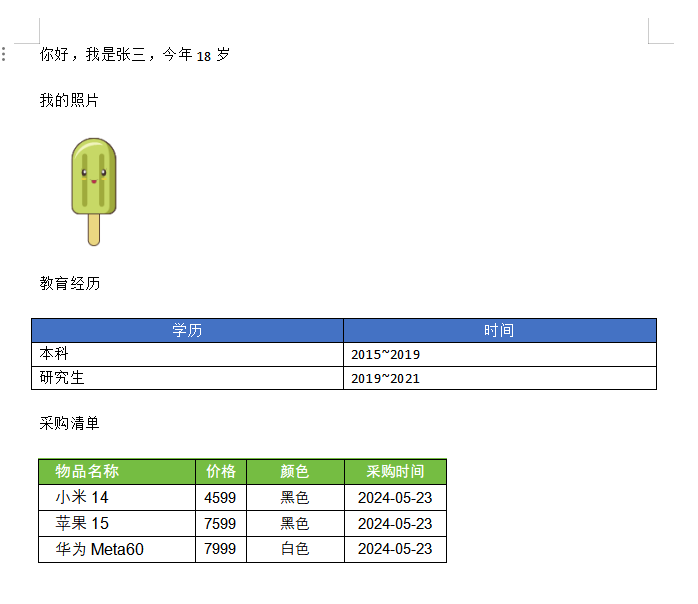
表格行循環
我們希望根據一個集合的內容來決定表格的行數,這是就用到表格行循環
貨物明細需要展示所有貨物,
{{goods}}是個標準的標簽,將{{goods}}置于循環行的上一行,循環行設置要循環的標簽和內容,注意此時的標簽應該使用[],以此來區別poi-tl的默認標簽語法。
示例代碼
// 循環行表格
@Test
void test5() {Good good = new Good();good.setName("小米14");good.setPrice("4599");good.setColor("黑色");good.setTime("2024-05-23");Good good2 = new Good();good2.setName("蘋果15");good2.setPrice("7599");good2.setColor("黑色");good2.setTime("2024-05-23");Good good3 = new Good();good3.setName("華為Meta60");good3.setPrice("7999");good3.setColor("白色");good3.setTime("2024-05-23");ArrayList<Good> goods = new ArrayList<>();goods.add(good);goods.add(good2);goods.add(good3);// 定義模板對應的數據HashMap<String, Object> data = new HashMap<>();data.put("name", "張三");data.put("age", 18);data.put("img", Pictures.ofUrl("http://deepoove.com/images/icecream.png").size(100, 100).create());// 第0行居中且背景為藍色的表格RowRenderData row0 =Rows.of("學歷", "時間").textColor("FFFFFF").bgColor("4472C4").center().create();RowRenderData row1 = Rows.create("本科", "2015~2019");RowRenderData row2 = Rows.create("研究生", "2019~2021");data.put("eduList", Tables.create(row0, row1, row2));// 添加采購列表數據data.put("goods", goods);// 加載本地模板文件InputStream inputStream = getClass().getResourceAsStream("/演示模板1.docx");// 定義行循環插件LoopRowTableRenderPolicy policy = new LoopRowTableRenderPolicy();// 綁定插件Configure config = Configure.builder().bind("goods", policy).build();// 渲染模板XWPFTemplate template = XWPFTemplate.compile(inputStream, config).render(data);try {// 寫出到文件template.writeAndClose(new FileOutputStream("output.docx"));} catch (IOException e) {throw new RuntimeException(e);}
}@Data
public class Good {private String name;private String price;private String color;private String time;
}

項目線上部署
Docker部署
首先編寫Dockerfile
Java的Dockerfile
方式一:基于已經打包的jar包編寫DockerFile
從阿里鏡像獲取源地址,以獲取更快的下載速度
訪問:https://cr.console.aliyun.com/cn-hangzhou/instances/artifact

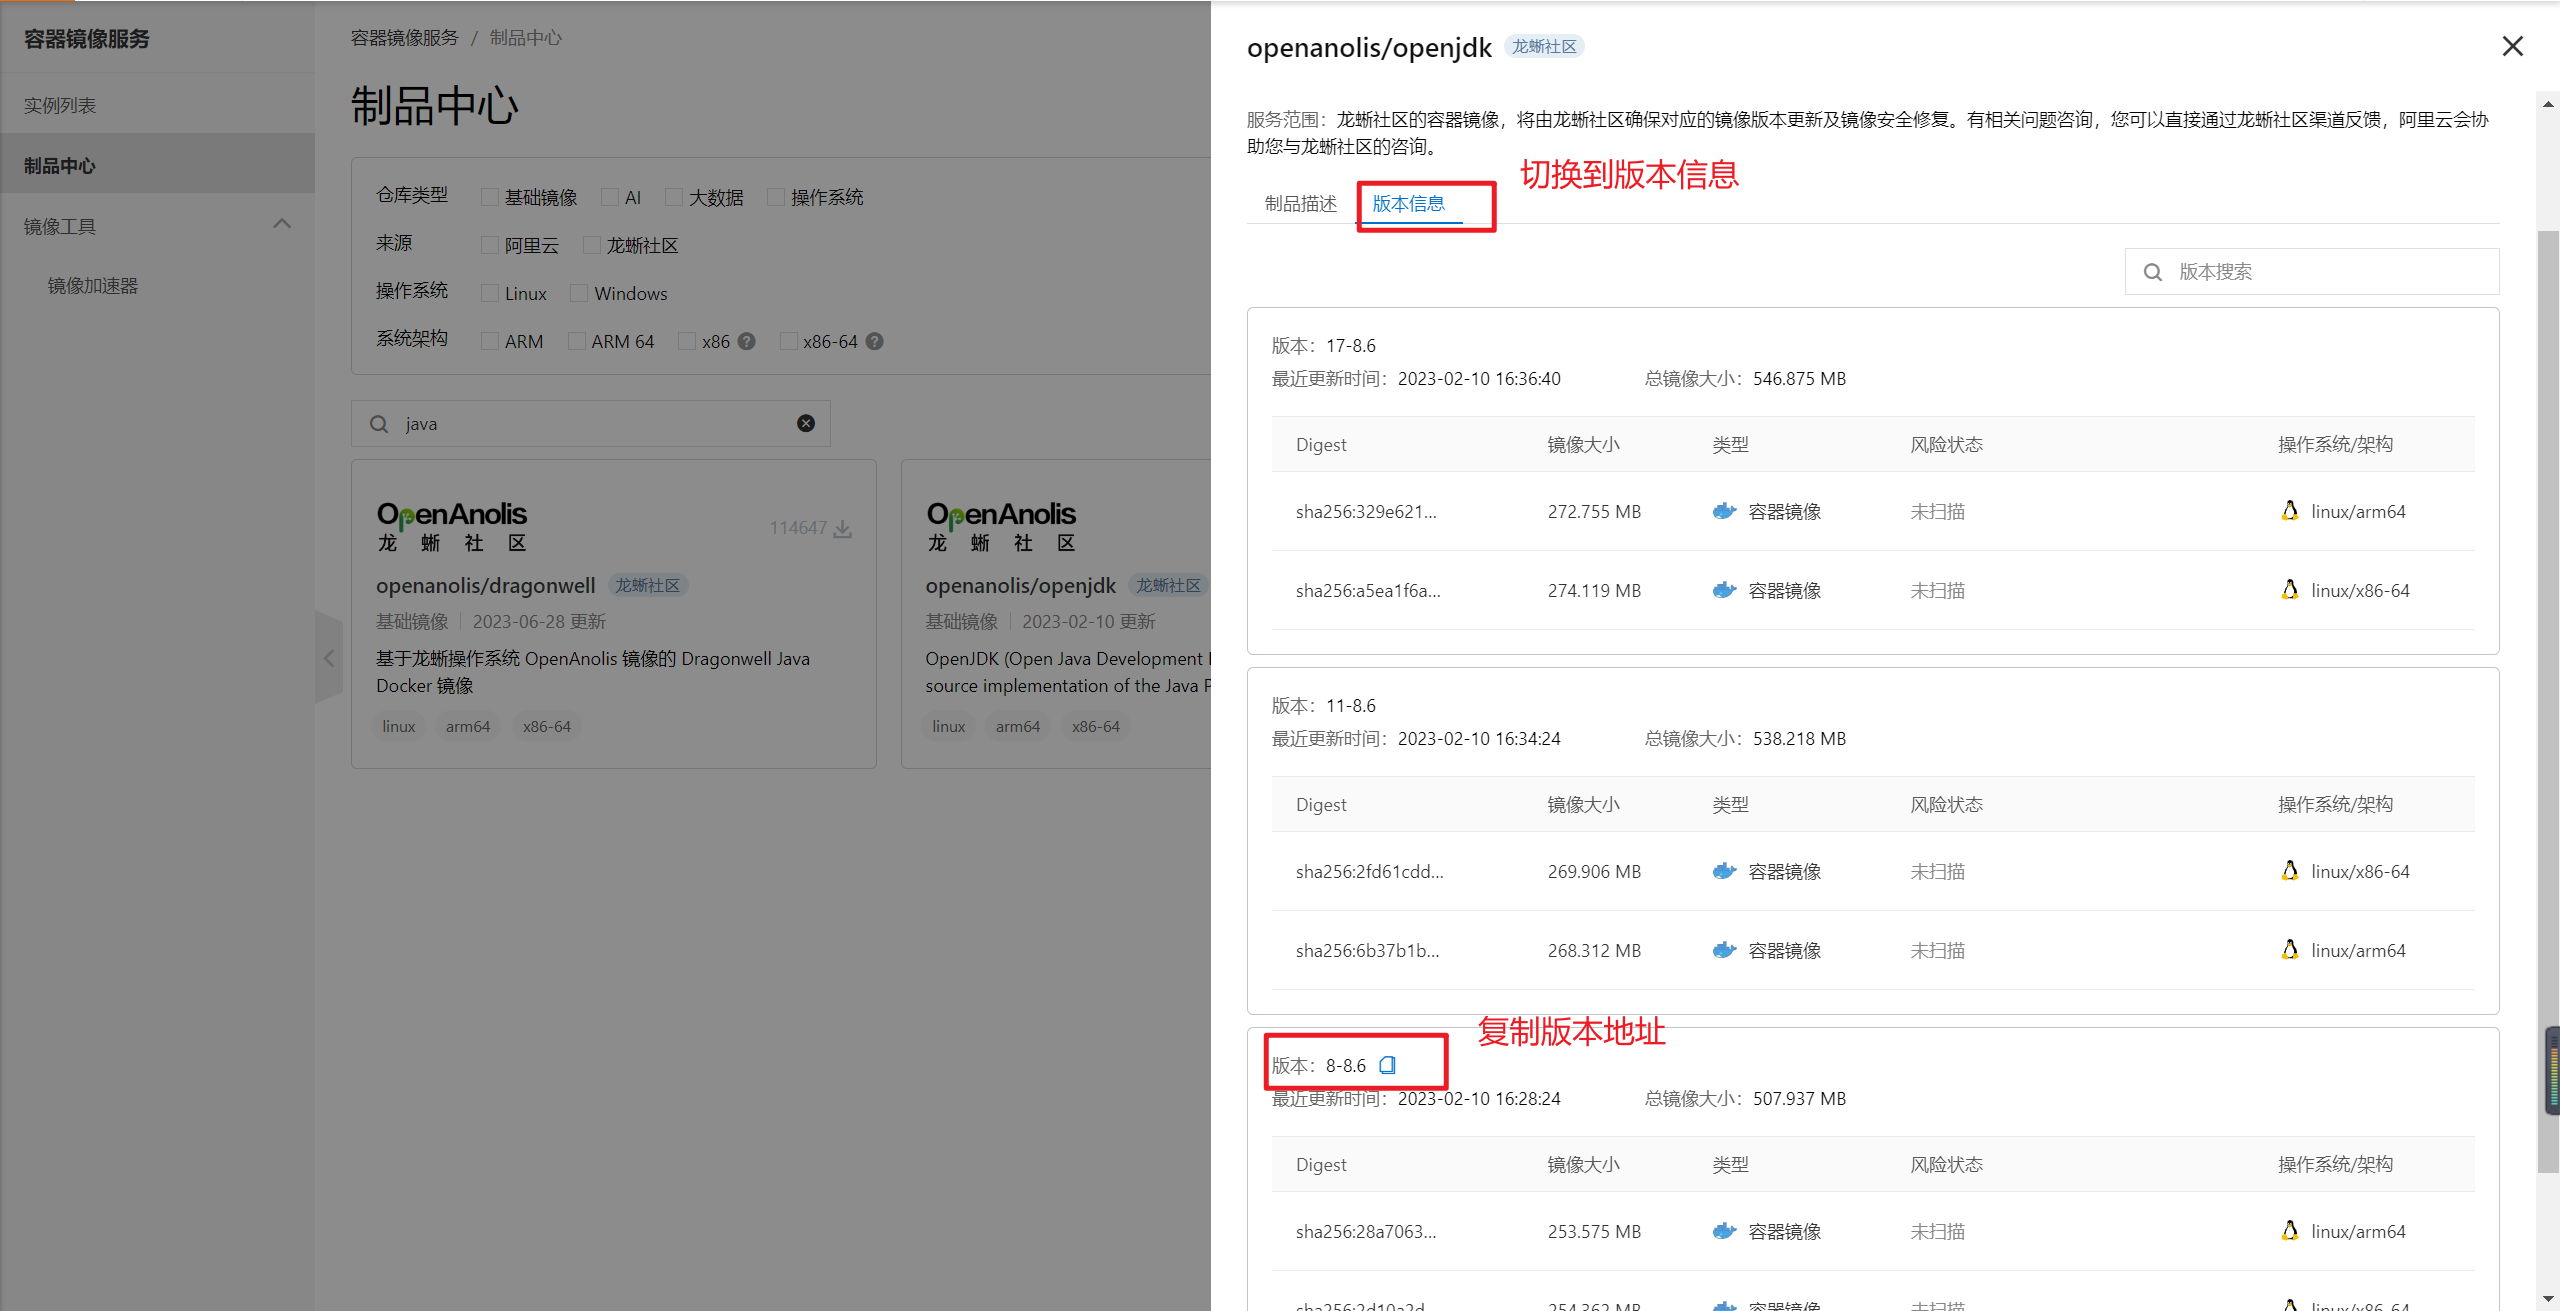
# 可以從阿里云的容器鏡像服務中 找到openjdk,選擇相對應的版本
FROM anolis-registry.cn-zhangjiakou.cr.aliyuncs.com/openanolis/openjdk:8-8.6# 這里就是進入創建好的目錄
WORKDIR /app# 將打包后的jar包復制到指定目錄(這里我是復制到了創建好的工作目錄)下,并重命名
COPY ./user-center-0.0.1-SNAPSHOT.jar ./user-center-0.0.1-SNAPSHOT.jar# 運行命令
CMD ["java","-jar","/app/user-center-0.0.1-SNAPSHOT.jar","--spring.profiles.active=prod"]
方式二:只上傳代碼,其他都交給Docker
FROM maven:3.8.1-jdk-8-slim as builderWORKDIR /app# 復制代碼到容器
COPY pom.xml .
COPY src ./src# 打包并跳過Test檢查
RUN mvn package -DskipTestsCMD ["java","-jar","/app/target/user-center-0.0.1-SNAPSHOT.jar","--spring.profiles.active=prod"]
構建鏡像
將Dockerfile和源碼放在平級,然后運行下面命令構建鏡像
docker build -t user-center:1.0.0 .

啟動鏡像
docker run -d --name=user-center -p 8080:8080 user-center:1.0.0
前端Dockerfile
方式一:在鏡像中進行打包
參考文章:https://blog.51cto.com/u_16099258/10476241
編寫 Dockerfile
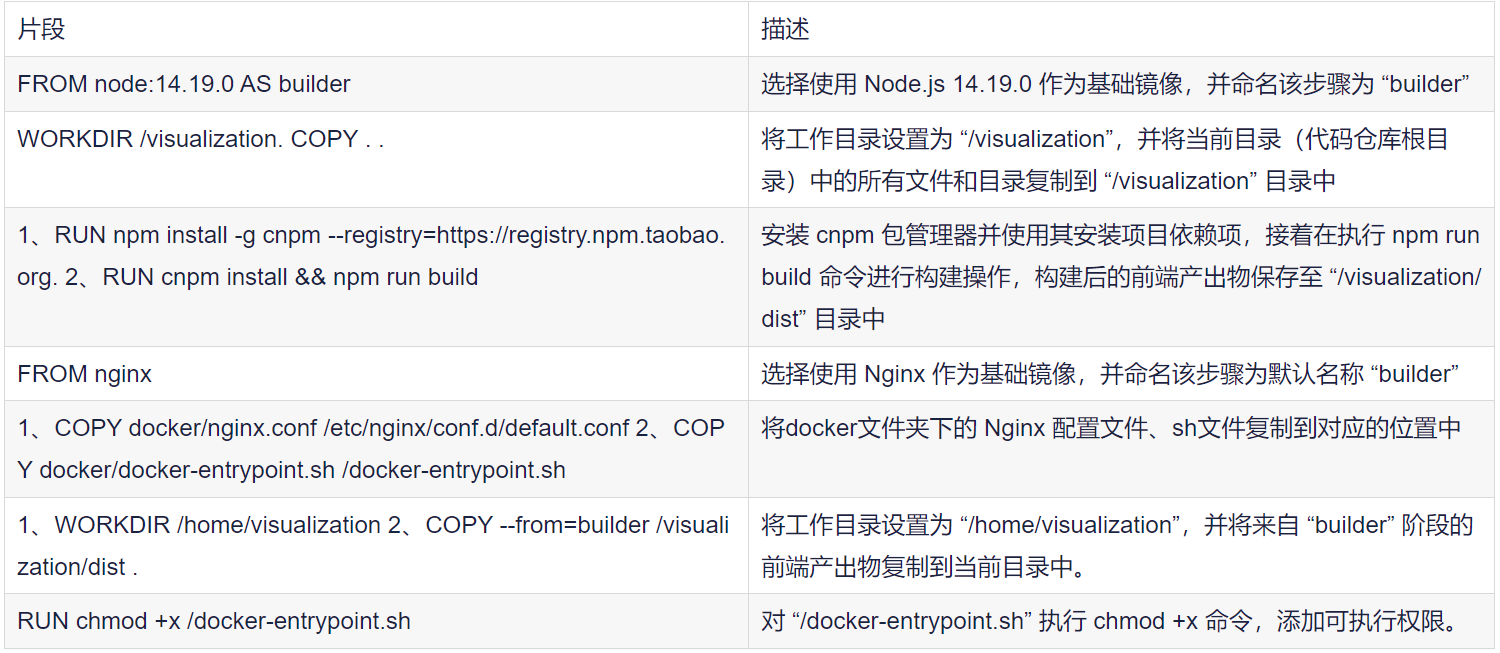
# 第一階段:構建前端產出物
FROM node:20.11.1 AS builderWORKDIR /visualization
COPY . .
RUN npm install -g pnpm --registry=https://registry.npmmirror.com/
RUN pnpm install && pnpm run build# 第二階段:生成最終容器映像
FROM nginxCOPY docker/nginx.conf /etc/nginx/conf.d/default.conf
COPY docker/docker-entrypoint.sh /docker-entrypoint.shWORKDIR /home/visualization
COPY --from=builder /visualization/dist .RUN chmod +x /docker-entrypoint.sh
在根目錄新建 docker 文件夾,放兩個文件
1、新建nginx.conf文件,用于配置前端項目訪問nginx配置文件
2、新建docker-entrypoint.sh文件,執行腳本動態修改nginx.conf中的代理請求地址nginx.conf內容
~根據項目情況做出修改,gzip配置前端無則可刪除
~ /dev是前端代理跨域的基準地址,要保持統一,代理到后端的地址,做代理的目的是后面可以根據容器run動態改變proxy_pass地址
~如果項目無https則可刪除443監聽~有https則需要配置證書ssl_certificate、ssl_certificate_key,此文件的路徑為后面 運行容器時(run) -v將宿主機的目錄映射至容器,就是容器的目錄
新建nginx.conf文件
server {listen 80;server_name  localhost;# gzip config
#     gzip off;
#     gzip_min_length 1k;
#     gzip_comp_level 9;
#     gzip_types text/plain text/css text/javascript application/json application/javascript application/x-javascript application/xml;
#     gzip_vary off;
#     gzip_disable "MSIE [1-6]\.";#location / {root   /home/visualization;index  index.html index.htm;try_files $uri $uri/ /index.html;}location ^~/api/ {# 代理proxy_pass http://cx5k97.natappfree.cc/;access_log /var/log/nginx/dev_access.log;error_log /var/log/nginx/dev_error.log;}
}
新建docker-entrypoint.sh文件
#!/usr/bin/env bashAPI_BASE_PATH=$API_BASE_PATH;
if [ -z "$API_BASE_PATH" ]; thenAPI_BASE_PATH="https://xxx.xxx/";
fiapiUrl="proxy_pass  $API_BASE_PATH;"
sed -i '22c '"$apiUrl"'' /etc/nginx/conf.d/default.conf
sed -i '75c '"$apiUrl"'' /etc/nginx/conf.d/default.conf# 變量CERT判斷是否需要證書https, $CERT存在則不需要
certOr="#"
if [ -n "$CERT" ]; thensed -i '45c '"$certOr"'' /etc/nginx/conf.d/default.confsed -i '46c '"$certOr"'' /etc/nginx/conf.d/default.confsed -i '60c '"$certOr"'' /etc/nginx/conf.d/default.confsed -i '61c '"$certOr"'' /etc/nginx/conf.d/default.conf
finginx -g "daemon off;"
然后在根目錄新建 .dockerignore,忽略文件
# Dependency directory
# https://www.npmjs.org/doc/misc/npm-faq.html#should-i-check-my-node_modules-folder-into-git
node_modules
.DS_Store
dist# node-waf configuration
.lock-wscript# Compiled binary addons (http://nodejs.org/api/addons.html)
build/Release
.dockerignore
Dockerfile
*docker-compose*# Logs
logs
*.log# Runtime data
.idea
.vscode
*.suo
*.ntvs*
*.njsproj
*.sln
*.sw*
pids
*.pid
*.seed
.git
.hg
.svn
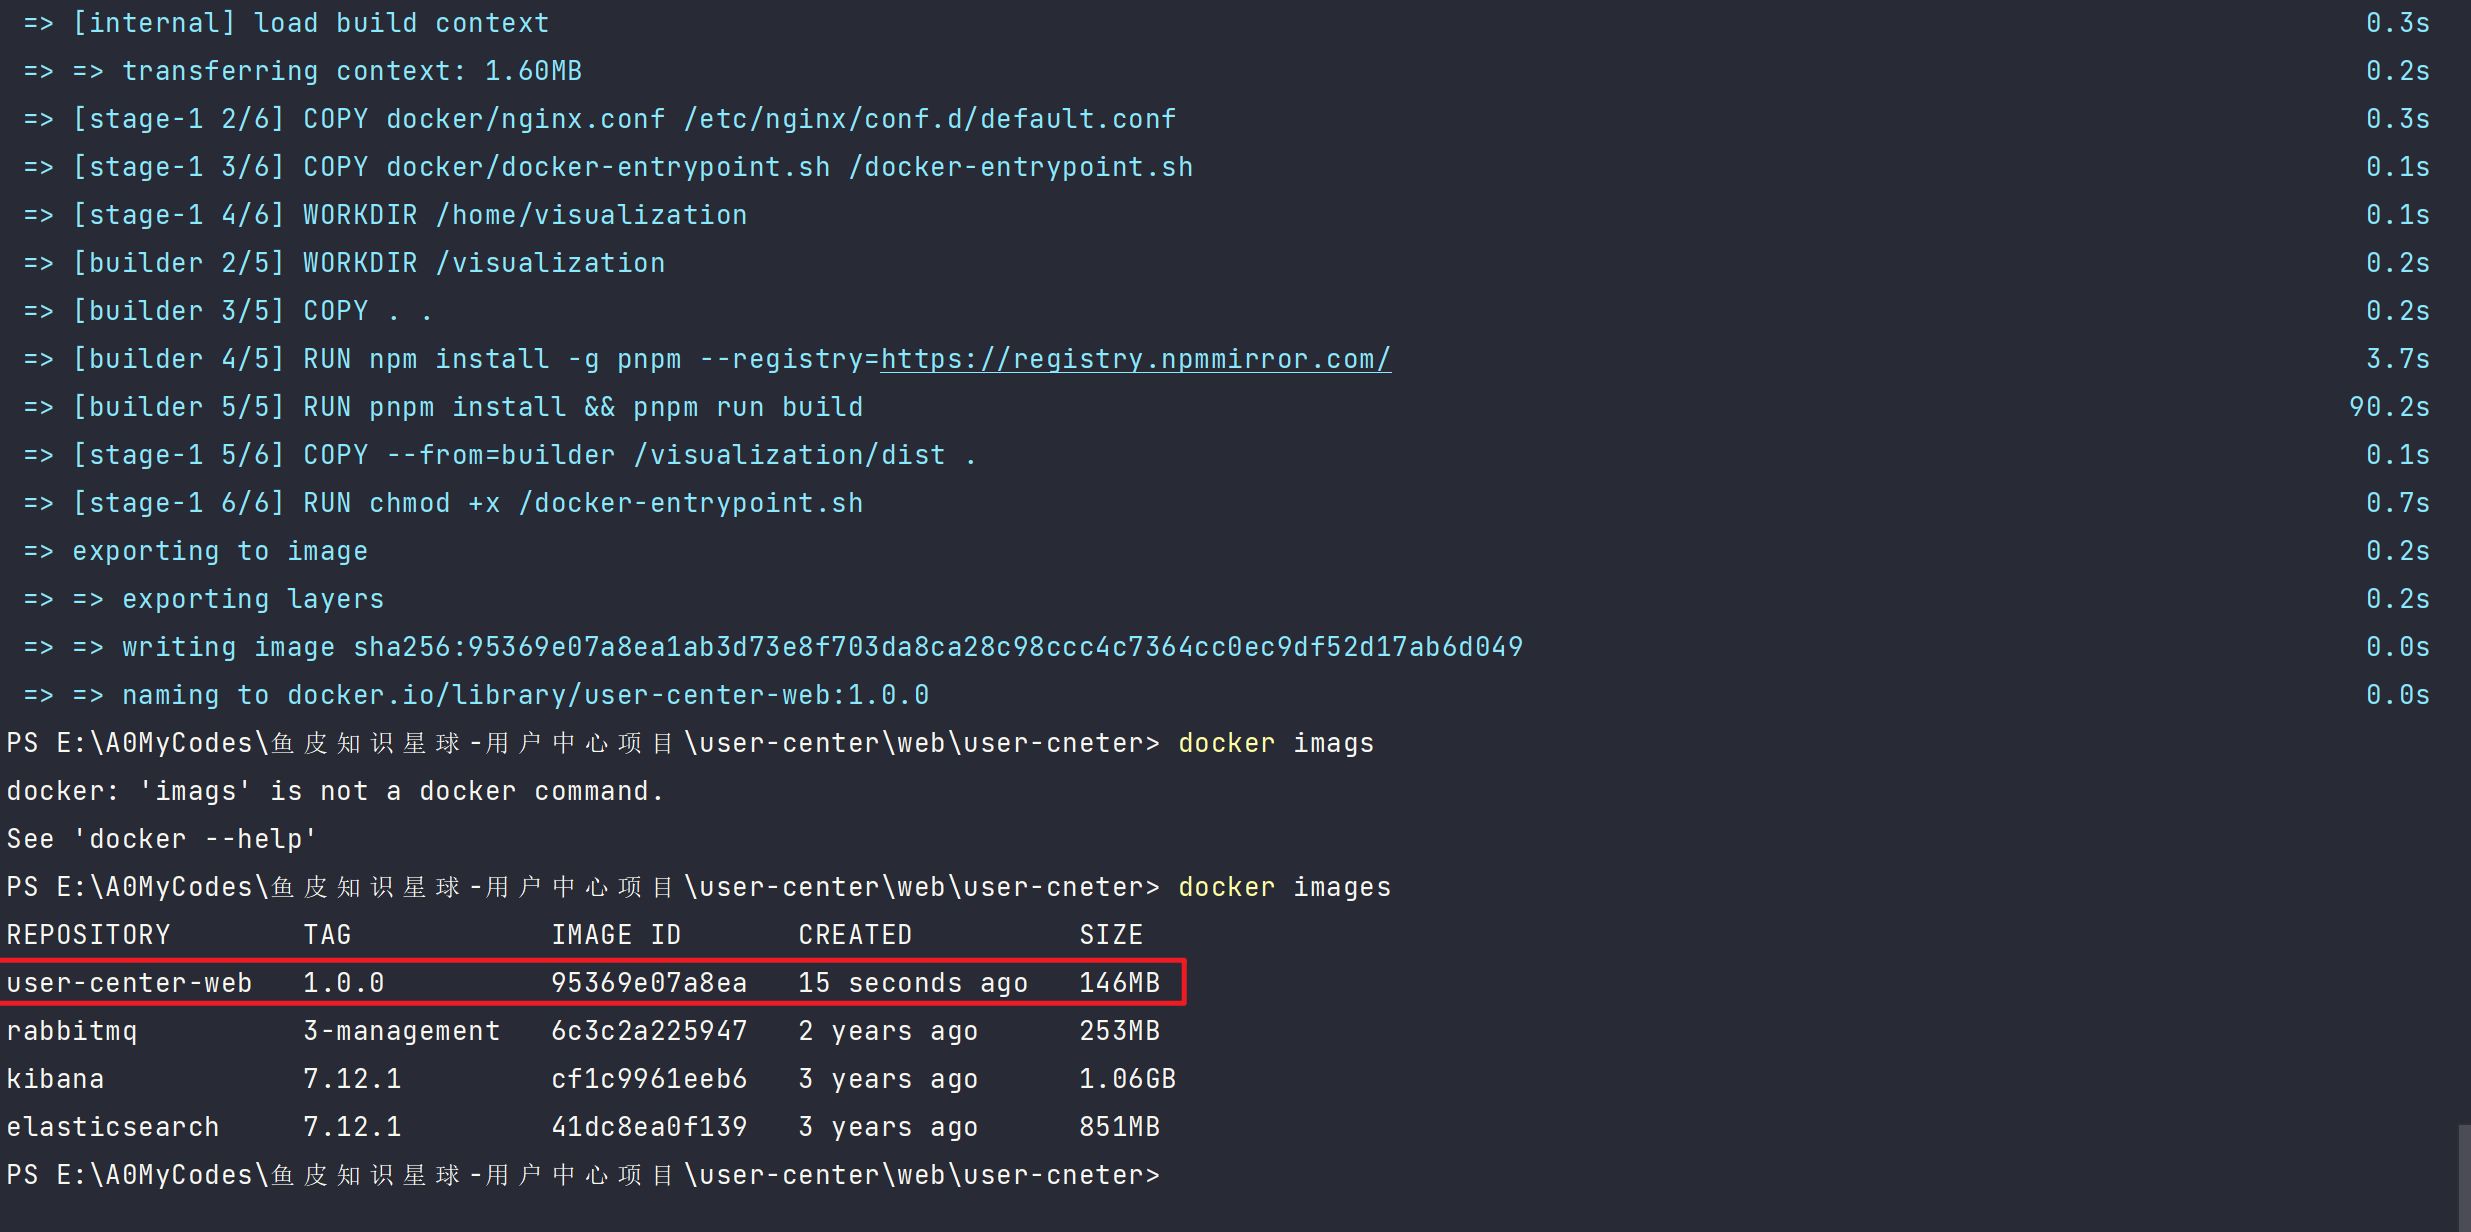
構建結果
運行
//方式一:
// contanier_hello為容器名稱
// -p 9090:80  將容器里面的80端口映射到宿主機的8080端口,80端口就是nginx里面配置,多個端口多個配置,必須確保服務器已經開了此端口
docker run -d --name user-center-web -p 8000:80 user-center-web:1.0.0//方式二:
// 運行容器的時候改變nginx代理地址
// -e API_BASE_PATH就是上面sh文件中定義的變量 把nginx的后端接口地址改為http://www.baidu.com,這個地址一定不要格式錯誤,不然nginx會解析不出來docker run -d --name user-center-web -p 80:80 -e "API_BASE_PATH=http://8g6igw.natappfree.cc/" user-center-web:1.0.0


)

