
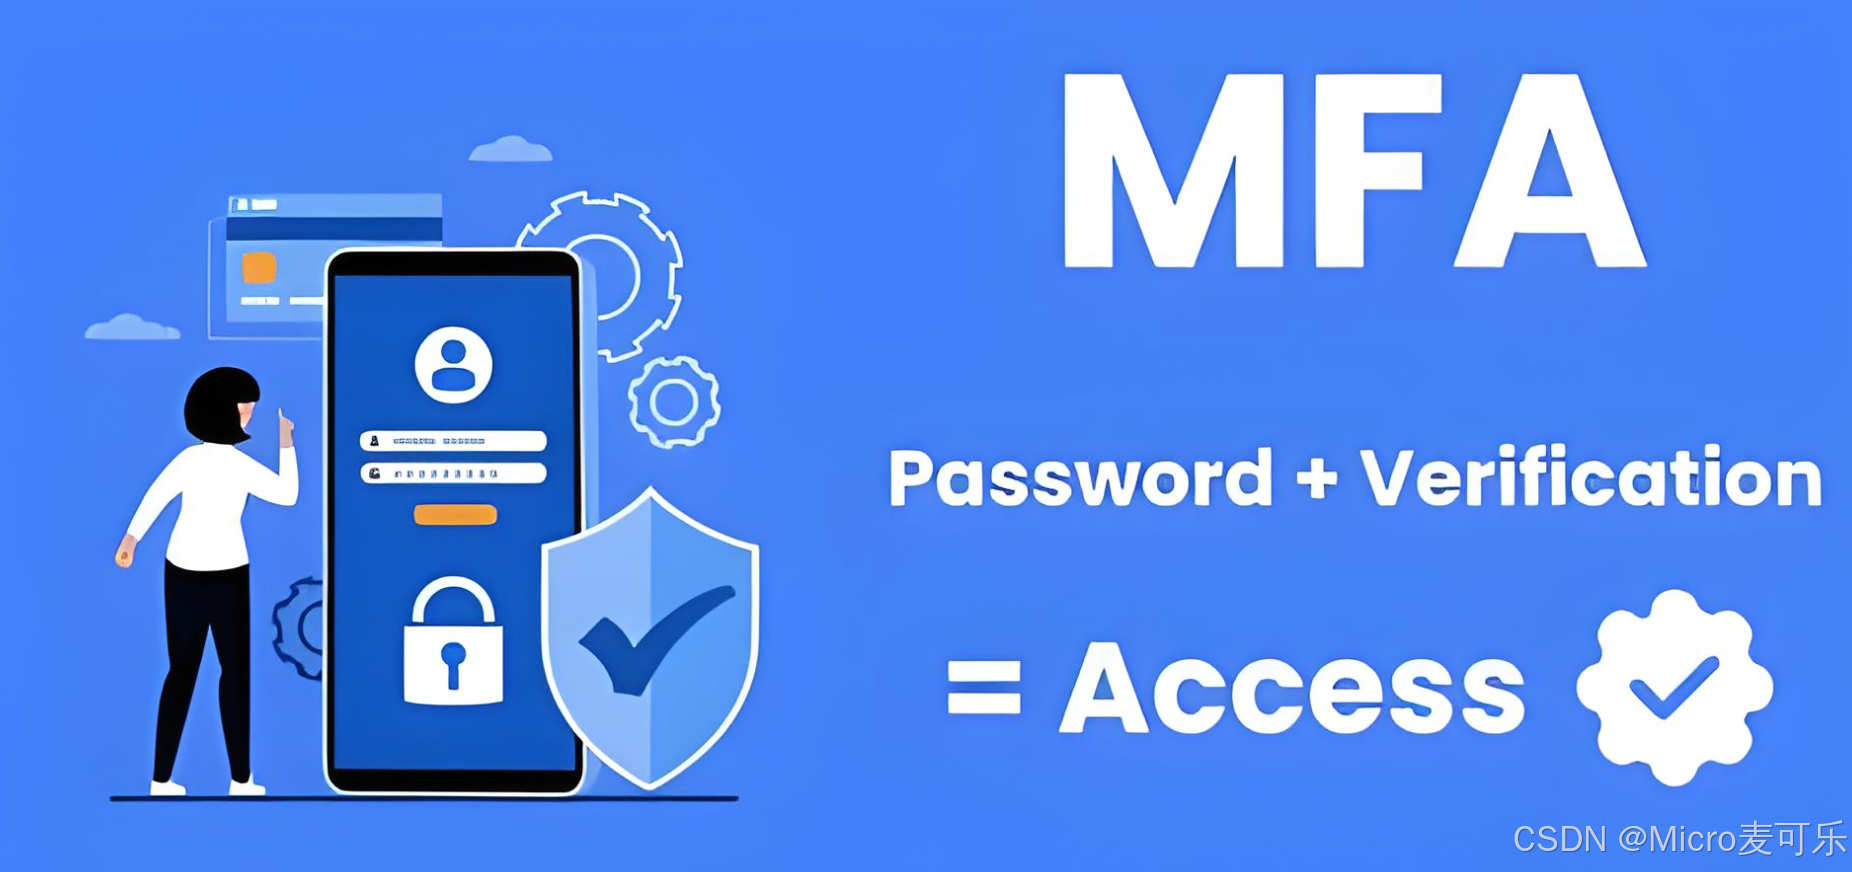
最新Spring Security實戰教程(十七)企業級安全方案設計 - 多因素認證(MFA)實現
- 1. 前言
- 2. 為什么需要多因素認證?
-
-
- 傳統認證的風險
- MFA的核心優勢
- 常見多因素認證實現方案
-
- 3. 多因素認證的核心原理
- 4. 系統架構與流程設計
-
-
- ? 用戶注冊/初始化
- ? 第一步:用戶名+密碼登錄
- ? TOTP 驗證
- ? 完整流程圖
-
- 5. Spring Security整合MFA實現
-
-
- 5.1 引入依賴
- 5.2 用戶實體
- 5.3 用戶 Mapper
- 5.4 TOTP 工具類(Google Authenticator 兼容)
- 5.5 Service 層:用戶與 MFA 邏輯
- 5.6 安全配置(SecurityConfig.java)
-
- 5.6 .1 自定義異常 MfaRequiredException.java
- 6.5.2 自定義 AuthenticationProvider
- 5.6.3 自定義過濾器 MfaAuthenticationFilter.java
- 5.6.4 自定義失敗處理器 CustomAuthenticationFailureHandler.java
- 5.6.5 安全配置 SecurityConfig.java
- 5.7 控制器:登錄、MFA 驗證、注冊與秘鑰初始化
- 5.8 前端頁面示例(Thymeleaf)
-
- 6. 總結與落地建議
-
-
- 實際生產環境推薦:
-
回顧鏈接:
最新Spring Security實戰教程(一)初識Spring Security安全框架
最新Spring Security實戰教程(二)表單登錄定制到處理邏輯的深度改造
最新Spring Security實戰教程(三)Spring Security 的底層原理解析
最新Spring Security實戰教程(四)基于內存的用戶認證
最新Spring Security實戰教程(五)基于數據庫的動態用戶認證傳統RBAC角色模型實戰開發
最新Spring Security實戰教程(六)最新Spring Security實戰教程(六)基于數據庫的ABAC屬性權限模型實戰開發
最新Spring Security實戰教程(七)方法級安全控制@PreAuthorize注解的靈活運用
最新Spring Security實戰教程(八)Remember-Me實現原理 - 持久化令牌與安全存儲方案
最新Spring Security實戰教程(九)前后端分離認證實戰 - JWT+SpringSecurity無縫整合
最新Spring Security實戰教程(十)權限表達式進階 - 在SpEL在安全控制中的高階魔法
最新Spring Security實戰教程(十一)CSRF攻防實戰 - 從原理到防護的最佳實踐
最新Spring Security實戰教程(十二)CORS安全配置 - 跨域請求的安全邊界設定
最新Spring Security實戰教程(十三)會話管理機制 - 并發控制與會話固定攻擊防護
最新Spring Security實戰教程(十四)OAuth2.0精講 - 四種授權模式與資源服務器搭建
最新Spring Security實戰教程(十五)快速集成 GitHub 與 Gitee 的社交登錄
最新Spring Security實戰教程(十六)微服務間安全通信 - JWT令牌傳遞與校驗機制
1. 前言
在微服務與分布式架構日益普及的今天,傳統的 單一憑證(用戶名+密碼) 已經難以滿足企業對于身份驗證的高安全性需求。多因素認證(Multi‐Factor Authentication,簡稱 MFA) 通過用戶知道的東西(如密碼)+ 用戶擁有的東西(如動態驗證碼)或 用戶自身的一部分(如指紋)三種因素的組合,大幅提升了系統防護能力。
比如我們常的 GitHub、騰訊云等就開啟了MFA,GitHub 開啟 MFA后可以使用 使用Authenticator 應用掃描,而騰訊云則需要短信驗證碼來進行校驗。
本章節博主將帶著大家深入解析MFA,并基于 Spring Security 6 ,結合 MySQL 與 MyBatis-Plus,帶你從理論到實戰,快速構建一套企業級的 MFA 認證方案。
2. 為什么需要多因素認證?
傳統認證的風險
- 密碼脆弱性:大部分的數據泄露源于弱密碼或重復密碼
- 撞庫攻擊:黑客利用泄露的密碼庫嘗試登錄其他系統
- 釣魚攻擊:偽造登錄頁面竊取用戶憑證
MFA的核心優勢
多因素認證(MFA)通過多種不同類別的憑證 來共同完成身份驗證,顯著提升安全性:
- Something you know(你知道的東西):用戶名與密碼、PIN 碼等;
- Something you have(你擁有的東西):手機收到的 OTP、應用令牌(Authenticator)等;
- Something you are(你自身的一部分):生物特征(指紋、面部識別等)。
當密碼被破解或泄露后,如果沒有第二因素(如手機動態驗證碼),攻擊者依然無法登錄。
常見多因素認證實現方案
認證方式
安全性
用戶體驗
實施成本
SMS驗證碼
★★☆
★★★
★★☆
郵件驗證
★★☆
★★☆
★★☆
TOTP
★★★
★★★☆
★★★
生物識別
★★★☆
★★★★
★★★★
本方案選擇TOTP:平衡安全性與實施成本,兼容Google Authenticator等標準應用
3. 多因素認證的核心原理
以 TOTP(Time‐based One‐Time Password)為例:
- 服務端生成用戶專屬密鑰(
Secret Key),并在用戶首次登錄或在安全設置中心將其展示給用戶(通常通過二維碼形式掃描到Google Authenticator、Authy等應用中) - 手機端應用(如
Google Authenticator)基于Secret Key與當前時間戳,通過HMAC‐SHA1算法計算出 6 位動態驗證碼 - 用戶登錄時,輸入用戶名+密碼(第 1 因素),若校驗通過,跳轉到 MFA 驗證頁面,要求輸入手機上展示的 6 位動態驗證碼(第 2 因素)
- 服務端驗證客戶端提交的動態驗證碼是否與基于相同 Secret Key 和當前時間戳計算出的值一致。若一致,則認為通過 MFA ,登錄成功;否則,拒絕登錄或提示重試
整個流程中,只有用戶掌握 Secret Key(存在手機應用中),且需實時生成動態驗證碼,即使攻擊者獲得了用戶名+密碼,沒有手機和 Secret Key,也無法通過第二因素驗證。
4. 系統架構與流程設計
本章節以單體 Spring Boot 應用演示 MFA 流程,生產環境可拆分成獨立的認證服務(Auth Service)與業務服務(Resource Service),二者均依賴集中管理的用戶與 MFA 數據庫。關鍵流程:
用戶注冊/初始化
后臺管理員或用戶注冊時,系統為用戶生成一對 RSA 密鑰(可選)或僅生成 TOTP Secret,保存用戶表中。
將生成的 Secret 以二維碼或明文形式呈現給用戶,用戶通過 Google Authenticator 等掃描或手動錄入。
第一步:用戶名+密碼登錄
用戶提交用戶名+密碼,Service 層校驗密碼(結合 BCrypt)。
校驗成功后,將用戶標記為“已通過第一步認證”,并生成一個短期令牌(可存放到 session 或 JWT)表示“待 MFA”狀態,重定向到 MFA 驗證頁。
TOTP 驗證
用戶在 MFA 驗證頁中輸入 6 位動態驗證碼,提交后,后臺從數據庫中取出該用戶的 Secret,通過 TOTP 算法生成當前時刻的合法驗證碼,進行比對。
若校驗通過,則完成整個登錄流程,Spring Security 將真正的 Authentication 對象置入 SecurityContext 中,登錄成功,跳轉到首頁;否則,提示錯誤并重試。
完整流程圖

5. Spring Security整合MFA實現
根據前面的章節我們已經整合好了 mysql + mybatis等的項目案例,我們繼續追加子模塊,引入Google Authenticator 兼容 TOTP 實現:com.warrenstrange:googleauth:1.5.0
5.1 引入依賴
下面以 pom.xml 為例,列出主要依賴:
<!-- pom.xml --><dependencies><!-- Spring Boot Starter Web + Thymeleaf --><dependency><groupId>org.springframework.boot</groupId><artifactId>spring-boot-starter-web</artifactId></dependency><dependency><groupId>org.springframework.boot</groupId><artifactId>spring-boot-starter-thymeleaf</artifactId></dependency><!-- Spring Security 6 --><dependency><groupId>org.springframework.boot</groupId><artifactId>spring-boot-starter-security</artifactId></dependency><!-- MyBatis-Plus & MySQL 驅動 --><dependency><groupId>com.baomidou</groupId><artifactId>mybatis-plus-boot-starter</artifactId><version>3.5.3.5</version></dependency><dependency><groupId>mysql</groupId><artifactId>mysql-connector-java</artifactId><scope>runtime</scope></dependency><!-- Google Authenticator TOTP 實現 --><dependency><groupId>com.warrenstrange</groupId><artifactId>googleauth</artifactId><version>1.5.0</version></dependency><!-- Lombok(可選) --><dependency><groupId>org.projectlombok</groupId><artifactId>lombok</artifactId><scope>provided</scope></dependency><!-- 測試 --><dependency><groupId>org.springframework.boot</groupId><artifactId>spring-boot-starter-test</artifactId><scope>test</scope></dependency></dependencies>
5.2 用戶實體
@Data
@TableName("users")
public class User {@TableId(type = IdType.AUTO)private Long id;private String username;private String password;private Boolean enabled;private Boolean mfaEnabled;private String mfaSecret;private LocalDateTime createdAt;private LocalDateTime updatedAt;
}
使用 Lombok @Data 簡化 getter/setter
mfaEnabled 與 mfaSecret 字段分別表示該用戶是否啟用 MFA 及其對應的 TOTP 密鑰
5.3 用戶 Mapper
@Mapper
public interface UserMapper extends BaseMapper<User> {// 如果需要自定義 SQL,可在此處聲明
}
5.4 TOTP 工具類(Google Authenticator 兼容)
我們將使用 com.warrenstrange.googleauth.GoogleAuthenticator 來生成并驗證動態驗證碼(TOTP)
public class TotpUtils {private static final GoogleAuthenticator gAuth = new GoogleAuthenticator();/*** 為用戶生成一個新的 TOTP 密鑰(Base32 編碼格式)** @return Base32 編碼的密鑰*/public static String generateSecretKey() {GoogleAuthenticatorKey key = gAuth.createCredentials();return key.getKey();}/*** 驗證用戶提交的 TOTP 碼是否合法(基于用戶的 Secret Key)** @param secretKey Base32 編碼的 TOTP 密鑰* @param code      用戶提交的 6 位驗證碼* @return true 如果校驗通過;false 否則*/public static boolean verifyTotp(String secretKey, int code) {return gAuth.authorize(secretKey, code);}/*** 將 Base32 編碼的密鑰轉換為 Hex,若業務需要展示給前端 URI 可用該方法*/public static String getHexKey(String base32Secret) {Base32 codec = new Base32();byte[] bytes = codec.decode(base32Secret);return Hex.encodeHexString(bytes);}/*** 生成在 Google Authenticator 中添加賬戶的二維碼 URI** @param username 用戶名* @param secret   Base32 編碼密鑰* @param issuer   應用或企業名稱,比如 "MyCompany"* @return otpauth://totp/issuer:username?secret=SECRET&issuer=issuer*/public static String getOtpAuthURL(String username, String secret, String issuer) {return String.format("otpauth://totp/%s:%s?secret=%s&issuer=%s",issuer, username, secret, issuer);}
}
說明:
generateSecretKey():生成一個新的 Base32 格式秘鑰,用于 TOTP 綁定。verifyTotp(secretKey, code):校驗用戶提交的 6 位 TOTP 碼是否與當前時刻計算值匹配。getOtpAuthURL(...):方便在前端生成二維碼,讓用戶用 Google Authenticator 掃描。
5.5 Service 層:用戶與 MFA 邏輯
我們封裝用戶管理與 MFA 相關的業務邏輯到 UserService
IUserService.java(接口)
public interface IUserService {User findByUsername(String username);void register(User user);void enableMfa(Long userId);boolean verifyTotp(Long userId, int code);
}
UserServiceImpl.java(實現)
@Service
public class UserServiceImpl implements IUserService {@Autowiredprivate UserMapper userMapper;private final BCryptPasswordEncoder passwordEncoder = new BCryptPasswordEncoder();@Overridepublic User findByUsername(String username) {return userMapper.selectOne(new QueryWrapper<User>().eq("username", username));}@Overridepublic void register(User user) {// 加密密碼user.setPassword(passwordEncoder.encode(user.getPassword()));user.setEnabled(true);user.setMfaEnabled(false);user.setMfaSecret(null);userMapper.insert(user);}@Overridepublic void enableMfa(Long userId) {// 為用戶生成 TOTP Secret 并更新User u = userMapper.selectById(userId);String secret = TotpUtils.generateSecretKey();u.setMfaSecret(secret);u.setMfaEnabled(true);userMapper.updateById(u);}@Overridepublic boolean verifyTotp(Long userId, int code) {User u = userMapper.selectById(userId);if (u == null || !u.getMfaEnabled() || u.getMfaSecret() == null) {return false;}return TotpUtils.verifyTotp(u.getMfaSecret(), code);}
}
說明:
register(User):用戶注冊時將密碼加密存庫,初始不啟用 MFA。enableMfa(Long):為指定用戶生成 TOTP Secret,更新到數據庫,并將mfaEnabled標記為true。verifyTotp(Long, int):驗證用戶提交的 TOTP 碼是否正確。
5.6 安全配置(SecurityConfig.java)
Spring Security 6 中,我們需要覆蓋默認的認證流程,實現分為兩步的 MFA 登錄。思路如下:
- 自定義
AuthenticationProvider:首先校驗用戶名+密碼,如果用戶啟用了 MFA,就拋出一個自定義異常(MfaRequiredException),在AuthenticationFailureHandler中捕獲并重定向到 MFA 驗證頁。 - 在 MFA 驗證頁中,用戶提交 TOTP 碼后,我們自定義一個
MfaAuthenticationFilter,從 session 中讀取“待 MFA”狀態的用戶信息,再調用 Service 校驗 TOTP。如果通過,則直接構建最終的UsernamePasswordAuthenticationToken并置入 SecurityContext。
5.6 .1 自定義異常 MfaRequiredException.java
public class MfaRequiredException extends AuthenticationException {private final String username;public MfaRequiredException(String msg, String username) {super(msg);this.username = username;}public String getUsername() {return username;}
}
6.5.2 自定義 AuthenticationProvider
/*** 第一步:校驗用戶名 + 密碼* 如果用戶啟用 MFA,則拋出 MfaRequiredException,后續由 MfaAuthenticationFilter 處理*/
@Component
public class CustomAuthenticationProvider implements AuthenticationProvider {@Autowiredprivate IUserService userService;private final BCryptPasswordEncoder passwordEncoder = new BCryptPasswordEncoder();@Overridepublic Authentication authenticate(Authentication authentication) throws AuthenticationException {String username = authentication.getName();String password = (String) authentication.getCredentials();User user = userService.findByUsername(username);if (user == null || !user.getEnabled()) {throw new BadCredentialsException("用戶名或密碼錯誤");}if (!passwordEncoder.matches(password, user.getPassword())) {throw new BadCredentialsException("用戶名或密碼錯誤");}// 如果用戶啟用了 MFA,則拋出自定義異常,提示進行第二步驗證if (Boolean.TRUE.equals(user.getMfaEnabled())) {throw new MfaRequiredException("MFA 驗證必需", username);}// 未啟用 MFA 或繼承走這里,直接構建 Authenticationreturn new UsernamePasswordAuthenticationToken(username, null,Collections.singletonList(new SimpleGrantedAuthority("ROLE_USER")));}@Overridepublic boolean supports(Class<?> authentication) {return UsernamePasswordAuthenticationToken.class.isAssignableFrom(authentication);}
}
說明:
- 如果用戶開啟
mfaEnabled,校驗密碼后不直接登錄,而是通過拋出異常告知后續過濾器進行 MFA 驗證。
5.6.3 自定義過濾器 MfaAuthenticationFilter.java
/*** 該過濾器負責處理 /mfa-verify POST 請求,* 從 session 中獲取待驗證用戶名,校驗用戶提交的 TOTP 碼。*/
@Component
public class MfaAuthenticationFilter extends AbstractAuthenticationProcessingFilter {private final IUserService userService;public MfaAuthenticationFilter(IUserService userService) {super(new AntPathRequestMatcher("/mfa-verify", "POST"));this.userService = userService;// 不讓 Spring Security 為我們阻止 CSRF,示例中 CSRF 已關閉}@Overridepublic org.springframework.security.core.Authentication attemptAuthentication(HttpServletRequest request,HttpServletResponse response) throws IOException, ServletException {// 應用前端將用戶名暫存到 sessionAttribute: "MFA_USER"String username = (String) request.getSession().getAttribute("MFA_USER");if (username == null) {throw new RuntimeException("會話中找不到待 MFA 用戶");}// 獲取用戶提交的 TOTP 碼String codeStr = request.getParameter("code");if (codeStr == null || codeStr.isEmpty()) {throw new RuntimeException("TOTP 碼不能為空");}int code;try {code = Integer.parseInt(codeStr);} catch (NumberFormatException e) {throw new RuntimeException("TOTP 碼格式不正確");}// 從數據庫校驗 TOTPUser user = userService.findByUsername(username);boolean valid = userService.verifyTotp(user.getId(), code);if (!valid) {throw new RuntimeException("TOTP 驗證失敗");}// 驗證成功,構建真正的 Authentication 對象UsernamePasswordAuthenticationToken auth =new UsernamePasswordAuthenticationToken(username, null, Collections.singletonList(() -> "ROLE_USER"));return auth;}@Overrideprotected void successfulAuthentication(HttpServletRequest request,HttpServletResponse response,FilterChain chain,org.springframework.security.core.Authentication authResult) throws IOException, ServletException {// 將最終的 Authentication 填入 SecurityContextSecurityContextHolder.getContext().setAuthentication(authResult);// 登錄成功后清除 session 中的 MFA 用戶標志request.getSession().removeAttribute("MFA_USER");// 跳轉到首頁response.sendRedirect("/");}@Overrideprotected void unsuccessfulAuthentication(HttpServletRequest request,HttpServletResponse response,org.springframework.security.core.AuthenticationException failed) throws IOException, ServletException {// 驗證失敗,跳回 MFA 驗證頁面response.setContentType(MediaType.TEXT_PLAIN_VALUE);response.getWriter().write("MFA 驗證失敗:" + failed.getMessage());response.setStatus(HttpServletResponse.SC_UNAUTHORIZED);}
}
說明:
- 該過濾器攔截
POST /mfa-verify請求,讀取 session 中預先放置的 “MFA_USER” 用戶名,以及前端提交的code。- 調用
userService.verifyTotp(...)校驗動態驗證碼,若通過則構建最終的Authentication。
5.6.4 自定義失敗處理器 CustomAuthenticationFailureHandler.java
/*** 處理第一步用戶名/密碼登錄失敗或觸發 MFA 的情況*/
@Component
public class CustomAuthenticationFailureHandler implements AuthenticationFailureHandler {@Overridepublic void onAuthenticationFailure(HttpServletRequest request,HttpServletResponse response,AuthenticationException exception) throws IOException, ServletException {// 如果是 MfaRequiredException,重定向到 /mfa 頁面,并將用戶名存入 sessionif (exception instanceof MfaRequiredException) {String username = ((MfaRequiredException) exception).getUsername();request.getSession().setAttribute("MFA_USER", username);// 重定向到 MFA 驗證頁面response.sendRedirect("/mfa");} else {// 普通登錄失敗,重定向回 /login?errorresponse.sendRedirect("/login?error=true");}}
}
說明:
- 當
CustomAuthenticationProvider拋出MfaRequiredException時,說明用戶通過密碼校驗但需要第二步 MFA,此時將“待 MFA”用戶名寫入 session,并重定向到 MFA 驗證頁面/mfa。- 普通失敗(如密碼錯誤)則帶上
?error=true重定向回登錄頁。
5.6.5 安全配置 SecurityConfig.java
/*** 核心安全配置:*  1. 注入自定義 AuthenticationProvider*  2. 配置表單登錄和 MfaAuthenticationFilter*/
@Configuration
public class SecurityConfig {@Autowiredprivate CustomAuthenticationProvider customAuthenticationProvider;@Autowiredprivate MfaAuthenticationFilter mfaAuthenticationFilter;@Autowiredprivate CustomAuthenticationFailureHandler customFailureHandler;@Beanpublic SecurityFilterChain filterChain(HttpSecurity http, AuthenticationConfiguration authConfig) throws Exception {// 禁用 CSRF 簡化示例http.csrf(csrf -> csrf.disable());// 使用自定義 AuthenticationProvider 替換默認的 DaoAuthenticationProviderhttp.authenticationProvider(customAuthenticationProvider);// 1. 首先,配置表單登錄http.authorizeHttpRequests(auth -> auth.requestMatchers("/login", "/register", "/css/**", "/js/**").permitAll().anyRequest().authenticated()).formLogin(form -> form.loginPage("/login").loginProcessingUrl("/login") // 與表單提交 action 保持一致.failureHandler(customFailureHandler).defaultSuccessUrl("/", true));// 2. 注冊 MFA 過濾器,它要在 UsernamePasswordAuthenticationFilter 之后執行http.addFilterAfter(mfaAuthenticationFilter, org.springframework.security.web.authentication.UsernamePasswordAuthenticationFilter.class);// 3. Session 管理:MFA 過程中會話保持http.sessionManagement(session -> session.sessionCreationPolicy(SessionCreationPolicy.IF_REQUIRED));// 4. 未授權時返回 401http.exceptionHandling(ex -> ex.authenticationEntryPoint((request, response, authException) ->response.sendError(HttpServletResponse.SC_UNAUTHORIZED, "Unauthorized")));return http.build();}// 若需手動獲取 AuthenticationManager,可使用以下 Bean@Beanpublic AuthenticationManager authenticationManager(AuthenticationConfiguration authConfig) throws Exception {return authConfig.getAuthenticationManager();}
}
關鍵點:
- 將
CustomAuthenticationProvider注冊到 Spring Security,替代默認的用戶名/密碼校驗邏輯。- 配置表單登錄,登錄失敗由
CustomAuthenticationFailureHandler處理。- 注冊
MfaAuthenticationFilter,攔截/mfa-verify提交。- SessionPersist 保持“待 MFA”狀態直到第二步完成。
5.7 控制器:登錄、MFA 驗證、注冊與秘鑰初始化
我們需要提供幾個頁面和對應的 Controller:
-
/login:自定義登錄頁面(用戶名+密碼) -
/register:用戶注冊頁面 -
/mfa:MFA 驗證頁面,用戶輸入 6 位 TOTP 碼 -
/mfa-verify:MFA 驗證提交接口,由MfaAuthenticationFilter處理 -
/enable-mfa:在用戶登錄后打開此接口可為用戶生成 TOTP Secret,并展示二維碼@Controller
public class AuthController {@Autowired private IUserService userService;/*** 登錄頁(第一步:用戶名 + 密碼)*/ @GetMapping("/login") public String loginPage(@RequestParam(required = false) String error, Model model) {model.addAttribute("error", error != null);return "login"; }/*** 注冊頁(僅示例)*/ @GetMapping("/register") public String registerPage() {return "register"; }@PostMapping("/register") public String doRegister(@RequestParam String username, @RequestParam String password) {User u = new User();u.setUsername(username);u.setPassword(password);userService.register(u);return "redirect:/login"; }/*** MFA 驗證頁:用戶輸入動態驗證碼*/ @GetMapping("/mfa") public String mfaPage(HttpSession session, Model model) {String username = (String) session.getAttribute("MFA_USER");if (username == null) {// 無待驗證用戶,跳到登錄頁return "redirect:/login";}model.addAttribute("username", username);return "mfa"; }/*** 啟用 MFA:登錄后用戶請求此接口可獲取 TOTP Secret 與二維碼 URL*/ @GetMapping("/enable-mfa") public String enableMfa(Authentication authentication, Model model) {if (authentication == null || !authentication.isAuthenticated()) {return "redirect:/login";}String username = authentication.getName();User u = userService.findByUsername(username);if (u.getMfaEnabled()) {model.addAttribute("message", "MFA 已啟用");return "home";}// 為用戶生成秘鑰并開啟 MFAuserService.enableMfa(u.getId());u = userService.findByUsername(username); // 刷新String secret = u.getMfaSecret();String otpAuthURL = TotpUtils.getOtpAuthURL(username, secret, "MyCompany");model.addAttribute("otpAuthURL", otpAuthURL);model.addAttribute("secret", secret);return "enable-mfa"; }@GetMapping("/") public String homePage() {return "home"; }}
說明:
GET /enable-mfa用于用戶主動綁定 MFA(生成 Secret 并呈現給用戶)。若業務要求后臺自動開通,可在注冊后直接調用userService.enableMfa(...)。
5.8 前端頁面示例(Thymeleaf)
為簡化,以下示例僅為最基本表單。生產環境可加入更豐富的樣式與 JS 驗證。
login.html
<!DOCTYPE html>
<html xmlns:th="http://www.thymeleaf.org">
<head><title>登錄</title>
</head>
<body>
<h2>登錄</h2>
<form th:action="@{/login}" method="post"><div><label>用戶名:</label><input type="text" name="username" required/></div><div><label>密碼:</label><input type="password" name="password" required/></div><div th:if="${error}"><p style="color:red;">用戶名或密碼錯誤</p></div><div><button type="submit">登錄</button></div>
</form>
<p>沒有賬號?<a th:href="@{/register}">注冊</a></p>
</body>
</html>
register.html
<!DOCTYPE html>
<html xmlns:th="http://www.thymeleaf.org">
<head><title>注冊</title>
</head>
<body>
<h2>注冊</h2>
<form th:action="@{/register}" method="post"><div><label>用戶名:</label><input type="text" name="username" required/></div><div><label>密碼:</label><input type="password" name="password" required/></div><div><button type="submit">注冊</button></div>
</form>
<p>已有賬號?<a th:href="@{/login}">登錄</a></p>
</body>
</html>
mfa.html
<!DOCTYPE html>
<html xmlns:th="http://www.thymeleaf.org">
<head><title>MFA 驗證</title>
</head>
<body>
<h2>多因素認證</h2>
<p>用戶 <span th:text="${username}"></span>,請輸入手機應用上的 6 位動態驗證碼:</p>
<form th:action="@{/mfa-verify}" method="post"><div><label>動態驗證碼:</label><input type="text" name="code" pattern="\d{6}" maxlength="6" required/></div><div><button type="submit">驗證</button></div>
</form>
</body>
</html>
enable-mfa.html
<!DOCTYPE html>
<html xmlns:th="http://www.thymeleaf.org">
<head><title>啟用 MFA</title>
</head>
<body>
<h2>啟用多因素認證 (MFA)</h2>
<p>請使用 Google Authenticator 或其他兼容 TOTP 的應用掃描下方二維碼,或使用秘鑰手動添加:</p>
<div><!-- 可以使用前端庫生成二維碼,此處直接展示 URI,方便生成 QR --><p>OTPAuth URL: <span th:text="${otpAuthURL}"></span></p><p>Secret Key: <span th:text="${secret}"></span></p>
</div>
<p>設置完成后,請退出重新登錄并輸入動態驗證碼。</p>
</body>
</html>
home.html
<!DOCTYPE html>
<html xmlns:th="http://www.thymeleaf.org">
<head><title>首頁</title>
</head>
<body>
<h2>歡迎來到系統</h2>
<p>您已成功登錄(且通過 MFA 驗證)。</p>
<p><a th:href="@{/enable-mfa}">啟用 MFA(如果尚未啟用)</a></p>
<form th:action="@{/logout}" method="post"><button type="submit">退出登錄</button>
</form>
</body>
</html>
注意:
- 如果需要在頁面中展示二維碼,可以使用前端 QRCode.js 等庫,將
otpAuthURL渲染為二維碼。
6. 總結與落地建議
本文從“為什么需要多因素認證”入手,講解了基于 TOTP 的 MFA 核心原理,并詳細演示了如何在 Spring Security 6 中分兩步完成登錄與 MFA 驗證的流程。關鍵點回顧:
-
第一步:用戶名+密碼
- 自定義
AuthenticationProvider,校驗用戶名與密碼; - 若用戶啟用 MFA,則拋出
MfaRequiredException,并將用戶名暫存到 Session。
- 自定義
-
第二步:TOTP 驗證
- 自定義
MfaAuthenticationFilter,攔截/mfa-verify請求; - 從 Session 中獲取“待 MFA”用戶名,調用服務端 TOTP 校驗邏輯;
- 校驗通過后,構建最終
Authentication并置入SecurityContext。
- 自定義
-
MySQL + MyBatis-Plus
- 在數據庫
users表中增加mfa_enabled與mfa_secret字段; - Service 層通過 Google Authenticator 兼容庫生成并驗證動態驗證碼;
- MyBatis-Plus 簡化了實體與 Mapper 的開發。
- 在數據庫
實際生產環境推薦:
- 二維碼展示與綁定:在
/enable-mfa頁面使用前端二維碼生成庫(如qrcode.js)將otpAuthURL渲染為二維碼圖片,方便用戶掃碼。 - 密鑰保護:
mfa_secret為敏感數據,建議對其進行數據庫加密存儲或使用 KMS 等專用系統保護。 - 備份碼與恢復:當用戶手機丟失時,可預先生成一組一次性“恢復碼”,用戶在綁定 MFA 時妥善保存,避免無法登錄。
- 登陸失敗鎖定:對于連續多次 TOTP 驗證失敗的賬戶,可暫時鎖定或觸發告警,防止暴力破解。
- SSL/TLS 強制:確保所有頁面(尤其是登錄與 MFA 頁面)使用 HTTPS,防止中間人攻擊截獲驗證碼。
- 會話超時與防并發:可考慮對“待 MFA”狀態的會話設置合理的超時時間(如 2 分鐘),超時后必須重新進行第一步登錄。
通過上面的設計與實現,企業級應用即可在原有用戶名+密碼的基礎上,平滑地接入基于 TOTP 的多因素認證,大幅提升系統安全性,抵御常見的賬戶破解與釣魚風險。
如果你在實踐過程中有任何疑問或更好的擴展思路,歡迎在評論區留言,最后希望大家 一鍵三連 給博主一點點鼓勵!


:通用人工智能AGI是什么?)


