1.摘要
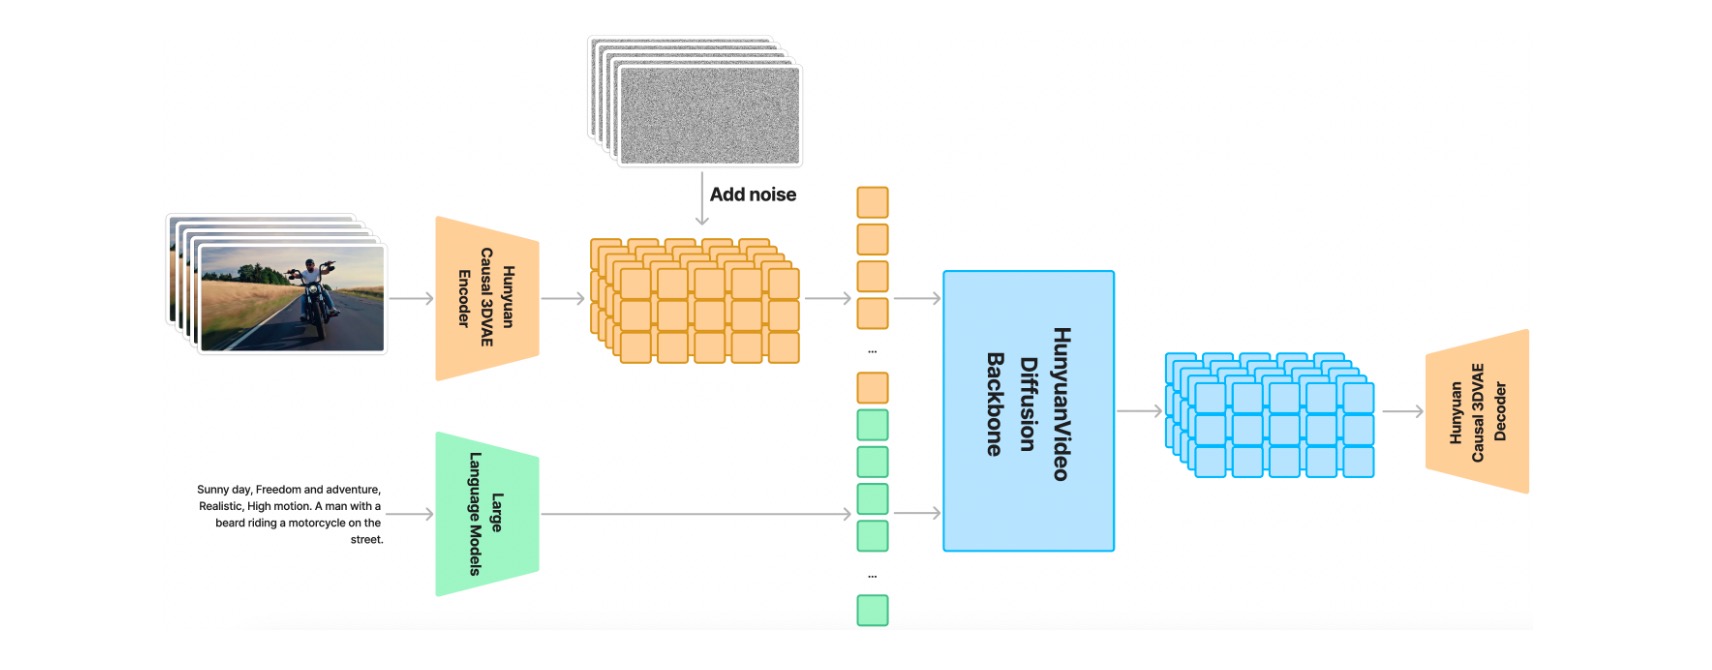
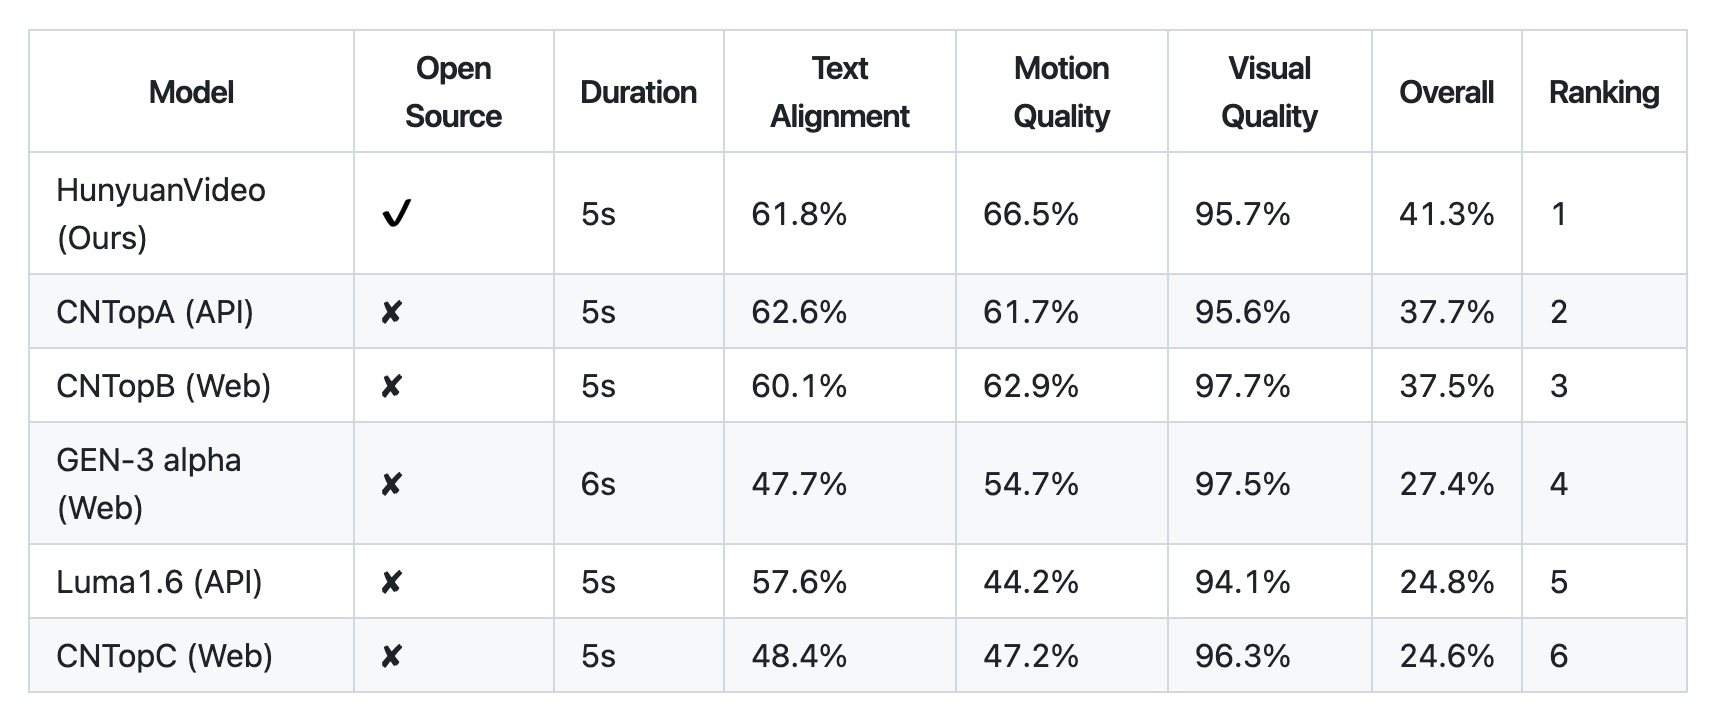
HunyuanVideo是一個全新的開源視頻基礎模型,其視頻生成性能堪比領先的閉源模型,甚至超越它們。我們采用了多項模型學習的關鍵技術,通過有效的模型架構和數據集擴展策略,我們成功訓練了一個擁有超過 130 億個參數的視頻生成模型,使其成為所有開源模型中規模最大的模型。
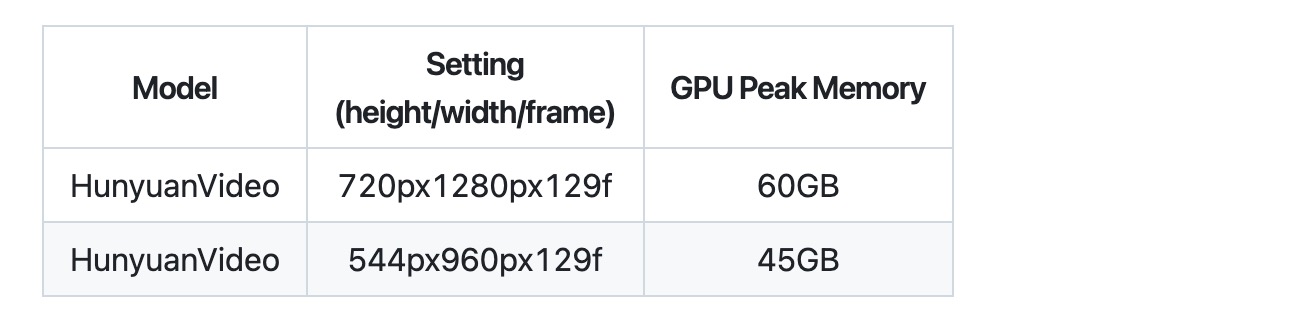
部署環境為:linux服務器,GPU大小為64G。
2. 安裝
2.1 下載項目代碼
git clone https://github.com/tencent/HunyuanVideo
cd HunyuanVideo
2.2 linux 環境部署
#1. Create conda environment
conda create -n HunyuanVideo python==3.10.9
# 2. Activate the environment
conda activate HunyuanVideo
# 3. Install PyTorch and other dependencies using conda
# For CUDA 11.8
conda install pytorch==2.4.0 torchvision==0.19.0 torchaudio==2.4.0 pytorch-cuda=11.8 -c pytorch -c nvidia
# For CUDA 12.4
conda install pytorch==2.4.0 torchvision==0.19.0 torchaudio==2.4.0 pytorch-cuda=12.4 -c pytorch -c nvidia
conda install pytorch-cuda -c pytorch -c nvidia
# 4. Install pip dependencies
python -m pip install -r requirements.txt
# 5. Install flash attention v2 for acceleration (requires CUDA 11.8 or above)
python -m pip install ninja
python -m pip install git+https://github.com/Dao-AILab/flash-attention.git@v2.6.3
# 6. Install xDiT for parallel inference (It is recommended to use torch 2.4.0 and flash-attn 2.6.3)
python -m pip install xfuser==0.4.0
2.3 模型下載
https://huggingface.co/tencent/HunyuanVideo/tree/refs%2Fpr%2F18
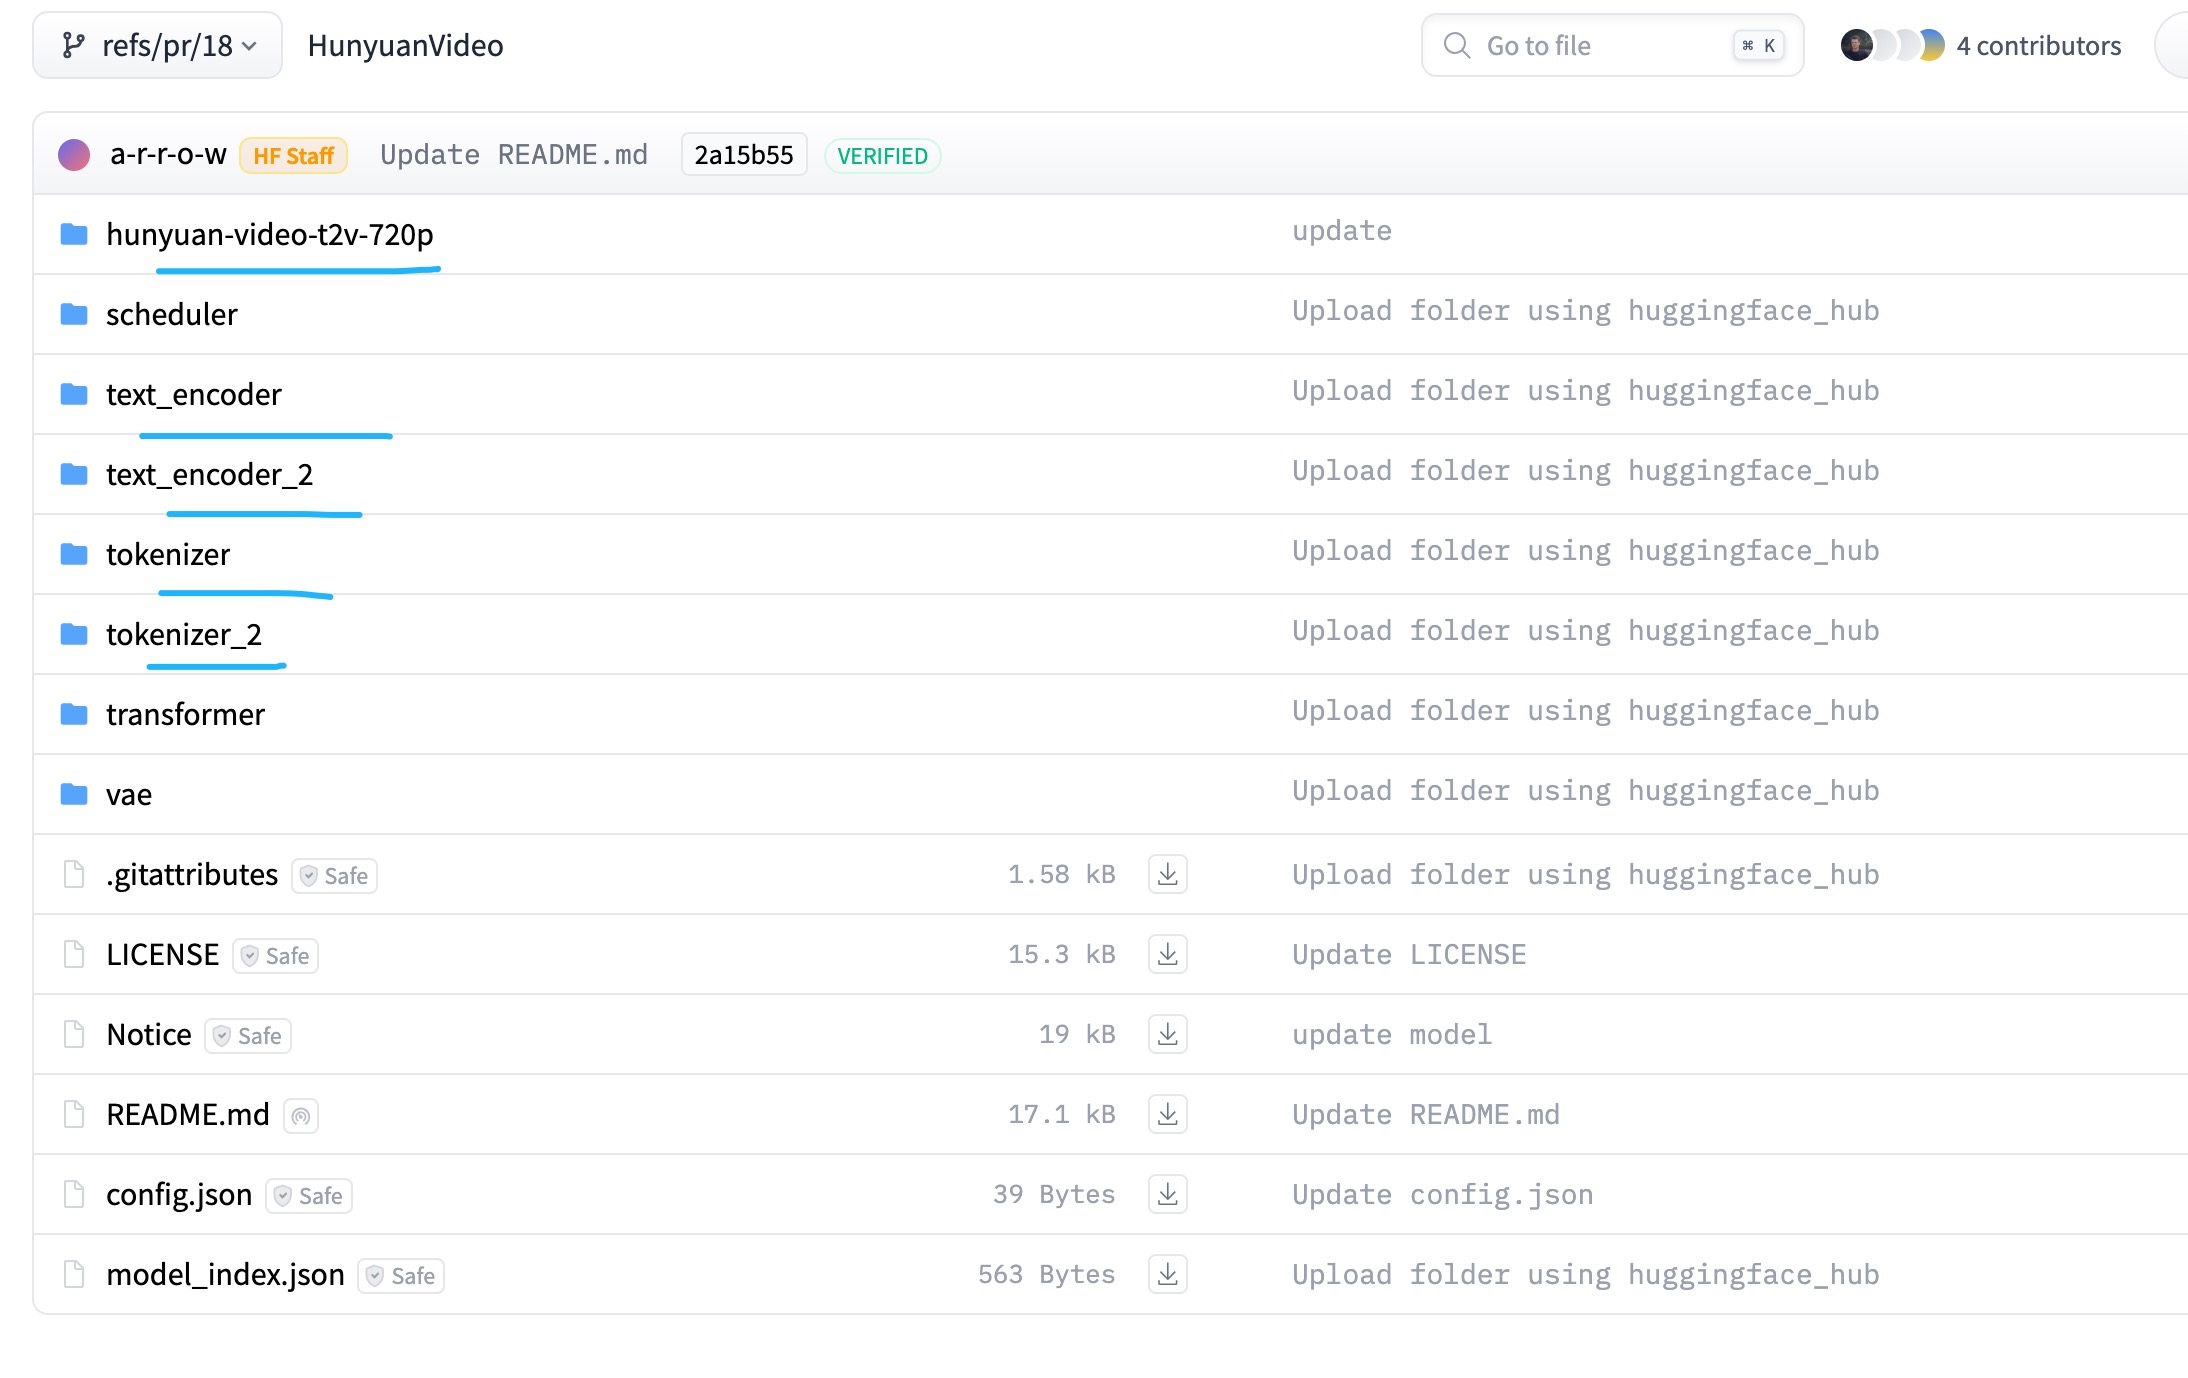
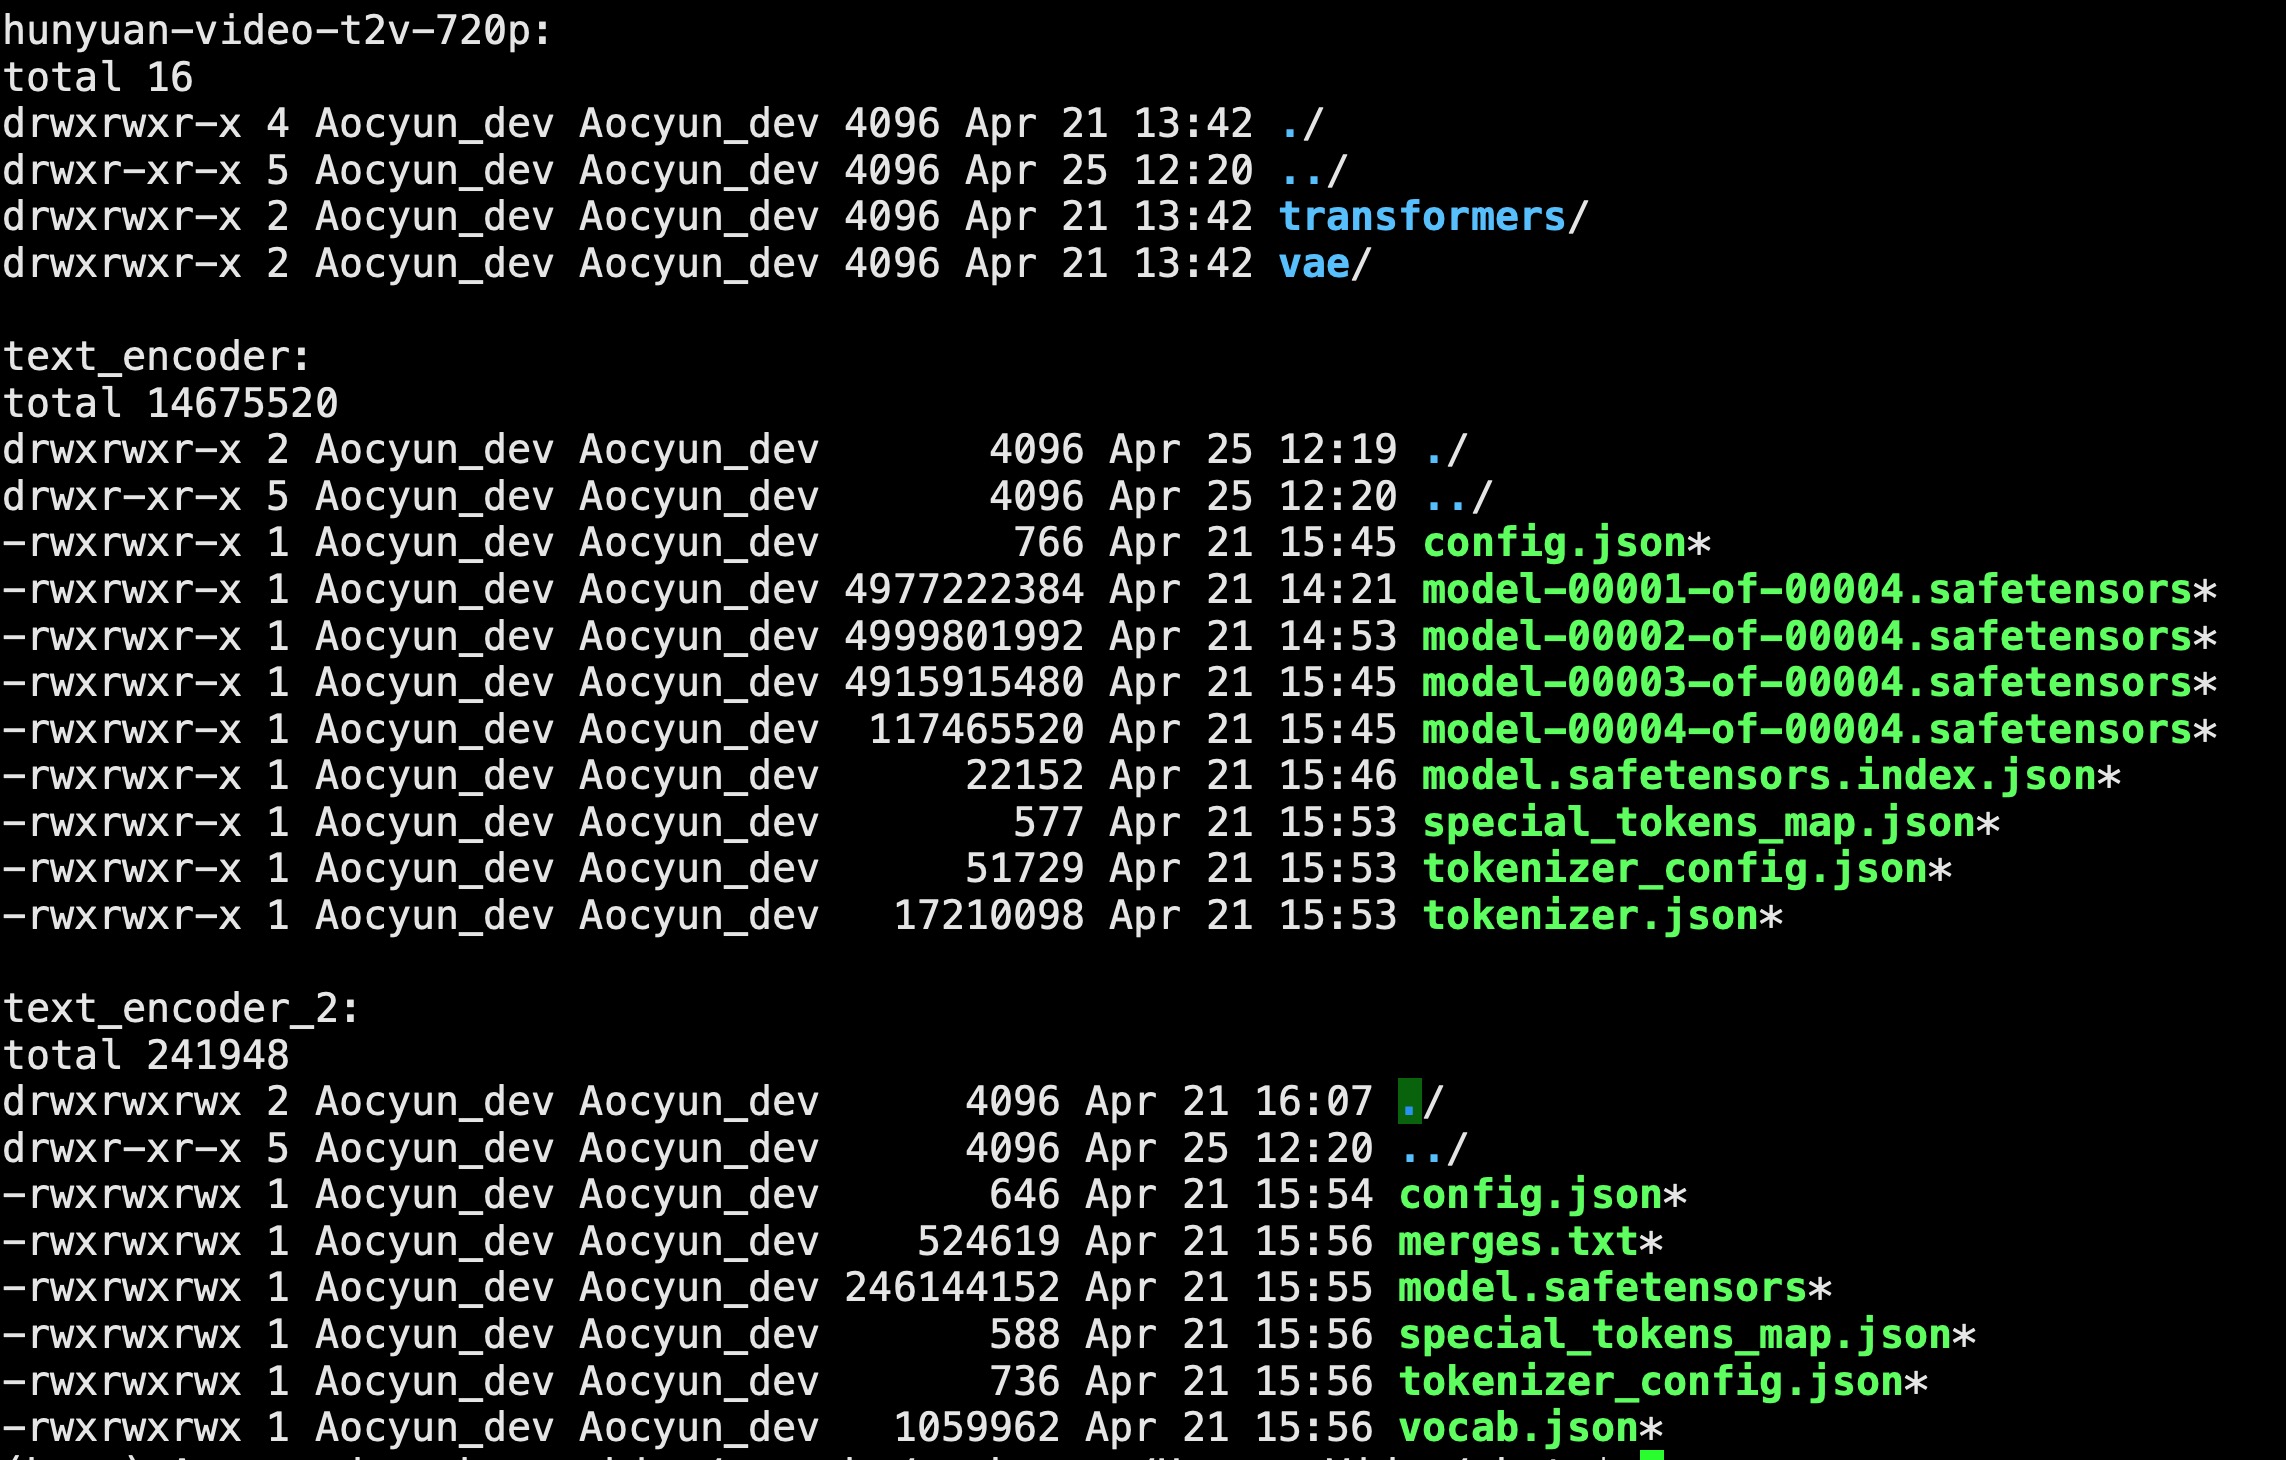
- 需要下載hunyuan-video-t2v-720p,text_encoder,text_encoder_2,tokenizer,tokenizer_2這5個。
- 下載完成以后需要把tokenizer里面的內容放到text_encoder內。需要把tokenizer_2里面的內容放到text_encoder_2內。
cp tokenizer/* text_encoder
cp tokenizer_2/* text_encoder_2
- 把hunyuan-video-t2v-720p,text_encoder,text_encoder_2放到目錄HunyuanVideo/ckpts下面:
- 目錄結構:

3. 生成視頻
3.1 本地生成
cd HunyuanVideo
CUDA_VISIBLE_DEVICES=0 python sample_video.py \
?????? --video-size 544 544 \
?????? --video-length 129 \
?????? --infer-steps 50 \
?????? --prompt "A cat walks on the grass, realistic style." \
?????? --flow-reverse \
?????? --use-cpu-offload \
?????? --save-path ./results
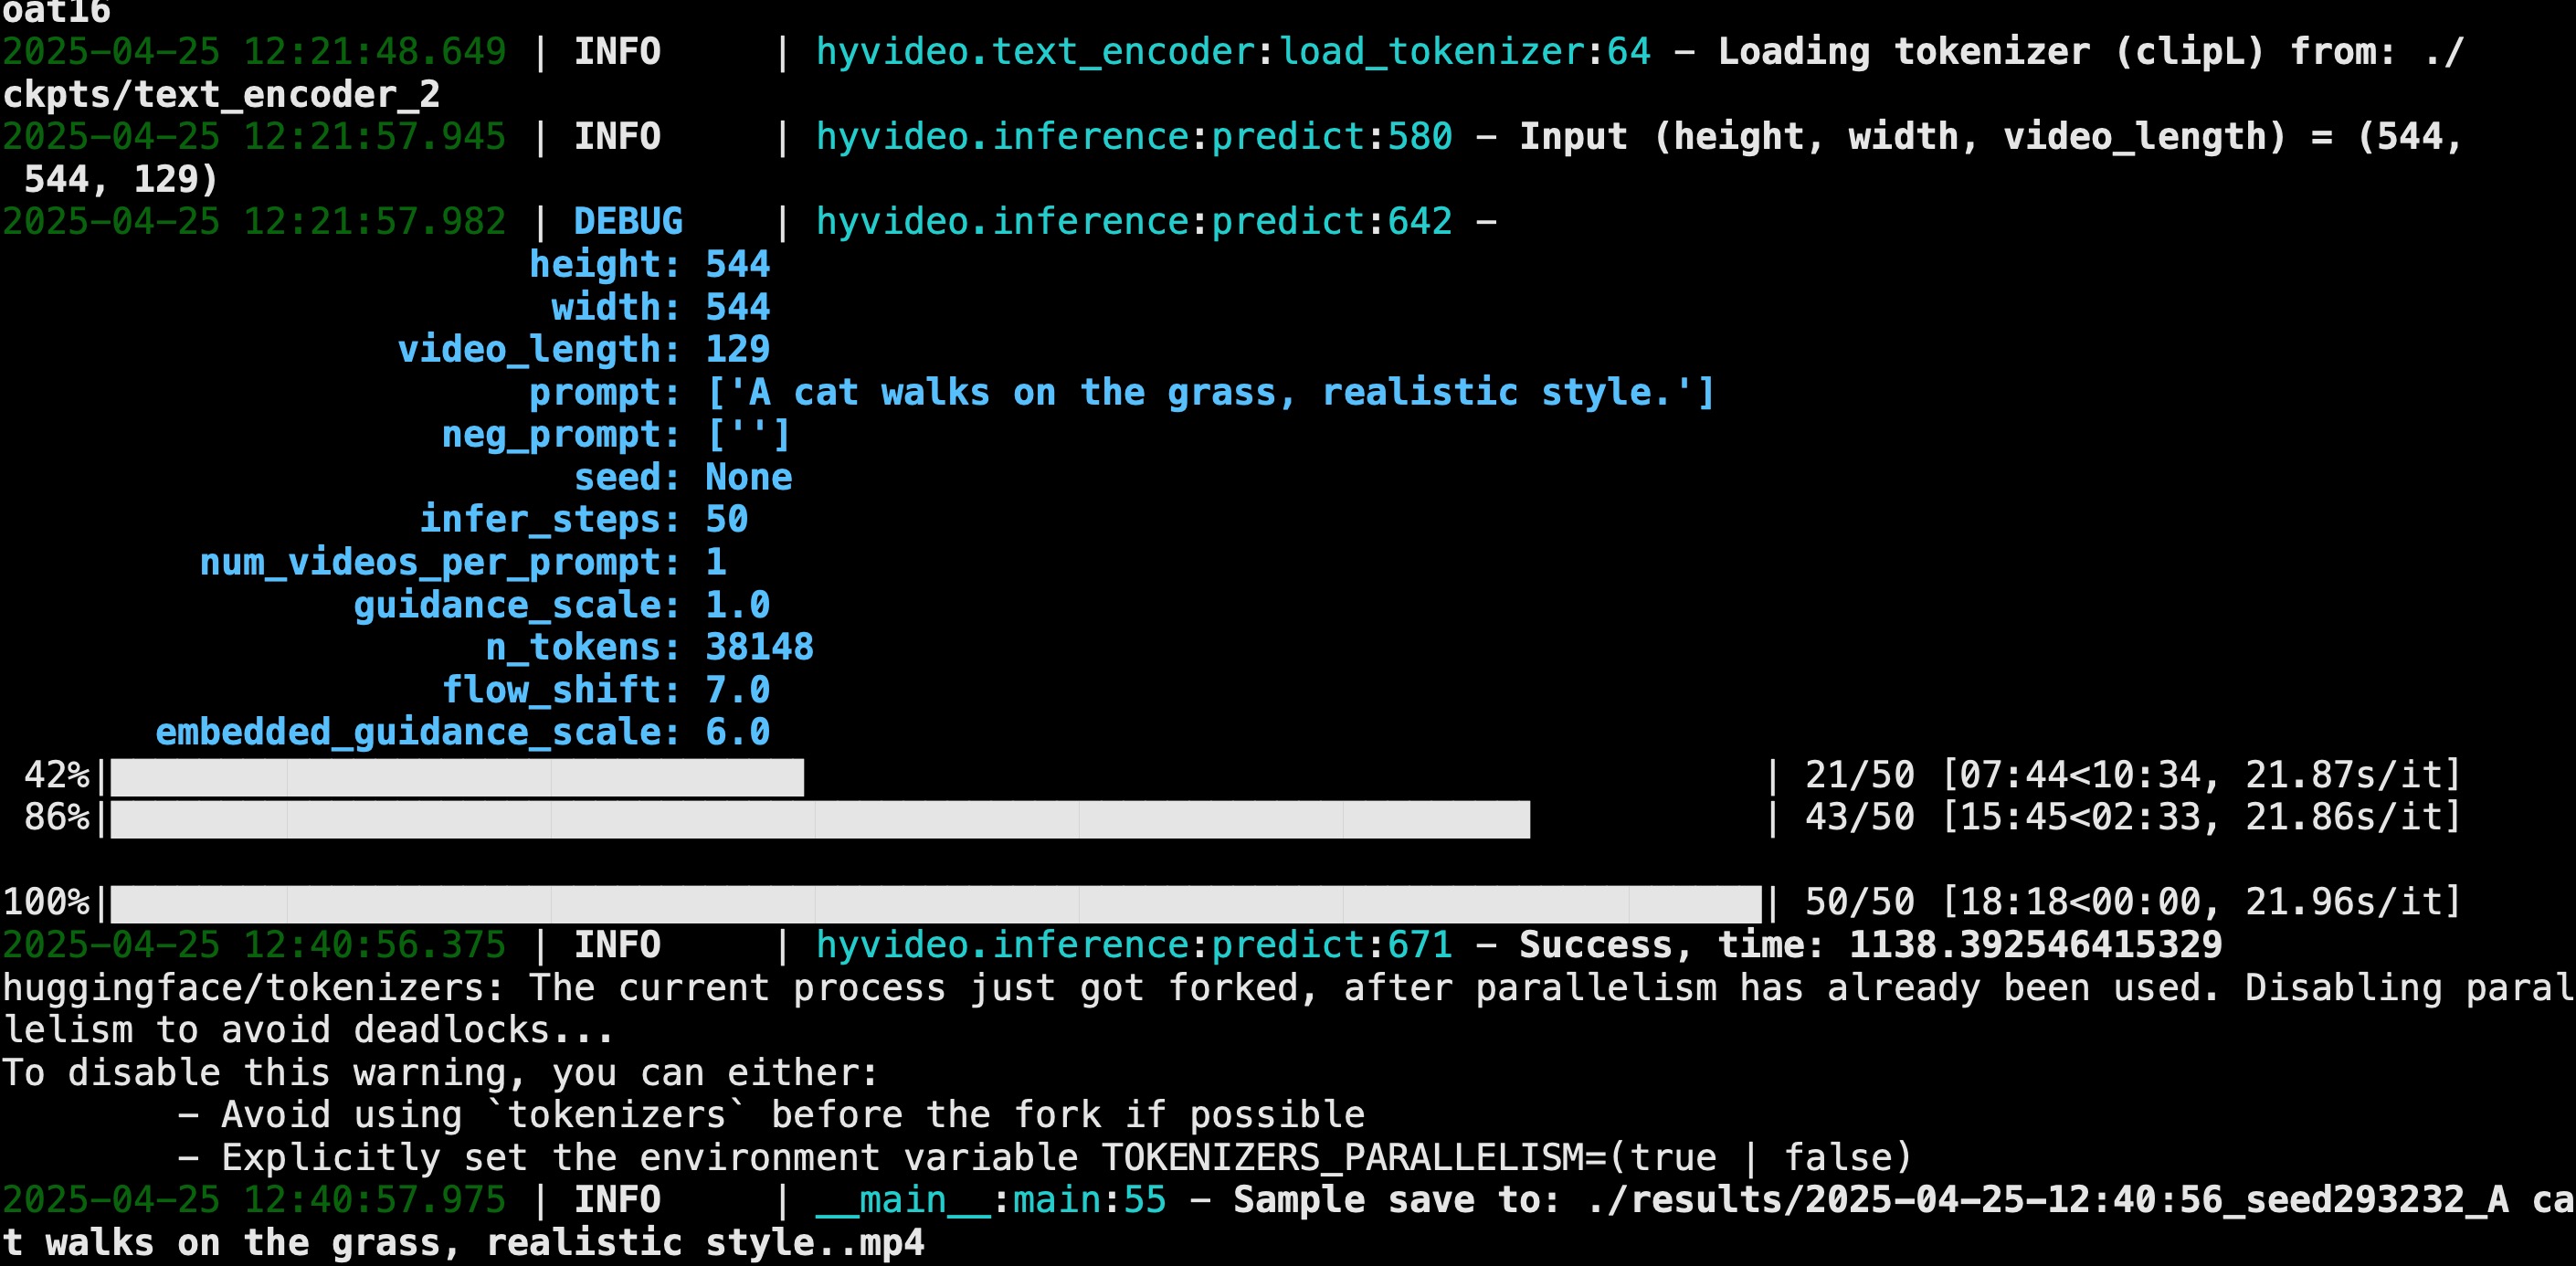
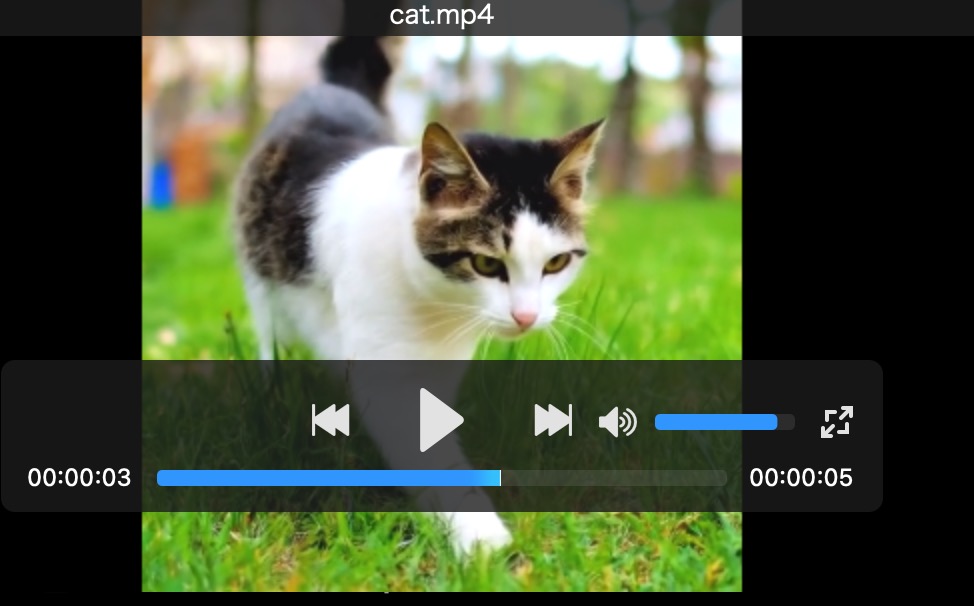
文本生成視頻成功,視頻時長5秒,生成用時18分鐘。
生成的視頻在results目錄下面:

最后去掉引號:
mv '2025-04-25-12:40:56_seed293232_A cat walks on the grass, realistic style..mp4' cat.mp4
3.2?運行Gradio Server
3.2.1?啟動服務
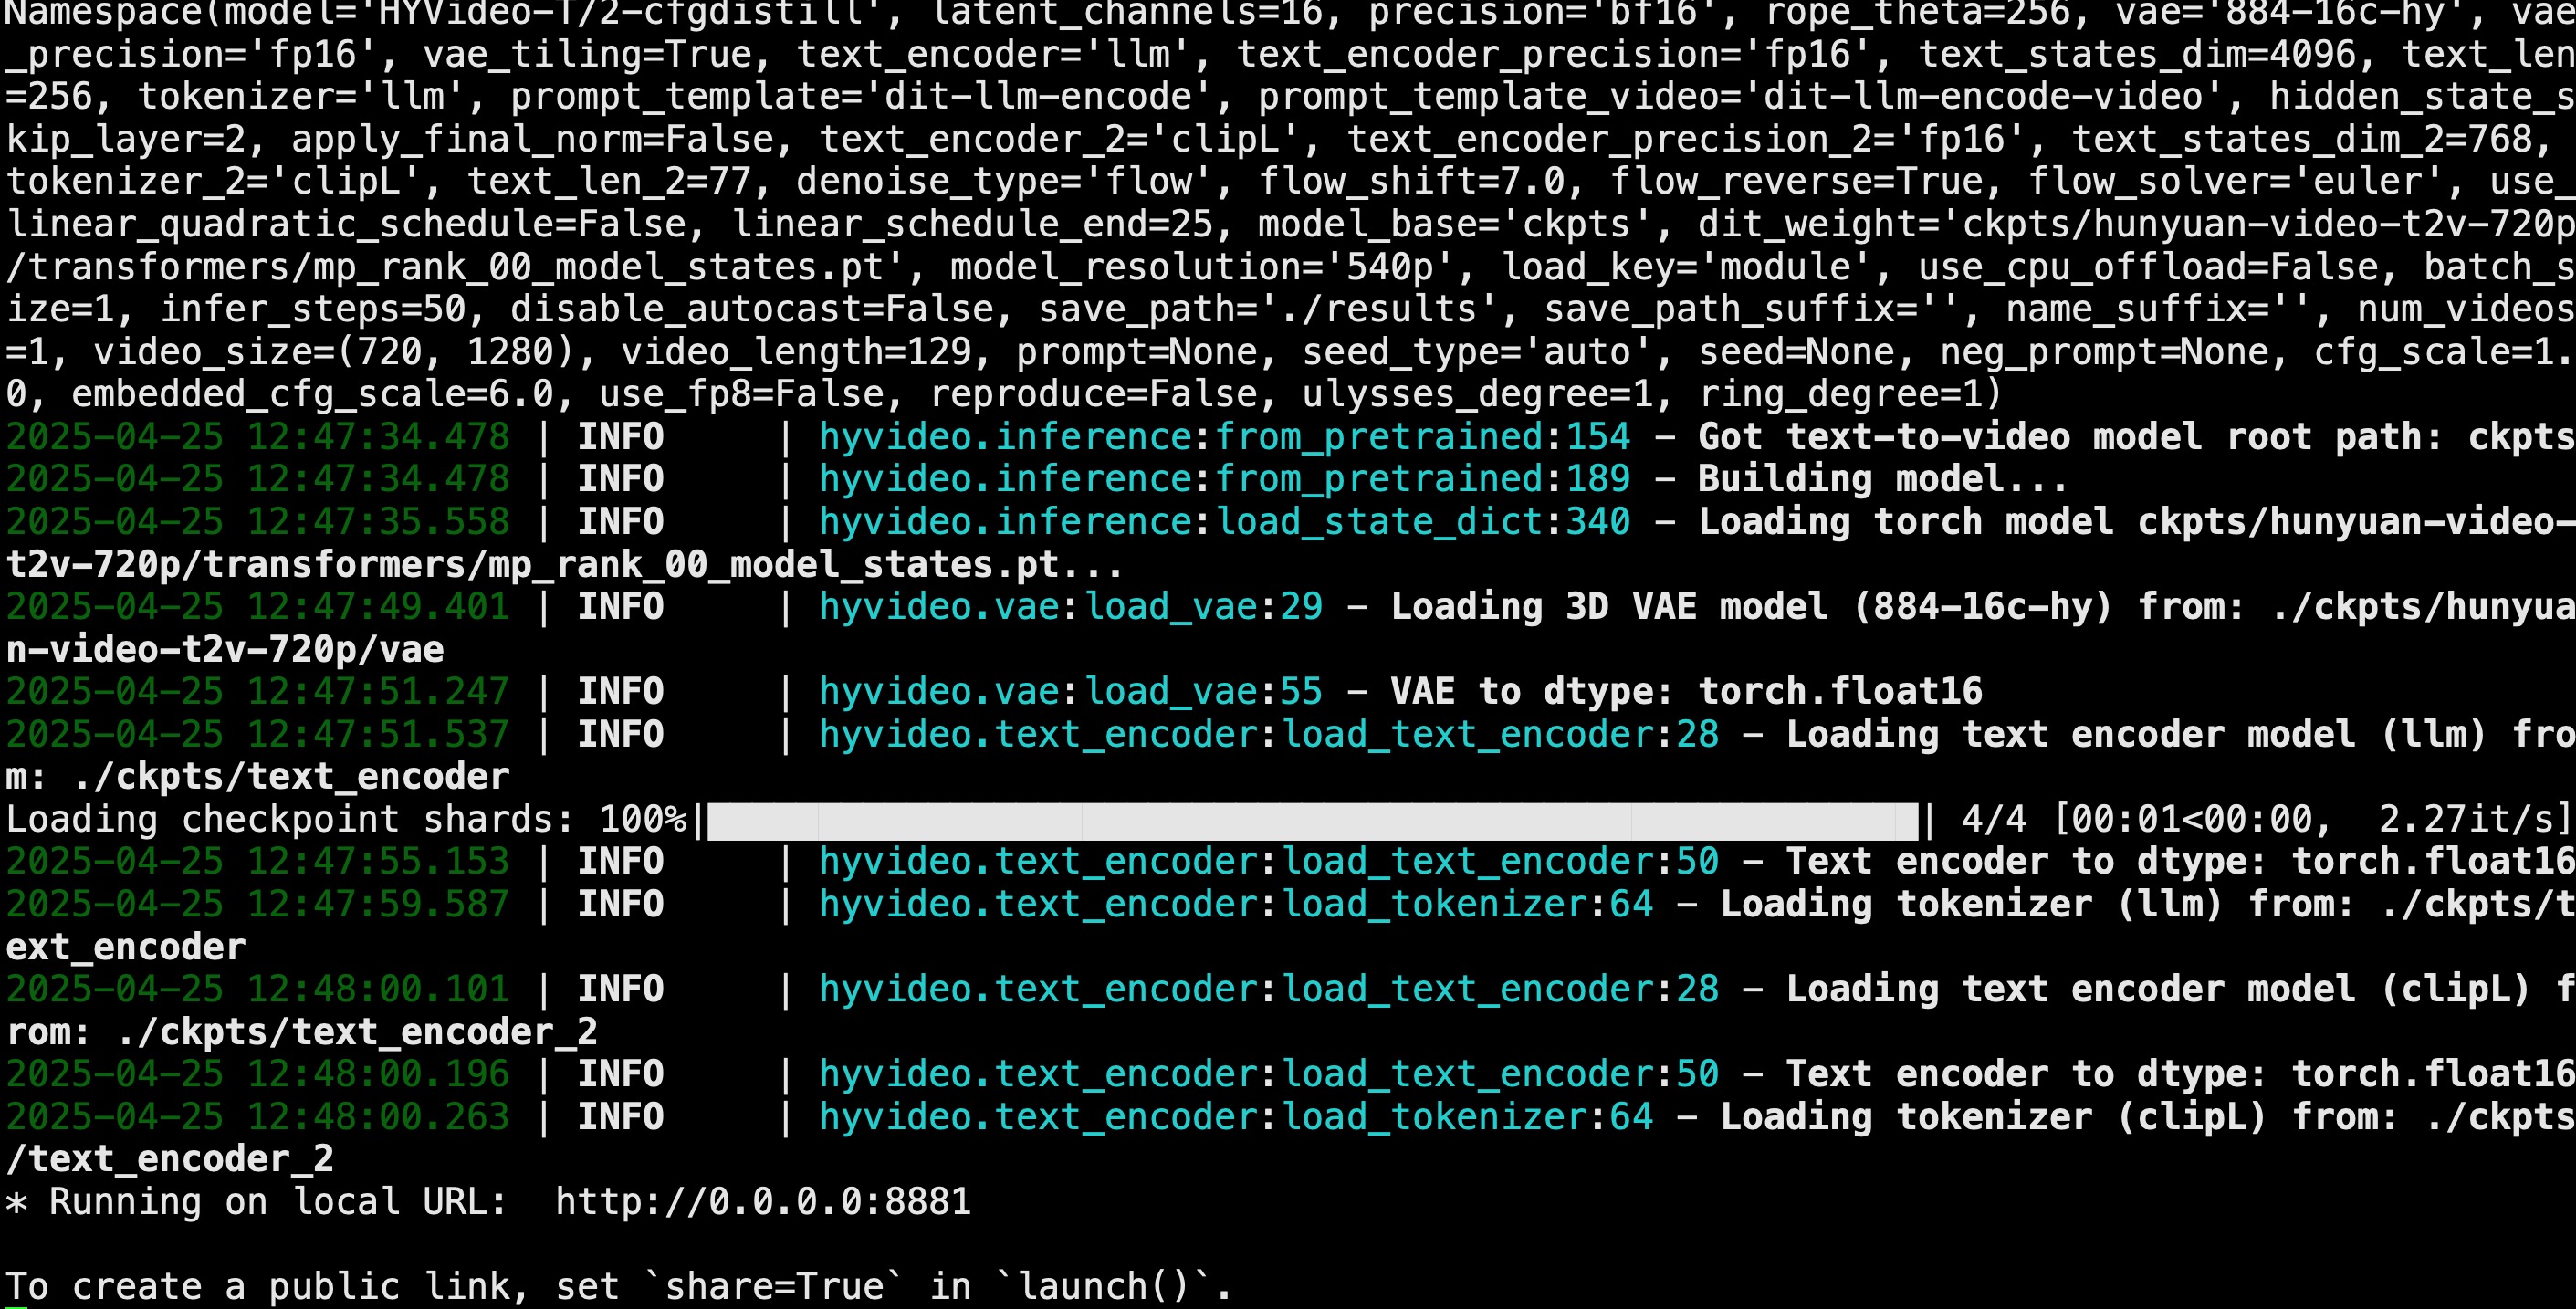
Python gradio_server.py --flow-reverse
由于本機端口占用,所以我把端口改成了8881.
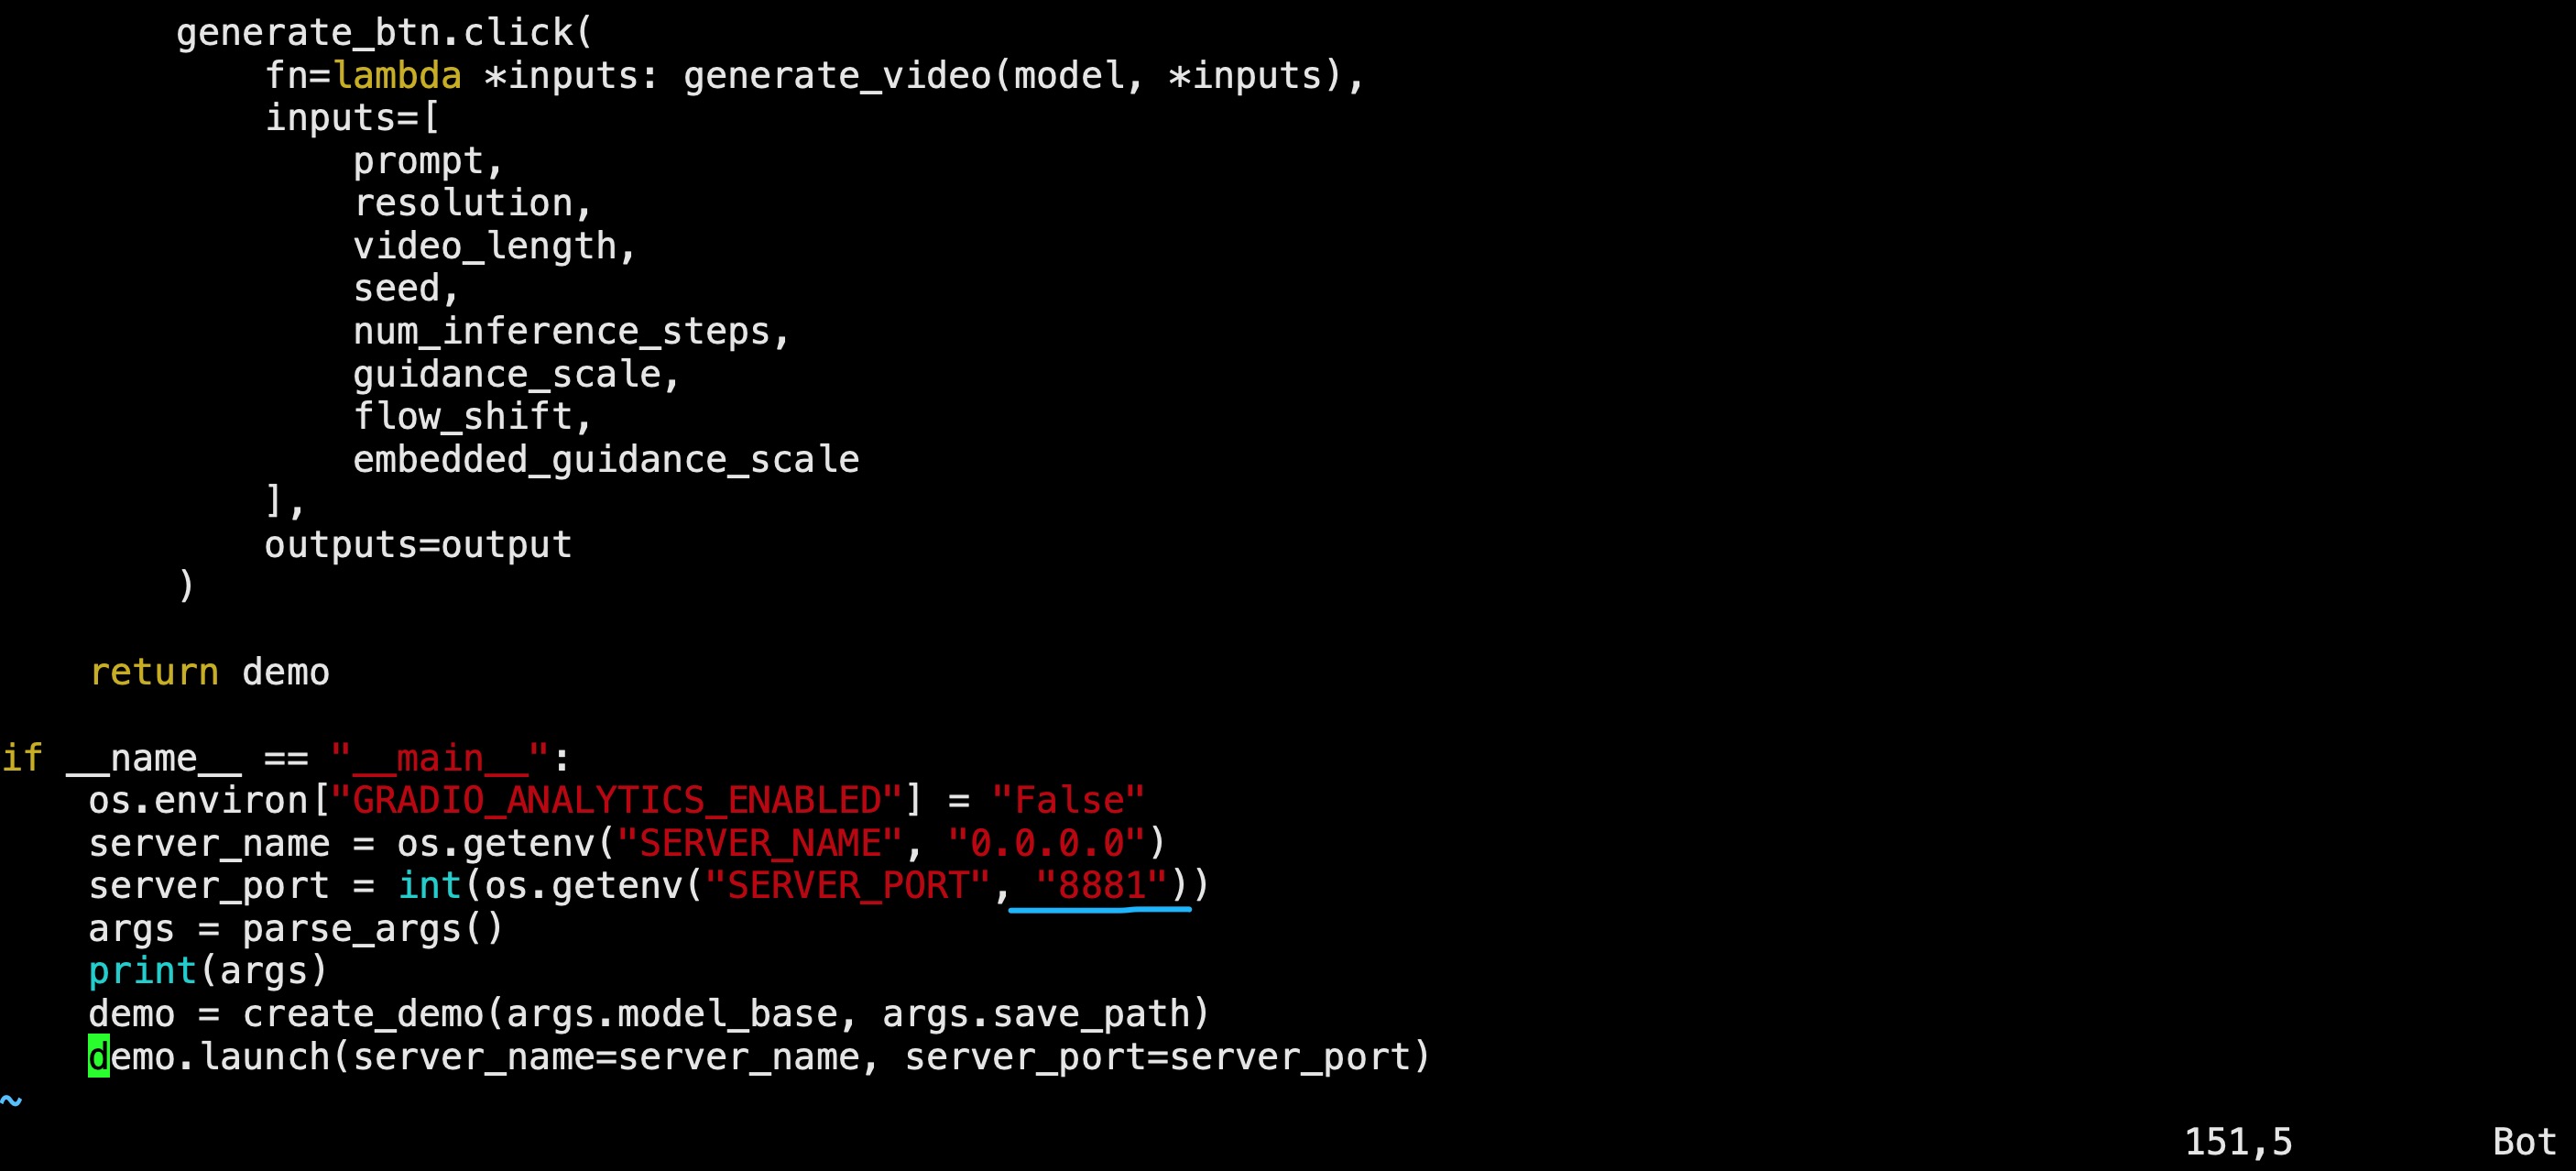
運行成功:
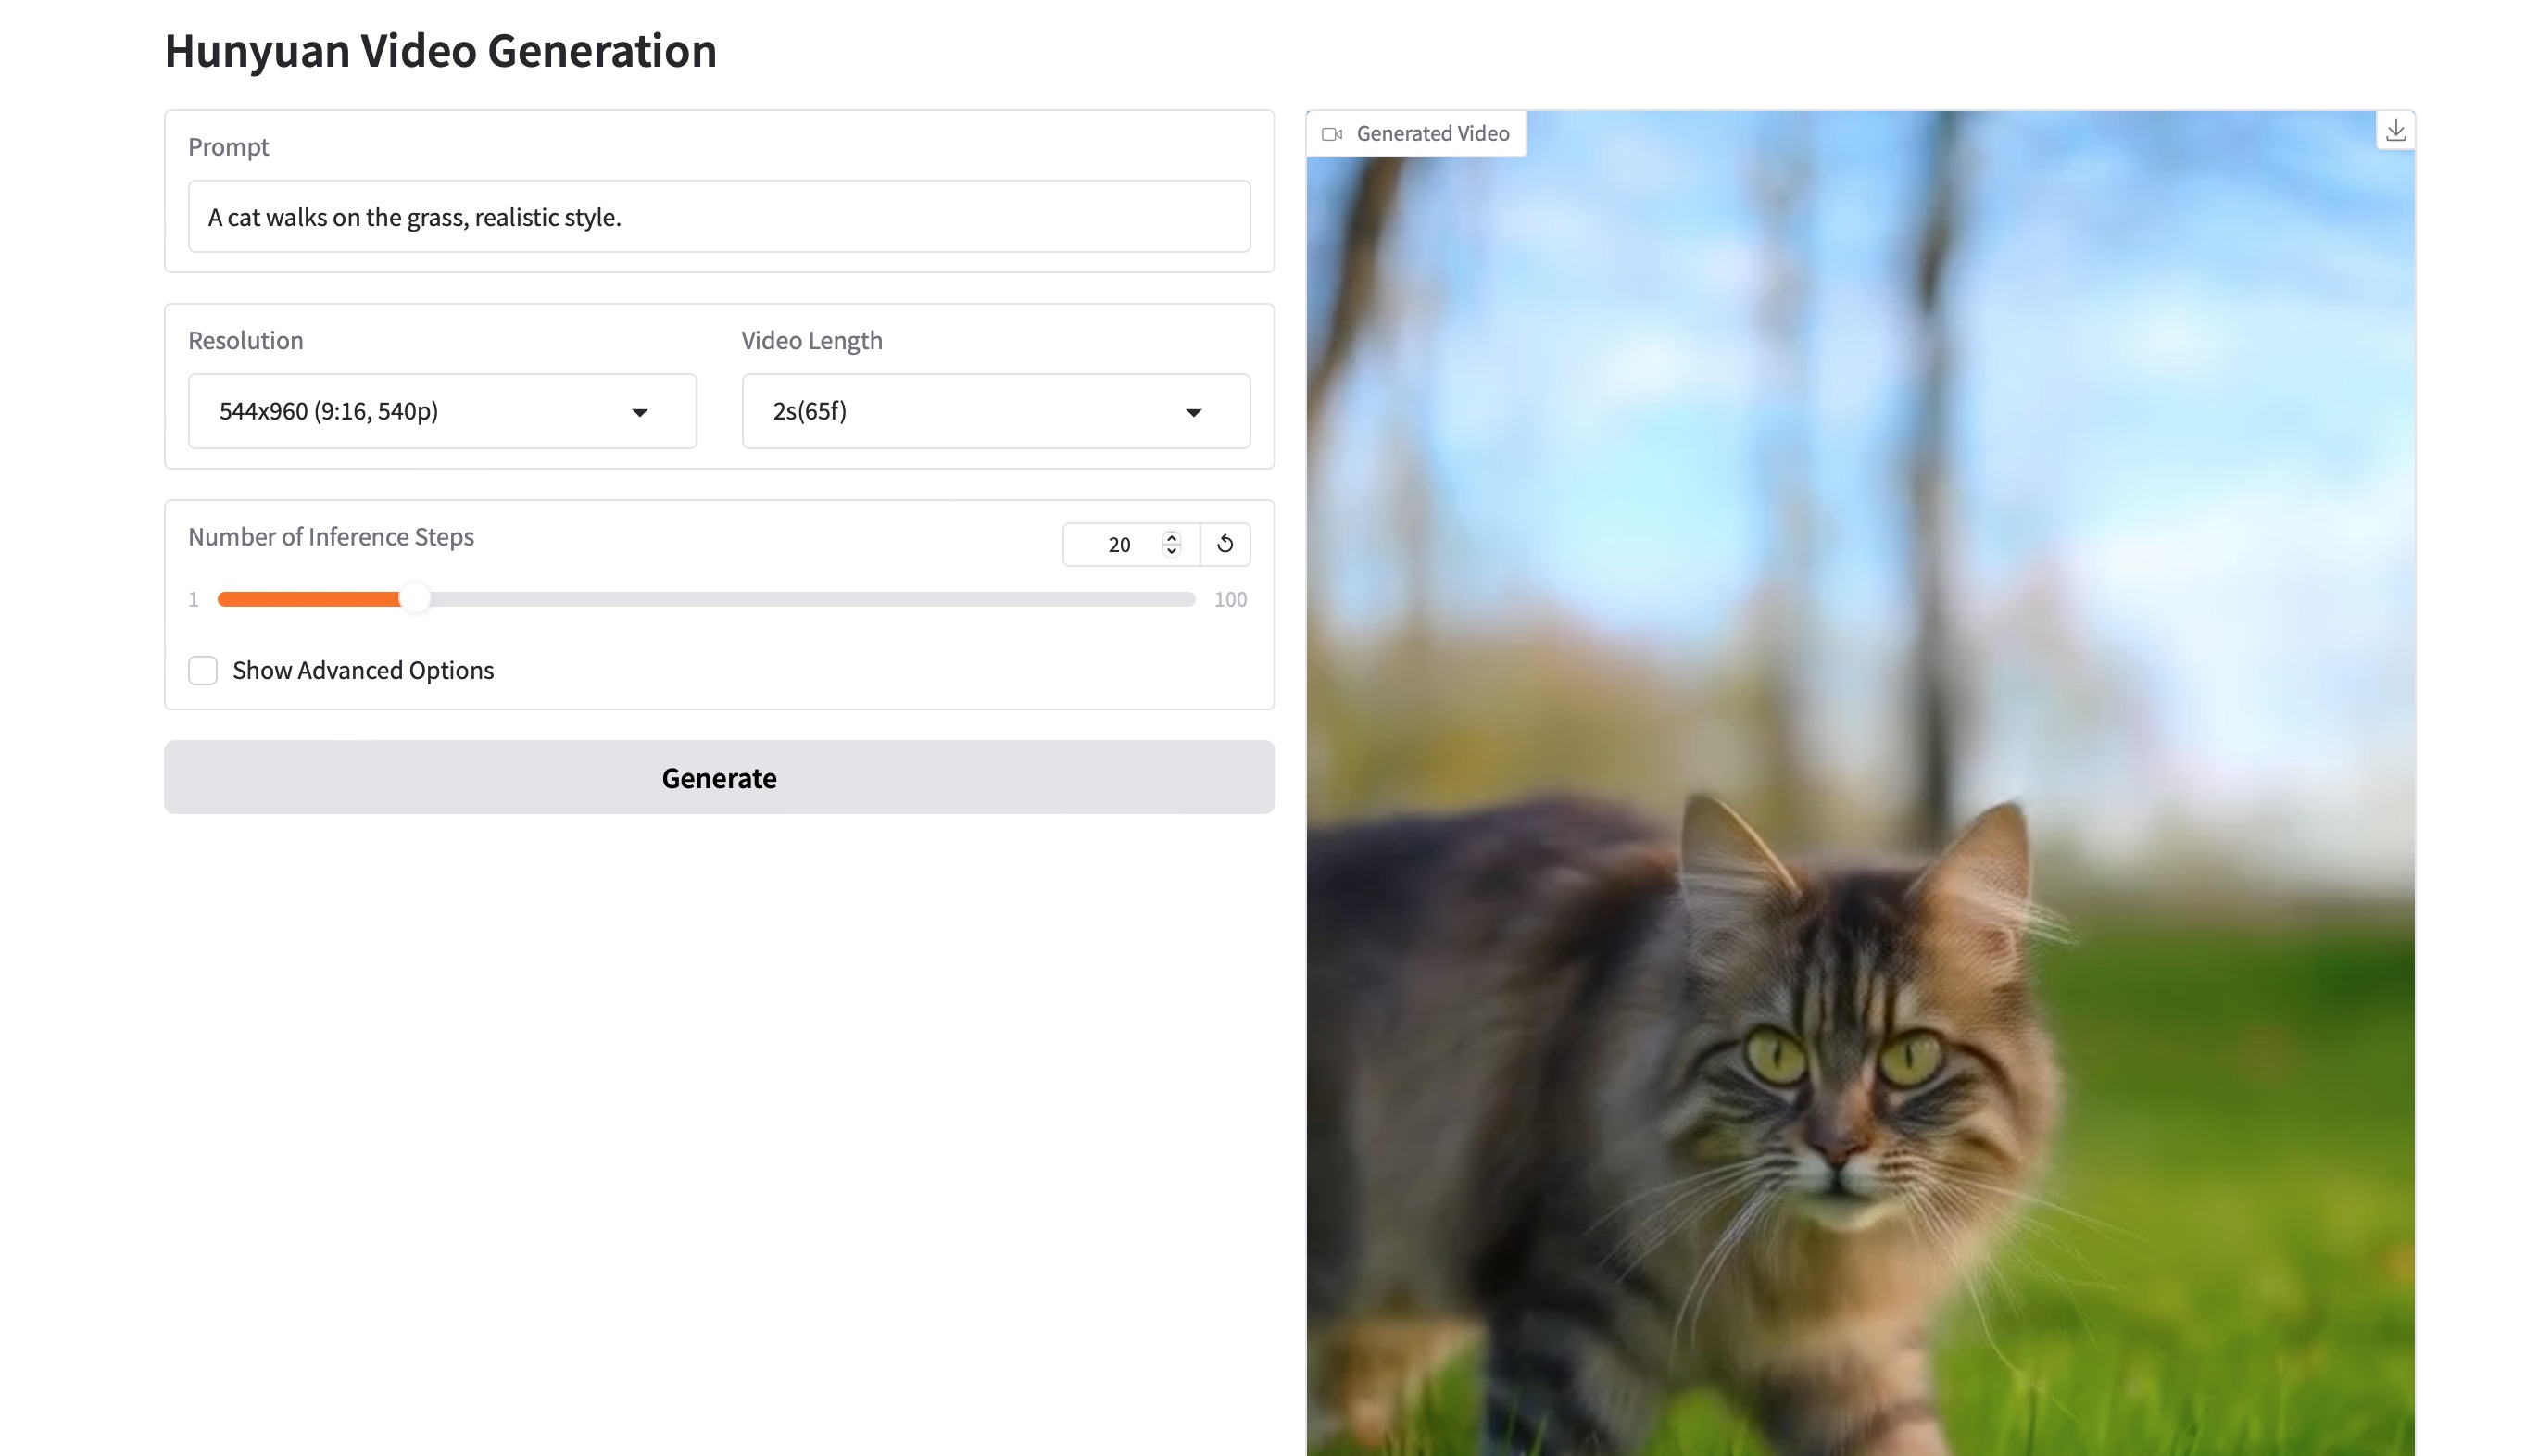
3.2.2 網頁生成視頻
由于GPU才64G,所以Number of Inference Steps設置為20。
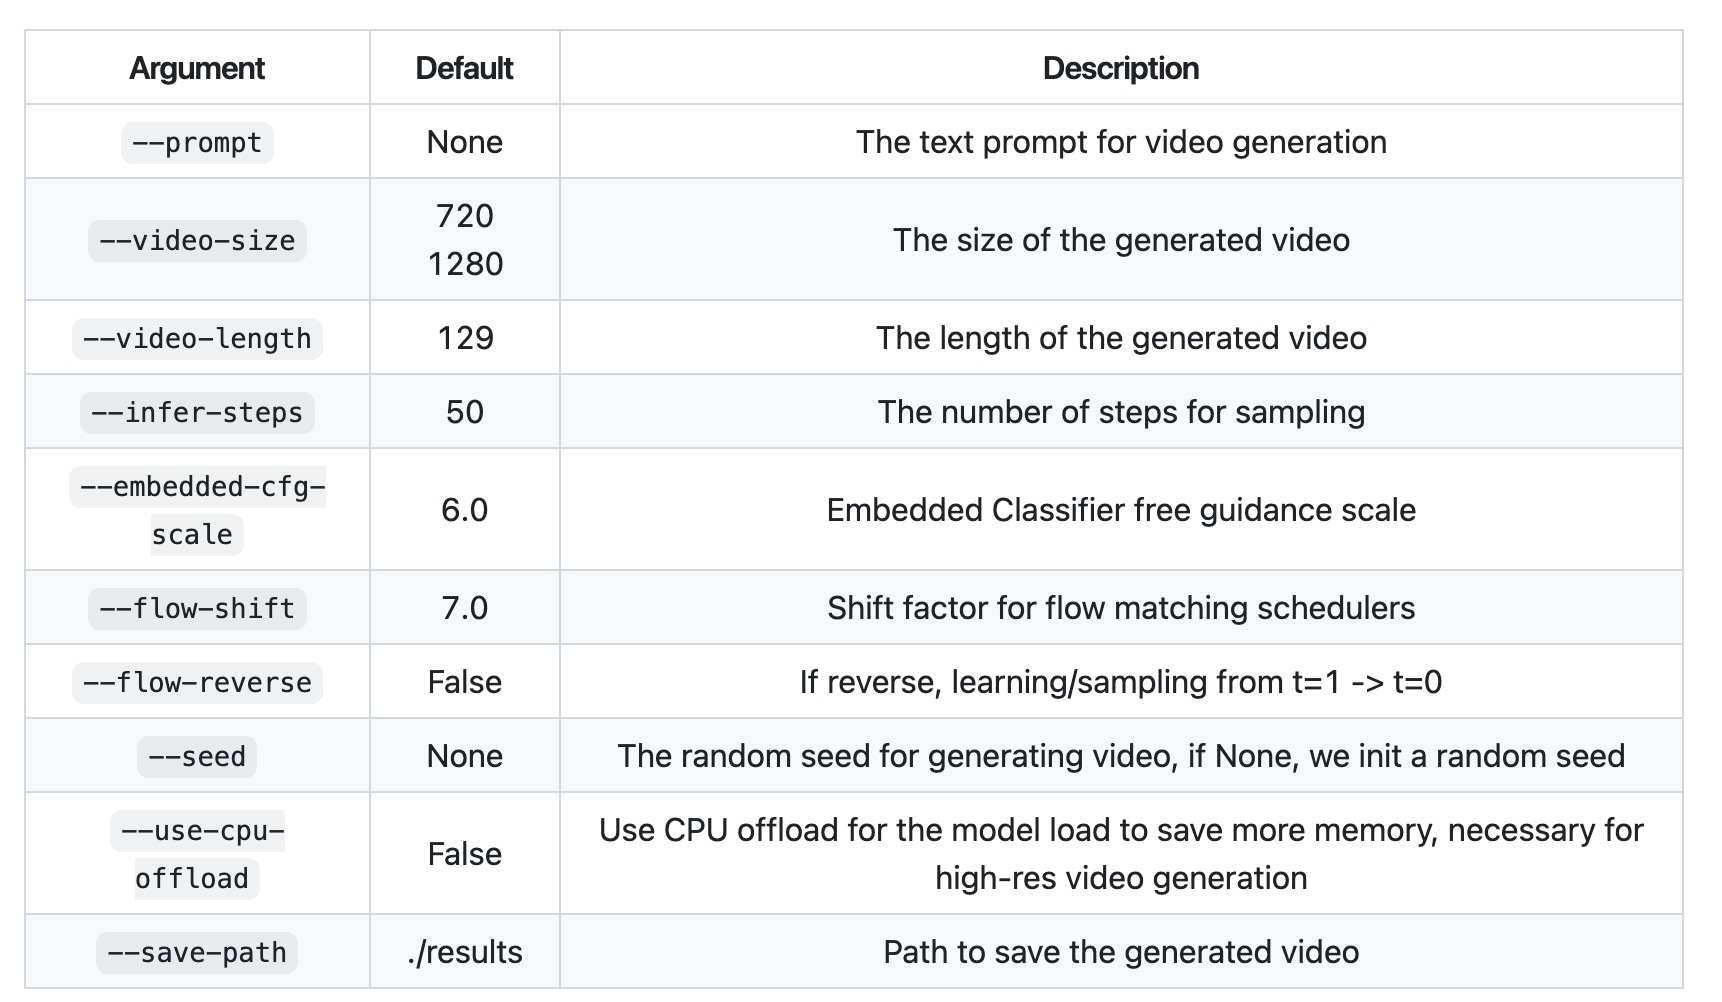
3.3 參數詳解
4. 可能遇到的問題及解決方法
4.1 問題1
TypeError: argument of type 'bool' is not iterable
ValueError: When localhost is not accessible, a shareable link must be created. Please set share=True or check your proxy settings to allow access to localhost.

解決方案:
pydantic這個包版本的問題,退回2.10.6版本即可 pip install pydantic==2.10.6,完美解決。
4.2 問題2
RuntimeError: Unable to find a valid cuDNN algorithm to run convolution
解決方案:
在gradio_server.py中增加以下代碼:
import torch
torch.backends.cudnn.benchmark = True
4.3 問題3?
ffmpy.ffmpy.FFExecutableNotFoundError: Executable 'ffprobe' not found
解決方案:
sudo apt-get install ffmpeg


)


)
)


Redis對比Java總結)

 C)


分頁查詢我的待辦)
