背景
正常業務已經支持 讀三代卡了,前端調用醫保封裝好的服務就可以了,但是長護要讀卡,就需要去訪問萬達,他們又搞了一套讀卡的動態庫,為了能夠掉萬達的接口,就需要去想辦法調用它們提供的動態庫方法,里面實現了一個加密串的規則,需要拿到那個加密串。
思路
選擇實現語言
作為搞Java的,遇到這種就沒什么辦法,給的DLL是32位的,讀需要換32位JVM,系統加載的方式也不太方便,要寫CPP,有一些組件,但是32位JVM搞起來又怕不適配,即使解決了這些問題,又要考慮寫一個簡單的圖形化界面,又不能用JAVAFX,還有一大堆問題要解決,所以用JAVA這套東西還是算了。
既然是DLL 那就搞CPP吧,CPP寫起來也很麻煩,這時候就想起了C# 語法與JAVA簡直沒啥差別,很快就能上手。
首先大學學的C#到現在基本等于沒學,直接創建一個C#項目搞起,行動才能解決困難。
這里需要了解一些C# 框架的區別? .net framework? 和 .net core??
都是微軟的,一個只能windos 一個能跨平臺,一個不維護了,一個在擁抱未來。
想著讀卡服務? 也沒有必要跨平臺了,就用.net framework 寫一個demo 讀dll(一會寫一下怎么讀的),讀起來還有一點麻煩的 需要考慮dll的依賴,當前要讀的dll需要依賴三代卡的一系列dll,把那些dll一起扔到debug路徑就行了。還是很快十分鐘就讀出來了。
接下來需要解決寫圖形化頁面的問題,這里可用WinForm 新的也可以用 WPF啥的
整體的思路就是? 創建一個圖形化程序,然后起一個http服務并支持WebSocket服務
用戶打開圖形化程序之后,就可以訪問這個服務,該服務會調用萬達的DLL 調用它提供的方法,這個DLL 又會去找三代卡讀卡的DLL 然后掉讀卡器,返回結果,之后萬達的DLL加密,服務端拿到結果返回前端,前端在請求后臺接口就可以了。
最后思來想去,還是擁抱跨平臺,容器化,從.net framework 換成了 .net core。
行動
首先先創建了一個.net framework的項目 試驗了一下讀DLL的代碼

這會創建一個控制臺程序
在program.cs? 也就是主啟動類 類似 java的main方法里面直接寫代碼
using System;
using System.Text;
using System.Runtime.InteropServices;namespace ReadDll
{internal class Program{[DllImport("ReadCardForCh.dll", CharSet = CharSet.Ansi, CallingConvention = CallingConvention.StdCall)]public static extern int ReadCardForCh(string x, StringBuilder pRcv);static void Main(string[] args){String input = "SBK";StringBuilder pRcv = new StringBuilder();int result = ReadCardForCh(input, pRcv);Console.WriteLine("Result:"+result);Console.WriteLine("Returned:" + pRcv.ToString());while (true){}}}
}
運行
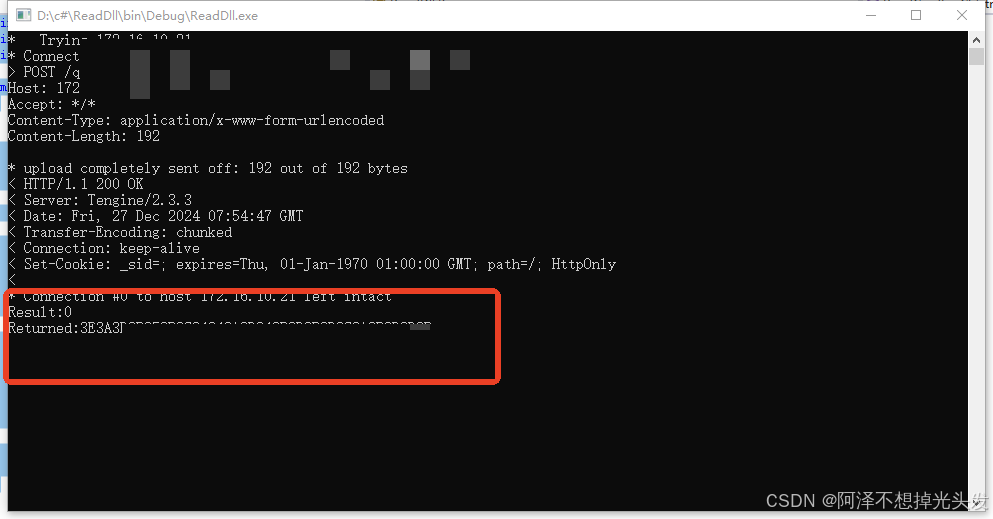
可以看到返回結果了,這里需要注意的是,加載dll的路徑,需要把你要加載的Dll依賴的庫也就是Dll一并放在生成的exe路徑中去,類似下面這樣。
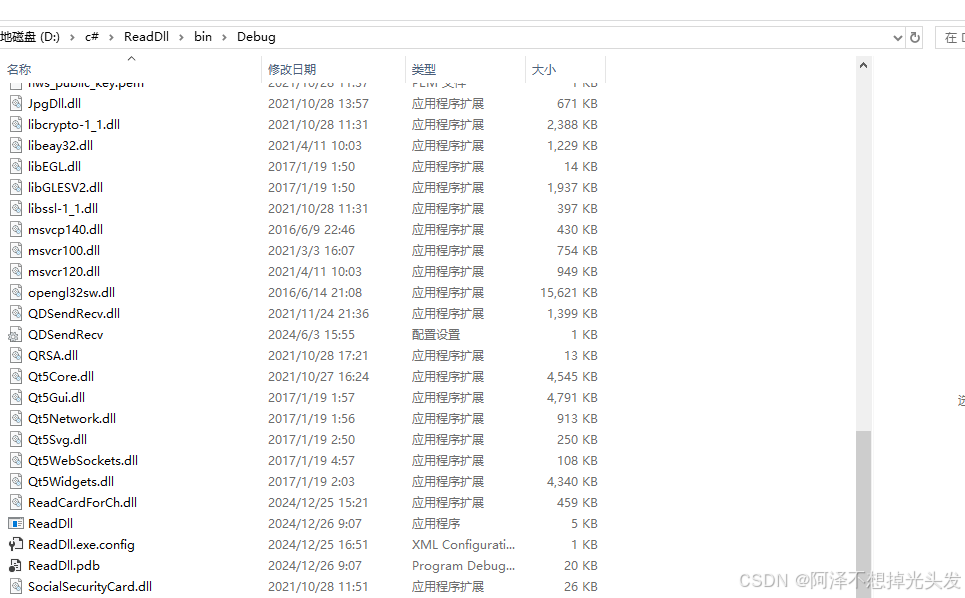
直接運行 ReadDLL 這個exe也可以。
加入圖形化頁面
創建.net core 的圖形化項目
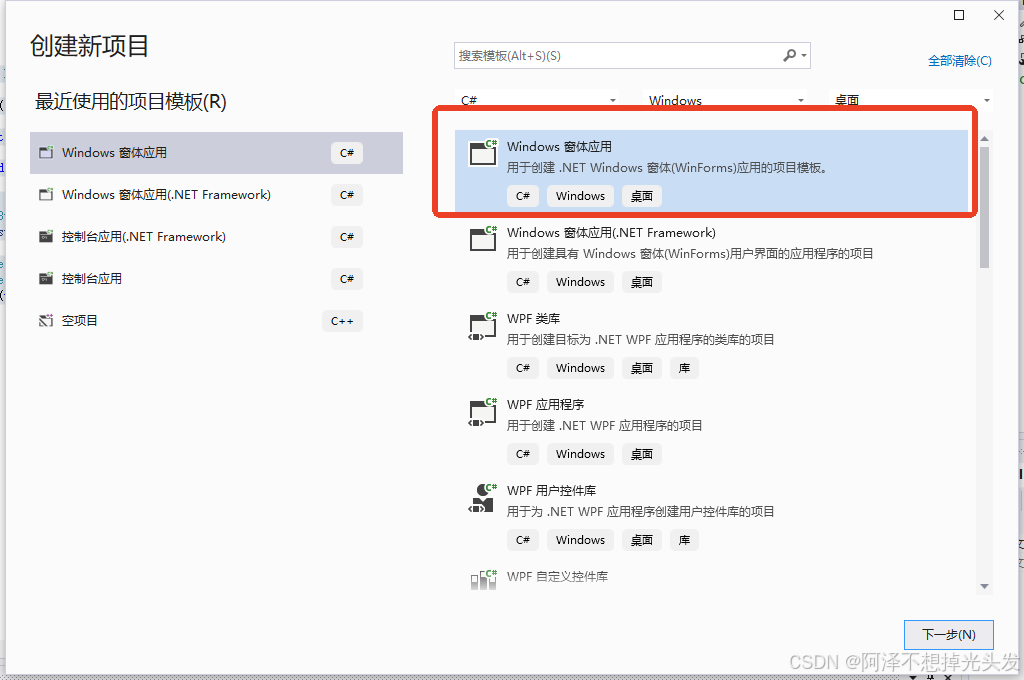
它會生成下面的解決方案結構
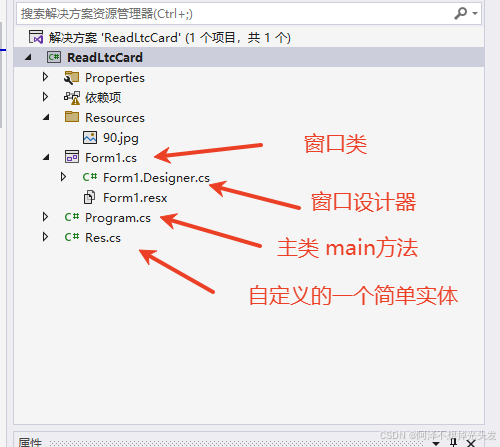
雙擊Form1.cs 會進入設計器
設計器結構左側 工具箱 右側 設計界面
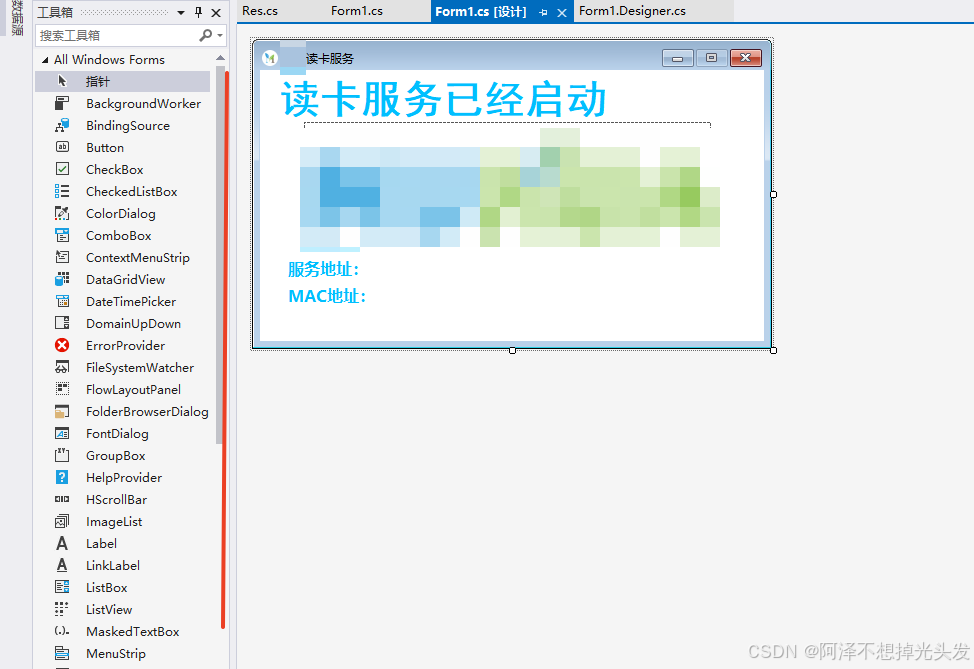
在左側拖拽 會生成對應的代碼到 FormDesigner.cs里面去,一般不需要修改,都是自動生成,我們只需要在Form1.cs 里面寫一寫代碼就可以了。
整個頁面包含幾個部分,沒有很復雜。
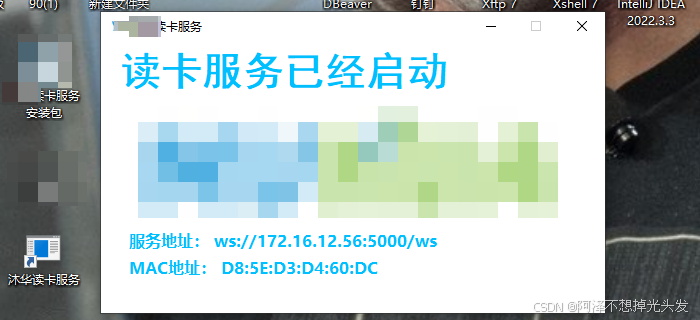
三個label? 用來展示文本 和獲取到的本地ip信息 mac 地址信息
一個PictureBox 用來展示背景圖
一個notifyIcon? 生成右下角通知欄圖標
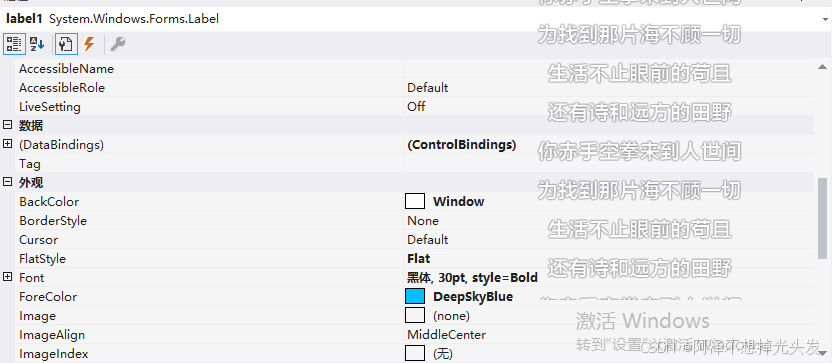
點擊設計器上面的一個組件,就會在右下角展示屬性編輯窗口,可以修改組件的屬性,完成一些行為,一會會舉一些簡單的例子。
進入 Form1.cs 看代碼
創建一個成員變量,加載Dll。
[DllImport("ReadCardForCh.dll", CharSet = CharSet.Ansi, CallingConvention = CallingConvention.StdCall)]public static extern int ReadCardForCh(string x, StringBuilder pRcv);在構造器里面有一個初始化方法,不用動,我們在其他位置寫代碼就行。
public Form1(){InitializeComponent();this.FormClosing += new FormClosingEventHandler(Form1_FormClosing);}// 重寫一下FormClosing 方法 做到 關閉X 不關閉程序 并最小化 好家伙制作流氓程序了開始private void Form1_FormClosing(object sender, FormClosingEventArgs e){// 檢查關閉的原因是否是用戶點擊了關閉按鈕if (e.CloseReason == CloseReason.UserClosing){// 取消關閉操作e.Cancel = true;// 將窗體最小化this.WindowState = FormWindowState.Minimized;}}?創建項目會生成一個 窗口加載方法,我們可以用這個方法去初始化我們的一些行為
private void Form1_Load(object sender, EventArgs e){// 初始化底部小圖標右鍵菜單 右鍵彈出退出 initRightNotifyMenuStrip();// 初始化鼠標左鍵雙擊 最大化窗口initNotifyIconMouseClick();// 初始化本地的一些ip信息initAddressInfo();// 異步創建一個Http服務 并支持WebSocket_webSocketTask = Task.Run(() => StartWebSocketServer());}private void initRightNotifyMenuStrip(){ContextMenuStrip contextMenu = new ContextMenuStrip();contextMenu.Items.Add("退出", null, (sender, e) =>{Application.Exit();});// 設置右鍵菜單notifyIcon1.ContextMenuStrip = contextMenu;}private void initNotifyIconMouseClick(){notifyIcon1.MouseClick += (sender, e) =>{notifyIcon1_MouseDoubleClick(sender, e);};}private void notifyIcon1_MouseDoubleClick(object sender, MouseEventArgs e){if(e.Button == MouseButtons.Left){this.WindowState = FormWindowState.Normal;}}private void initAddressInfo(){NetworkInterface[] networkInterfaces = NetworkInterface.GetAllNetworkInterfaces();foreach (var item in networkInterfaces){IPInterfaceProperties iPInterfaceProperties = item.GetIPProperties();PhysicalAddress physicalAddress = item.GetPhysicalAddress();string mac = string.Join(":", physicalAddress.GetAddressBytes().Select(b => b.ToString("X2")));if (item.OperationalStatus == OperationalStatus.Up){foreach (UnicastIPAddressInformation ip in iPInterfaceProperties.UnicastAddresses){// 只獲取 IPv4 地址if (ip.Address.AddressFamily == System.Net.Sockets.AddressFamily.InterNetwork){if (ip.Address.ToString() != "127.0.0.1"){label2.Text = label2.Text + " ws://" + ip.Address.ToString() + ":5000/ws";label3.Text = label3.Text + " " + mac;}}}}}}http服務實現
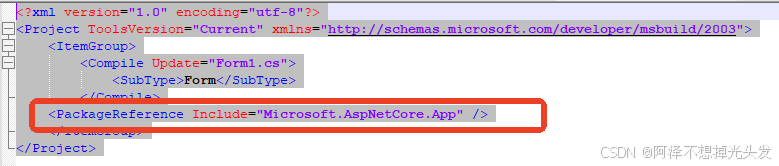
private async Task StartWebSocketServer(){_webHost = Host.CreateDefaultBuilder().ConfigureWebHostDefaults(webBuilder =>{webBuilder.UseKestrel().Configure(app =>{app.UseRouting();app.UseWebSockets();app.Use(async (context, next) =>{if (context.Request.Path == "/ws"){if (context.WebSockets.IsWebSocketRequest){var webSocket = await context.WebSockets.AcceptWebSocketAsync();notifyIcon1.ShowBalloonTip(3);await HandleWebSocketConnection(webSocket);}else{context.Response.StatusCode = 400;}}else{await next();}});}).UseUrls("http://localhost:5000"); // 設置 Web 服務器監聽的端口}).Build();// 啟動 WebSocket 服務器await _webHost.StartAsync();}private async Task HandleWebSocketConnection(System.Net.WebSockets.WebSocket webSocket){byte[] buffer = new byte[1024 * 4];try{while (webSocket.State == System.Net.WebSockets.WebSocketState.Open){var result = await webSocket.ReceiveAsync(new ArraySegment<byte>(buffer), CancellationToken.None);if (result.MessageType == System.Net.WebSockets.WebSocketMessageType.Text){var message = Encoding.UTF8.GetString(buffer, 0, result.Count);Console.WriteLine($"Received message: {message}");this.Invoke(new Action<string>(AddLabelToUI), new object[] { message });StringBuilder pRcv = new StringBuilder();int code = ReadCardForCh(message, pRcv);res resInfo = new res();resInfo.code = code;resInfo.message = pRcv.ToString();// 發送響應消息var responseMessage = Encoding.UTF8.GetBytes(JsonSerializer.Serialize(resInfo));// var responseMessage = Encoding.UTF8.GetBytes("Echo: " + message);await webSocket.SendAsync(new ArraySegment<byte>(responseMessage), System.Net.WebSockets.WebSocketMessageType.Text, true, CancellationToken.None);}else if (result.MessageType == System.Net.WebSockets.WebSocketMessageType.Close){// 關閉連接await webSocket.CloseAsync(System.Net.WebSockets.WebSocketCloseStatus.NormalClosure, "Closing", CancellationToken.None);}}}catch (Exception ex){Console.WriteLine("WebSocket error: " + ex.Message);}}private void AddLabelToUI(string message){// 將 Label 添加到窗體的 Controls 集合中this.label4.Text = "本次發送消息:"+message;}上面需要注意的是 可能需要引入 .net asp 庫 用來寫web項目的組件。
我是這么引入的,對 visual studio 2022 暫時不太熟悉
直接編輯
![]() ?
?
完整的類
using Microsoft.AspNetCore.Builder;
using Microsoft.AspNetCore.Hosting;
using Microsoft.Extensions.Hosting;
using System.Net.NetworkInformation;
using System.Runtime.InteropServices;
using System.Text;
using System.Text.Json;namespace ReadLtcCard
{public partial class Form1 : Form{[DllImport("ReadCardForCh.dll", CharSet = CharSet.Ansi, CallingConvention = CallingConvention.StdCall)]public static extern int ReadCardForCh(string x, StringBuilder pRcv);private IHost _webHost;private Task _webSocketTask;public Form1(){InitializeComponent();this.FormClosing += new FormClosingEventHandler(Form1_FormClosing);}private void Form1_Load(object sender, EventArgs e){initRightNotifyMenuStrip();initNotifyIconMouseClick();initAddressInfo();_webSocketTask = Task.Run(() => StartWebSocketServer());}private async Task StartWebSocketServer(){_webHost = Host.CreateDefaultBuilder().ConfigureWebHostDefaults(webBuilder =>{webBuilder.UseKestrel().Configure(app =>{app.UseRouting();app.UseWebSockets();app.Use(async (context, next) =>{if (context.Request.Path == "/ws"){if (context.WebSockets.IsWebSocketRequest){var webSocket = await context.WebSockets.AcceptWebSocketAsync();notifyIcon1.ShowBalloonTip(3);await HandleWebSocketConnection(webSocket);}else{context.Response.StatusCode = 400;}}else{await next();}});}).UseUrls("http://localhost:5000");  // 設置 Web 服務器監聽的端口}).Build();// 啟動 WebSocket 服務器await _webHost.StartAsync();}private async Task HandleWebSocketConnection(System.Net.WebSockets.WebSocket webSocket){byte[] buffer = new byte[1024 * 4];try{while (webSocket.State == System.Net.WebSockets.WebSocketState.Open){var result = await webSocket.ReceiveAsync(new ArraySegment<byte>(buffer), CancellationToken.None);if (result.MessageType == System.Net.WebSockets.WebSocketMessageType.Text){var message = Encoding.UTF8.GetString(buffer, 0, result.Count);Console.WriteLine($"Received message: {message}");this.Invoke(new Action<string>(AddLabelToUI), new object[] { message });StringBuilder pRcv = new StringBuilder();int code = ReadCardForCh(message, pRcv);res resInfo = new res();resInfo.code = code;resInfo.message = pRcv.ToString();// 發送響應消息var responseMessage = Encoding.UTF8.GetBytes(JsonSerializer.Serialize(resInfo));// var responseMessage = Encoding.UTF8.GetBytes("Echo: " + message);await webSocket.SendAsync(new ArraySegment<byte>(responseMessage), System.Net.WebSockets.WebSocketMessageType.Text, true, CancellationToken.None);}else if (result.MessageType == System.Net.WebSockets.WebSocketMessageType.Close){// 關閉連接await webSocket.CloseAsync(System.Net.WebSockets.WebSocketCloseStatus.NormalClosure, "Closing", CancellationToken.None);}}}catch (Exception ex){Console.WriteLine("WebSocket error: " + ex.Message);}}private void AddLabelToUI(string message){// 將 Label 添加到窗體的 Controls 集合中this.label4.Text = "本次發送消息:"+message;}private void initAddressInfo(){NetworkInterface[] networkInterfaces = NetworkInterface.GetAllNetworkInterfaces();foreach (var item in networkInterfaces){IPInterfaceProperties iPInterfaceProperties = item.GetIPProperties();PhysicalAddress physicalAddress = item.GetPhysicalAddress();string mac = string.Join(":", physicalAddress.GetAddressBytes().Select(b => b.ToString("X2")));if (item.OperationalStatus == OperationalStatus.Up){foreach (UnicastIPAddressInformation ip in iPInterfaceProperties.UnicastAddresses){// 只獲取 IPv4 地址if (ip.Address.AddressFamily == System.Net.Sockets.AddressFamily.InterNetwork){if (ip.Address.ToString() != "127.0.0.1"){label2.Text = label2.Text + " ws://" + ip.Address.ToString() + ":5000/ws";label3.Text = label3.Text + " " + mac;}}}}}}private void initRightNotifyMenuStrip(){ContextMenuStrip contextMenu = new ContextMenuStrip();contextMenu.Items.Add("退出", null, (sender, e) =>{Application.Exit();});// 設置右鍵菜單notifyIcon1.ContextMenuStrip = contextMenu;}private void initNotifyIconMouseClick(){notifyIcon1.MouseClick += (sender, e) =>{notifyIcon1_MouseDoubleClick(sender, e);};}private void notifyIcon1_MouseDoubleClick(object sender, MouseEventArgs e){if(e.Button == MouseButtons.Left){this.WindowState = FormWindowState.Normal;}}private void Form1_FormClosing(object sender, FormClosingEventArgs e){// 檢查關閉的原因是否是用戶點擊了關閉按鈕if (e.CloseReason == CloseReason.UserClosing){// 取消關閉操作e.Cancel = true;// 將窗體最小化this.WindowState = FormWindowState.Minimized;}}}
}
設計器代碼? 不用看 直接操作設計器就能生成 里面的邏輯也比較簡單,就是創建組件,設置屬性,添加到窗口控制容器里面去,就會展示到頁面上。
namespace ReadLtcCard
{partial class muhuaForm{/// <summary>///  Required designer variable./// </summary>private System.ComponentModel.IContainer components = null;/// <summary>///  Clean up any resources being used./// </summary>/// <param name="disposing">true if managed resources should be disposed; otherwise, false.</param>protected override void Dispose(bool disposing){if (disposing && (components != null)){components.Dispose();}base.Dispose(disposing);}#region Windows Form Designer generated code/// <summary>///  Required method for Designer support - do not modify///  the contents of this method with the code editor./// </summary>private void InitializeComponent(){components = new System.ComponentModel.Container();System.ComponentModel.ComponentResourceManager resources = new System.ComponentModel.ComponentResourceManager(typeof(muhuaForm));notifyIcon1 = new NotifyIcon(components);label1 = new Label();label2 = new Label();label3 = new Label();pictureBox1 = new PictureBox();label4 = new Label();((System.ComponentModel.ISupportInitialize)pictureBox1).BeginInit();SuspendLayout();// // notifyIcon1// notifyIcon1.BalloonTipIcon = ToolTipIcon.Info;notifyIcon1.BalloonTipText = "服務啟動成功";notifyIcon1.BalloonTipTitle = "狀態";notifyIcon1.Icon = (Icon)resources.GetObject("notifyIcon1.Icon");notifyIcon1.Text = "讀卡服務";notifyIcon1.Visible = true;// // label1// label1.AutoSize = true;label1.BackColor = SystemColors.Window;label1.FlatStyle = FlatStyle.Flat;label1.Font = new Font("黑體", 30F, FontStyle.Bold);label1.ForeColor = Color.DeepSkyBlue;label1.Location = new Point(12, 9);label1.Name = "label1";label1.Size = new Size(345, 40);label1.TabIndex = 0;label1.Text = "讀卡服務已經啟動";// // label2// label2.AutoSize = true;label2.BackColor = SystemColors.Window;label2.Font = new Font("Microsoft YaHei UI", 12F, FontStyle.Bold);label2.ForeColor = Color.DeepSkyBlue;label2.Location = new Point(24, 188);label2.Name = "label2";label2.Size = new Size(90, 22);label2.TabIndex = 1;label2.Text = "服務地址:";// // label3// label3.AutoSize = true;label3.BackColor = SystemColors.Window;label3.Font = new Font("Microsoft YaHei UI", 12F, FontStyle.Bold);label3.ForeColor = Color.DeepSkyBlue;label3.Location = new Point(24, 215);label3.Name = "label3";label3.Size = new Size(97, 22);label3.TabIndex = 2;label3.Text = "MAC地址:";// // pictureBox1// pictureBox1.BackColor = Color.White;pictureBox1.Image = (Image)resources.GetObject("pictureBox1.Image");pictureBox1.Location = new Point(44, 52);pictureBox1.Name = "pictureBox1";pictureBox1.Size = new Size(407, 130);pictureBox1.SizeMode = PictureBoxSizeMode.Zoom;pictureBox1.TabIndex = 3;pictureBox1.TabStop = false;// // label4// label4.AutoSize = true;label4.Location = new Point(24, 237);label4.Name = "label4";label4.Size = new Size(0, 17);label4.TabIndex = 4;// // muhuaForm// AutoScaleDimensions = new SizeF(7F, 17F);AutoScaleMode = AutoScaleMode.Font;BackColor = Color.White;ClientSize = new Size(504, 271);Controls.Add(label4);Controls.Add(pictureBox1);Controls.Add(label3);Controls.Add(label2);Controls.Add(label1);FormBorderStyle = FormBorderStyle.FixedSingle;Icon = (Icon)resources.GetObject("$this.Icon");Location = new Point(500, 500);MaximizeBox = false;Name = "muhuaForm";StartPosition = FormStartPosition.CenterScreen;Text = "讀卡服務";Load += Form1_Load;((System.ComponentModel.ISupportInitialize)pictureBox1).EndInit();ResumeLayout(false);PerformLayout();}#endregionprivate NotifyIcon notifyIcon1;private Label label1;private Label label2;private Label label3;private PictureBox pictureBox1;private Label label4;}
}
namespace ReadLtcCard
{public class res{public int code { get; set; }public string message { get; set; }}
}
前端測試demo
<!DOCTYPE html>
<html lang="zh">
<head><meta charset="UTF-8"><meta name="viewport" content="width=device-width, initial-scale=1.0"><title>WebSocket 測試</title><style>body {font-family: Arial, sans-serif;text-align: center;padding-top: 50px;}#status {font-size: 18px;margin-bottom: 20px;}#message {width: 80%;height: 100px;margin-bottom: 20px;font-size: 16px;}button {padding: 10px 20px;font-size: 16px;cursor: pointer;}</style>
</head>
<body><div id="status">正在連接 WebSocket...</div><textarea id="message" placeholder="請輸入消息" rows="4" cols="50"></textarea><br><button id="sendBtn" disabled>發送消息</button><button id="closeBtn" disabled>關閉連接</button><script>// WebSocket 地址const wsUrl = "ws://localhost:5000/ws";let socket = null;// 獲取頁面元素const statusElement = document.getElementById('status');const sendBtn = document.getElementById('sendBtn');const closeBtn = document.getElementById('closeBtn');const messageInput = document.getElementById('message');// 創建 WebSocket 連接function createWebSocket() {socket = new WebSocket(wsUrl);socket.onopen = () => {statusElement.textContent = "WebSocket 已連接!";sendBtn.disabled = false;closeBtn.disabled = false;};socket.onmessage = (event) => {const message = event.data;console.log('收到消息:', message);alert('收到消息: ' + message); // 顯示收到的消息};socket.onerror = (error) => {statusElement.textContent = "WebSocket 發生錯誤!";console.error("WebSocket 錯誤:", error);};socket.onclose = () => {statusElement.textContent = "WebSocket 連接已關閉!";sendBtn.disabled = true;closeBtn.disabled = true;};}// 發送消息sendBtn.addEventListener('click', () => {const message = messageInput.value;if (message) {socket.send(message);console.log('發送消息:', message);messageInput.value = ''; // 清空輸入框}});// 關閉連接closeBtn.addEventListener('click', () => {if (socket) {socket.close();}});// 頁面加載時自動嘗試連接createWebSocket();</script>
</body>
</html>
實現效果

點擊關閉和最小化都會最小化 不會關閉程序
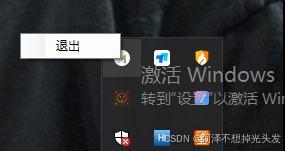
右鍵展示退出功能
左鍵點擊恢復正常大小
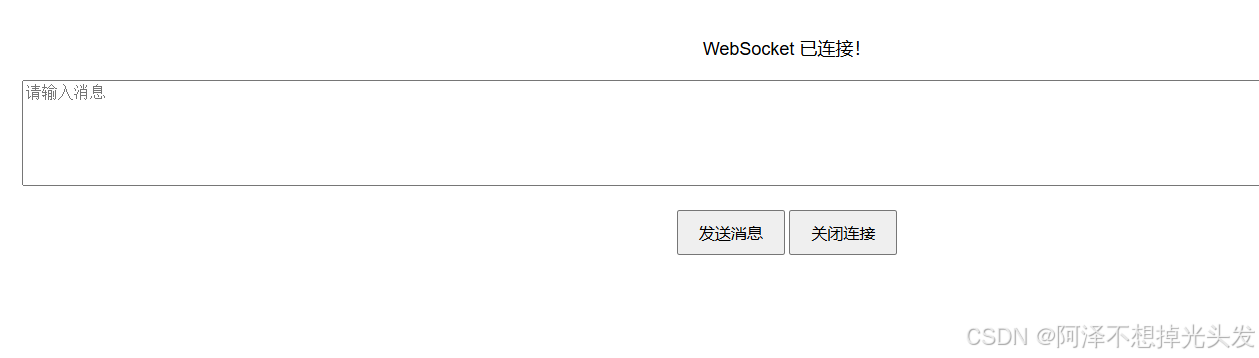

服務連接會提示氣泡
點擊發送消息,會調用上面的加載的動態庫方法,然后去掉讀卡器,此時已經插上讀卡器和設備卡或者身份證了
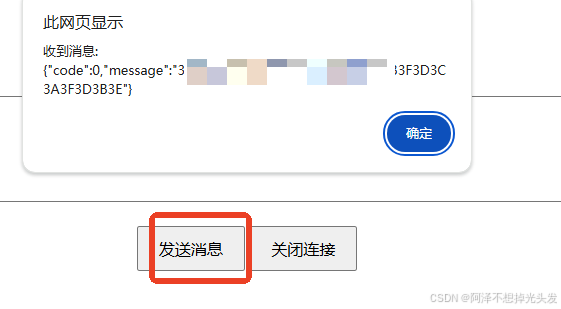
發送任意消息讀社保卡,SBK 讀社保卡 SFZ 讀身份證 需要讀卡器支持
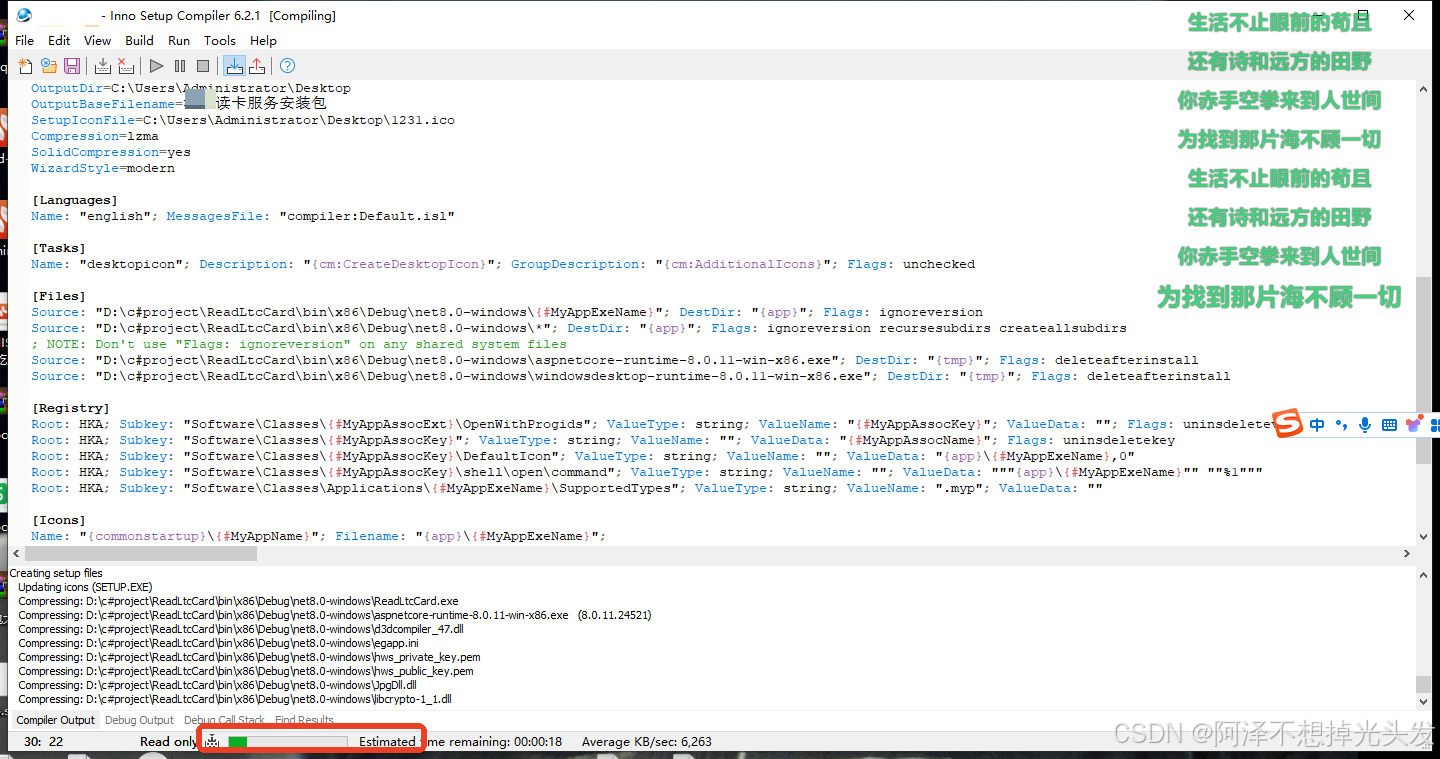
打包
這里選擇使用 innp setup? 開源 方便,可選擇生成腳本。
iss文件
; Script generated by the Inno Setup Script Wizard.
; SEE THE DOCUMENTATION FOR DETAILS ON CREATING INNO SETUP SCRIPT FILES!#define MyAppName "讀卡服務"
#define MyAppVersion "1.5"
#define MyAppPublisher "1"
#define MyAppURL "https://www.1.com/"
#define MyAppExeName "ReadLtcCard.exe"
#define MyAppAssocName "ReadLtcCard"
#define MyAppAssocExt ".exe"
#define MyAppAssocKey StringChange(MyAppAssocName, " ", "") + MyAppAssocExt[Setup]
; NOTE: The value of AppId uniquely identifies this application. Do not use the same AppId value in installers for other applications.
; (To generate a new GUID, click Tools | Generate GUID inside the IDE.)
AppId={{435B626D-BBCB-4955-8AE4-6EEC86BD2981}
AppName={#MyAppName}
AppVersion={#MyAppVersion}
;AppVerName={#MyAppName} {#MyAppVersion}
AppPublisher={#MyAppPublisher}
AppPublisherURL={#MyAppURL}
AppSupportURL={#MyAppURL}
AppUpdatesURL={#MyAppURL}
DefaultDirName={pf}\mhReadServer
ChangesAssociations=yes
DisableProgramGroupPage=yes
; Uncomment the following line to run in non administrative install mode (install for current user only.)
;PrivilegesRequired=lowest
OutputDir=C:\Users\Administrator\Desktop
OutputBaseFilename=讀卡服務安裝包
SetupIconFile=C:\Users\Administrator\Desktop\1231.ico
Compression=lzma
SolidCompression=yes
WizardStyle=modern[Languages]
Name: "english"; MessagesFile: "compiler:Default.isl"[Tasks]
Name: "desktopicon"; Description: "{cm:CreateDesktopIcon}"; GroupDescription: "{cm:AdditionalIcons}"; Flags: unchecked[Files]
Source: "D:\c#project\ReadLtcCard\bin\x86\Debug\net8.0-windows\{#MyAppExeName}"; DestDir: "{app}"; Flags: ignoreversion
Source: "D:\c#project\ReadLtcCard\bin\x86\Debug\net8.0-windows\*"; DestDir: "{app}"; Flags: ignoreversion recursesubdirs createallsubdirs
; NOTE: Don't use "Flags: ignoreversion" on any shared system files
Source: "D:\c#project\ReadLtcCard\bin\x86\Debug\net8.0-windows\aspnetcore-runtime-8.0.11-win-x86.exe"; DestDir: "{tmp}"; Flags: deleteafterinstall
Source: "D:\c#project\ReadLtcCard\bin\x86\Debug\net8.0-windows\windowsdesktop-runtime-8.0.11-win-x86.exe"; DestDir: "{tmp}"; Flags: deleteafterinstall[Registry]
Root: HKA; Subkey: "Software\Classes\{#MyAppAssocExt}\OpenWithProgids"; ValueType: string; ValueName: "{#MyAppAssocKey}"; ValueData: ""; Flags: uninsdeletevalue
Root: HKA; Subkey: "Software\Classes\{#MyAppAssocKey}"; ValueType: string; ValueName: ""; ValueData: "{#MyAppAssocName}"; Flags: uninsdeletekey
Root: HKA; Subkey: "Software\Classes\{#MyAppAssocKey}\DefaultIcon"; ValueType: string; ValueName: ""; ValueData: "{app}\{#MyAppExeName},0"
Root: HKA; Subkey: "Software\Classes\{#MyAppAssocKey}\shell\open\command"; ValueType: string; ValueName: ""; ValueData: """{app}\{#MyAppExeName}"" ""%1"""
Root: HKA; Subkey: "Software\Classes\Applications\{#MyAppExeName}\SupportedTypes"; ValueType: string; ValueName: ".myp"; ValueData: ""[Icons]
Name: "{commonstartup}\{#MyAppName}"; Filename: "{app}\{#MyAppExeName}";
Name: "{autoprograms}\{#MyAppName}"; Filename: "{app}\{#MyAppExeName}"
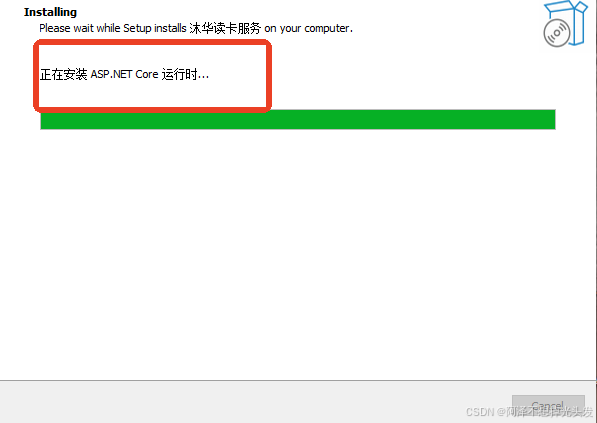
Name: "{autodesktop}\{#MyAppName}"; Filename: "{app}\{#MyAppExeName}"; Tasks: desktopicon[Run]Filename: "{tmp}\aspnetcore-runtime-8.0.11-win-x86.exe"; Parameters: "/quiet /norestart"; StatusMsg: "正在安裝 ASP.NET Core 運行時..."; Flags: waituntilterminated runascurrentuser
Filename: "{tmp}\windowsdesktop-runtime-8.0.11-win-x86.exe"; Parameters: "/quiet /norestart"; StatusMsg: "正在安裝 Windows Desktop 運行時..."; Flags: waituntilterminated runascurrentuser
Filename: "{app}\{#MyAppExeName}"; Description: "{cm:LaunchProgram,{#StringChange(MyAppName, '&', '&&')}}"; Flags: nowait postinstall skipifsilent這里注意 需要同步安裝 asp 和 .net core的環境 提前放在debug的路徑里面去。然后在file中指定文件,其實不指定也行上面已經寫了*了
然后在run中添加安裝最后要安裝依賴包的設置,這樣在按照之后就會自動安裝了。
用 inno setup? 打開iss 粘貼上面的腳本 修改路徑信息和資源信息,大概就可以用了(可以自己生成)
然后點擊運行就會生成一個安裝包
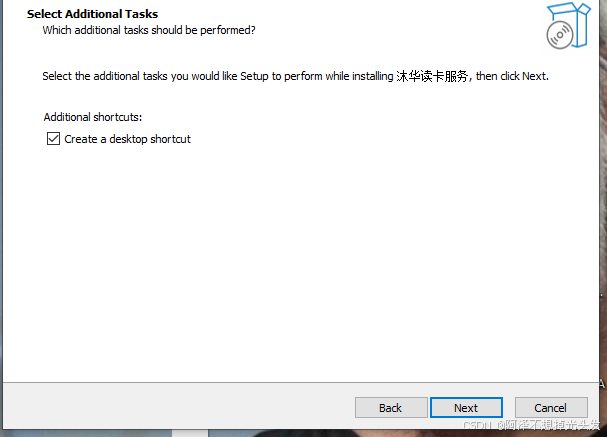
注意安裝完成 會自動開機啟動
至此一個簡單的讀卡服務殼已經制作好了
總結
簡單的桌面端應用開發不是很難,用過Javafx 之類的框架思想都是共通的Java語法與c# 大部分相似,所以只需要熟悉一下就好了,沒必要深究這個,想學就需要花大量時間研究.net core。我的想法是工作驅動,需要就去學就好了。
編寫思路就是? 給窗體? 添加組件? 設置屬性 設置事件處理方法,圖形化開發,現在基本都是事件驅動式開發處理交互了。
難點? 語法的不適應,IDE的不適感。這些都可克服。
把自己的思想從語言抽離出來,把它理解成為編程,思想是共用的,Java代碼別白學不太難理解。
需要提升的地方。寫沒有像寫WEB一樣的完整客戶端開發思路,效果是可以實現的,但是寫的很爛,終究原因是 思路捋清了,也只是完成了一部分,細節怎么實現就需要對語言的熟練度了。
好了這次分享就到這里吧。

)


php簡單實現)
Unittest+Selenium實戰小案例)


:外部觸發)


:少量數據求解未知QUBO矩陣,以少見多)


