目錄
一、實驗
1.環境
2.初始化前端項目
3.安裝 vue-route
4.安裝 pinia
5.安裝 axios
6.安裝 Element Plus
7.gitee創建工程
8. 配置路由映射
9.Vite 使用 Element Plus
二、問題
1.README.md 文檔推送到gitee未自動換行
2.訪問login頁面顯示空白
3.表單輸入賬戶與密碼,按鈕依然為禁用狀態
一、實驗
1.環境
(1)主機
表1 主機
| 系統 | 軟件 | 版本 | 備注 |
| Windows11 | VS Code | 1.96.2 | |
| Node.js | v18.20.4(LTS) |
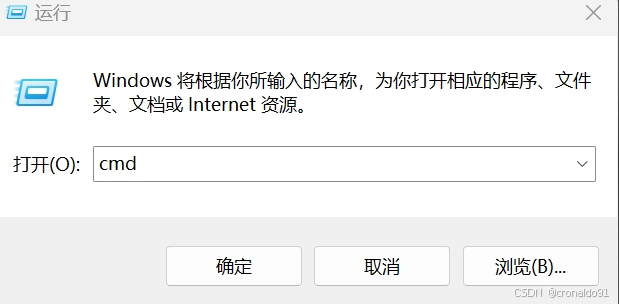
運行(輸入cmd)
查看VS Code版本
Code --version
查看node版本
node -v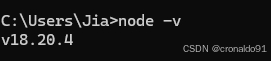
查看npm版本
npm -v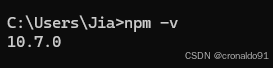
2.初始化前端項目
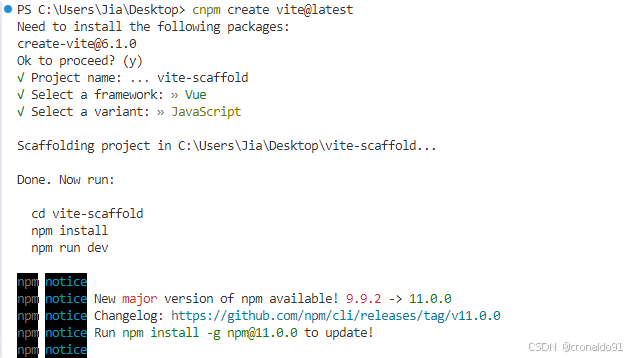
(1)安裝vite
cnpm create vite@latest輸入y,然后選擇vue
接下來選擇JavaScript
(2)安裝依賴
切換目錄
cd vite-axios![]()
這里切換cnpm安裝依賴
cnpm install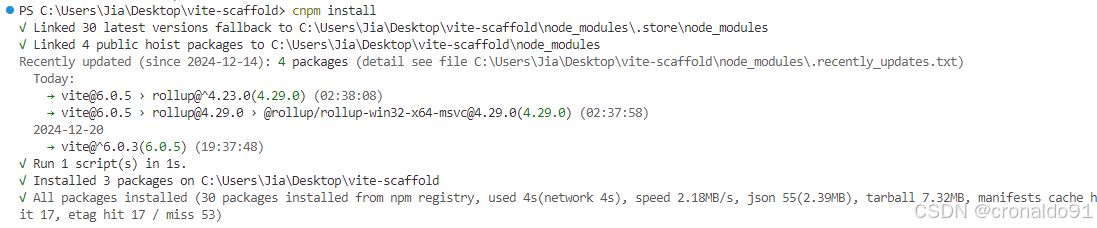
(3) 運行
npm run dev
彈出界面:
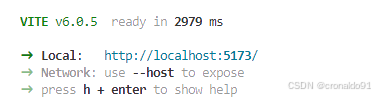
可以訪問到Vite + Vue
http://localhost:5173/
(4)退出
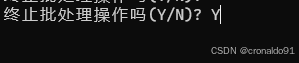
CTRL + C 結束

輸入Y
3.安裝 vue-route
(1) 查閱
https://router.vuejs.org/zh/installation.html(2) 安裝vue-router
使用cnpm安裝
cnpm install vue-router@4
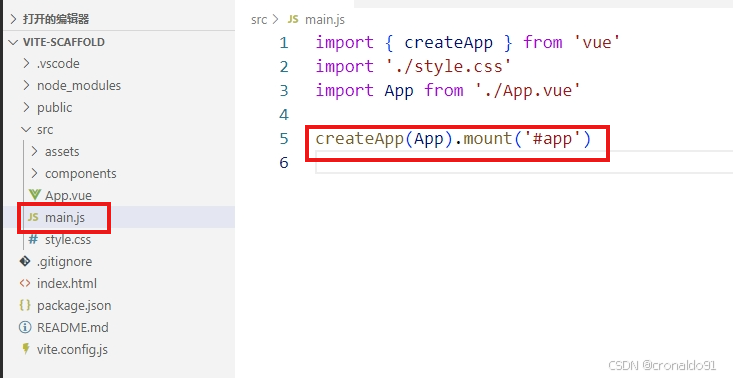
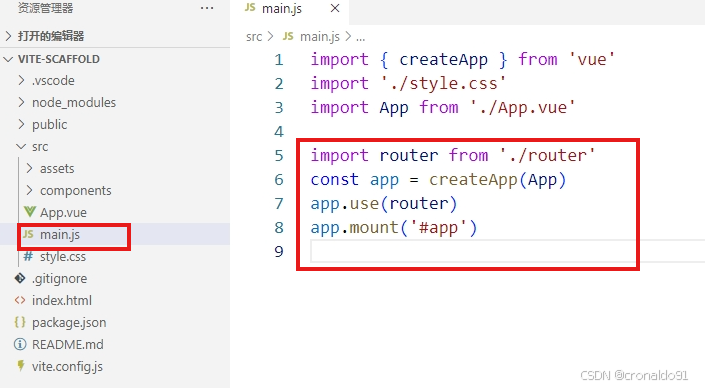
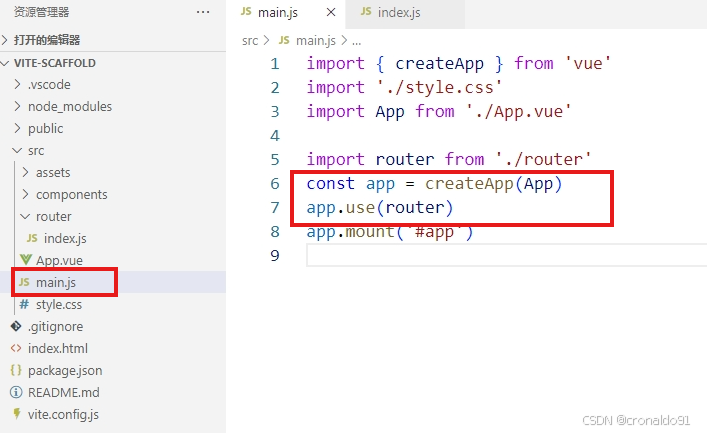
(3) main.js集成路由
導入router
import router from './router'注冊路由
const app = createApp(App)
app.use(router)
app.mount('#app')
修改前:
修改后:
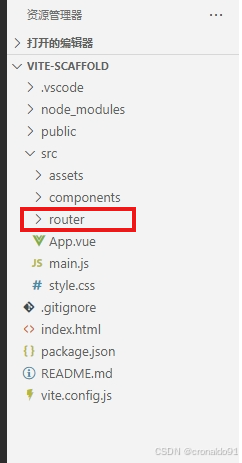
(4)創建路由配置目錄router
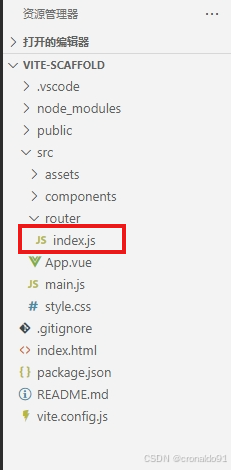
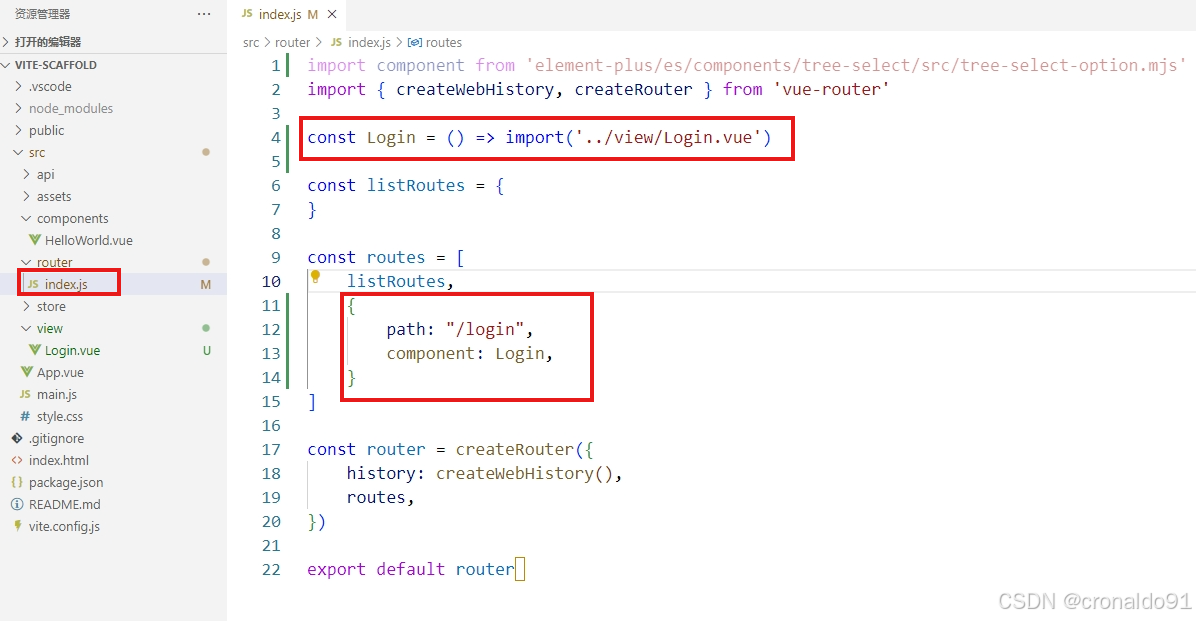
(5) router下創建index.js (實現組件與路由映射)
(6)修改index.js
導入創建路由的方法
import { createWebHistory, createRouter } from 'vue-router'定義路由映射
const listRoutes = {}const routes = [listRoutes,
]
創建路由實例
const router = createRouter({history: createWebHistory(),routes,
})
導出默認路由
export default router??(7) 運行
npm run dev
彈出界面:

可以訪問到Vite + Vue
http://localhost:5173/
(8)退出
CTRL + C 結束
輸入Y
4.安裝 pinia
(1) 查閱
https://pinia.vuejs.org/zh/getting-started.html?(2) 安裝pinia
使用cnpm安裝
cnpm install pinia
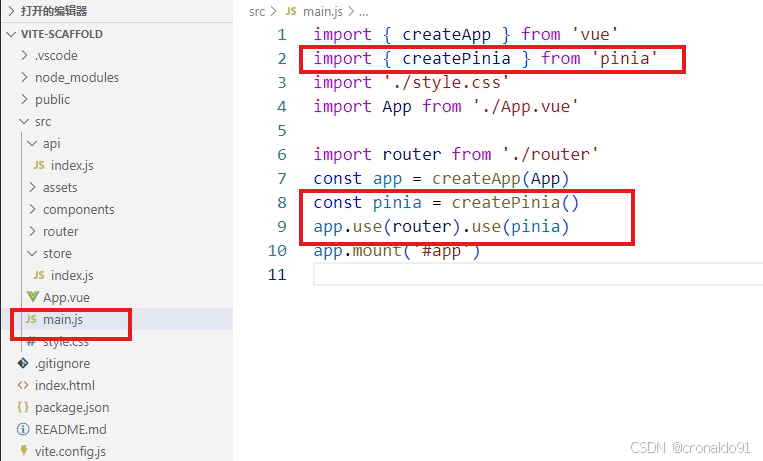
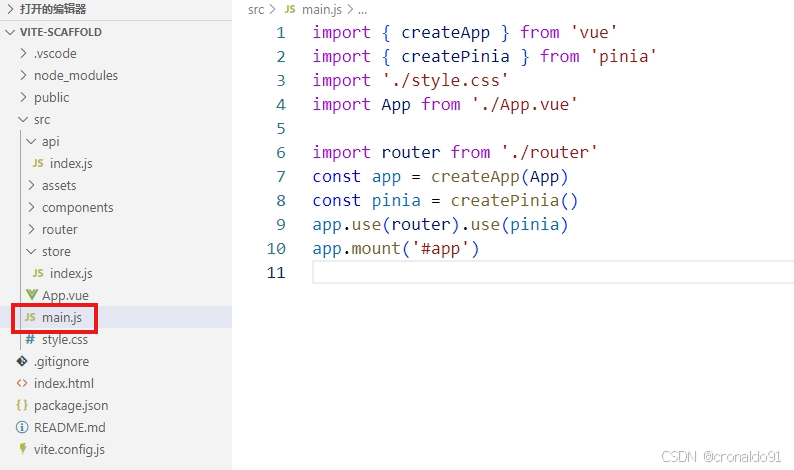
(3)?main.js集成pinia
導入創建pinia的方法
import { createPinia } from 'pinia'注冊pinia
const pinia = createPinia()
app.use(router).use(pinia)
app.mount('#app')
修改前:
修改后:
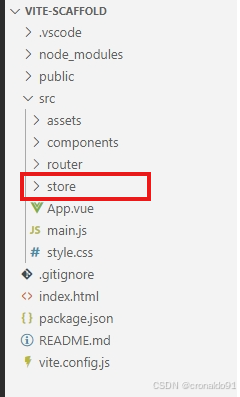
(5)創建全局狀態(容器)目錄store
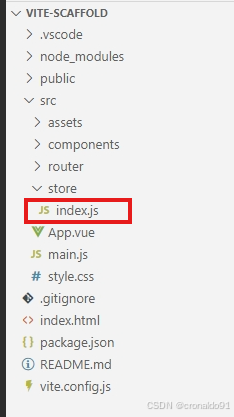
(6)store下創建index.js
(7)修改index.js
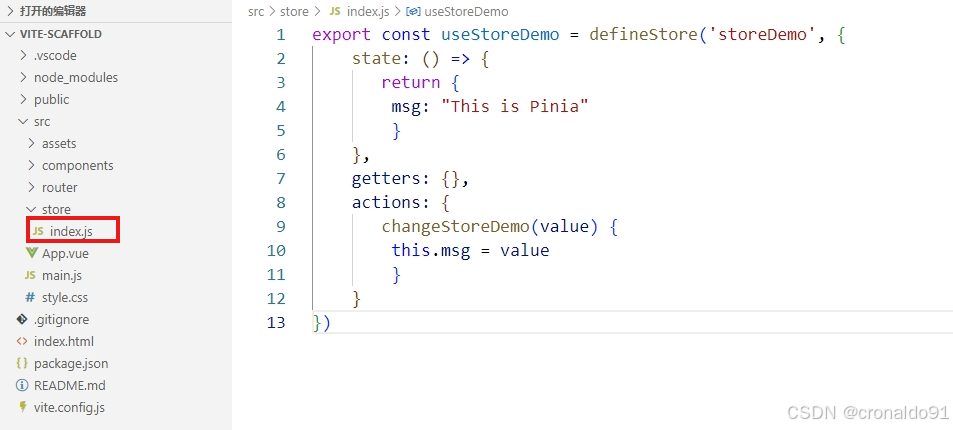
導入定義Store
import { defineStore } from 'pinia'state?是 store 的數據 (data),getters?是 store 的計算屬性 (computed),而?actions?則是方法 (methods)
export const useStoreDemo = defineStore('storeDemo', {state: () => {return {msg: "This is Pinia"}   },getters: {},actions: {changeStoreDemo(value) {this.msg = value}}
})
5.安裝 axios
(1) 查閱
https://www.axios-http.cn/docs/intro(2)安裝axios
使用cnpm安裝
cnpm install axios
(3)?創建封裝目錄api

(4)api下創建index.js
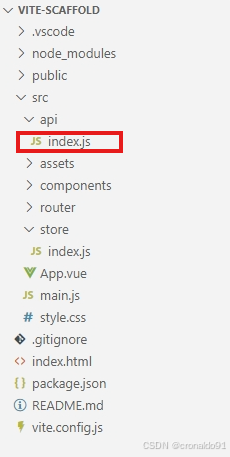
(5)修改 index.js
import axios from 'axios'
const request = (url = '', data = {}, method = "get", timeout = 5000) => {return new Promise((resolve, reject)=>{const methodLower = method.toLowerCase() if (methodLower === 'get') {axios({method: methodLower,params: data,timeout: timeout,url: url,}).then((response)=>{resolve(response)}).catch((error)=>{reject(error)})} else if (methodLower === "post") {axios({method: methodLower,data: data,timeout: timeout,url: url,}).then((response)=>{resolve(response)}).catch((error)=>{reject(error)})}})
}export default request
6.安裝 Element Plus
(1) 查閱
https://element-plus.org/zh-CN/guide/installation.html
(2)安裝Element Plus
使用cnpm安裝
(--save 參數 在裝的時候會把包的信息寫入package.json?)
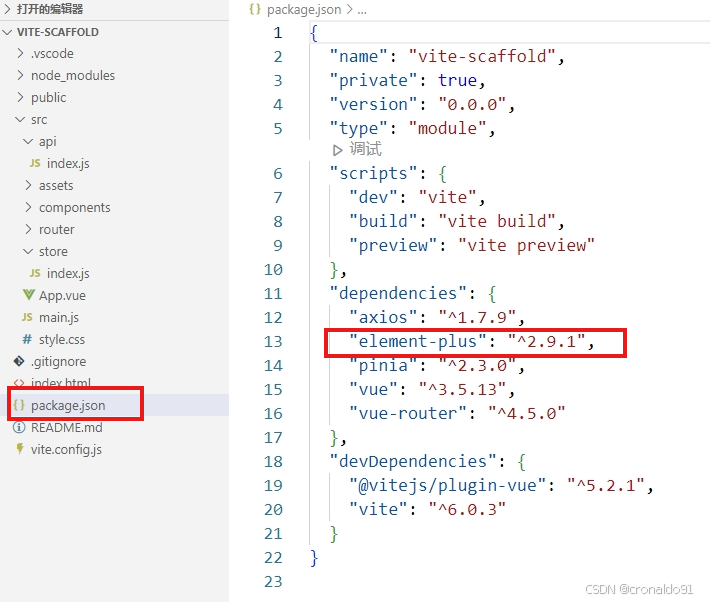
cnpm install element-plus --save
(3) 查看package.json?
(4)查閱
https://element-plus.org/zh-CN/guide/quickstart.html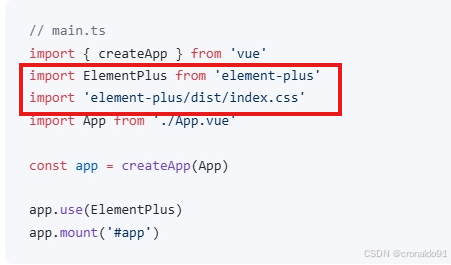
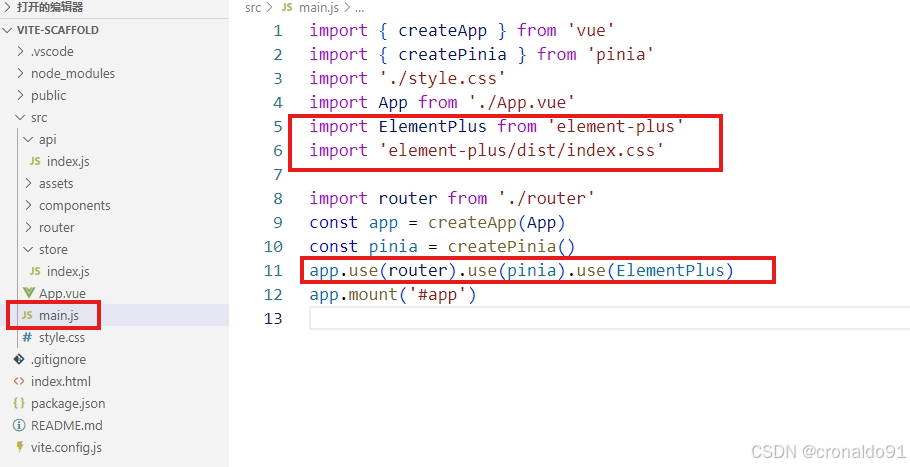
(5)main.js集成Element Plus
……
import ElementPlus from 'element-plus'
import 'element-plus/dist/index.css'
……
app.use(router).use(pinia).use(ElementPlus)
修改前:
修改后:
??(6) 運行
npm run dev
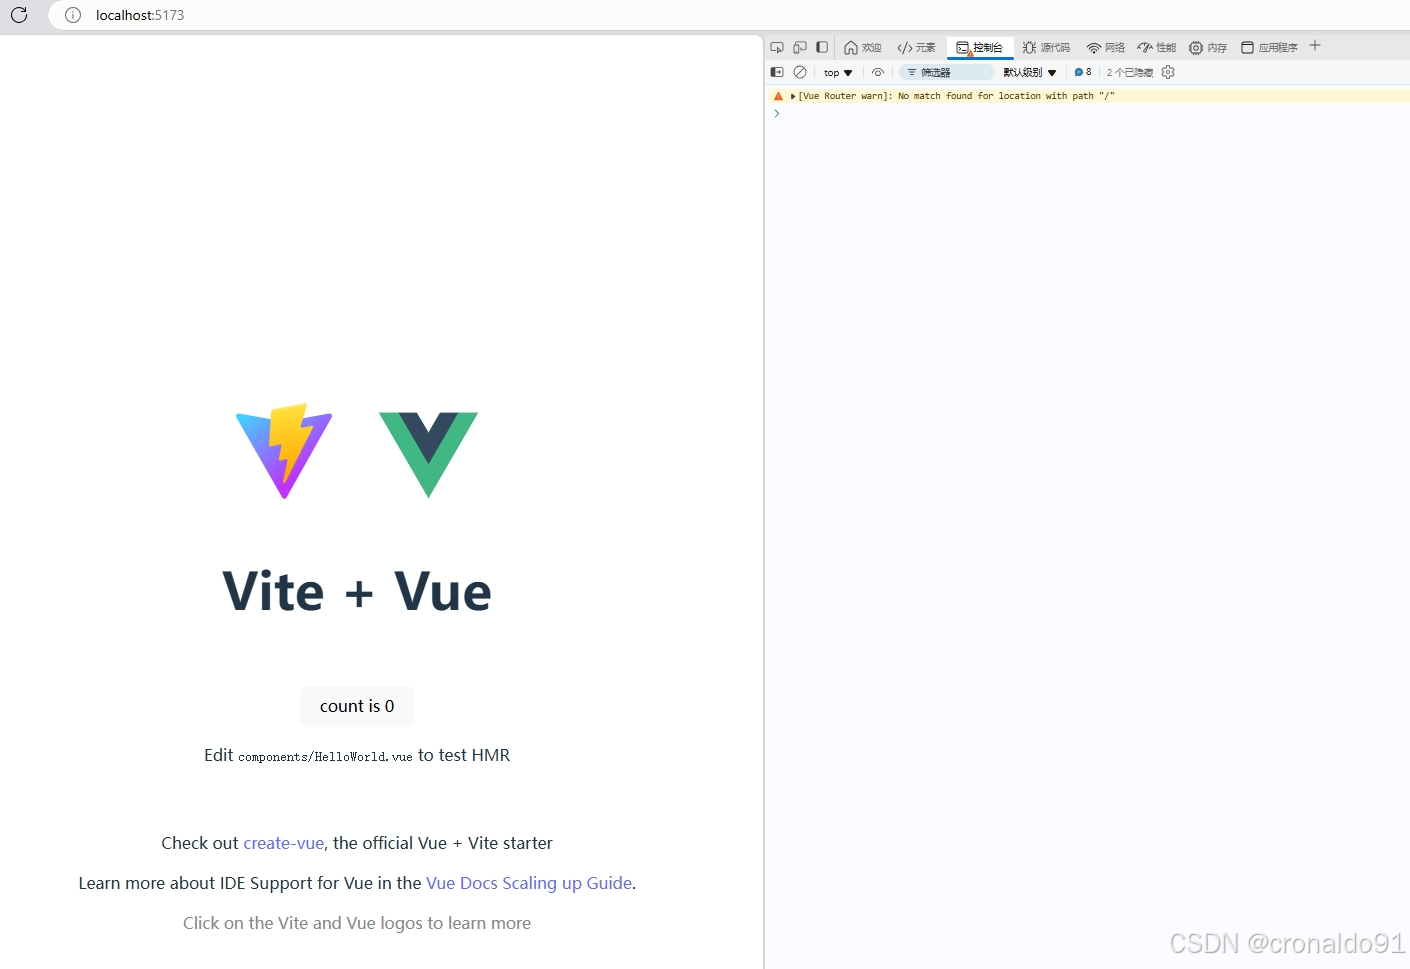
彈出界面:
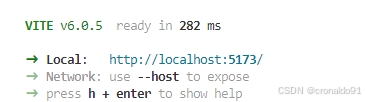
可以訪問到Vite + Vue
http://localhost:5173/
F12 查看控制臺 (目前暫未配置路由)
(7)退出
CTRL + C 結束
輸入Y
7.gitee創建工程
(1)新建倉庫
https://gitee.com/
(2)創建

(3)創建 git 倉庫
git init![]()
git add .
git add -A![]()
git commit -m "項目初始化配置"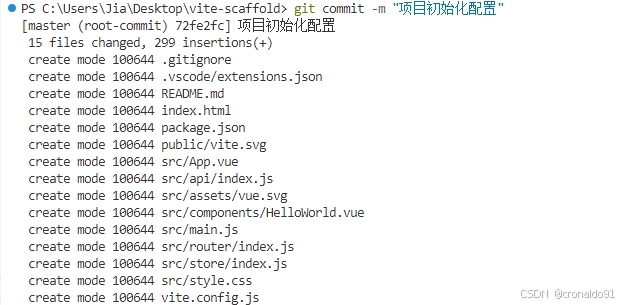
XXXXXXXX/vite-scaffold為創建的gitee倉庫
git remote add origin?git@gitee.com:XXXXXXXX/vite-scaffold.git![]()
git push -u origin "master"
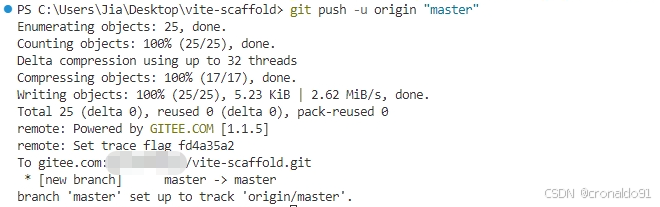
(4) gitee查看
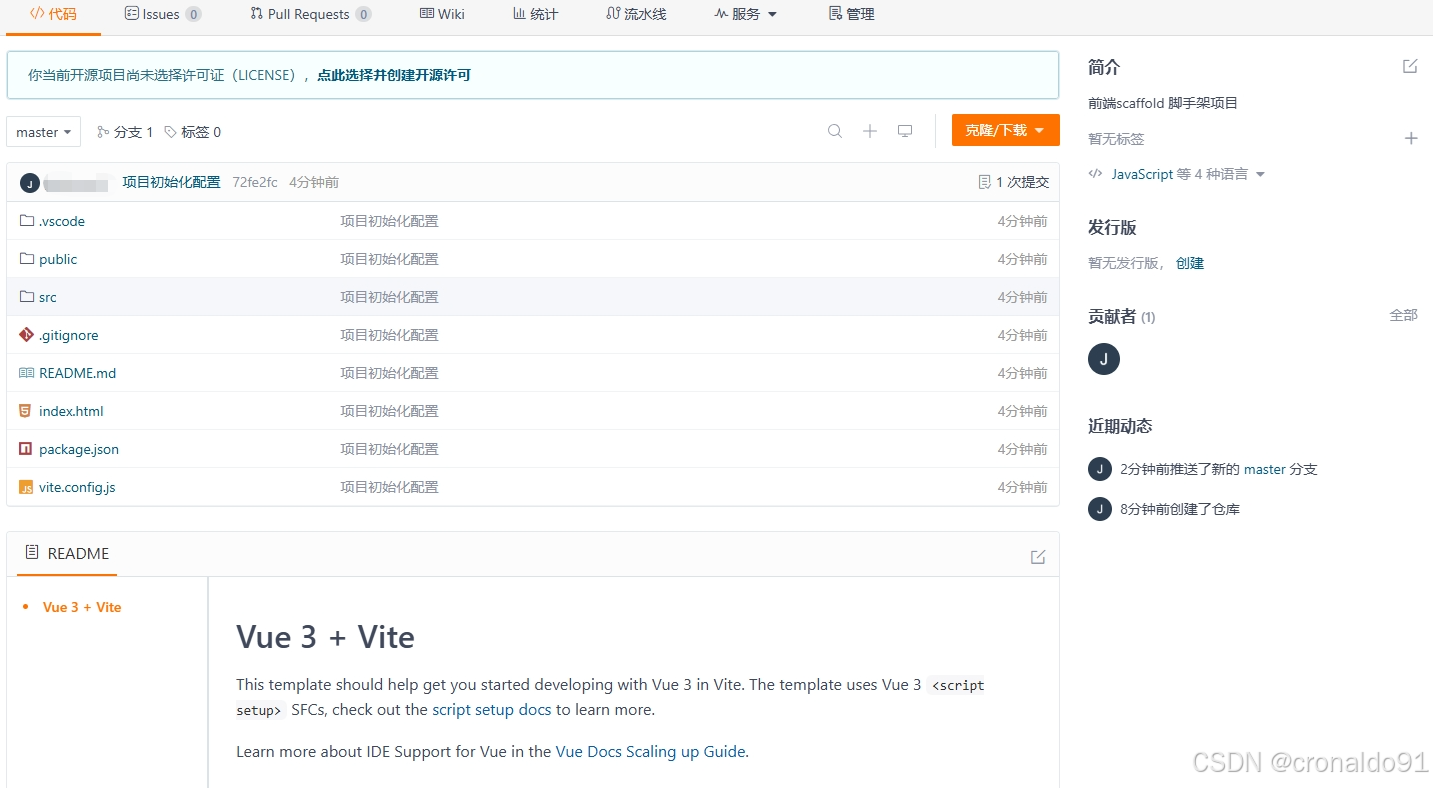
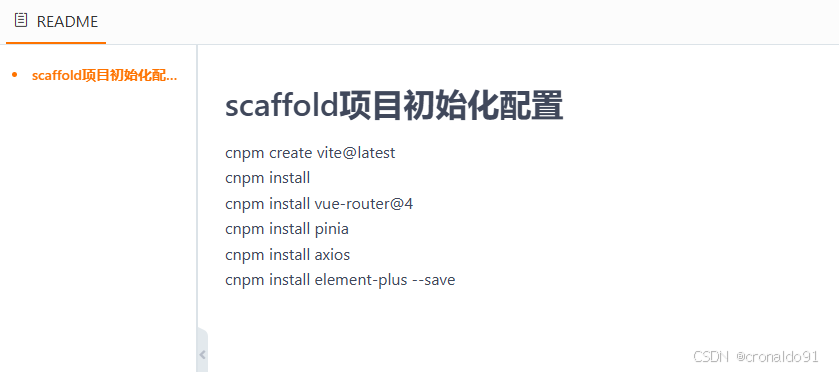
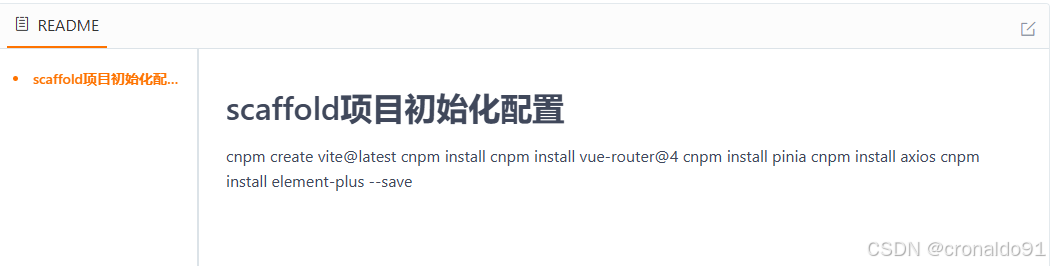
(5)修改README.md
# scaffold項目初始化配置cnpm create vite@latest
cnpm install
cnpm install vue-router@4
cnpm install pinia
cnpm install axios
cnpm install element-plus --save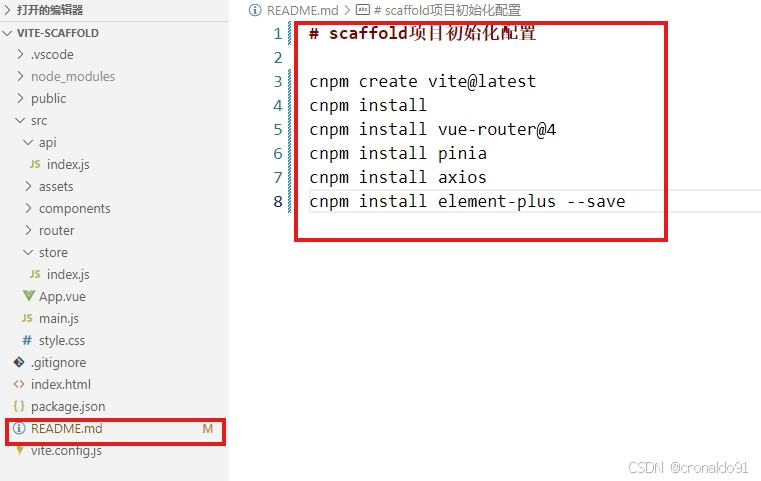
(6)git查看狀態
git status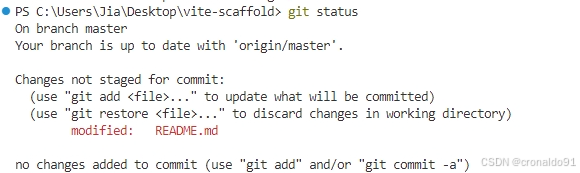
(7) 提交并推送
git commit -am "修改文檔"
git push -u origin "master"

(8)gitee查看
8. 配置路由映射
(1)創建頁面組件目錄view
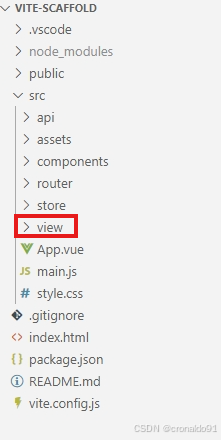
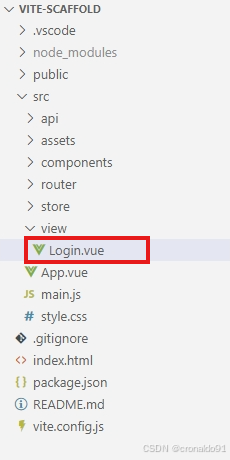
(2)view下創建多個組件
Login.vue
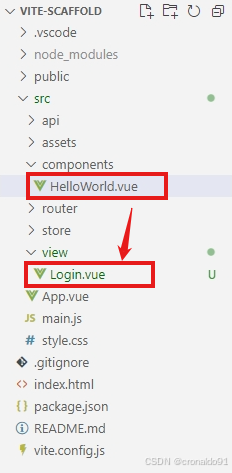
然后把compoents下的HelloWorld.vue 內容,復制到Login.vue
(3)修改router下的index.js
通過懶加載形式把Login.vue導入
const Login = () => import('../view/Login.vue')添加路由映射關系
……
const routes = [listRoutes,{path: "/login",component: Login,}
]
^
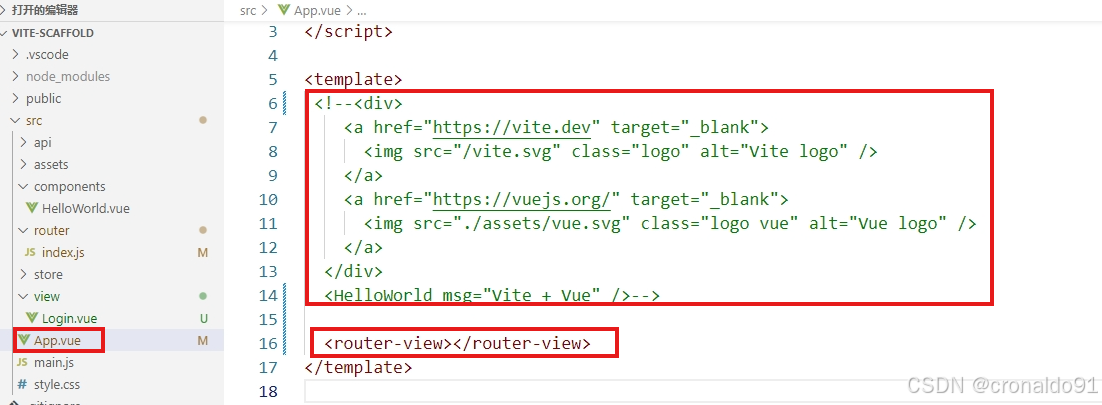
(4)路由輸出到App.vue
修改App.vue
……
<router-view></router-view>
……
???(5) 運行
npm run dev
彈出界面:
可以訪問到Vite + Vue
http://localhost:5173/login(6)退出
CTRL + C 結束
輸入Y
9.Vite 使用 Element Plus
(1)查閱
https://element-plus.org/zh-CN/component/card.html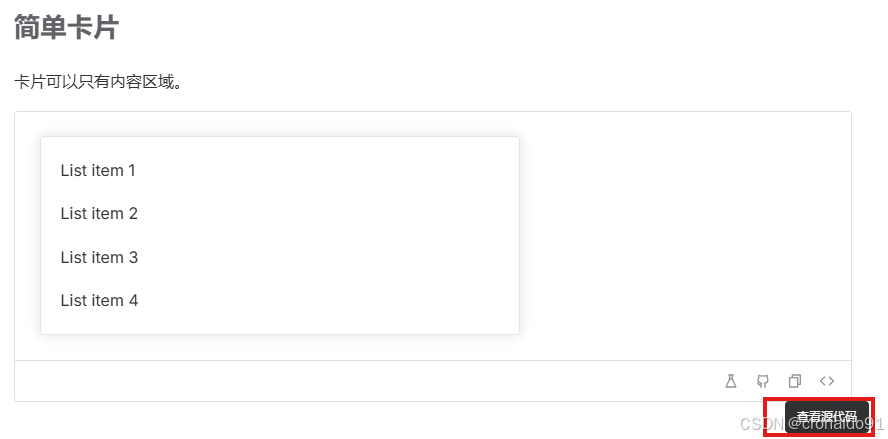
(2)修改Login.vue
添加卡片
<template><el-card class="box-card"><p v-for="o in 4" :key="o" class="text item">{{ 'List item ' + o }}</p></el-card>
</template>
樣式
<style scoped>.text {font-size: 14px;} .item {padding: 18px 0;}.box-card {width: 480px;}
</style>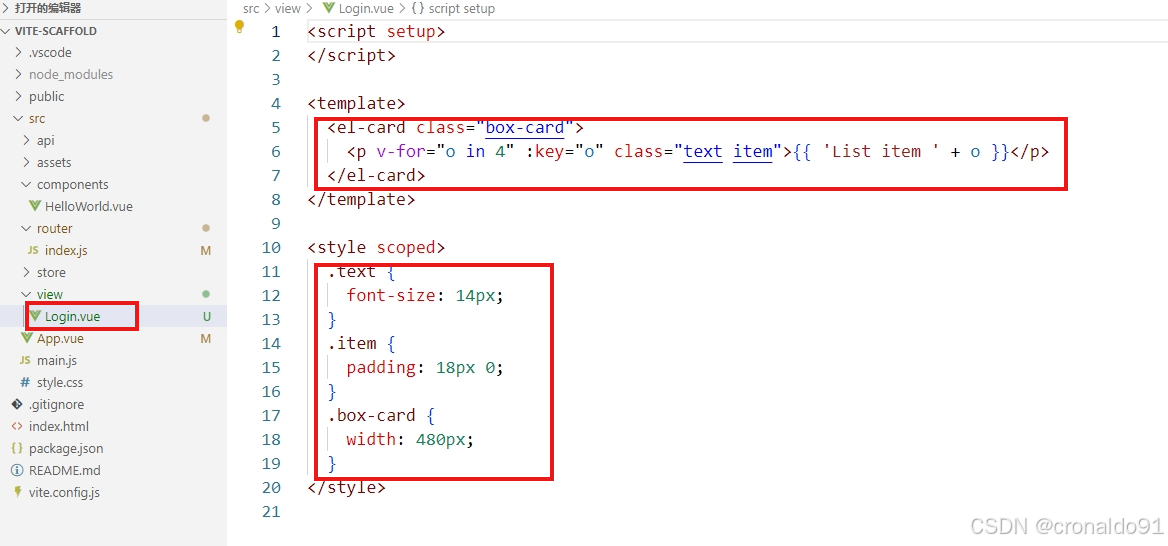
(3)?訪問到Vite + Vue
http://localhost:5173/login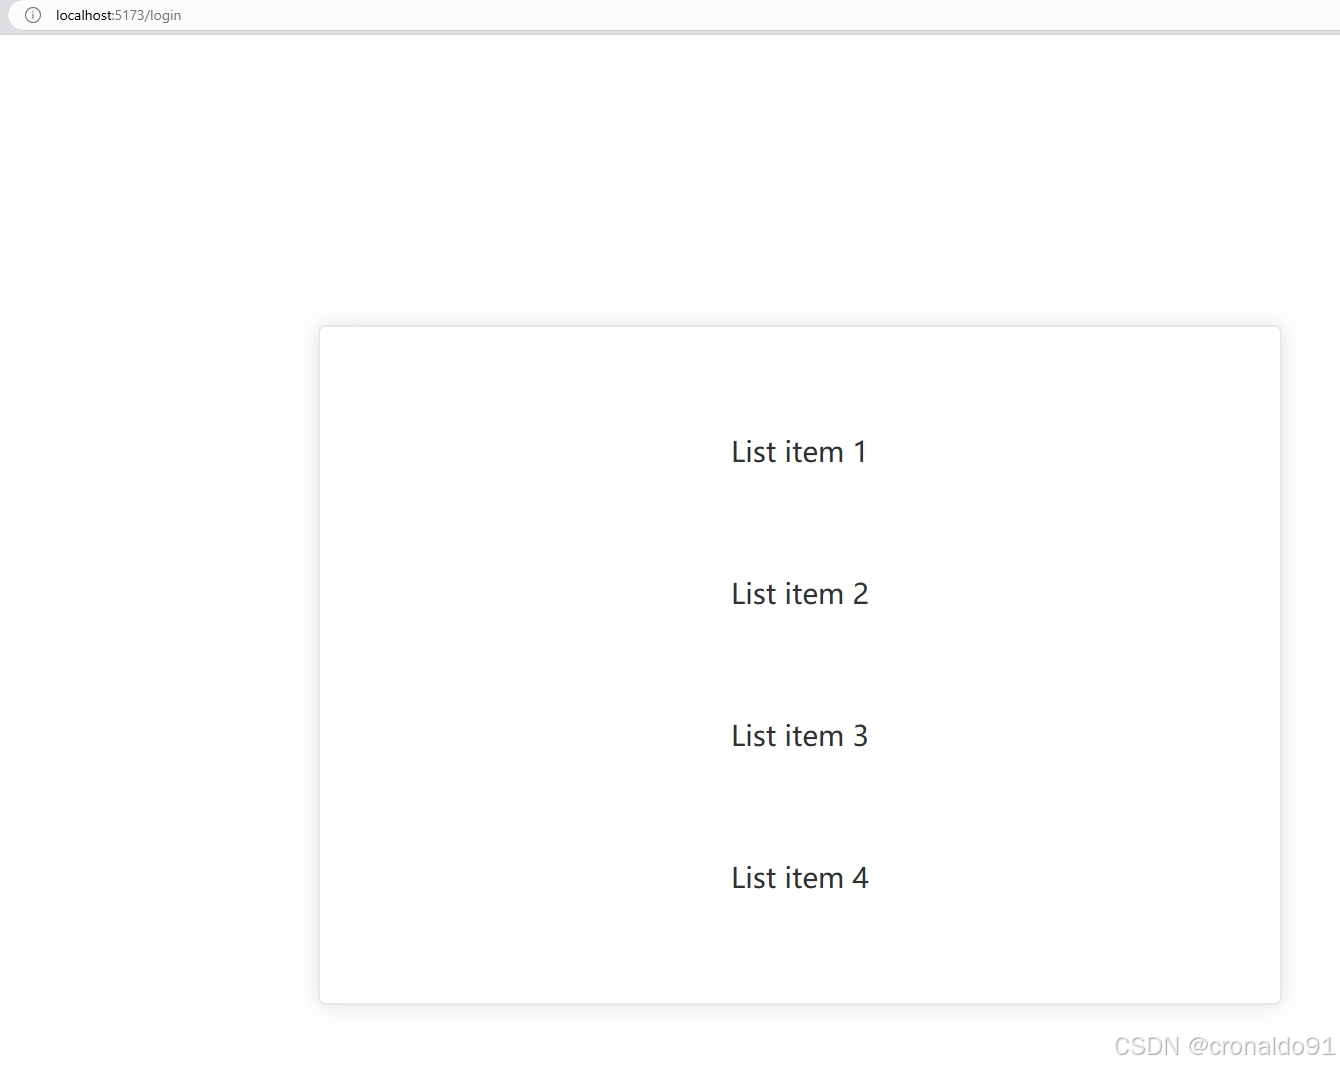
(4)git查看狀態
git status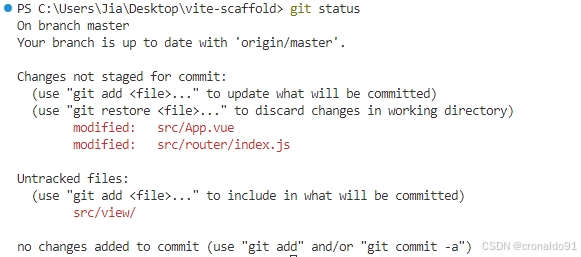
(5) 提交
git add -Agit commit -am "首頁路由配置"
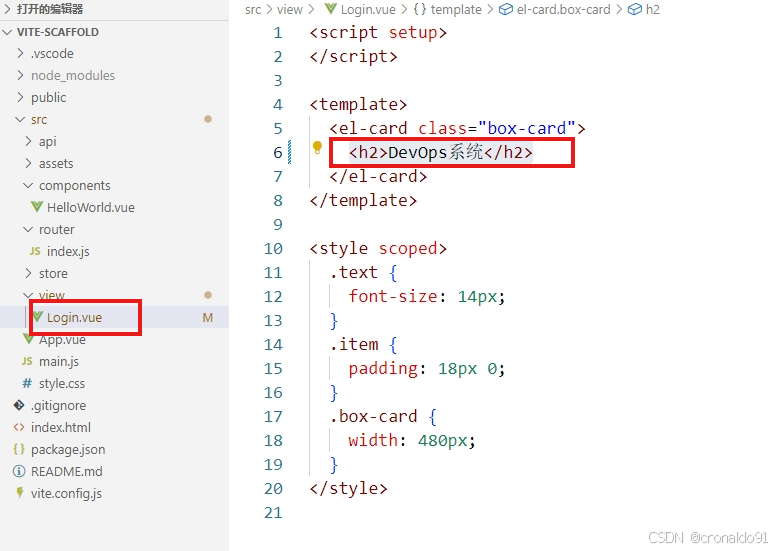
(6)添加標題元素
修改Login.vue
……
<h2>DevOps系統</h2>
……
(7) 訪問到Vite + Vue
http://localhost:5173/login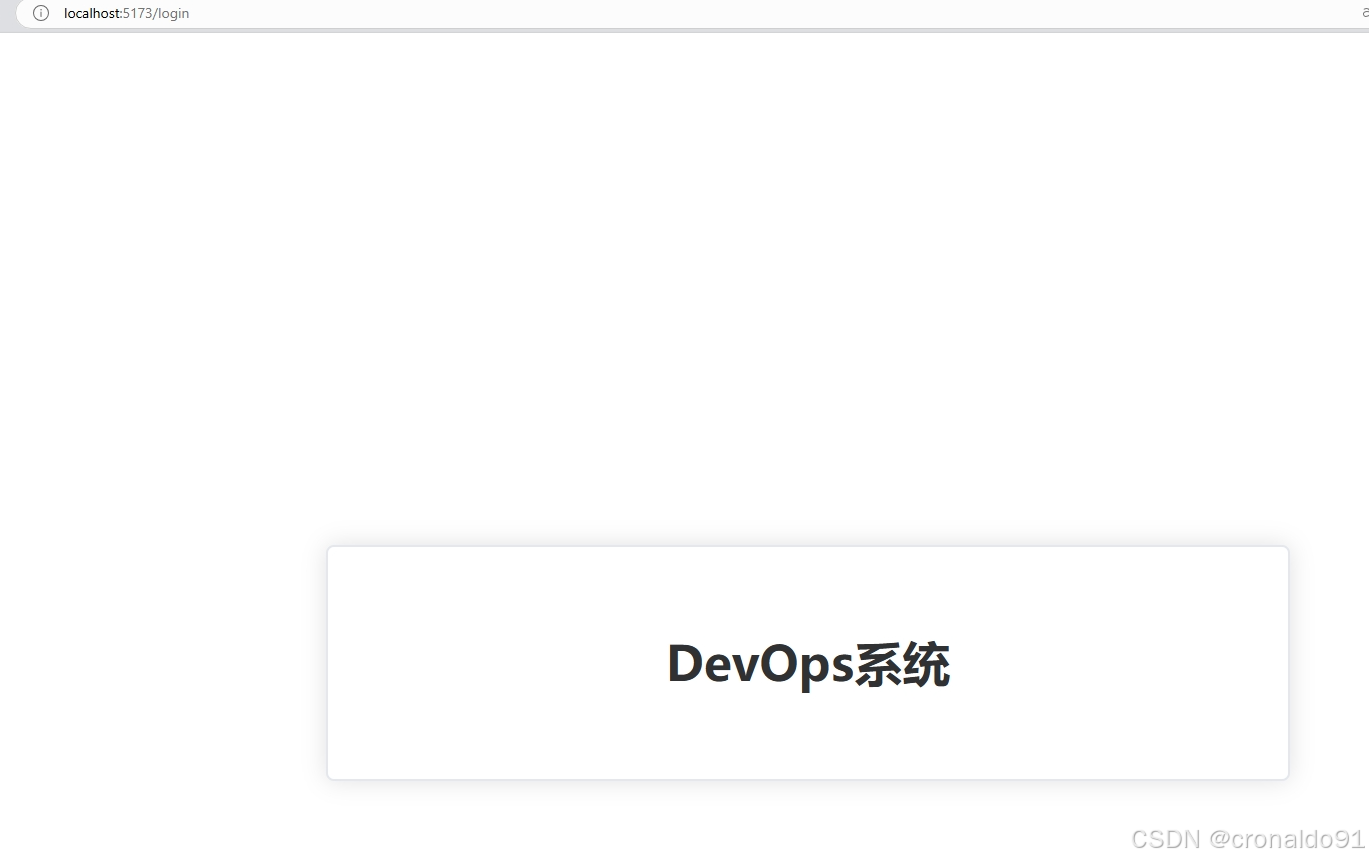
(8)查閱表單
https://element-plus.org/zh-CN/component/card.html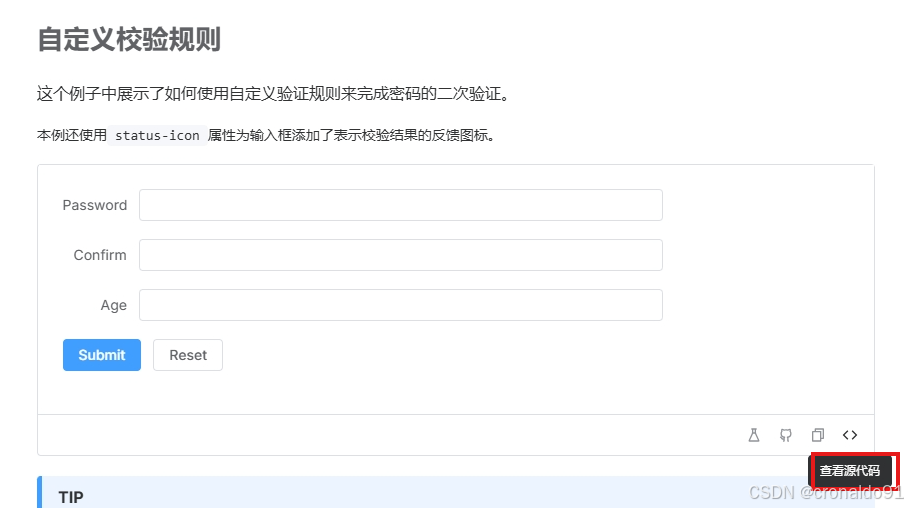
(9)添加表單
修改Login.vue
<el-form:model="loginInfo"status-icon:rules="rules"><el-form-item prop="username"><el-input v-model.number="loginInfo.username" /></el-form-item><el-form-item prop="password"><el-input v-model="loginInfo.password" type="password" autocomplete="off" /></el-form-item><el-form-item><el-button type="primary" @click="submitForm(ruleFormRef)">登錄</el-button></el-form-item></el-form>(10)訪問到Vite + Vue
http://localhost:5173/login
(11)查閱輸入框與圖標
輸入框
https://element-plus.org/zh-CN/component/input.html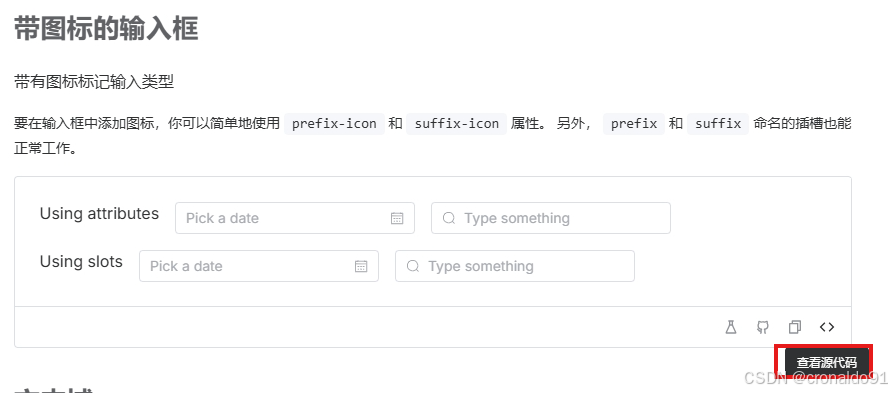
圖標
https://element-plus.org/zh-CN/component/icon.html
(12)安裝圖標
cnpm install @element-plus/icons-vue --save
(13)找到username圖標
https://element-plus.org/zh-CN/component/icon.html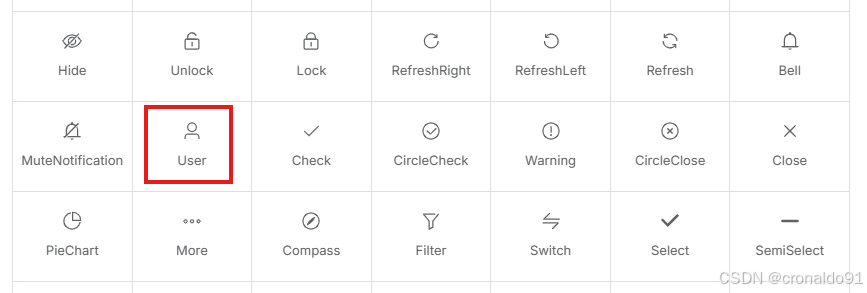
點擊圖標
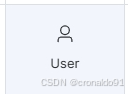
顯示已復制
![]()
獲取到圖標信息:
<el-icon><User /></el-icon>(14)找到password圖標
?點擊圖標
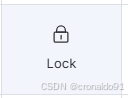
顯示已復制
![]()
獲取到圖標信息:
<el-icon><Lock /></el-icon>(15) 添加圖標,并將圖標映射到輸入框中
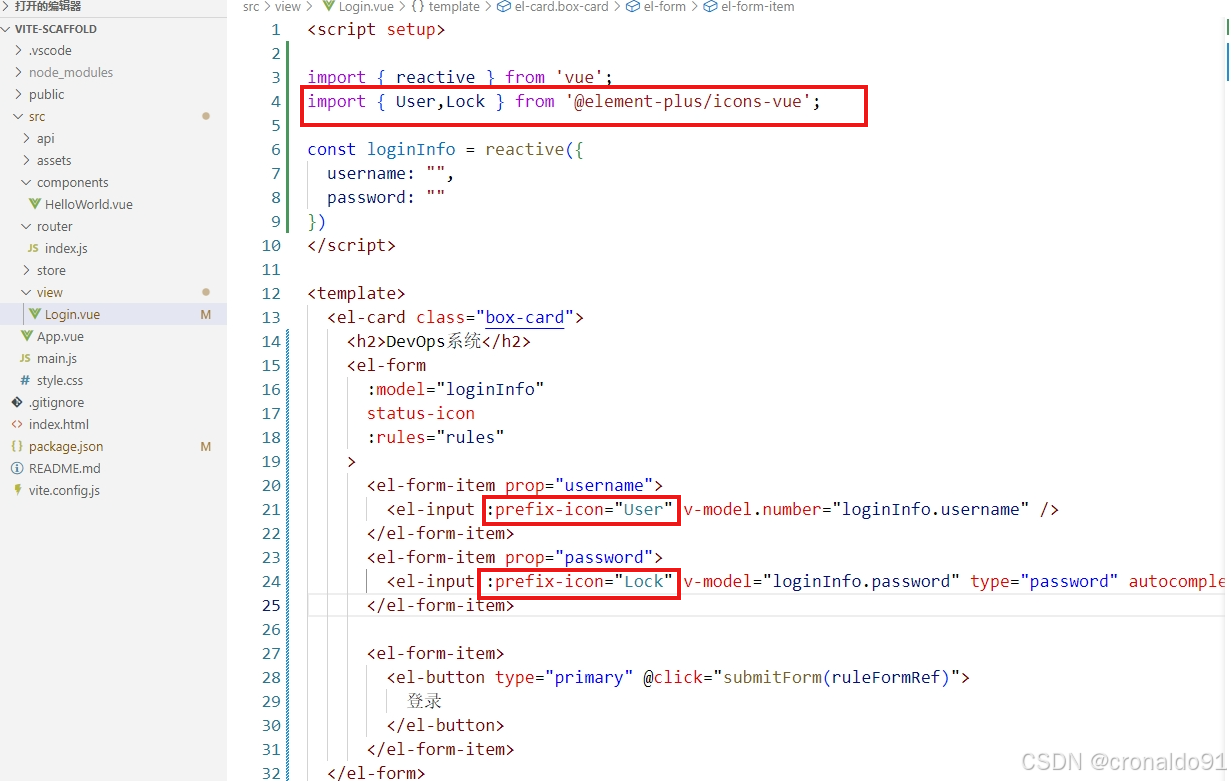
修改Login.vue
……
import { User,Lock } from '@element-plus/icons-vue';
……
:prefix-icon="User"
……
:prefix-icon="Lock"
……
?(16)訪問到Vite + Vue
http://localhost:5173/login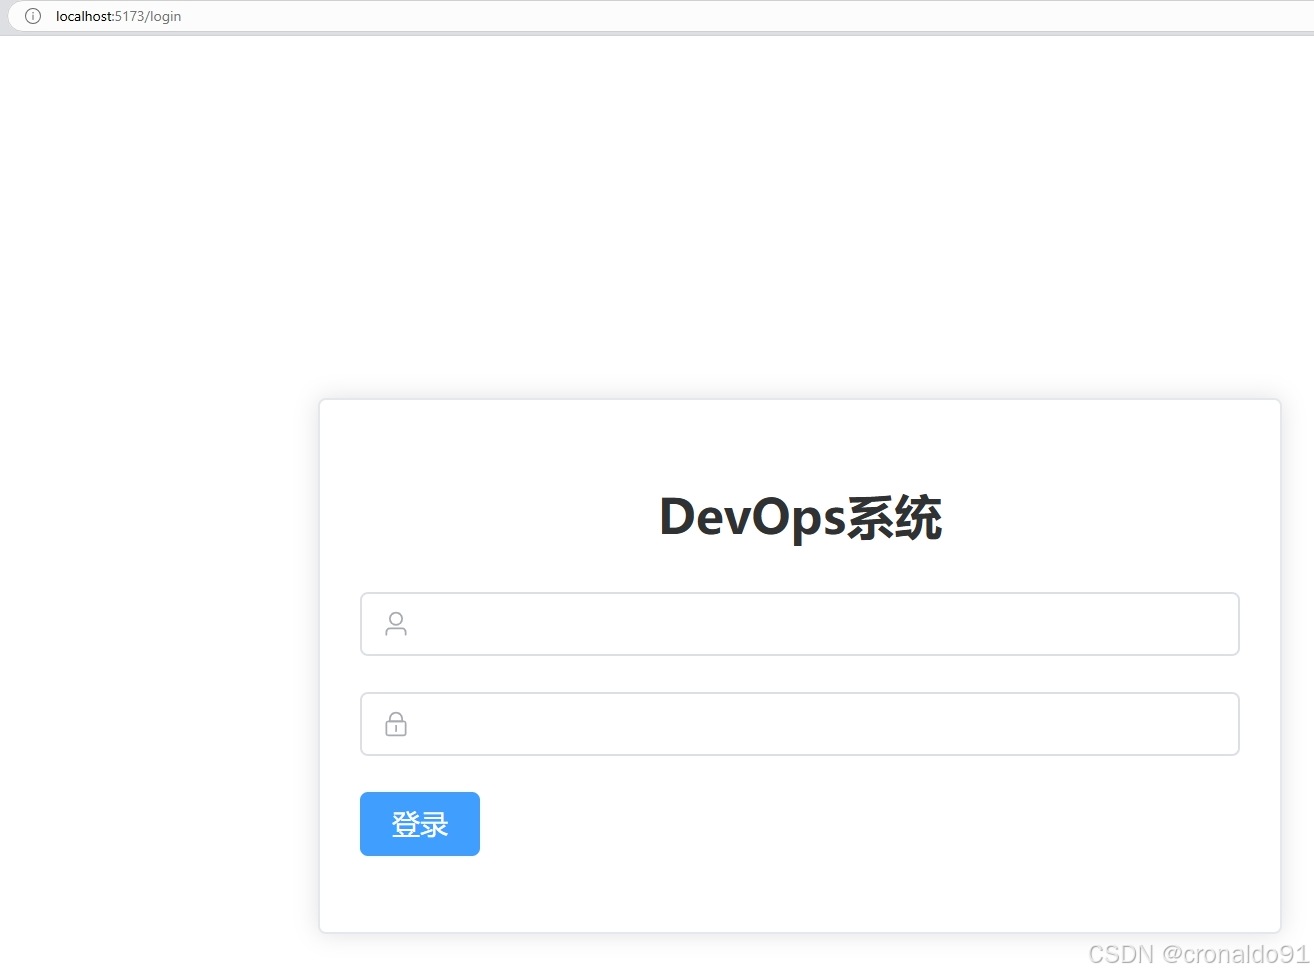
?(17)git提交
git commit -am "輸入框與按鈕配置"
(18)查閱輸入框設置固定寬度
https://element-plus.org/zh-CN/component/input.html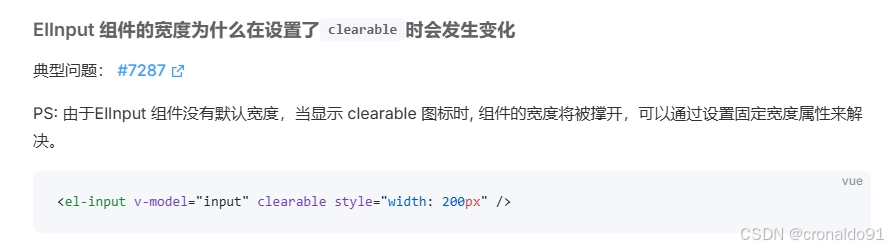
(19)添加clearable 圖標
修改Login.vue
clearable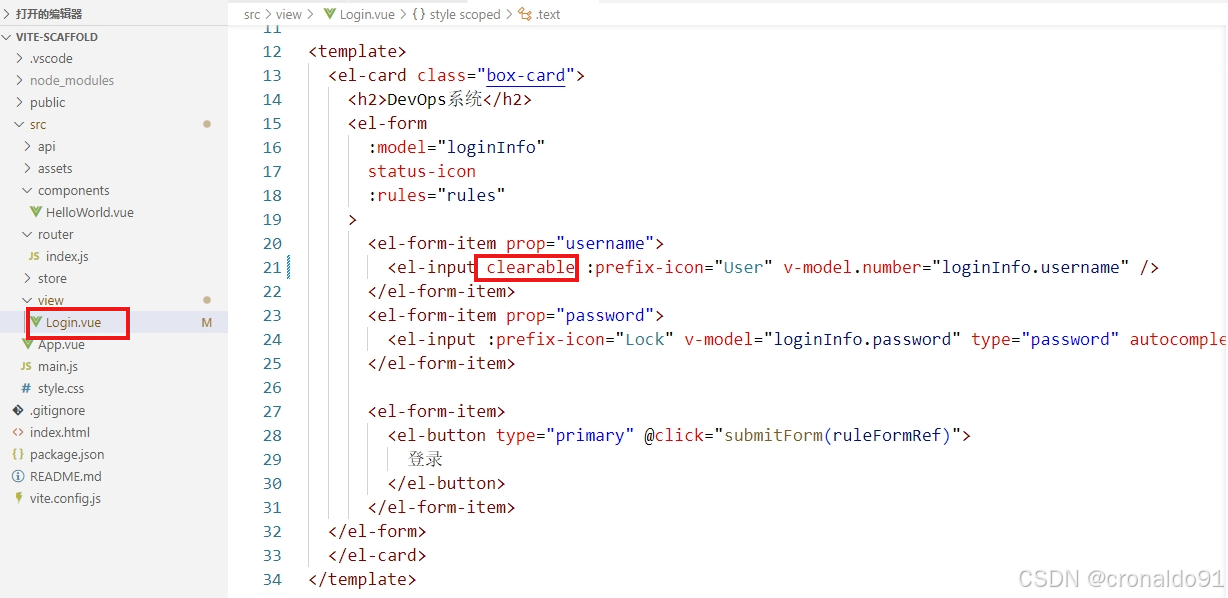
?(20)訪問到Vite + Vue
http://localhost:5173/login
(21)查閱切換密碼圖標

(22)添加切換密碼圖標
修改Login.vue
show-password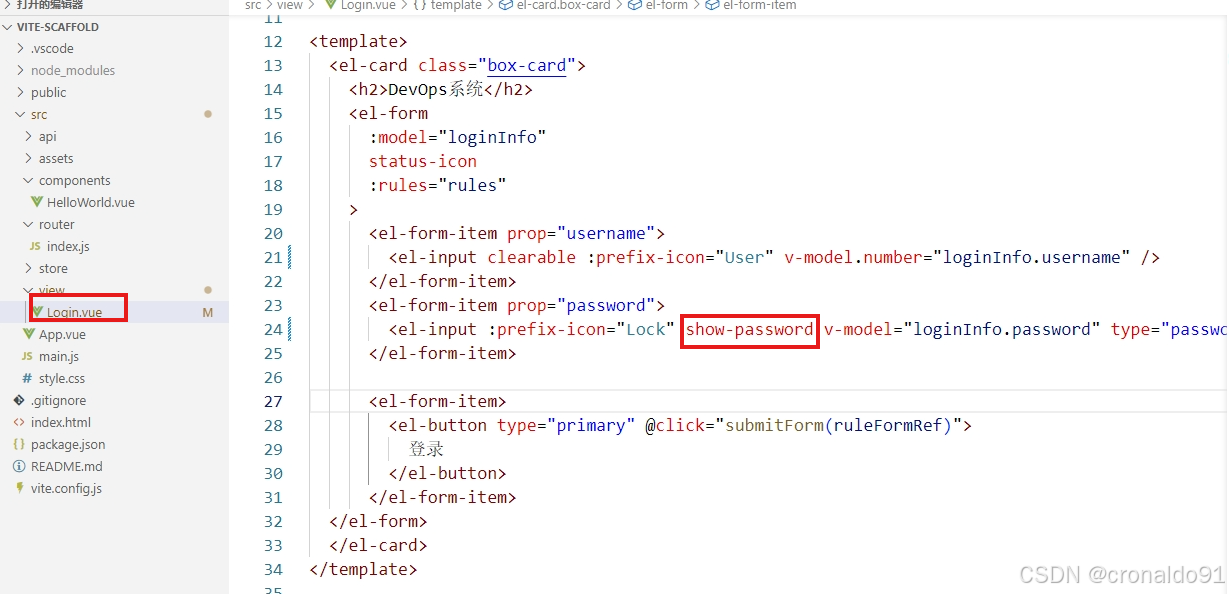
?(23)訪問到Vite + Vue
http://localhost:5173/login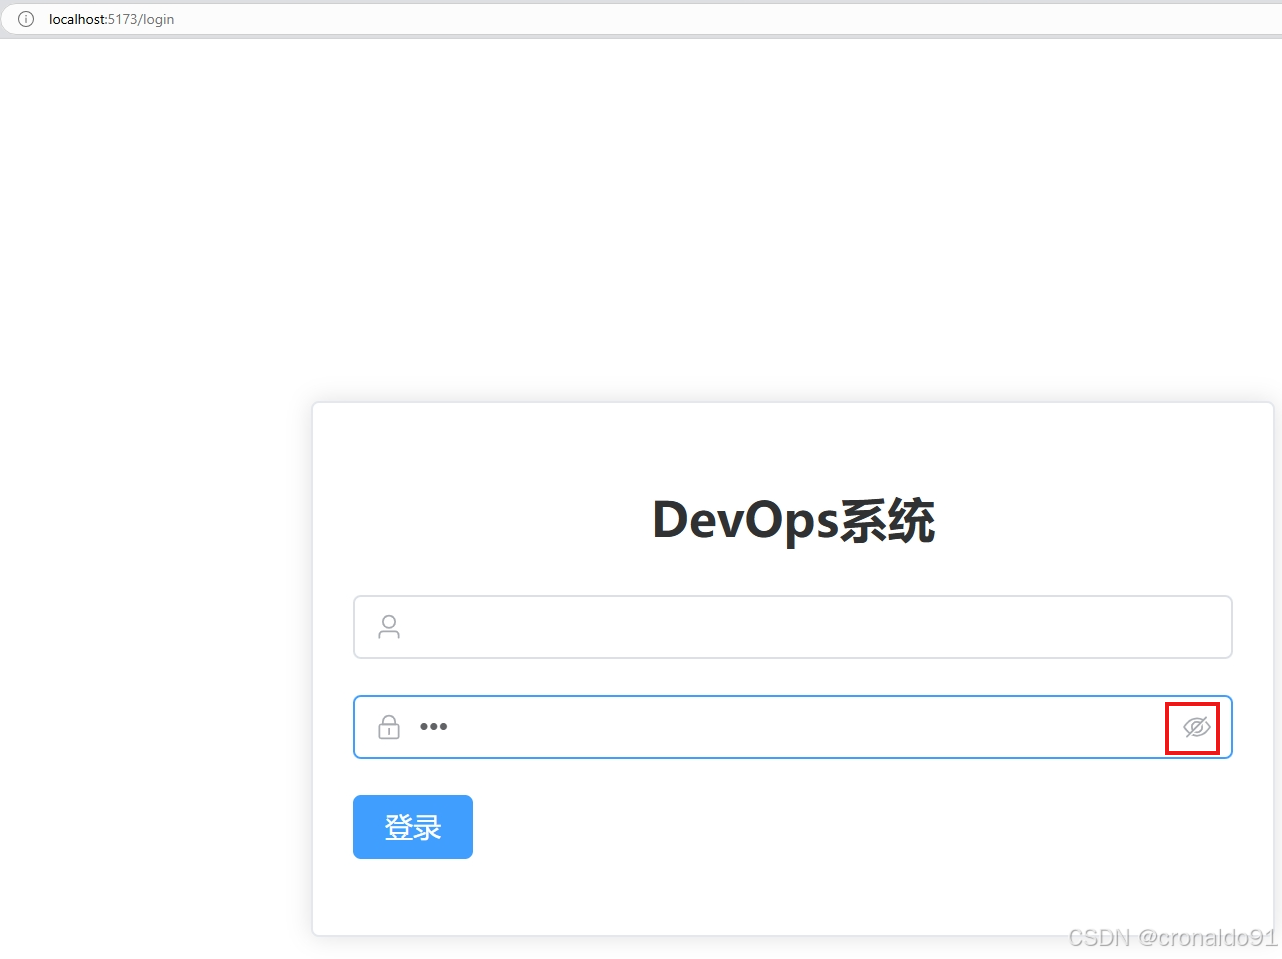
(24)查閱輸入框占位文本

(25)添加輸入框占位文本
修改Login.vue
……
placeholder="請輸入賬戶名"
……
placeholder="請輸入密碼"
……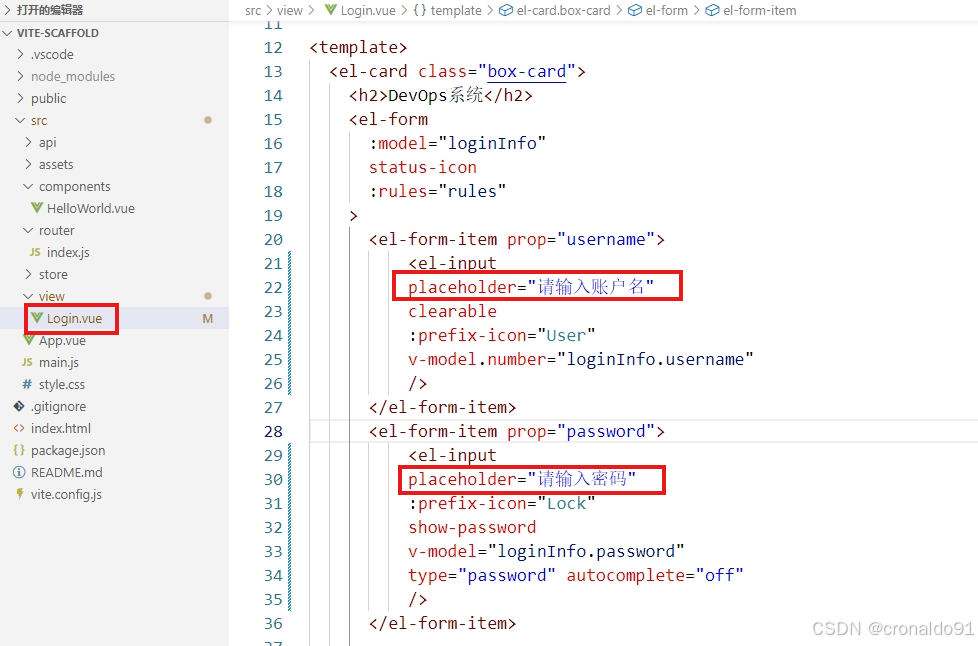
?(26)訪問到Vite + Vue
http://localhost:5173/login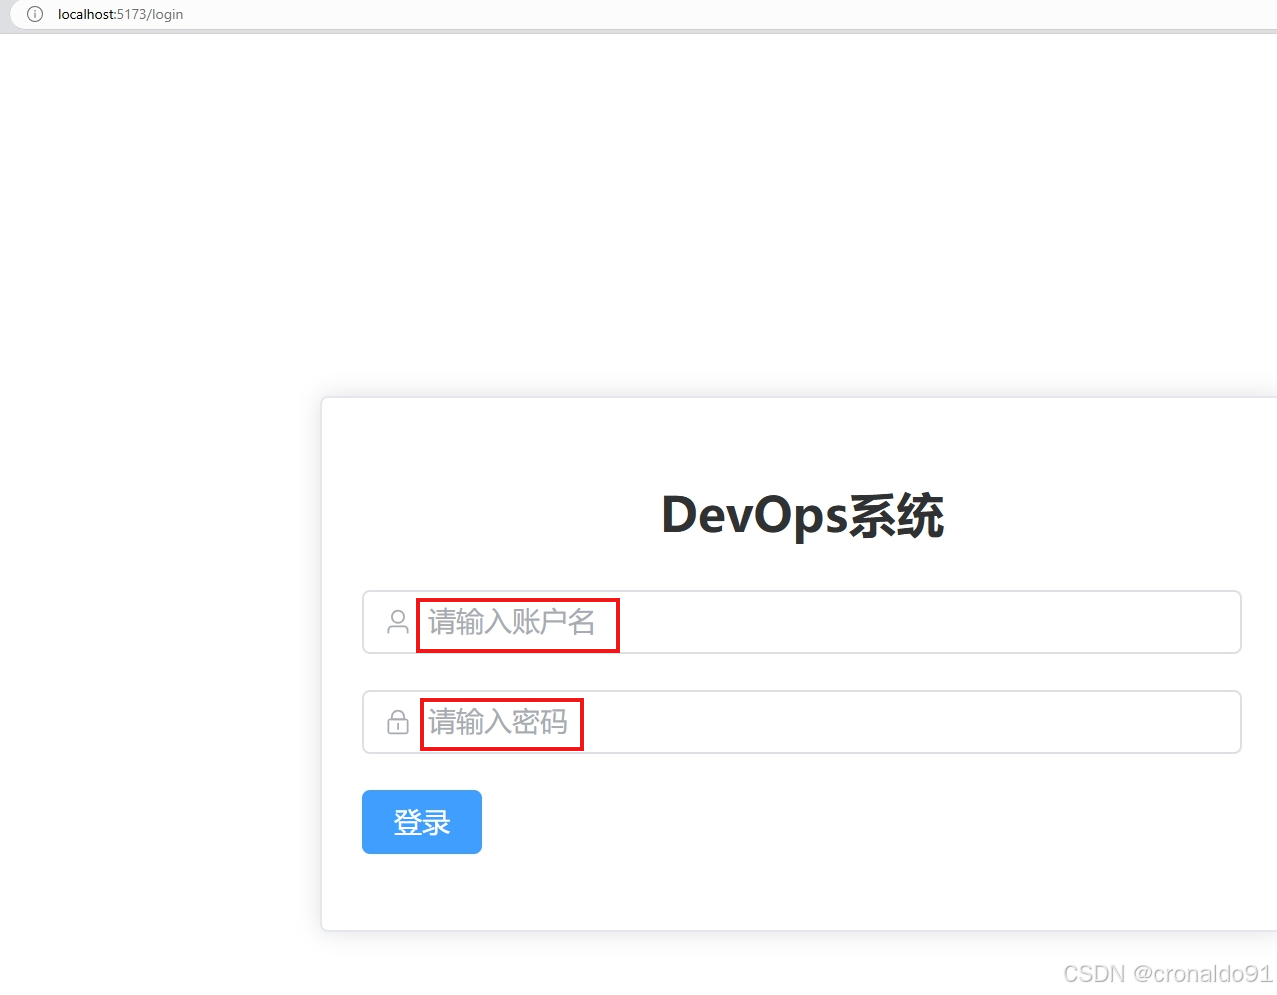
(27)查閱表單校驗
https://element-plus.org/zh-CN/component/form.html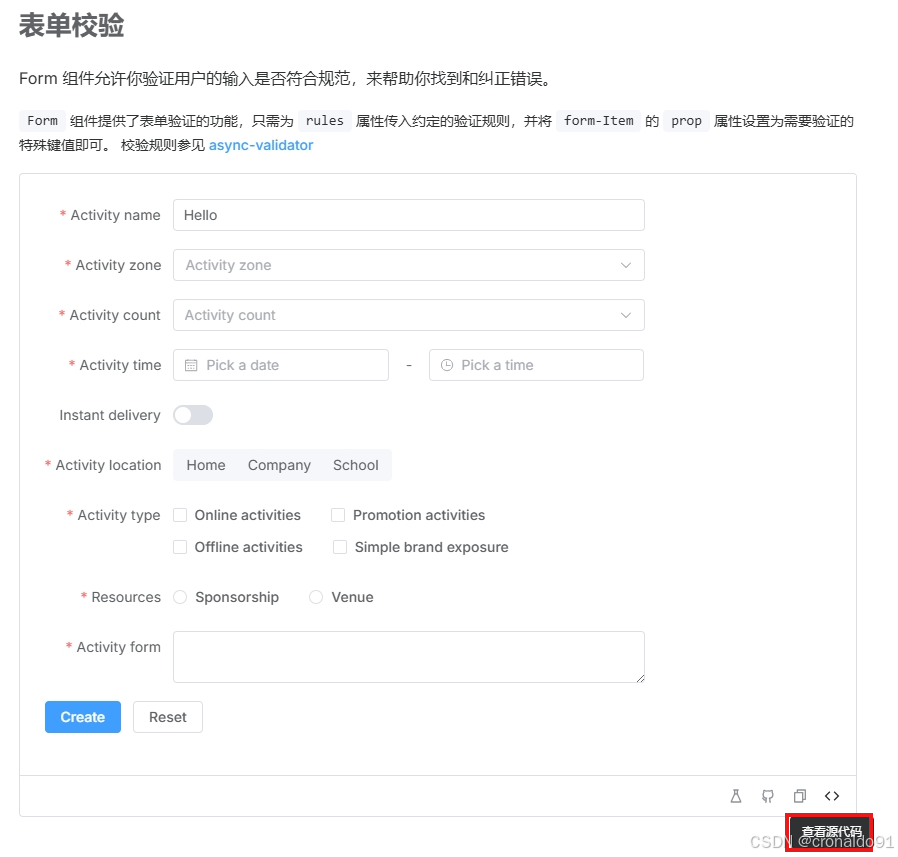
(28)表單添加校驗
修改Login.vue
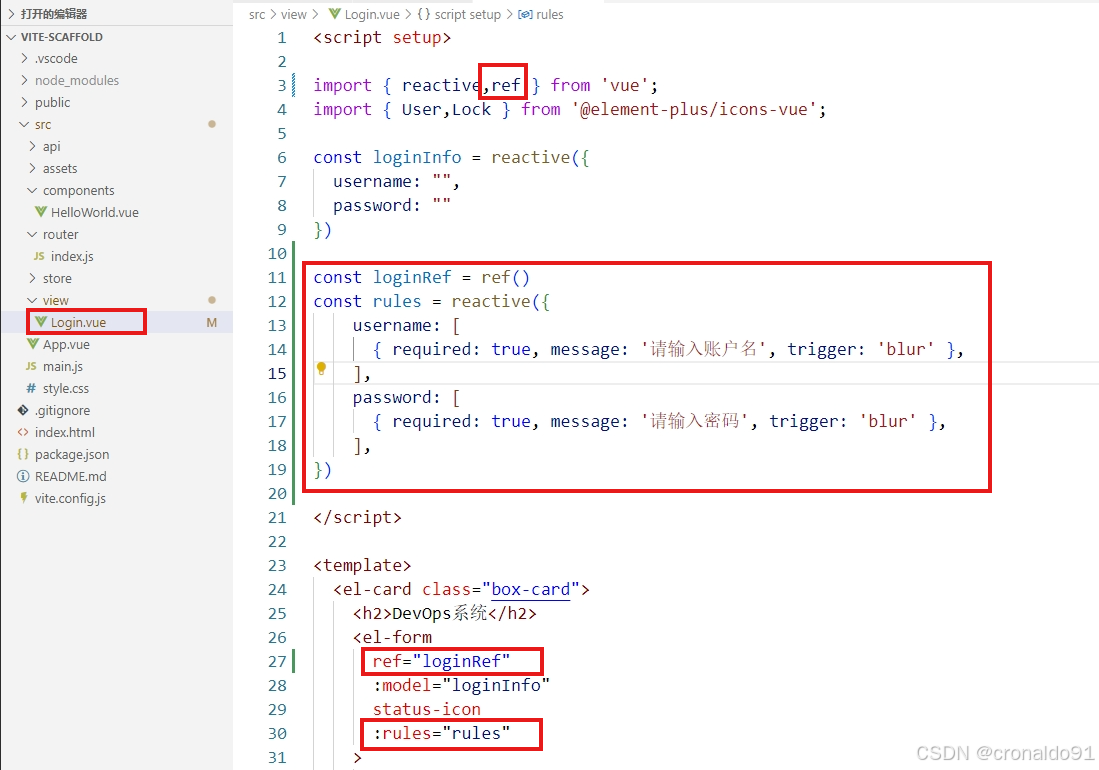
import { reactive,ref } from 'vue';
……
const loginRef = ref()
const rules = reactive({username: [{ required: true, message: '請輸入賬戶名', trigger: 'blur' },],password: [{ required: true, message: '請輸入密碼', trigger: 'blur' },],
})
……
ref="loginRef"
:rules="rules"
……
?(29)訪問到Vite + Vue
http://localhost:5173/login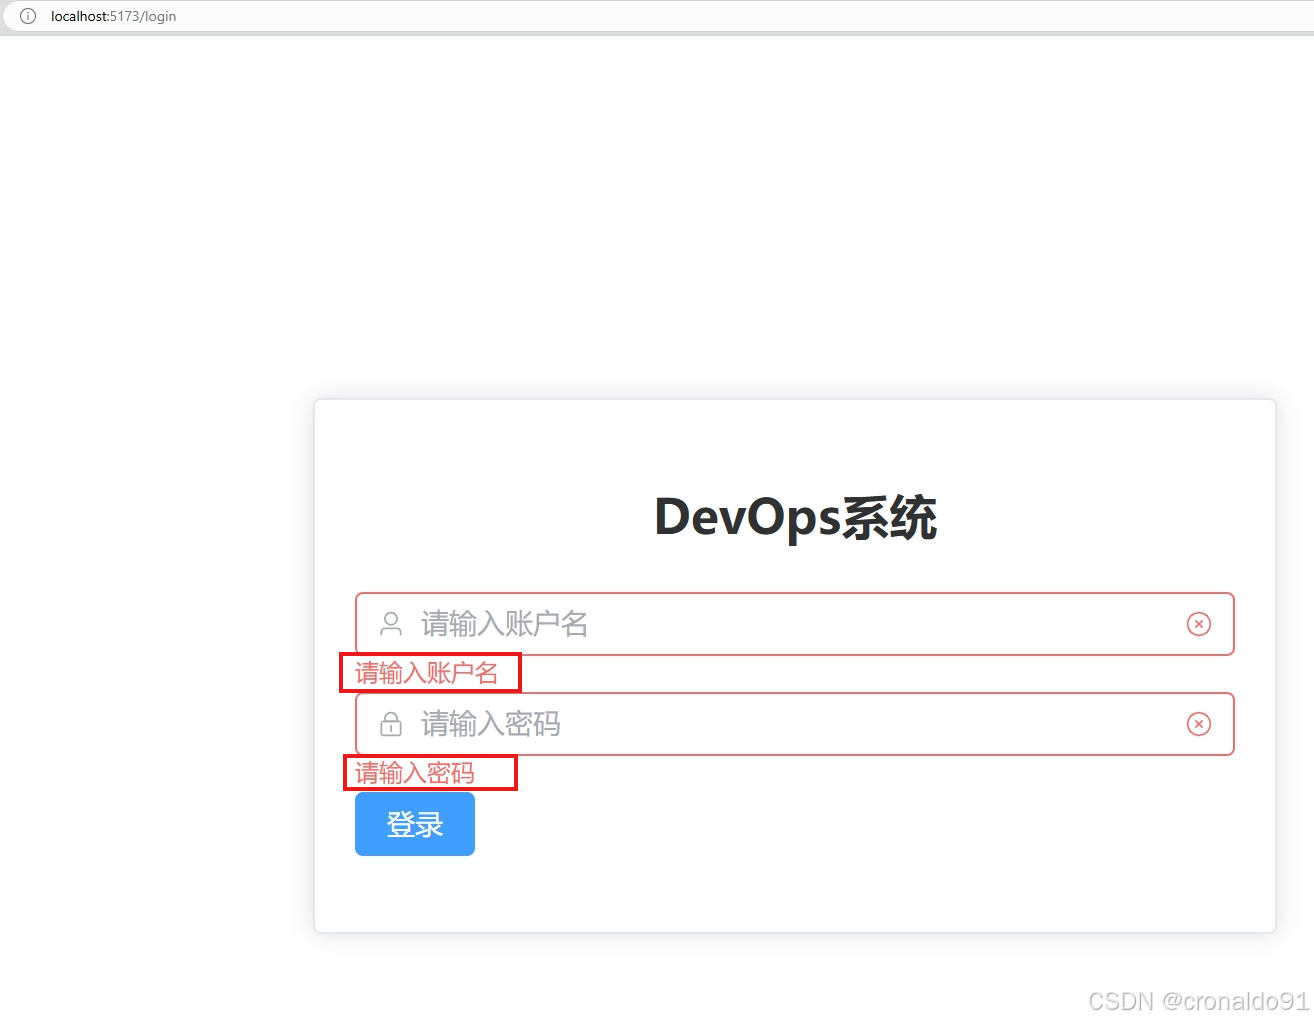
(30)查閱按鈕禁用狀態
https://element-plus.org/zh-CN/component/button.html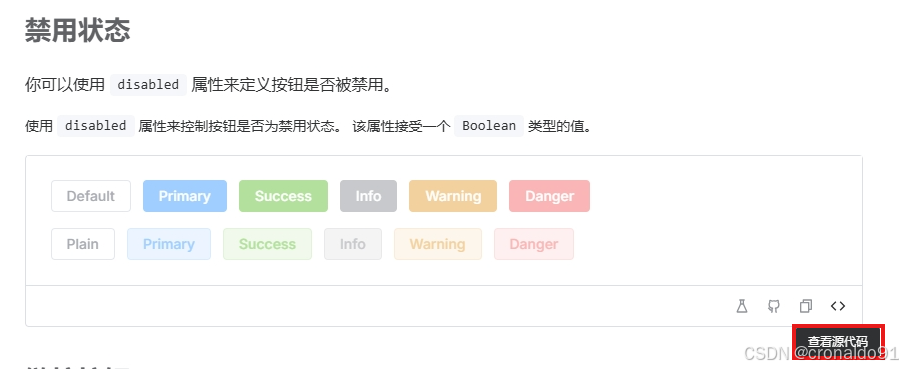
(31)登錄按鈕添加禁用狀態
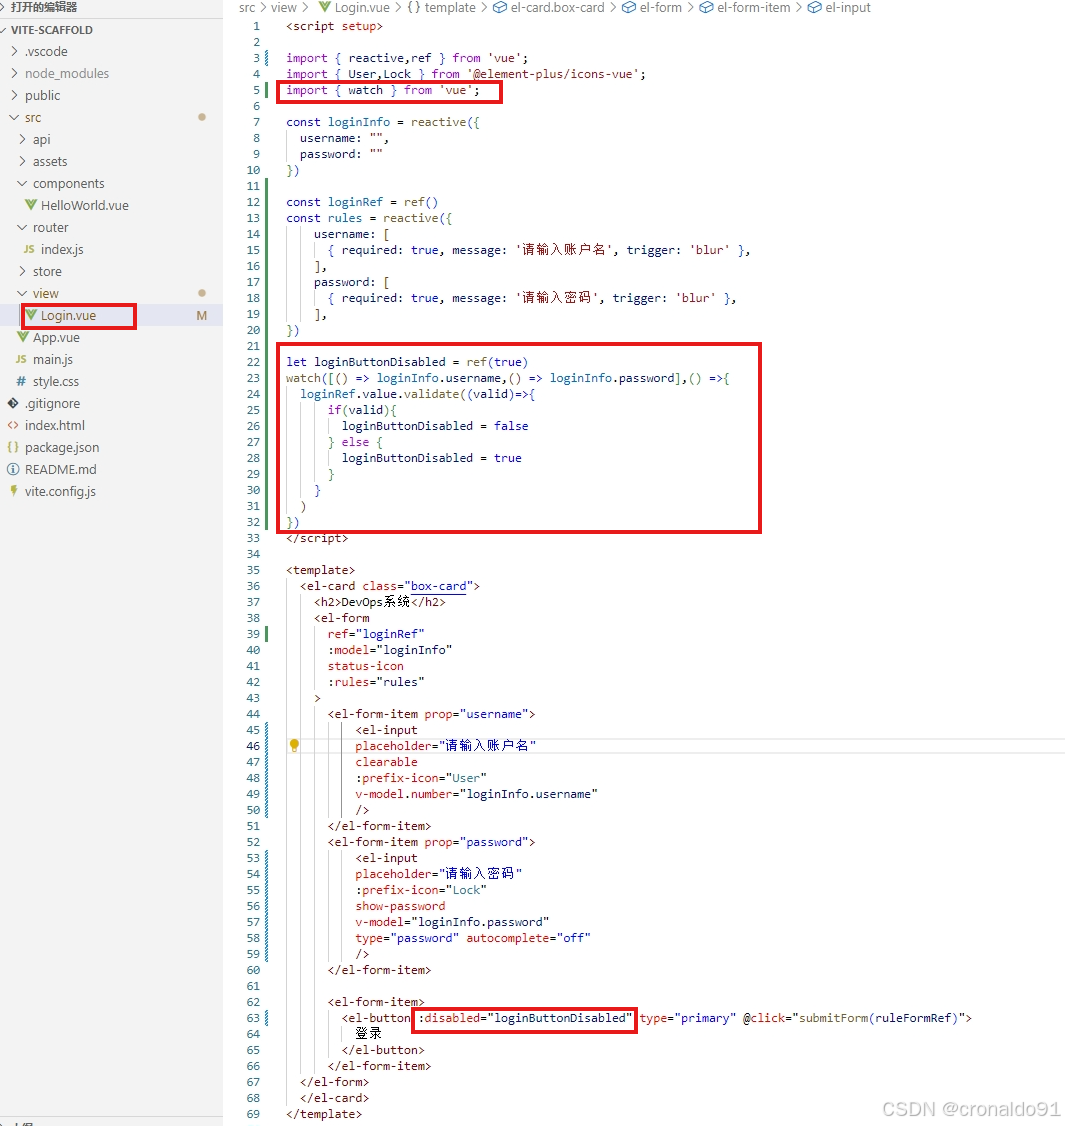
import { watch } from 'vue';
……
let loginButtonDisabled = ref(true)
watch([() => loginInfo.username,() => loginInfo.password],() =>{loginRef.value.validate((valid)=>{if(valid){loginButtonDisabled = false} else {loginButtonDisabled = true}})
})
……
:disbaled="loginButtonDisabled"
……
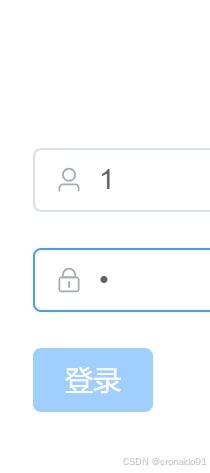
(32)訪問到Vite + Vue
http://localhost:5173/login未輸入賬戶或密碼。登錄按鈕為禁用狀態 (淺藍色)
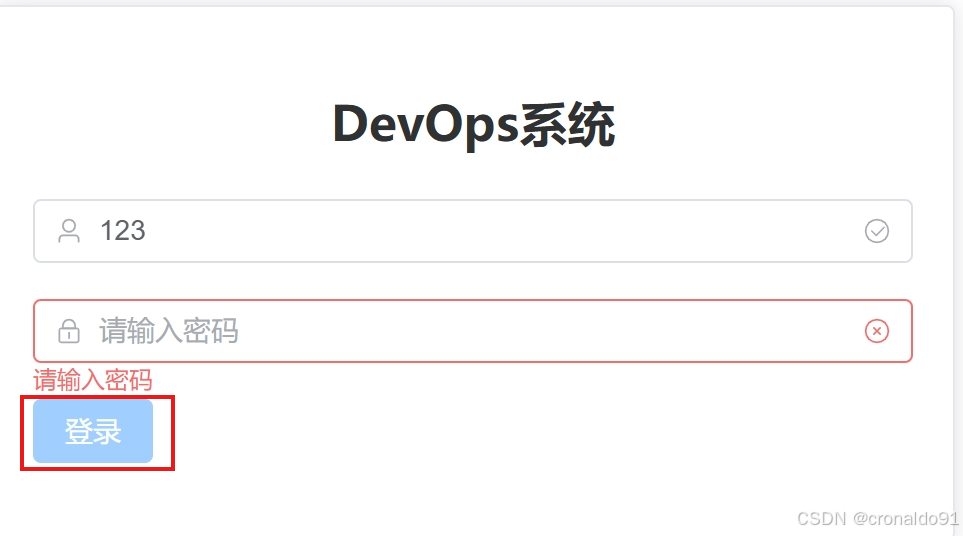
未輸入密碼。登錄按鈕為禁用狀態 (淺藍色)
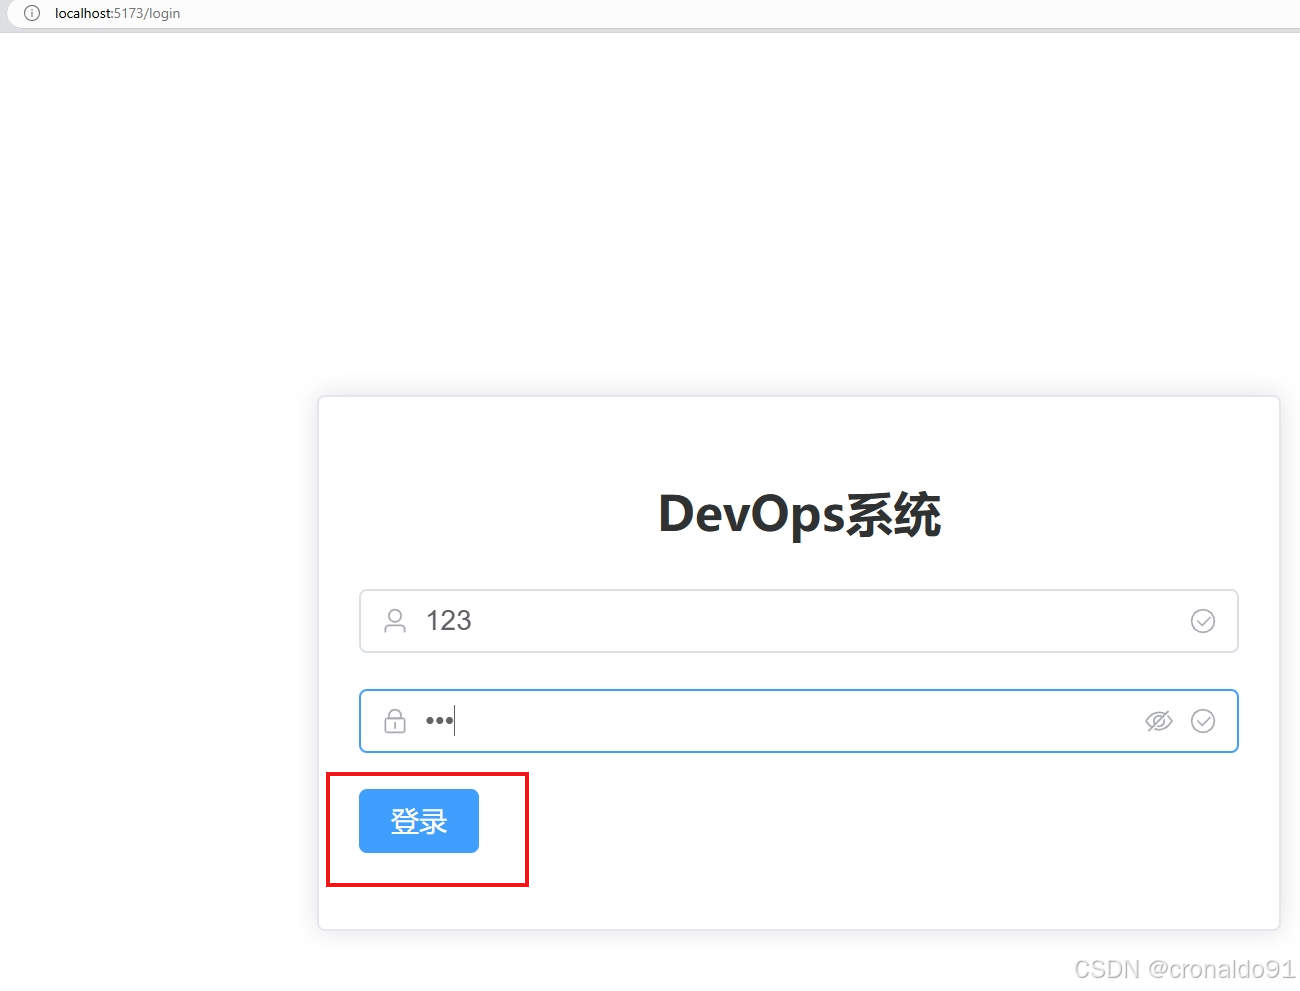
輸入賬戶與密碼。登錄按鈕為啟用狀態 (深藍色)
(33)git提交
git commit -am "輸入框與按鈕配置"
二、問題
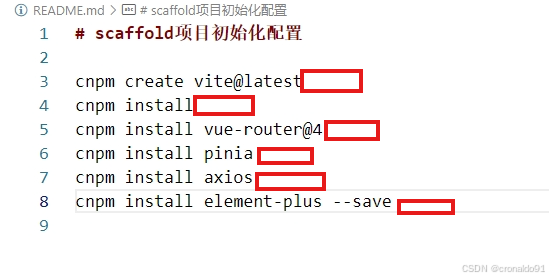
1.README.md 文檔推送到gitee未自動換行
(1)問題
README.md寫好內容時,發現它縮到一起了,不是想要的格式
(2)原因
換行末尾,未打上空格。
(3)方法
? ?直接在要換行的語句最后打上2個空格
git push后,成功換行
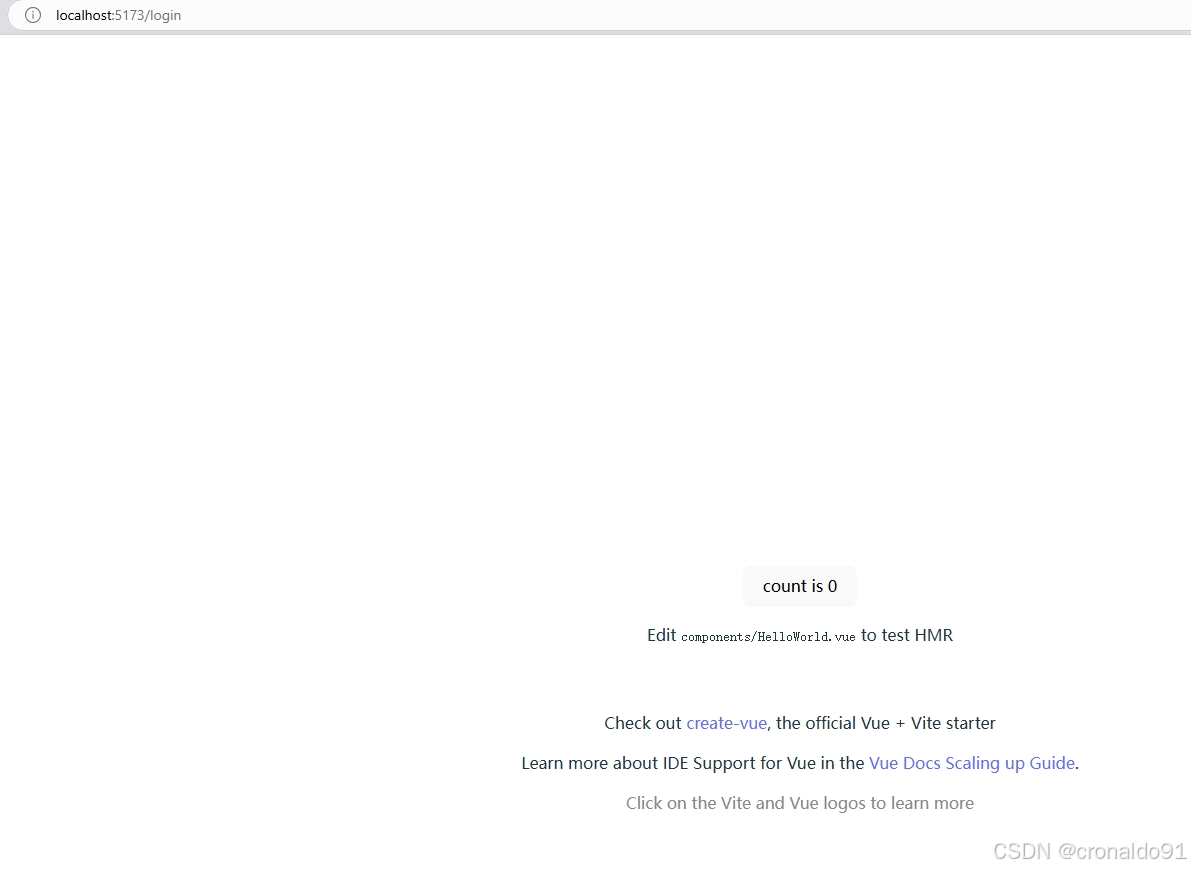
2.訪問login頁面顯示空白
(1)問題
訪問login頁面空白
(2)原因
渲染配置錯誤
(3) 方法
修改前
![]()
修改后:
![]()
成功:
3.表單輸入賬戶與密碼,按鈕依然為禁用狀態
(1)問題
表單輸入賬戶與密碼,按鈕依然為禁用狀態 (淺藍色)
(2)原因分析
watch監聽狀態的值判斷需要配置正確
(3)方法
修改watch監聽里if判斷
修改前:

修改后:
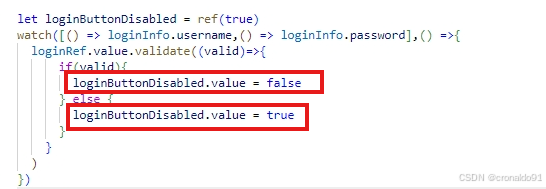
成功:
圖標顯示(深藍色)


增加觸屏驅動)


