鴻蒙開發——3.ArkTS聲明式開發:構建第一個ArkTS應用
- 一、創建ArkTS工程
- 二、ArkTS工程目錄結構(Stage模型)
- 三、構建第一個頁面
- 四、構建第二個頁面
- 五、實現頁面之間的跳轉
- 六、模擬器運行
一、創建ArkTS工程
1、若首次打開DevEco Studio,請點擊Create Project創建工程。如果已經打開了一個工程,請在菜單欄選擇File > New > Create Project來創建一個新工程。
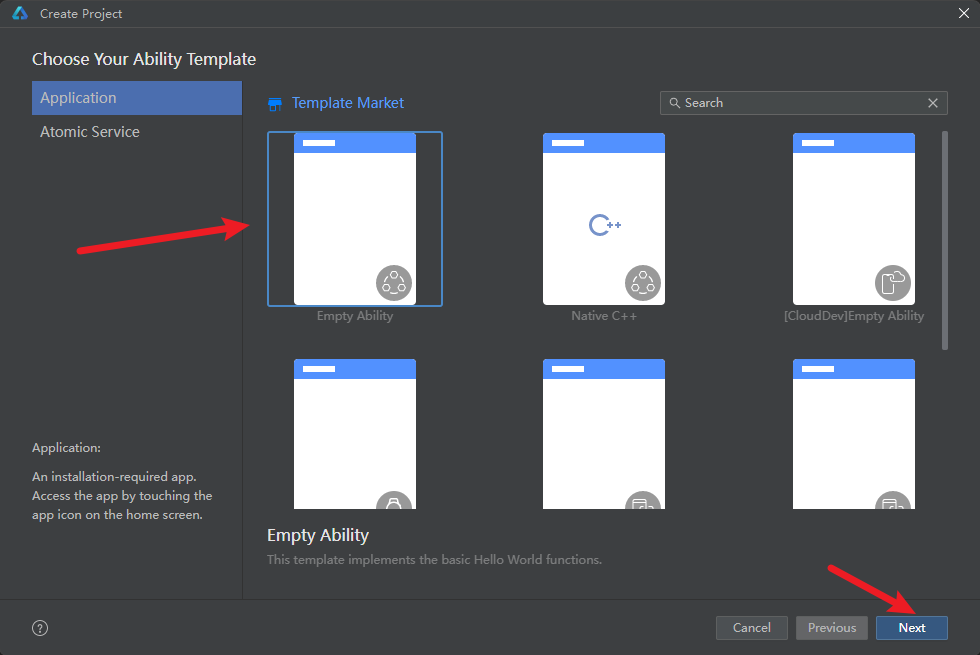
2、選擇Application應用開發(本文以應用開發為例,Atomic Service對應為元服務開發),選擇模板Empty Ability,點擊Next進行下一步配置。
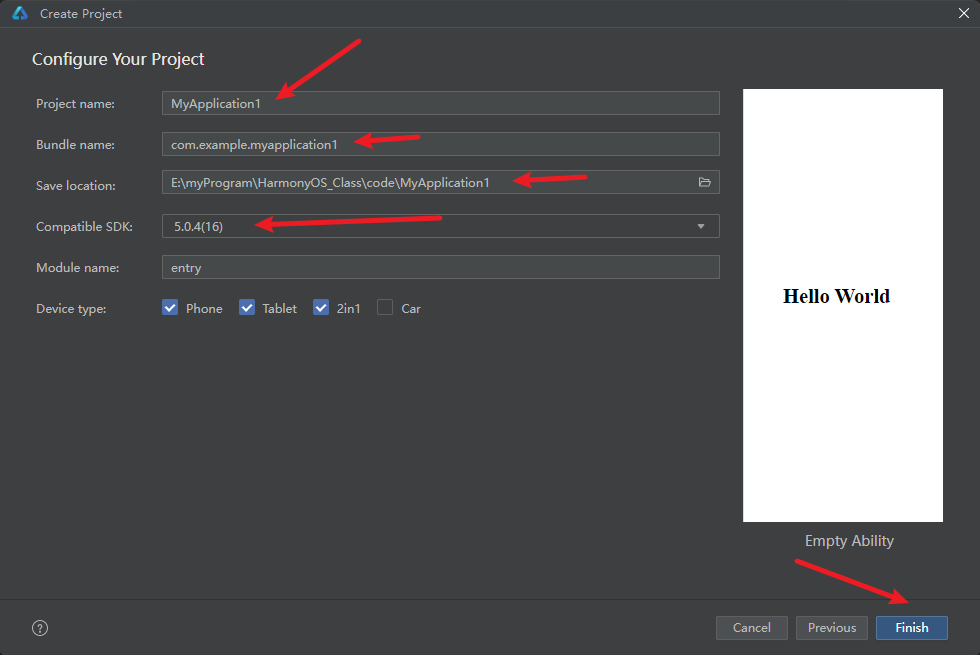
3、進入配置工程界面,配置項目名稱、保存位置等,Compatible SDK表示兼容的最低API Version,此處以選擇5.0.4(16)為例,其他參數保持默認設置即可,點擊Finish,工具會自動生成示例代碼和相關資源,等待工程創建完成。
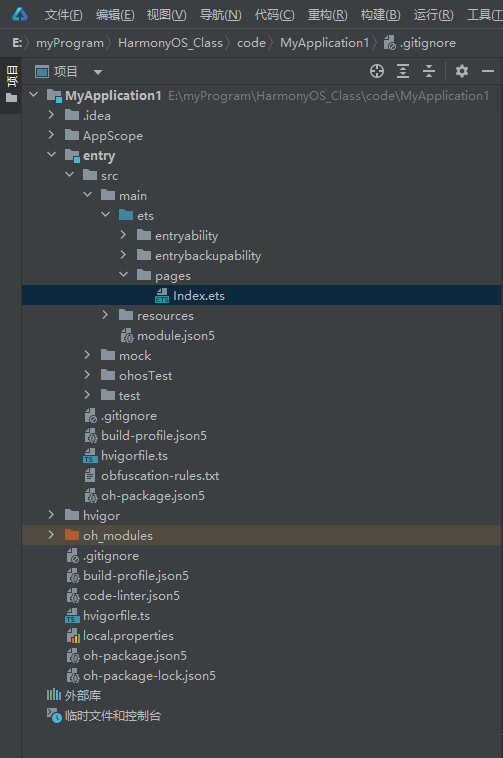
二、ArkTS工程目錄結構(Stage模型)
-
AppScope > app.json5:應用的全局配置信息,詳見app.json5配置文件。
-
entry:HarmonyOS工程模塊,編譯構建生成一個HAP包。
- src > main > ets:用于存放ArkTS源碼。
- src > main > ets > entryability:應用/服務的入口。
- src > main > ets > entrybackupability:應用提供擴展的備份恢復能力。
- src > main > ets > pages:應用/服務包含的頁面。
- src > main > resources:用于存放應用/服務所用到的資源文件,如圖形、多媒體、字符串、布局文件等。關于資源文件,詳見資源分類與訪問。
- src > main > module.json5:模塊配置文件。主要包含HAP包的配置信息、應用/服務在具體設備上的配置信息以及應用/服務的全局配置信息。具體的配置文件說明,詳見module.json5配置文件。
- build-profile.json5:當前的模塊信息 、編譯信息配置項,包括buildOption、targets配置等。
- hvigorfile.ts:模塊級編譯構建任務腳本。
- obfuscation-rules.txt:混淆規則文件。混淆開啟后,在使用Release模式進行編譯時,會對代碼進行編譯、混淆及壓縮處理,保護代碼資產。詳見開啟代碼混淆。
- oh-package.json5:用來描述包名、版本、入口文件(類型聲明文件)和依賴項等信息。
-
oh_modules:用于存放三方庫依賴信息。
-
build-profile.json5:工程級配置信息,包括簽名signingConfigs、產品配置products等。其中 products中可配置當前運行環境,默認為HarmonyOS。
-
hvigorfile.ts:工程級編譯構建任務腳本。
-
oh-package.json5:主要用來描述全局配置,如:依賴覆蓋(overrides)、依賴關系重寫(overrideDependencyMap)和參數化配置(parameterFile)等。
三、構建第一個頁面
1、工程同步完成后,在Project窗口,點擊entry > src > main > ets > pages,打開Index.ets文件,進行頁面的編寫,編輯器會默認生成代碼基本骨架:
@Entry
@Component
struct Index {@State message: string = 'Hello World';build() {RelativeContainer() {Text(this.message).id('HelloWorld').fontSize($r('app.float.page_text_font_size')).fontWeight(FontWeight.Bold).alignRules({center: { anchor: '__container__', align: VerticalAlign.Center },middle: { anchor: '__container__', align: HorizontalAlign.Center }}).onClick(() => {this.message = 'Welcome';})}.height('100%').width('100%')}
}
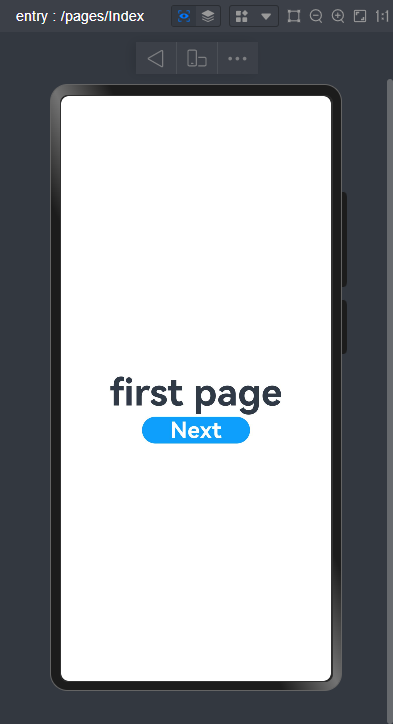
2、在已有頁面代碼基礎之上,添加一個Button組件,用于用戶點擊后跳轉至第二個頁面中:
@Entry
@Component
struct Index {@State message: string = 'first page';build() {RelativeContainer() {Text(this.message).id('HelloWorld').fontSize($r('app.float.page_text_font_size')).fontWeight(FontWeight.Bold).alignRules({center: { anchor: '__container__', align: VerticalAlign.Center },middle: { anchor: '__container__', align: HorizontalAlign.Center }}).onClick(() => {this.message = 'Welcome';})Button(){Text('Next').fontSize(30).fontWeight(FontWeight.Bold)}.type(ButtonType.Capsule).margin({top: 100}).backgroundColor('#0D9FFB').width('40%').height('5%').fontColor(Color.White).alignRules({center: { anchor: '__container__', align: VerticalAlign.Center },middle: { anchor: '__container__', align: HorizontalAlign.Center }})}.height('100%').width('100%')}
}
四、構建第二個頁面
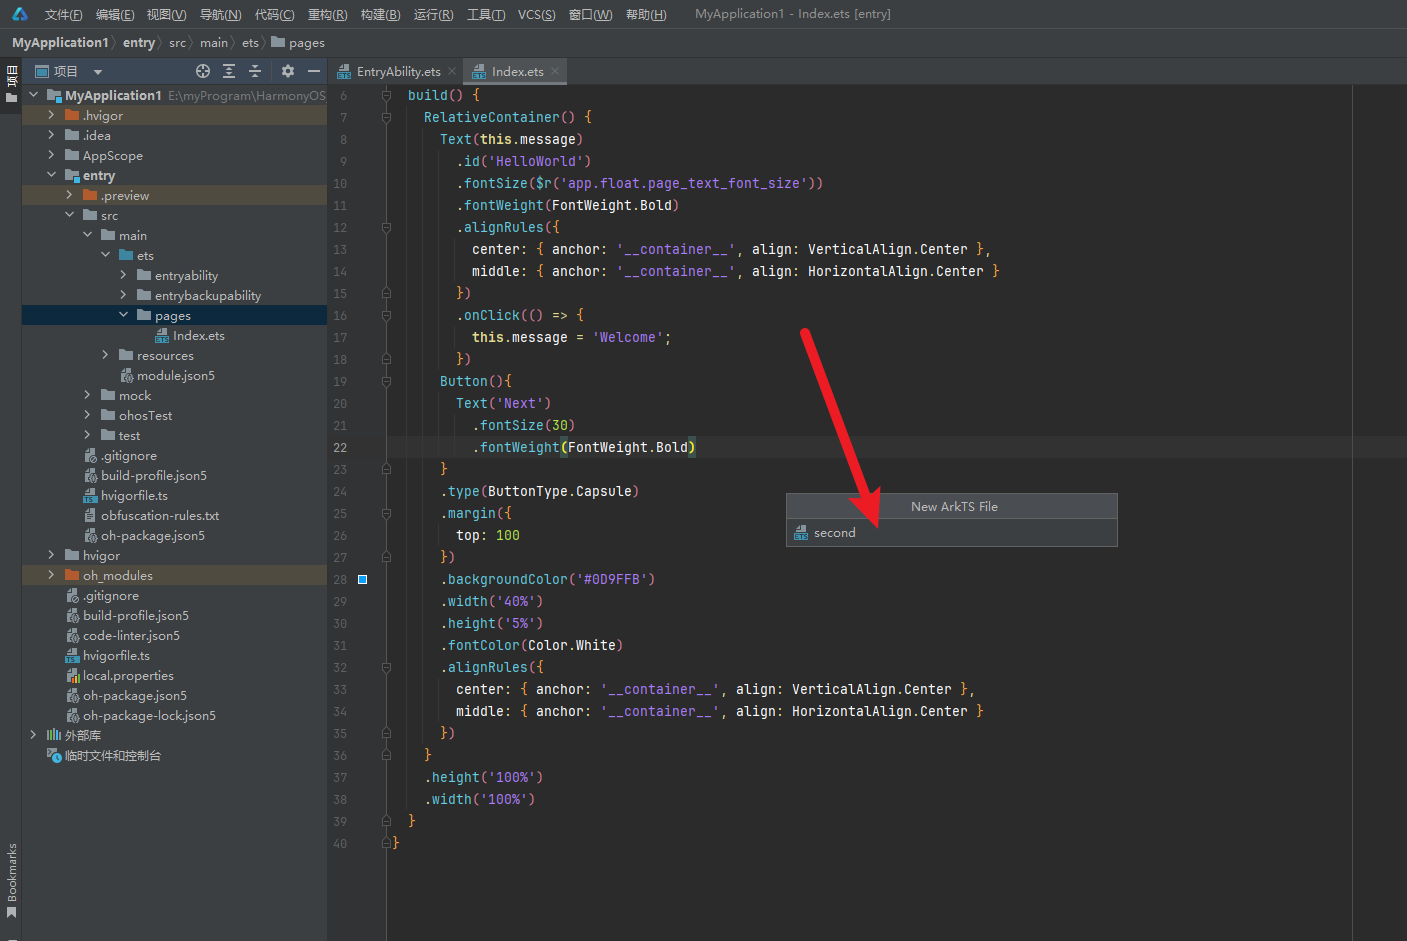
1、創建第二個頁面。
新建第二個頁面文件。在Project窗口,打開entry > src > main > ets,右鍵點擊pages文件夾,選擇New > ArkTS File,命名為second,點擊回車鍵。可以看到文件目錄結構如下:

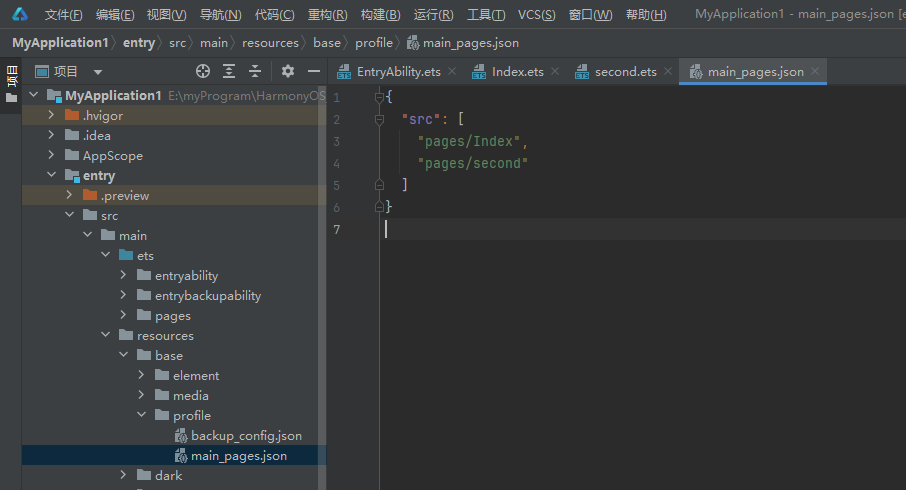
2、配置第二個頁面的路由。在Project窗口,打開entry > src > main > resources > base > profile,在main_pages.json文件中的"src"下配置第二個頁面的路由"pages/second"。示例如下:
{"src": ["pages/Index","pages/second"]
}
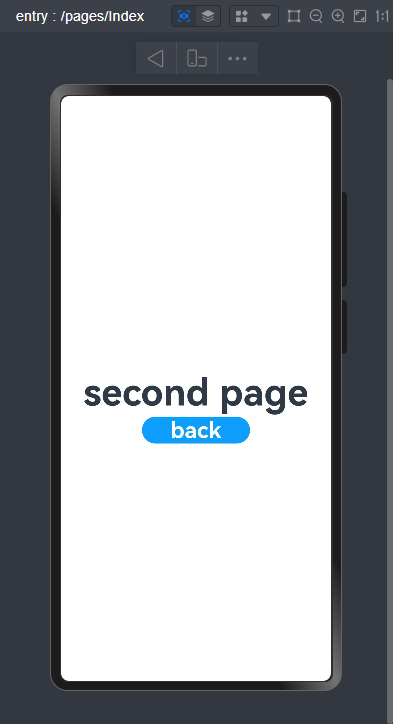
3、添加文本及按鈕。
參照第一個頁面,在第二個頁面添加Text組件、Button組件等,并設置其樣式。second.ets文件的示例如下:
@Entry
@Component
struct second {@State message: string = 'second page';build() {RelativeContainer() {Text(this.message).id('HelloWorld').fontSize($r('app.float.page_text_font_size')).fontWeight(FontWeight.Bold).alignRules({center: { anchor: '__container__', align: VerticalAlign.Center },middle: { anchor: '__container__', align: HorizontalAlign.Center }}).onClick(() => {this.message = 'Welcome';})Button(){Text('back').fontSize(30).fontWeight(FontWeight.Bold)}.type(ButtonType.Capsule).margin({top: 100}).backgroundColor('#0D9FFB').width('40%').height('5%').fontColor(Color.White).alignRules({center: { anchor: '__container__', align: VerticalAlign.Center },middle: { anchor: '__container__', align: HorizontalAlign.Center }})}.height('100%').width('100%')}
}
五、實現頁面之間的跳轉
頁面間的導航可以通過頁面路由router來實現。頁面路由router根據頁面url找到目標頁面,從而實現跳轉。使用頁面路由請導入router模塊。
如果需要實現更好的轉場動效,推薦使用Navigation。
1、第一個頁面跳轉到第二個頁面。
在第一個頁面中,跳轉按鈕綁定onClick事件,點擊按鈕時跳轉到第二頁。Index.ets文件的示例如下:
// 導入頁面路由模塊
import { router } from '@kit.ArkUI';
import { BusinessError } from '@kit.BasicServicesKit';
@Entry
@Component
struct Index {@State message: string = 'first page';build() {RelativeContainer() {Text(this.message).id('HelloWorld').fontSize($r('app.float.page_text_font_size')).fontWeight(FontWeight.Bold).alignRules({center: { anchor: '__container__', align: VerticalAlign.Center },middle: { anchor: '__container__', align: HorizontalAlign.Center }}).onClick(() => {this.message = 'Welcome';})Button(){Text('Next').fontSize(30).fontWeight(FontWeight.Bold)}.type(ButtonType.Capsule).margin({top: 100}).backgroundColor('#0D9FFB').width('40%').height('5%').fontColor(Color.White).alignRules({center: { anchor: '__container__', align: VerticalAlign.Center },middle: { anchor: '__container__', align: HorizontalAlign.Center }}).onClick(()=>{console.info(`Succeeded in clicking the 'next' button.`)router.pushUrl({url:'pages/second'}).then(()=>{console.info('succeeded in jumping to the second page.')}).catch((err:BusinessError)=>{console.error(`Failed to jump to the second page. Code is ${err.code},message is ${err.message}`)})})}.height('100%').width('100%')}
}
2、第二個頁面返回到第一個頁面。
在第二個頁面中,返回按鈕綁定onClick事件,點擊按鈕時返回到第一頁。Second.ets文件的示例如下:
// 導入頁面路由模塊
import { router } from '@kit.ArkUI';
import { BusinessError } from '@kit.BasicServicesKit';@Entry
@Component
struct second {@State message: string = 'second page';build() {RelativeContainer() {Text(this.message).id('HelloWorld').fontSize($r('app.float.page_text_font_size')).fontWeight(FontWeight.Bold).alignRules({center: { anchor: '__container__', align: VerticalAlign.Center },middle: { anchor: '__container__', align: HorizontalAlign.Center }}).onClick(() => {this.message = 'Welcome';})Button(){Text('back').fontSize(30).fontWeight(FontWeight.Bold)}.type(ButtonType.Capsule).margin({top: 100}).backgroundColor('#0D9FFB').width('40%').height('5%').fontColor(Color.White).alignRules({center: { anchor: '__container__', align: VerticalAlign.Center },middle: { anchor: '__container__', align: HorizontalAlign.Center }}).onClick(()=>{console.info(`Succeeded in clicking the 'next' button`)try{router.back()console.info(`Succeeded in jumping to the second page.`)}catch(err){let code=(err as BusinessError).code;let message=(err as BusinessError).message;console.error(`Failed to return to the first page. Code is ${code}, message is ${message}`)}})}.height('100%').width('100%')}
}
六、模擬器運行


)
Detail-Preserving Latent Diffusion for Stable Shadow Removal論文閱讀)


)


詳解)


