前言
最近在找完暑期實習之后,終于有了一些干項目外的空余時間學習新的知識,在這么多輪面試中,數據庫的考察非常多,但孱弱的數據庫基礎導致我有很多次面試被問住,因此我希望在學習CMU-15445(Fall 2024)的過程中能夯實我的基礎,更好的理解數據庫在計算機中的應用。
我將從本節開始記錄我從查找資源、注冊以及后續project提交的過程。
1. 準備工作
1.1 Gradescope注冊
在學習課程之前,我們需要注冊一個Gradescope賬號用于提交測試我們的project,并留記錄以證明自己的學習經歷。
非CMU學生如果要測試project,需在網站Gradescope提前注冊賬號。
- 確保將學校設置為“
Carnegie Mellon University”- 參賽代碼為“
WWWJZ5”
1.2 clone倉庫
課程主頁:CMU 15-445/645 :: Intro to Database Systems (Fall 2024)
github:cmu-db/bustub: The BusTub Relational Database Management System (Educational)
過程如下:
-
首先,在自己的github下創建新存儲庫
-
在PC上,創建公有 BusTub 存儲庫的克隆:
$ git clone --bare https://github.com/cmu-db/bustub.git bustub-public -
將公有BusTub鏡像到剛才創建的新存儲庫中:
$ cd bustub-public# If you pull / push over HTTPS
$ git push https://github.com/student/bustub-private.git master# If you pull / push over SSH
$ git push git@github.com:student/bustub-private.git master
我這里使用的SSH協議,用戶名和倉庫名寫為自己新創建的倉庫名和用戶名,如下:
$ git push git@github.com:qiaobeibei/cmu-15445.git但是在 push 過程中,遇到了一個問題:
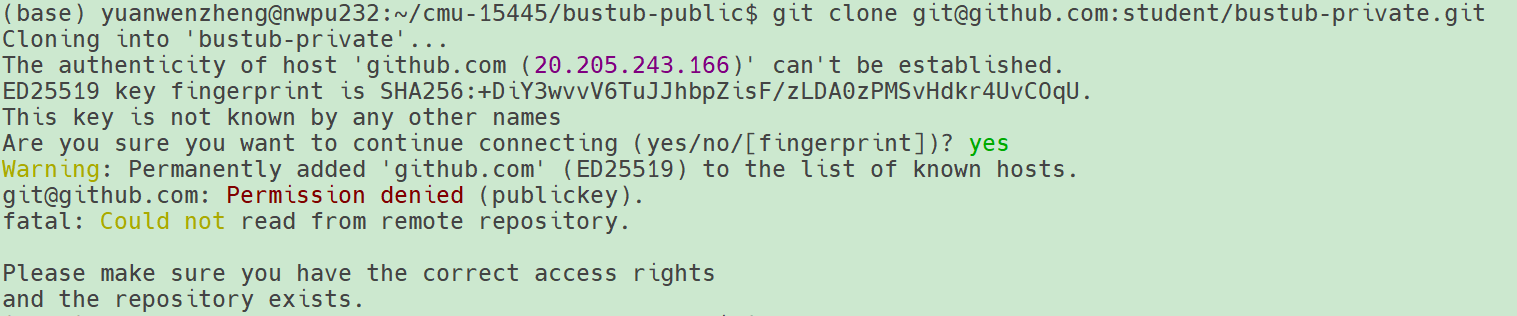
這里需要我們配置有效的SSH密鑰,從而能通過GitHub的身份驗證:
-
我們先查看本地是否已經存在SSH密鑰:
$ ls -al ~/.ssh如果存在
id_rsa.pub(RSA 密鑰)或者id_ed25519.pub(Ed25519 密鑰),則說明本地已存有密鑰,如下
將
id_rsa.pub文件的內容輸出到終端,然后復制:$ cat ~/.ssh/id_rsa.pub
如果密鑰不存在,那么我們需要生成新的SSH密鑰:
$ ssh-keygen -t ed25519 -C "your_email@example.com"your_email@example.com是我們Github上注冊的郵箱地址。生成密鑰后,啟動SSH代理并將新生成的密鑰添加到代理中:
$ eval "$(ssh-agent -s)"
$ ssh-add ~/.ssh/id_ed25519
若使用的是 RSA 密鑰,就把
id_ed25519替換成id_rsa。然后查看密鑰內容,并復制。
-
將SSH 公鑰添加到 GitHub 賬戶
-
登錄 GitHub 賬戶,點擊右上角的頭像,然后選擇
Settings。 -
在左側菜單中,點擊
SSH and GPG keys。 -
點擊
New SSH key按鈕。 -
在
Title字段中,輸入一個描述性的名稱,例如你的電腦名稱或使用場景,方便你識別這個密鑰。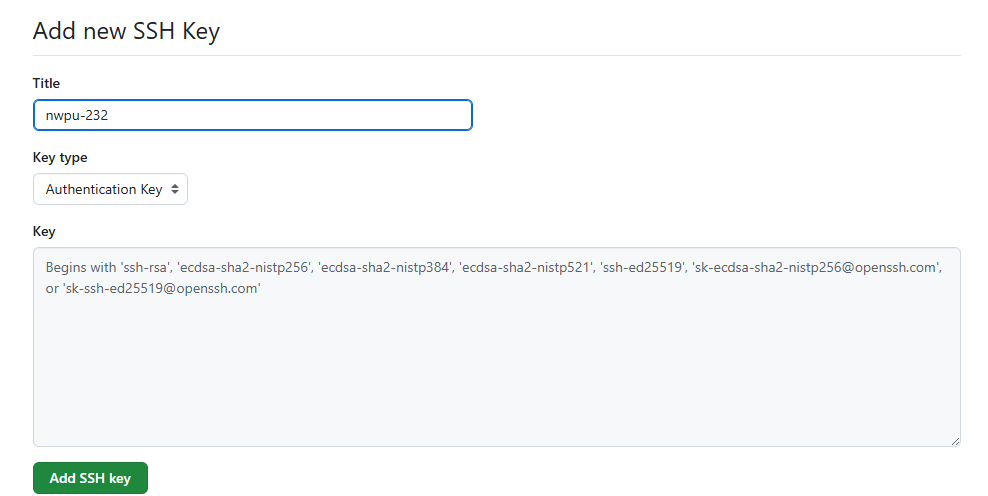

-
在
Key字段中,粘貼你剛才復制的公鑰內容。 -
點擊
Add SSH key按鈕保存設置。
-
-
測試SSh連接
輸入以下指令,測試SSH連接是否正常:
ssh -T git@github.com執行該命令后,輸入密鑰的密碼短語,若出現以下結果,則連接成功:

其中,
username是 GitHub 用戶名,可以正常使用 SSH 協議克隆和操作倉庫了。
再次克隆倉庫:
$ git push git@github.com:qiaobeibei/cmu-15445.git
push成功后,刪除剛才clone到本地的公有 bustub-public 倉庫。
$ cd ..
$ rm -rf bustub-public
-
將我們的個人倉庫clone到本地計算機
# If you pull / push over HTTPS $ git clone https://github.com/student/bustub-private.git# If you pull / push over SSH $ git clone git@github.com:student/bustub-private.git -
將公共的 BusTub 倉庫添加為第二個遠程倉庫
$ git remote add public https://github.com/cmu-db/bustub.git使用以下命令驗證遠程倉庫是否已成功添加:
$ git remote -v預期輸出示例:
origin	https://github.com/qiaobeibei/cmu-15445.git (fetch)
origin	https://github.com/qiaobeibei/cmu-15445.git (push)
public	https://github.com/cmu-db/bustub.git (fetch)
public	https://github.com/cmu-db/bustub.git (push)
1.3 環境部署
首先要配置LLVM的C/C++環境,這一步非常重要,可以參考文章:CMU15445 2023spring環境準備 | JoyTsing
簡要流程:
-
安裝LLVM全家桶+cmkae
sudo apt install clang clangd lldb cmake -
安裝LLVM
wget https://mirrors.tuna.tsinghua.edu.cn/llvm-apt/llvm.sh chmod +x llvm.sh sudo ./llvm.sh all -m https://mirrors.tuna.tsinghua.edu.cn/llvm-apt -
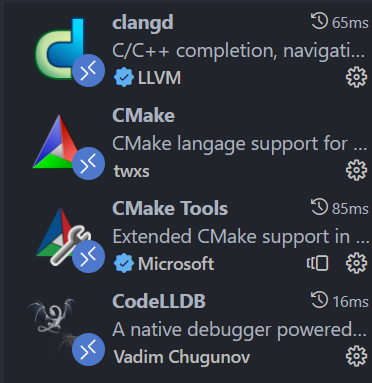
Vscode所需插件:
1.4 build
首先cd到項目根目錄下,運行腳本安裝依賴
$ sudo build_support/packages.sh
然后編譯流程和官網介紹一樣:
Then run the following commands to build the system:
$ mkdir build
$ cd build
$ cmake ..
$ make
If you want to compile the system in debug mode, pass in the following flag to cmake: Debug mode:
$ cmake -DCMAKE_BUILD_TYPE=Debug ..
$ make -j`nproc`
This enables AddressSanitizer by default.
If you want to use other sanitizers,
$ cmake -DCMAKE_BUILD_TYPE=Debug -DBUSTUB_SANITIZER=thread ..
$ make -j`nproc`
There are some differences between macOS and Linux (i.e., mutex behavior) that might cause test cases to produce different results in different platforms. We recommend students to use a Linux VM for running test cases and reproducing errors whenever possible.
后續就是跟著project的介紹一步步做,完成project的task后,通過下面的命令進行測試:
$ cd build
$ make -j$(nproc) hyperloglog_test
$ ./test/hyperloglog_test
運行編譯好的測試程序即可測試:
./test/hyperloglog_test

確保從測試用例名稱中移除了
DISABLED_前綴,不然這些測試用例不會運行。如果想要運行某個之前被禁用的測試用例,只需把DISABLED_前綴去掉即可。
比如要測試./test/buffer/lru_k_replacer_test.cpp,需要將測試用例第二個形參開頭的DISABLE_前綴去掉,然后再次make,就會正常測試。

)


采樣)
)


![[密碼學實戰]商用密碼產品密鑰體系架構:從服務器密碼機到動態口令系統](http://pic.xiahunao.cn/[密碼學實戰]商用密碼產品密鑰體系架構:從服務器密碼機到動態口令系統)


——4.28)
在圖像分類中的應用)
》)


