參考文章:
保姆式yolov5教程,訓練你自己的數據集 - 知乎
Windows 10|11下安裝mmyolo-0.5.0版本 - 知乎
Ubuntu22.04安裝教程&基于華為Ascend AI處理器的om模型atc轉換環境安裝_ubuntu安裝atc工具-CSDN博客嵌入式AI---在華為昇騰推理自己的yolov5目標檢測模型_昇騰 yolo-CSDN博客?
YOLOv5配置
使用conda創建新的虛擬環境并激活
conda create -n openmmlab python=3.8 -y
conda activate openmmlab
?pytorch安裝
CPU:
conda install pytorch==1.13.1 torchvision==0.14.1 torchaudio==0.13.1 cpuonly -c pytorchNvidia顯卡且CUDA>=11.6:
conda install pytorch==1.13.1 torchvision==0.14.1 torchaudio==0.13.1 pytorch-cuda=11.6 -c pytorch -c nvidia其他的pytorch版本沒測試
下載mmyolo-0.5.0,進入mmyolo-0.5.0目錄下
cd path  # 這里的path就是上面復制的路徑,用你自己的路徑替換path
# --------------進入到目錄中后直接復制下面的命令并執行-------------------------
pip install chardet
pip install -U openmim
mim install -r requirements/mminstall.txt
# Install albumentations
pip install -r requirements/albu.txt
# Install MMYOLO,使用可編輯模式安裝,以后編輯這個文件夾下的代碼會對整個環境生效
mim install -v -e .
安裝可視化工具?
WandB 可視化需要在官網注冊,并在?Weights & Biases?獲取到 WandB 的 API Keys。?
pip install wandb
# 運行了 wandb login 后輸入上文中獲取到的 API Keys ,便登錄成功。
wandb login
?
YOLOv5訓練
進入yolov5文件夾目錄
cd [path_to_yolov5] 數據集格式
在yolov5目錄下新建文件夾dataset?
road #(數據集名字)
├── images      ├── train          ├── xx.jpg     ├── val         ├── xx.jpg
├── labels      ├── train          ├── xx.txt     ├── val         ├── xx.txt
在yolov5/data文件夾下新建road.yaml
內容如下所示:
# Train/val/test sets as 1) dir: path/to/imgs, 2) file: path/to/imgs.txt, or 3) list: [path/to/imgs1, path/to/imgs2, ..]
path: /opt/data/private/zyx/yolov5/dataset/road8802 # dataset root dir
train: images/train # train images (relative to 'path')
val: images/val # val images (relative to 'path')
test: # test images (optional)# Classes
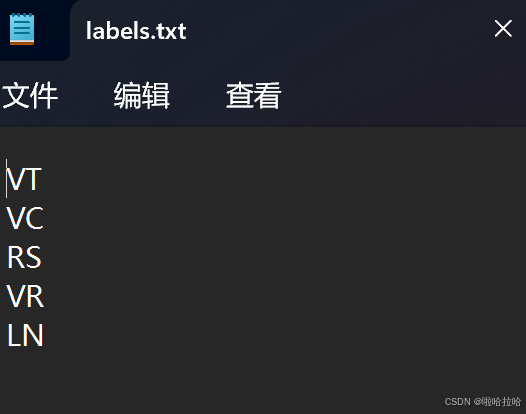
nc: 5 # number of classes
names: ['VT', 'VC', 'RS', 'VR','LN'] # class names其中:
-
path:數據集的根目錄
-
train:訓練集與path的相對路徑
-
val:驗證集與path的相對路徑
-
nc:類別數量,因為這個數據集只有一個類別(fire),nc即為1。
-
names:類別名字。
訓練
python train.py --weights yolov5s.pt --data data/road.yaml --epochs 200 --workers 1 --batch-size 64推理
模型訓練完成后,將runs/exp/weights下的模型(best.pt)復制在yolov5文件夾下
python detect.py --weights best.onnx --source ../yolov5/dataset/road7190/images/val --data data/road.yaml pt->onnx
python export.py --weights best.pt --data data/road.yaml --include onnx完成后會在目錄下看到best.onnx文件?
ATC轉OM文件
創建python3.7.5的虛擬環境和安裝python依賴
conda create -n v3onnx python=3.7.5pip3 install attrs numpy decorator sympy cffi pyyaml pathlib2 psutil protobuf scipy requests absl-py下載CANN的兩個包
在昇騰社區官網上下載CANN的兩個包:toolkit和nnrt包
一定要根據推理時使用的cann版本下載對應版本的包
這是我的鏡像:model_convert_cann7.0_aarch64_910b_py310:v6.0
可以看到cann時7.0版本?
社區版資源下載-資源下載中心-昇騰社區
Ascend-cann-nnrt_7.0.1_linux-x86_64.run
Ascend-cann-toolkit_7.0.1_linux-x86_64.run
安裝包?
?將包下載好放入虛擬環境中,開始安裝:
chmod +x Ascend-cann-nnrt_7.0.1_linux-x86_64.run
chmod +x Ascend-cann-toolkit_7.0.1_linux-x86_64.run
#賦予權限./Ascend-cann-nnrt_7.0.1_linux-x86_64.run --check
./Ascend-cann-toolkit_7.0.1_linux-x86_64.run --check
#檢查安裝包完整性./Ascend-cann-nnrt_7.0.1_linux-x86_64.run --install
./Ascend-cann-toolkit_7.0.1_linux-x86_64.run --install
配置ATC運行環境?
由于環境未配置,哪怕我們安裝了CANN包也無法使用atc命令,因此我們需要配置環境?
vi ~/.bashrcexport ASCEND_TOOLKIT_HOME=/usr/local/Ascend/ascend-toolkit/latest
export LD_LIBRARY_PATH=${ASCEND_TOOLKIT_HOME}/lib64:${ASCEND_TOOLKIT_HOME}/lib64/plugin/opskernel:${ASCEND_TOOLKIT_HOME}/lib64/plugin/nnengine:/usr/local/Ascend/ascend-toolkit/latest/x86_64-linux/devlib/:$LD_LIBRARY_PATH
export PYTHONPATH=${ASCEND_TOOLKIT_HOME}/python/site-packages:${ASCEND_TOOLKIT_HOME}/opp/op_impl/built-in/ai_core/tbe:$PYTHONPATH
export PATH=${ASCEND_TOOLKIT_HOME}/bin:${ASCEND_TOOLKIT_HOME}/compiler/ccec_compiler/bin:$PATH
export ASCEND_AICPU_PATH=${ASCEND_TOOLKIT_HOME}
export ASCEND_OPP_PATH=${ASCEND_TOOLKIT_HOME}/opp
export TOOLCHAIN_HOME=${ASCEND_TOOLKIT_HOME}/toolkit
export ASCEND_HOME_PATH=${ASCEND_TOOLKIT_HOME}source ~/.bashrc
export后點擊Esc,然后輸入:wq來保存退出
然后即可使用atc命令?
使用ATC命令
atc --model=best.onnx --framework=5 --output=best --input_format=NCHW --soc_version=Ascend910B2?--soc_version這個參數一定要通過查看npu-smi info來看,一定要一模一樣,不能忽略后面的數字
?然后即可生成best.om文件,之后就可以在昇騰910B上推理
910B推理?
代碼編寫
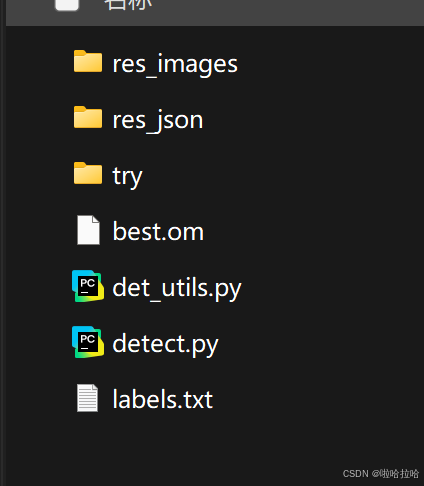
新建一個文件夾om_infer:
新建detect.py、det_utils.py、labels.txt;將轉換好的om模型復制到文件夾中;try保存原始的推理圖片
?填充labels.txt
一個類別一行
編寫detect.py(檢測)和det_util.py(后處理)?
det_utils.py
import cv2
import numpy as npdef letterbox(img, new_shape=(640, 640), color=(114, 114, 114), auto=False, scaleFill=False, scaleup=True):# Resize image to a 32-pixel-multiple rectangle https://github.com/ultralytics/yolov3/issues/232shape = img.shape[:2]  # current shape [height, width]if isinstance(new_shape, int):new_shape = (new_shape, new_shape)# Scale ratio (new / old)r = min(new_shape[0] / shape[0], new_shape[1] / shape[1])if not scaleup:  # only scale down, do not scale up (for better test mAP)r = min(r, 1.0)# Compute paddingratio = r, r  # width, height ratiosnew_unpad = int(round(shape[1] * r)), int(round(shape[0] * r))dw, dh = new_shape[1] - new_unpad[0], new_shape[0] - new_unpad[1]  # wh paddingif auto:  # minimum rectangledw, dh = np.mod(dw, 64), np.mod(dh, 64)  # wh paddingelif scaleFill:  # stretchdw, dh = 0.0, 0.0new_unpad = (new_shape[1], new_shape[0])ratio = new_shape[1] / shape[1], new_shape[0] / shape[0]  # width, height ratiosdw /= 2  # divide padding into 2 sidesdh /= 2if shape[::-1] != new_unpad:  # resizeimg = cv2.resize(img, new_unpad, interpolation=cv2.INTER_LINEAR)top, bottom = int(round(dh - 0.1)), int(round(dh + 0.1))left, right = int(round(dw - 0.1)), int(round(dw + 0.1))img = cv2.copyMakeBorder(img, top, bottom, left, right, cv2.BORDER_CONSTANT, value=color)  # add borderreturn img, ratio, (dw, dh)def xyxy2xywh(x):# Convert nx4 boxes from [x1, y1, x2, y2] to [x, y, w, h] where xy1=top-left, xy2=bottom-righty = np.copy(x)#y = x.clone() if isinstance(x, torch.Tensor) else np.copy(x)y[:, 0] = (x[:, 0] + x[:, 2]) / 2  # x centery[:, 1] = (x[:, 1] + x[:, 3]) / 2  # y centery[:, 2] = x[:, 2] - x[:, 0]  # widthy[:, 3] = x[:, 3] - x[:, 1]  # heightreturn ydef xywh2xyxy(x):# Convert nx4 boxes from [x, y, w, h] to [x1, y1, x2, y2] where xy1=top-left, xy2=bottom-righty = np.copy(x)#y = x.clone() if isinstance(x, torch.Tensor) else np.copy(x)y[:, 0] = x[:, 0] - x[:, 2] / 2  # top left xy[:, 1] = x[:, 1] - x[:, 3] / 2  # top left yy[:, 2] = x[:, 0] + x[:, 2] / 2  # bottom right xy[:, 3] = x[:, 1] + x[:, 3] / 2  # bottom right yreturn ydef numpy_nms(predictions, conf_thres=0.25, iou_thres=0.45):"""修正后的NMS函數"""# 處理輸入維度if predictions.ndim == 3:predictions = predictions.squeeze(0)# 過濾低置信度預測mask = predictions[:, 4] >= conf_threspredictions = predictions[mask]if predictions.shape[0] == 0:return np.empty((0, 6))# 轉換坐標格式boxes = xywh2xyxy(predictions[:, :4])# 獲取類別ID(關鍵修正)class_scores = predictions[:, 5:]class_ids = np.argmax(class_scores, axis=1).astype(int)  # 強制轉換為整數# 組合最終結果 [x1, y1, x2, y2, conf, class_id]detections = np.concatenate([boxes,predictions[:, 4:5],  # 置信度class_ids[:, None].astype(int)  # 確保整數類型], axis=1)return _nms_boxes(detections, iou_thres)def _nms_boxes(detections, iou_threshold):"""修正后的NMS核心函數"""if detections.size == 0:return np.empty((0, 6))x1 = detections[:, 0]y1 = detections[:, 1]x2 = detections[:, 2]y2 = detections[:, 3]scores = detections[:, 4]areas = (x2 - x1 + 1) * (y2 - y1 + 1)order = scores.argsort()[::-1]keep = []while order.size > 0:i = order[0]keep.append(i)xx1 = np.maximum(x1[i], x1[order[1:]])yy1 = np.maximum(y1[i], y1[order[1:]])xx2 = np.minimum(x2[i], x2[order[1:]])yy2 = np.minimum(y2[i], y2[order[1:]])w = np.maximum(0.0, xx2 - xx1 + 1)h = np.maximum(0.0, yy2 - yy1 + 1)inter = w * hovr = inter / (areas[i] + areas[order[1:]] - inter)inds = np.where(ovr <= iou_threshold)[0]order = order[inds + 1]return detections[keep]def scale_coords(img1_shape, coords, img0_shape, ratio_pad=None):# Rescale coords (xyxy) from img1_shape to img0_shapeif ratio_pad is None:  # calculate from img0_shapegain = min(img1_shape[0] / img0_shape[0], img1_shape[1] / img0_shape[1])  # gain  = old / newpad = (img1_shape[1] - img0_shape[1] * gain) / 2, (img1_shape[0] - img0_shape[0] * gain) / 2  # wh paddingelse:gain = ratio_pad[0][0]pad = ratio_pad[1]coords[:, [0, 2]] -= pad[0]  # x paddingcoords[:, [1, 3]] -= pad[1]  # y paddingcoords[:, :4] /= gainclip_coords(coords, img0_shape)return coordsdef clip_coords(boxes, shape):# Clip bounding xyxy bounding boxes to image shape (height, width)boxes[:, [0, 2]] = boxes[:, [0, 2]].clip(0, shape[1])boxes[:, [1, 3]] = boxes[:, [1, 3]].clip(0, shape[0])return boxesdef nms(box_out, conf_thres=0.4, iou_thres=0.5):return numpy_nms(box_out, conf_thres=conf_thres, iou_thres=iou_thres)#try:#   boxout = non_max_suppression(box_out, conf_thres=conf_thres, iou_thres=iou_thres, multi_label=True)#except:#    boxout = non_max_suppression(box_out, conf_thres=conf_thres, iou_thres=iou_thres)#return boxout
detect.py?
#python detect.py --input ./test --img_output ./res_images --json_output ./res_json
import json
import cv2
import numpy as np
import glob
import os
from det_utils import letterbox, nms, scale_coords
from ais_bench.infer.interface import InferSession
from time import time
import argparsemodel_path = "./best.om"  # om格式模型文件
label_path = './labels.txt'  # 標簽def calculate_iou(box1, boxes):"""計算單個框與多個框的IoU"""# 計算交集區域x1 = np.maximum(box1[0, 0], boxes[:, 0])y1 = np.maximum(box1[0, 1], boxes[:, 1])x2 = np.minimum(box1[0, 2], boxes[:, 2])y2 = np.minimum(box1[0, 3], boxes[:, 3])intersection = np.maximum(0, x2 - x1) * np.maximum(0, y2 - y1)# 計算面積area_box1 = (box1[0, 2] - box1[0, 0]) * (box1[0, 3] - box1[0, 1])area_boxes = (boxes[:, 2] - boxes[:, 0]) * (boxes[:, 3] - boxes[:, 1])union = area_box1 + area_boxes - intersectionreturn intersection / uniondef preprocess_image(image, cfg, bgr2rgb=True):  # 圖片預處理img, scale_ratio, pad_size = letterbox(image, new_shape=cfg['input_shape'])  # image尺度不定,故需調整尺寸適配模型輸入if bgr2rgb:img = img[:, :, ::-1]img = img.transpose(2, 0, 1)  # HWC2CHWimg = np.ascontiguousarray(img, dtype=np.float32)  # 將輸入數組轉換為連續存儲數組,加速運算效率return img, scale_ratio, pad_sizedef draw_bbox(bbox, img0, wt, names):"""繪制不同顏色的預測框"""# 定義5種類別對應的BGR顏色(可根據需要修改)color_palette = [(0, 255, 0),  # 綠色 - 類別0(255, 0, 0),  # 藍色 - 類別1(0, 0, 255),  # 紅色 - 類別2(0, 255, 255),  # 黃色 - 類別3(255, 0, 255)  # 粉色 - 類別4]det_result_str = ''for idx, class_id in enumerate(bbox[:, 5]):# 確保類別ID是整數class_id = int(round(float(class_id)))if class_id >= len(color_palette) or class_id < 0:print(f"Warning: 無效的類別ID {class_id},使用默認顏色")color = (255, 255, 255)  # 白色作為默認else:color = color_palette[class_id]  # 根據類別選擇顏色if float(bbox[idx][4]) < 0.05:continue# 繪制邊界框x1, y1 = int(bbox[idx][0]), int(bbox[idx][1])x2, y2 = int(bbox[idx][2]), int(bbox[idx][3])img0 = cv2.rectangle(img0, (x1, y1), (x2, y2), color, wt)# 繪制類別標簽(黑色背景白字)label = f"{names.get(class_id, 'unknown')} {bbox[idx][4]:.2f}"(tw, th), _ = cv2.getTextSize(label, cv2.FONT_HERSHEY_SIMPLEX, 0.5, 1)# 標簽背景img0 = cv2.rectangle(img0, (x1, y1 - 20), (x1 + tw, y1), color, -1)# 標簽文字img0 = cv2.putText(img0, label, (x1, y1 - 5),cv2.FONT_HERSHEY_SIMPLEX, 1, (255, 255, 255), 2)return img0def get_labels_from_txt(path):"""從txt文件獲取圖片標簽"""labels_dict = dict()with open(path) as f:for cat_id, label in enumerate(f.readlines()):labels_dict[cat_id] = label.strip()return labels_dictdef detect_img(model, detect_path, img_output_dir, json_output_dir, conf_thres=0.4, iou_thres=0.5):raw_img = cv2.imread(detect_path)  # 載入原始圖片img_height, img_width = raw_img.shape[:2]# 獲取圖片原始尺寸labels = get_labels_from_txt(label_path)# 預處理cfg = {'conf_thres': conf_thres,  # 模型置信度閾值,閾值越低,得到的預測框越多'iou_thres': iou_thres,  # IOU閾值,重疊率過低的框會被過濾'input_shape': [640, 640],  # 輸入尺寸}img, scale_ratio, pad_size = preprocess_image(raw_img, cfg)img = img / 255.0  # 訓練模型時將0~255值域轉化為了0~1,故推理階段也需同樣處理# 檢測t1 = time()output = model.infer([img])[0]#output = torch.tensor(output)# 使用numpy實現的nmsboxout = nms(output, conf_thres=cfg["conf_thres"], iou_thres=cfg["iou_thres"])if len(boxout) > 0:pred_all = boxout[0] if isinstance(boxout, list) else boxoutscale_coords(cfg['input_shape'], pred_all[:, :4], raw_img.shape, ratio_pad=(scale_ratio, pad_size))else:pred_all = np.empty((0, 6))# 非極大值抑制后處理#boxout = nms(output, conf_thres=cfg["conf_thres"], iou_thres=cfg["iou_thres"])#pred_all = boxout[0].numpy()# 預測坐標轉換#scale_coords(cfg['input_shape'], pred_all[:, :4], raw_img.shape, ratio_pad=(scale_ratio, pad_size))t2 = time()print("detect time: %fs" % (t2 - t1))# 準備JSON數據結構json_data = {"file_name": os.path.basename(detect_path),"detections": [],"image_size": {"width": img_width,"height": img_height}}# 結果繪制if pred_all.size > 0:draw_bbox(pred_all, raw_img,2, labels)for det in pred_all:x_min, y_min, x_max, y_max = map(int, det[:4])confidence = float(det[4])class_id = int(det[5])json_data["detections"].append({"disease_class": labels.get(class_id, "unknown"),"confidence": round(confidence, 4),"bbox": {"x_min": x_min,"y_min": y_min,"x_max": x_max,"y_max": y_max}})# 保存JSON到獨立目錄os.makedirs(json_output_dir, exist_ok=True)json_filename = os.path.basename(detect_path).rsplit('.', 1)[0] + ".json"json_path = os.path.join(json_output_dir, json_filename)with open(json_path, 'w') as f:json.dump(json_data, f, indent=2)# 保存圖片到圖片目錄os.makedirs(img_output_dir, exist_ok=True)img_filename = "res_" + os.path.basename(detect_path)img_output_path = os.path.join(img_output_dir, img_filename)cv2.imwrite(img_output_path, raw_img, [int(cv2.IMWRITE_JPEG_QUALITY), 95])def batch_detect(model, input_dir, img_output_dir, json_output_dir, conf_thres=0.4, iou_thres=0.5):"""帶參數傳遞的批量推理函數"""os.makedirs(json_output_dir, exist_ok=True)  # 自動創建JSON目錄os.makedirs(img_output_dir, exist_ok=True)  # 自動創建圖片目錄# 擴展支持更多圖像格式image_extensions = ['*.jpg', '*.jpeg', '*.png', '*.bmp', '*.tiff']image_paths = []for ext in image_extensions:image_paths.extend(sorted(glob.glob(os.path.join(input_dir, ext))))print(f"Found {len(image_paths)} pictures")for img_path in image_paths:detect_img(model=model,detect_path=img_path,img_output_dir=img_output_dir,json_output_dir=json_output_dir,conf_thres=conf_thres,iou_thres=iou_thres)if __name__ == "__main__":# 創建參數解析器parser = argparse.ArgumentParser(description='目標檢測批量推理腳本')parser.add_argument('--input', type=str, required=True, help='輸入圖片目錄路徑,支持jpg/png/bmp格式')parser.add_argument('--img_output', type=str, required=True, help='圖片輸出目錄')parser.add_argument('--json_output', type=str, required=True, help='JSON輸出目錄')parser.add_argument('--conf', type=float, default=0.4, help='置信度閾值 (默認: 0.4)')parser.add_argument('--iou', type=float, default=0.5, help='IOU閾值 (默認: 0.5)')# 解析參數args = parser.parse_args()# 初始化模型model = InferSession(0, model_path)# 執行批量推理batch_detect(model=model,input_dir=args.input,img_output_dir=args.img_output,json_output_dir=args.json_output,conf_thres=args.conf,iou_thres=args.iou)print('檢測完成!\n圖片結果保存在: {}\nJSON結果保存在: {}'.format(os.path.abspath(args.img_output),os.path.abspath(args.json_output)))
示例命令:
python detect.py \--input ./try \--img_output ./res_images \--json_output ./res_json
![[ 3分鐘算法 ] | 遞歸搜索題目 : 合并兩個有序鏈表(遞歸版)](http://pic.xiahunao.cn/[ 3分鐘算法 ] | 遞歸搜索題目 : 合并兩個有序鏈表(遞歸版))
)


:使用 Semantic Kernel 和 DeepSeek 構建AI應用)
 ——c#cad二次開發)


![Outlook客戶端無法連接到服務器,添加賬戶顯示“無網絡連接,請檢查你的網絡設置,然后重試。[2603]”](http://pic.xiahunao.cn/Outlook客戶端無法連接到服務器,添加賬戶顯示“無網絡連接,請檢查你的網絡設置,然后重試。[2603]”)
