Vue3框架
- 是前端渲染框架
- 瀏覽器向服務器第一次發送請求,就會將所有頁面的樣式全部返回到瀏覽器
- vue中會將所有js文件最后打包成一個js文件,當前訪問其中一個頁面時,其他頁面的樣式也已經返回到瀏覽器中了,下次切換頁面時,就不會再向服務器發送請求
1.配置環境
1)vue3的安裝
-
Windows上推薦使用
powershell或者cmd -
1.
Node.js安裝:官網地址, 具體的安裝細節可以參考下面的安裝教程
參考Nodejs安裝教程 -
2.
vue3安裝:Vue官網, 具體的安裝細節可以參考下面的安裝教程
Vue3 v5.0.8的安裝教程 -
3.安裝
@vue/cli:vue的腳手架
打開終端執行:
npm i -g @vue/cli
安裝較慢可以配置鏡像:
npm config set registry https://registry.npmmirror.com/
如果執行后面的操作有bug,可能是最新版有問題,可以嘗試安裝早期版本,比如:npm i -g @vue/cli@4
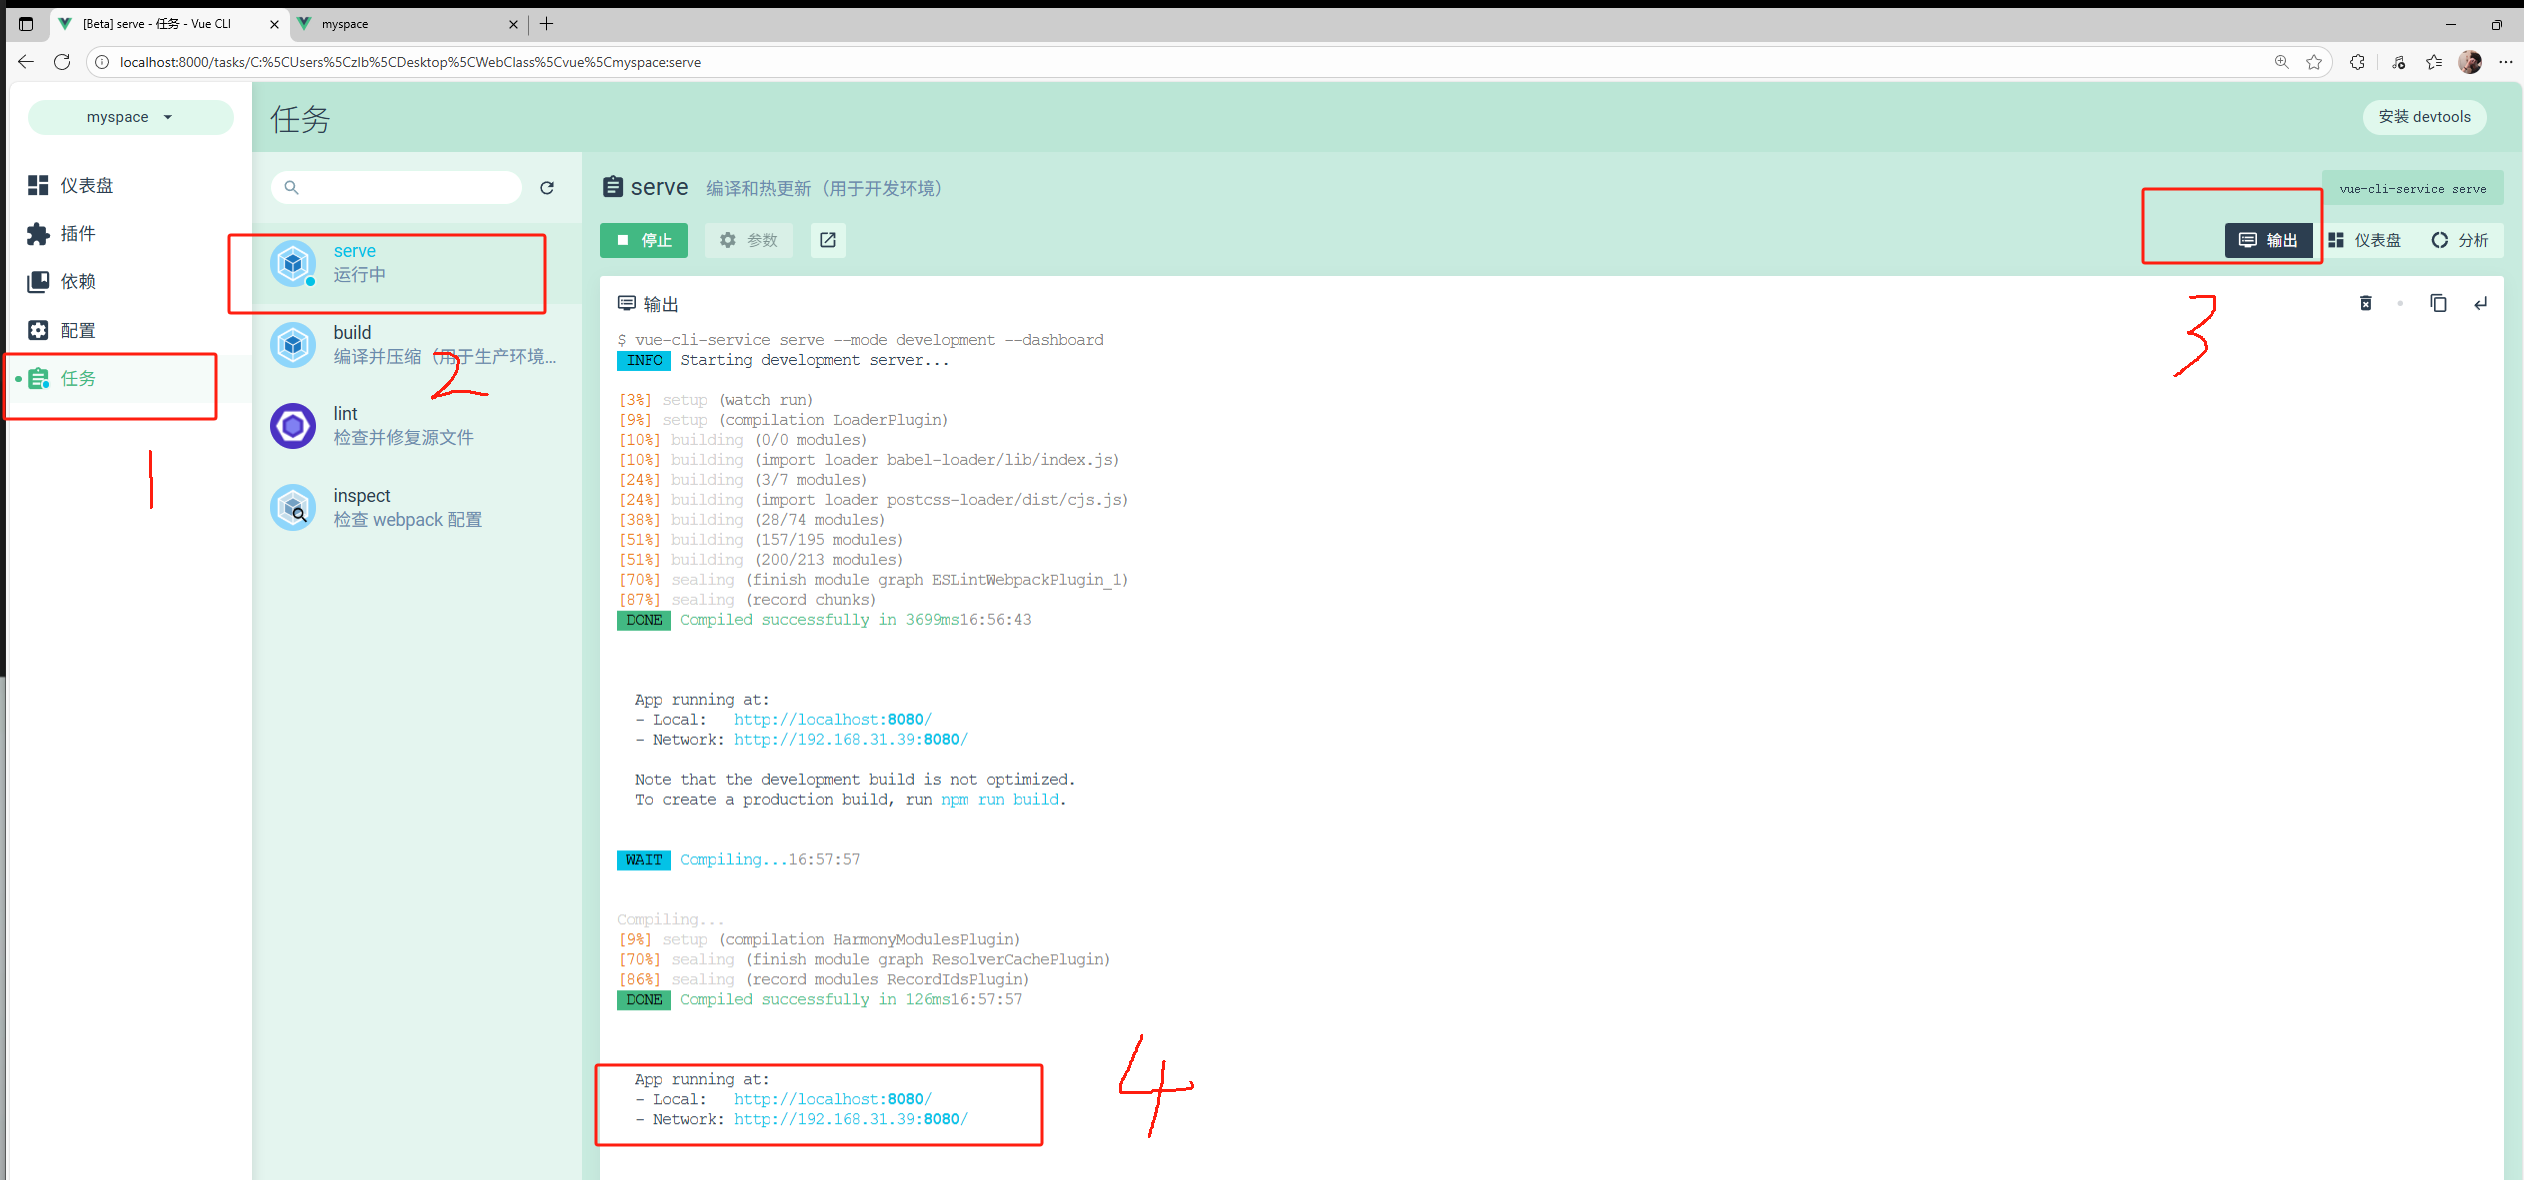
- 4.啟動
vue自帶的圖形化項目管理界面:vue ui- 常見問題1:Windows上運行
vue,提示無法加載文件,表示用戶權限不足。 - 解決方案:用管理員身份打開終端,輸入
set-ExecutionPolicy RemoteSigned,然后輸入y
- 常見問題1:Windows上運行
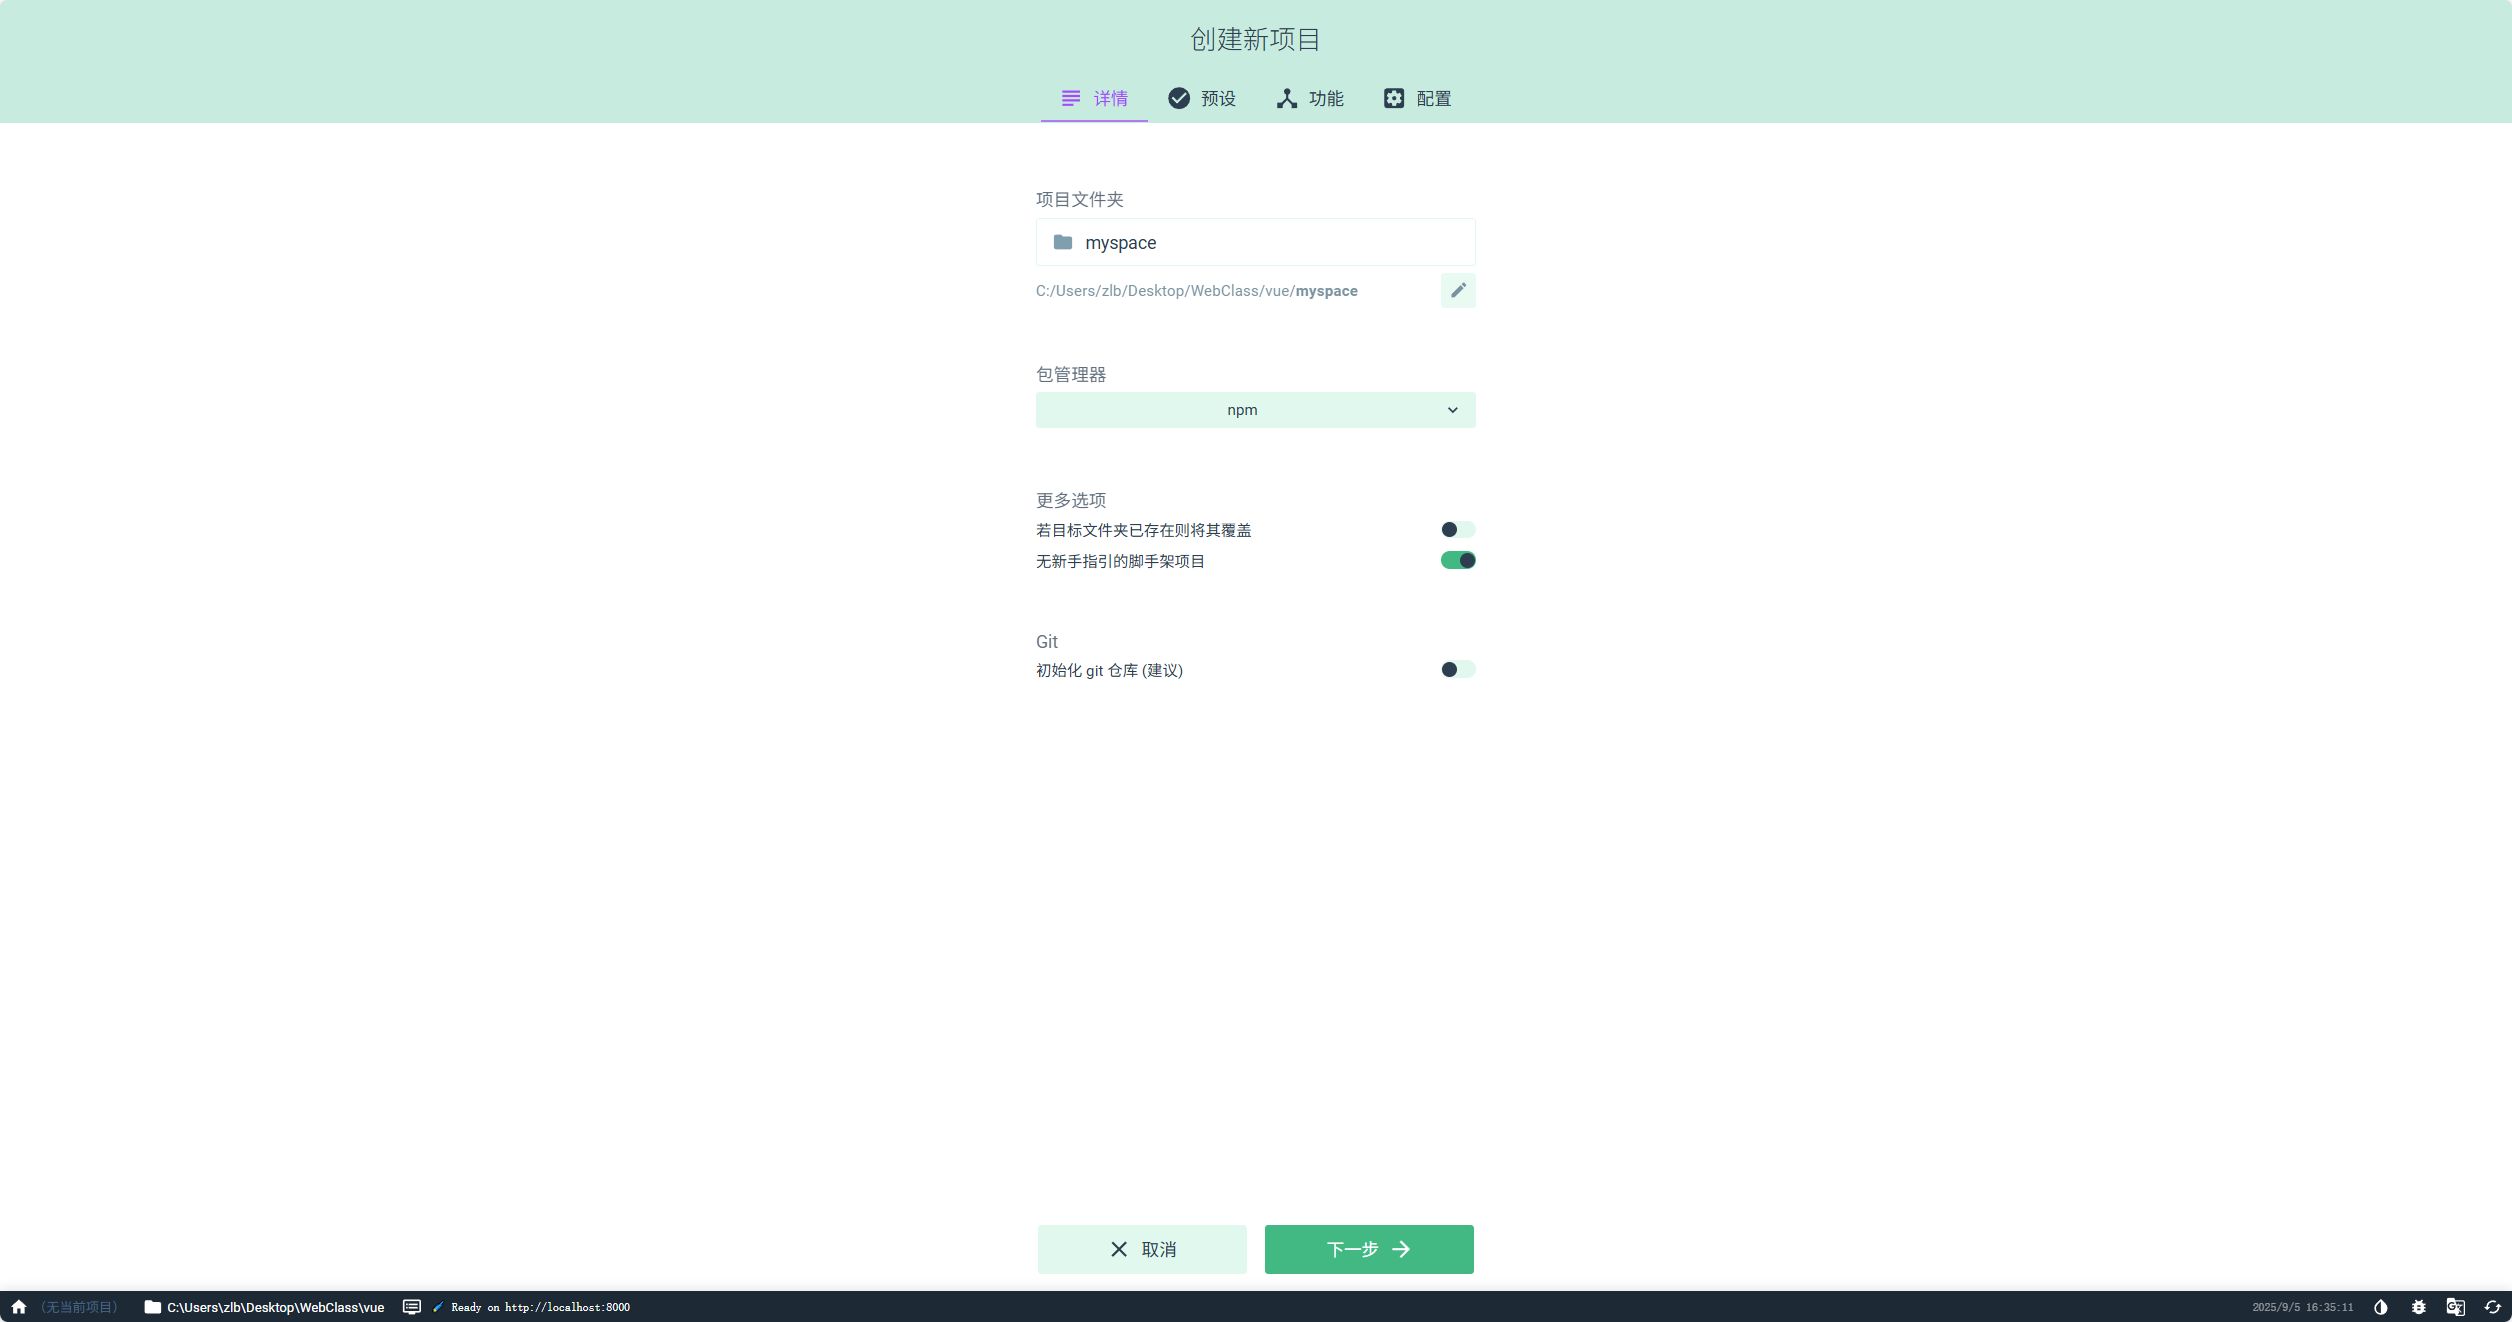
2.創建項目
- 1.選擇文件夾,創建項目名稱:
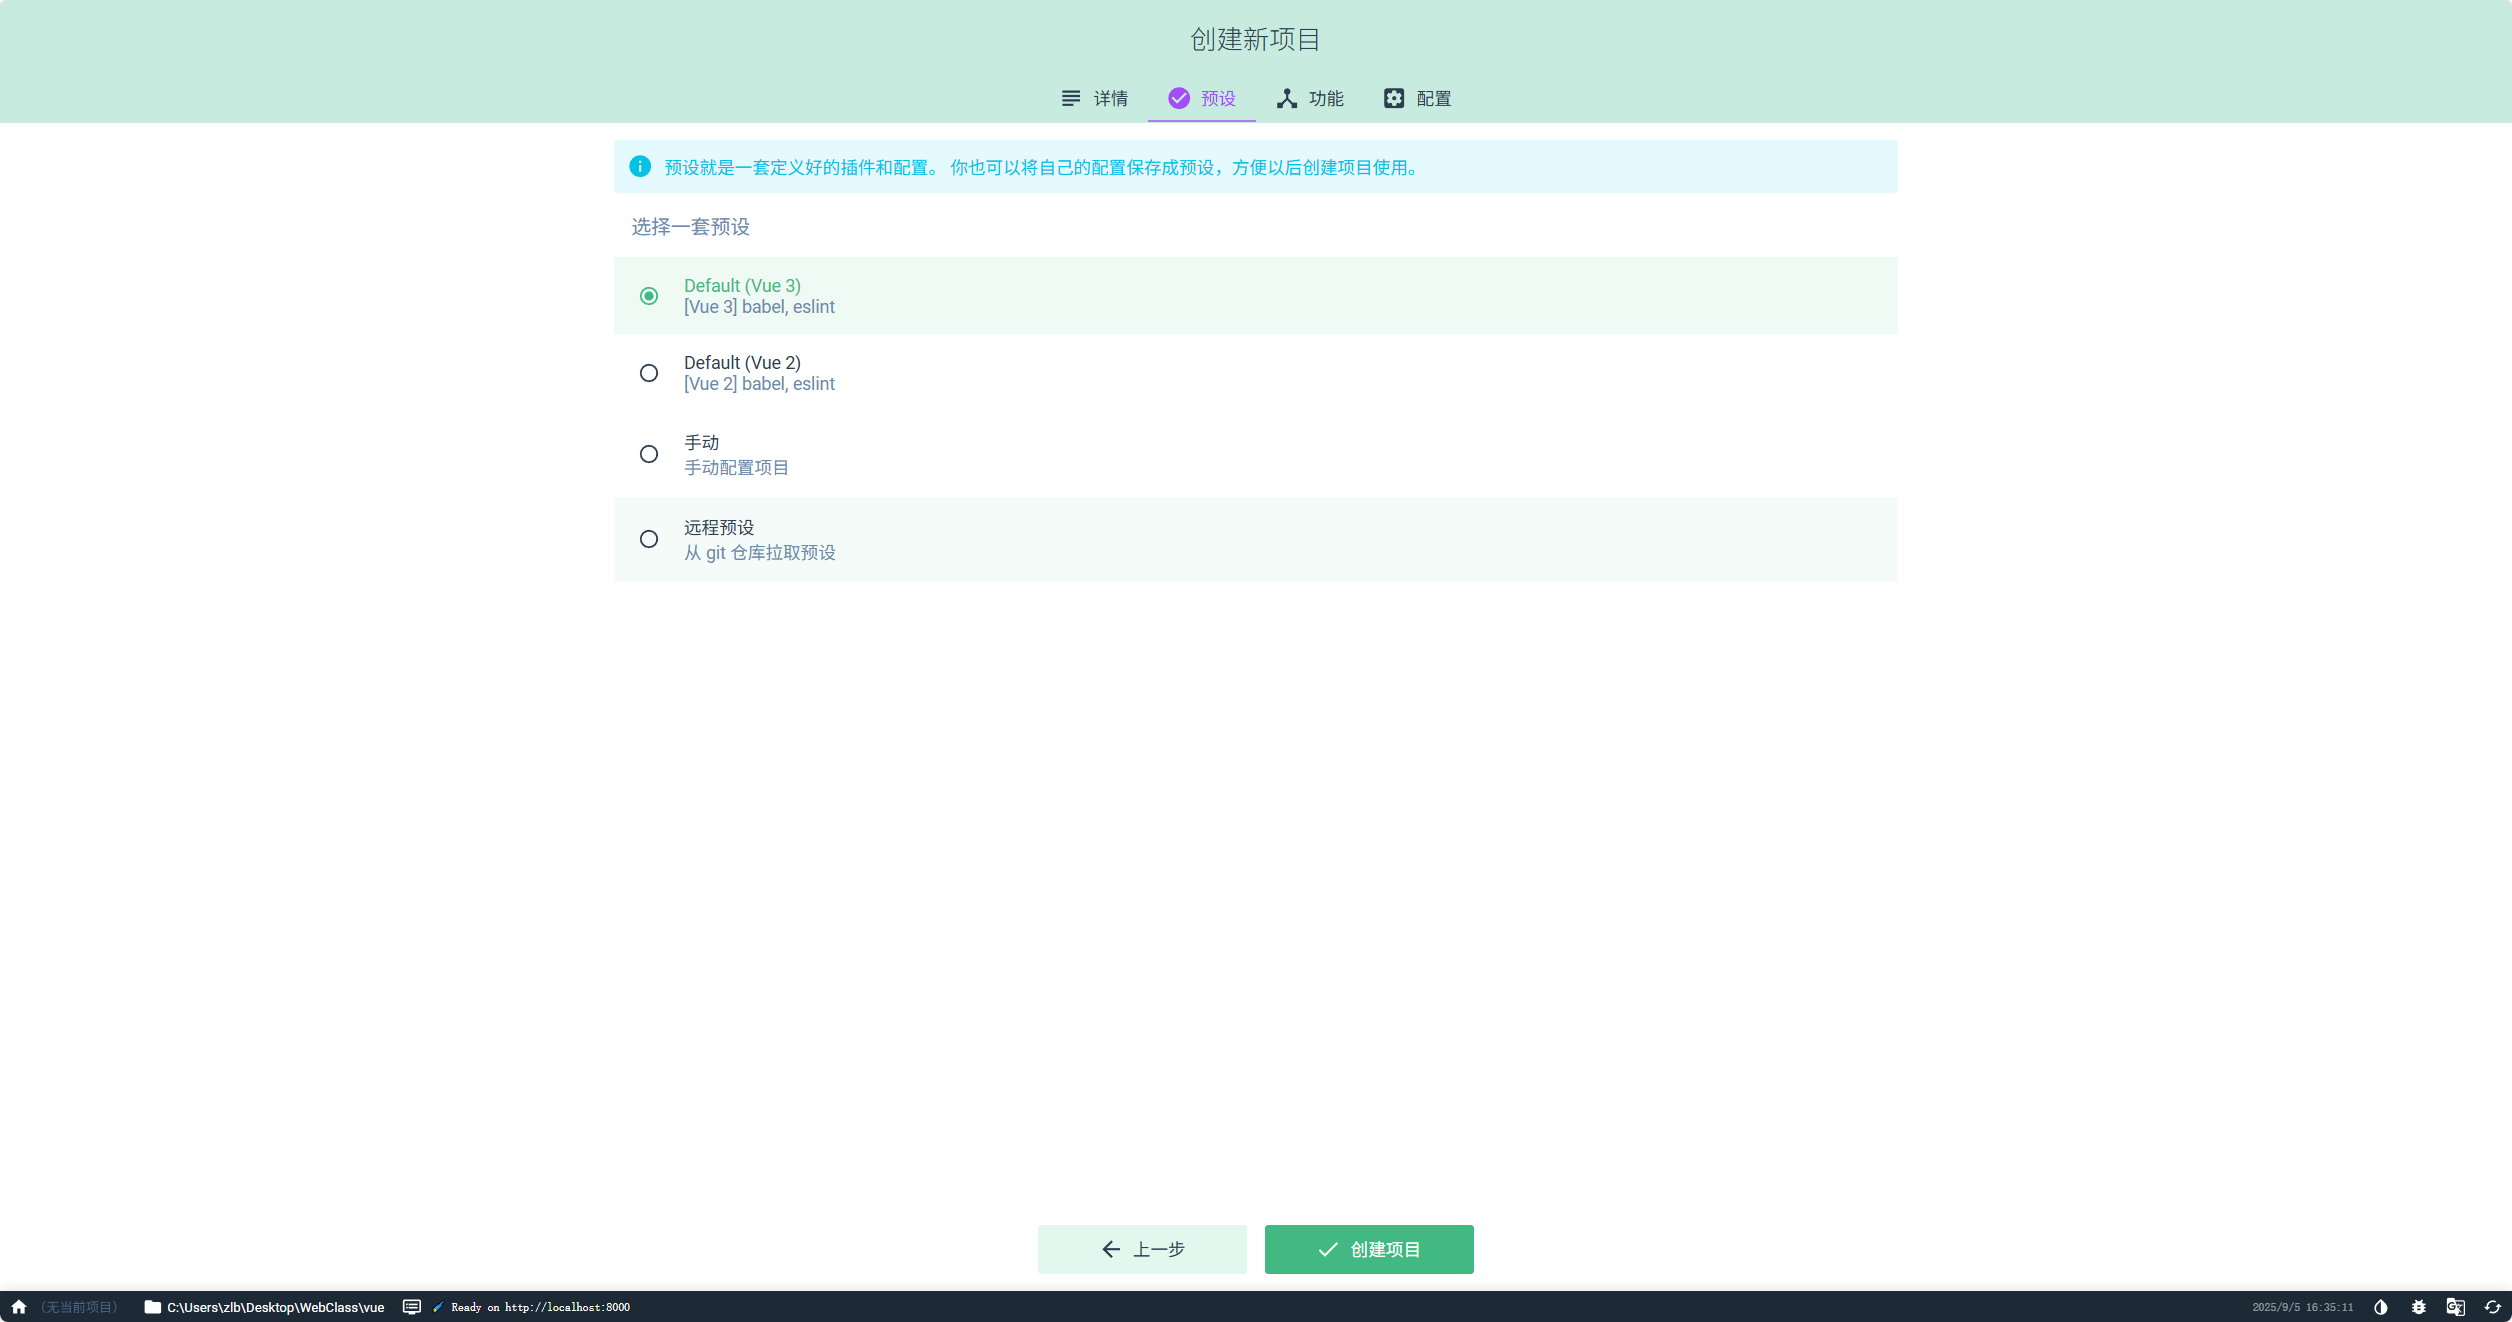
- 2.選擇vue3框架:
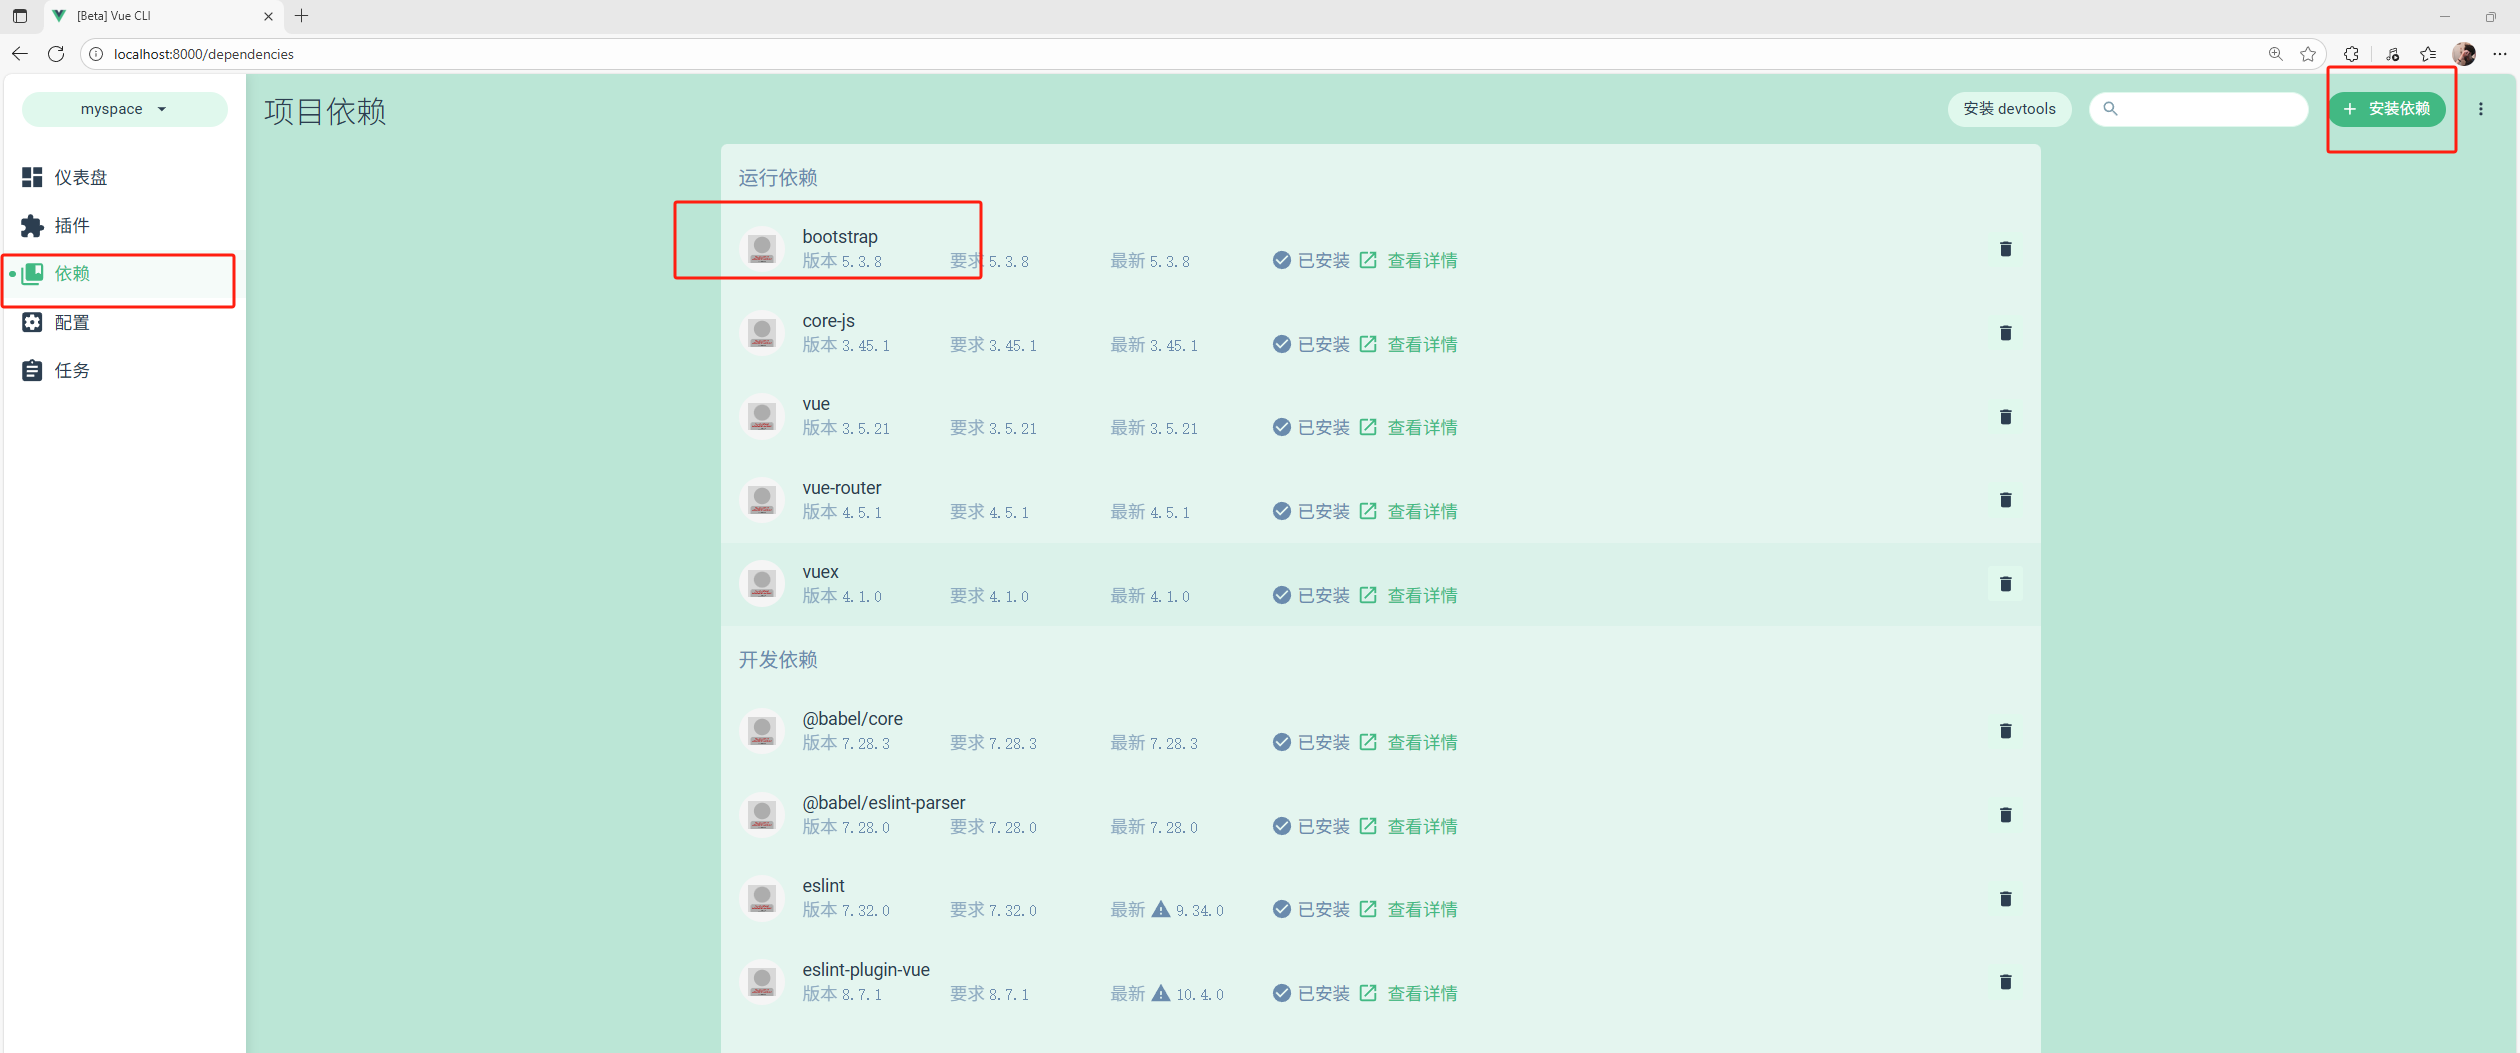
- 3.添加必要插件:

- 4.安裝依賴:bootstrap
- 5.運行項目:
- 6.使用
vscode打開項目文件夾 - 推薦的一個
vscode插件,用于vue文件的代碼高亮等顯示:Vetur
3.Vue的優勢
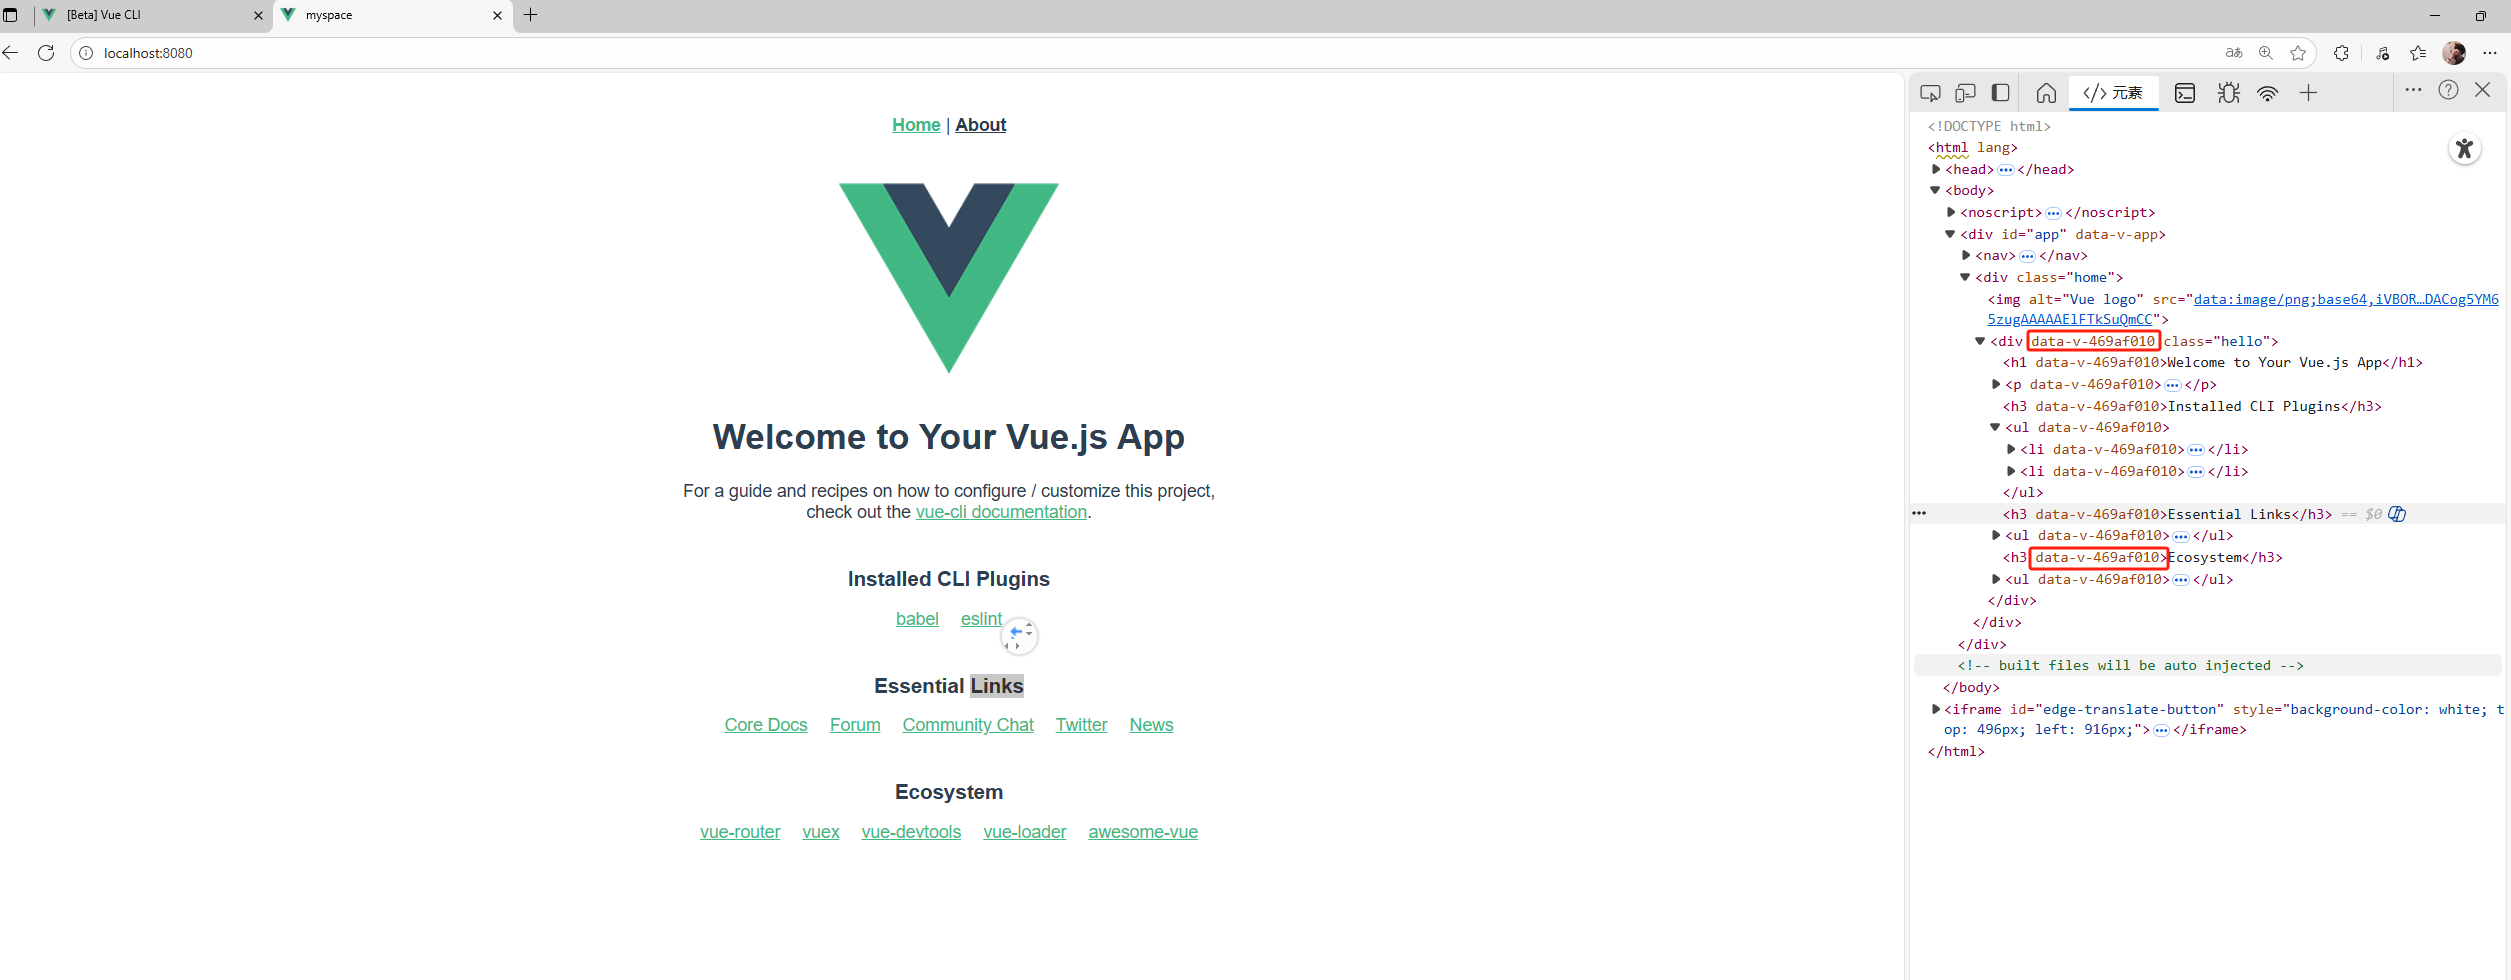
- 1.寫不同組件的css樣式時不需要考慮不同組件之間的樣式互相影響:在渲染時,vue會自動給每個css類自動生成一個隨機的值,從而確保不同組件的樣式不會互相影響
4.系統設計
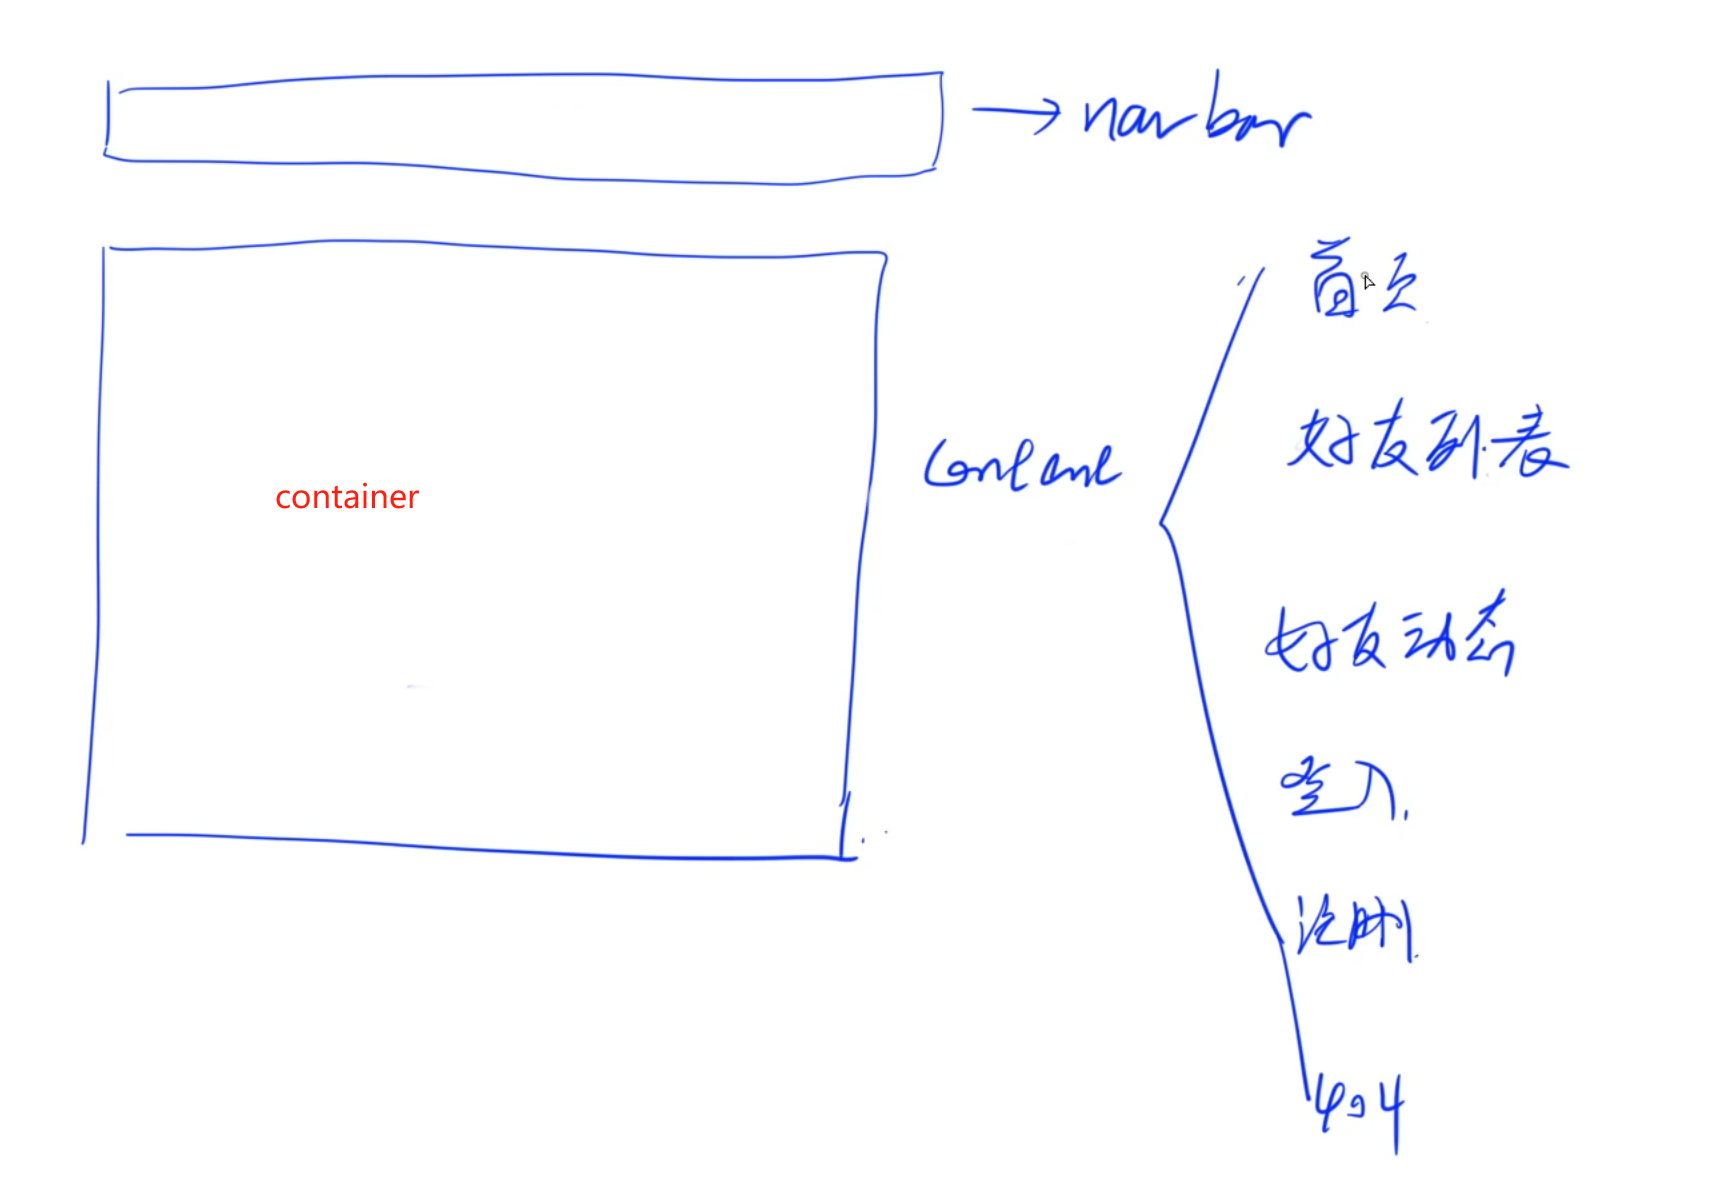
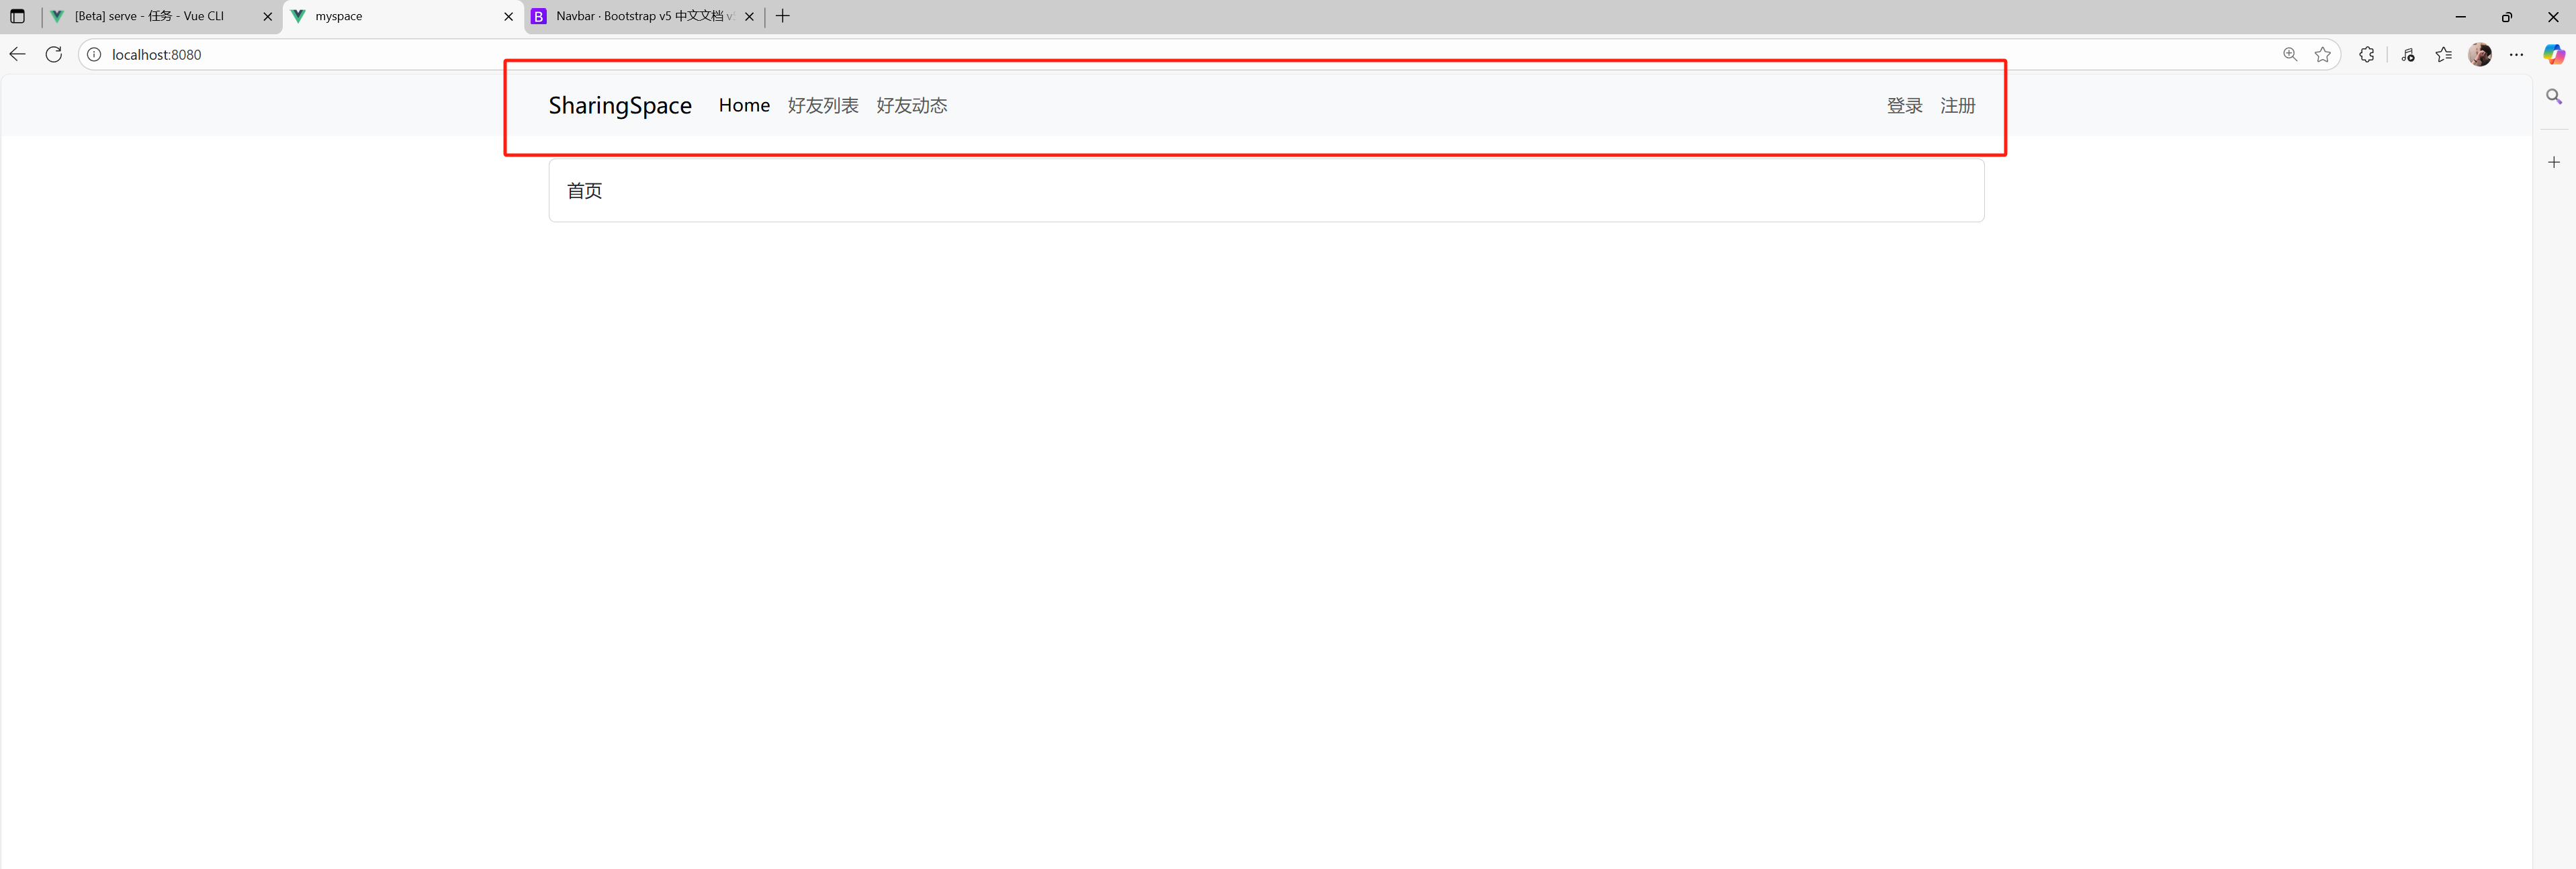
1)NavBar——導航欄
- 負責所有頁面的路由跳轉
- 通過在BootStrap官網找到自己需要的樣式
比如:
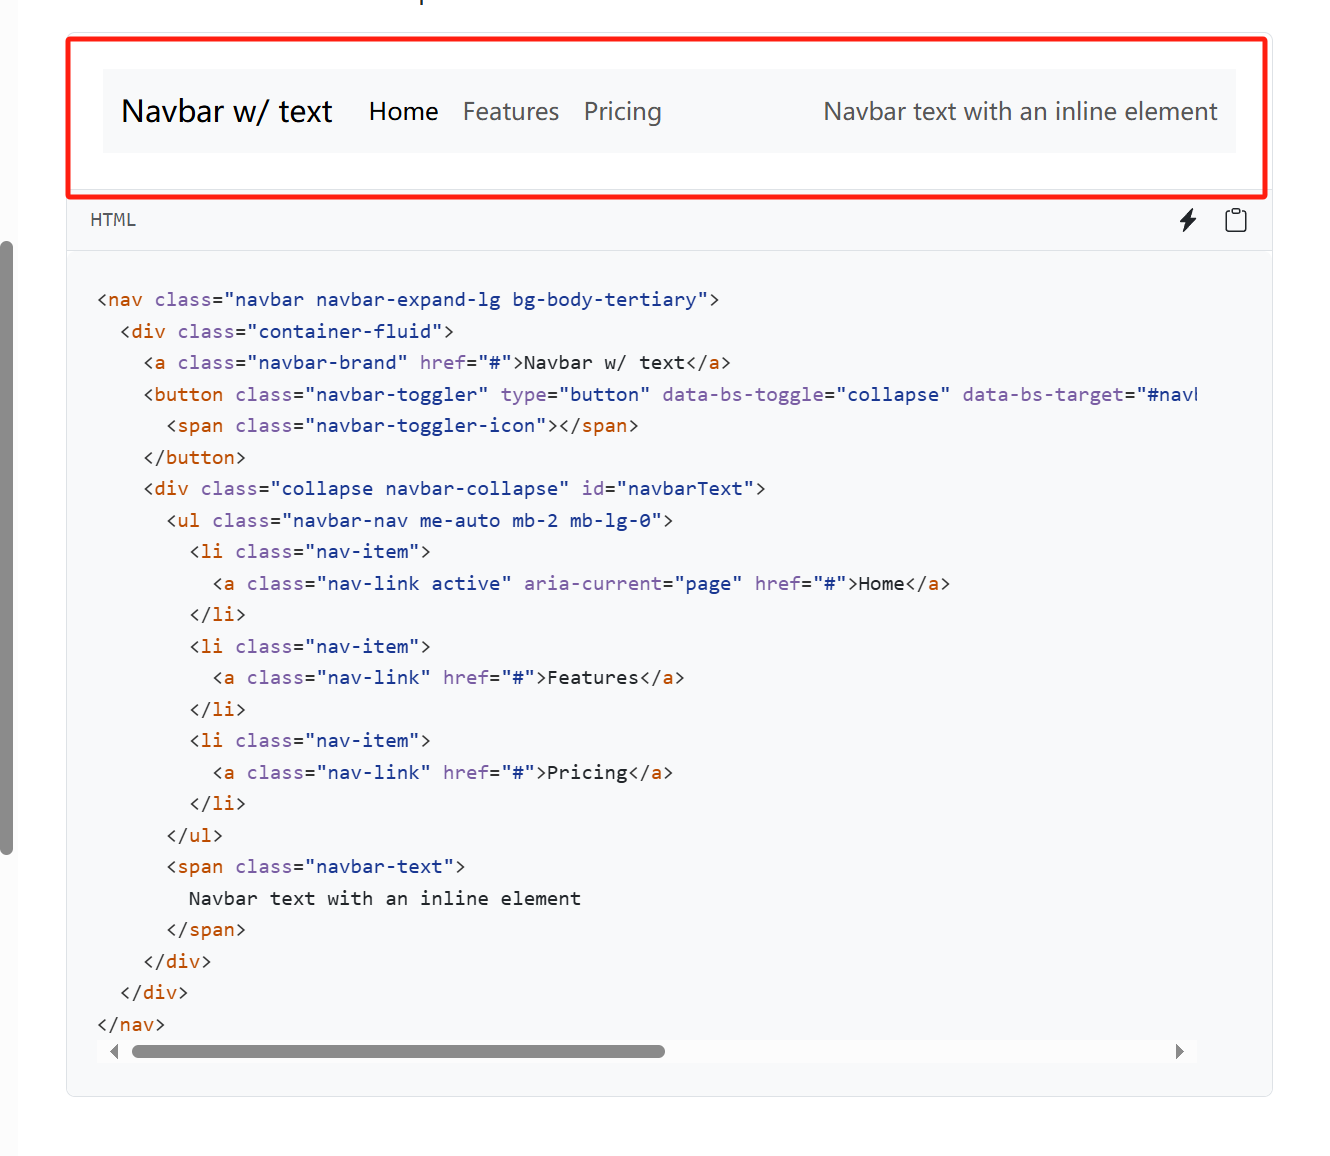
- 1.將樣式代碼直接復制,然后根據自己的頁面設計稍加修改即可:
NavBar.vue:
<template><nav class="navbar navbar-expand-lg bg-body-tertiary"><div class="container"><a class="navbar-brand" href="#">SharingSpace</a><button class="navbar-toggler" type="button" data-bs-toggle="collapse" data-bs-target="#navbarText" aria-controls="navbarText" aria-expanded="false" aria-label="Toggle navigation"><span class="navbar-toggler-icon"></span></button><div class="collapse navbar-collapse" id="navbarText"><ul class="navbar-nav me-auto mb-2 mb-lg-0"><li class="nav-item"><a class="nav-link active" aria-current="page" href="/">Home</a></li><li class="nav-item"><a class="nav-link" href="#">好友列表</a></li><li class="nav-item"><a class="nav-link" href="#">好友動態</a></li></ul><ul class="navbar-nav"><li class="nav-item"><a class="nav-link" href="#">登錄</a></li><li class="nav-item"><a class="nav-link" href="#">注冊</a></li></ul></div></div></nav>
</template><script>
export default {name: "NavBar",
}</script><style scoped></style>
- 2.將NavBar添加到展示組件上:
App.vue:
<template><NavBar/><router-view/>
</template>
<script>
import 'bootstrap/dist/css/bootstrap.css';
import 'bootstrap/dist/js/bootstrap.js';
import NavBar from './components/NavBar.vue';
export default {name: "App",components: {NavBar: NavBar,}
}
</script><style>
</style>- 3.頁面效果:
2)ContentBase——頁面統一容器組件
- 作用是將所有頁面展示在同一個規范下,比如一些共通性的樣式,每個頁面距離NavBar組件的margin-top等
-
使用
<slot></slot>存放父組件傳過來的children - 當需要修改整個頁面布局的展示形式時,只需要統一修改ContentBase就能完成全部頁面的修改
ContenBase.vue:
<template><div class="home"><div class="container"><div class="card"><div class="card-body"><slot></slot></div></div></div></div>
</template><script>
export default {name: "ContentBase",
}
</script><style scoped>
.container {margin-top: 20px;
}
</style>
3)Views——頁面組件
- 由于初期的頁面布局只是名字不同,這里只展示
HomeView的構造,其他頁面結構完全相同
HomeView.vue:
<template><ContentBase>首頁</ContentBase>
</template><script>
import ContentBase from '@/components/ContentBase.vue'export default {name: 'HomeView',components: {ContentBase}
}
</script><style scoped>
</style>
4)router——頁面路由
- 添加不同頁面的路由路徑
- 將所有頁面組件導入,并通過定義router:
path: '/xxx', name: 'xxxx', component: 'xxxxx',來指定不同路徑對應的頁面組件 - 重定向:通過
catchAll(.*)將除上述連接外的所有連接重定向到404
index.js:
import { createRouter, createWebHistory } from 'vue-router'
import HomeView from '../views/HomeView.vue';
import LoginView from '../views/LoginView.vue';
import RegisterView from '../views/RegisterView.vue';
import NotFoundView from '../views/NotFoundView.vue';
import UserListView from '../views/UserListView.vue';
import UserProfileView from '../views/UserProfileView.vue';const routes = [{path: '/',name: 'home',component: HomeView},{path: '/login/',name: 'name-login',component: LoginView},{path: '/register/',name: 'name-register',component: RegisterView},{path: '/userlist/',name: 'name-userlist',component: UserListView},{path: '/userprofile/',name: 'name-userprofile',component: UserProfileView},{path: '/404/',name: 'name-notfound',component: NotFoundView},{path: '/:catchAll(.*)',redirect: '/404/'}
]const router = createRouter({history: createWebHistory(),routes
})
export default router
5)<router-link>——頁面跳轉
- 當添加router后,就能根據對應的地址加載對應的頁面組件進行展示
- 在NavBar中綁定對應的路徑實現頁面跳轉:
NavBar.vue:
<template><nav class="navbar navbar-expand-lg bg-body-tertiary"><div class="container"><a class="navbar-brand" href="#">SharingSpace</a><button class="navbar-toggler" type="button" data-bs-toggle="collapse" data-bs-target="#navbarText" aria-controls="navbarText" aria-expanded="false" aria-label="Toggle navigation"><span class="navbar-toggler-icon"></span></button><div class="collapse navbar-collapse" id="navbarText"><ul class="navbar-nav me-auto mb-2 mb-lg-0"><li class="nav-item"><a class="nav-link active" aria-current="page" href="/">Home</a></li><li class="nav-item"><a class="nav-link" href="/userlist">好友列表</a></li><li class="nav-item"><a class="nav-link" href="/userprofile">好友動態</a></li></ul><ul class="navbar-nav"><li class="nav-item"><a class="nav-link" href="/login">登錄</a></li><li class="nav-item"><a class="nav-link" href="register">注冊</a></li></ul></div></div></nav>
</template><script>
export default {name: "NavBar",
}</script>
<style scoped>
</style>
- 但是這種形式每次會向服務器發送請求,刷新對應的頁面,屬于后端渲染
- vue中提供了前端渲染的標簽:
<router-link>:每次切換頁面時就不會在刷新了,因為第一次請求時已經將所有頁面樣式發送過來了。
NavBar.vue:
<template><nav class="navbar navbar-expand-lg bg-body-tertiary"><div class="container"><router-link class="navbar-brand" :to="{name: 'home'}">SharingSpace</router-link><button class="navbar-toggler" type="button" data-bs-toggle="collapse" data-bs-target="#navbarText" aria-controls="navbarText" aria-expanded="false" aria-label="Toggle navigation"><span class="navbar-toggler-icon"></span></button><div class="collapse navbar-collapse" id="navbarText"><ul class="navbar-nav me-auto mb-2 mb-lg-0"><li class="nav-item"><router-link class="nav-link active" aria-current="page" :to="{name: 'home'}">Home</router-link></li><li class="nav-item"><router-link class="nav-link" :to="{name: 'name-userlist'}">好友列表</router-link></li><li class="nav-item"><router-link class="nav-link" :to="{name: 'name-userprofile'}">好友動態</router-link></li></ul><ul class="navbar-nav"><li class="nav-item"><router-link class="nav-link" :to="{name: 'name-login'}">登錄</router-link></li><li class="nav-item"><router-link class="nav-link" :to="{name: 'name-register'}">注冊</router-link></li></ul></div></div></nav>
</template><script>
export default {name: "NavBar",
}</script>
<style scoped>
</style>
5.頁面功能實現
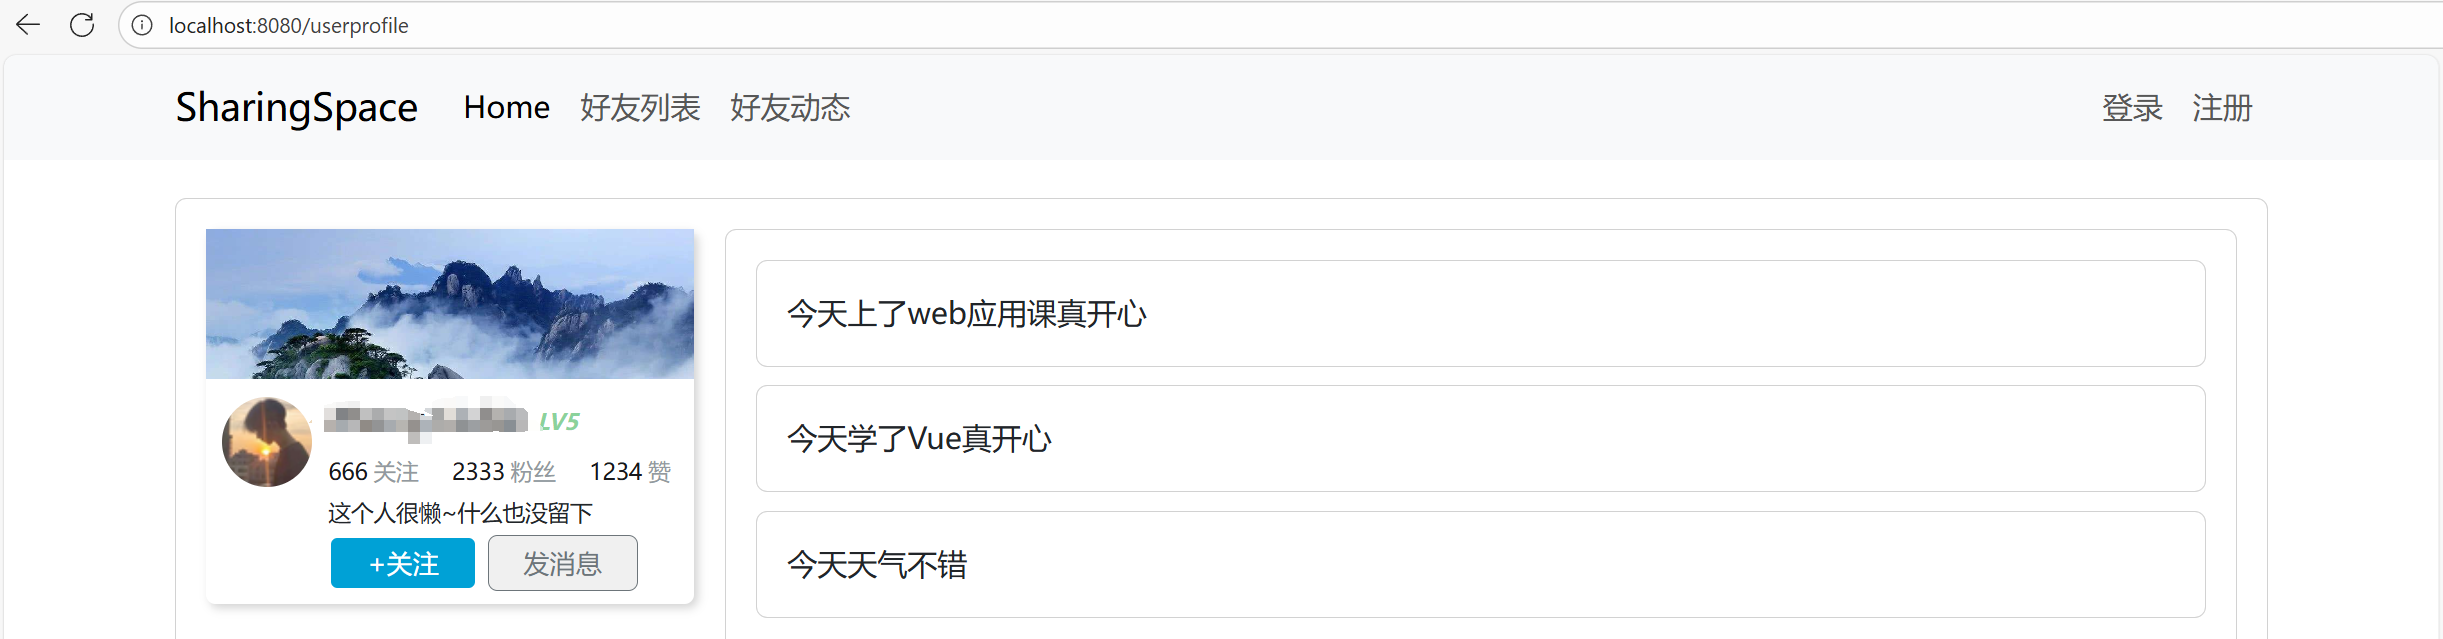
1)UserProfileView——用戶個人空間
- 用戶個人空間總共包含三個模塊: 用戶信息,用戶歷史的動態,編輯動態模塊
- 使用bootstarp的grid布局來規劃頁面:用戶信息占3份,歷史動態占9份,編輯動態模塊也是占3份,緊跟在用戶信息下面
- 首先是實現
<UserInfo> 和<UserProfileContent>組件,將其添加到當前個人空間組件中:
1.UserProfileView: 用戶個人空間總組件
<template><ContentBase><div class="row"><div class="col-3"><UserInfo /></div><div class="col-9"><UserProfileContent /></div></div></ContentBase>
</template><script>
import ContentBase from '@/components/ContentBase.vue';
import UserInfo from '@/components/UserInfo.vue';
import UserProfileContent from '@/components/UserProfileContent.vue';export default {name: 'UserProfileView',components: {ContentBase,UserInfo,UserProfileContent},
}
</script><style scoped></style>
2.UserInfo:用戶個人信息子組件
- 包含用戶名稱、頭像、粉絲數、點贊數、收藏數
<template><div class="row"><div class="col-3"><div class="user-card"><div class="user-card-head"></div><div class="user-card-body"><div class="user-card-body-left"><img src="https://cdn.acwing.com/media/user/profile/photo/450127_md_da0516e621.jpg" alt=""></div><div class="user-card-body-right"><div class="user-card-body-right-text"><div class="user-card-body-right-text-username">Liubin Zhong<span>LV5</span></div><div class="user-card-body-right-text-reputation"><span class="user-card-body-right-text-reputation-item"><span>58</span><span>收藏</span></span><span class="user-card-body-right-text-reputation-item"><span>32</span><span>粉絲</span></span><span class="user-card-body-right-text-reputation-item"><span>15</span><span>贊</span></span></div><div class="user-card-body-right-text-discreption">這個人很懶~什么也沒留下</div></div><div class="user-card-body-right-button"><button>+關注</button><button>發消息</button></div></div></div></div></div><div class="col-9"></div></div>
</template><script>export default {name: "UserInfo",
}
</script><style scoped>img {border-radius: 50%;
}.user-card {width: 300px;height: 200px;box-shadow: 2px 2px 5px lightgrey;border-radius: 5px;
}.user-card-head {background-image: url('/src/assets/mountain.jpg');background-size: cover;width: 100%;height: 80px;
}.user-card-body {width: 300px;height: calc(100% - 85px);box-sizing: border-box;padding-top: 10px;
}.user-card-body-left {width: 65px;height: 100%;float: left;text-align: center;
}.user-card-body-left>img {border-radius: 50%;width: 48px;height: 48px;
}.user-card-body-right {width: calc(100% - 70px);height: 100%;float: left;
}.user-card-body-right-text {width: 100%;height: 70%;
}.user-card-body-right-text-username {font-size: 16px;color: #222222;font-weight: bold;padding: 0px 0px 10px 0px;
}.user-card-body-right-text-username>span {font-size: 12px;color: #8BD29B;font-style: italic;
}.user-card-body-right-text-reputation {width: 276px;height: 22px;padding: 0px 0px 10px 0px;font-size: 12px;color: #9499A0;box-sizing: border-box;line-height: 12px;
}.user-card-body-right-text-reputation-item {margin-right: 18px;
}.user-card-body-right-text-reputation-item>span:nth-child(1) {font-size: 12px;color: #18191c;padding: 0px 3px 0px 0px;
}.user-card-body-right-text-reputation-item>span:nth-child(2) {font-size: 12px;color: #9299A0;
}.user-card-body-right-text-discreption {margin-top: 1px;width: 200px;height: 10px;font-size: 12px;line-height: 10px;
}.user-card-body-right-button>button {width: 100px;height: 30px;font-size: 14px;border-radius: 5px;border: none;cursor: pointer;
}.user-card-body-right-button>button:nth-child(1) {color: white;background-color: #00A1D6;padding: 1px 6px;float: left;margin-right: 5px;
}.user-card-body-right-button>button:nth-child(1):hover {background-color: #00B5E5;transition: 700ms;
}.user-card-body-right-button>button:nth-child(2) {padding: 1px 6px;color: #6D757A;float: left;border: #6D757A solid 1px;
}.user-card-body-right-button>button:nth-child(2):hover {border-color: #00B5E5;color: #00B5E5;transition: 700ms;
}
</style>
3.UserProfileContent:用戶歷史動態
- 展示用戶的歷史動態信息內容
<template><div class="card"><div></div></div>
</template><script>export default {name: "UserProfileContent",
}
</script><style scoped></style>
2)組件之間的數據交互
-
setup(props, context):初始化變量、函數ref:定義變量,可以用.value屬性重新賦值reactive:定義對象,不可重新賦值props:存儲父組件傳遞過來的數據context.emit():觸發父組件綁定的函數
-
在父組件中通過
setup(),定義一個user,封裝用戶的個人信息,方便傳遞給UserInfo子組件獲取數據 -
父組件給子組件傳遞數據是通過
props傳遞,而子組件給父組件傳遞數據是通過觸發父組件的函數event,來修改父組件中的數據,因為數據全部是定義在了父組件中。
1.父組件給子組件傳遞信息——子組件中展示用戶的個人信息
- 父組件:用戶個人空間
- 傳遞信息是通過給子組件綁定一個封裝的對象:
:user="user",這里的: == v.bind:,是一個簡寫。
UserProfile.vue:
<template><ContentBase><div class="row"><div class="col-3"><UserInfo :user="user"/></div><div class="col-9"><UserProfileContent /></div></div></ContentBase>
</template><script>
import ContentBase from '@/components/ContentBase.vue';
import UserInfo from '@/components/UserInfo.vue';
import UserProfileContent from '@/components/UserProfileContent.vue';
import { reactive } from 'vue';export default {name: 'UserProfileView',components: {ContentBase,UserInfo,UserProfileContent},setup() {const user = reactive({id: 1,username: "vue hello",lastName: "Vue",firstName: "hello",followCount: 666,fans: 2333,favoriaties: 1234,is_followed: true,});return {user: user,}}
}
</script>
<style scoped></style>
- 子組件通過
user獲取到封裝的值 - 如果需要對數據進行拼接等運算操作,則需要將
user放到props中通過setup()函數重新定義一個值作為運算的返回值:
UserInfo.vue::
<template><div class="row"><div class="col-3"><div class="user-card"><div class="user-card-head"></div><div class="user-card-body"><div class="user-card-body-left"><img src="https://cdn.acwing.com/media/user/profile/photo/450127_md_da0516e621.jpg" alt=""></div><div class="user-card-body-right"><div class="user-card-body-right-text"><div class="user-card-body-right-text-username">{{fullName}}<span>LV5</span></div><div class="user-card-body-right-text-reputation"><span class="user-card-body-right-text-reputation-item"><span>{{ user.followCount }}</span><span>關注</span></span><span class="user-card-body-right-text-reputation-item"><span>{{ user.fans }}</span><span>粉絲</span></span><span class="user-card-body-right-text-reputation-item"><span>{{ user.favoriaties}}</span><span>贊</span></span></div><div class="user-card-body-right-text-discreption">這個人很懶~什么也沒留下</div></div><div class="user-card-body-right-button"><button @click="follow" v-if="!user.is_followed">+關注</button><button @click="unfollow" v-if="user.is_followed">取消關注</button><button>發消息</button></div></div></div></div></div><div class="col-9"></div></div>
</template><script>
import { computed } from 'vue';
export default {name: "UserInfo",props: {user: {type: Object,required: true,},},setup(props) {let fullName = computed(() => props.user.lastName + ' ' + props.user.firstName);const follow = () => {}const unfollow = () => {}return {fullName,follow,unfollow,}}
}
</script><style scoped>
//此處先省略,避免重復篇幅
</style>
2.子組件通過觸發父組件的函數操作數據——子組件中點擊關注按鈕需要將關注數進行+ 1
- 1.
UserProfile.vue:在父組件中定義函數,傳遞到子組件中
<template><ContentBase><div class="row"><div class="col-3"><UserInfo @follow="follow" @unfollow="unfollow" :user="user"/></div><div class="col-9"><UserProfileContent /></div></div></ContentBase>
</template><script>
import ContentBase from '@/components/ContentBase.vue';
import UserInfo from '@/components/UserInfo.vue';
import UserProfileContent from '@/components/UserProfileContent.vue';
import { reactive } from 'vue';export default {name: 'UserProfileView',components: {ContentBase,UserInfo,UserProfileContent},setup() {const user = reactive({id: 1,username: "hello vue",lastName: "Vue",firstName: "Hello",followCount: 666,fans: 2333,favoriaties: 1234,is_followed: false,});const follow = () => {if (user.is_followed) return;user.is_followed = true;user.fans ++;};const unfollow = () => {if (!user.is_followed) return;user.is_followed = false;user.fans --;};return {user: user,follow,unfollow,}}
}
</script><style scoped></style>- 2.
UserInfo.vue:子組件中通過context獲取到父組件傳遞過來的函數,從而在自定義的函數中通過context.emit()觸發對應的父組件函數進行數據的操作 - 將子組件中自定義的函數綁定到按鈕上,點擊按鈕觸發自定義函數,而自定義函數中會觸發父組件傳遞過來的函數,從而對父組件中存儲的數據進行修改。
<template><div class="row"><div class="col-3"><div class="user-card"><div class="user-card-head"></div><div class="user-card-body"><div class="user-card-body-left"><img src="https://cdn.acwing.com/media/user/profile/photo/450127_md_da0516e621.jpg" alt=""></div><div class="user-card-body-right"><div class="user-card-body-right-text"><div class="user-card-body-right-text-username">{{fullName}}<span>LV5</span></div><div class="user-card-body-right-text-reputation"><span class="user-card-body-right-text-reputation-item"><span>{{ user.followCount }}</span><span>關注</span></span><span class="user-card-body-right-text-reputation-item"><span>{{ user.fans }}</span><span>粉絲</span></span><span class="user-card-body-right-text-reputation-item"><span>{{ user.favoriaties}}</span><span>贊</span></span></div><div class="user-card-body-right-text-discreption">這個人很懶~什么也沒留下</div></div><div class="user-card-body-right-button"><button @click="follow" type="button"  v-if="!user.is_followed">+關注</button><button v-on:click="unfollow" type = "button" v-if="user.is_followed">取消關注</button><button>發消息</button></div></div></div></div></div><div class="col-9"><button v-on:click="follow" type="button">去哪</button></div></div>
</template><script>
import { computed } from 'vue';
export default {name: "UserInfo",props: {user: {type: Object,required: true,},},setup(props, context) {let fullName = computed(() => props.user.lastName + ' ' + props.user.firstName);const follow = () => {console.log("follow");context.emit('follow');};const unfollow = () => {console.log('unfollow');context.emit('unfollow');};return {fullName,follow,unfollow}}
}
</script><style scoped>.user-card-body-right-button>button {width: 100px;height: 30px;font-size: 14px;border-radius: 5px;border: none;cursor: pointer;position: relative;z-index: 9999;border: 2px solid;
}
</style>
- Vue中綁定一個事件使用
v-on:click="xxx",可以簡寫成@click="xxx" - 觸發父組件傳遞的函數使用
context.emit() - 總的來說就是:數據在哪定義的在哪修改
遇到的一個小問題:
- 我是直接將之前寫的一個模仿B站的小卡片直接作為個人信息的樣式展示的
- 但是獲取不到按鈕的點擊事件觸發:
- 調了半天:最后發現是由于之前的樣式中
.user-card-body-right里用了float: left;和一些固定高度的子元素(例如.user-card-body-right-text高度寫了 70%),這樣會導致.user-card-body-right-text的容器區域蓋住了下面的按鈕。雖然它是透明的,但實際上它在按鈕上方,占據了點擊事件。所以看到按鈕在頁面上,鼠標點擊的時候,事件卻落在透明的文字容器上 → 按鈕沒反應。 - 解決方案:我這里使用的是簡單方法:通過
position: relative + z-index。只有在元素是定位元素(position: relative/absolute/fixed/sticky)時,z-index才會生效。
設置了position: relative; z-index: 9999;,把按鈕抬到了“最上層”,高于之前擋住它的元素。所以按鈕又能被鼠標點到了。 - 較優的解決方案是將float布局改成flex布局,就不需要靠
z-index來壓層了
- 目前的頁面布局:
3)數據對象添加展示——帖子展示
- 1.在父組件中將帖子封裝成一個數組對象:
UserProfile.vue:
const posts = reactive({count: 3,posts: [{id: 1,userId: 1,content: "今天上了web應用課真開心",},{id: 2,userId: 1,content: "今天學了Vue真開心",},{id: 3,userId: 1,content: "今天天氣不錯",},]});
- 2.展示帖子:
- 使用
v-for="post in posts.posts" :key="post.id"來遍歷傳過來的帖子對象數組,只展示其中post的content部分:
UserProfileContent.vue:
<template><div class="card"><div class="card-body"><div v-for="post in posts.posts" :key="post.id"><div class="card single-post"><div class="card-body">{{ post.content }}</div></div></div></div></div>
</template><script>export default {name: "UserProfileContent",props: {posts: {type: Object,required: true,},}
}
</script><style scoped>
.single-post {margin-bottom: 10px;
}
</style>
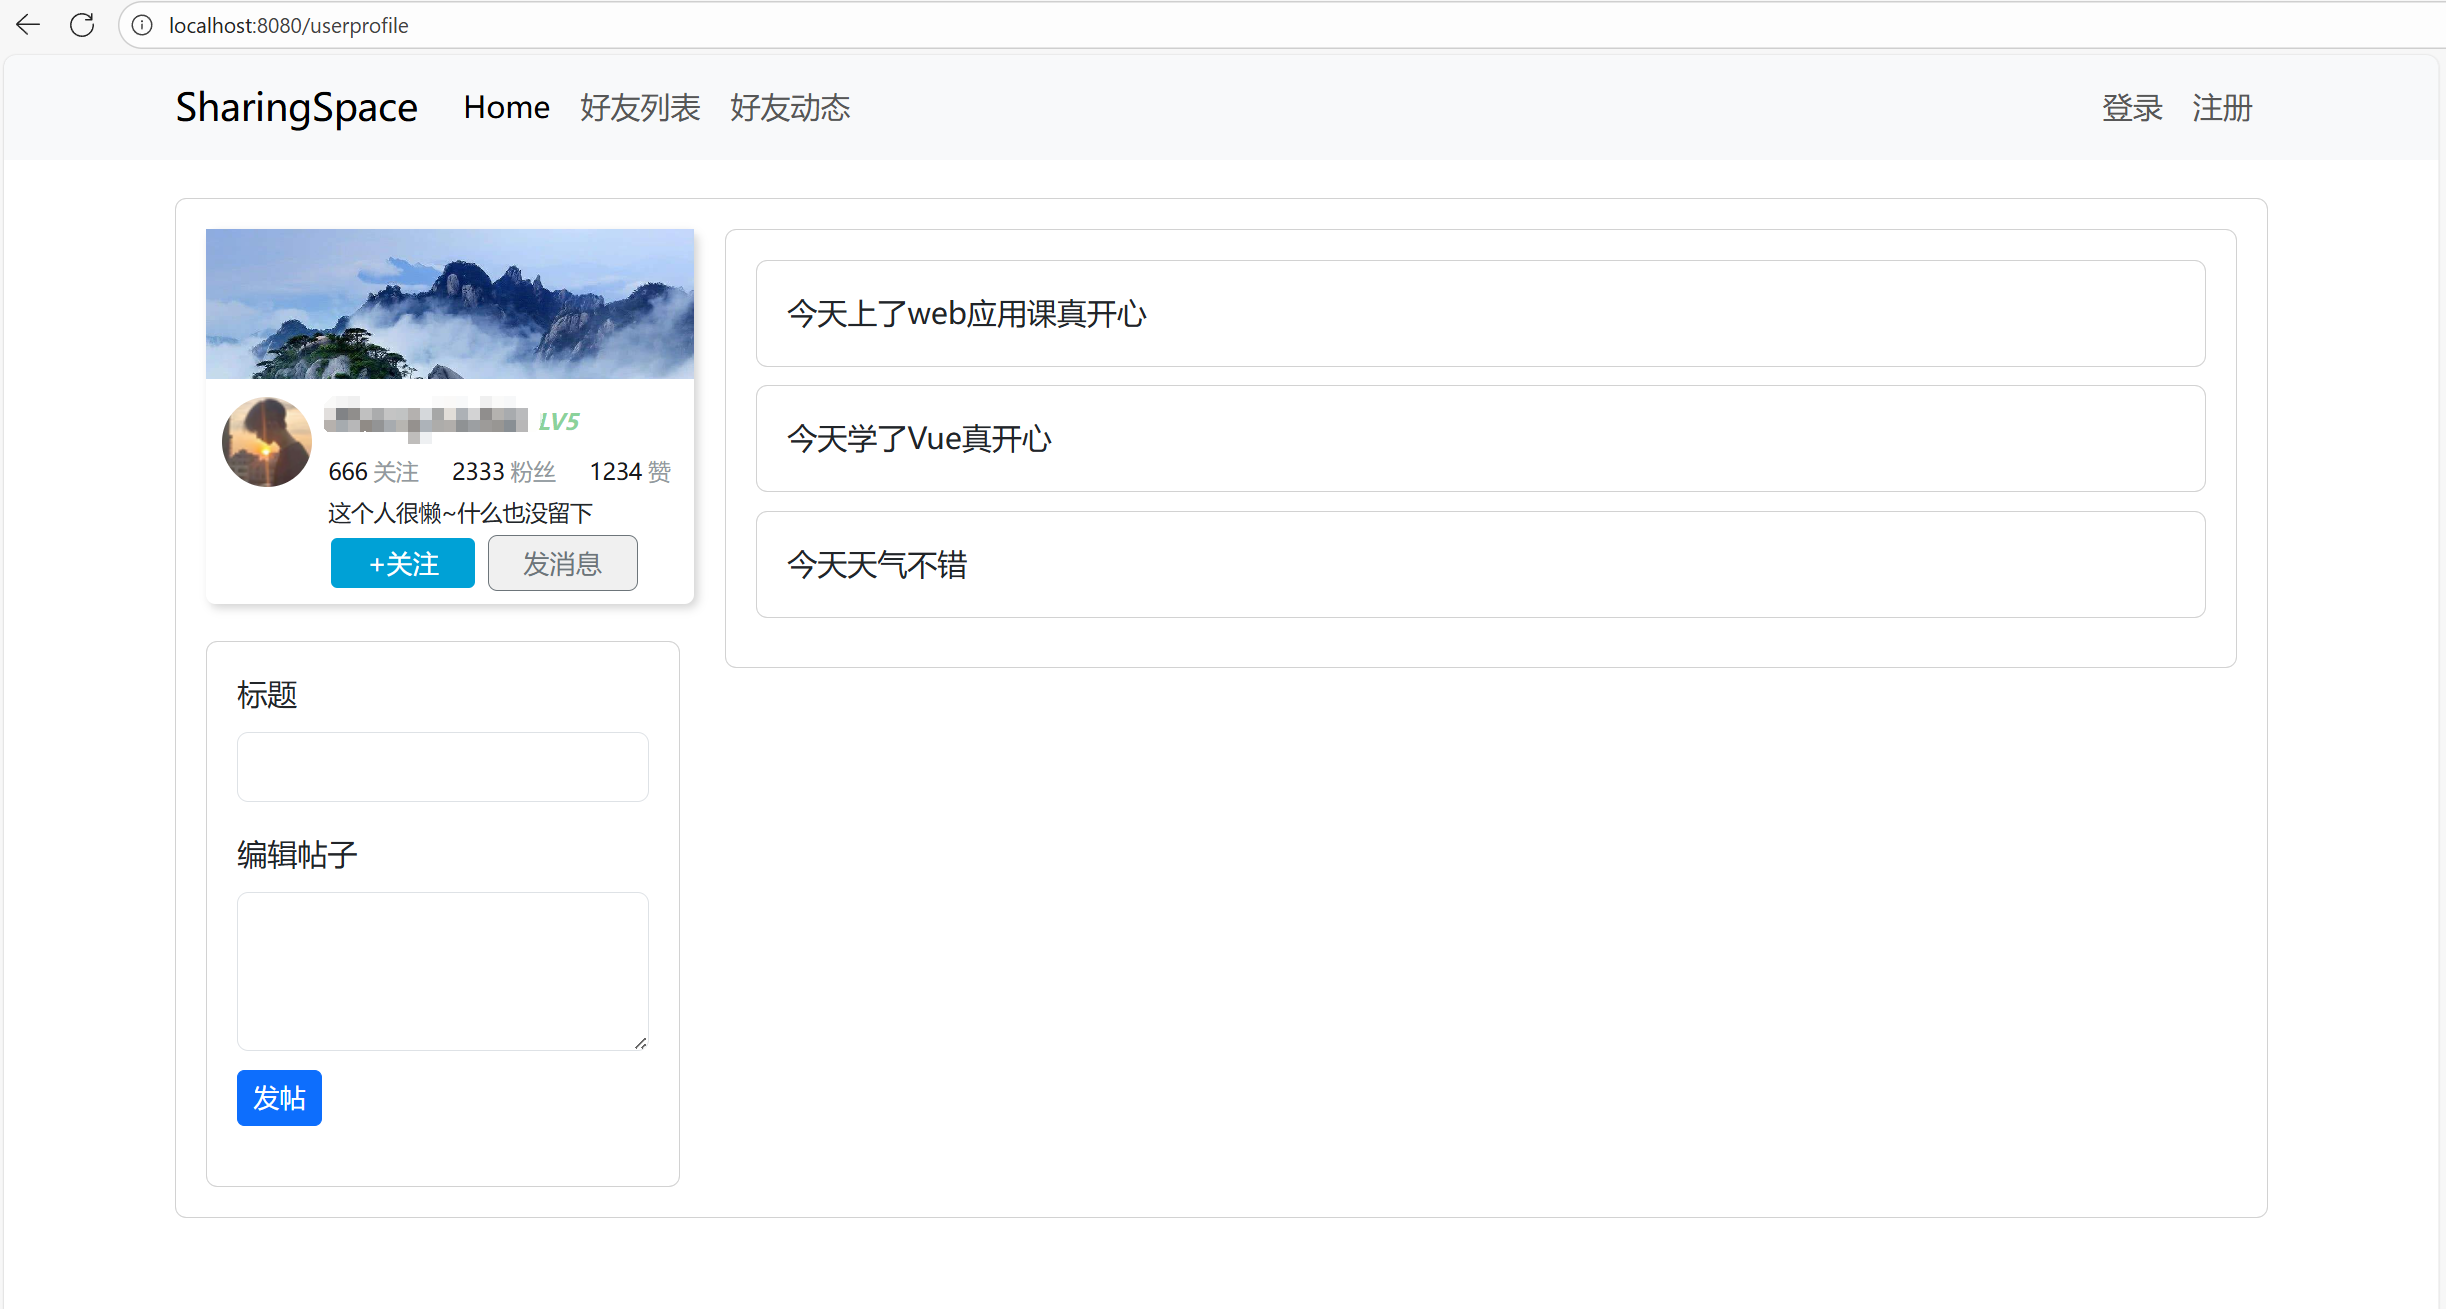
*3.完善UserEditProfile.vue發帖編輯區:
在bootstrap官網找到對應的編輯樣式,直接復制過來修改:
<template><div class="card edit-field"><div class="card-body"><div class="mb-3"><label for="edit-title" class="form-label">標題</label><input type="email" class="form-control" id="exampleFormControlInput1"></div><div class="mb-3"><label for="edit-post" class="form-label">編輯帖子</label><textarea v-model="content" class="form-control" id="exampleFormControlTextarea1" rows="3"></textarea><button  type="button" class="btn btn-primary btn-sm" >發帖</button></div></div></div>
</template><script>
import { ref } from 'vue';export default {name: "UserEditProfile",setup(props, context) {let content = ref('');return {content,}}
}
</script><style scoped>.edit-field {margin-top: 20px;
}button {margin-top: 10px;
}
</style>- 頁面展示:
4)動態對象添加——發帖并展示
- 在發帖編輯區編輯好帖子之后,點擊發帖會上傳到帖子展示區
- 這就涉及到
UserEditProfile區需要添加一個帖子對象到帖子數組中 - 屬于子組件觸發父組件傳遞的函數來修改數據
- 1.首先通過
v-model="content"獲取到帖子編輯區的內容,作為參數傳遞給子組件中的submit_post函數 - 2.點擊發帖按鈕綁定子組件的
submit_post函數,點擊時,觸發子組件函數并傳入content表示帖子的內容,從而觸發父組件傳遞的submit_post函數,并傳入content,而父組件中,如果該函數觸發則會將content封裝成一個貼子對象,通過unshift()添加到帖子數組的頂部,完成最新的動態展示
UserEditProfile.vue:
<template><div class="card edit-field"><div class="card-body"><div class="mb-3"><label for="edit-title" class="form-label">標題</label><input type="email" class="form-control" id="exampleFormControlInput1"></div><div class="mb-3"><label for="edit-post" class="form-label">編輯帖子</label><textarea v-model="content" class="form-control" id="exampleFormControlTextarea1" rows="3"></textarea><button @click="submit_post" type="button" class="btn btn-primary btn-sm" >發帖</button></div></div></div>
</template>
<script>
import { ref } from 'vue';export default {name: "UserEditProfile",setup(props, context) {let content = ref('');const submit_post = () => {context.emit("submit_post", content.value);content.value = "";}return {content,submit_post,}}
}
</script>
<style scoped>
.edit-field {margin-top: 20px;
}
button {margin-top: 10px;
}
</style>
UserProfileView.vue:
<template><ContentBase><div class="row"><div class="col-3"><UserInfo @follow="follow" @unfollow="unfollow" :user="user"/><UserEditProfileVue @submit_post="submit_post"/></div><div class="col-9"><UserProfileContent :posts="posts" /></div></div></ContentBase>
</template><script>
import ContentBase from '@/components/ContentBase.vue';
import UserInfo from '@/components/UserInfo.vue';
import UserProfileContent from '@/components/UserProfileContent.vue';
import { reactive } from 'vue';
import UserEditProfileVue from '@/components/UserEditProfile.vue';export default {name: 'UserProfileView',components: {ContentBase,UserInfo,UserProfileContent,UserEditProfileVue},setup() {const user = reactive({id: 1,username: "zhongliubin",lastName: "Zhong",firstName: "Liubin",followCount: 666,fans: 2333,favoriaties: 1234,is_followed: false,});const posts = reactive({count: 3,posts: [{id: 1,userId: 1,content: "今天上了web應用課真開心",},{id: 2,userId: 1,content: "今天學了Vue真開心",},{id: 3,userId: 1,content: "今天天氣不錯",},]});const follow = () => {if (user.is_followed) return;user.is_followed = true;user.fans ++;};const unfollow = () => {if (!user.is_followed) return;user.is_followed = false;user.fans --;};const submit_post = (content) => {if (content == '') return;posts.count ++;posts.posts.unshift({id: posts.count,userId: 1,content: content,});};return {user: user,follow,unfollow,posts,submit_post,}}
}
</script>
<style scoped>
</style>
- 頁面展示:標題區并未完成,后續如果有時間再完善

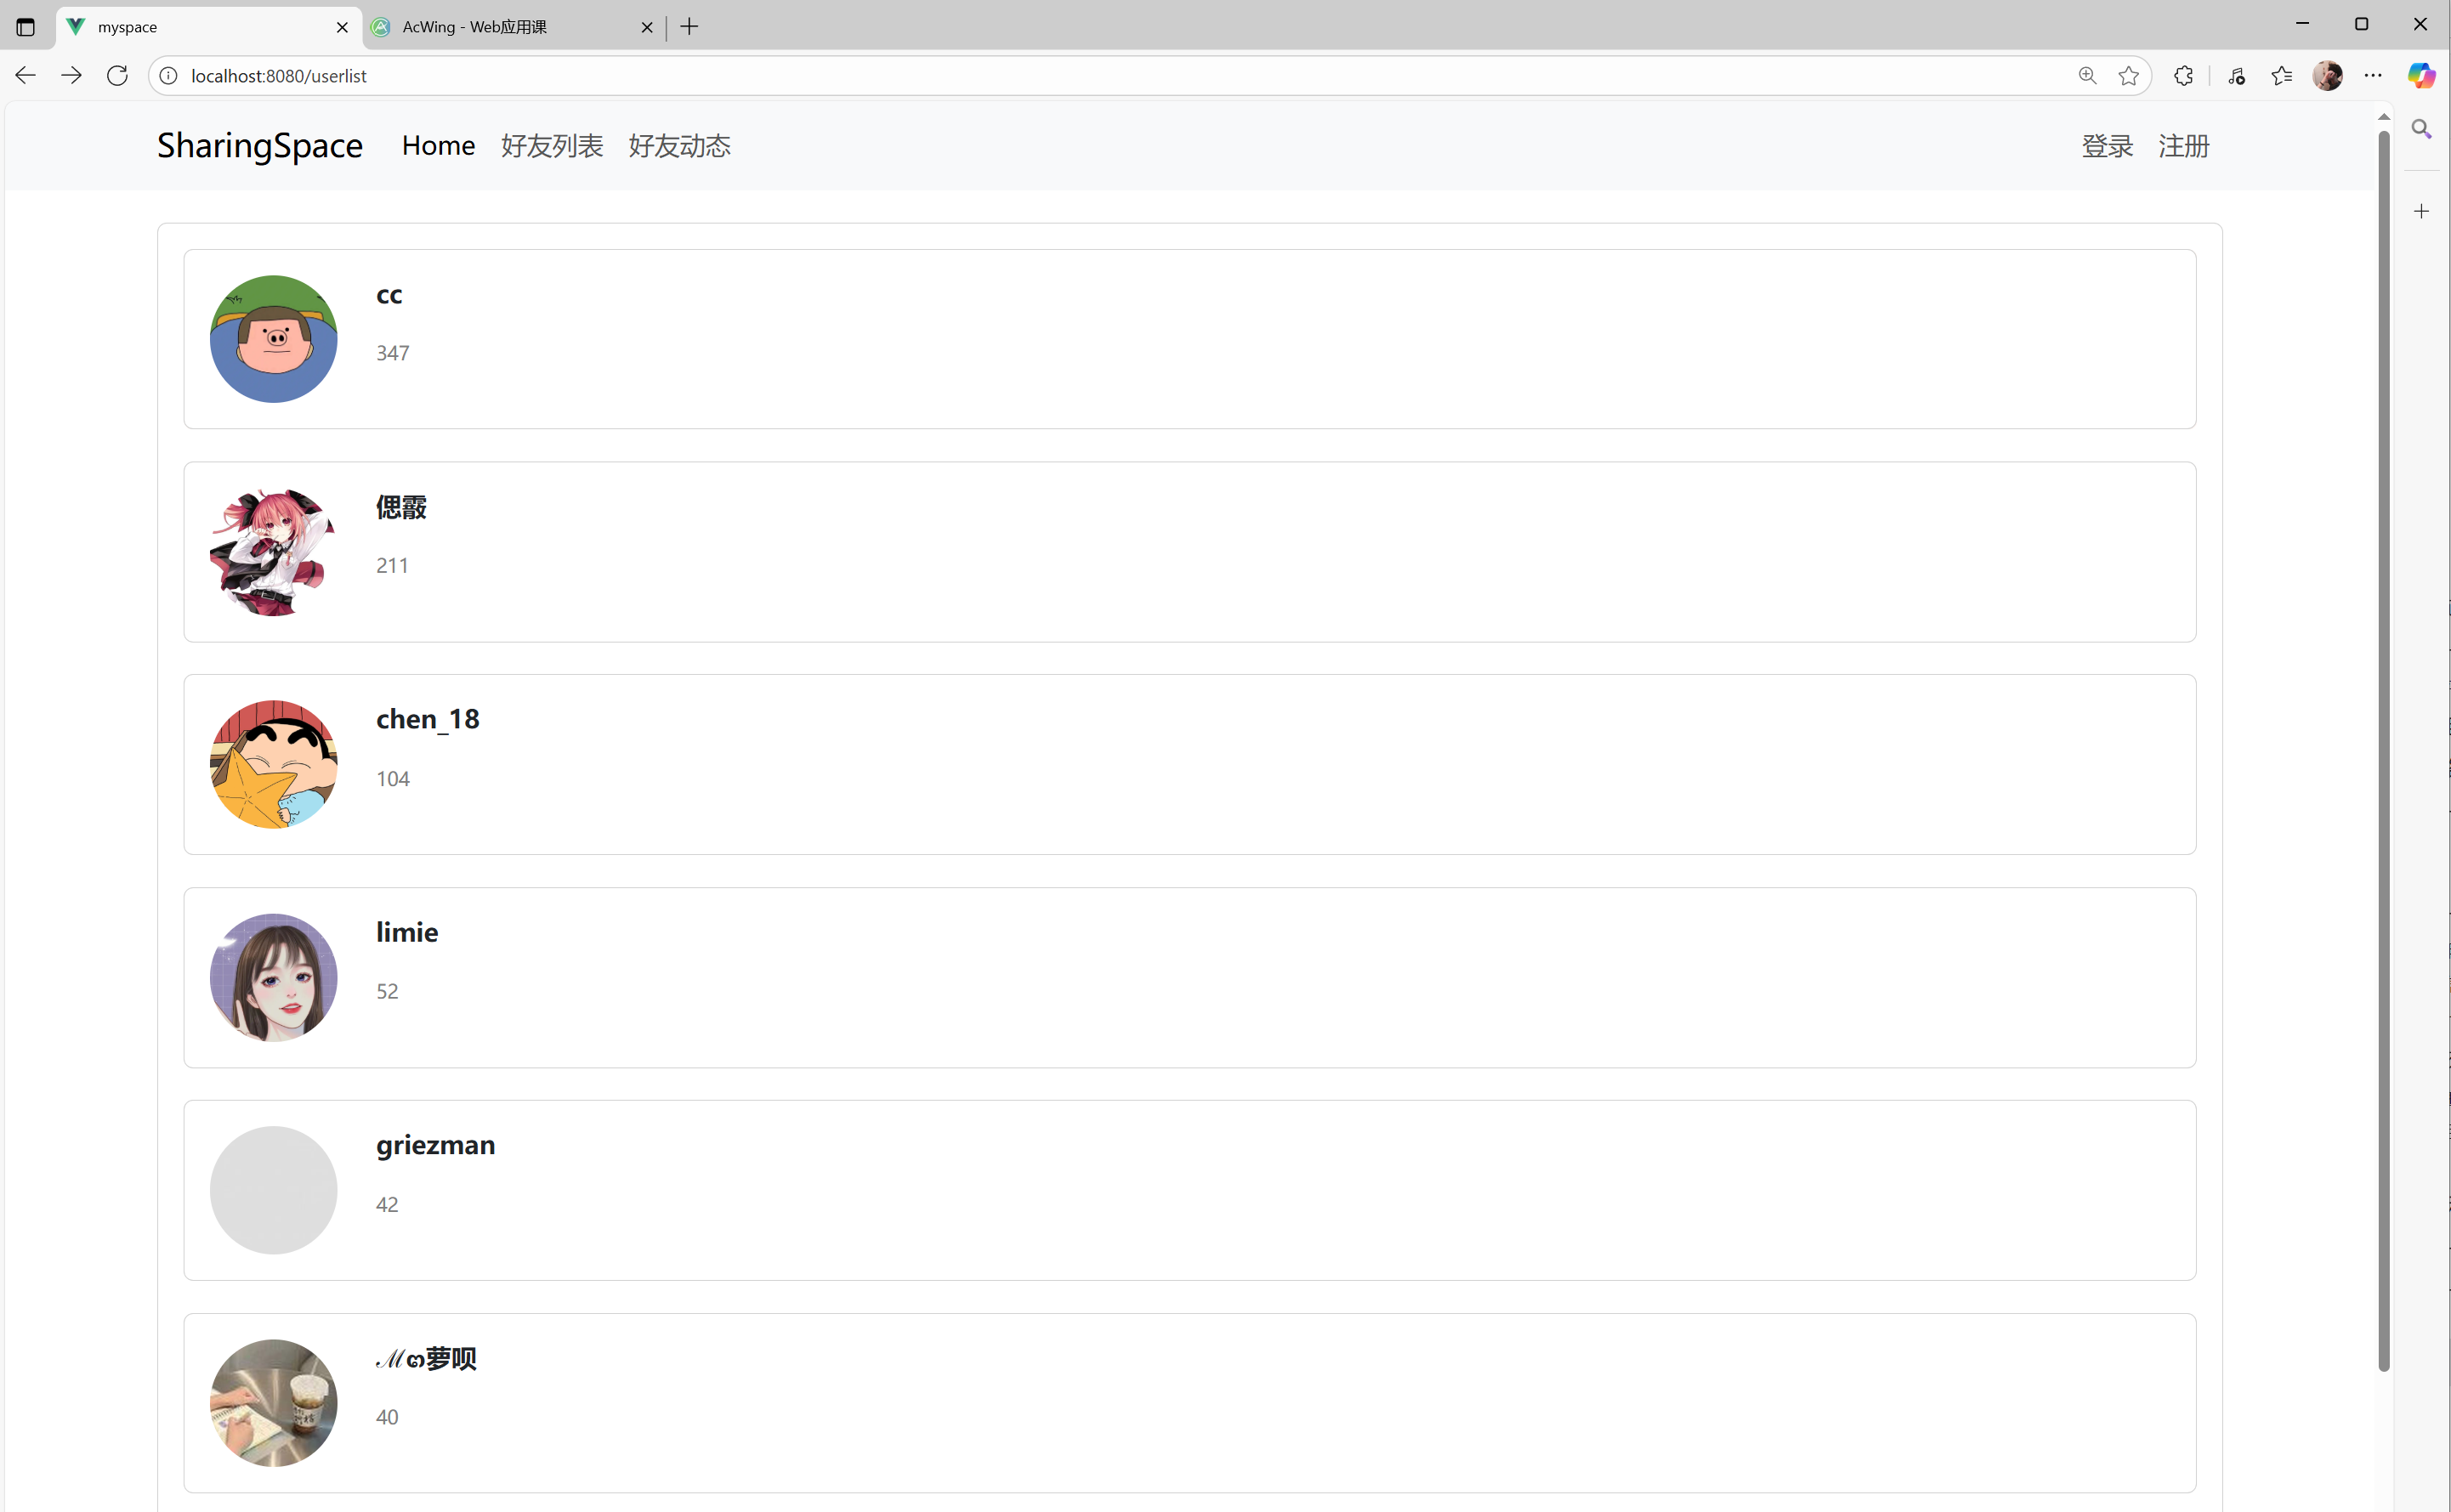
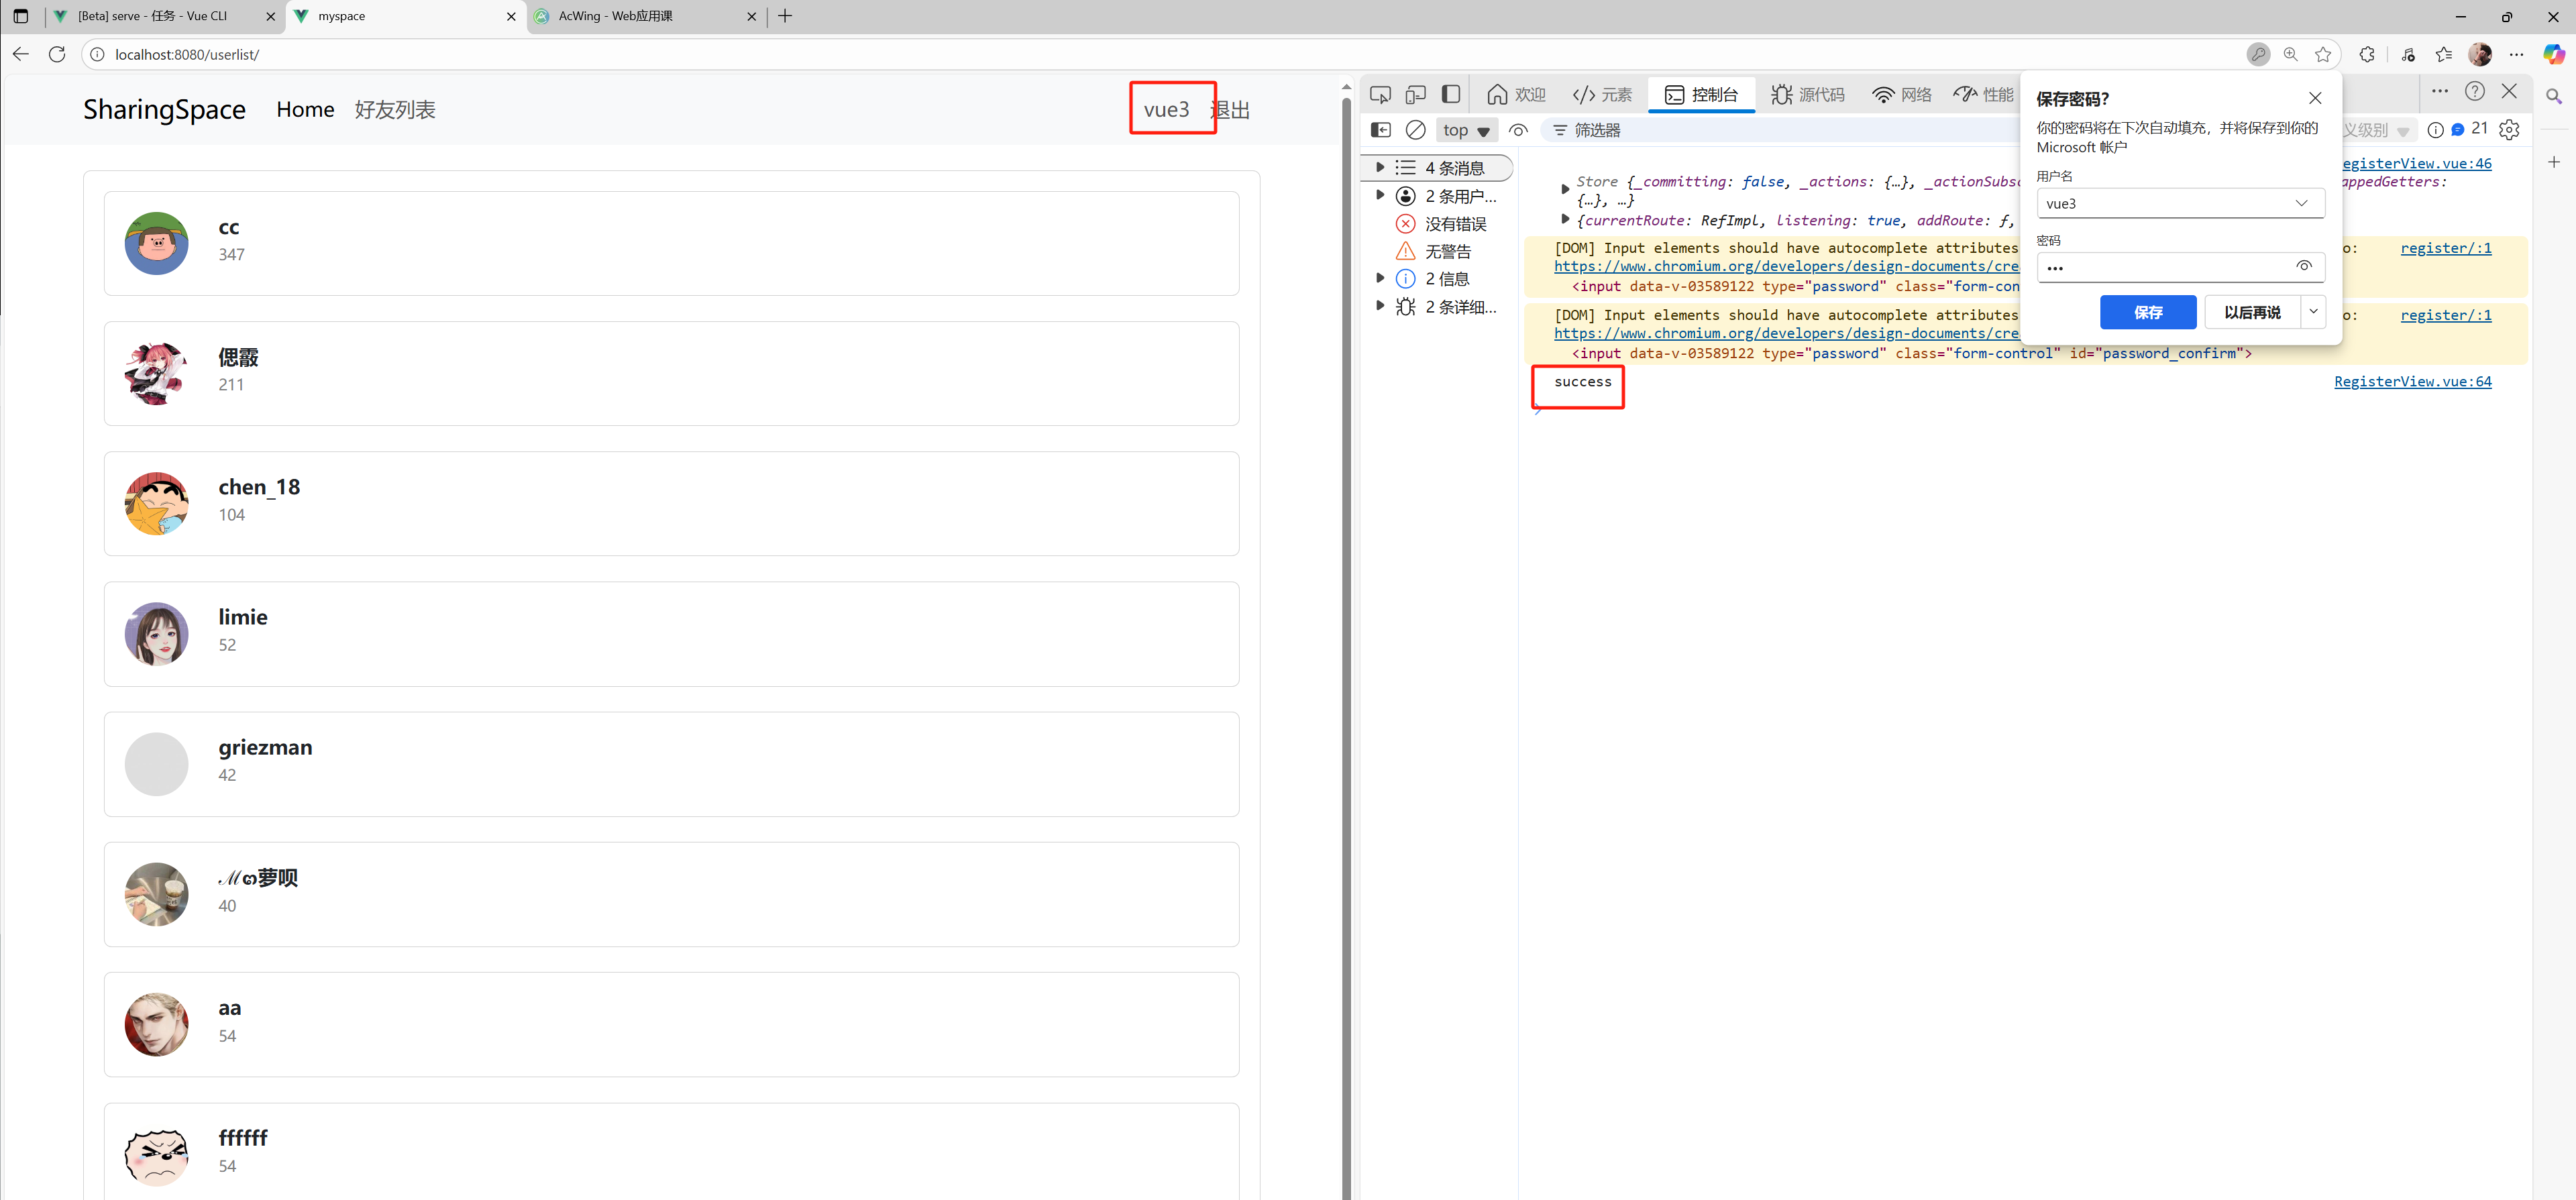
5)好友列表展示——模擬從云端獲取好友數據
- 模擬從云端獲取好友數據并展示
- 這里直接使用課程提供的API從云端獲取數據,如果有興趣,可以自己在服務器中實現該API
- 在
setup()中使用ref定義一個user數組,用于接收請求返回的user列表 - 然后將user列表中的信息通過
v-for="user in users" :key="user.id"獲取到每個user的頭像、用戶名、粉絲數用于信息展示
UserListProfile.vue:
<template><ContentBase><div class="card" v-for="user in users" :key="user.id"><div class="card-body"><div class="row"><div class="col-1"><img class="img-fluid" v-bind:src="user.photo" alt=""></div><div class="col-11"><div class="username">{{ user.username }} </div><div class="followcount">{{ user.followerCount }}</div></div></div></div></div></ContentBase>
</template><script>
import ContentBase from '@/components/ContentBase.vue'
import $ from 'jquery';
import { ref } from 'vue';export default {name: 'UserListView',components: {ContentBase},setup() {let users = ref([]);$.ajax({url: 'https://app165.acapp.acwing.com.cn/myspace/userlist/',type: "GET",success(resp) {users.value = resp;}});return {users,};}
}
</script><style scoped>
img {border-radius: 50%;
}.username {font-weight: bold;height: 50%;
}.followcount {font-size: 12px;height: 50%;color: gray;
}.card {margin-bottom: 20px;cursor: pointer;
}.card:hover {box-shadow: 2px 2px 10px lightsalmon;transition: 500ms;
}
</style>
- 頁面效果:
6)訪問不同好友空間——鏈接添加參數訪問不同id的空間頁面
- 在訪問空間頁面時,是通過
userId來訪問,于是路徑中需要添加對應的參數 - 在
router.js添加:
{path: '/userprofile/:userId/',name: 'name-userprofile',component: UserProfileView},
如何取得鏈接中的參數
- 1.NavBar中,訪問時需要用到參數,則需要設置訪問路徑的參數:
params: {}
<li class="nav-item"><router-link class="nav-link" :to="{name: 'name-userprofile', params: {userId: 2}}">好友動態</router-link>
</li>
- 2.使用
useRoute從而獲取到鏈接中的參數:
const route = useRoute();console.log(route.params.userId);
7)登錄
- 表單提交:
@submit.prevent="login",表單提交事件為login,并且阻止默認的表單提交行為 - 前端模擬:
<template><ContentBase><div class="row justify-content-center"><div class="col-3"><form @submit.prevent="login"><div class="mb-3"><label for="username" class="form-label">用戶名</label><input v-model="username" type="text" class="form-control" id="username"></div><div class="mb-3"><label for="password" class="form-label">密碼</label><input v-model="password" type="password" class="form-control" id="password"></div><div class="error-message">{{ error_message }}</div><button type="submit" class="btn btn-primary">登錄</button></form></div></div></ContentBase>
</template><script>
import ContentBase from '@/components/ContentBase.vue'
import { ref } from 'vue';export default {name: 'LoginView',components: {ContentBase},setup() {let username = ref('');let password = ref('');let error_message = ref('');const login = () => {console.log(username.value, password.value);}return {username: username,password: password,error_message: error_message,login,}}
}
</script><style scoped>button {width: 100%;}
</style>
1. 登錄狀態的維護
1.傳統Session的登錄維護方式:
* 用戶輸入用戶名+密碼去登錄時,會訪問服務器的登錄驗證
* 如果驗證通過,服務器會通過`cookie`返回一個`session_id`給客戶端,并將該`session_id`保存在數據庫中,用于判斷是屬于哪個用戶的登錄驗證
* 登錄成功之后,用戶每次向服務器發送請求,都會攜帶`session_id`,而服務器會去驗證該`session_id`是否存在并且是屬于該用戶,通過則可以繼續訪問
* Session 過期與銷毀:`Session` 有一個有效期限,一般通過設置一個固定的時間,或者在一定時間內沒有用戶活動時會將 `Session `標記為過期。當` Session `過期時,服務器會銷毀對應的 `Session` 數據,釋放內存或其他資源。
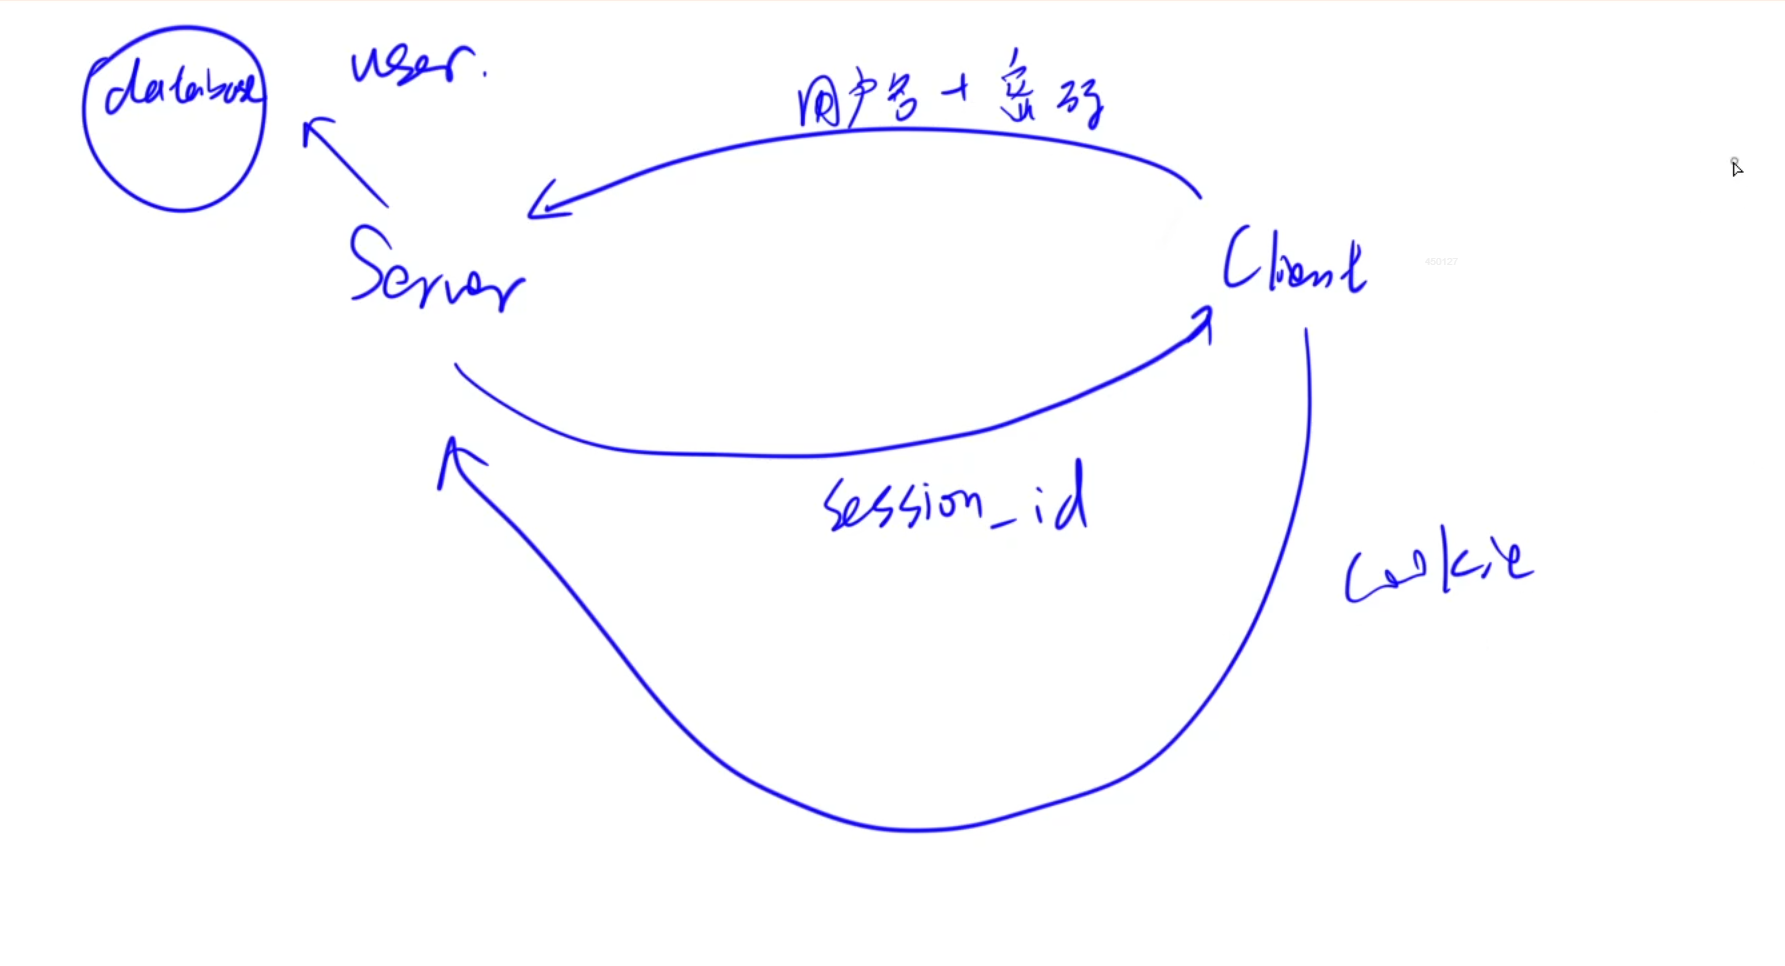
- 傳統的
cookie維護登錄方式,在面對跨域訪問時,由于js限制無法訪問不同源的的資源,cookie是有跨域問題的,詳細介紹參考Cookie、Session、Token的區別
2.jwt維護跨域的登錄狀態(JSON Web Token)
-
1.用戶輸入用戶名+密碼進行登錄時,首先會驗證用戶名和密碼是否正確
-
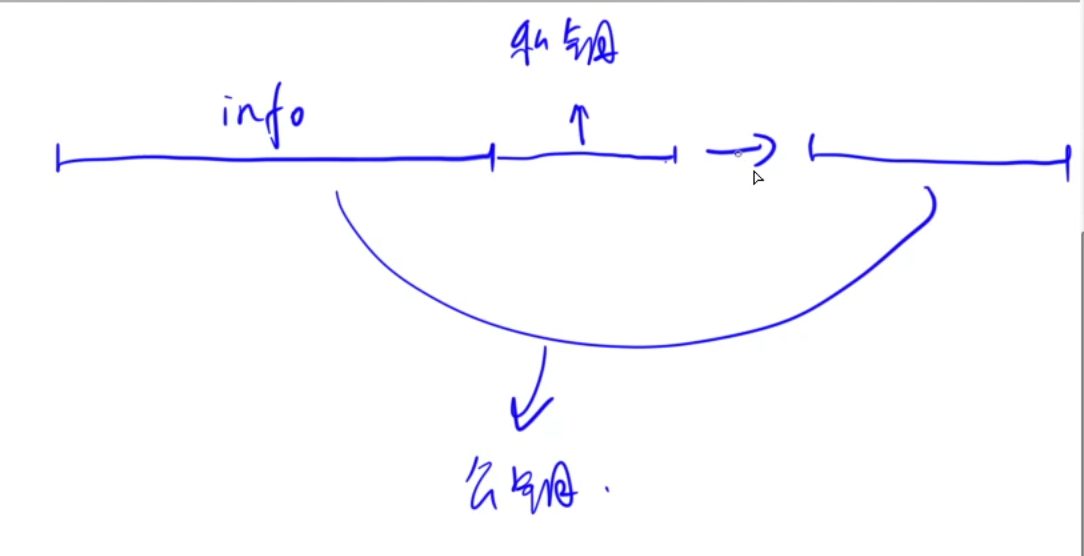
2.驗證通過則由服務器將用戶的一些信息
info+ 服務器本地配置的私鑰(一個字符串)通過加密算法得到一個新的Token,而這個Token會與info一起返回給客戶端 -
3.當客戶端向服務器發送請求時,每次需要攜帶該
Token和info,接收到請求后,服務器會將info與本地的私鑰進行拼接,再通過同一個加密算法求出此次請求返回的加密值是多少,將該加密值與客戶端傳回的token進行比對 -
4.如果一致則允許訪問,如果不一樣則說明該信息被修改了,不合法,不允許訪問。
-
過期與銷毀:可以在info中設置有效期,設置公鑰頒發的有效期,如果超過時間則該token過期,需要重新登錄并頒發新的token
-
該狀態的安全性是由加密算法保證的:
info+私鑰 -> token是很容易的,但是如果想通過token + info -> 私鑰是幾乎無法在短時間內突破的,如果我們修改了info的信息,由于無法獲取私鑰的值,那么加密產生的token必然是不同的。
-
通過
postman查看后端服務器提供的api返回的jwt:
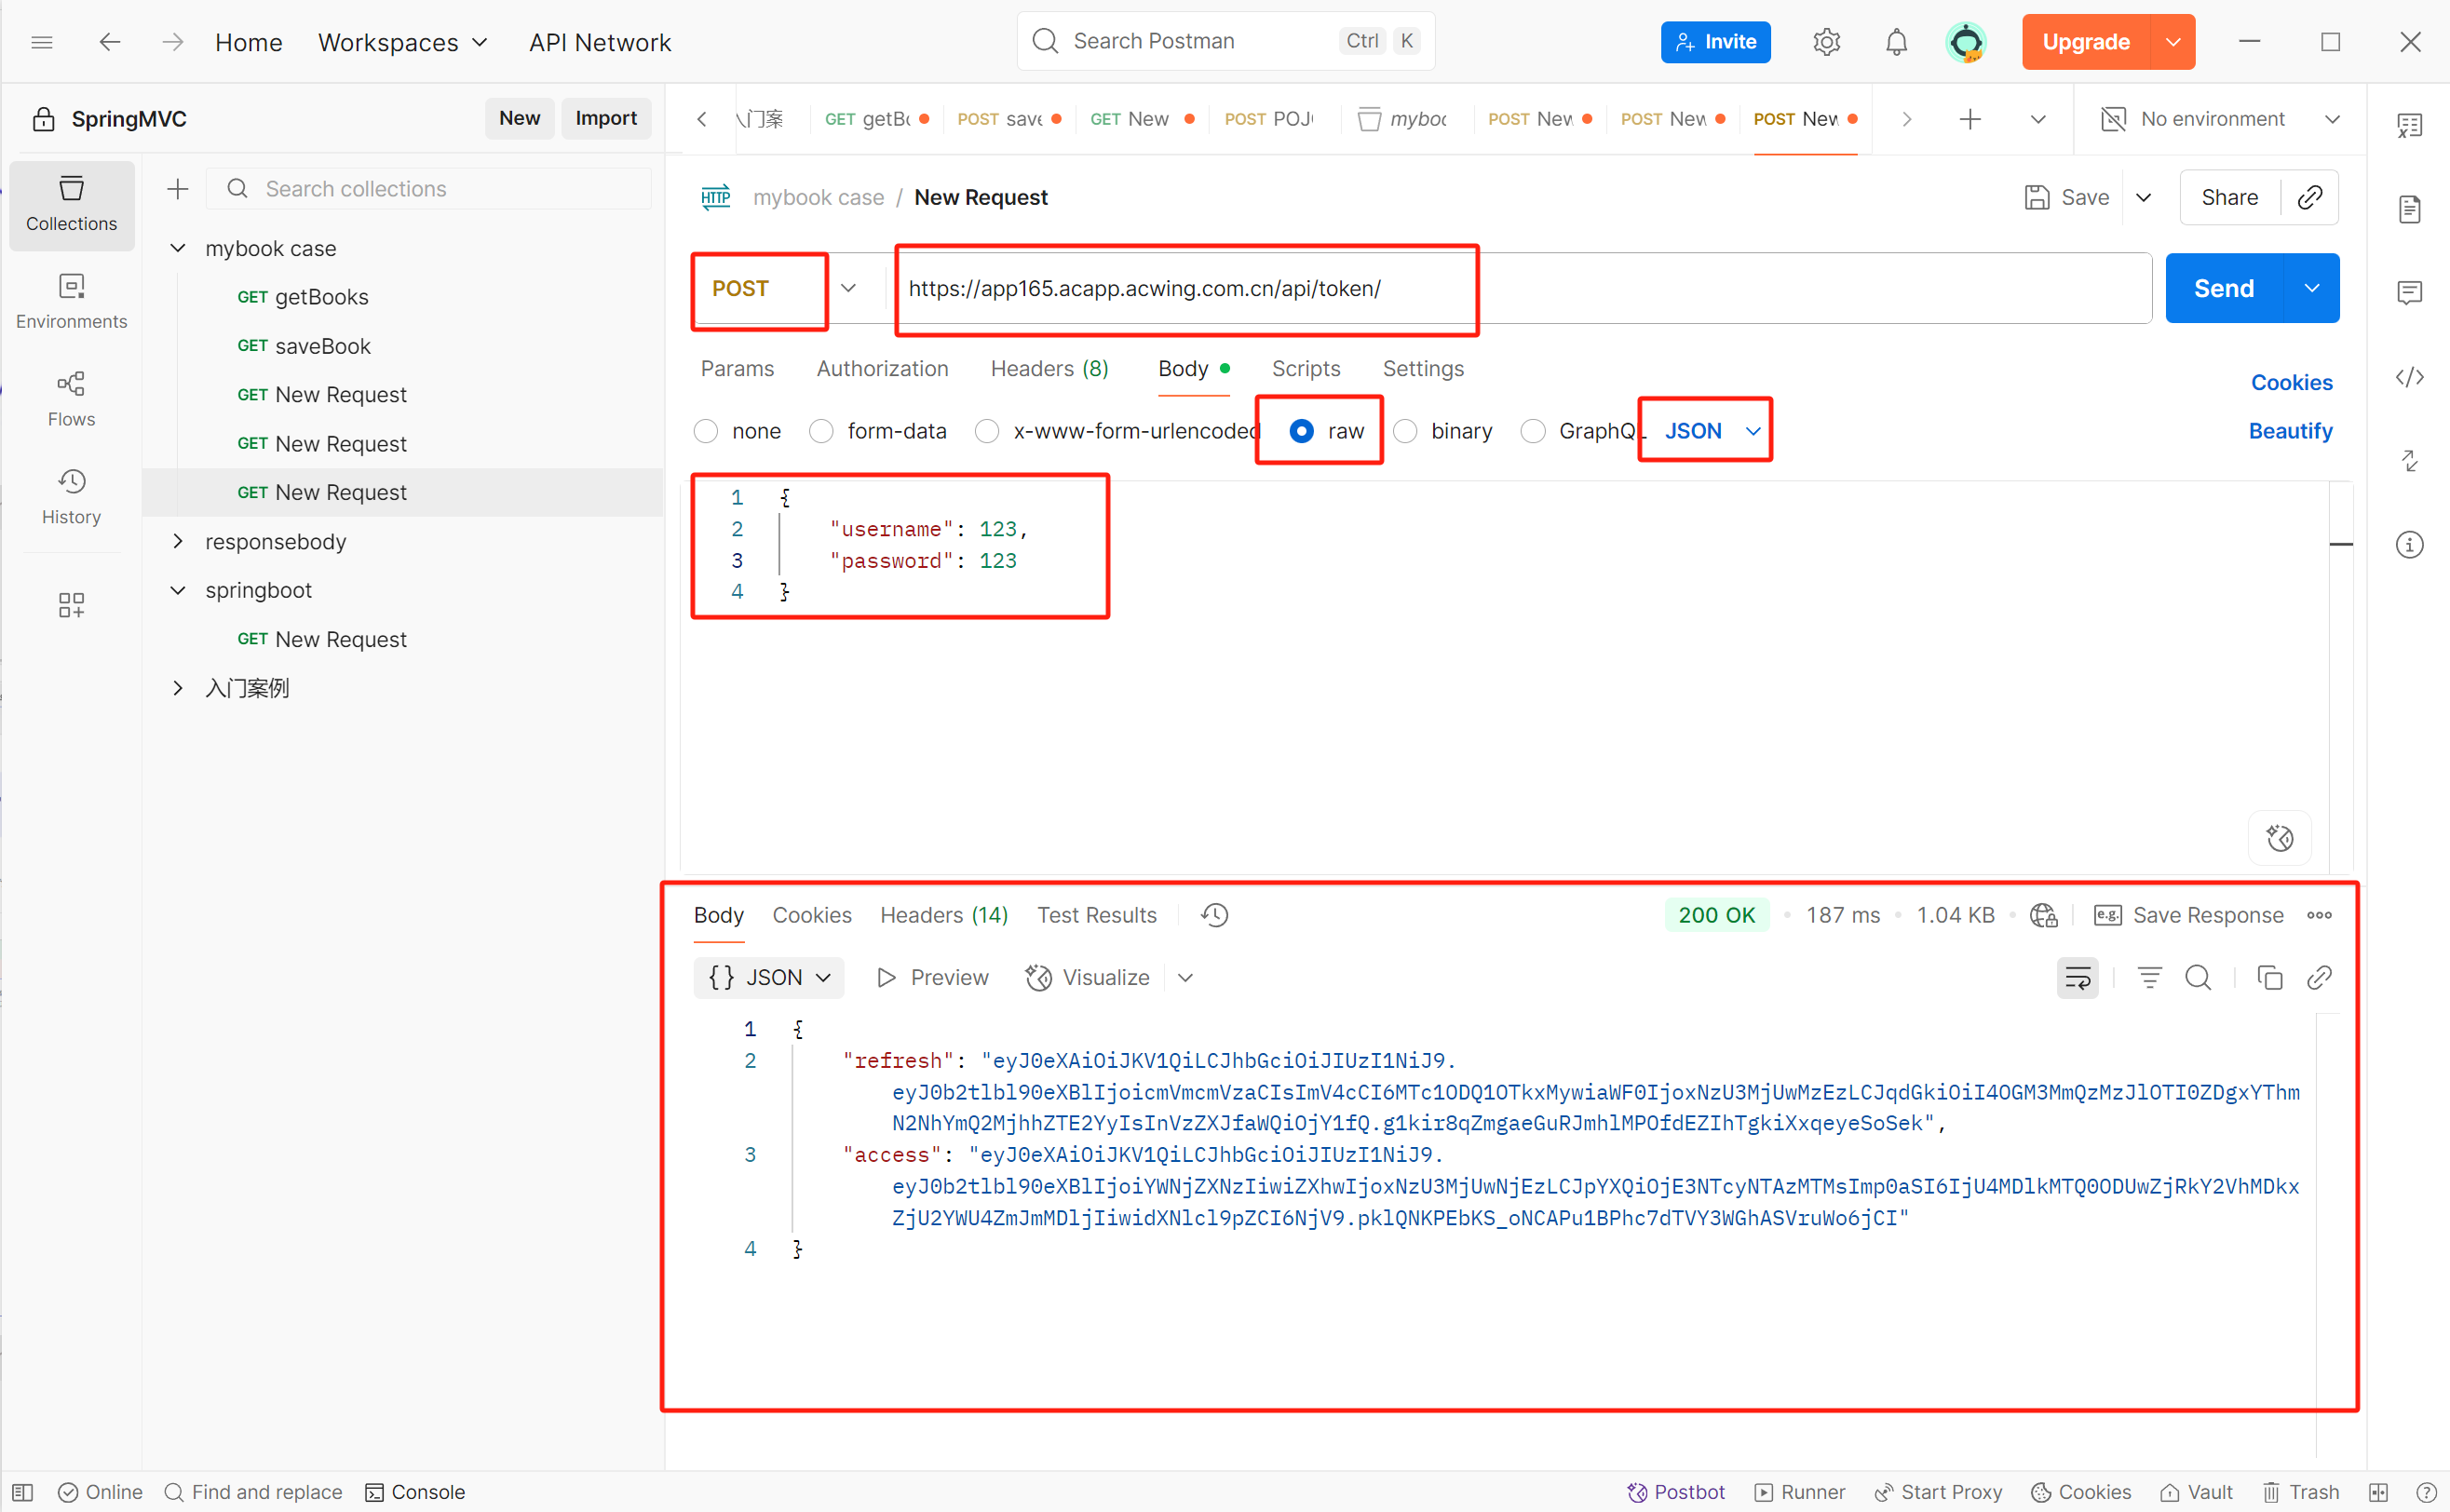
-
通過jwt的解析網站查看jwt中包含的信息:
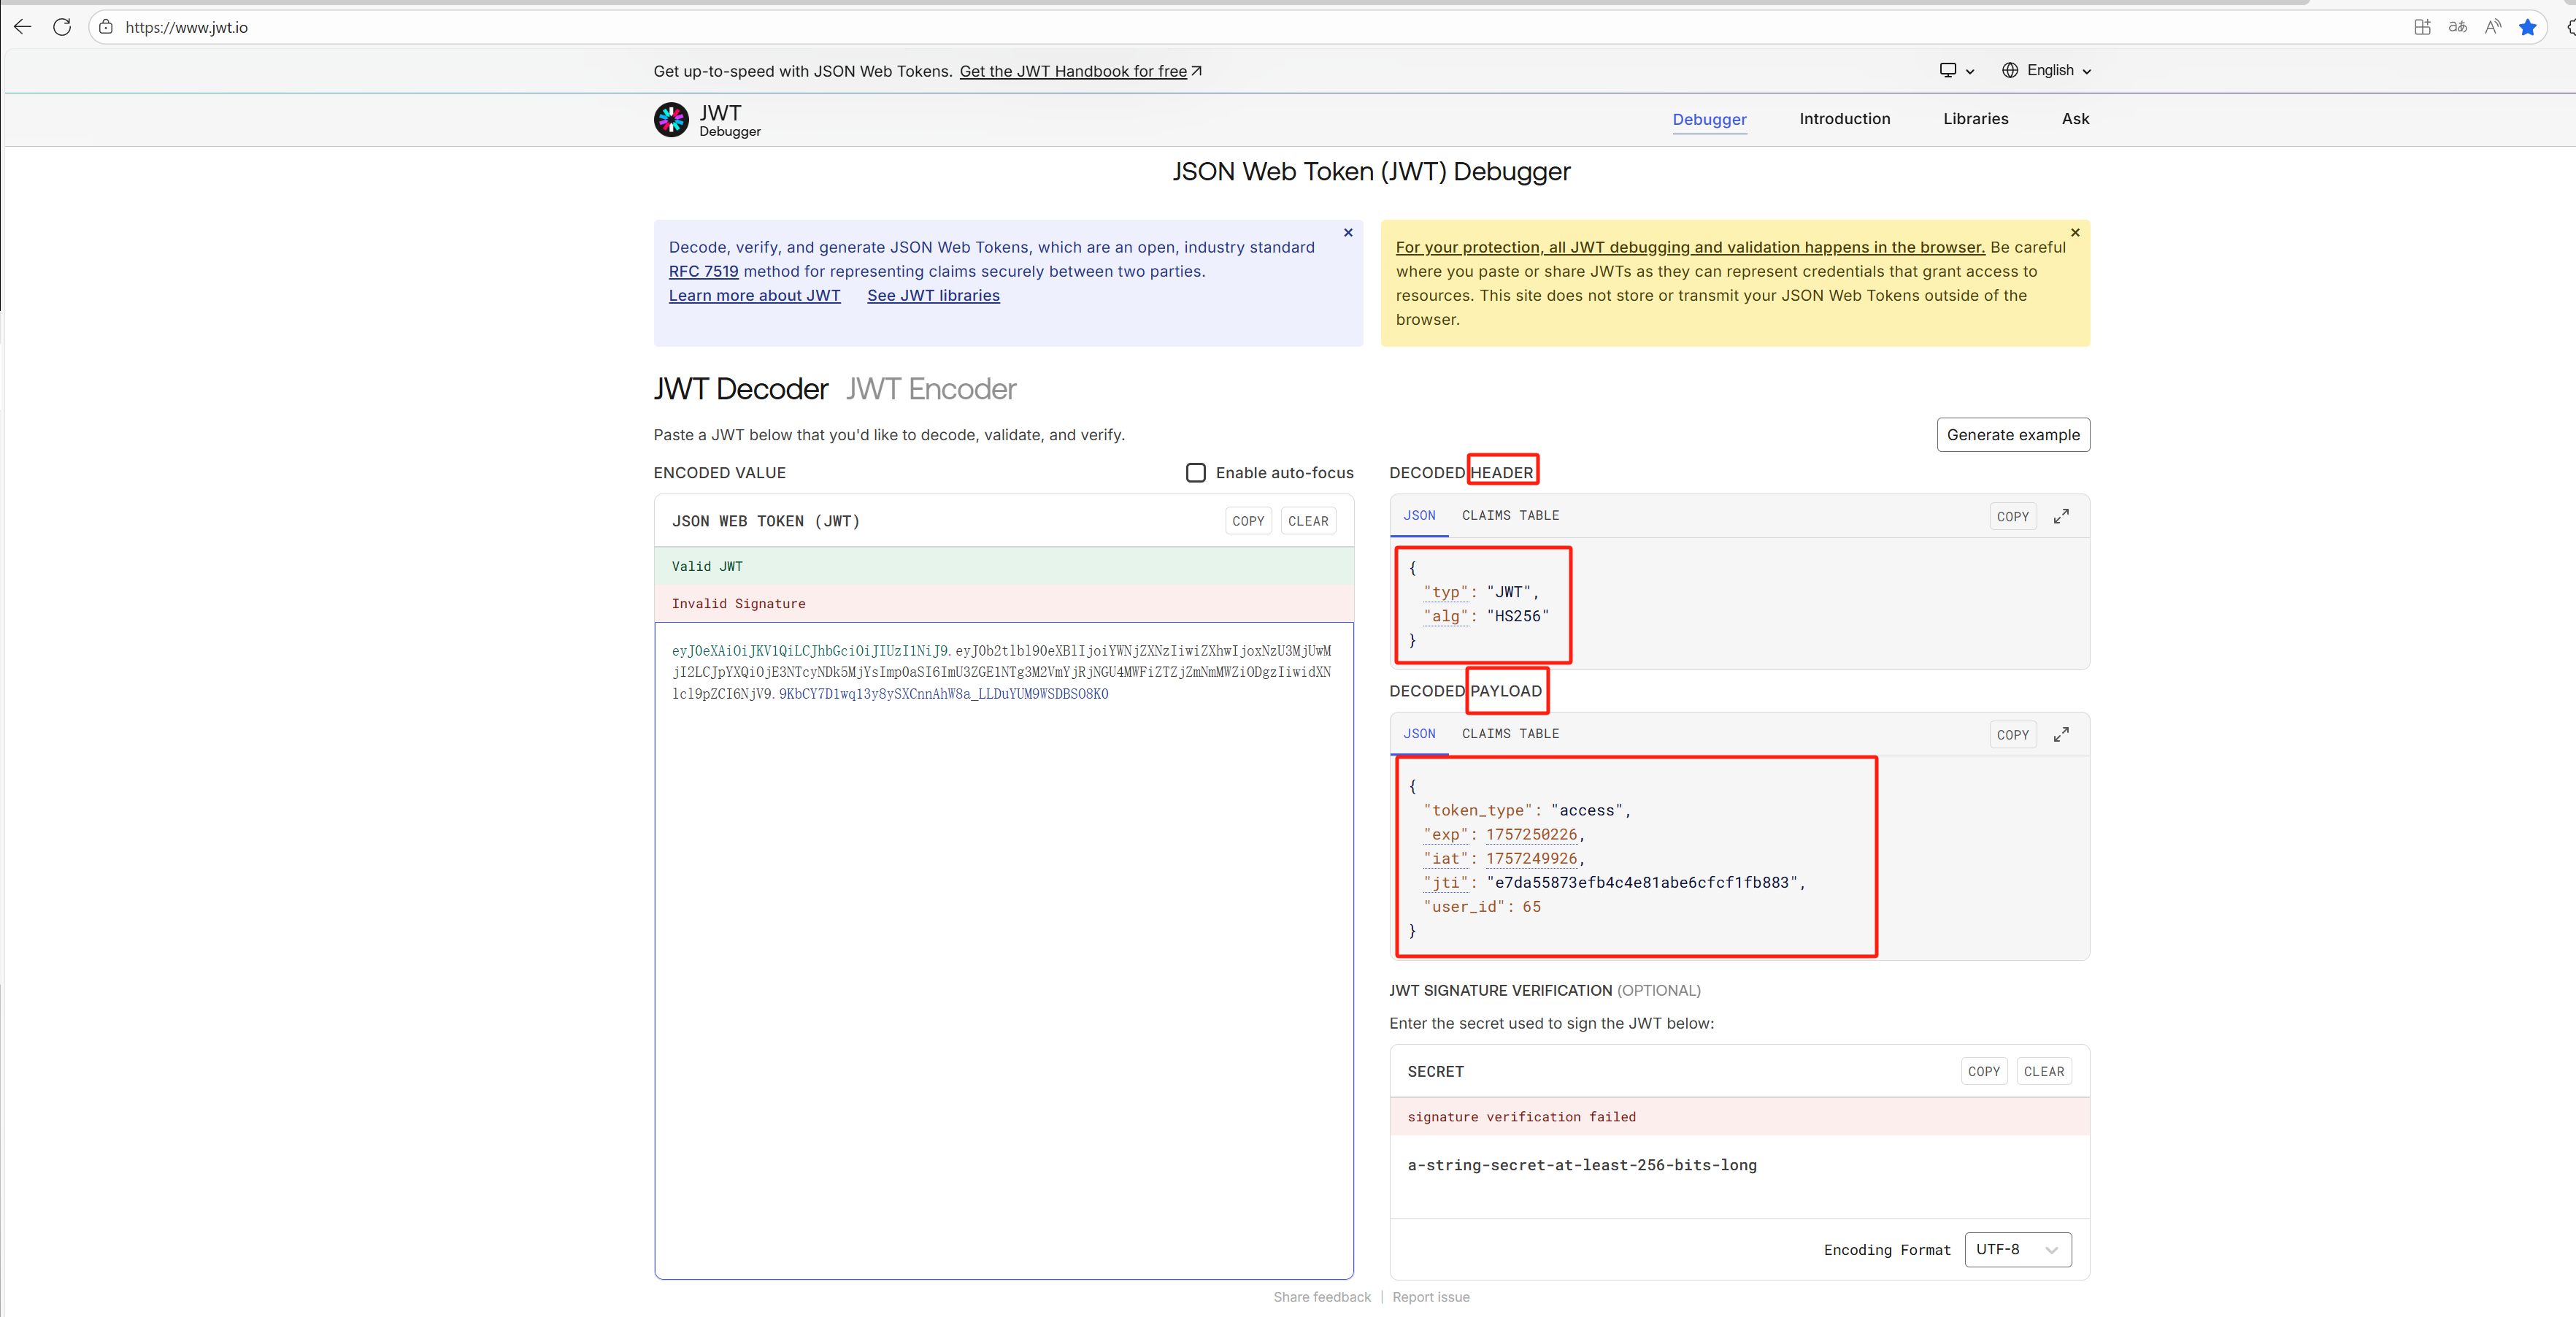
-
access: 訪問令牌,有效期5分鐘, 直接獲取服務器端的認證jwt
refresh: 刷新令牌,有效期14天 -
為什么還要有
refresh令牌,GET請求的api會將參數添加到路徑上,不安全,所以access的令牌有效期較短,而refresh的令牌是通過POST請求獲取的,將refresh的令牌傳入就能獲取到一個新的access令牌,每次access令牌過期,就會將refresh令牌傳到refreshapi中,重新獲取一個新的access令牌
補充知識點一、什么是跨域
跨域是指瀏覽器出于安全考慮,限制網頁腳本訪問不同源(協議、域名、端口)的資源。兩個URL的協議、域名或端口任意一個不相同時,就屬于不同源,瀏覽器會阻止腳本請求從一個源加載的文檔與另一個源的資源進行交互。
補充知識點二、跨域產生的原因
跨域問題產生的根本原因是瀏覽器的同源策略(Same-Origin Policy)。同源策略是瀏覽器實現的一種安全協議,它限制了一個源的文檔或腳本如何與另一個源的資源進行交互。如果沒有同源策略,惡意網頁可能會讀取另一個網頁的敏感信息,如用戶輸入的密碼、銀行賬號等,從而進行非法操作。
2.維護全局變量
- 用戶信息需要維護成一個全局變量,便于各個組件獲取
- Vue中使用
vuex維護state,存儲全局變量 - 為了使各個部分的信息獨立,新增
module:user.js:主要存放user的個人信息 - 這樣就可以通過
store.state.user獲取user里面的相關信息
store.index.js
import { createStore } from 'vuex'
import ModuleUser from './user'export default createStore({state: {},getters: {},mutations: {},actions: {},modules: {user: ModuleUser,}
})
store.user.js
const ModuleUser = ({state: {id: "",username: "",photo: "",followerCount: 0,},getters: {},mutations: {},actions: {},modules: {}
});
export default ModuleUser;
state:主要維護變量getters:讀取state的信息,然后進行運算等actions:定義對state信息的異步更新操作mutations:對state信息的同步更新操作
3.登錄的實現
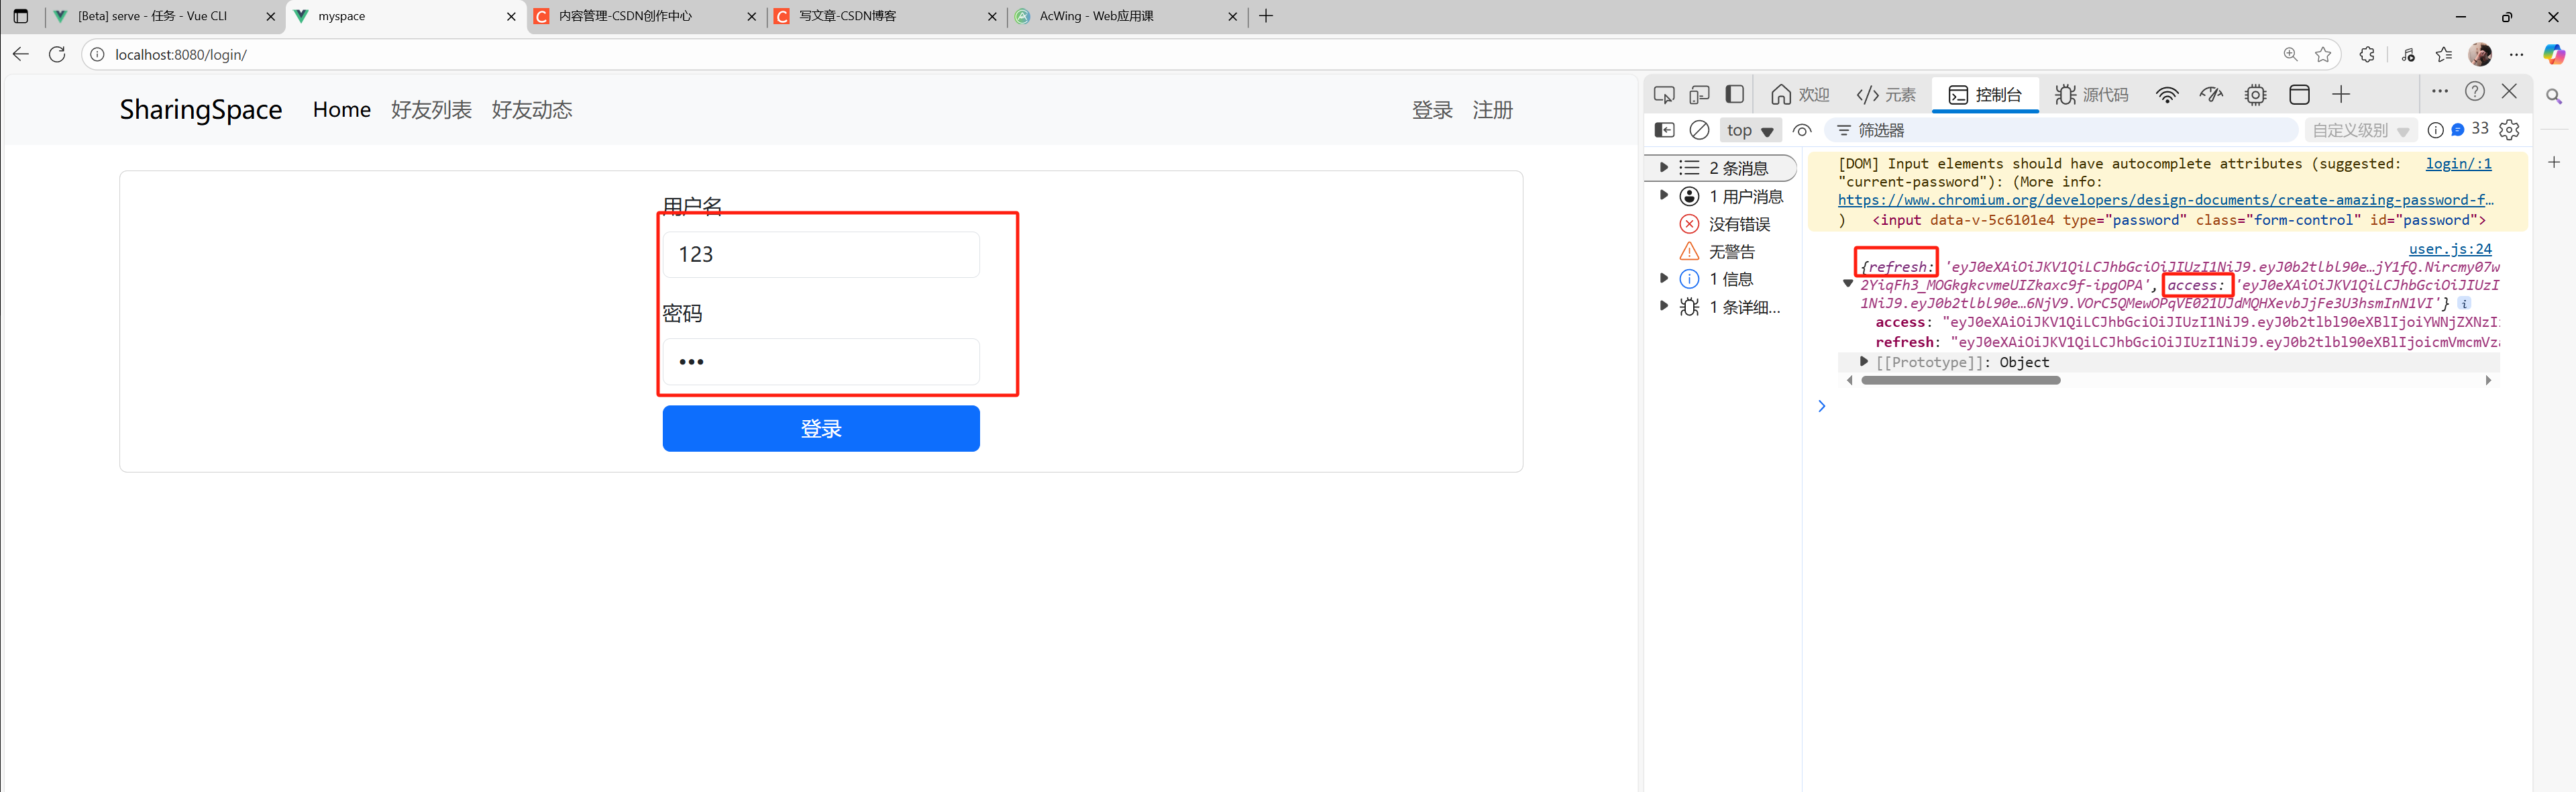
1.獲取jwt-token令牌
- 定義異步請求方法
login:通過用戶名和密碼以POST請求形式訪問后端api(https://app165.acapp.acwing.com.cn/api/token/),成功的話會返回令牌通過resp參數接收
user.js:
import $ from 'jquery';const ModuleUser = ({state: {id: "",username: "",photo: "",followerCount: 0,},getters: {},mutations: {},actions: {login(context, data) {$.ajax({url: "https://app165.acapp.acwing.com.cn/api/token/",type: "POST",data: {username: data.username,password: data.password,},success(resp) {console.log(resp);}});}},modules: {}
});export default ModuleUser;- 在
LoginView中通過調用store.dispathc("login")來觸發登錄令牌的請求,傳入參數為從登錄文本框和密碼文本框獲取的用戶名和密碼,并且添加了登錄成功和失敗的回調函數
LoginView.vue:
<script>
import ContentBase from '@/components/ContentBase.vue'
import { ref } from 'vue';
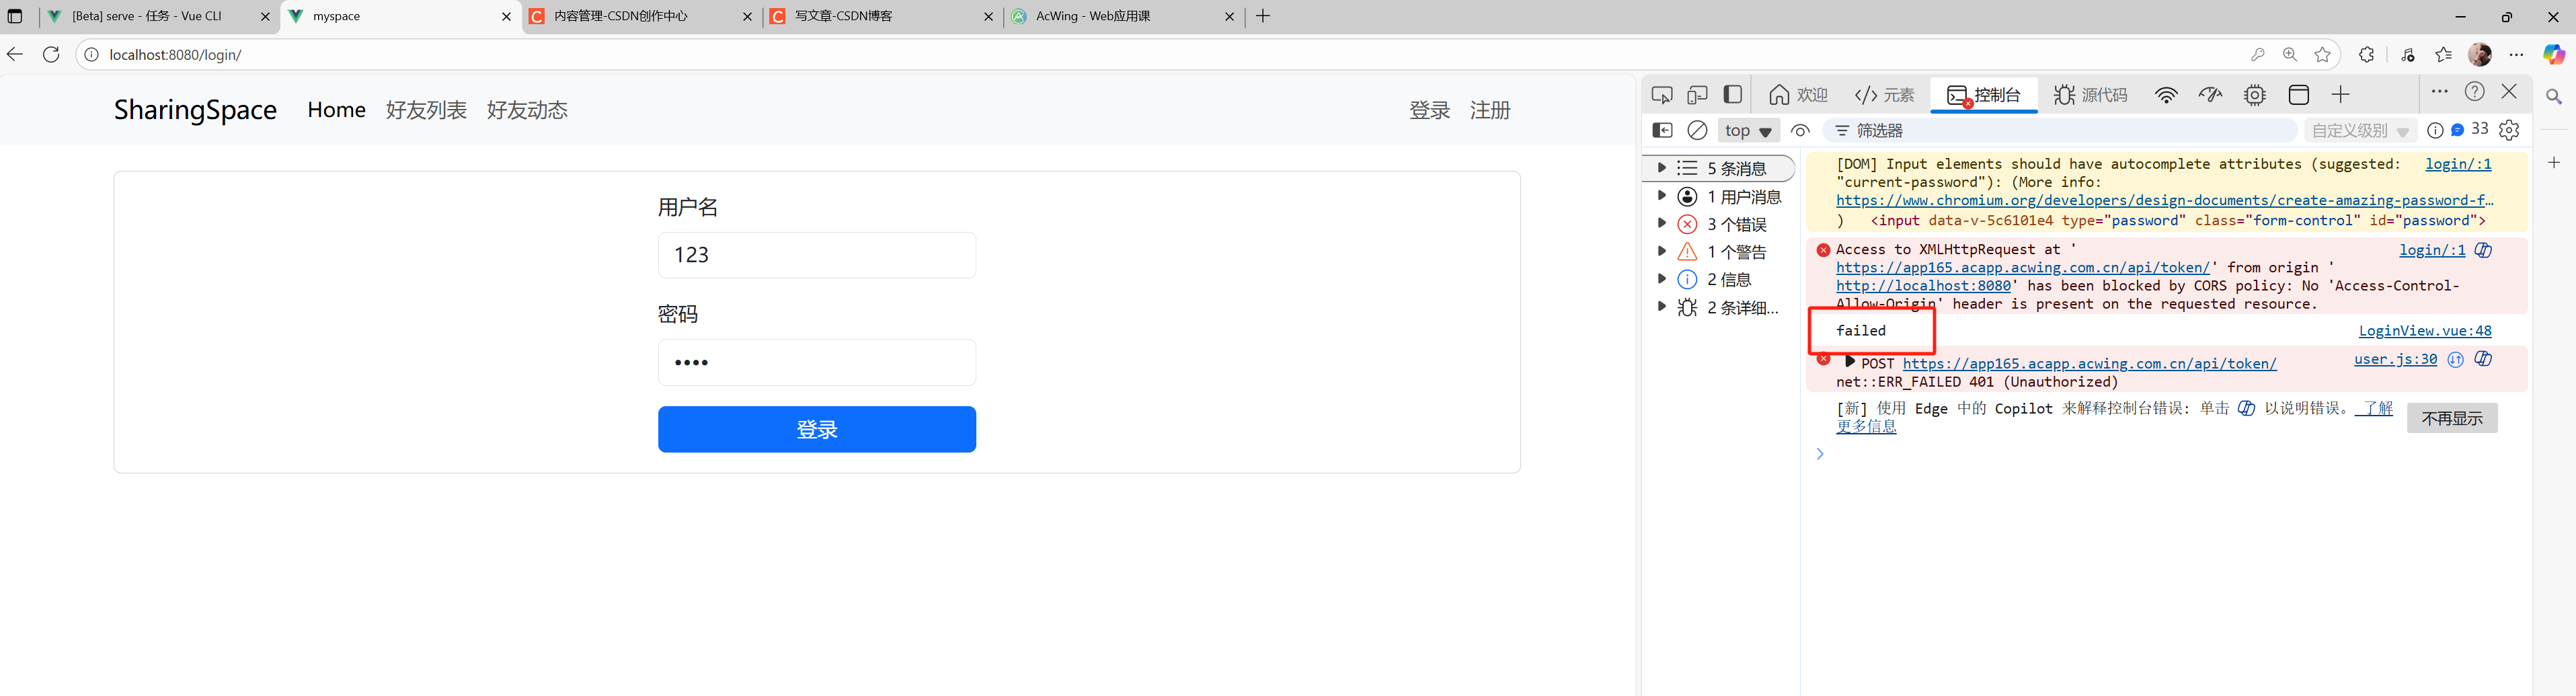
import { useStore } from 'vuex';export default {name: 'LoginView',components: {ContentBase},setup() {const store = useStore();let username = ref('');let password = ref('');let error_message = ref('');const login = () => {store.dispatch("login", {username: username.value,password: password.value,success() {console.log("success");},error() {console.log("failed");}});};return {username: username,password: password,error_message: error_message,login,}}
}
</script>
- 為了直觀只展示script部分
- 請求結果展示:
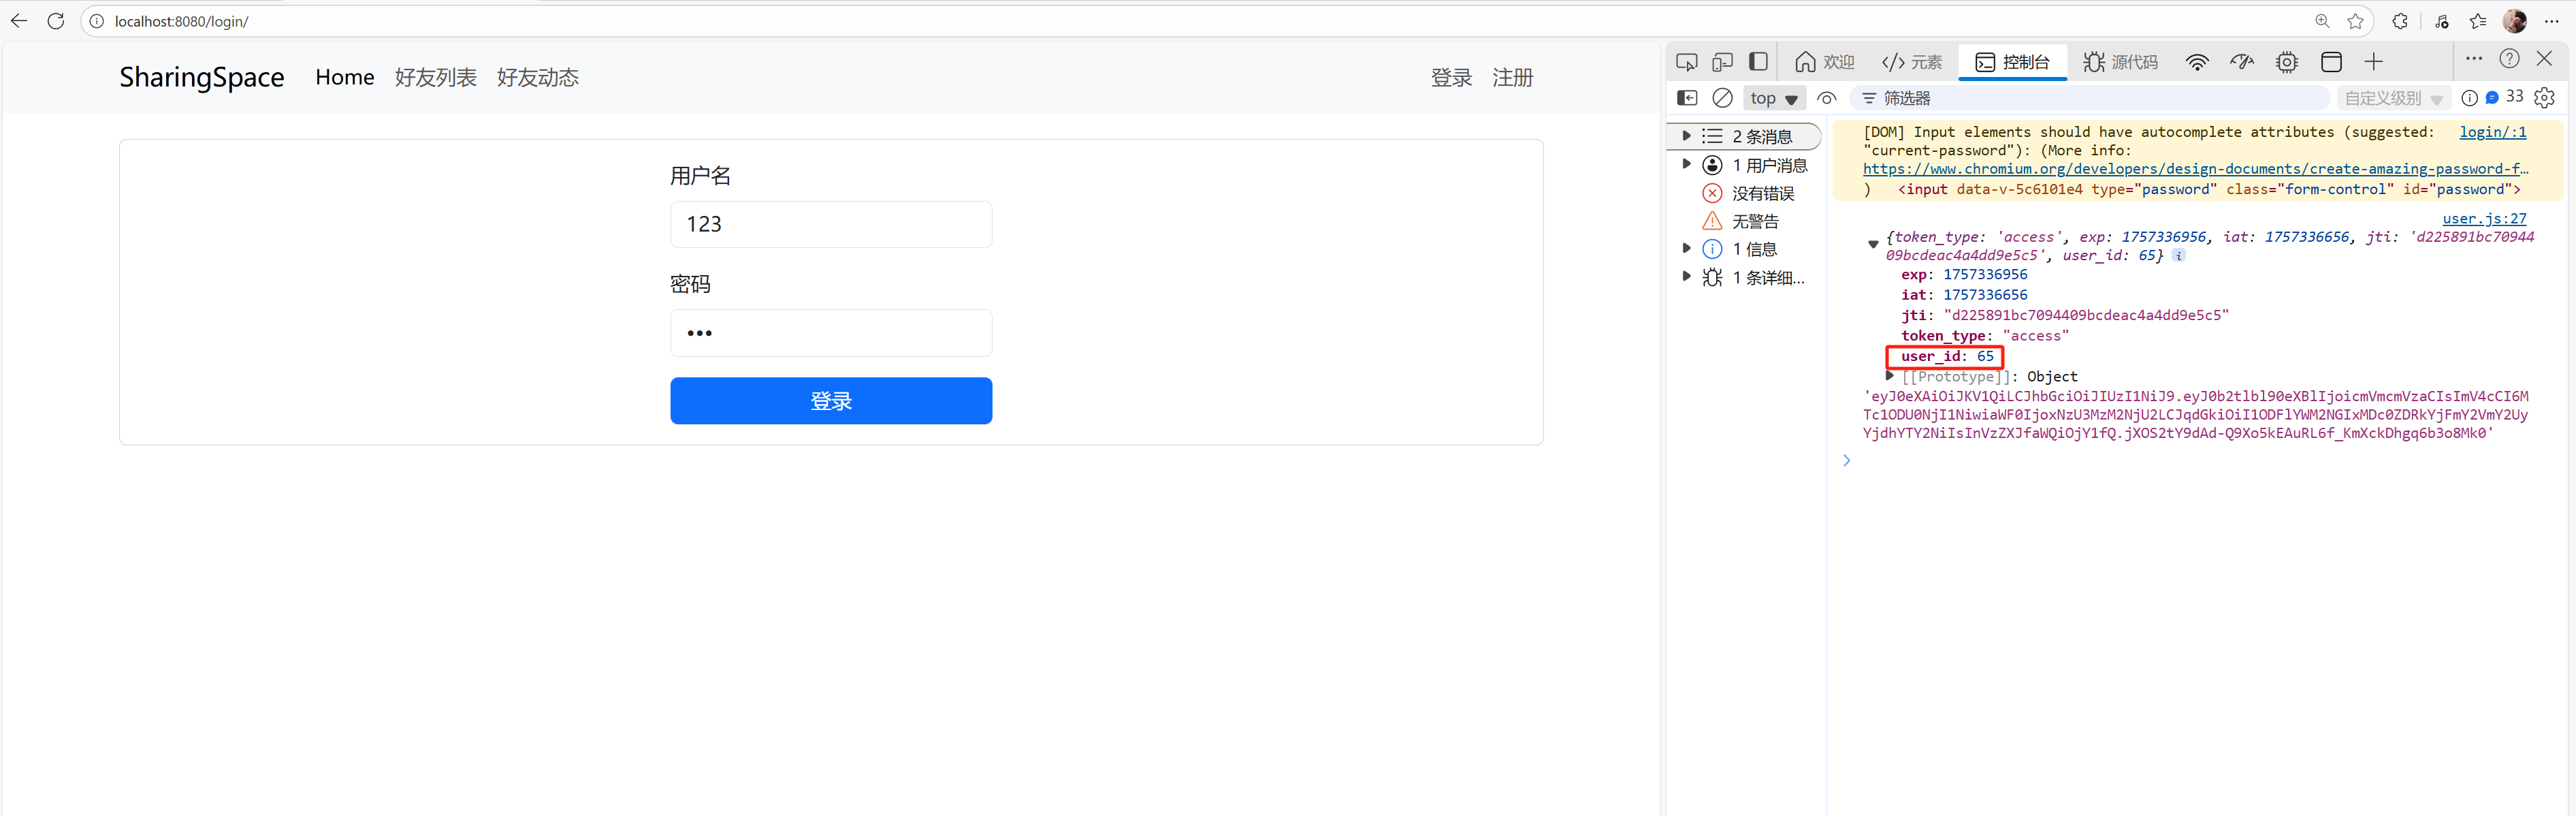
2.解析jwt-token得到用戶在數據庫中的user_id
- 使用jwtDecode函數來解析獲取到的jwt-token:
import { jwtDecode } from “jwt-decode”;
user.js:
import $ from 'jquery';
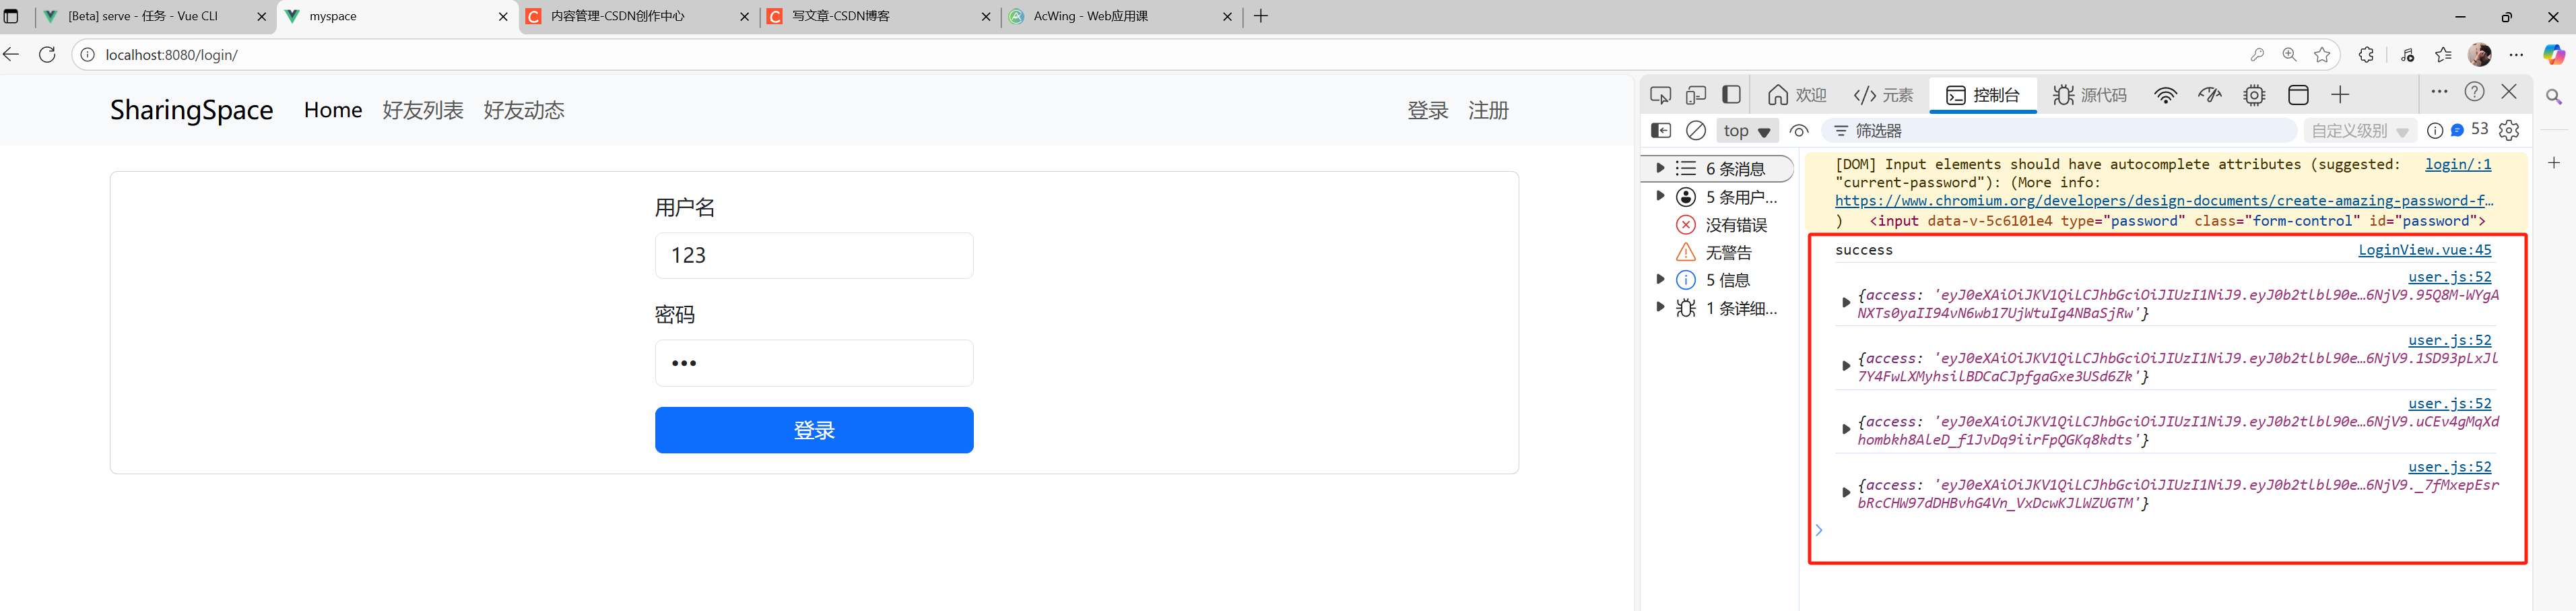
import { jwtDecode } from 'jwt-decode';const ModuleUser = ({state: {id: "",username: "",photo: "",followerCount: 0,},getters: {},mutations: {},actions: {login(context, data) {$.ajax({url: "https://app165.acapp.acwing.com.cn/api/token/",type: "POST",data: {username: data.username,password: data.password,},success(resp) {const {refresh, access} = resp;const access_info = jwtDecode(access);console.log(access_info, refresh);}});}},modules: {}
});
export default ModuleUser;
- 獲取結果:
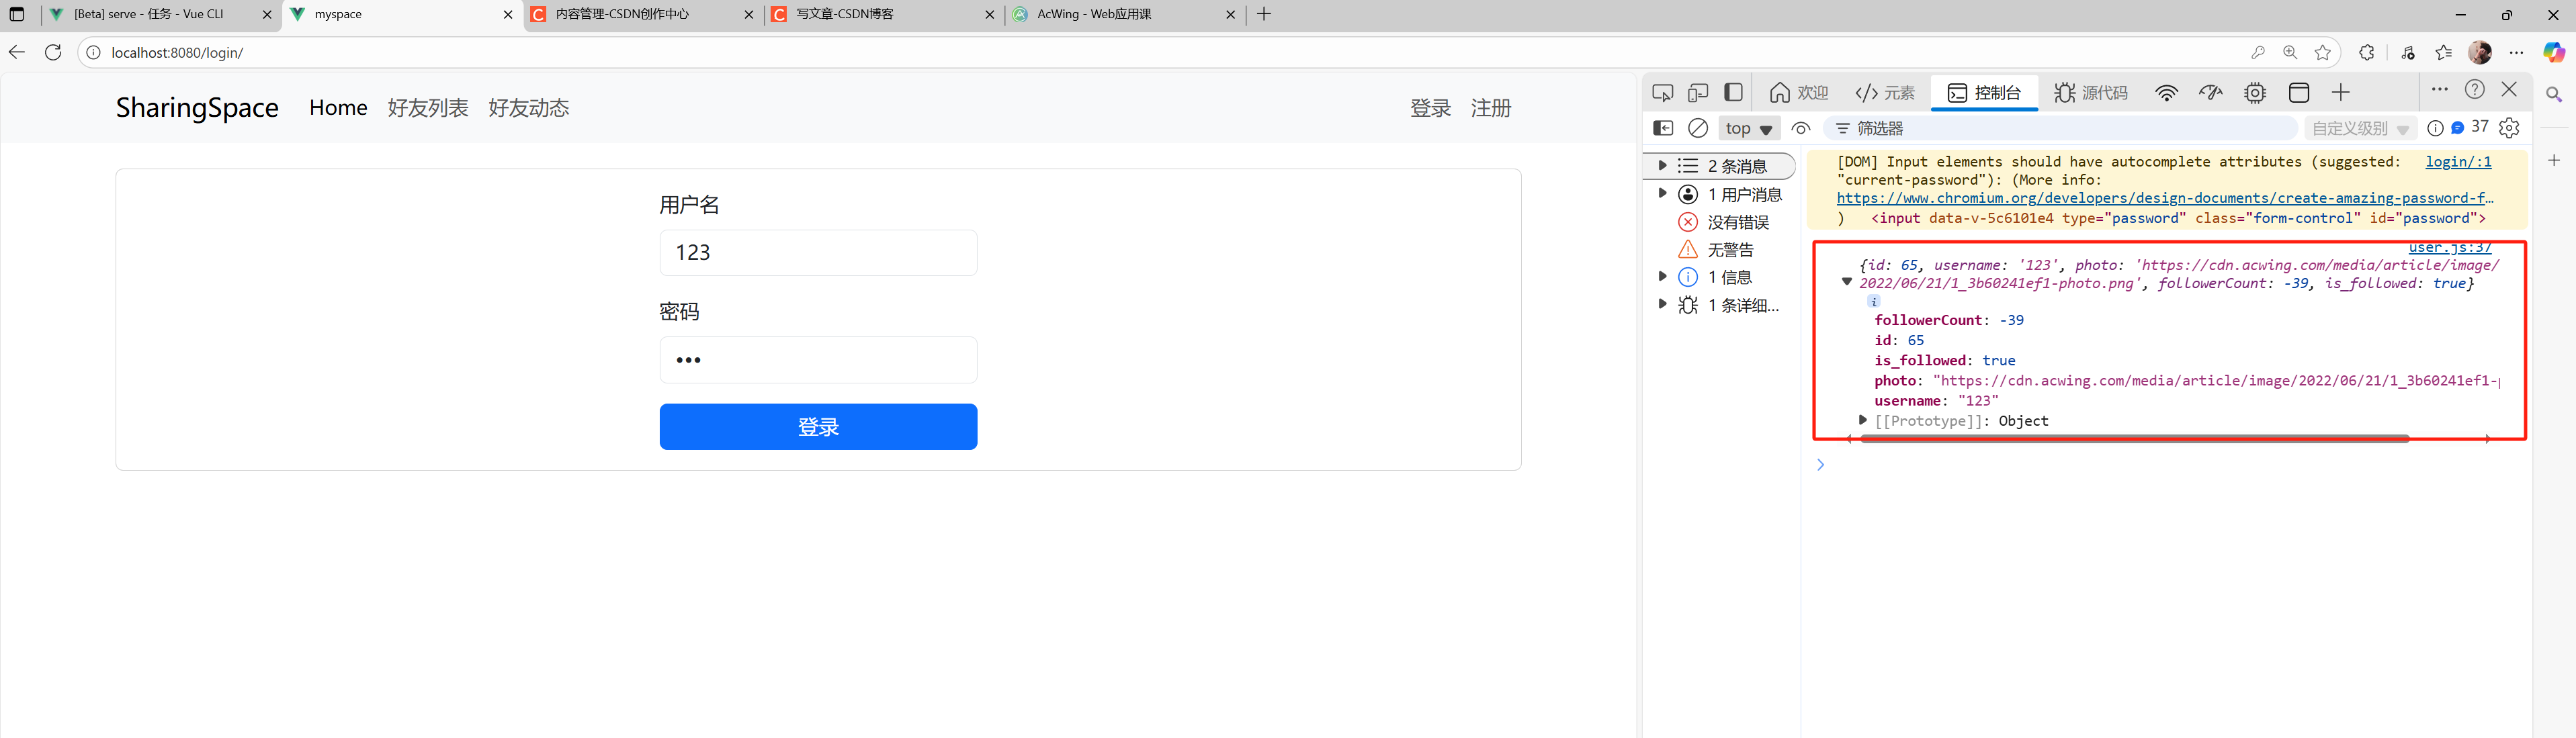
3.通過user_id獲取用戶信息
- 用戶的詳細信息一般是需要jwt驗證才能獲取
- 所以當得到
user_id后,通過該user_id向后端發送獲取用戶信息的請求(需要攜帶jwt-token)
user.js:
import $ from 'jquery';
import { jwtDecode } from 'jwt-decode';const ModuleUser = ({state: {id: "",username: "",photo: "",followerCount: 0,},getters: {},mutations: {},actions: {login(context, data) {$.ajax({url: "https://app165.acapp.acwing.com.cn/api/token/",type: "POST",data: {username: data.username,password: data.password,},success(resp) {const {access} = resp;const access_info = jwtDecode(access);$.ajax({url: "https://app165.acapp.acwing.com.cn/myspace/getinfo/",type: "GET",data: {user_id: access_info.user_id,},headers: {'Authorization': "Bearer " + access,},success(resp) {console.log(resp);}});}});}},modules: {}
});export default ModuleUser;- 用戶信息獲取結果:
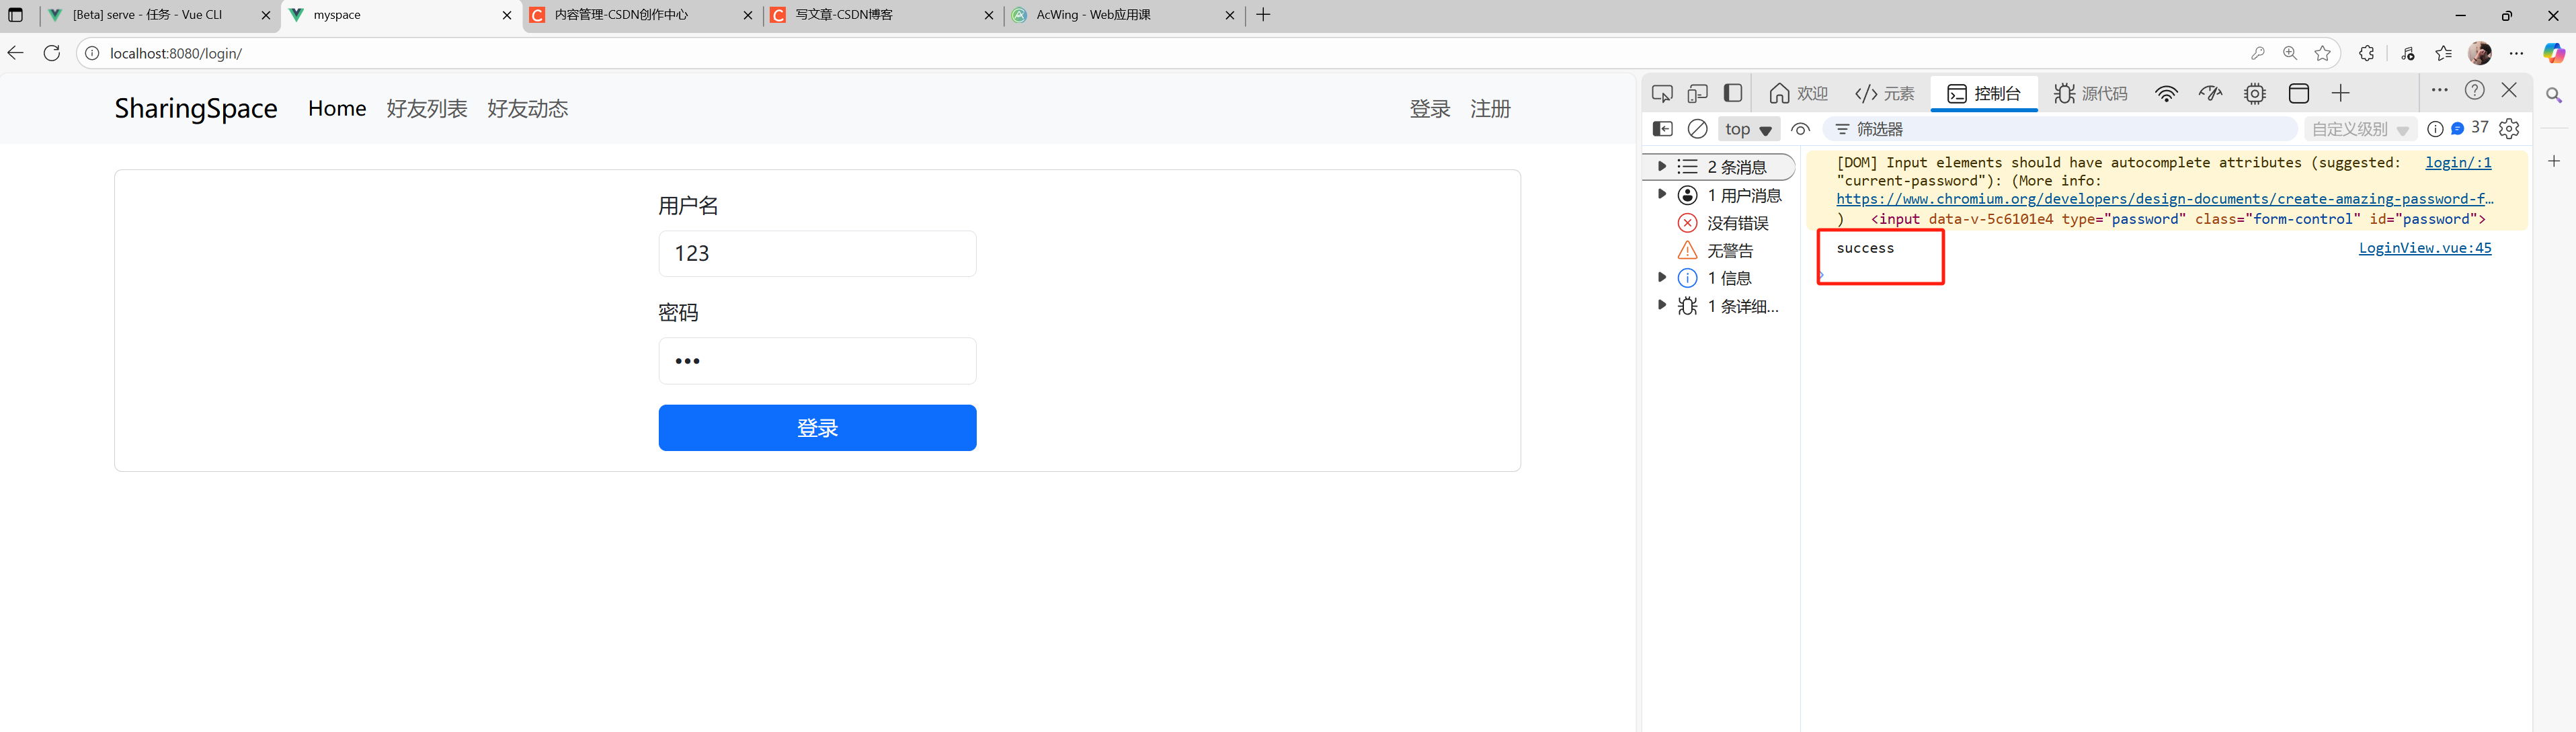
4.將獲取的用戶信息更新到當前全局中
- 在
mutations中定義對user的更新操作 - 而當通過登錄請求獲取到
user_id,并通過user_id發送獲取用戶信息請求成功后,觸發在mutations中定義的updateUser,將全局中的user更新成登錄的user - 調用作為參數傳遞過來的
data.success(),證明根據輸入的用戶名和密碼,登錄成功 - 如果整個過程失敗了,則說明賬戶和密碼是不對的,無法獲取到jwt-token
user.js:
import $ from 'jquery';
import { jwtDecode } from 'jwt-decode';const ModuleUser = ({state: {id: "",username: "",photo: "",followerCount: 0,access: "",refresh: "",is_login: false,},getters: {},mutations: {updateUser(state, user) {state.id = user.id;state.username = user.username;state.photo = user.photo;state.followerCount = user.followerCount;state.access = user.access;state.refresh = user.refresh;state.is_login = user.is_login;},},actions: {login(context, data) {$.ajax({url: "https://app165.acapp.acwing.com.cn/api/token/",type: "POST",data: {username: data.username,password: data.password,},success(resp) {const {access, refresh} = resp;const access_info = jwtDecode(access);$.ajax({url: "https://app165.acapp.acwing.com.cn/myspace/getinfo/",type: "GET",data: {user_id: access_info.user_id,},headers: {'Authorization': "Bearer " + access,},success(resp) {context.commit("updateUser", {...resp,access: access,refresh: refresh,is_login: true,});data.success(); },});},error() {data.error();}});}},modules: {}
});
export default ModuleUser;
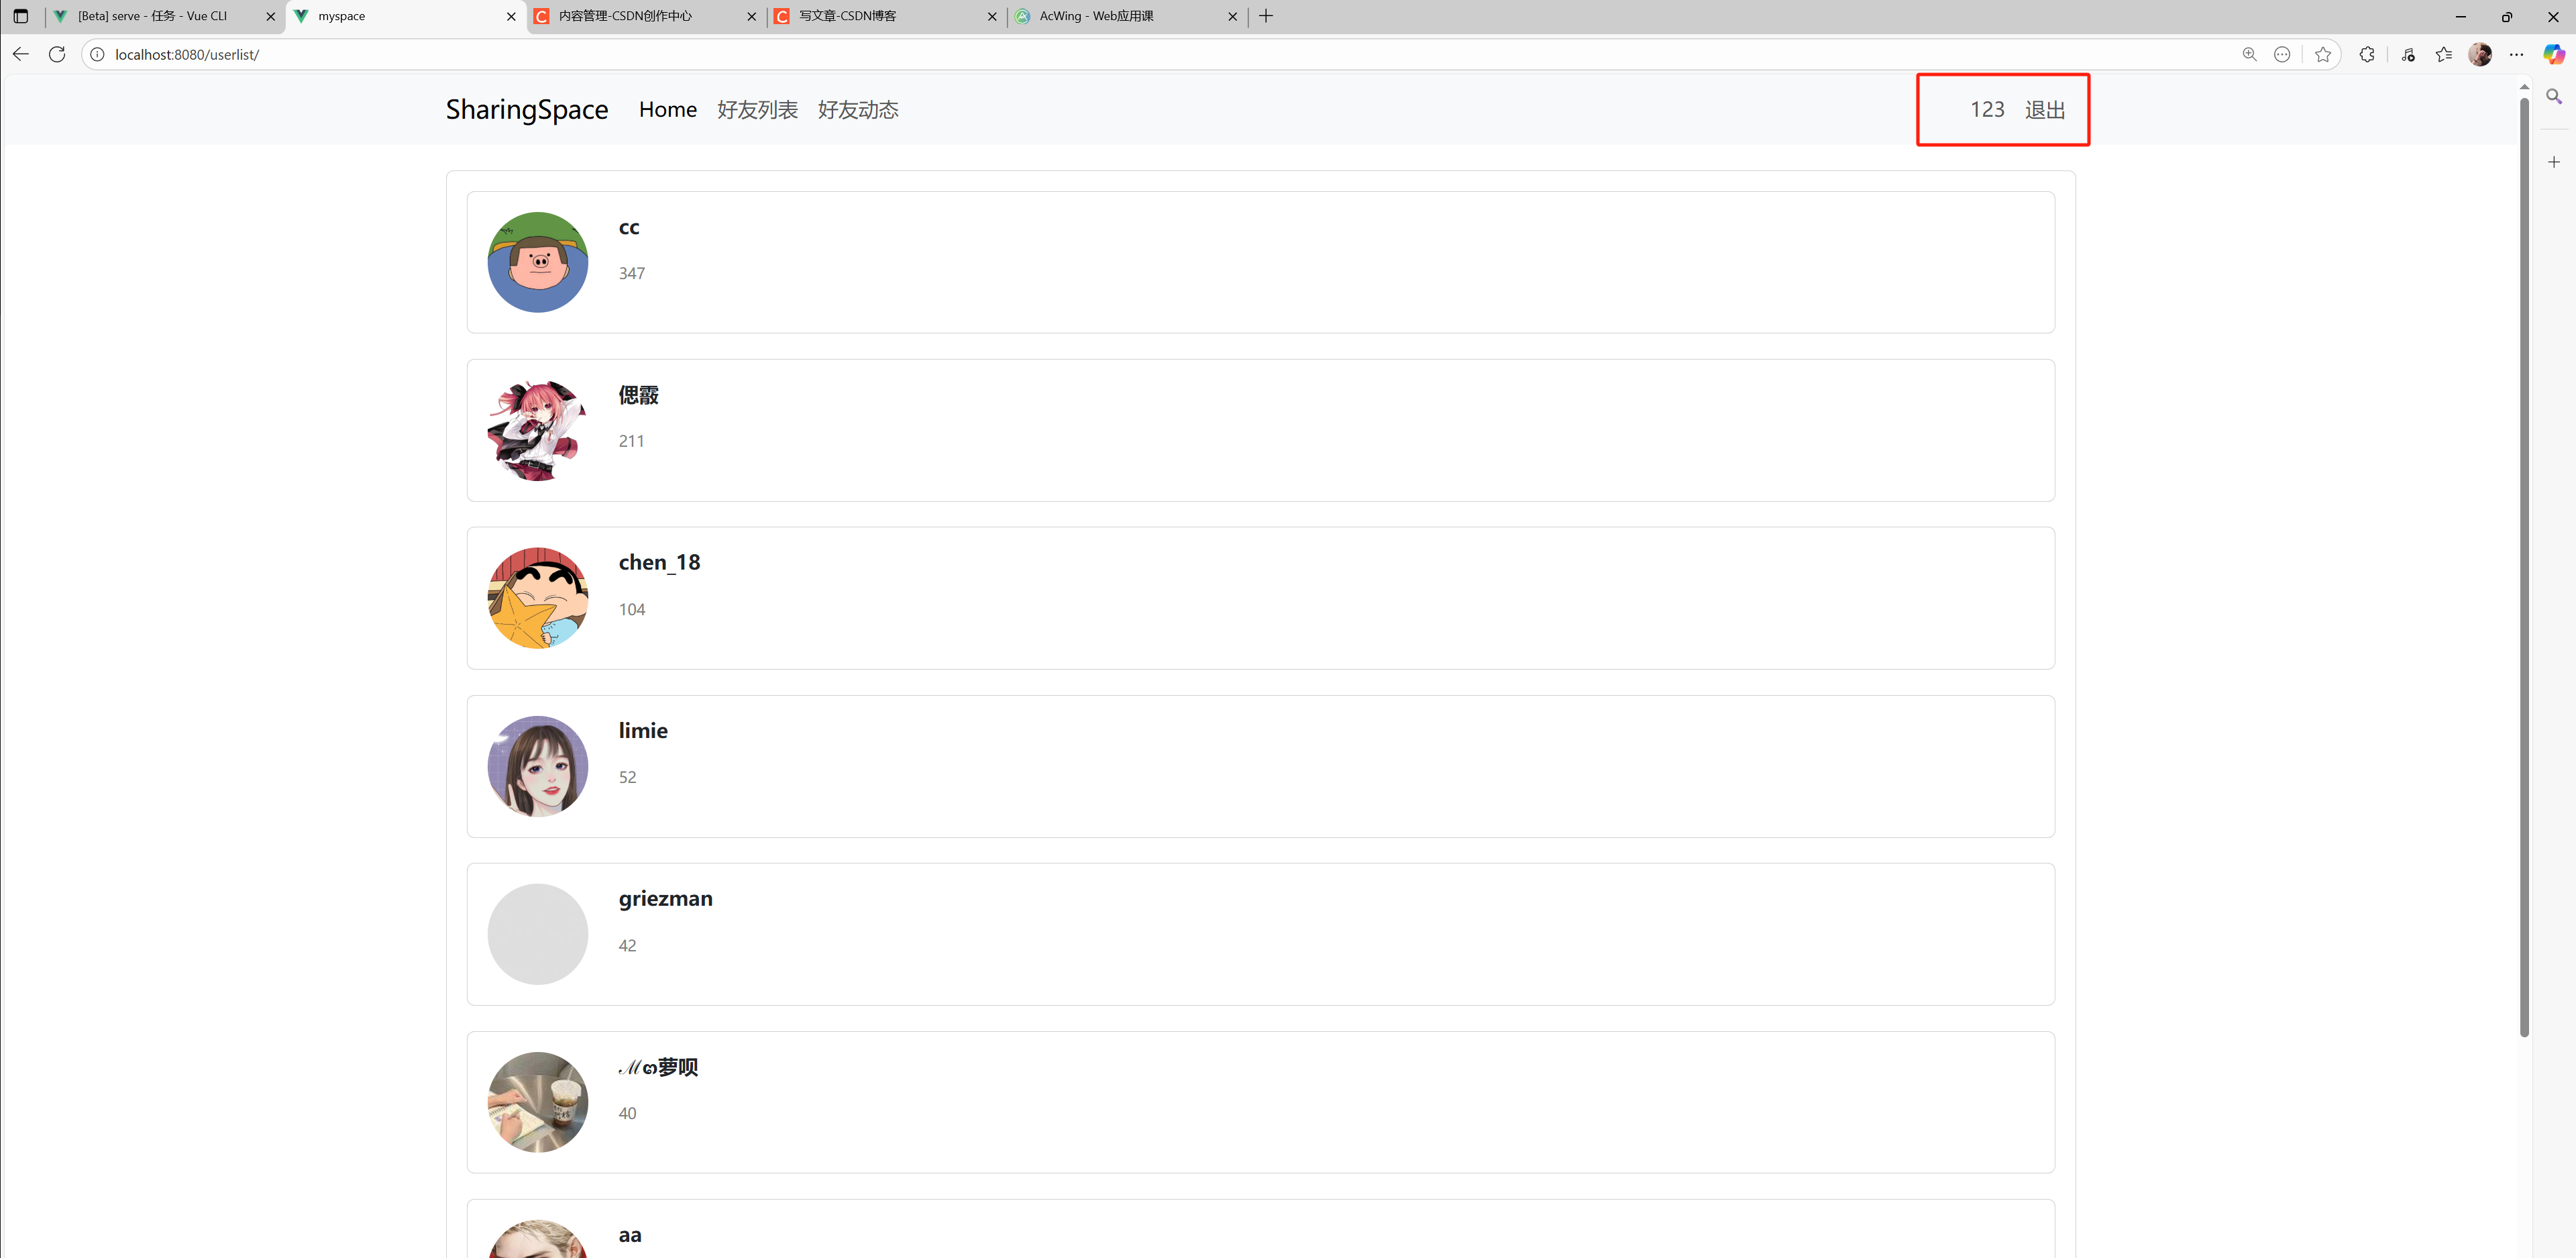
- 登錄成功展示:
- 登錄失敗展示:
5.維護jwt-token的有效期
- 因為access令牌有效期是五分鐘,而整體的refresh令牌有效期是14天
- 為了維護14天的有效登錄,需要每隔五分鐘通過refresh請求,獲取一個新的access令牌
- 于是我們需要定義函數使得每五分鐘能夠發送refresh請求,獲取新的access令牌
- 而為了防止出現邊界,比如剛好五分鐘時,瀏覽器卡住,導致請求發送失敗,access令牌刷新失敗,登錄狀態失效,我們可以設置為四分半發送一次refersh請求。
*使用setInterval()設置周期函數每四分半發送一次refresh請求
import $ from 'jquery';
import { jwtDecode } from 'jwt-decode';const ModuleUser = ({state: {id: "",username: "",photo: "",followerCount: 0,access: "",refresh: "",is_login: false,},getters: {},mutations: {updateUser(state, user) {state.id = user.id;state.username = user.username;state.photo = user.photo;state.followerCount = user.followerCount;state.access = user.access;state.refresh = user.refresh;state.is_login = user.is_login;},updateAccess(access) {state.access = access;}},actions: {login(context, data) {$.ajax({url: "https://app165.acapp.acwing.com.cn/api/token/",type: "POST",data: {username: data.username,password: data.password,},success(resp) {const {access, refresh} = resp;const access_info = jwtDecode(access);setInterval(() => {$.ajax({url: "https://app165.acapp.acwing.com.cn/api/token/refresh/",type: "POST",data: {refresh: refresh,},success(resp) {console.log(resp);context.commit("updateAccess", resp.access);},});}, 4.5 * 60 * 1000);$.ajax({url: "https://app165.acapp.acwing.com.cn/myspace/getinfo/",type: "GET",data: {user_id: access_info.user_id,},headers: {'Authorization': "Bearer " + access,},success(resp) {context.commit("updateUser", {...resp,access: access,refresh: refresh,is_login: true,});data.success(); },});},error() {data.error();}});}},modules: {}
});
export default ModuleUser;
- 當登錄成功之后,每四分半發送一次refresh請求,請求到新的access之后觸發
mutations的updateAccess(access),將全局存放的access替換成最新的access,以此來維護長期的登錄有效狀態 - 通過refresh刷新access展示:
6.登錄成功跳轉到好友列表
- 通過
router.push({name: "name-userlist"});: 登錄成功則跳轉到name-userlist - 如果登錄失敗,則將
erro_message = '用戶名或者密碼錯誤'
export default {name: 'LoginView',components: {ContentBase},setup() {const store = useStore();let username = ref('');let password = ref('');let error_message = ref('');const login = () => {error_message.value = "";store.dispatch("login", {username: username.value,password: password.value,success() {console.log("success");router.push({name: 'name-userlist'});},error() {console.log("failed");error_message.value = "用戶名或者密碼錯誤";}});};return {username: username,password: password,error_message: error_message,login,}}
}
7.NavBar右上角的登錄信息變更
- 當登錄成功之后,NavBar右上角的登錄和注冊需要變成用戶名和退出進行展示
- 這里使用
v-if 和v-else
NavBar.vue:
<template><nav class="navbar navbar-expand-lg bg-body-tertiary"><div class="container"><router-link class="navbar-brand" :to="{name: 'home'}">SharingSpace</router-link><button class="navbar-toggler" type="button" data-bs-toggle="collapse" data-bs-target="#navbarText" aria-controls="navbarText" aria-expanded="false" aria-label="Toggle navigation"><span class="navbar-toggler-icon"></span></button><div class="collapse navbar-collapse" id="navbarText"><ul class="navbar-nav me-auto mb-2 mb-lg-0"><li class="nav-item"><router-link class="nav-link active" aria-current="page" :to="{name: 'home'}">Home</router-link></li><li class="nav-item"><router-link class="nav-link" :to="{name: 'name-userlist'}">好友列表</router-link></li><li class="nav-item"><router-link class="nav-link" :to="{name: 'name-userprofile', params: {userId: 2}}">好友動態</router-link></li></ul><ul class="navbar-nav" v-if="!$store.state.user.is_login"><li class="nav-item"><router-link class="nav-link" :to="{name: 'name-login'}">登錄</router-link></li><li class="nav-item"><router-link class="nav-link" :to="{name: 'name-register'}">注冊</router-link></li></ul><ul class="navbar-nav" v-else><li class="nav-item"><router-link class="nav-link" :to="{name: 'name-userprofile', params: {userId: $store.state.user.id}}">{{ $store.state.user.username }}</router-link></li><li class="nav-item"><a class="nav-link" style="cursor: pointer">退出</a></li></ul></div></div></nav>
</template><script>
export default {name: "NavBar",
}</script><style scoped></style>
- 頁面展示:
8.退出登錄
- 當需要退出登錄時,直接將jwt令牌刪除即可
- 簡單比喻就是:給你發了一張通行證,當你不想再進行通行時,直接將通行證撕毀即可,不用通知發證人
- 由于jwt令牌存放在全局變量access中,所以需要在
user.js中定義刪除令牌的邏輯
vue知識點
- 1.調用
mutations里面的api使用commit() - 2.調用
actions里面的api使用dispatch()
store.user.js:主要展示mutations里面的logout邏輯
import $ from 'jquery';
import { jwtDecode } from 'jwt-decode';const ModuleUser = ({state: {id: "",username: "",photo: "",followerCount: 0,access: "",refresh: "",is_login: false,},getters: {},mutations: {updateUser(state, user) {state.id = user.id;state.username = user.username;state.photo = user.photo;state.followerCount = user.followerCount;state.access = user.access;state.refresh = user.refresh;state.is_login = user.is_login;},updateAccess(state, access) {state.access = access;},logout(state) {state.access = "";state.id = "";state.username = "";state.photo = "";state.followerCount = 0;state.refresh = "";state.is_login = false;},},
});
export default ModuleUser;
NavBar.vue: 主要展示退出的綁定邏輯
<template><ul class="navbar-nav" v-else><li class="nav-item"><router-link class="nav-link" :to="{name: 'name-userprofile', params: {userId: $store.state.user.id}}">{{ $store.state.user.username }}</router-link></li><li class="nav-item"><a class="nav-link" @click="logout" style="cursor: pointer">退出</a></li></ul>
</template><script>import { useStore } from 'vuex';export default {name: "NavBar",setup() {const store = useStore();const logout = () => {store.commit("logout");}return {logout,}}
}
</script>
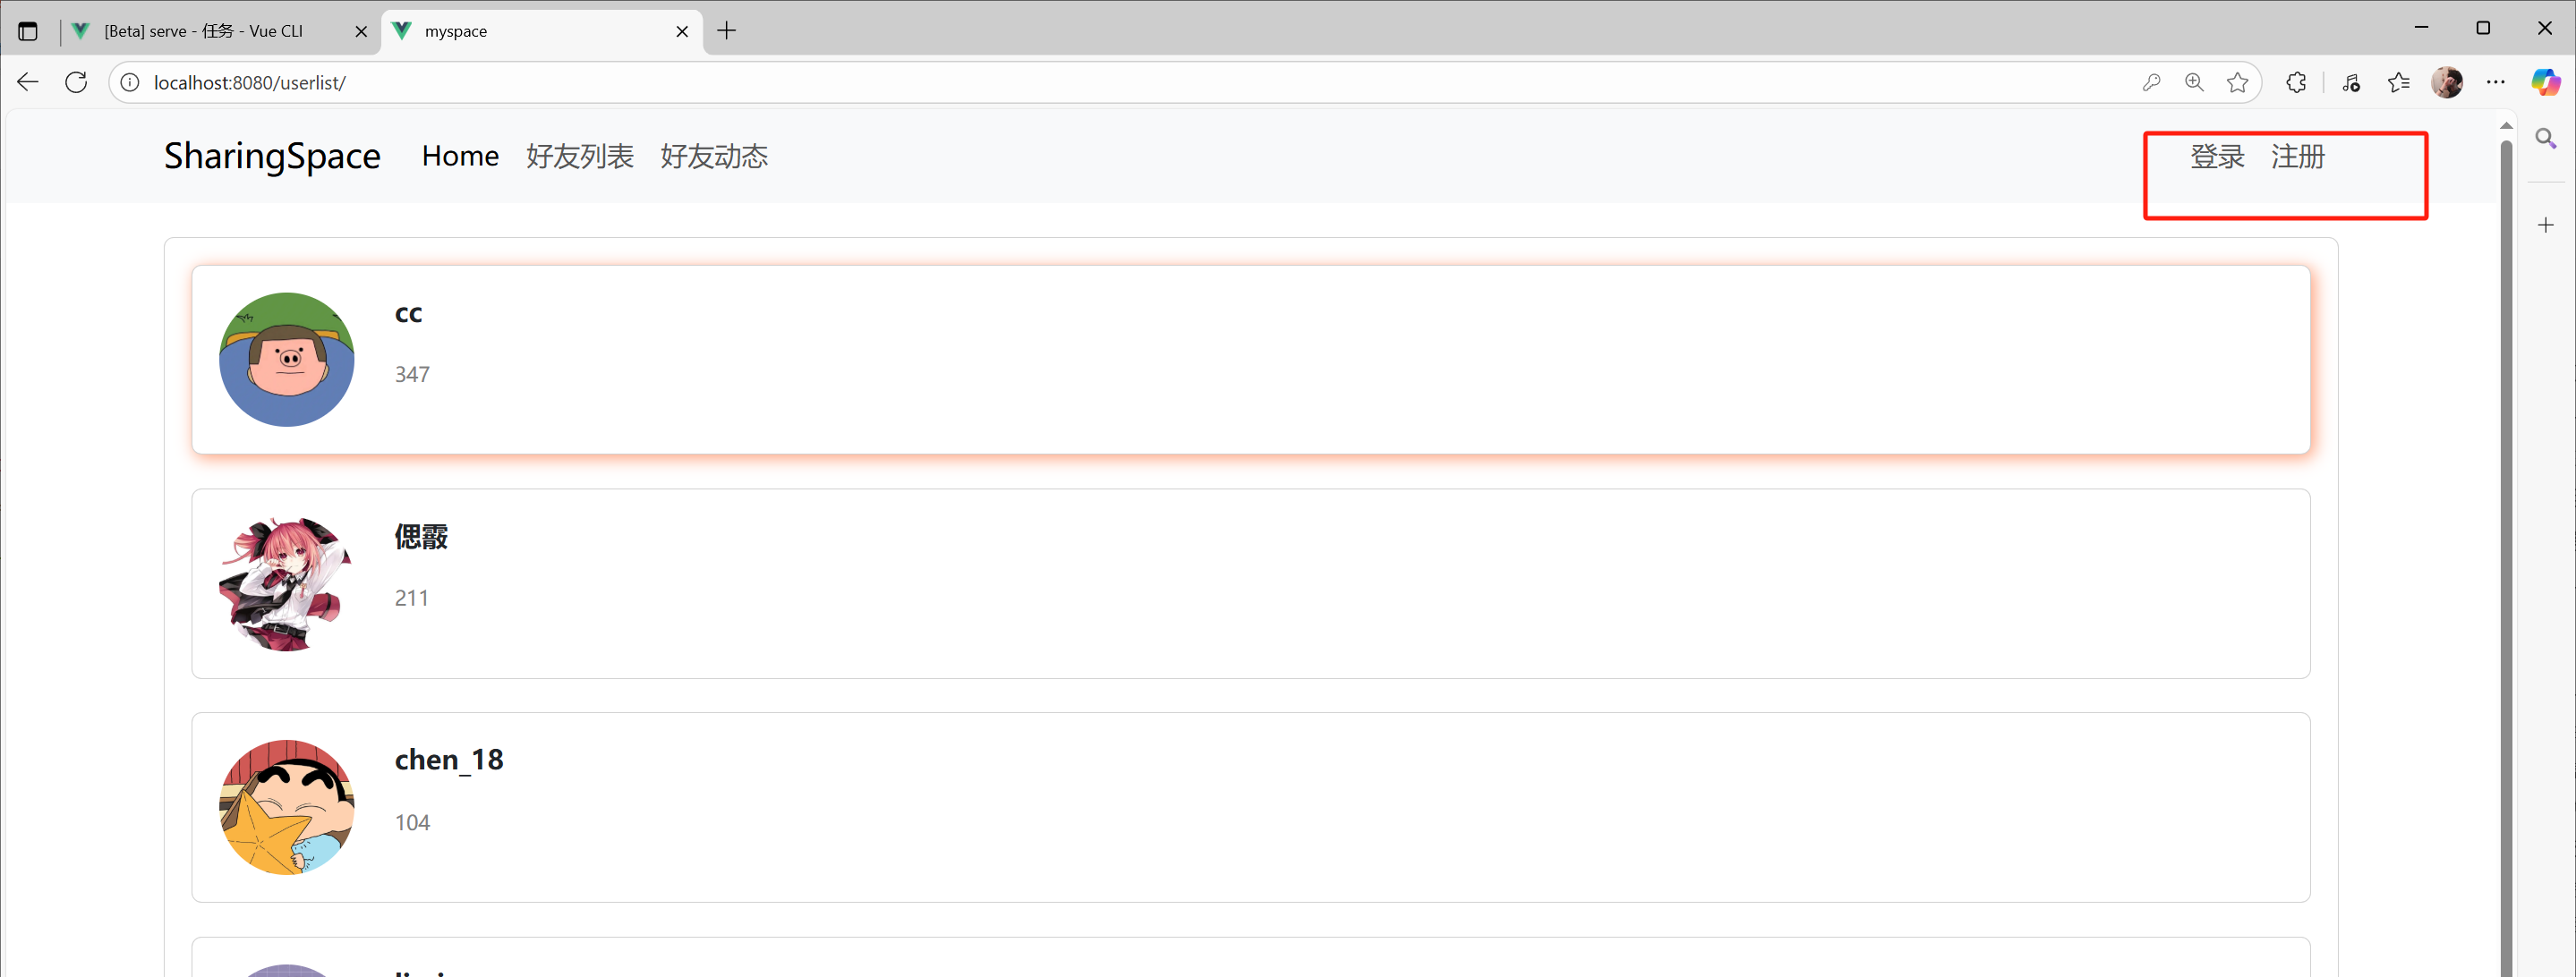
- 頁面效果:當登錄成功之后會跳轉到好友列表,右上角展示用戶名以及退出,點擊退出則展示登錄注冊
7)權限控制——只有登錄狀態才能查看自己和好友的個人空間以及發帖
- 1.先將用戶動態頁面從導航欄中刪除
- 2.在登錄后,點擊好友列表的其中一個,跳轉到對應的好友個人空間
/userprofile/userid:router.push({name: "name-userprofile", params: {userId}}); - 3.如果未登錄則跳轉到登錄界面:
router.push({name: "name-login"});
UserListView.vue:
<template><ContentBase><div class="card" v-for="user in users" :key="user.id" @click="click_userprofile(user.id)"><div class="card-body"><div class="row"><div class="col-1"><img class="img-fluid" v-bind:src="user.photo" alt=""></div><div class="col-11"><div class="username">{{ user.username }}</div><div class="followcount">{{ user.followerCount }}</div></div></div></div></div></ContentBase>
</template><script>
import ContentBase from '@/components/ContentBase.vue'
import $ from 'jquery';
import { ref } from 'vue';
import router from '@/router/index';
import { useStore } from 'vuex';export default {name: 'UserListView',components: {ContentBase},setup() {let users = ref([]);const store = useStore();$.ajax({url: 'https://app165.acapp.acwing.com.cn/myspace/userlist/',type: "GET",success(resp) {users.value = resp;}});const click_userprofile = userId => {if (store.state.user.is_login) {router.push({name: "name-userprofile",params: {userId: userId,},});} else {router.push({name: "name-login",});}};return {users,click_userprofile,};}
}
</script>
- 將該事件綁定到好友列表的card上,這樣當點擊其中一個card時,就會觸發該
click_userprofile(userId),根據card分配的user.id,傳入到路徑中,從而完成對應個人空間的跳轉
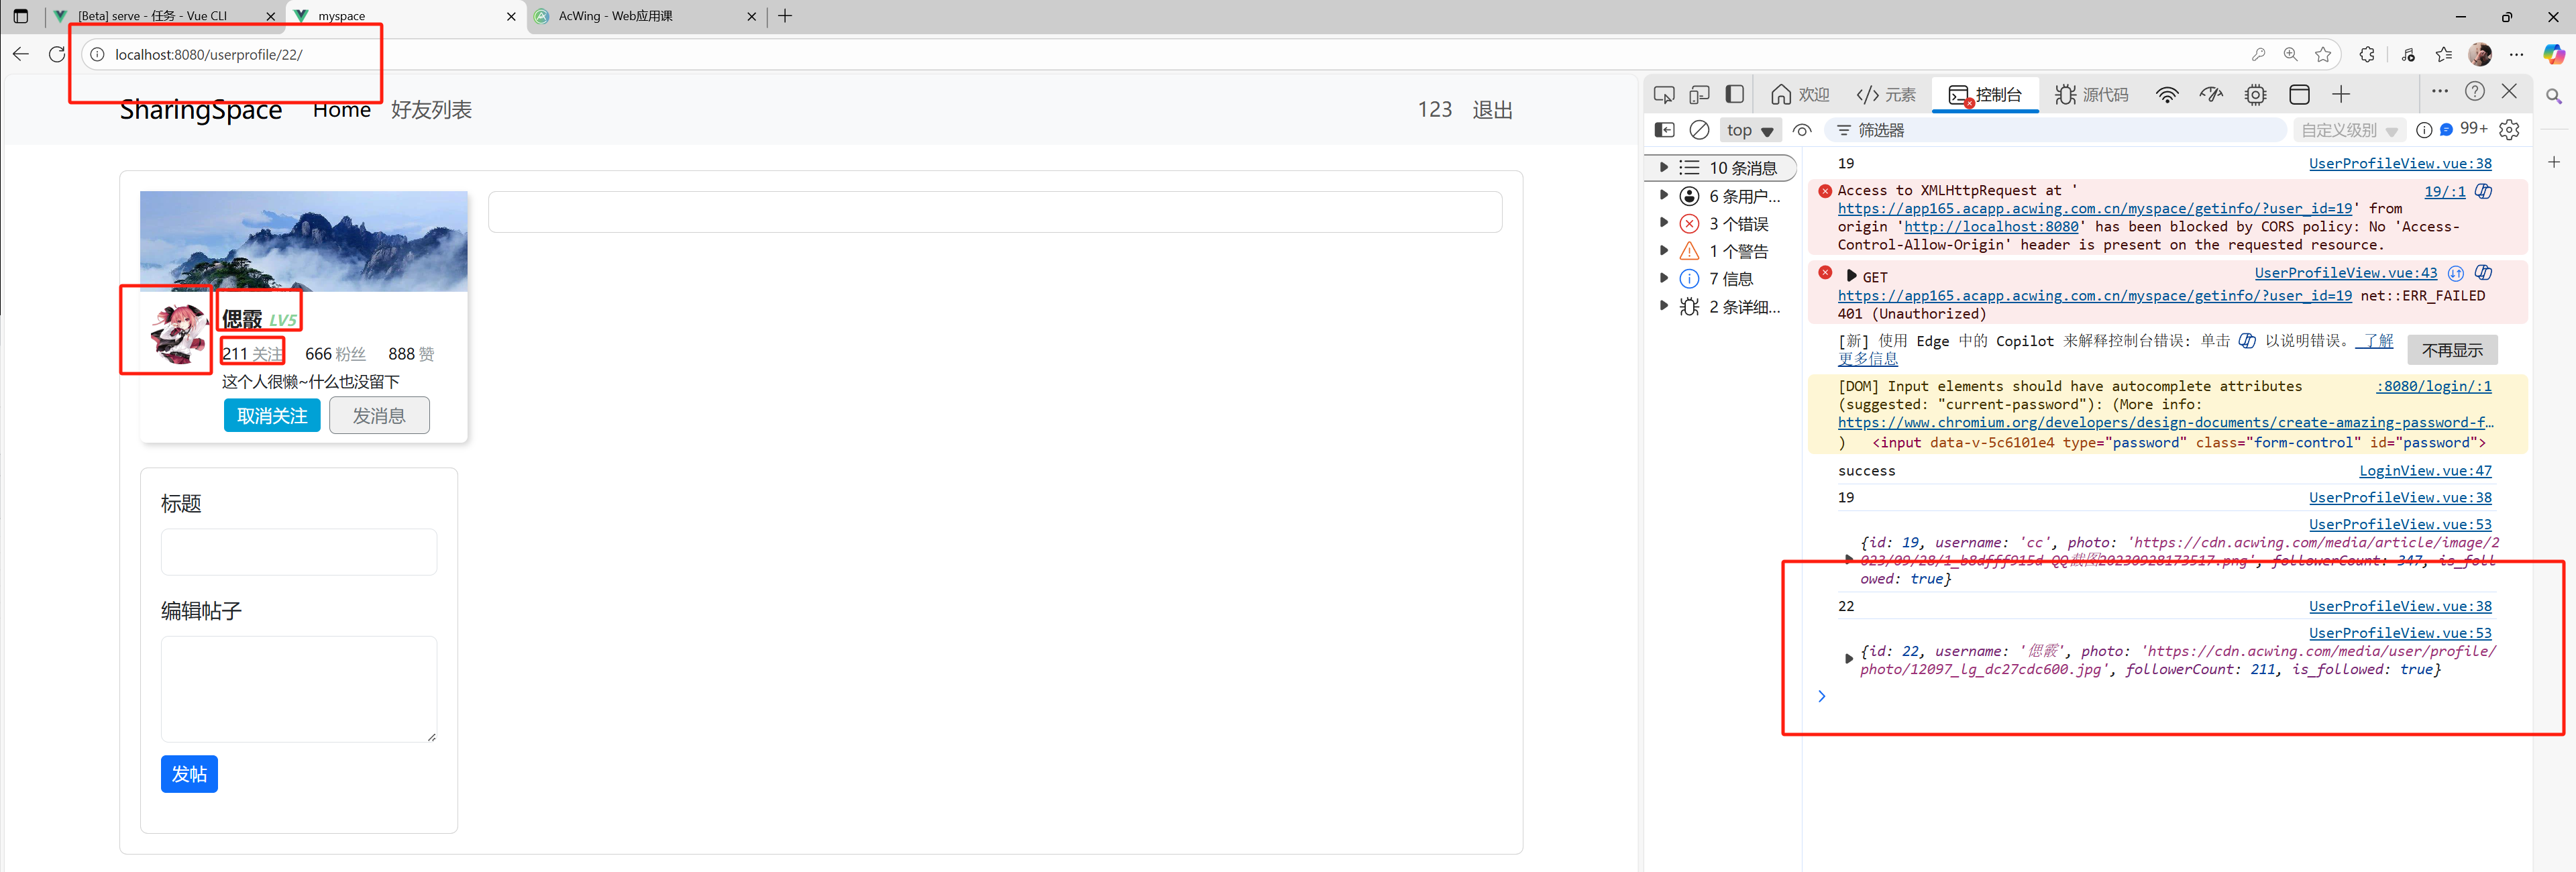
8)從云端動態拉取個人空間信息——點擊對應的好友跳轉到它的個人空間,展示是否關注以及粉絲數等信息
- 跳轉到每個用戶對應的
userprofile后,需要根據userId去向服務器發送獲取用戶信息請求
UserProfileView.vue: 主要展示拉取用戶信息的請求編寫
<script>
export default {name: 'UserProfileView',components: {ContentBase,UserInfo,UserProfileContent,UserEditProfileVue},setup() {const route = useRoute();const userId = route.params.userId;console.log(userId);const user = reactive({});const posts = reactive({});const store = useStore();$.ajax({url: "https://app165.acapp.acwing.com.cn/myspace/getinfo/",type: "GET",data: {user_id: userId,},headers: {'Authorization': "Bearer " + store.state.user.access,},success(resp) {console.log(resp);user.id = resp.id;user.username = resp.username;user.photo = resp.photo;user.followerCount = resp.followerCount;user.is_followed = resp.is_followed;},});}
}
</script>
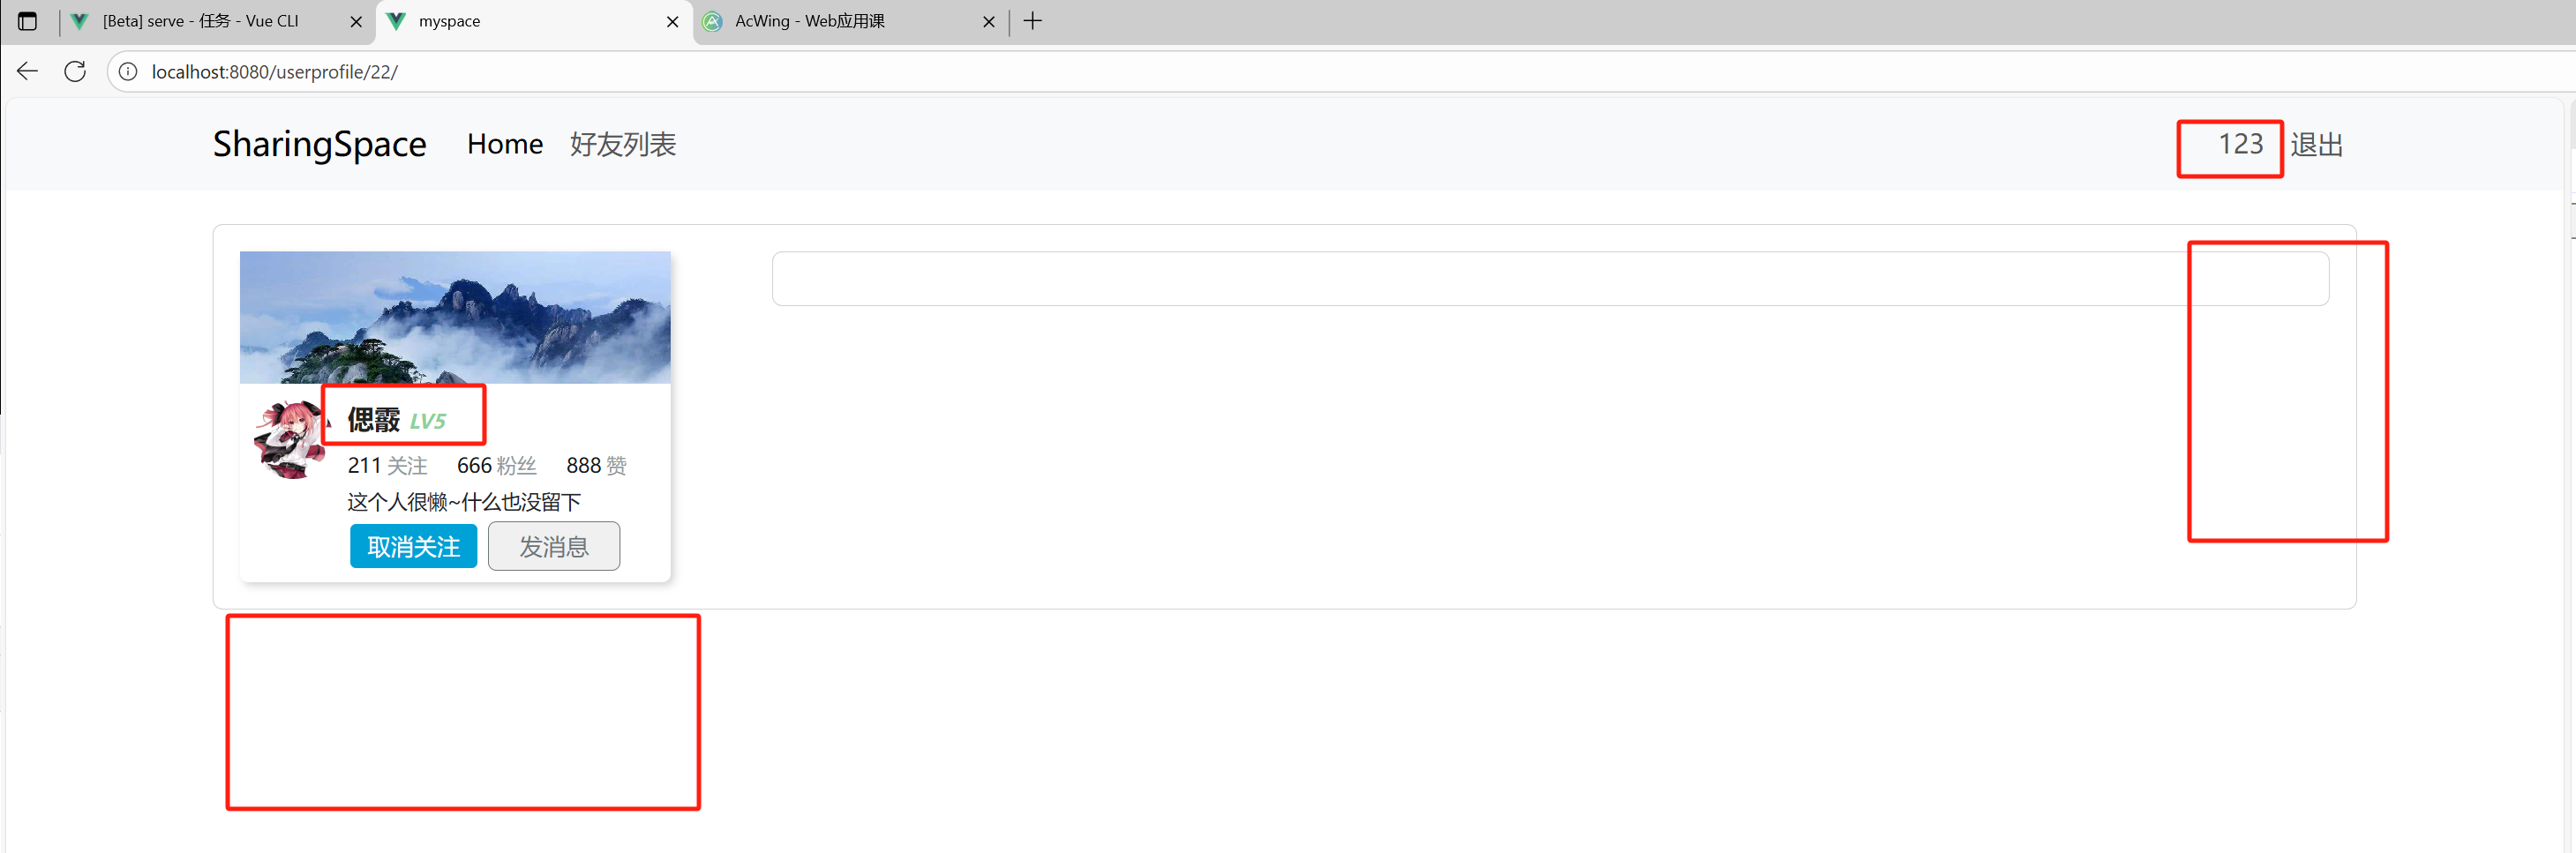
- 頁面效果:將對應的用戶信息拉取之后,就將里面的信息讀取到頁面對應的位置,由于這里的信息只包含username和關注數以及是否關注,粉絲數和獲贊數沒有,我就寫死為666和888了
9)發帖區如果是訪問的是個人空間則需要展示,好友空間則不展示
- 使用一個函數判斷:登錄的id:
store.state.user.id是否與當前訪問的id:userId是一樣的 - 如果一樣,展示發帖區,不一樣則不展示
UserProfileView.vue: 主要展示判斷邏輯以及使用v-if="is_me"邏輯
<template><ContentBase><div class="row"><div class="col-3"><UserInfo @follow="follow" @unfollow="unfollow" :user="user"/><UserEditProfileVue v-if="is_me" @submit_post="submit_post"/></div><div class="col-9"><UserProfileContent :posts="posts" /></div></div></ContentBase>
</template><script>
export default {name: 'UserProfileView',components: {ContentBase,UserInfo,UserProfileContent,UserEditProfileVue},setup() {const route = useRoute();const userId = parseInt(route.params.userId);console.log(userId);const user = reactive({});const posts = reactive({});const store = useStore();console.log(userId, store.state.user.id);const is_me = computed(() => userId === store.state.user.id);return {user: user,follow,unfollow,posts,submit_post,is_me,}}
}
</script>
- 頁面效果:

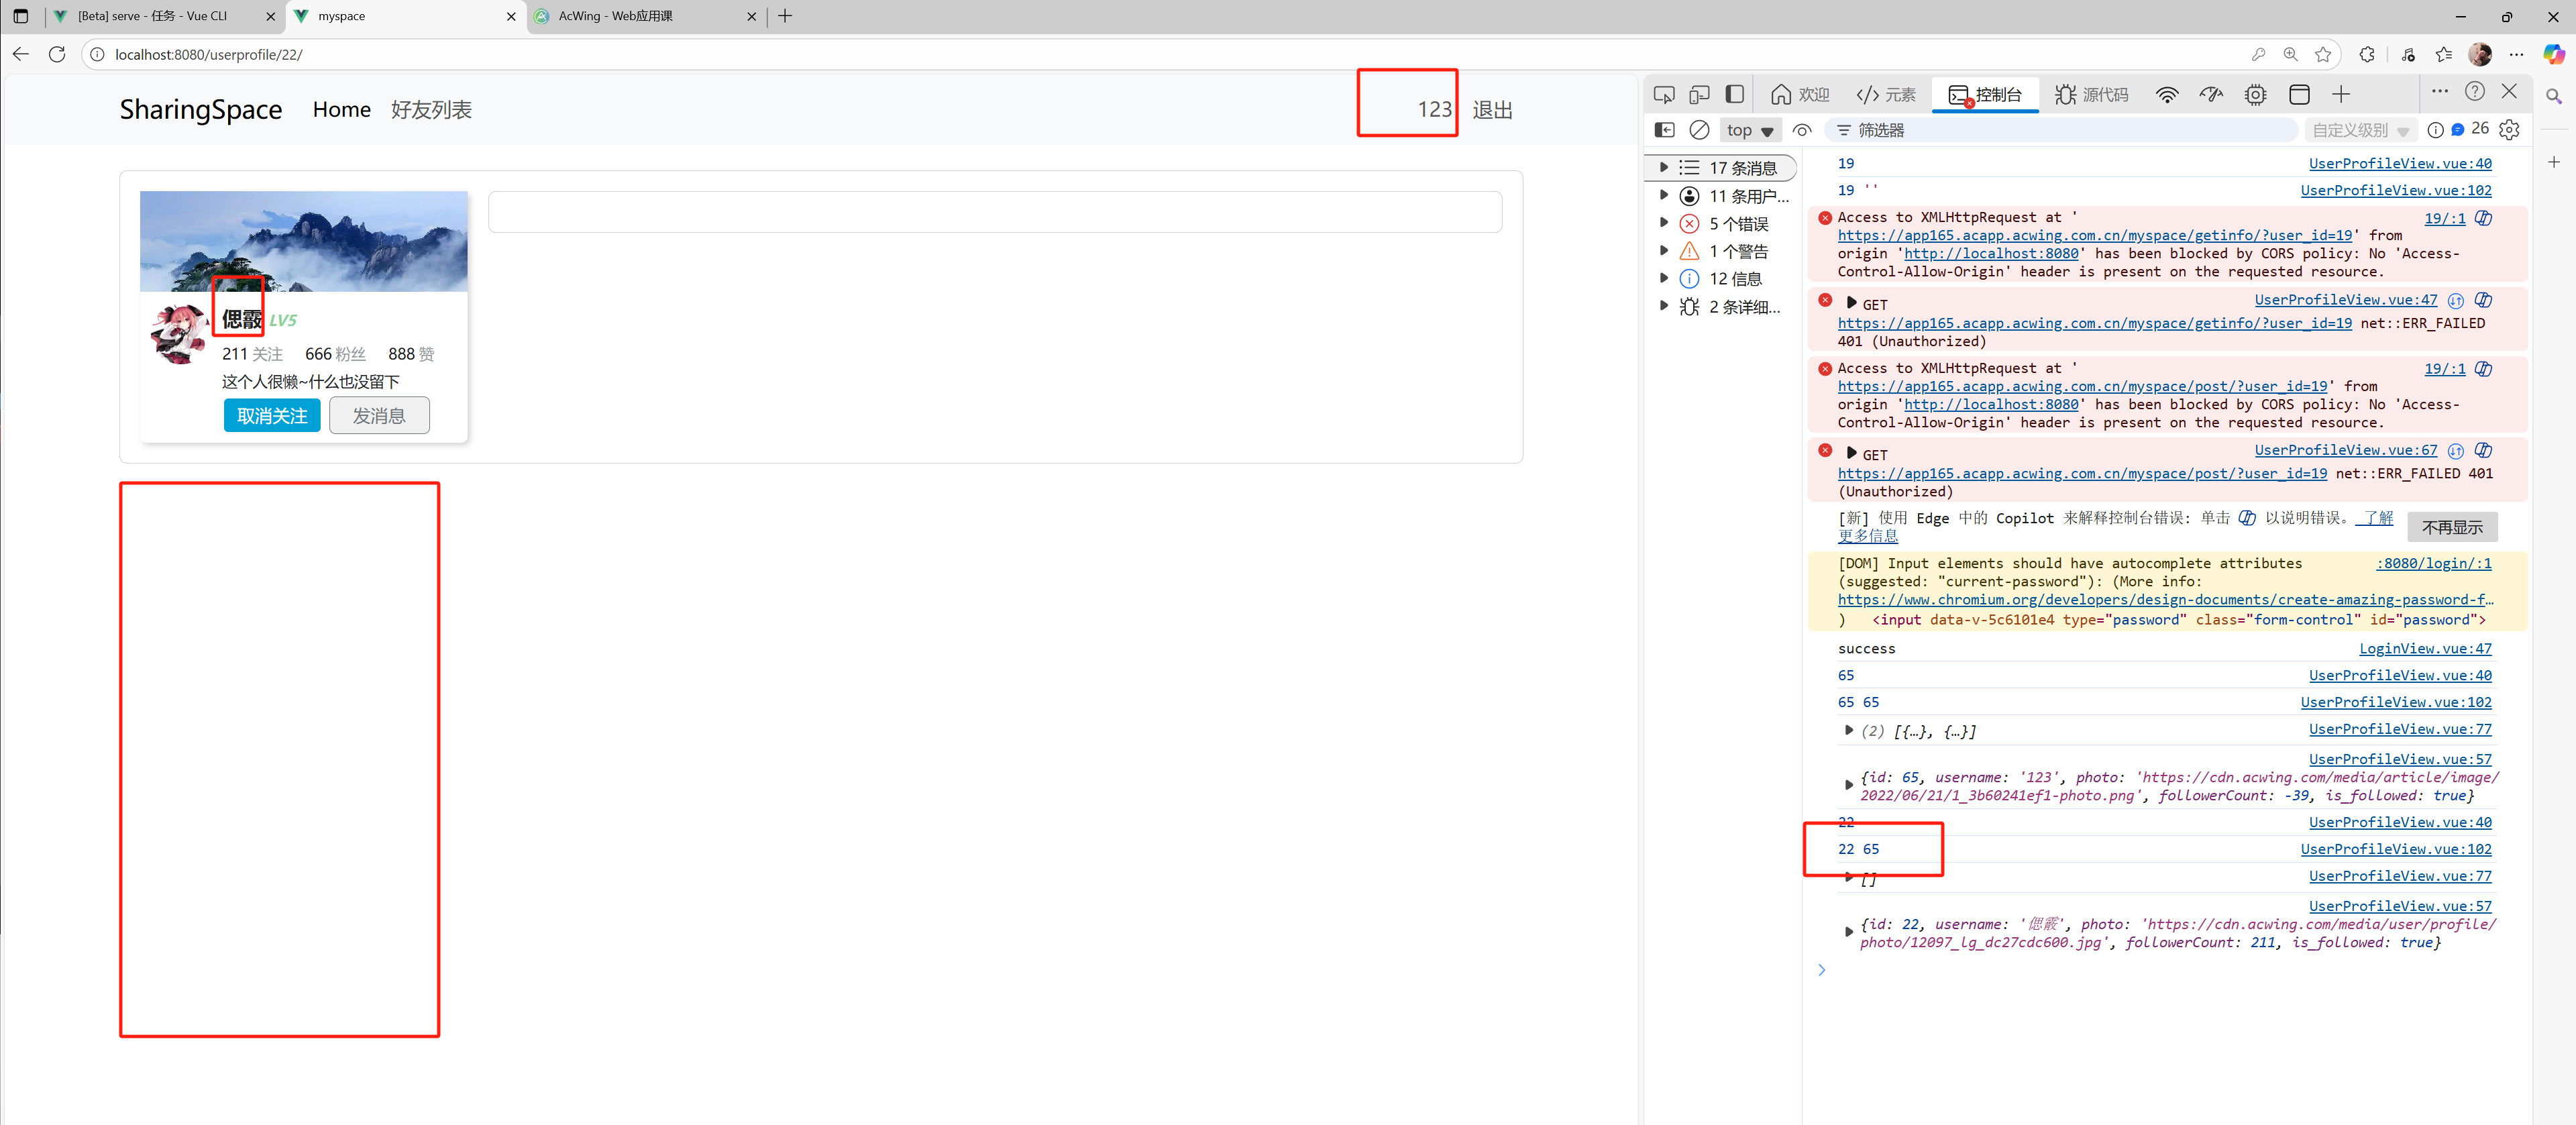
- 當點擊的是登錄者時,展示發貼區,其他好友空間則不展示
小bug:當進入好友空間點擊個人空間時,則不會跳轉到用戶的個人空間
- 這是因為在路徑相同,參數不同時,會默認認為是同一個路徑,不會進行判重,比如:
userprofile/22和userprofile/65,默認為是同一個路徑,所以不跳轉 - 在route上加入
:key="$route.fullPath",使得他以全路徑名來判重,這樣參數不同,他就會識別為不同的路徑,從而完成跳轉
<template><NavBar/><router-view :key="$route.fullPath"/>
</template><script>
import 'bootstrap/dist/css/bootstrap.css';
import 'bootstrap/dist/js/bootstrap.js';
import NavBar from './components/NavBar.vue';export default {name: "App",components: {NavBar: NavBar,}
}
</script>
<style>
</style>
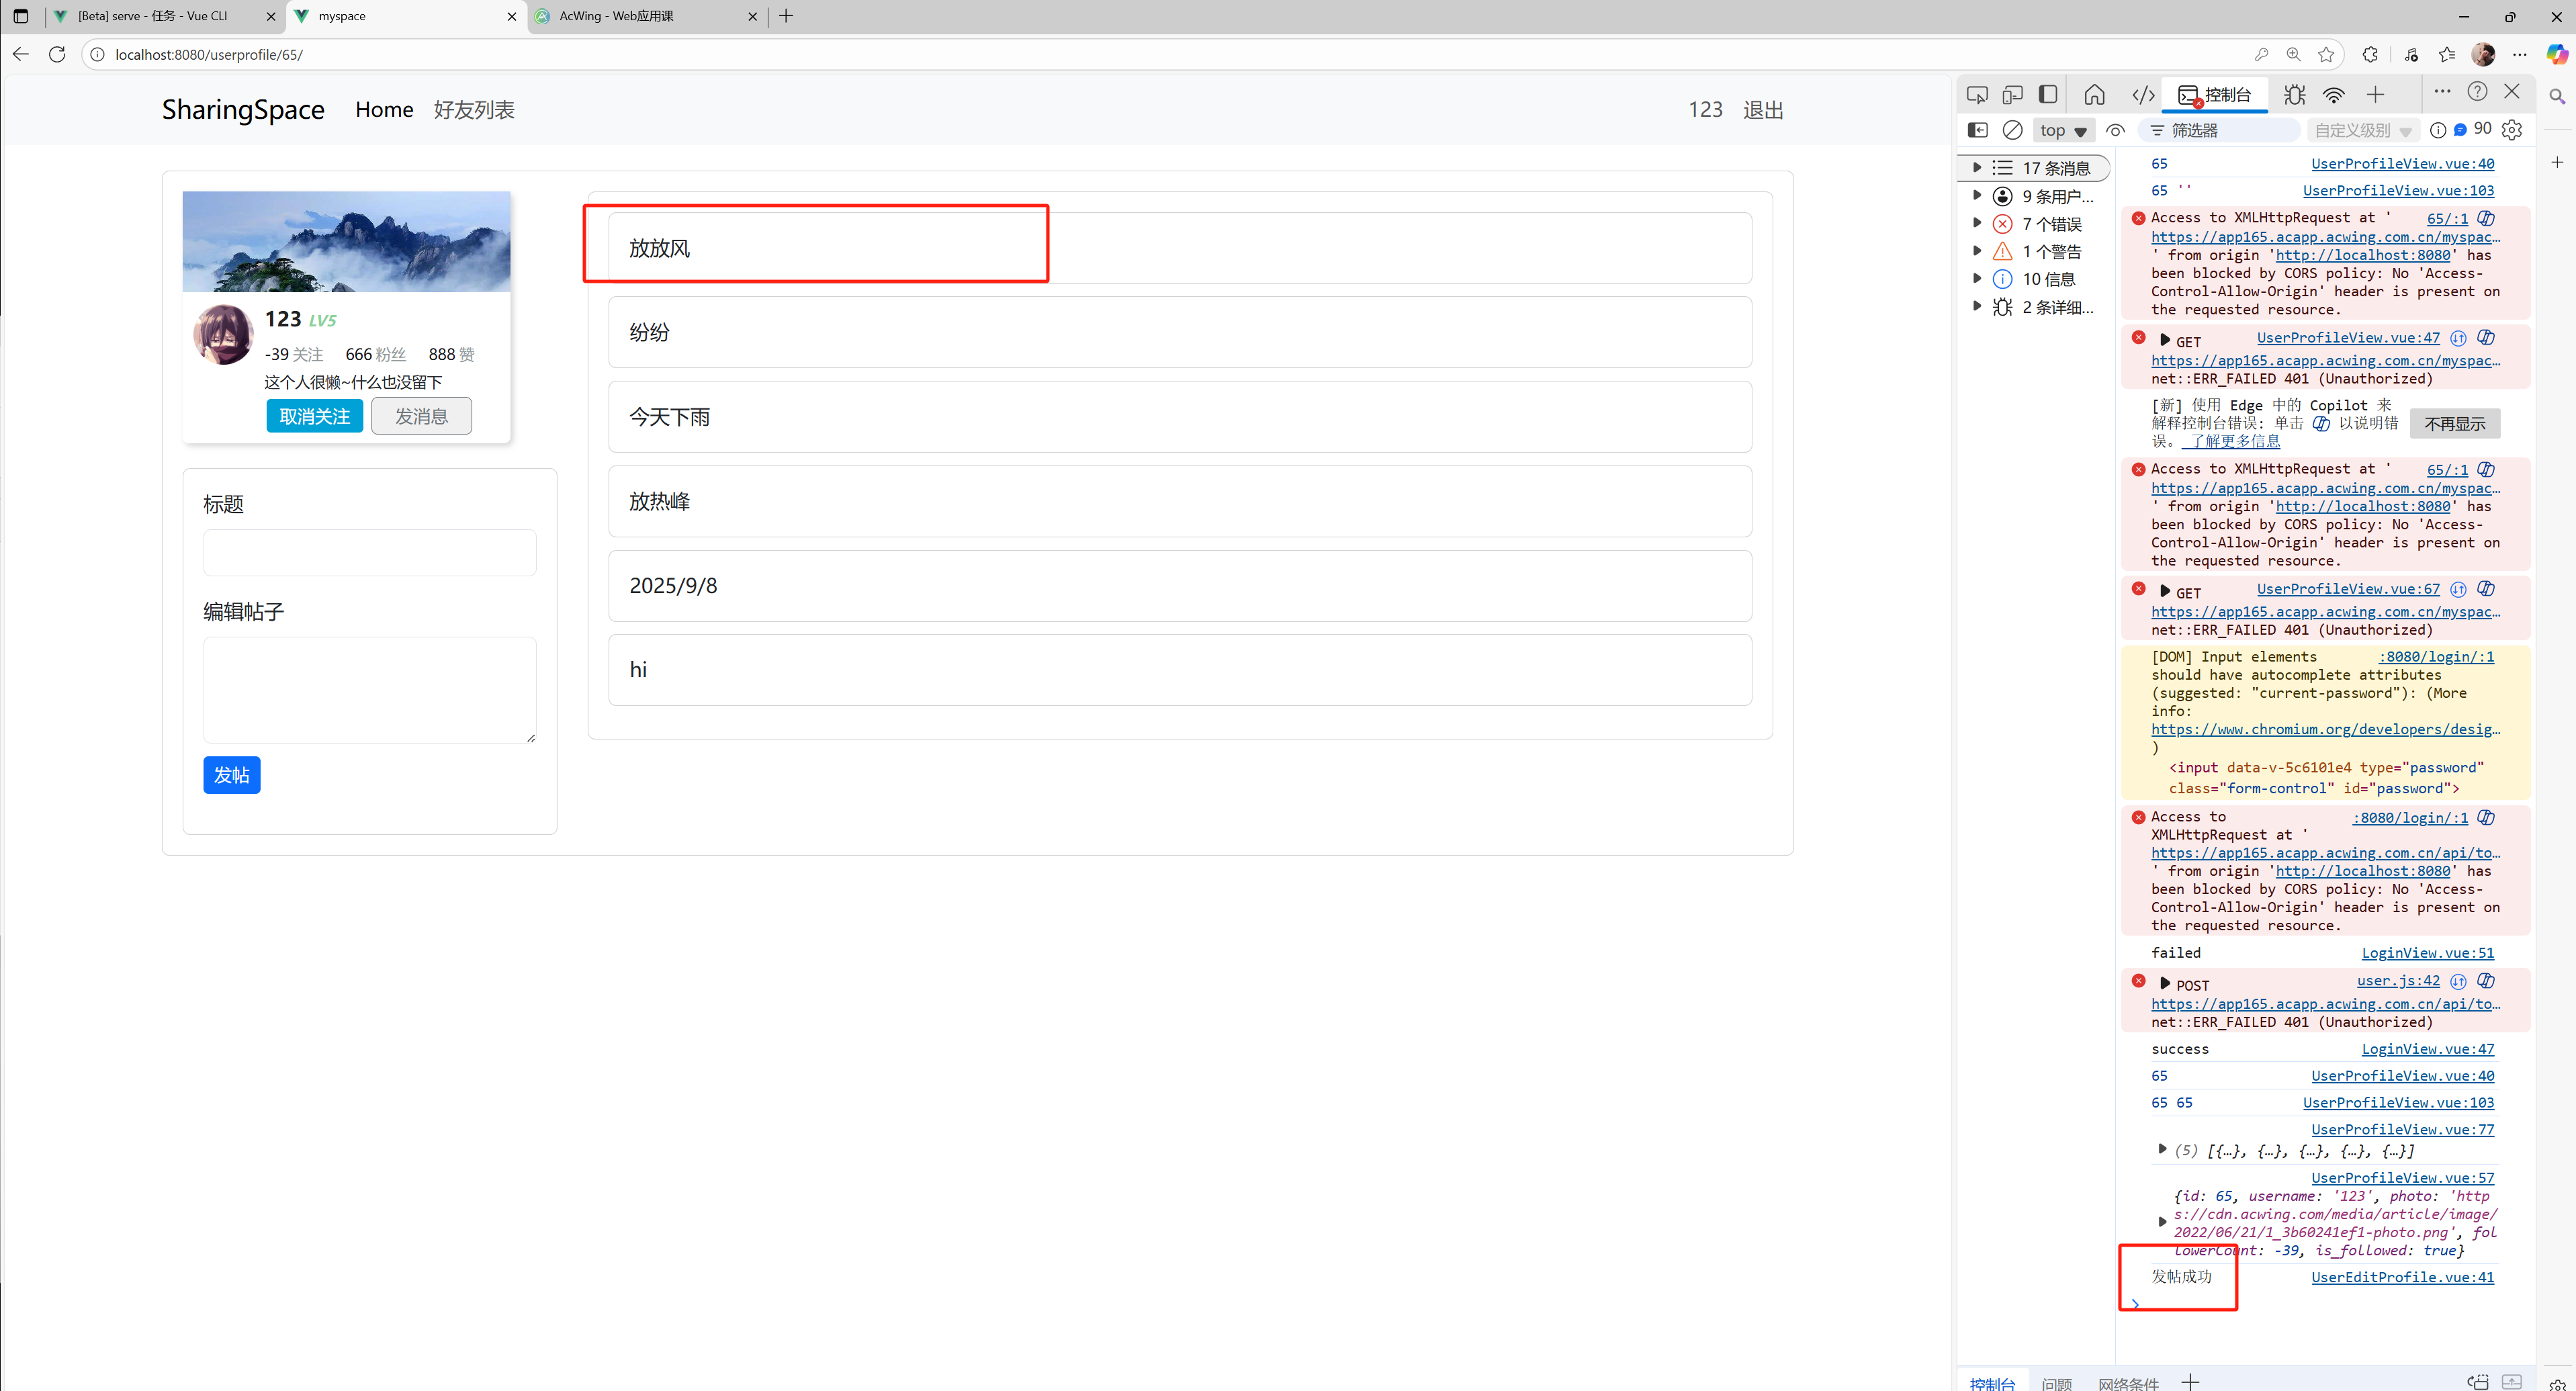
10)動態添加帖子——編輯帖子之后發送POST請求,完成帖子的添加
- 在自己的空間中編輯一個貼子,然后點擊發布,則需要向服務器發送發帖請求
- 請求通過之后則完成編輯區內容賦值給
content并清空編輯區
UserEditProfile.vue:
<template><div class="card edit-field"><div class="card-body"><div class="mb-3"><label for="edit-title" class="form-label">標題</label><input type="email" class="form-control" id="exampleFormControlInput1"></div><div class="mb-3"><label for="edit-post" class="form-label">編輯帖子</label><textarea v-model="content" class="form-control" id="exampleFormControlTextarea1" rows="3"></textarea><button @click="submit_post" type="button" class="btn btn-primary btn-sm" >發帖</button></div></div></div>
</template><script>
import { ref } from 'vue';
import $ from 'jquery';
import { useStore } from 'vuex';export default {name: "UserEditProfile",setup(props, context) {const store = useStore();let content = ref('');const submit_post = () => {$.ajax({url: "https://app165.acapp.acwing.com.cn/myspace/post/",type: "POST",data: {content: content.value,},headers: {'Authorization': "Bearer " + store.state.user.access, },success(resp) {if (resp.result === "success") {context.emit("submit_post", content.value);content.value = "";}},});}return {content,submit_post,}}
}
</script><style scoped>.edit-field {margin-top: 20px;
}
button {margin-top: 10px;
}
</style>
- 發帖展示:
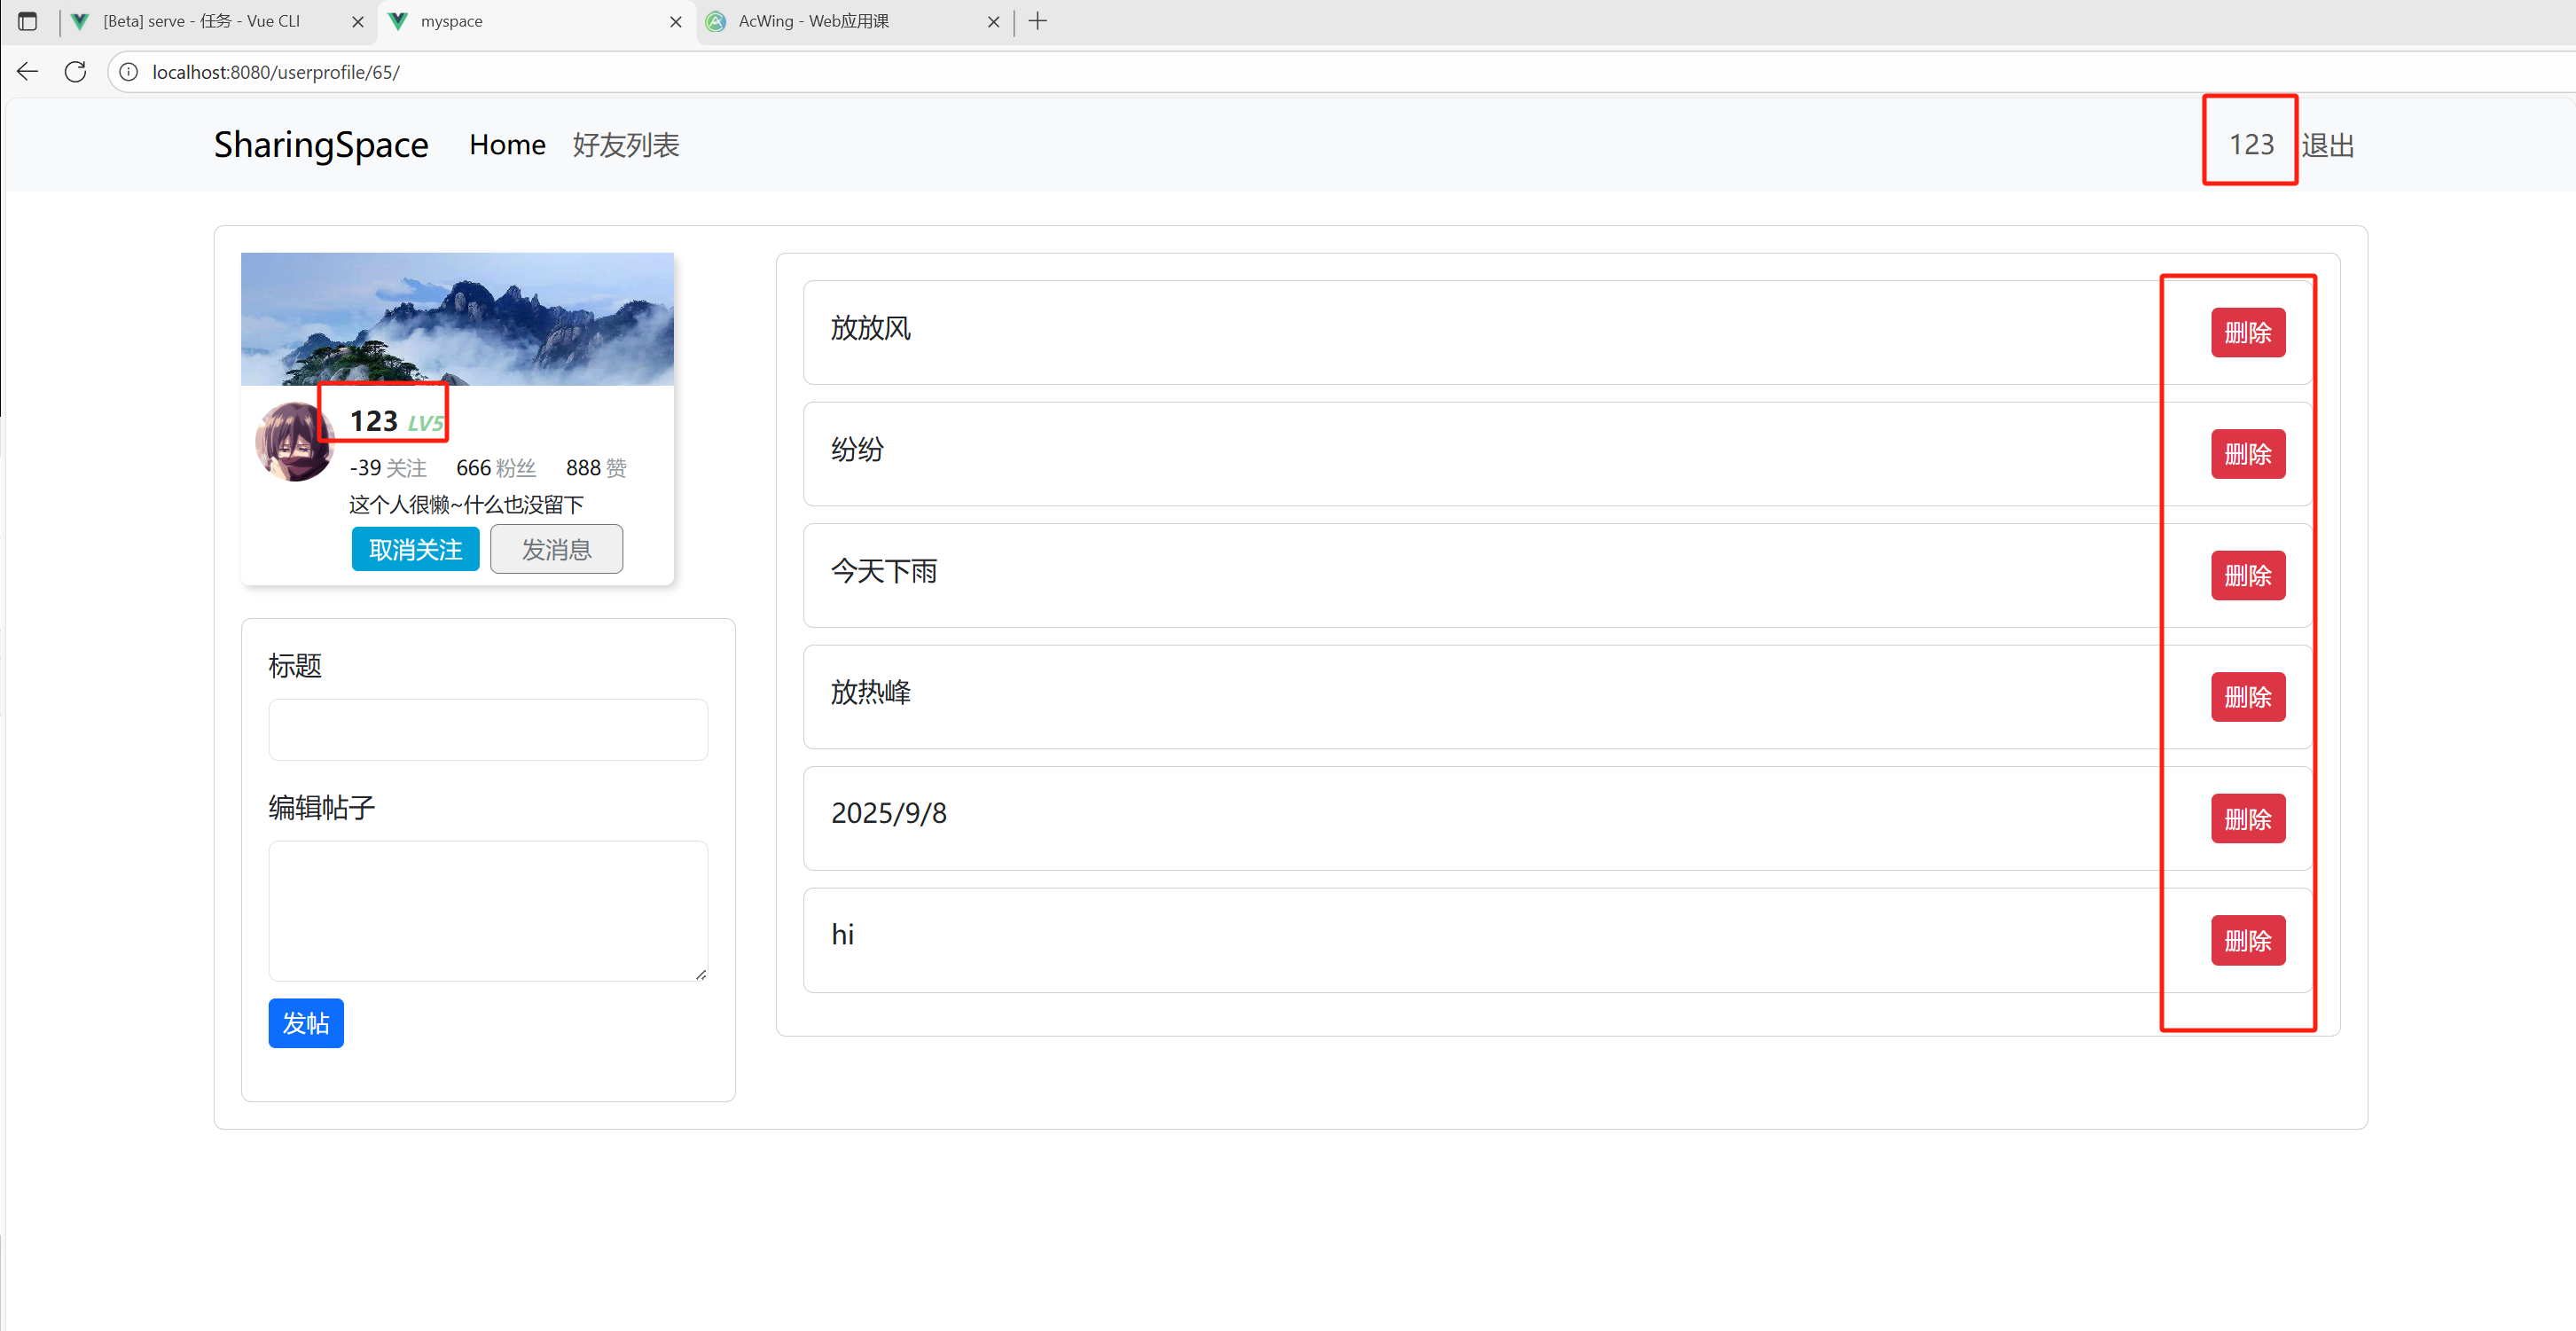
11)刪除帖子——進入自己的空間之后,可以刪除對應的帖子
- 增加刪除按鈕,用于刪除對應的帖子
- 需要特判:如果是自己的空間才展示刪除按鈕,如果不是則不展示
UserProfileContent.vue: 需要傳入user用于獲取當前登錄的用戶id
<template><div class="card"><div class="card-body"><div v-for="post in posts.posts" :key="post.id"><div class="card single-post"><div class="card-body">{{ post.content }}<button type="button" v-if="is_myself" class="btn btn-danger btn-sm">刪除</button></div></div></div></div></div>
</template><script>import { useStore } from 'vuex';
import { computed } from 'vue';export default {name: "UserProfileContent",props: {posts: {type: Object,required: true,},user: {type: Object,required: true,}},setup(props) {const store = useStore();let is_myself = computed(() => store.state.user.id === props.user.id);return {is_myself,}}
}
</script>
<style scoped>
.single-post {margin-bottom: 10px;
}button {float: right;
}
</style>
- 自己的空間展示刪除按鈕:
- 不是自己的空間則不展示:
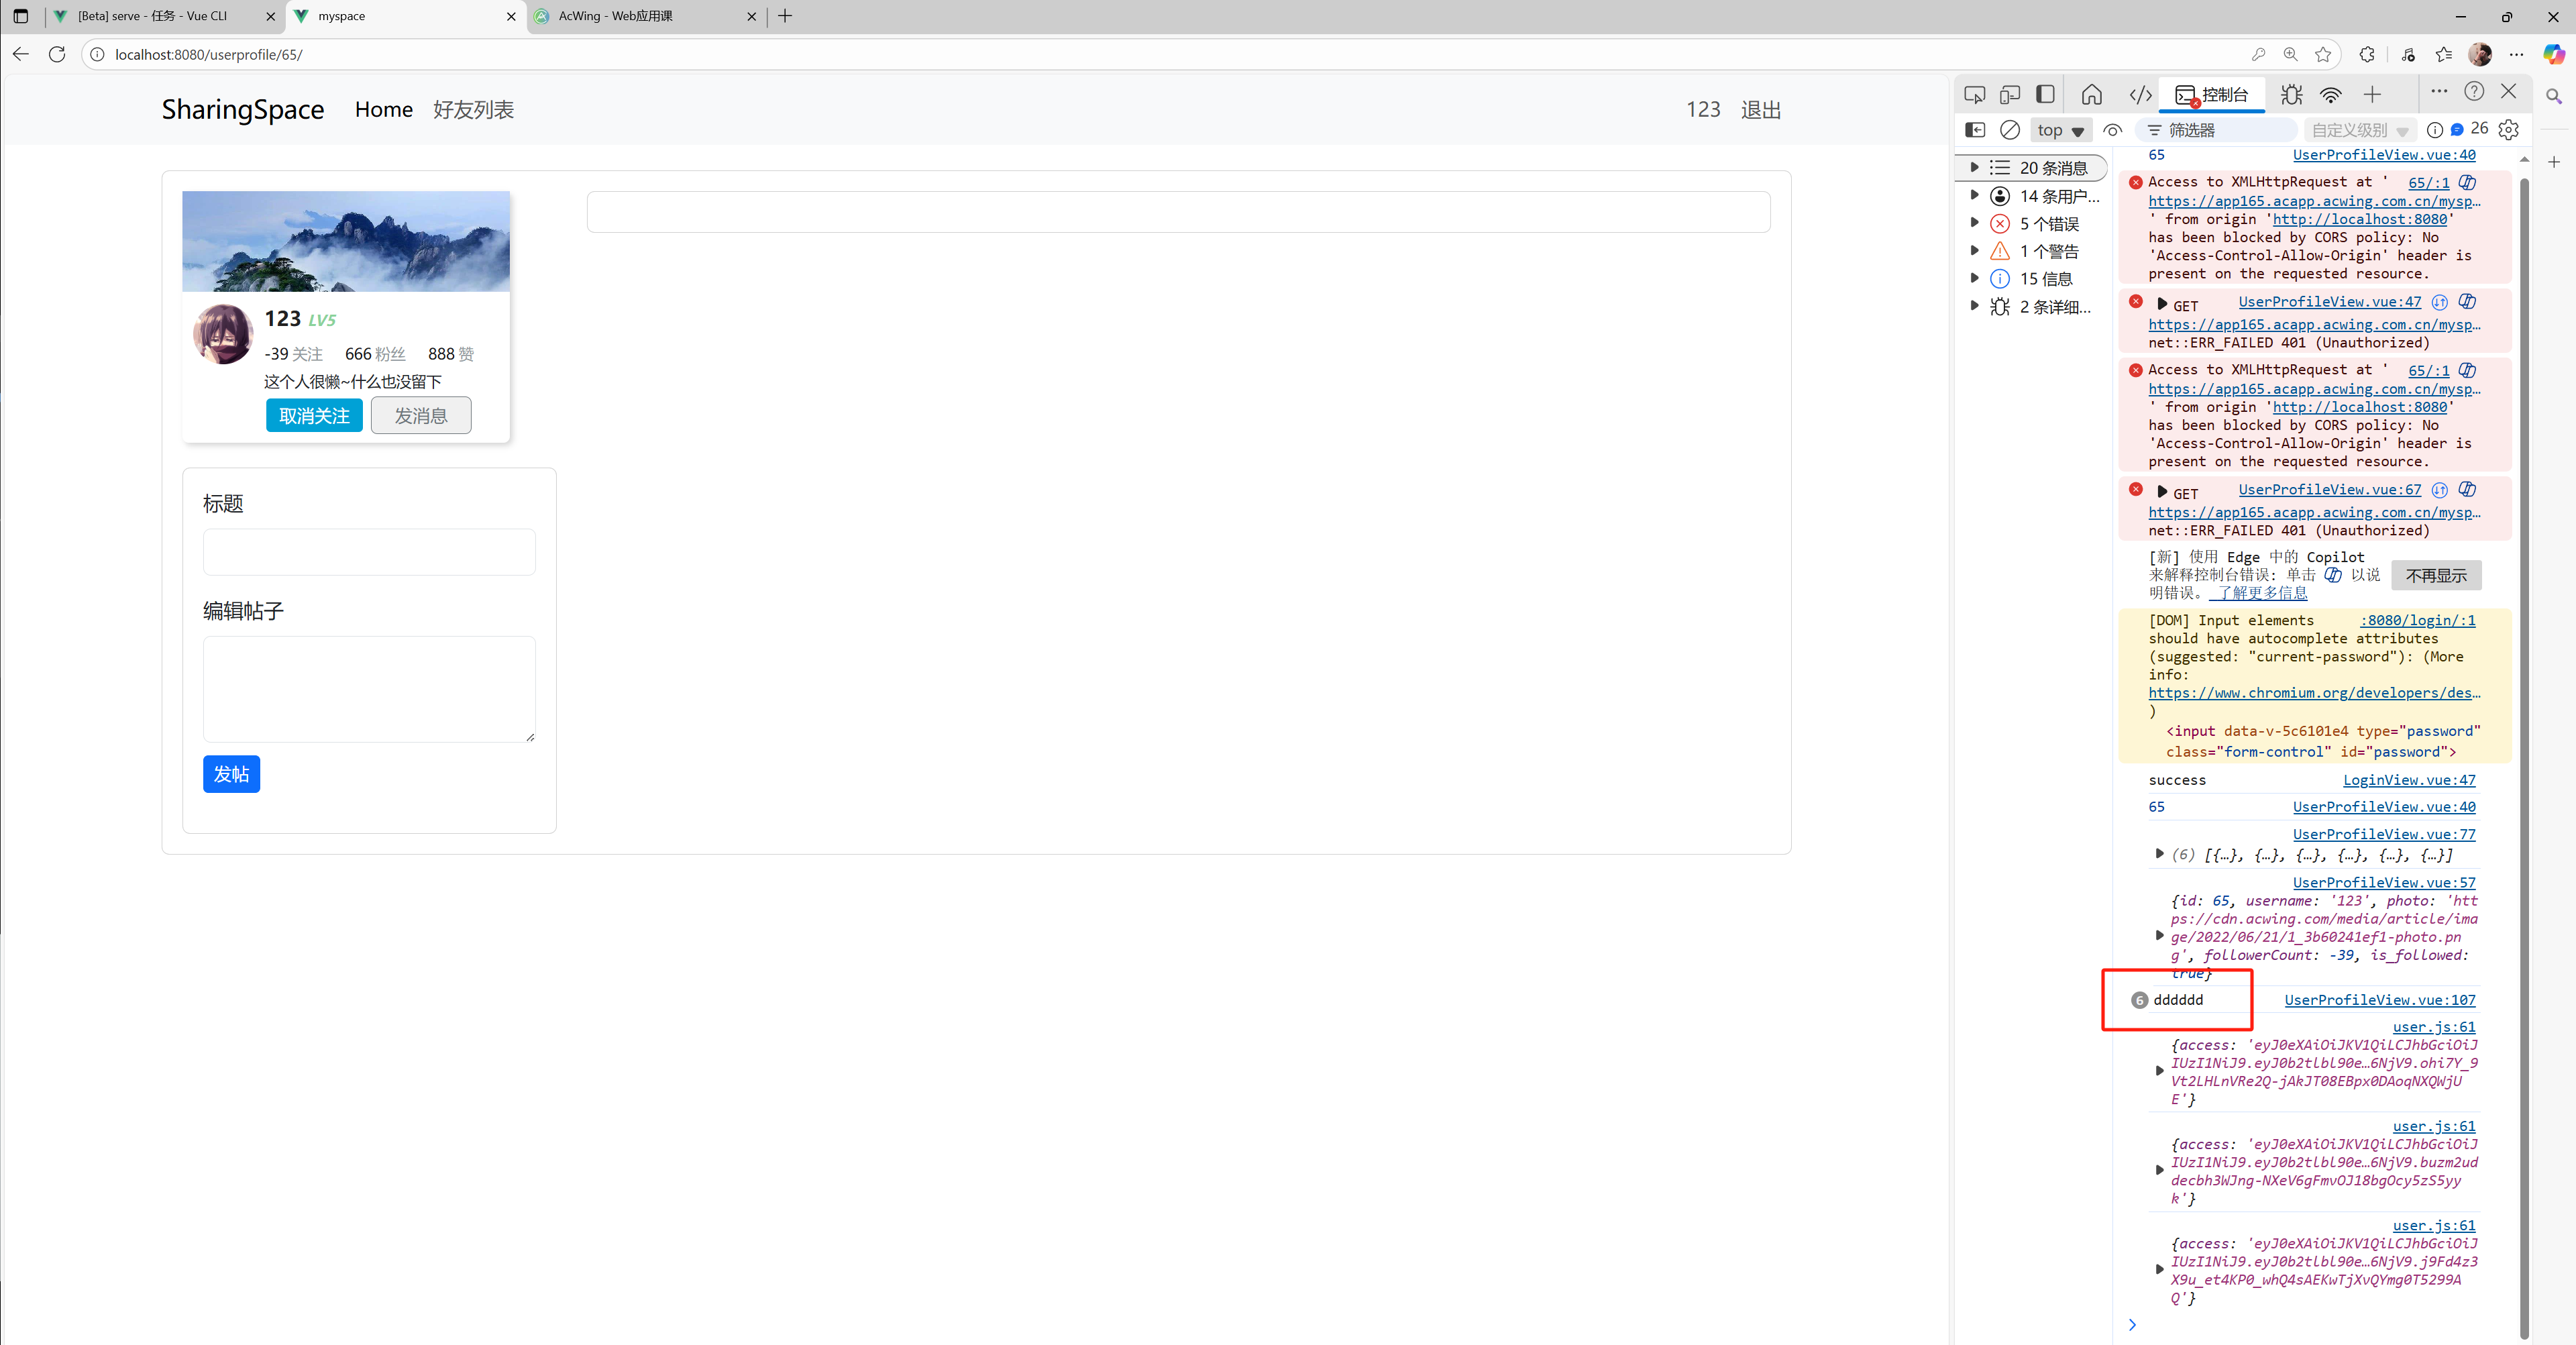
1.前端刪除邏輯——點擊帖子,獲取帖子的id,然后從帖子列表中將該帖子id對應的帖子刪除
- 在因為帖子數組posts是定義在
UserProfile中,需要修改帖子的話需要在這個組件中完成帖子的實際刪除 - 但是具體的帖子是由
UserProfileContent管理并展示的,這就需要父組件UserProfile將刪除函數傳遞給子組件UserProfileContent,使得子組件能夠觸發該函數 - 所以我們的刪除邏輯就是在
UserProfileContent組件中,點擊某個帖子的刪除鍵時,獲取到該帖子的post.id,并觸發刪除帖子的函數,傳入刪除的該帖子id - 而具體的帖子刪除是在父組件的
delete_post中,于是我們在子組件UserProfileContent中定義它的delete_post,當點擊刪除時,觸發該函數,在該函數觸發后,會觸發父組件傳過來的真正的delete_post函數
UserProfileView.vue: 具體的帖子刪除
<template><ContentBase><div class="row"><div class="col-3"><UserInfo @follow="follow" @unfollow="unfollow" :user="user"/><UserEditProfileVue v-if="is_me" @submit_post="submit_post"/></div><div class="col-9"><UserProfileContent :user="user" :posts="posts" @delete_post="delete_post"/></div></div></ContentBase>
</template><script>export default {name: 'UserProfileView',components: {ContentBase,UserInfo,UserProfileContent,UserEditProfileVue},setup() {const route = useRoute();const userId = parseInt(route.params.userId);console.log(userId);const user = reactive({});const posts = reactive({});const store = useStore();//點擊一個post時,獲取到它的post_id,將該post從posts中過濾掉const delete_post = post_id => {//返回true則保留,否則過濾掉,當傳入的post_id跟數組中的post.id相同時過濾console.log("dddddd");posts.posts = posts.posts.filter(post => post.id !== post_id);posts.count = posts.posts.length;};const is_me = computed(() => userId === store.state.user.id);return {user: user,follow,unfollow,posts,submit_post,is_me,delete_post,}}
}
</script>
<style scoped>
</style>
UserProfileContent.vue:通過觸發父組件傳遞的函數從而使得父組件完成帖子刪除
<template><div class="card"><div class="card-body"><div v-for="post in posts.posts" :key="post.id"><div class="card single-post"><div class="card-body">{{ post.content }}<button @click="delete_post(post.id)" type="button" v-if="is_myself" class="btn btn-danger btn-sm">刪除</button></div></div></div></div></div>
</template><script>import { useStore } from 'vuex';
import { computed } from 'vue';export default {name: "UserProfileContent",props: {posts: {type: Object,required: true,},user: {type: Object,required: true,}},setup(props, context) {const store = useStore();let is_myself = computed(() => store.state.user.id === props.user.id);const delete_post  = post_id => {context.emit('delete_post', post_id);};return {is_myself,delete_post,}}
}
</script><style scoped>
.single-post {margin-bottom: 10px;
}button {float: right;
}
</style>
- 頁面效果:點擊刪除時能夠從前端展示中將該帖子刪除
2.刪除時向后端發送刪除請求——從數據庫中真正刪除該帖子
- 通過發送刪除帖子的請求,將該帖子真正從數據庫刪除
UserProfileContent.vue:
<script>
import { useStore } from 'vuex';
import { computed } from 'vue';
import $ from 'jquery';export default {name: "UserProfileContent",props: {posts: {type: Object,required: true,},user: {type: Object,required: true,}},setup(props, context) {const store = useStore();let is_myself = computed(() => store.state.user.id === props.user.id);const delete_post  = post_id => {$.ajax({url: "https://app165.acapp.acwing.com.cn/myspace/post/",type: "DELETE",data: {post_id: post_id,},headers: {'Authorization': "Bearer " + store.state.user.access,},success(resp) {if (resp.result === "success") {context.emit('delete_post', post_id);}}});};return {is_myself,delete_post,}}
}
</script>
12)注冊功能
-
與登錄功能類似,直接向服務器發送注冊請求,傳入用戶名、密碼和確認密碼
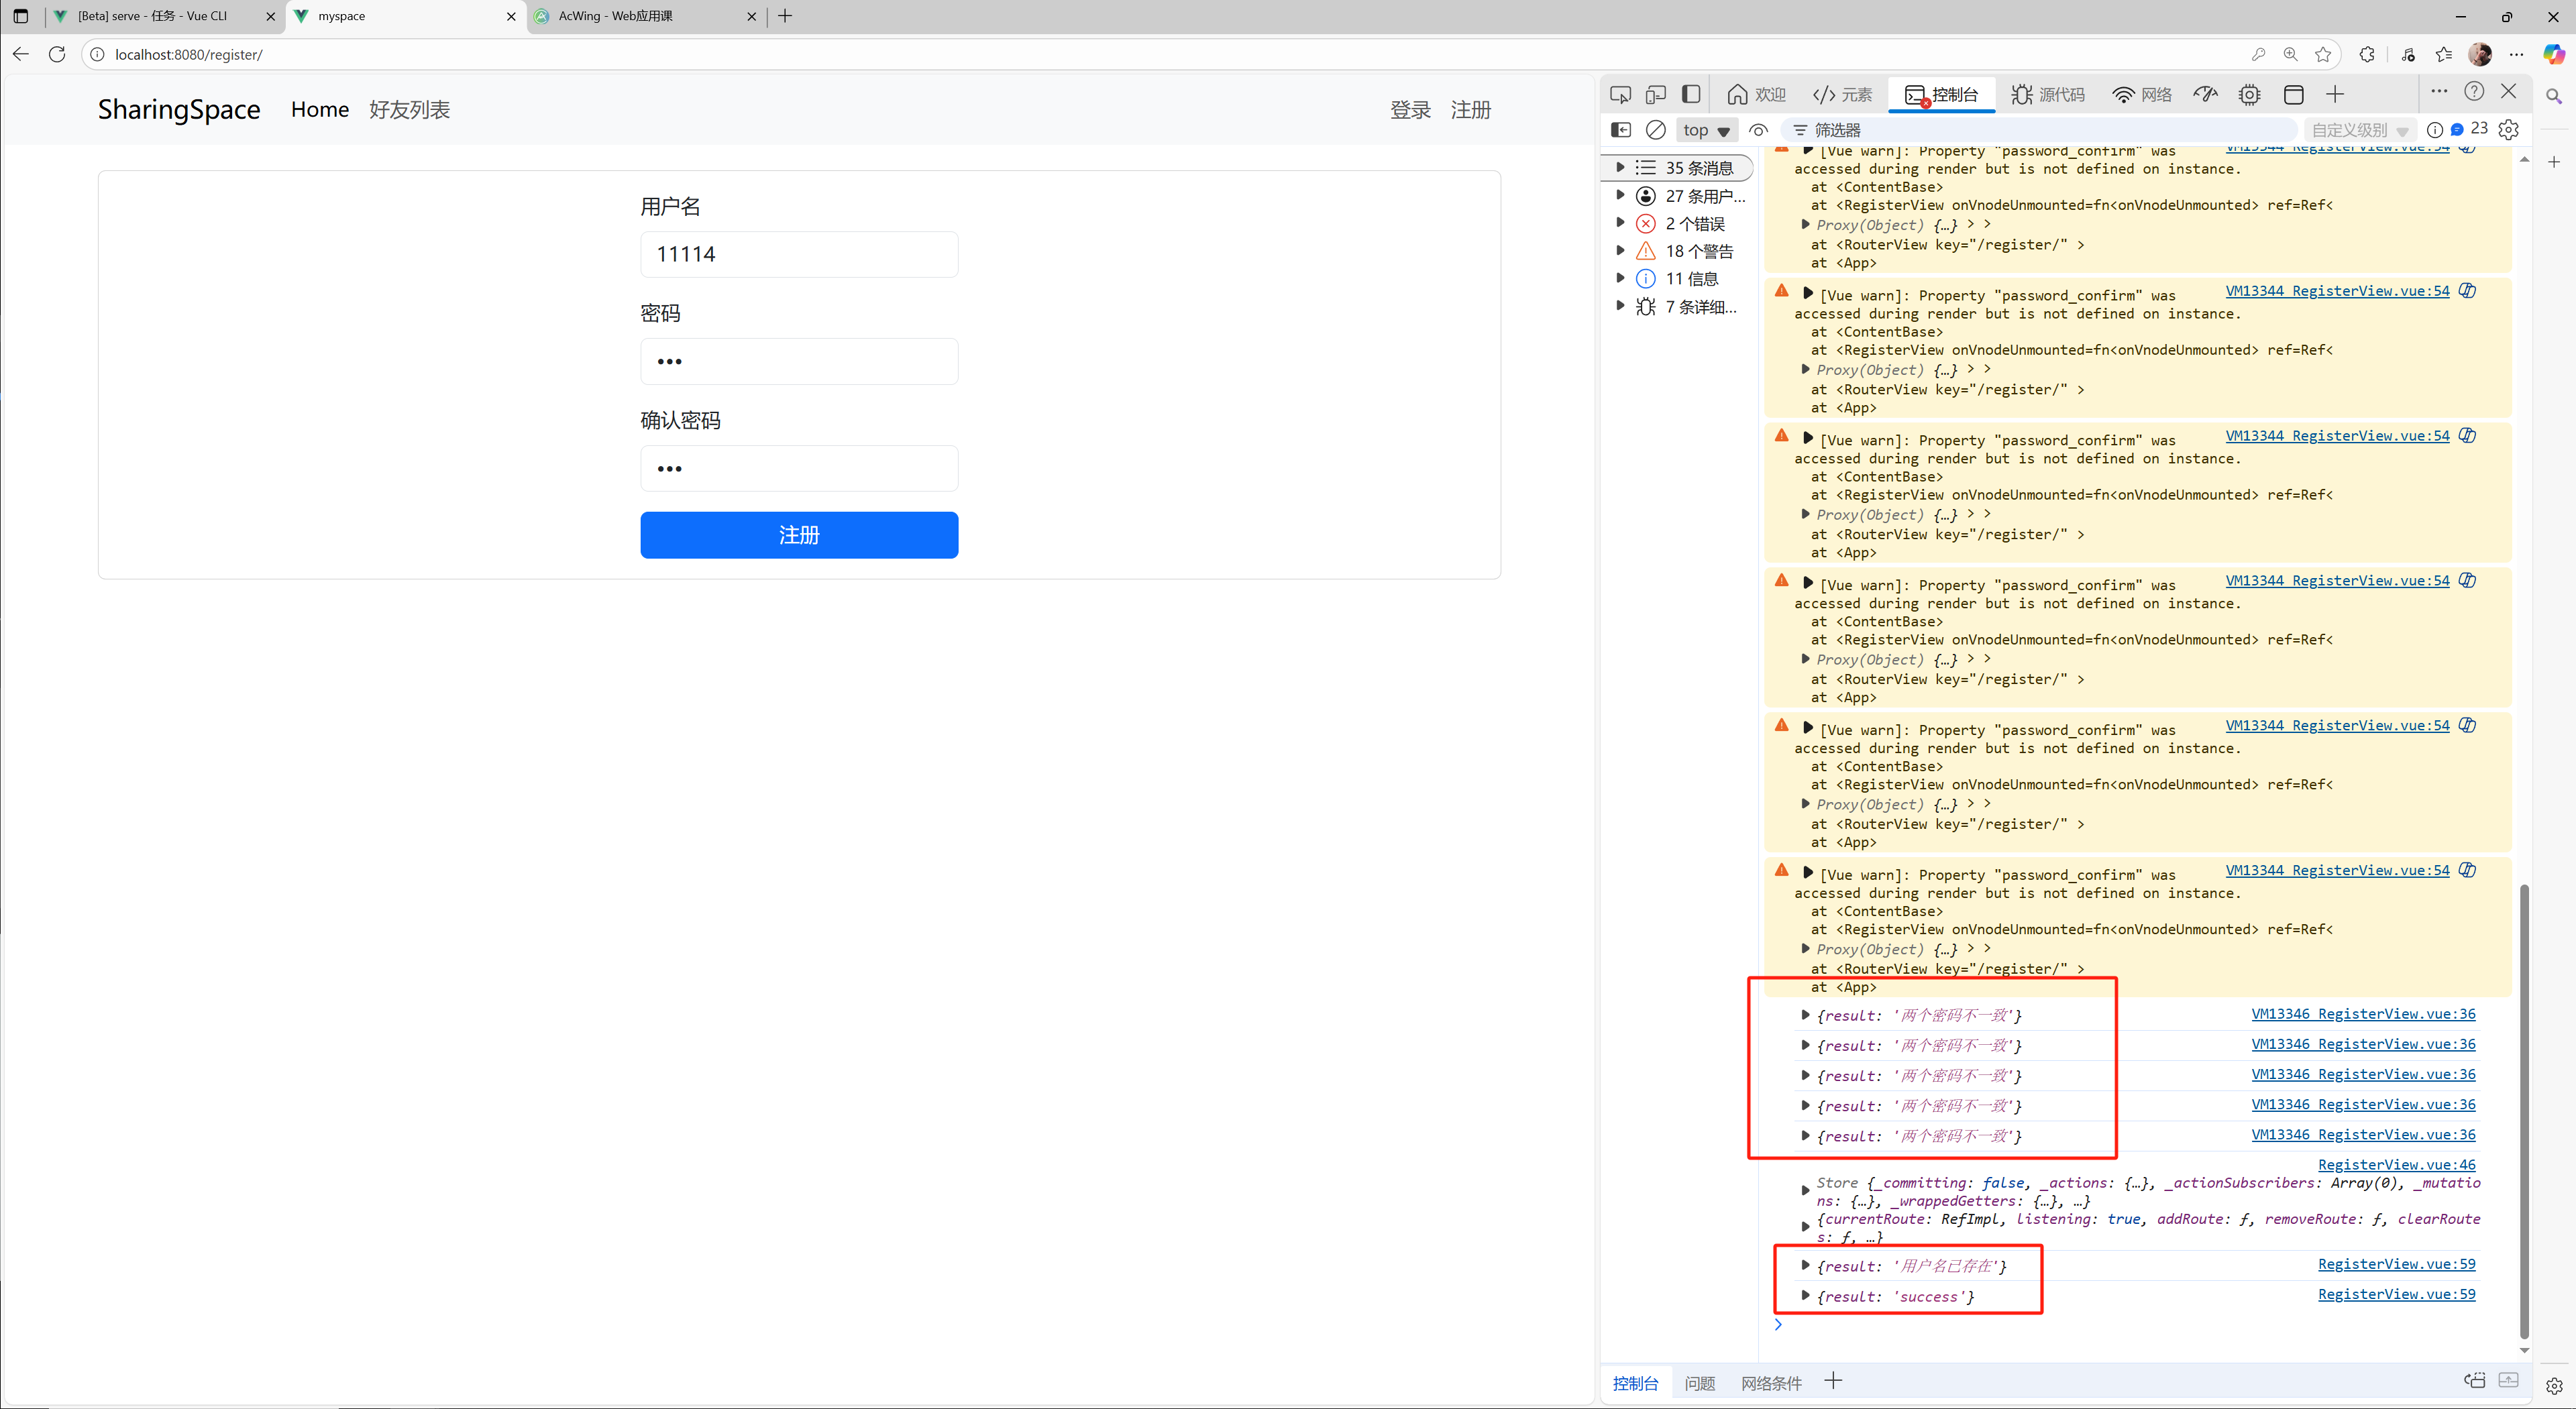
-
注冊請求發送成功之后就跟登錄是一樣的邏輯,于是套用login的代碼:
RegisterView.vue:
<template><ContentBase><div class="row justify-content-center"><div class="col-3"><form @submit.prevent="register"><div class="mb-3"><label for="username" class="form-label">用戶名</label><input v-model="username" type="text" class="form-control" id="username"></div><div class="mb-3"><label for="password" class="form-label">密碼</label><input v-model="password" type="password" class="form-control" id="password"></div><div class="mb-3"><label for="password_confirm" class="form-label">確認密碼</label><input v-model="password_confirm" type="password" class="form-control" id="password_confirm"></div><div class="error-message">{{ error_message }}</div><button type="submit" class="btn btn-primary">注冊</button></form></div></div></ContentBase>
</template><script>
import ContentBase from '@/components/ContentBase.vue'
import { ref } from 'vue';
import { useStore } from 'vuex';
import router from '@/router/index';
import $ from 'jquery';export default {name: 'RegisterView',components: {ContentBase},setup() {const store = useStore();let username = ref('');let password = ref('');let password_confirm = ref('');let error_message = ref('');console.log(store, router);const register = () => {error_message.value = "";$.ajax({url: "https://app165.acapp.acwing.com.cn/myspace/user/",type: "POST",data: {username: username.value,password: password.value,password_confirm: password_confirm.value,},success(resp) {if (resp.result === "success") {store.dispatch("login", {username: username.value,password: password.value,success() {console.log("success");router.push({name: 'name-userlist'});},error() {error_message.value = "服務器異常,請稍后再試";},});} else {error_message.value = resp.result;}}});};return {username: username,password: password,password_confirm,error_message,register,}}
}
</script>
<style scoped>button {width: 100%;}.error-message {color: red;}
</style>
- 注冊成功之后,會直接跟登錄一樣,右上角顯示注冊的用戶名以及退出登錄選項
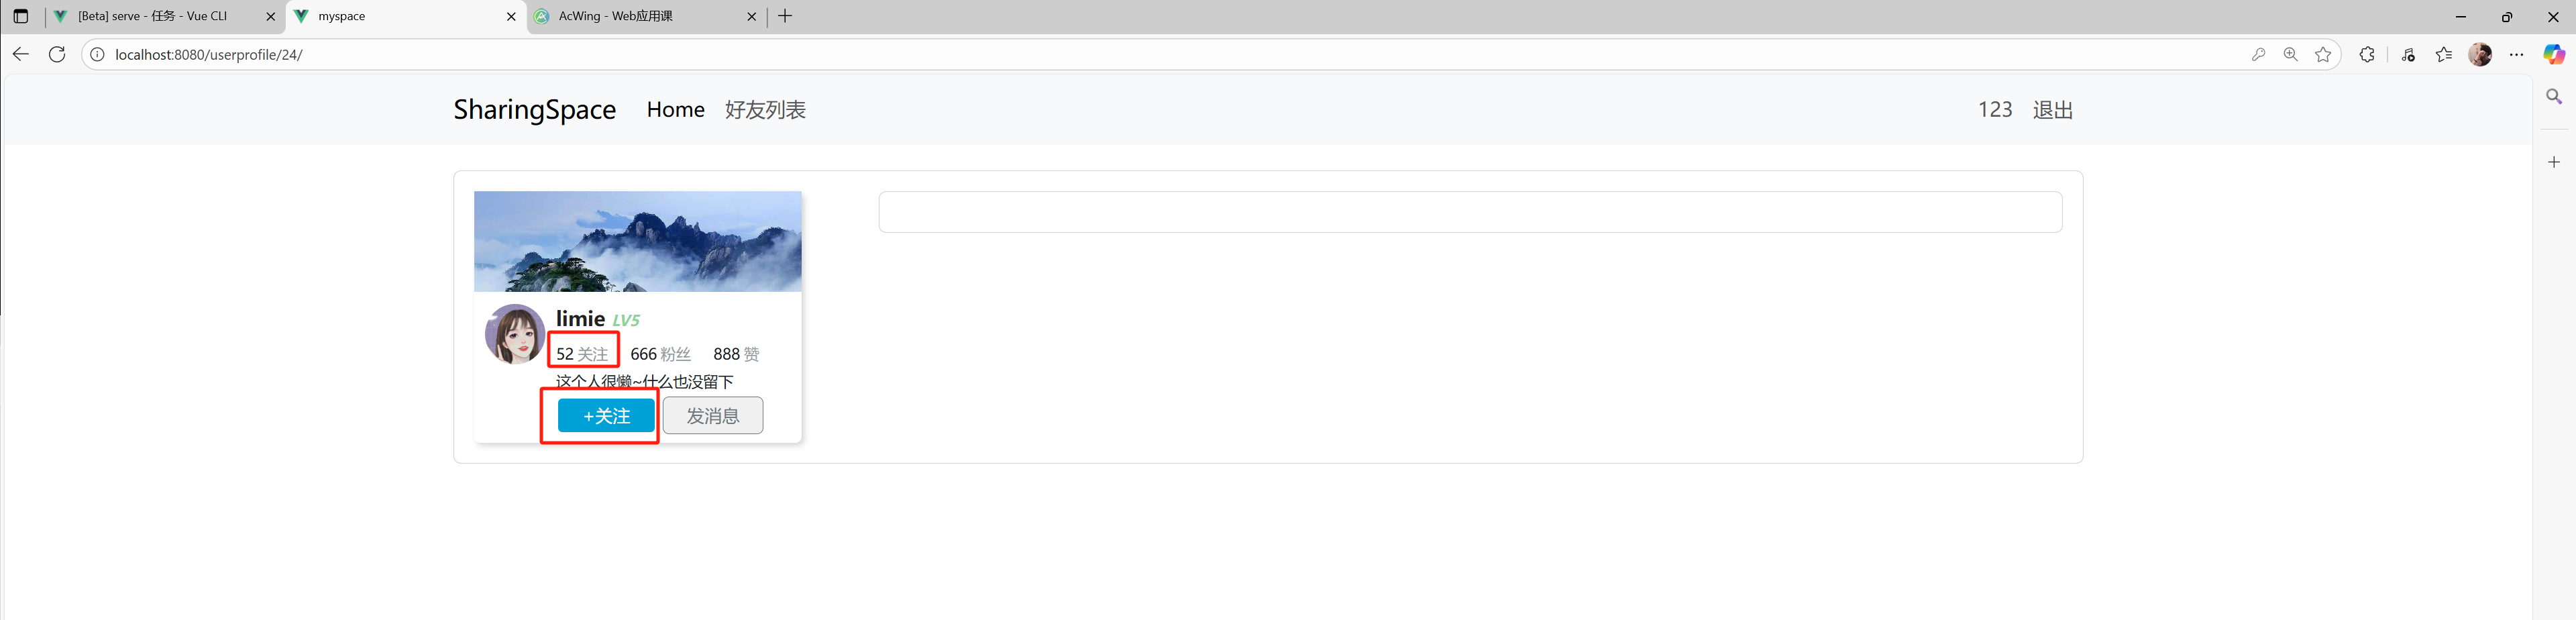
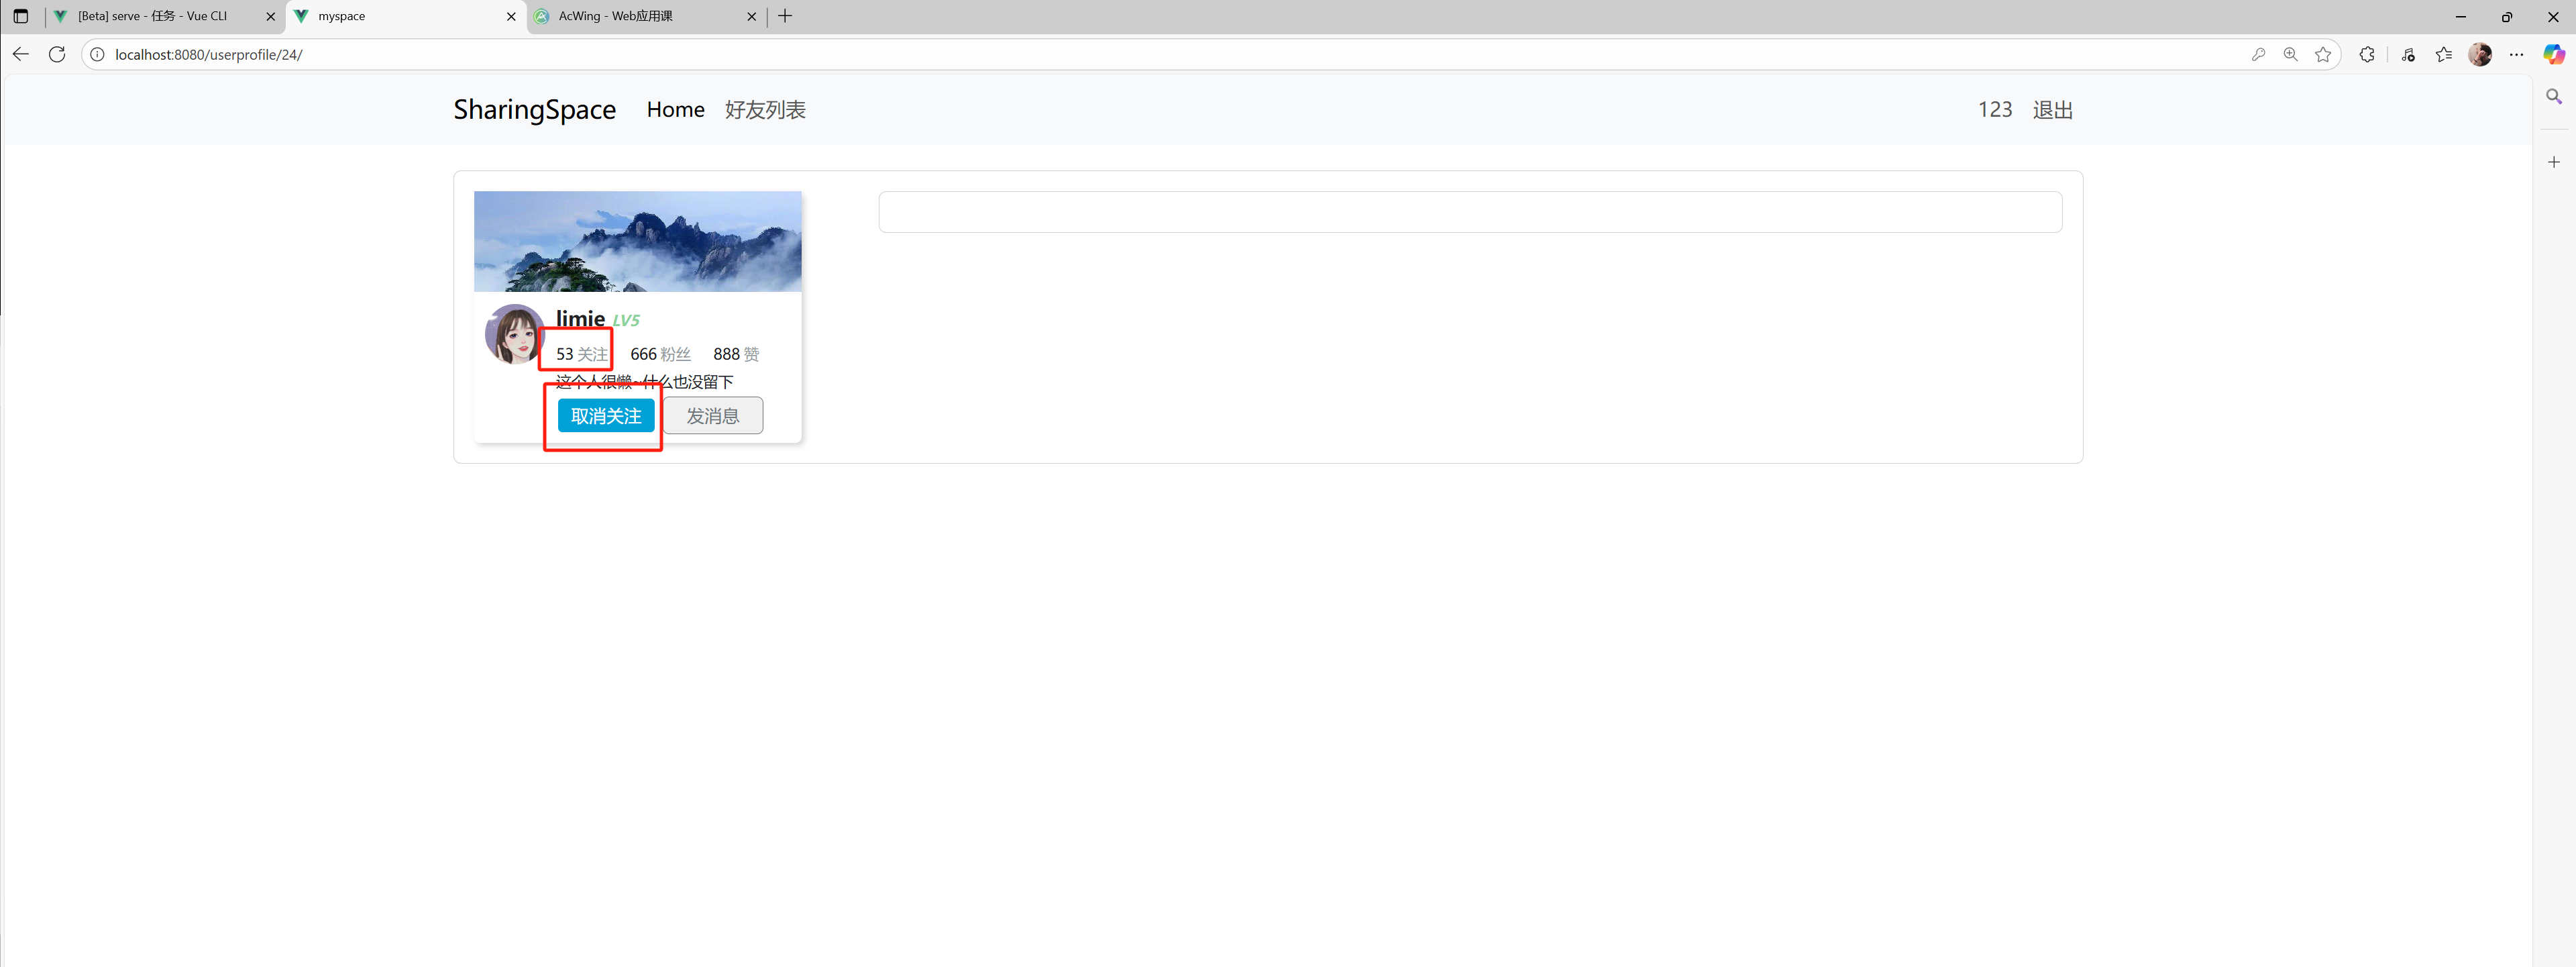
13)關注功能——點擊關注按鈕更新數據庫的關注狀態
- 每次在前端修改之前,先向后端發送請求,根據后端返回結果修改前端的數據展示,使得前后端是同步
- 在子組件中點擊關注和取消關注是向后端發送請求,如果后端修改成功則觸發前端在父組件的關注狀態修改邏輯
UserInfo.vue:
<template><div class="row"><div class="col-3"><div class="user-card"><div class="user-card-head"></div><div class="user-card-body"><div class="user-card-body-left"><img :src="user.photo" alt=""></div><div class="user-card-body-right"><div class="user-card-body-right-text"><div class="user-card-body-right-text-username">{{ user.username }}<span>LV5</span></div><div class="user-card-body-right-text-reputation"><span class="user-card-body-right-text-reputation-item"><span>{{ user.followerCount }}</span><span>關注</span></span><span class="user-card-body-right-text-reputation-item"><span>666</span><span>粉絲</span></span><span class="user-card-body-right-text-reputation-item"><span>888</span><span>贊</span></span></div><div class="user-card-body-right-text-discreption">這個人很懶~什么也沒留下</div></div><div class="user-card-body-right-button"><button @click="follow" type="button"  v-if="!user.is_followed">+關注</button><button v-on:click="unfollow" type = "button" v-if="user.is_followed">取消關注</button><button>發消息</button></div></div></div></div></div><div class="col-9"></div></div>
</template><script>
import { computed } from 'vue';
import $ from 'jquery';
import { useStore } from 'vuex';export default {name: "UserInfo",props: {user: {type: Object,required: true,},},setup(props, context) {const store = useStore();let fullName = computed(() => props.user.lastName + ' ' + props.user.firstName);const follow = () => {$.ajax({url: "https://app165.acapp.acwing.com.cn/myspace/follow/",type: "POST",data: {target_id: props.user.id,},headers: {'Authorization': "Bearer " + store.state.user.access,},success(resp) {if (resp.result === "success") {context.emit('follow');}}});};const unfollow = () => {$.ajax({url: "https://app165.acapp.acwing.com.cn/myspace/follow/",type: "POST",data: {target_id: props.user.id,},headers: {'Authorization': "Bearer " + store.state.user.access,},success(resp) {if (resp.result === "success") {context.emit('unfollow');}}});};return {fullName,follow,unfollow}}
}
</script><style scoped>img {border-radius: 50%;
}.user-card {width: 260px;height: 200px;box-shadow: 2px 2px 5px lightgrey;border-radius: 5px;
}.user-card-head {background-image: url('/src/assets/mountain.jpg');background-size: cover;width: 100%;height: 80px;
}.user-card-body {width: 260px;height: calc(100% - 85px);box-sizing: border-box;padding-top: 10px;
}.user-card-body-left {width: 65px;height: 100%;float: left;text-align: center;
}.user-card-body-left>img {border-radius: 50%;width: 48px;height: 48px;
}.user-card-body-right {width: calc(100% - 70px);height: 100%;float: left;
}.user-card-body-right-text {width: 100%;height: 70%;
}.user-card-body-right-text-username {font-size: 16px;color: #222222;font-weight: bold;padding: 0px 0px 10px 0px;
}.user-card-body-right-text-username>span {font-size: 12px;color: #8BD29B;font-style: italic;
}.user-card-body-right-text-reputation {width: 250px;height: 22px;padding: 0px 0px 10px 0px;font-size: 12px;color: #9499A0;box-sizing: border-box;line-height: 12px;
}.user-card-body-right-text-reputation-item {margin-right: 18px;
}.user-card-body-right-text-reputation-item>span:nth-child(1) {font-size: 12px;color: #18191c;padding: 0px 3px 0px 0px;
}.user-card-body-right-text-reputation-item>span:nth-child(2) {font-size: 12px;color: #9299A0;
}.user-card-body-right-text-discreption {margin-top: 1px;width: 200px;height: 10px;font-size: 12px;line-height: 10px;
}.user-card-body-right-button>button {width: 80px;height: 30px;font-size: 14px;border-radius: 5px;border: none;cursor: pointer;position: relative;z-index: 9999;border: 2px solid;
}.user-card-body-right-button>button:nth-child(1) {color: white;background-color: #00A1D6;padding: 1px 6px;float: left;margin-right: 5px;
}.user-card-body-right-button>button:nth-child(1):hover {background-color: #00B5E5;transition: 700ms;
}.user-card-body-right-button>button:nth-child(2) {padding: 1px 6px;color: #6D757A;float: left;border: #6D757A solid 1px;
}
</style>
- 在父組件中真正執行關注和取消關注的前端數據修改:
UserProfileView.vue:
<script>
export default {name: 'UserProfileView',components: {ContentBase,UserInfo,UserProfileContent,UserEditProfileVue},setup() {const route = useRoute();const userId = parseInt(route.params.userId);console.log(userId);const user = reactive({});const posts = reactive({});const store = useStore();const follow = () => {if (user.is_followed) return;user.is_followed = true;user.followerCount ++;};const unfollow = () => {if (!user.is_followed) return;user.is_followed = false;user.followerCount --;};return {user: user,follow,unfollow,posts,submit_post,is_me,delete_post,}}
}
</script>
- 關注和取消關注持久化到數據庫展示:
- 至此整個項目前端全部完成,所有數據交互都是通過訪問后端api進行的
- 功能包括:好友列表、登錄注冊、發布帖子(日常分享)、刪除自己發布的帖子、查看好友的空間以及歷史動態、關注和取消關注
*注:以上內容來自acwing的web應用課vue框架的學習應用,僅作為學習交流,不用作商業用途,如果感興趣可以去該網站查看,y總nb!!!。以上內容如有侵權,聯系刪除。
)


—— 中間件安全WPS分析WeblogicJenkinsJettyCVE)

:fixture從入門到精通)


)


)
:Service)

