目錄
圖片組件的介紹
1.Image.network加載圖片???
????????1.1?Image scale圖片縮小一倍
????????1.2?Image alignment使用
????????1.3?Image fit?屬性的取值及說明
????????1.3.1 Contain 默認效果?
????????1.3.2?Fill 圖片會縮放至完全填滿目標區域(寬高)
????????1.3.3?Fill 圖片會縮放至完全填滿目標區域(寬高)
????????1.4?repeat 圖片平鋪
????????1.4.1?repeatX軸\Y軸都平鋪
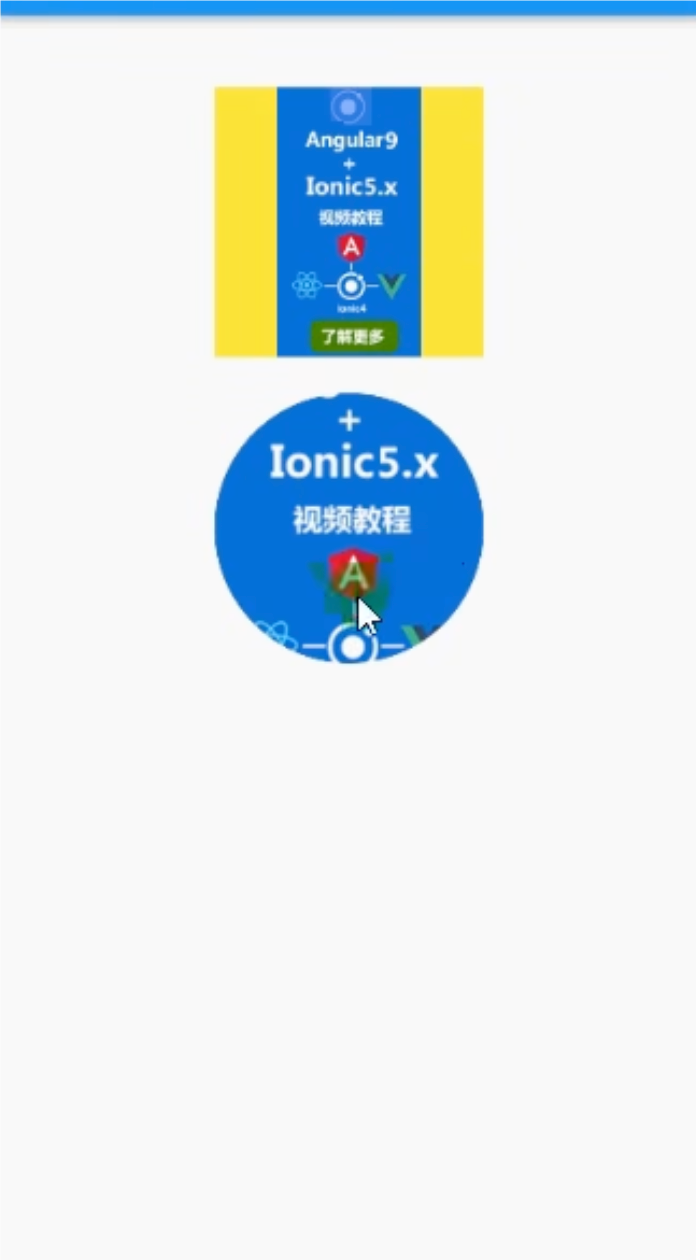
1.5. 實現圓角圖片
? ? ? ? 1.5.1?Container 實現圓角圖片
? ? ? ? 1.5.2?Container circular 圓角參數設置
? ? ? ? 1.6.1?使用ClipOval使用實現一個圓形圖片
2.加載本地圖片
????????2.1 要在 Flutter 中加載本地圖片,需要完成兩個主要步驟:? ? ? ?
????????2.1.2 在 項目下創建images資源文件
????????2.1.2 在 pubspec.yaml 中配置圖片資源路徑
? ? ? ? 2.1.3?使用 Image.asset 或 Image 組件加載圖片
圖片組件的介紹
1.Image.network加載圖片???
import 'package:flutter/material.dart';void main() {runApp(MaterialApp(home: Scaffold(appBar: AppBar(title: Text("sss")), body: MyApp2()),),);
}class MyApp2 extends StatefulWidget {@overrideState<StatefulWidget> createState() {return MyAppState();}
}class MyAppState extends State<MyApp2> {@overrideWidget build(BuildContext context) {return Center(child: Container(height: 300,width: 300,decoration: BoxDecoration(color: Colors.yellow),child: Image.network("https://img2.baidu.com/it/u=1069891123,3492077884&fm=253&fmt=auto&app=138&f=JPEG?w=304&h=456",),),);}
}
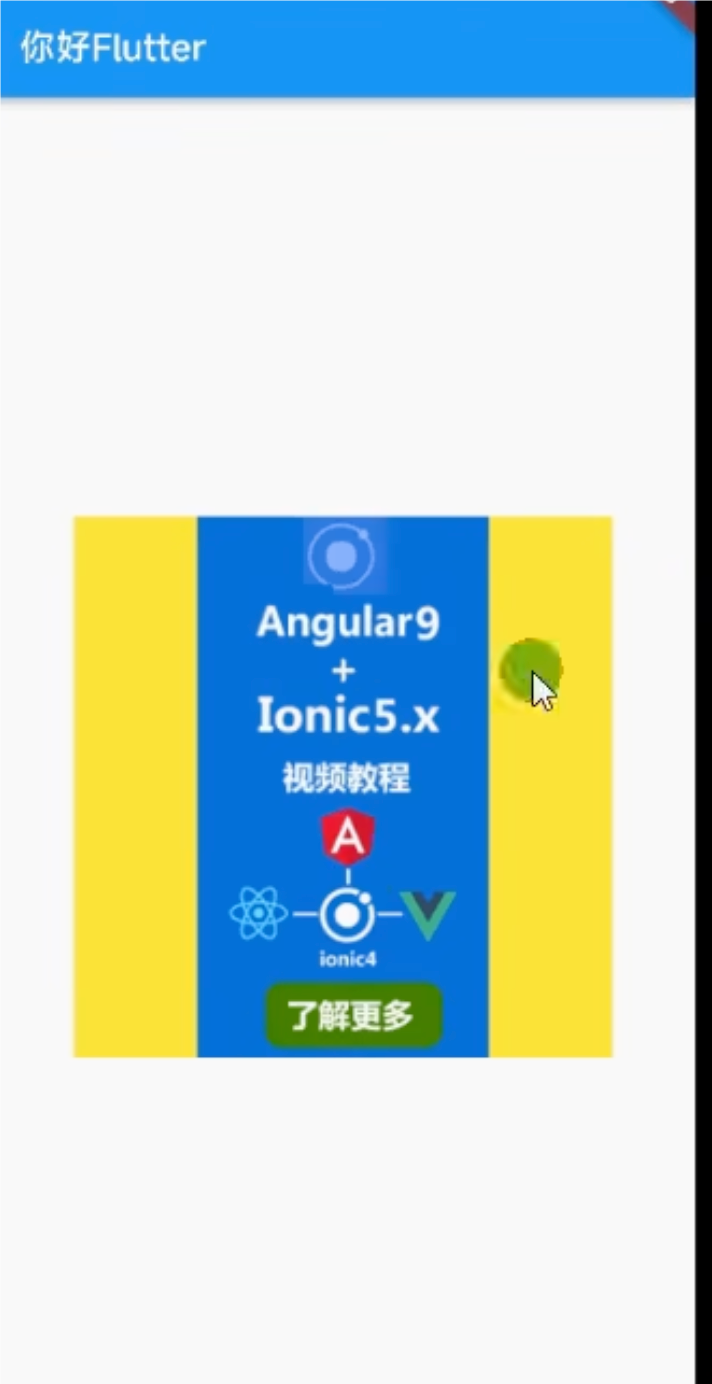
????????1.1?Image scale圖片縮小一倍
class MyAppState extends State<MyApp2> {@overrideWidget build(BuildContext context) {return Center(child: Container(height: 300,width: 300,decoration: BoxDecoration(color: Colors.yellow),child: Image.network("https://img2.baidu.com/it/u=1069891123,3492077884&fm=253&fmt=auto&app=138&f=JPEG?w=304&h=456",scale: 2, //圖片縮小),),);}
}
????????1.2?Image alignment使用
class MyAppState extends State<MyApp2> {@overrideWidget build(BuildContext context) {return Center(child: Container(height: 300,width: 300,decoration: BoxDecoration(color: Colors.yellow),child: Image.network("https://img2.baidu.com/it/u=1069891123,3492077884&fm=253&fmt=auto&app=138&f=JPEG?w=304&h=456",scale: 2,//縮放alignment: Alignment.centerLeft,//位置),),);}
}或者修改Container位置class MyAppState extends State<MyApp2> {@overrideWidget build(BuildContext context) {return Center(child: Container(alignment: Alignment.centerLeft, //位置height: 300,width: 300,decoration: BoxDecoration(color: Colors.yellow),child: Image.network("https://img2.baidu.com/it/u=1069891123,3492077884&fm=253&fmt=auto&app=138&f=JPEG?w=304&h=456",scale: 2,//縮放// alignment: Alignment.centerLeft, //位置),),);}
}
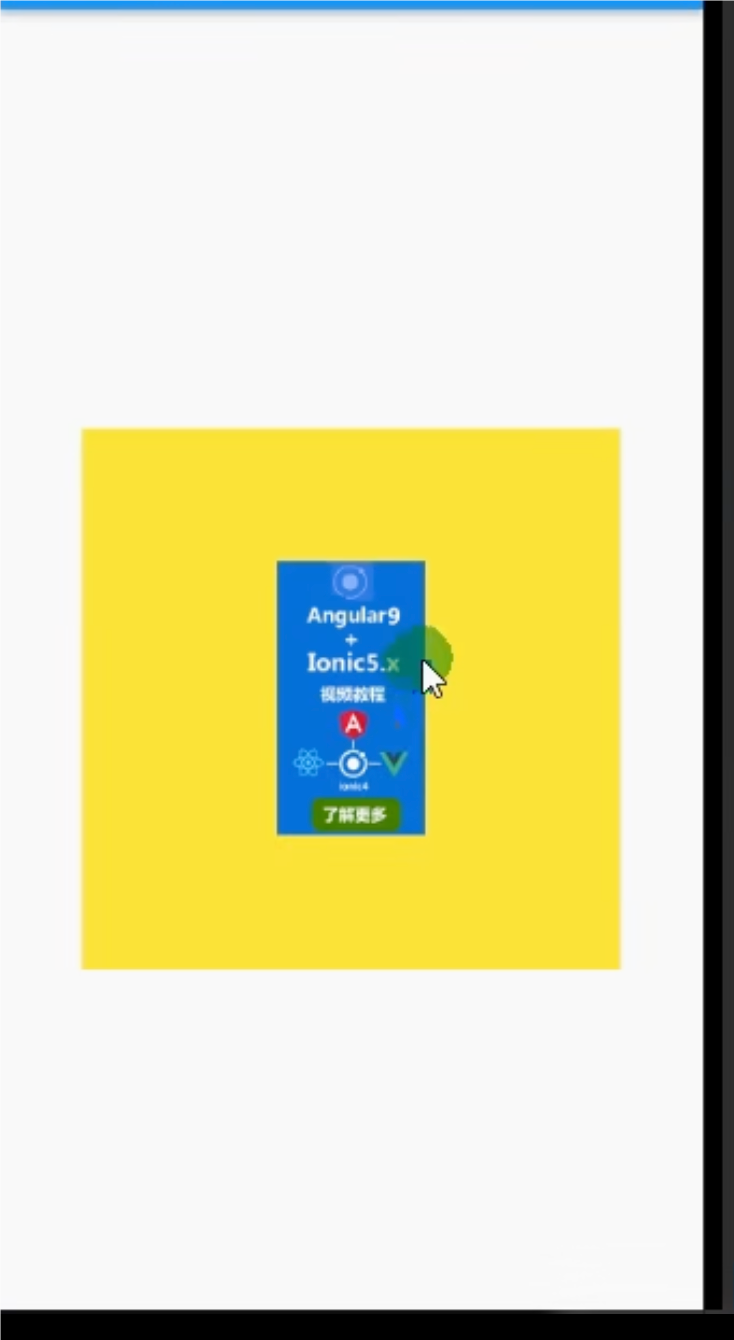
????????1.3?Image fit?屬性的取值及說明
| 屬性名 | 作用描述 |
|---|---|
BoxFit.fill | - 強制圖片填滿整個容器(寬高均與容器一致)。 - 可能導致圖片變形(寬高比被忽略)。 |
BoxFit.contain | - 圖片按原比例縮放,完全包含在容器內(寬或高中至少一邊與容器邊緣對齊)。 - 可能在另一邊留有空白。 |
BoxFit.cover | - 圖片按原比例縮放,覆蓋整個容器(寬和高均不小于容器)。 - 超出容器的部分會被裁剪。 |
BoxFit.fitWidth | - 圖片寬度與容器寬度一致,高度按比例縮放。 - 可能超出容器高度或留有空白。 |
BoxFit.fitHeight | - 圖片高度與容器高度一致,寬度按比例縮放。 - 可能超出容器寬度或留有空白。 |
BoxFit.none | - 圖片按原始尺寸顯示,不進行任何縮放。 - 若圖片尺寸大于容器,會被截斷顯示。 |
BoxFit.scaleDown | - 類似于?contain,但只在圖片尺寸大于容器時縮小,不會放大圖片。- 保持原圖清晰度,避免低分辨率圖片拉伸模糊。 |

?????????1.3.1 Contain 默認效果?
class MyAppState extends State<MyApp2> {@overrideWidget build(BuildContext context) {return Center(child: Container(// alignment: Alignment.centerRight, //位置height: 300,width: 300,decoration: BoxDecoration(color: Colors.yellow),child: Image.network("https://img2.baidu.com/it/u=1069891123,3492077884&fm=253&fmt=auto&app=138&f=JPEG?w=304&h=456",// scale: 2,//縮放// alignment: Alignment.centerLeft, //位置fit: BoxFit.contain, //圖片fit屬性 = 默認),),);}
}
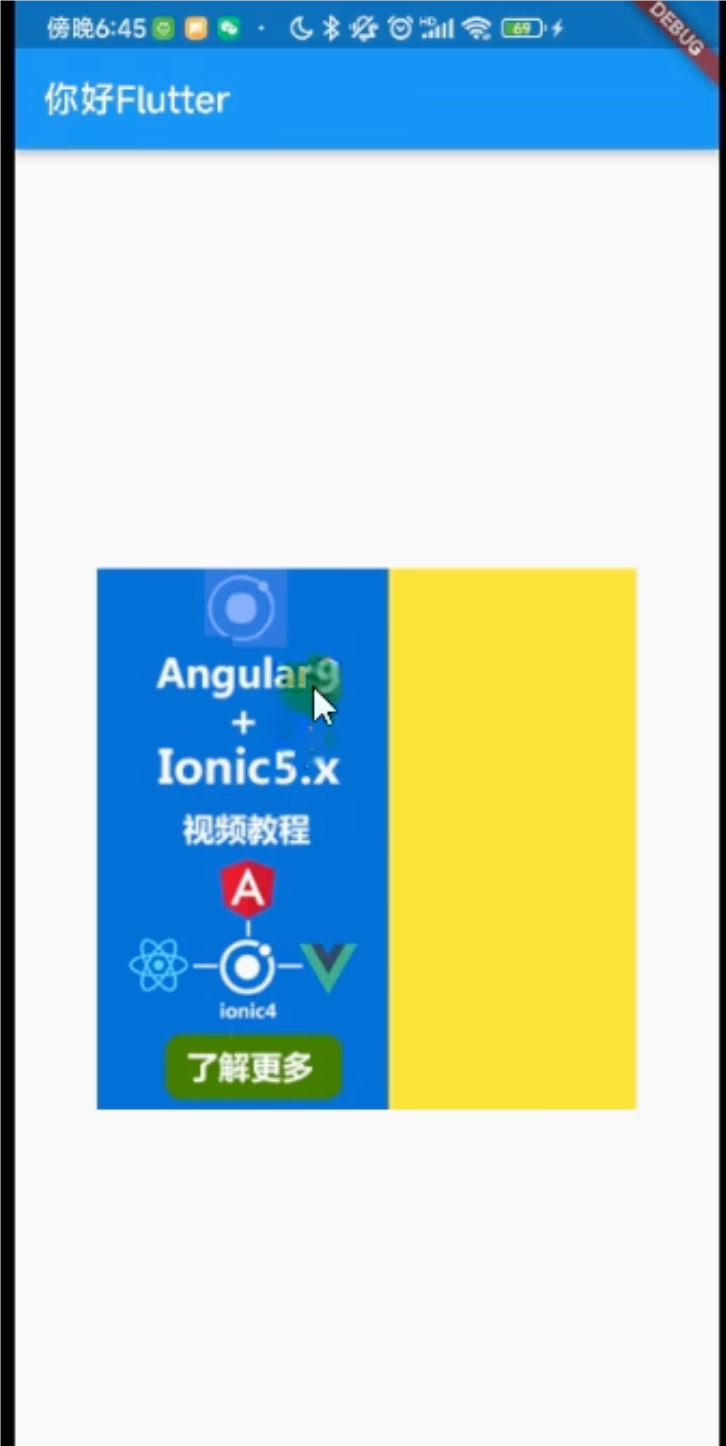
????????1.3.2?Fill 圖片會縮放至完全填滿目標區域(寬高)
????????1.3.3?Fill 圖片會縮放至完全填滿目標區域(寬高)
class MyAppState extends State<MyApp2> {@overrideWidget build(BuildContext context) {return Center(child: Container(// alignment: Alignment.centerRight, //位置height: 300,width: 300,decoration: BoxDecoration(color: Colors.yellow),child: Image.network("https://img2.baidu.com/it/u=1069891123,3492077884&fm=253&fmt=auto&app=138&f=JPEG?w=304&h=456",// scale: 2,//縮放// alignment: Alignment.centerLeft, //位置fit: BoxFit.fitWidth, //圖片fit屬性= 寬度充滿),),);}
}
????????1.4?repeat 圖片平鋪
class MyAppState extends State<MyApp2> {@overrideWidget build(BuildContext context) {return Center(child: Container(// alignment: Alignment.centerRight, //位置height: 300,width: 500,decoration: BoxDecoration(color: Colors.yellow),child: Image.network("https://img2.baidu.com/it/u=1069891123,3492077884&fm=253&fmt=auto&app=138&f=JPEG?w=304&h=456",// scale: 2,//縮放// alignment: Alignment.centerLeft, //位置// fit: BoxFit.fitWidth, //圖片fit屬性= 寬度充滿repeat: ImageRepeat.repeatX, //X軸平鋪),),);}
}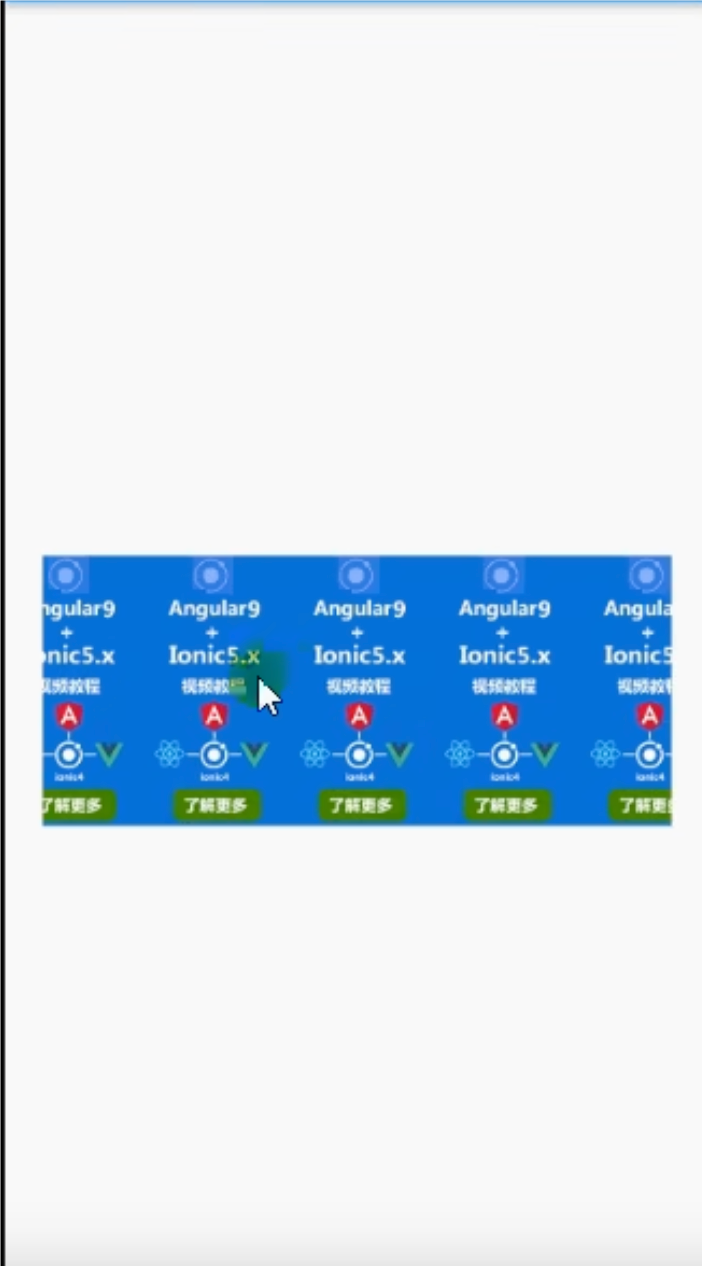
????????1.4.1?repeatX軸\Y軸都平鋪
class MyAppState extends State<MyApp2> {@overrideWidget build(BuildContext context) {return Center(child: Container(// alignment: Alignment.centerRight, //位置height: 300,width: 500,decoration: BoxDecoration(color: Colors.yellow),child: Image.network("https://img2.baidu.com/it/u=1069891123,3492077884&fm=253&fmt=auto&app=138&f=JPEG?w=304&h=456",// scale: 2,//縮放// alignment: Alignment.centerLeft, //位置// fit: BoxFit.fitWidth, //圖片fit屬性= 寬度充滿repeat: ImageRepeat.repeat, //X軸\Y軸都平鋪),),);}
}
1.5. 實現圓角圖片
? ? ? ? 1.5.1?Container 實現圓角圖片
import 'package:flutter/material.dart';void main() {runApp(MaterialApp(home: Scaffold(appBar: AppBar(title: Text("sss")),body: Column(children: [MyApp2(), SizedBox(height: 20), Circular()]),),),);
}class MyApp2 extends StatefulWidget {@overrideState<StatefulWidget> createState() {return MyAppState();}
}class MyAppState extends State<MyApp2> {@overrideWidget build(BuildContext context) {return Center(child: Container(// alignment: Alignment.centerRight, //位置height: 300,width: 300,decoration: BoxDecoration(color: Colors.yellow),child: Image.network("https://img2.baidu.com/it/u=1069891123,3492077884&fm=253&fmt=auto&app=138&f=JPEG?w=304&h=456",// scale: 2,//縮放// alignment: Alignment.centerLeft, //位置// fit: BoxFit.fitWidth, //圖片fit屬性= 寬度充滿repeat: ImageRepeat.repeat, //X軸\Y軸都平鋪),),);}
}//實現一個圓形圖片
class Circular extends StatelessWidget {@overrideWidget build(BuildContext context) {return Container(margin: EdgeInsets.fromLTRB(0, 10, 0, 0),height: 300,width: 300,decoration: BoxDecoration(color: Colors.yellow,borderRadius: BorderRadius.circular(150),image: DecorationImage(image: NetworkImage("https://img2.baidu.com/it/u=1069891123,3492077884&fm=253&fmt=auto&app=138&f=JPEG?w=304&h=456",),fit: BoxFit.cover,),),);}
}
? ? ? ? 1.5.2?Container circular 圓角參數設置
borderRadius: BorderRadius.circular(10)//圓角
? ? ? ? 1.6.1?使用ClipOval使用實現一個圓形圖片
import 'package:flutter/material.dart';void main() {runApp(MaterialApp(home: Scaffold(appBar: AppBar(title: Text("sss")),body: Column(children: [MyApp2(),SizedBox(height: 20),Circular(),SizedBox(height: 30),ClipImage(),],),),),);
}class MyApp2 extends StatefulWidget {@overrideState<StatefulWidget> createState() {return MyAppState();}
}class MyAppState extends State<MyApp2> {@overrideWidget build(BuildContext context) {return Center(child: Container(// alignment: Alignment.centerRight, //位置height: 150,width: 150,decoration: BoxDecoration(color: Colors.yellow),child: Image.network("https://img2.baidu.com/it/u=1069891123,3492077884&fm=253&fmt=auto&app=138&f=JPEG?w=304&h=456",// scale: 2,//縮放// alignment: Alignment.centerLeft, //位置// fit: BoxFit.fitWidth, //圖片fit屬性= 寬度充滿repeat: ImageRepeat.repeat, //X軸\Y軸都平鋪),),);}
}//實現一個圓形圖片
class Circular extends StatelessWidget {@overrideWidget build(BuildContext context) {return Container(margin: EdgeInsets.fromLTRB(0, 10, 0, 0),height: 150,width: 150,decoration: BoxDecoration(color: Colors.yellow,borderRadius: BorderRadius.circular(10),image: DecorationImage(image: NetworkImage("https://img2.baidu.com/it/u=1069891123,3492077884&fm=253&fmt=auto&app=138&f=JPEG?w=304&h=456",),fit: BoxFit.cover,),),);}
}//使用ClipOval使用實現一個圓形圖片
class ClipImage extends StatelessWidget {@overrideWidget build(BuildContext context) {return ClipOval(child: Image.network("https://img2.baidu.com/it/u=1069891123,3492077884&fm=253&fmt=auto&app=138&f=JPEG?w=304&h=456",width: 150,height: 150,fit: BoxFit.cover,),);}
}
//使用ClipOval使用實現一個圓形圖片
class ClipImage extends StatelessWidget {@overrideWidget build(BuildContext context) {return ClipOval(child: Image.network("https://img2.baidu.com/it/u=1069891123,3492077884&fm=253&fmt=auto&app=138&f=JPEG?w=304&h=456",width: 150,height: 150,fit: BoxFit.cover,),);}
}

2.加載本地圖片
????????2.1 要在 Flutter 中加載本地圖片,需要完成兩個主要步驟:? ? ? ?
????????2.1.2 在 項目下創建images資源文件
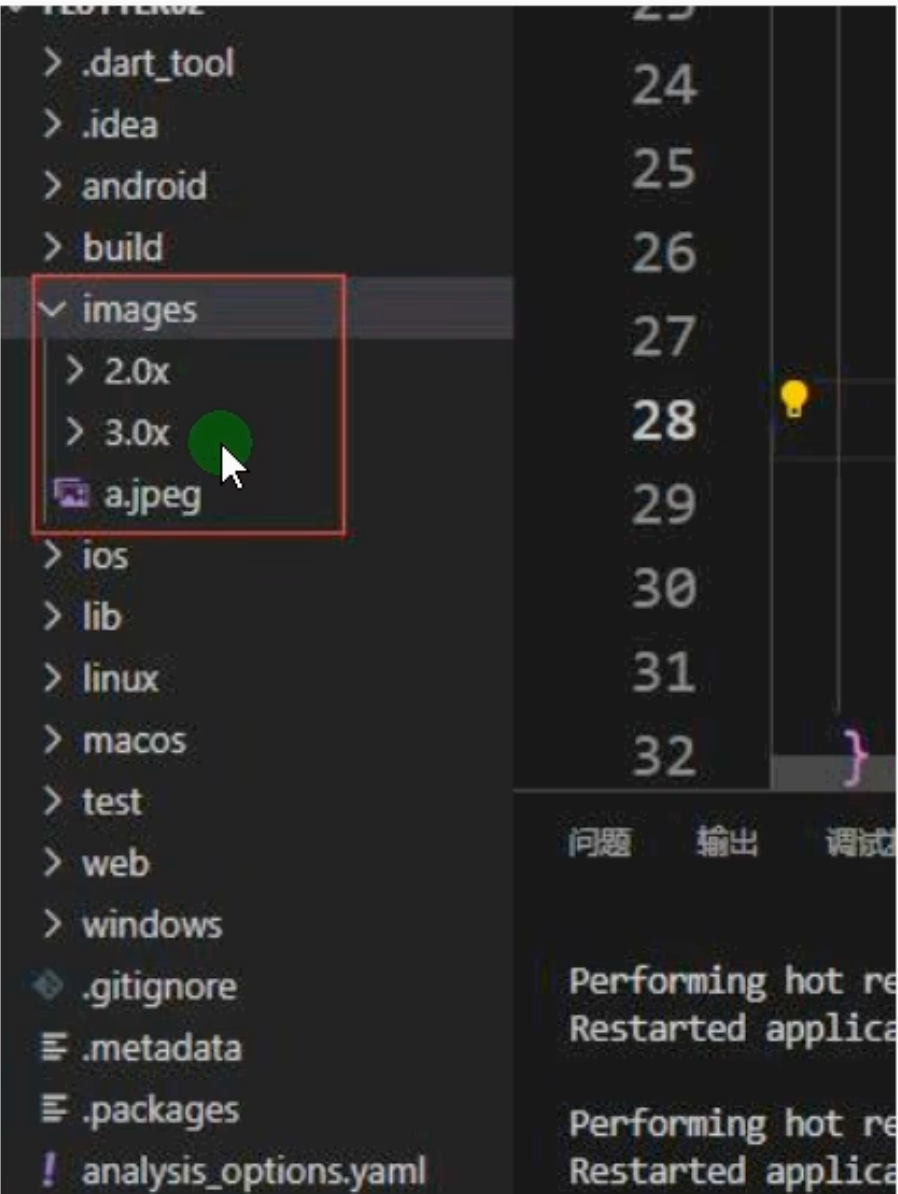
????????2.1.2 在 pubspec.yaml 中配置圖片資源路徑
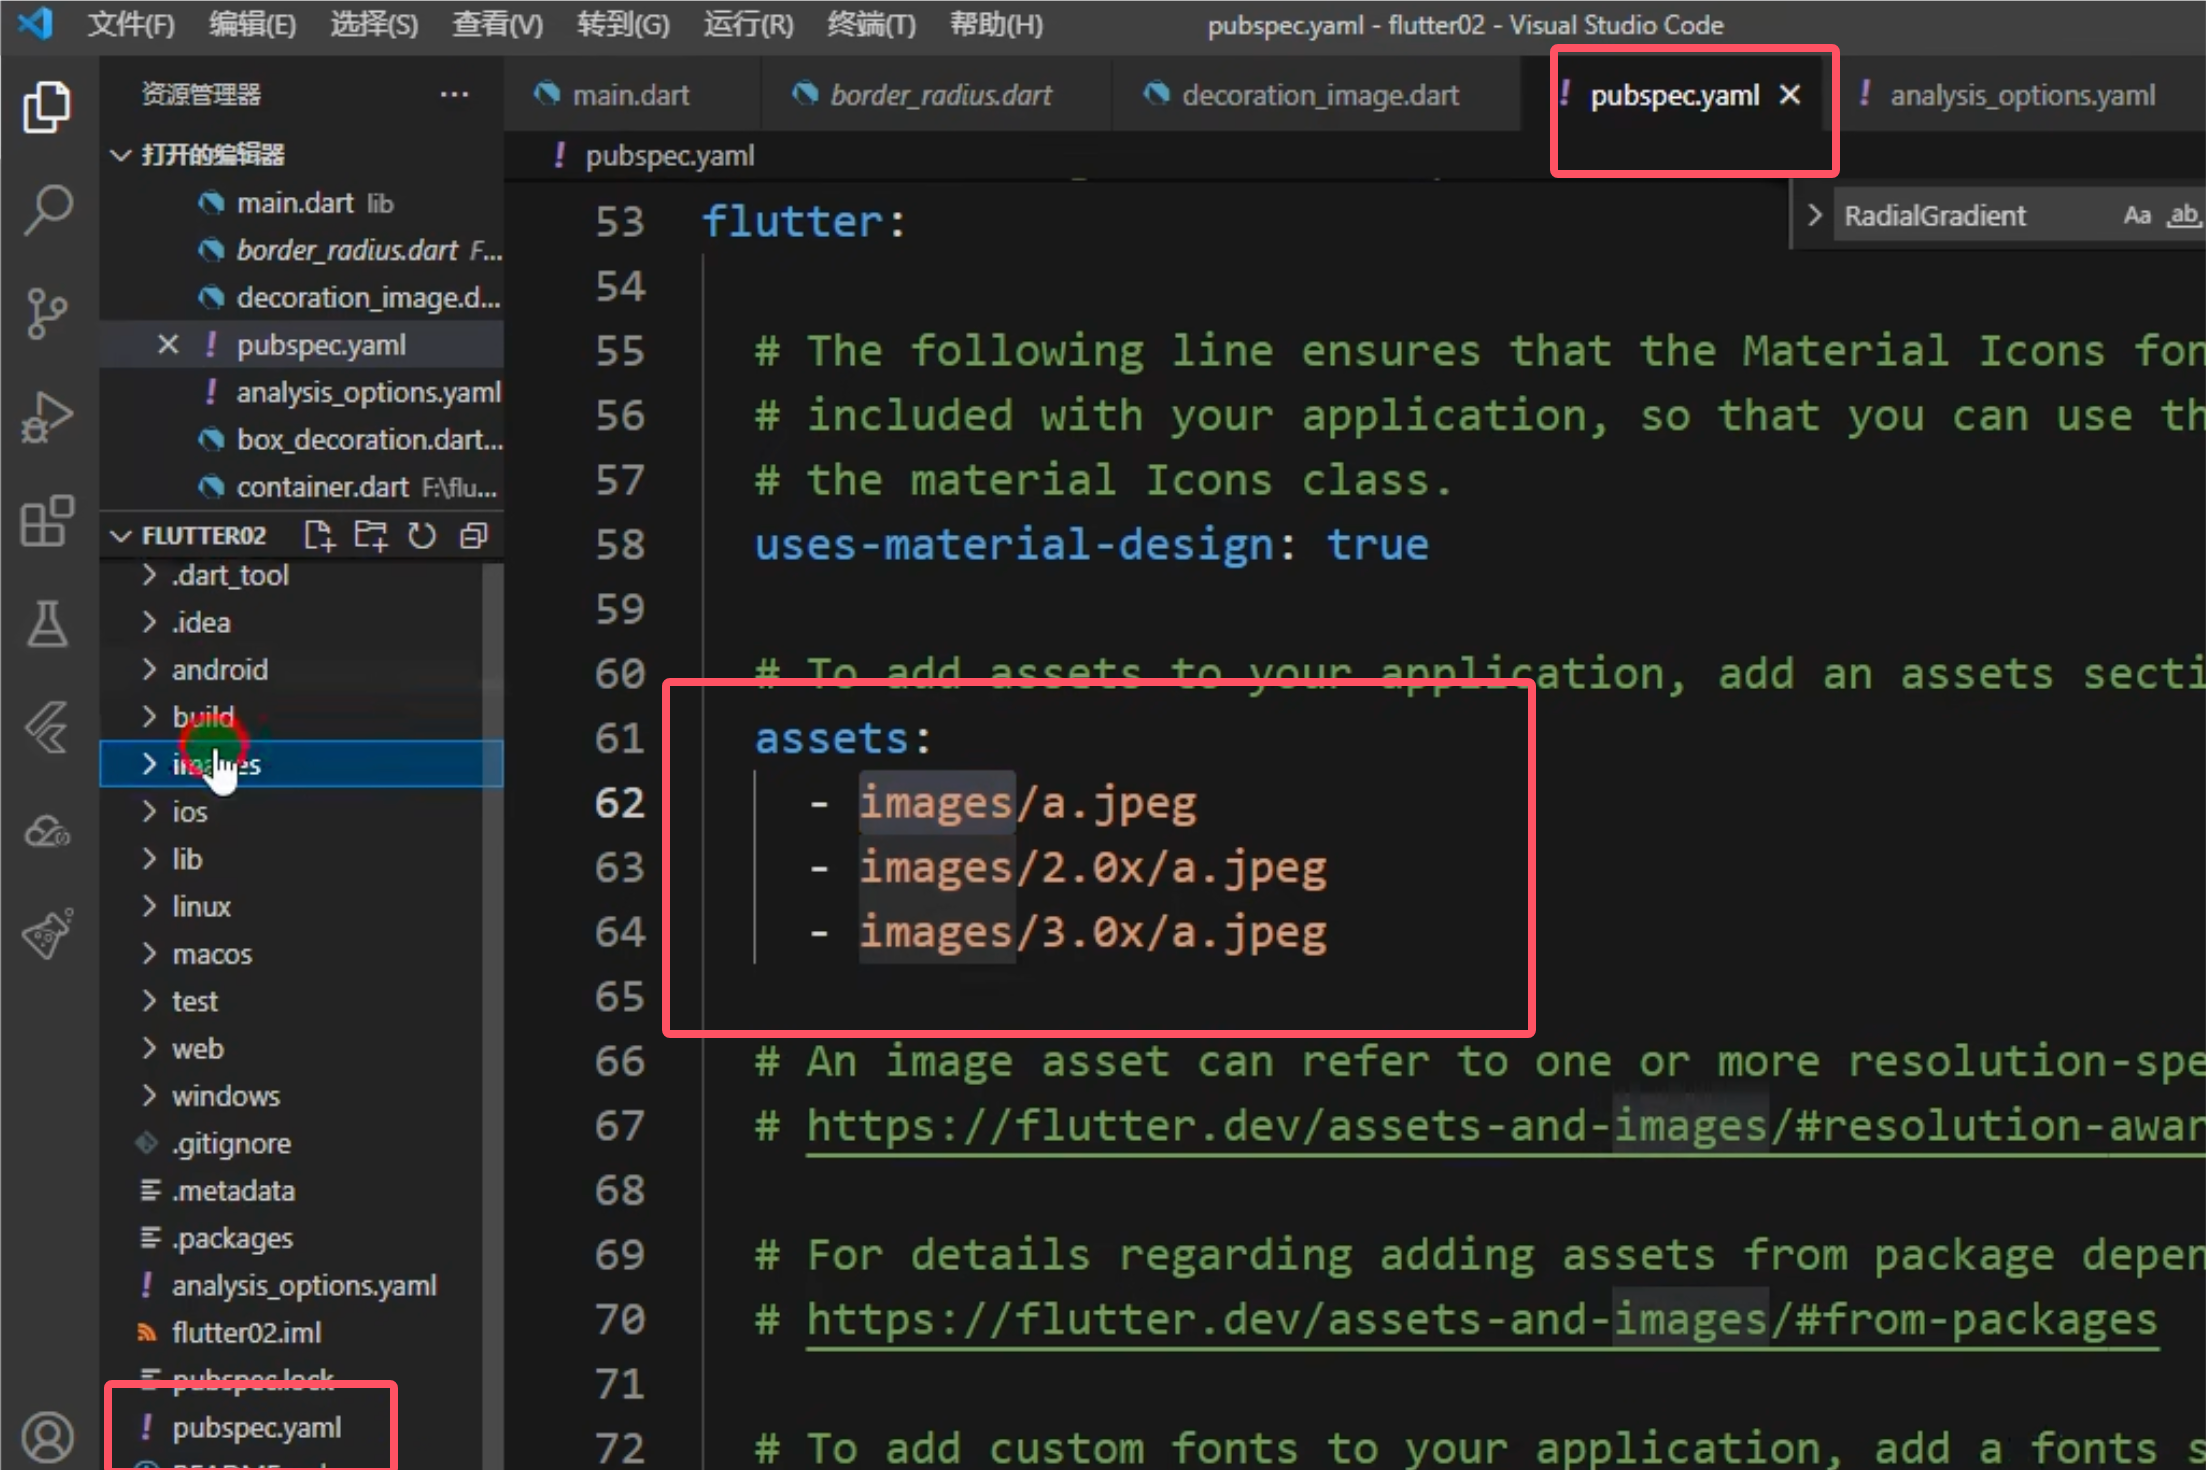
? ? ? ? 2.1.3?使用 Image.asset 或 Image 組件加載圖片
//加載一個本地圖片
class LocalImage extends StatelessWidget {@overrideWidget build(BuildContext context) {return Container(width: 150,height: 150,child: Image.asset("images/a.png"),);}
}
class LocalImage extends StatelessWidget {const MyApp({Key? key}) : super(key: key);@overrideWidget build(BuildContext context) {return MaterialApp(home: Scaffold(appBar: AppBar(title: const Text('本地圓形圖片加載示例')),body: Center(child: Column(mainAxisAlignment: MainAxisAlignment.center,children: [// 使用CircleAvatar加載圓形圖片CircleAvatar(radius: 100,backgroundImage: AssetImage('images/profile.png'),),const SizedBox(height: 30),// 使用ClipOval自定義圓形圖片ClipOval(child: Image.asset('images/background.jpg',width: 200,height: 200,fit: BoxFit.cover,),),const SizedBox(height: 30),// 使用Container的decoration屬性Container(width: 150,height: 150,decoration: BoxDecoration(shape: BoxShape.circle,image: DecorationImage(image: AssetImage('images/icon.png'),fit: BoxFit.cover,),),),],),),),);}
}


)

:核心概念 + 命令詳解 + 部署案例】)
)
 - 解堆 (行 -> 列))


