配置GCNv2_SLAM所需環境并實現AutoDL云端運行項目的全過程記錄。
本文首發于?慕雪的寒舍
1. 引子
前幾天寫了一篇在本地虛擬機里面CPU運行GCNv2_SLAM項目的博客:鏈接,關于GCNv2_SLAM項目相關的介紹請移步此文章,本文不再重復說明。
- GCNv2: Efficient Correspondence Prediction for Real-Time SLAM;
- github.com/jiexiong2016/GCNv2_SLAM;
在之前的測試中,本地虛擬機CPU運行的效果非常差,推理速度只有可憐兮兮的0.5 HZ,但是我手頭又沒有帶顯卡的環境,所以想到了可以去網上租個帶顯卡的容器化環境。
AutoDL就是一個租GPU環境的平臺: https://www.autodl.com/,而且autodl租顯卡是可以按小時付費的,比按月付費的更加劃算,更好過自己買個顯卡在本地倒騰ubuntu環境,所以就直接開整了!
先注冊一個AutoDL的賬戶,給里面充值一丟丟錢,然后就可以租一個顯卡容器化環境來運行GCNv2_SLAM啦!

2. AutoDL環境選擇
老版本PyTorch的鏡像由于4090無法使用太低的cuda版本導致無法選擇,如果需要使用更低版本的pytorch鏡像,則需要租用2080ti或者1080ti顯卡的環境。
2080ti顯卡可以選擇如下環境,實測可用:
PyTorch  1.5.1
Python  3.8(ubuntu18.04)
Cuda  10.1

創建環境后,建議使用左側的ssh登錄指令直接在本地終端里面執行,登錄到云端。如果你沒有本地的ssh終端,也可以點擊JupyterLab里面的終端來運行命令。

后文涉及到下載很多文件,如果從github下載很慢,可以在本地下好之后通過JupyterLab傳到云端去。注意傳文件之前要先在文件列表里面選好目標的目錄。

還可以嘗試autodl自帶的代理:www.autodl.com/docs/network_turbo/,但是慕雪試用的時候這個代理一直返回503,不可用狀態。
3. 依賴安裝
3.1. 需要的apt包安裝
運行之前先更新一下環境,這部分操作和在本地虛擬機里面安裝環境都是一樣的。
sudo apt-get update -y
sudo apt-get upgrade -y
更新的時候會有一個新的sshd配置的提醒,這里直接選擇1用新版本配置就可以了
A new version (/tmp/file1bBLK4) of configuration file /etc/ssh/sshd_config is available, but the version installed currently has been
locally modified.1. install the package maintainer's version             5. show a 3-way difference between available versions2. keep the local version currently installed           6. do a 3-way merge between available versions3. show the differences between the versions            7. start a new shell to examine the situation4. show a side-by-side difference between the versions
What do you want to do about modified configuration file sshd_config? 1
因為選了Pytorch鏡像,Python工具組系統已經自帶了,不需要安裝。
安裝要用的到的工具包
# 工具包
sudo apt-get install -y \apt-utils \curl wget unzip zip \cmake make automake \openssh-server \net-tools \vim git gcc g++
安裝x11相關的依賴包
# x11 for gui
sudo apt-get install -y  \libx11-xcb1 \libfreetype6 \libdbus-1-3 \libfontconfig1 \libxkbcommon0   \libxkbcommon-x11-0
注意,這里安裝的x11依賴包有兩個版本過高了,后續安裝pangolin等項目的依賴的時候會報錯(依賴沖突),需要降級下面這兩個依賴包
apt-get install -y \libx11-xcb1=2:1.6.4-3ubuntu0.4 \libx11-6=2:1.6.4-3ubuntu0.4
3.2. Pangolin-6.0
安裝pangolin之前先安裝如下依賴包
# pangolin
sudo apt-get install -y \libgl1-mesa-dev \libglew-dev \libboost-dev \libboost-thread-dev \libboost-filesystem-dev \libpython2.7-dev \libglu1-mesa-dev freeglut3-dev
root@autodl-container-e39d46b8d3-01da7b14:~# apt-get install -y     libgl1-mesa-dev     libglew-dev     libboost-dev     libboost-thread-dev     libboost-filesystem-dev     libpython2.7-dev     libglu1-mesa-dev freeglut3-dev
Reading package lists... Done
Building dependency tree
Reading state information... Done
Some packages could not be installed. This may mean that you have
requested an impossible situation or if you are using the unstable
distribution that some required packages have not yet been created
or been moved out of Incoming.
The following information may help to resolve the situation:The following packages have unmet dependencies:freeglut3-dev : Depends: libxext-dev but it is not going to be installedDepends: libxt-dev but it is not going to be installedlibgl1-mesa-dev : Depends: mesa-common-dev (= 20.0.8-0ubuntu1~18.04.1) but it is not going to be installedDepends: libx11-dev but it is not going to be installedDepends: libx11-xcb-dev but it is not going to be installedDepends: libxdamage-dev but it is not going to be installedDepends: libxext-dev but it is not going to be installedDepends: libxfixes-dev but it is not going to be installedDepends: libxxf86vm-dev but it is not going to be installed
E: Unable to correct problems, you have held broken packages.
隨后使用如下命令來編譯安裝Pangolin,Github地址:Pangolin-0.6。
建議這些依賴包都進入~/autodl-tmp數據盤來下載和安裝,這樣即便后續需要更換鏡像也能保留
# 下載
wget -O Pangolin-0.6.tar.gz https://github.com/stevenlovegrove/Pangolin/archive/refs/tags/v0.6.tar.gz
# 解壓
tar -zxvf Pangolin-0.6.tar.gzpushd Pangolin-0.6rm -rf buildmkdir build && cd build# 編譯安裝 cmake -DCPP11_NO_BOOST=1 ..make -j$(nproc)make install# 刷新動態庫ldconfig
popd
編譯安裝成功

3.3. OpenCV 3.4.5
先安裝依賴項
sudo apt-get install -y \build-essential libgtk2.0-dev \libavcodec-dev libavformat-dev \libjpeg.dev libtiff5.dev libswscale-dev \libcanberra-gtk-module
因為autodl環境是amd64,所以直接用下面的命令就OK了,不需要額外的處理
# amd64
# 添加新源后繼續安裝
sudo apt-get install -y software-properties-common
# 下面這條命令實測在arm64上不能用,先不要執行
sudo add-apt-repository "deb http://security.ubuntu.com/ubuntu xenial-security main"
sudo apt-get -y update
sudo apt-get install -y libjasper1 libjasper-dev
以下是安裝libjasper的截圖

安裝好了依賴項后,使用如下命令編譯opencv,Github地址:opencv的3.4.5版本。
# 下載和解壓
wget -O opencv-3.4.5.tar.gz https://github.com/opencv/opencv/archive/refs/tags/3.4.5.tar.gz
tar -zxvf opencv-3.4.5.tar.gz
# 開始編譯和安裝
pushd opencv-3.4.5rm -rf buildmkdir build && cd build # 構建和編譯安裝,-j4代表4線程并發cmake -D CMAKE_BUILD_TYPE=Release -D CMAKE_INSTALL_PREFIX=/usr/local ..make -j$(nproc)make install# 刷新動態庫ldconfig
popd
正常編譯安裝,莫得問題
3.4. Eigen 3.7
Eigen包在gitlab里面下載:gitlab.com/libeigen/eigen/-/releases/3.3.7
# 下載
wget -O eigen-3.3.7.tar.gz https://gitlab.com/libeigen/eigen/-/archive/3.3.7/eigen-3.3.7.tar.gz
tar -zxvf eigen-3.3.7.tar.gz
# 開始編譯和安裝
cd eigen-3.3.7
mkdir build && cd build
cmake ..
make && make install
# 拷貝路徑(避免頭文件引用不到)
sudo cp -r /usr/local/include/eigen3/Eigen /usr/local/include
還是用相同的cpp的demo代碼來測試是否安裝成功(直接g++編譯就可以了)
#include <iostream>
//需要將頭文件從 /usr/local/include/eigen3/ 復制到 /usr/local/include
#include <Eigen/Dense>
//using Eigen::MatrixXd;
using namespace Eigen;
using namespace Eigen::internal;
using namespace Eigen::Architecture;
using namespace std;
int main()
{cout<<"*******************1D-object****************"<<endl;Vector4d v1;v1<< 1,2,3,4;cout<<"v1=\n"<<v1<<endl;VectorXd v2(3);v2<<1,2,3;cout<<"v2=\n"<<v2<<endl;Array4i v3;v3<<1,2,3,4;cout<<"v3=\n"<<v3<<endl;ArrayXf v4(3);v4<<1,2,3;cout<<"v4=\n"<<v4<<endl;
}
正常編譯運行
root@autodl-container-e39d46b8d3-01da7b14:~/pkg/eigen-3.3.7/build# g++ test.cpp -o t
root@autodl-container-e39d46b8d3-01da7b14:~/pkg/eigen-3.3.7/build# ./t
*******************1D-object****************
v1=
1
2
3
4
v2=
1
2
3
v3=
1
2
3
4
v4=
1
2
3
3.5. Libtorch 1.5.0
3.5.1. 關于手工編譯的說明
因為我們選擇的autodl環境里面已經帶了Pytorch了,所以可以不需要自己手動從源碼構建了。
我嘗試過從源碼構建pytorch 1.1.0版本,會在構建的半路被killed掉,不清楚問題在哪里,猜測是構建占用內存cpu過多導致的,當時被kill掉的輸出如下,大約在74%的時候,前后都沒有出現error,就直接被干掉了。


3.5.2. 不能使用本地已有的版本
我們選用的autodl鏡像里面其實已經自帶了一個可用的Torch目錄,路徑如下所示
/root/miniconda3/lib/python3.8/site-packages/torch/share/cmake/Torch
但是這個目錄中引用的libtorch預編譯版本是不包含C++11ABI兼容機制的,會最終導致Pangolin鏈接失敗,錯誤輸出如下所示。
這個鏈接失敗的問題和使用的Pangolin版本沒有關系,嘗試過Pangolin5.0和6.0都會鏈接失敗。
[100%] Linking CXX executable ../GCN2/rgbd_gcn
../lib/libORB_SLAM2.so: undefined reference to `pangolin::Split(std::string const&, char)'
../lib/libORB_SLAM2.so: undefined reference to `pangolin::CreatePanel(std::string const&)'
../lib/libORB_SLAM2.so: undefined reference to `DBoW2::FORB::fromString(cv::Mat&, std::string const&)'
../lib/libORB_SLAM2.so: undefined reference to `pangolin::BindToContext(std::string)'
../lib/libORB_SLAM2.so: undefined reference to `DBoW2::FORB::toString(cv::Mat const&)'
../lib/libORB_SLAM2.so: undefined reference to `pangolin::CreateWindowAndBind(std::string, int, int, pangolin::Params const&)'
collect2: error: ld returned 1 exit status
CMakeFiles/rgbd_gcn.dir/build.make:152: recipe for target '../GCN2/rgbd_gcn' failed
make[2]: *** [../GCN2/rgbd_gcn] Error 1
CMakeFiles/Makefile2:67: recipe for target 'CMakeFiles/rgbd_gcn.dir/all' failed
make[1]: *** [CMakeFiles/rgbd_gcn.dir/all] Error 2
Makefile:83: recipe for target 'all' failed
make: *** [all] Error 2
在GCNv2的GITHUB中是有提到這個問題的,翻譯過來就是不要使用預編譯版本的libtorch,因為會出現CXX11 ABI導致的連接錯誤。

在Pytroch 1.3.0之后的版本,官方就已經提供了帶CXX11 ABI兼容的預編譯版本了,所以可以下載預編譯包之后來使用。直接使用容器內的libtorch依舊會有鏈接問題。
3.5.3. 下載預編譯版本
最開始我選擇的就是pytorch1.1.0版本的鏡像,但是由于沒辦法從源碼編譯所以切換成了pytorch1.5.1的鏡像。因為在pytorch1.3.0之后官方才提供了CXX11 ABI兼容的預編譯包,在這之前的版本都需要手工編譯,否則會有鏈接錯誤。
我們需要做的操作是從官網上下一個帶CXX11 ABI兼容的libtorch預編譯包,下載地址中包含cxx11-abi的才是帶有CXX11 ABI兼容的。1.5.0版本的libtorch包下載地址如下,其中cu101代表cuda10.1,最后的libtorch版本是1.5.0(libtorch 1.5.1版本的包下不了)
https://download.pytorch.org/libtorch/cu101/libtorch-cxx11-abi-shared-with-deps-1.5.0.zip
直接通過unzip解壓這個目錄,就能得到一個libtorch文件夾,后文需要的TORCH_PATH在libtorch的libtorch/share/cmake/Torch目錄中就有:
root@autodl-container-e39d46b8d3-01da7b14:~/autodl-tmp# ls libtorch/share/cmake/Torch
TorchConfig.cmake  TorchConfigVersion.cmake
預編譯的libtorch包容量都挺大的,建議本地提前下好然后上傳到autodl里面,在autodl里面直接下載太耗時了,都是錢吶!

4. 編譯GCNv2_SLAM
上正主了,克隆一下代碼
git clone https://github.com/jiexiong2016/GCNv2_SLAM.git
因為這次是在autodl環境中跑,有了顯卡,pytorch的版本和之前的博客中的完全不一樣,所以需要修改的代碼內容也不一樣。可以參考博客 GCNv2_SLAM-CPU詳細安裝教程(ubuntu18.04)-CSDN博客 中的說明進行修改。
4.1. 修改build.sh
預編譯版本的TORCH_PATH在壓縮包解壓后libtorch目錄中,即libtorch/share/cmake/Torch目錄。修改build.sh腳本中的路徑為此目錄就可以了
-DTORCH_PATH=/root/autodl-tmp/libtorch/share/cmake/Torch
修改之后就可以開始編譯,并根據報錯來解決后面的一些問題了
4.2. 修改代碼兼容高版本libtorch
這部分修改可以在我的Github倉庫中找到:github.com/musnows/GCNv2_SLAM/tree/pytorch1.5.0
4.2.1. C++14編譯配置
初次運行會出現如下錯誤,高版本的torch需要C++14來編譯,因為用到了14的新特性
/root/autodl-tmp/libtorch/include/c10/util/C++17.h:27:2: error: #error You need C++14 to compile PyTorch27 | #error You need C++14 to compile PyTorch| ^~~~~
需要我們修改camke文件,修改GCNv2_SLAM/CMakeLists.txt,新增如下內容
# 頭部插入
set(CMAKE_CXX_STANDARD 14)
set(CMAKE_CXX_STANDARD_REQUIRED ON)
# 修改尾部的11為14
# set_property(TARGET rgbd_gcn PROPERTY CXX_STANDARD 11)
set_property(TARGET rgbd_gcn PROPERTY CXX_STANDARD 14)
然后還需要注釋掉和C++11判斷相關的cmake配置,也就是下面這一堆
#Check C++11 or C++0x support
#include(CheckCXXCompilerFlag)
#CHECK_CXX_COMPILER_FLAG("-std=c++11" COMPILER_SUPPORTS_CXX11)
#CHECK_CXX_COMPILER_FLAG("-std=c++0x" COMPILER_SUPPORTS_CXX0X)
#if(COMPILER_SUPPORTS_CXX11)
#   set(CMAKE_CXX_FLAGS "${CMAKE_CXX_FLAGS} -std=c++11")add_definitions(-DCOMPILEDWITHC11)
#   message(STATUS "Using flag -std=c++11.")
#elseif(COMPILER_SUPPORTS_CXX0X)
#   set(CMAKE_CXX_FLAGS "${CMAKE_CXX_FLAGS} -std=c++0x")
#   add_definitions(-DCOMPILEDWITHC0X)
#   message(STATUS "Using flag -std=c++0x.")
#else()
#   message(FATAL_ERROR "The compiler ${CMAKE_CXX_COMPILER} has no C++11 support. Please use a different C++ compiler.")
#endif()
其中add_definitions(-DCOMPILEDWITHC11)不要注釋掉,有用!
修改cmake后需要刪除GCNv2_SLAM/build目錄重新運行build.sh腳本,否則修改可能不會生效。
4.2.2. 缺少對應的operator=
報錯如下
/root/autodl-tmp/GCNv2_SLAM/src/GCNextractor.cc: In constructor ‘ORB_SLAM2::GCNextractor::GCNextractor(int, float, int, int, int)’:
/root/autodl-tmp/GCNv2_SLAM/src/GCNextractor.cc:218:37: error: no match for ‘operator=’ (operand types are ‘std::shared_ptr<torch::jit::Module>’ and ‘torch::jit::Module’)module = torch::jit::load(net_fn);^
In file included from /usr/include/c++/7/memory:81:0,from /root/miniconda3/lib/python3.8/site-packages/torch/include/c10/core/Allocator.h:4,from /root/miniconda3/lib/python3.8/site-packages/torch/include/ATen/ATen.h:3,from /root/miniconda3/lib/python3.8/site-packages/torch/include/torch/csrc/api/include/torch/types.h:3,from /root/miniconda3/lib/python3.8/site-packages/torch/include/torch/script.h:3,from /root/autodl-tmp/GCNv2_SLAM/include/GCNextractor.h:24,from /root/autodl-tmp/GCNv2_SLAM/src/GCNextractor.cc:63:
問題主要是torch::jit::Module入參不再是一個指針了,所以要把shared_ptr給改成普通對象。
修改GCNv2_SLAM/include/GCNextractor.h文件的99行:
//原代碼
std::shared_ptr<torch::jit::script::Module> module;
//更改為
torch::jit::script::Module module;
還需要對應修改GCNv2_SLAM/src/GCNextractor.cc的270行:
//原代碼
auto output = module->forward(inputs).toTuple();
//更改為
auto output = module.forward(inputs).toTuple();
4.2.3. 標準庫chrono編譯問題
如果你的cmake修改不對,還可能會遇到chrono導致的編譯報錯
/root/autodl-tmp/GCNv2_SLAM/GCN2/rgbd_gcn.cc: In function ‘int main(int, char**)’:
/root/autodl-tmp/GCNv2_SLAM/GCN2/rgbd_gcn.cc:97:22: error: ‘std::chrono::monotonic_clock’ has not been declaredstd::chrono::monotonic_clock::time_point t1 = std::chrono::monotonic_clock::now();^~~~~~~~~~~~~~~
/root/autodl-tmp/GCNv2_SLAM/GCN2/rgbd_gcn.cc:106:22: error: ‘std::chrono::monotonic_clock’ has not been declaredstd::chrono::monotonic_clock::time_point t2 = std::chrono::monotonic_clock::now();^~~~~~~~~~~~~~~
/root/autodl-tmp/GCNv2_SLAM/GCN2/rgbd_gcn.cc:109:84: error: ‘t2’ was not declared in this scopedouble ttrack = std::chrono::duration_cast<std::chrono::duration<double> >(t2 - t1).count();^~
/root/autodl-tmp/GCNv2_SLAM/GCN2/rgbd_gcn.cc:109:84: note: suggested alternative: ‘tm’double ttrack = std::chrono::duration_cast<std::chrono::duration<double> >(t2 - t1).count();^~tm
/root/autodl-tmp/GCNv2_SLAM/GCN2/rgbd_gcn.cc:109:89: error: ‘t1’ was not declared in this scopedouble ttrack = std::chrono::duration_cast<std::chrono::duration<double> >(t2 - t1).count();^~
/root/autodl-tmp/GCNv2_SLAM/GCN2/rgbd_gcn.cc:109:89: note: suggested alternative: ‘tm’double ttrack = std::chrono::duration_cast<std::chrono::duration<double> >(t2 - t1).count();^~tm
^CCMakeFiles/rgbd_gcn.dir/build.make:62: recipe for target 'CMakeFiles/rgbd_gcn.dir/GCN2/rgbd_gcn.cc.o' failed
make[2]: *** [CMakeFiles/rgbd_gcn.dir/GCN2/rgbd_gcn.cc.o] Interrupt
CMakeFiles/Makefile2:67: recipe for target 'CMakeFiles/rgbd_gcn.dir/all' failed
make[1]: *** [CMakeFiles/rgbd_gcn.dir/all] Interrupt
Makefile:83: recipe for target 'all' failed
make: *** [all] Interrupt
錯誤的主要含義就是std::chrono::monotonic_clock不存在,這是老版本的一個類,C++11新版本已經給它刪掉了。查看GCN2/rgbd_gcn.cc代碼可以發現,這里有宏定義來區分
// GCNv2_SLAM/GCN2/rgbd_gcn.cc
#ifdef COMPILEDWITHC11std::chrono::steady_clock::time_point t1 = std::chrono::steady_clock::now();
#elsestd::chrono::monotonic_clock::time_point t1 = std::chrono::monotonic_clock::now();
#endif
前文提到的GCNv2_SLAM/CMakeLists.txt中需要保留add_definitions(-DCOMPILEDWITHC11)就是這個原因。有了這個宏定義此處代碼就會編譯std::chrono::steady_clock,不會有編譯錯誤了。
4.2.4. 修改PT文件
依舊需要修改3個pt文件,注意這時候修改的內容和CPU運行不一樣!
修改GCNv2_SLAM/GCN2下gcn2_320x240.pt、gcn2_640x480.pt和gcn2_tiny_320x240.pt中的內容。需要先解壓文件
unzip gcn2_320x240.pt
解壓出來之后會有GCNv2_SLAM/GCN2/gcn/code/gcn.py文件,這里的grid_sampler函數在pytorch 1.3.0之前是默認傳入True的,1.3.0改成默認False了,所以需要手動傳入True
# 原代碼
_32 = torch.squeeze(torch.grid_sampler(input, grid, 0, 0))
# 修改為
_32 = torch.squeeze(torch.grid_sampler(input, grid, 0, 0, True))
替換了之后,重新壓縮pt文件,先刪了原本的,重新壓縮
rm -rf gcn2_320x240.pt
zip -r gcn2_320x240.pt gcn
rm -rf gcn #刪除剛剛的gcn文件夾
這只是一個例子,其他幾個gcn2壓縮包都要用相同的方式修改!
unzip gcn2_640x480.pt
rm -rf gcn2_640x480.pt
# 修改下面這個文件
#   GCNv2_SLAM/GCN2/gcn2_480x640/code/gcn2_480x640.py
# 重新壓縮
zip -r gcn2_640x480.pt gcn2_480x640
rm -rf gcn2_480x640
unzip gcn2_tiny_320x240.pt
rm -rf gcn2_tiny_320x240.pt
# 修改文件
#   gcnv2slam/GCNv2_SLAM/GCN2/gcn2_tiny/code/gcn2_tiny.py
# 重新壓縮
zip -r gcn2_tiny_320x240.pt gcn2_tiny
rm -rf gcn2_tiny
4.3. 編譯項目
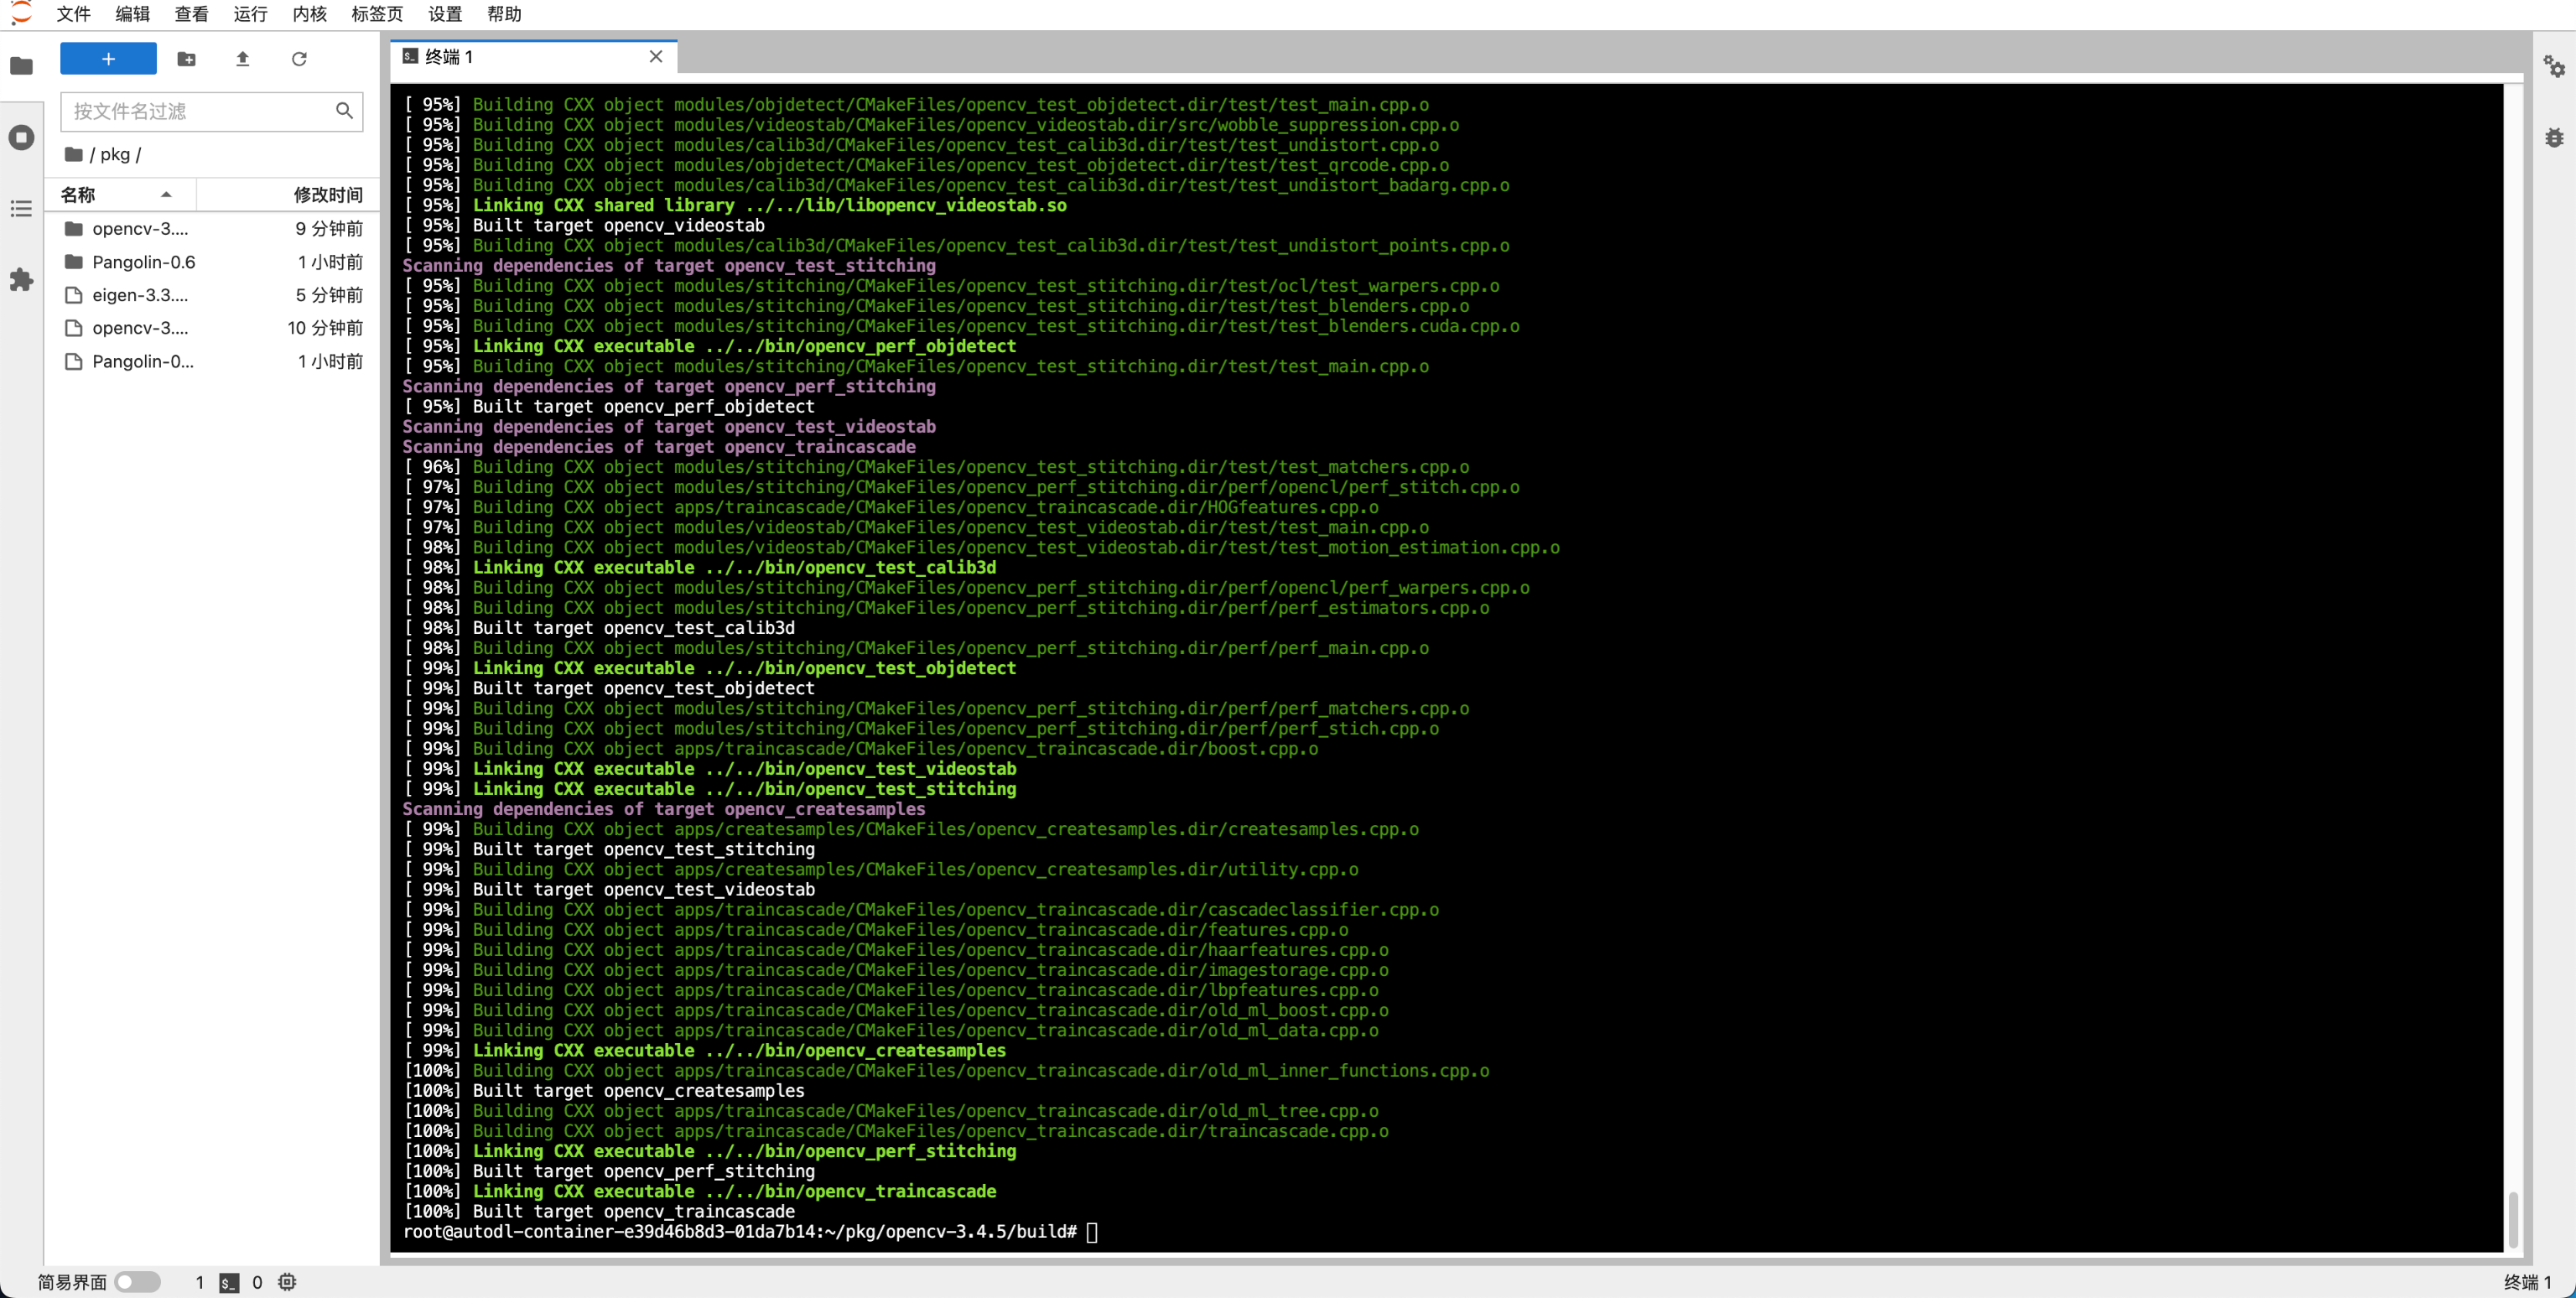
修改了上面提到的幾處問題,就能正常編譯成功了

5. 配置VNC環境
5.1. 安裝VNC服務端
默認情況下autodl是沒有GUI環境的,也就沒有辦法運行項目(會有x11報錯)
所以我們需要依照官方文檔來配置一下GUI:www.autodl.com/docs/gui/
# 安裝基本的依賴包
apt update && apt install -y libglu1-mesa-dev mesa-utils xterm xauth x11-xkb-utils xfonts-base xkb-data libxtst6 libxv1# 安裝libjpeg-turbo和turbovnc
export TURBOVNC_VERSION=2.2.5
export LIBJPEG_VERSION=2.0.90
wget http://aivc.ks3-cn-beijing.ksyun.com/packages/libjpeg-turbo/libjpeg-turbo-official_${LIBJPEG_VERSION}_amd64.deb
wget http://aivc.ks3-cn-beijing.ksyun.com/packages/turbovnc/turbovnc_${TURBOVNC_VERSION}_amd64.deb
dpkg -i libjpeg-turbo-official_${LIBJPEG_VERSION}_amd64.deb
dpkg -i turbovnc_${TURBOVNC_VERSION}_amd64.deb
rm -rf *.deb# 啟動VNC服務端,這一步可能涉及vnc密碼配置(注意不是實例的賬戶密碼)。另外如果出現報錯xauth未找到,那么使用apt install xauth再安裝一次
rm -rf /tmp/.X1*  # 如果再次啟動,刪除上一次的臨時文件,否則無法正常啟動
USER=root /opt/TurboVNC/bin/vncserver :1 -desktop X -auth /root/.Xauthority -geometry 1920x1080 -depth 24 -rfbwait 120000 -rfbauth /root/.vnc/passwd -fp /usr/share/fonts/X11/misc/,/usr/share/fonts -rfbport 6006# 檢查是否啟動,如果有vncserver的進程,證明已經啟動
ps -ef | grep vnc | grep -v grep
啟動vnc服務端會讓你輸入密碼,為了方便我直接用了autodl實例的密碼。只讀密碼view-only password選擇n不設置。
[root@autodl-container-e39d46b8d3-01da7b14:~/vnc]$ USER=root /opt/TurboVNC/bin/vncserver :1 -desktop X -auth /root/.Xauthority -geometry 1920x1080 -depth 24 -rfbwait 120000 -rfbauth /root/.vnc/passwd -fp /usr/share/fonts/X11/misc/,/usr/share/fonts -rfbport 6006You will require a password to access your desktops.Password:
Warning: password truncated to the length of 8.
Verify:
Would you like to enter a view-only password (y/n)? n
xauth:  file /root/.Xauthority does not existDesktop 'TurboVNC: autodl-container-e39d46b8d3-01da7b14:1 (root)' started on display autodl-container-e39d46b8d3-01da7b14:1Creating default startup script /root/.vnc/xstartup.turbovnc
Starting applications specified in /root/.vnc/xstartup.turbovnc
Log file is /root/.vnc/autodl-container-e39d46b8d3-01da7b14:1.log
啟動vnc服務端后就能搜到進程了
root@autodl-container-e39d46b8d3-01da7b14:~/vnc# ps -ef | grep vnc | grep -v grep
root      28861      1  0 11:22 pts/0    00:00:00 /opt/TurboVNC/bin/Xvnc :1 -desktop TurboVNC: autodl-container-64eb44b6f5-c569ba8d:1 (root) -httpd /opt/TurboVNC/bin//../java -auth /root/.Xauthority -geometr
如果關閉了實例之后需要重啟vnc,執行這兩個命令就行了
rm -rf /tmp/.X1*  # 如果再次啟動,刪除上一次的臨時文件,否則無法正常啟動
USER=root /opt/TurboVNC/bin/vncserver :1 -desktop X -auth /root/.Xauthority -geometry 1920x1080 -depth 24 -rfbwait 120000 -rfbauth /root/.vnc/passwd -fp /usr/share/fonts/X11/misc/,/usr/share/fonts -rfbport 6006
5.2. 本地端口綁定
隨后還需要進行本地ssh端口綁定,先到autodl的控制臺實例列表里面復制一下ssh鏈接命令,應該長這樣
ssh -p 端口號 root@域名
使用下面這個命令在本地的終端運行,就能實現把遠程的端口綁定到本地的6006端口了
ssh -CNgv -L 6006:127.0.0.1:6006 root@域名 -p 端口號
如果命令正確,輸入這個命令后會讓你鍵入autodl實例的密碼,在控制臺里面復制然后ctrl+shift+v(command+v)粘貼就行了。
期間需要保持這個終端一直開啟,不然轉發會終止。
5.3. 鏈接VNC
這里我使用了祖傳的VNC Viewer來連云端,全平臺都有客戶端,下載安裝就可以了。
安裝了之后,直接在頂欄輸入127.0.0.1:6006來鏈接云端。

如果提示connection closed大概率是vnc服務沒有正常安裝或者端口轉發沒有成功,請重試上述步驟。順利的話,就會彈出來讓你輸入密碼。
這里的密碼是啟動vnc服務端時設置的密碼,根據你設置的密碼輸入就行。

鏈接成功,會是黑屏,正常情況

5.4. 測試VNC是否安裝成功
我們可以用Pangolin的示例程序來試試有沒有配置成功
cd Pangolin-0.6/examples/HelloPangolin
mkdir build && cd build
cmake ..
make
編譯完成之后需要先執行export DISPLAY=:1啟用GUI再啟動需要GUI的程序
export DISPLAY=:1
./HelloPangolin
如果沒有export直接啟動,還是會報錯
root@autodl-container-e39d46b8d3-01da7b14:~/autodl-tmp/Pangolin-0.6/examples/HelloPangolin/build# ./HelloPangolin
terminate called after throwing an instance of 'std::runtime_error'what():  Pangolin X11: Failed to open X display
Aborted (core dumped)
export了環境變量之后就能正常啟動,且VNC里面也能看到畫面了
root@autodl-container-e39d46b8d3-01da7b14:~/autodl-tmp/Pangolin-0.6/examples/HelloPangolin/build# export DISPLAY=:1
root@autodl-container-e39d46b8d3-01da7b14:~/autodl-tmp/Pangolin-0.6/examples/HelloPangolin/build# ./HelloPangolin
出現下面這個魔方就是安裝VNC成功啦

你也可以編譯opencv的demo來測試vnc是否正常
cd opencv-3.4.5/samples/cpp/example_cmake
mkdir build && cd build
cmake ..
make
# 導入環境變量之后再啟動
export DISPLAY=:1
./opencv_example
如果正常,vnc里面會出現一個hello opencv,因為沒有攝像頭所以是黑屏

6. 運行GCNv2_SLAM分析TUM數據集
接下來就可以運行項目了,還是去下載TUM數據集,這里把之前博客的命令copy過來。
6.1. 下載數據集
下載地址:cvg.cit.tum.de/data/datasets/rgbd-dataset/download
下載fr1/desk數據集,這是一個桌子的RGBD數據

在GCNv2_SLAM工程下新建datasets/TUM,將數據集下載到其中
# 新建datasets/TUM數據集文件夾
mkdir -p datasets/TUM
cd datasets/TUM
# 下載數據集到datasets/TUM文件夾內
wget -O rgbd_dataset_freiburg1_desk.tgz https://cvg.cit.tum.de/rgbd/dataset/freiburg1/rgbd_dataset_freiburg1_desk.tgz
# 解壓數據集
tar -xvf rgbd_dataset_freiburg1_desk.tgz
然后還需要下載一個associate.py腳本來處理一下數據集才能正常運行
下載地址:svncvpr.in.tum.de,同時在我的Github倉庫也做了留檔。
wget -O associate.py https://svncvpr.in.tum.de/cvpr-ros-pkg/trunk/rgbd_benchmark/rgbd_benchmark_tools/src/rgbd_benchmark_tools/associate.py
這個腳本只能用python2運行,需要下載numpy庫。注意autodl的環境中python綁定到了python3,環境中的python2被攔掉了,所以需要安裝獨立的python2命令來運行python2。
在Pytorch1.5.1版本的autodl鏡像中,可以直接使用下面的命令來安裝python2和pip2:
apt-get install -y python-dev python-pip
隨后安裝numpy庫就ok了
root@autodl-container-e39d46b8d3-01da7b14:~/autodl-tmp/GCNv2_SLAM/datasets/TUM# pip2 install numpy
DEPRECATION: Python 2.7 reached the end of its life on January 1st, 2020. Please upgrade your Python as Python 2.7 is no longer maintained. pip 21.0 will drop support for Python 2.7 in January 2021. More details about Python 2 support in pip can be found at https://pip.pypa.io/en/latest/development/release-process/#python-2-support pip 21.0 will remove support for this functionality.
Looking in indexes: http://mirrors.aliyun.com/pypi/simple
Collecting numpyDownloading http://mirrors.aliyun.com/pypi/packages/3a/5f/47e578b3ae79e2624e205445ab77a1848acdaa2929a00eeef6b16eaaeb20/numpy-1.16.6-cp27-cp27mu-manylinux1_x86_64.whl (17.0 MB)|████████████████████████████████| 17.0 MB 21.1 MB/s
Installing collected packages: numpy
Successfully installed numpy-1.16.6
執行腳本來處理兩個文件,在數據文件夾里執行命令
python2 associate.py rgbd_dataset_freiburg1_desk/rgb.txt rgbd_dataset_freiburg1_desk/depth.txt > rgbd_dataset_freiburg1_desk/associate.txt
執行python命令后可以看看合并成功了沒有,如下應該就是沒問題了。
1305031472.895713 rgb/1305031472.895713.png 1305031472.892944 depth/1305031472.892944.png
1305031472.927685 rgb/1305031472.927685.png 1305031472.924814 depth/1305031472.924814.png
1305031472.963756 rgb/1305031472.963756.png 1305031472.961213 depth/1305031472.961213.png
在同一個網站下載的其他TUM數據集也需要用相同的方式進行處理
6.2. 運行項目
隨后進入項目的GCN2目錄執行命令,我把命令中的路徑都改成了相對路徑
# 注意需要導入vnc環境變量
export DISPLAY=:1
# 運行項目
cd GCN2
GCN_PATH=gcn2_320x240.pt ./rgbd_gcn ../Vocabulary/GCNvoc.bin TUM3_small.yaml ../datasets/TUM/rgbd_dataset_freiburg1_desk ../datasets/TUM/rgbd_dataset_freiburg1_desk/associate.txt
項目能正常運行,VNC中也有圖像輸出

運行結束后的輸出如下
[root@autodl-container-e39d46b8d3-01da7b14:~/autodl-tmp/GCNv2_SLAM/GCN2]$ GCN_PATH=gcn2_320x240.pt ./rgbd_gcn ../Vocabulary/GCNvoc.bin TUM3_small.yaml ../datasets/TUM/rgbd_dataset_freiburg1_desk ../datasets/TUM/rgbd_dataset_freiburg1_desk/associate.txtORB-SLAM2 Copyright (C) 2014-2016 Raul Mur-Artal, University of Zaragoza.
This program comes with ABSOLUTELY NO WARRANTY;
This is free software, and you are welcome to redistribute it
under certain conditions. See LICENSE.txt.Input sensor was set to: RGB-DLoading ORB Vocabulary. This could take a while...
Vocabulary loaded!Camera Parameters:
- fx: 267.7
- fy: 269.6
- cx: 160.05
- cy: 123.8
- k1: 0
- k2: 0
- p1: 0
- p2: 0
- fps: 30
- color order: RGB (ignored if grayscale)ORB Extractor Parameters:
- Number of Features: 1000
- Scale Levels: 8
- Scale Factor: 1.2
- Initial Fast Threshold: 20
- Minimum Fast Threshold: 7Depth Threshold (Close/Far Points): 5.97684-------
Start processing sequence ...
Images in the sequence: 573Framebuffer with requested attributes not available. Using available framebuffer. You may see visual artifacts.New map created with 251 points
Finished!
-------median tracking time: 0.0187857
mean tracking time: 0.0193772Saving camera trajectory to CameraTrajectory.txt ...trajectory saved!Saving keyframe trajectory to KeyFrameTrajectory.txt ...trajectory saved!
用時0.0187857,約合53hz,和論文里面GTX1070laptop的80hz還是差的有點遠。
后面又跑了幾次,結果更慢了。不過整體還是比CPU運行快了n多倍了!
median tracking time: 0.0225817
mean tracking time: 0.0236844

7. 嘗試4090運行失敗
7.1. 環境配置
我嘗試使用過4090顯卡,環境如下。4090沒辦法選更低版本的PyTorch了。
PyTorch  1.11.0
Python  3.8(ubuntu20.04)
Cuda  11.3
依賴項都用相同的命令安裝,以下是安裝依賴項時的部分截圖。


對應的Pytorch 1.11.0版本的libtorch下載鏈接如下。
https://download.pytorch.org/libtorch/cu113/libtorch-cxx11-abi-shared-with-deps-1.11.0%2Bcu113.zip
整個包比較大,一共有1.6GB,需要慢慢等待下載了。建議還是本地提前下好再傳上去,畢竟autodl每一分鐘都是錢吶!

最終項目可以正常編譯完成(也需要執行上文提到的代碼修改)

7.2. 數據集處理
在Pytorch1.11.0鏡像中需要用下面的方式來安裝python2來處理數據集,主要是python-pip包會提示不可用,沒辦法直接安裝。
apt-get install -y python-dev-is-python2
wget https://bootstrap.pypa.io/pip/2.7/get-pip.py
python2 get-pip.py
獲取到的python2如下,隨后正常安裝numpy來運行腳本就行了
root@autodl-container-64eb44b6f5-c569ba8d:~# python2 -V
Python 2.7.18
root@autodl-container-64eb44b6f5-c569ba8d:~# pip2 -V
pip 20.3.4 from /usr/local/lib/python2.7/dist-packages/pip (python 2.7)
7.3. 運行GCN2發生coredump
還是用相同的命令啟動程序
cd GCN2
GCN_PATH=gcn2_320x240.pt ./rgbd_gcn ../Vocabulary/GCNvoc.bin TUM3_small.yaml ../datasets/TUM/rgbd_dataset_freiburg1_desk ../datasets/TUM/rgbd_dataset_freiburg1_desk/associate.txt
完蛋,coredump了!
Camera Parameters:
- fx: 267.7
- fy: 269.6
- cx: 160.05
- cy: 123.8
- k1: 0
- k2: 0
- p1: 0
- p2: 0
- fps: 30
- color order: RGB (ignored if grayscale)
terminate called after throwing an instance of 'c10::Error'what():  Legacy model format is not supported on mobile.
Exception raised from deserialize at ../torch/csrc/jit/serialization/import.cpp:267 (most recent call first):
frame #0: c10::Error::Error(c10::SourceLocation, std::__cxx11::basic_string<char, std::char_traits<char>, std::allocator<char> >) + 0x6b (0x7fefb6de20eb in /root/autodl-tmp/libtorch/lib/libc10.so)
frame #1: c10::detail::torchCheckFail(char const*, char const*, unsigned int, char const*) + 0xd1 (0x7fefb6dddc41 in /root/autodl-tmp/libtorch/lib/libc10.so)
frame #2: <unknown function> + 0x35dd53d (0x7feff3ef353d in /root/autodl-tmp/libtorch/lib/libtorch_cpu.so)
frame #3: torch::jit::load(std::shared_ptr<caffe2::serialize::ReadAdapterInterface>, c10::optional<c10::Device>, std::unordered_map<std::__cxx11::basic_string<char, std::char_traits<char>, std::allocator<char> >, std::__cxx11::basic_string<char, std::char_traits<char>, std::allocator<char> >, std::hash<std::__cxx11::basic_string<char, std::char_traits<char>, std::allocator<char> > >, std::equal_to<std::__cxx11::basic_string<char, std::char_traits<char>, std::allocator<char> > >, std::allocator<std::pair<std::__cxx11::basic_string<char, std::char_traits<char>, std::allocator<char> > const, std::__cxx11::basic_string<char, std::char_traits<char>, std::allocator<char> > > > >&) + 0x1cd (0x7feff3ef48ad in /root/autodl-tmp/libtorch/lib/libtorch_cpu.so)
frame #4: torch::jit::load(std::__cxx11::basic_string<char, std::char_traits<char>, std::allocator<char> > const&, c10::optional<c10::Device>, std::unordered_map<std::__cxx11::basic_string<char, std::char_traits<char>, std::allocator<char> >, std::__cxx11::basic_string<char, std::char_traits<char>, std::allocator<char> >, std::hash<std::__cxx11::basic_string<char, std::char_traits<char>, std::allocator<char> > >, std::equal_to<std::__cxx11::basic_string<char, std::char_traits<char>, std::allocator<char> > >, std::allocator<std::pair<std::__cxx11::basic_string<char, std::char_traits<char>, std::allocator<char> > const, std::__cxx11::basic_string<char, std::char_traits<char>, std::allocator<char> > > > >&) + 0xc1 (0x7feff3ef64c1 in /root/autodl-tmp/libtorch/lib/libtorch_cpu.so)
frame #5: torch::jit::load(std::__cxx11::basic_string<char, std::char_traits<char>, std::allocator<char> > const&, c10::optional<c10::Device>) + 0x6f (0x7feff3ef65cf in /root/autodl-tmp/libtorch/lib/libtorch_cpu.so)
frame #6: ORB_SLAM2::GCNextractor::GCNextractor(int, float, int, int, int) + 0x670 (0x7ff071e213c0 in /root/autodl-tmp/GCNv2_SLAM/lib/libORB_SLAM2.so)
frame #7: ORB_SLAM2::Tracking::Tracking(ORB_SLAM2::System*, DBoW2::TemplatedVocabulary<cv::Mat, DBoW2::FORB>*, ORB_SLAM2::FrameDrawer*, ORB_SLAM2::MapDrawer*, ORB_SLAM2::Map*, ORB_SLAM2::KeyFrameDatabase*, std::__cxx11::basic_string<char, std::char_traits<char>, std::allocator<char> > const&, int) + 0x1e7e (0x7ff071dfcf0e in /root/autodl-tmp/GCNv2_SLAM/lib/libORB_SLAM2.so)
frame #8: ORB_SLAM2::System::System(std::__cxx11::basic_string<char, std::char_traits<char>, std::allocator<char> > const&, std::__cxx11::basic_string<char, std::char_traits<char>, std::allocator<char> > const&, ORB_SLAM2::System::eSensor, bool) + 0x5ae (0x7ff071de459e in /root/autodl-tmp/GCNv2_SLAM/lib/libORB_SLAM2.so)
frame #9: main + 0x22f (0x5609d811ae2f in ./rgbd_gcn)
frame #10: __libc_start_main + 0xf3 (0x7fefb704a083 in /lib/x86_64-linux-gnu/libc.so.6)
frame #11: _start + 0x2e (0x5609d811c7ce in ./rgbd_gcn)Aborted (core dumped)
這個問題我沒找到解決方案,于是放棄治療。
本來GCNv2就是一個很老的項目了,在40系顯卡上不好運行也正常。網上其實能搜到一篇在4060拯救者上運行GCNv2的博客,但是那篇博客里面并沒有提到這個coredump的問題,問GPT也沒給出一個可行的方案,還是不浪費時間了。
8. The end
本文成功在2080ti的環境上運行了GCNv2_SLAM項目,雖然運行速度依舊抵不上論文中用1070laptop跑出來的80HZ,但總比本地CPU運行的龜速快多了。


)
:從基礎到前沿技術及代碼實踐)
)


![BUUCTF [Black Watch 入群題]PWN1 題解](http://pic.xiahunao.cn/BUUCTF [Black Watch 入群題]PWN1 題解)
)


)