Excel的導入V2優化版
有些時候文件上傳這一步驟由前端來處理,只將上傳后的 URL 傳輸給后端(可以參考上一文中的圖片上傳功能),也就是導入請求中并不會直接處理 MultipartFile 對象,而是通過文件 URL 將其下載,之后進行文件流處理,具體過程如下:
?
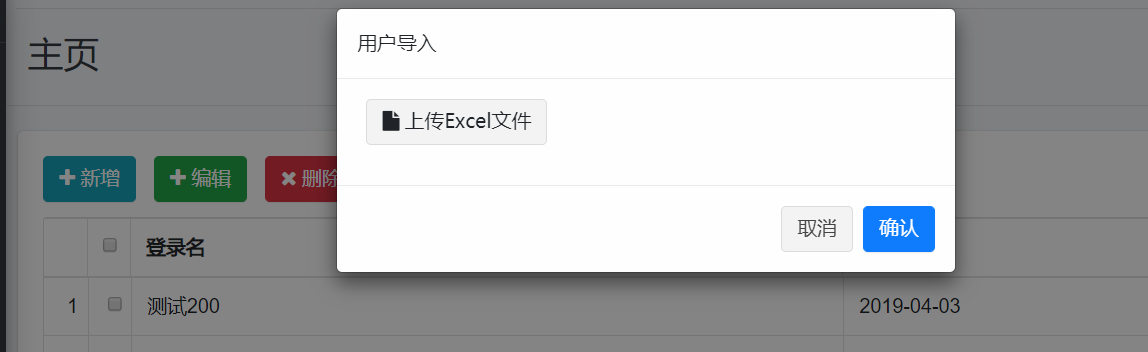
點擊 “ 導入V2 ” 按鈕,與 V1 按鈕不同,此時出現的不是文件選擇框,而是一個上傳文件的彈框,點擊彈框里的 “ 上傳 Excel 文件 ” 按鈕才會出現文件選擇框,選擇正確的文件后點擊確定,請求完成后同 V1 版本的導入功能效果一樣。
前端實現
HTML頁面
<!-- Main content --><div class="content"><div class="row"><div class="col-12"><div class="card"><div class="card-body"><div class="grid-btn"><button class="btn btn-info" onclick="userAdd()"><i class="fa fa-plus"></i> 新增</button><button class="btn btn-success" onclick="userEdit()"><i class="fa fa-plus"></i> 編輯</button><button class="btn btn-danger" onclick="deleteUser()"><i class="fa fa-remove"></i> 刪除</button><button class="btn btn-default" id="importV1Button"><i class="fa fa-upload"></i> 導入ExcelV1</button><button class="btn btn-default" onclick="importV2()"><iclass="fa fa-upload"></i> 導入ExcelV2</button><button class="btn btn-primary" onclick="window.location.href='/users/export'"><i class="fa fa-download"></i> 導出</button></div><table id="jqGrid" class="table table-bordered"></table><div id="jqGridPager"></div></div></div></div></div></div> </div>
HTML模態框(這里用的是Custombox)
<!--導入Excel模態框--><div class="content"><div class="modal" id="importV2Modal" tabindex="-1" role="dialog" aria-labelledby="importV2ModalLabel"><div class="modal-dialog" role="document"><div class="modal-content"><div class="modal-header"><h6 class="modal-title" id="importV2ModalLabel">用戶導入</h6></div><div class="modal-body"><div class="form-group"><input type="hidden" id="fileUrl" value=""><div class="col-sm-10"><a class="btn btn-default" id="uploadExcelV2"><i class="fa fa-file">上傳Excel文件</i></a></div></div></div><div class="modal-footer"><button type="button" class="btn btn-default" id="cancelImportV2">取消</button><button type="button" class="btn btn-primary" id="importV2Button">確認</button></div></div></div></div></div>
導入的JS
// 用戶導入V2
function importV2() {var modal = new Custombox.modal({content: {effect: 'fadein',target: '#importV2Modal'}});modal.open();
}
    new AjaxUpload('#uploadExcelV2', {action: 'upload/file',name: 'file',autoSubmit: 'true',responseType: 'json',onSubmit: function (file, extension) {if (!(extension && /^(xlsx)$/.test(extension.toLowerCase()))) {alert('只支持xlsx格式的文件!', {icon: "error",});return false;}},onComplete: function (file, r) {if (r.resultCode == 200) {$("#fileUrl").val(r.data);$("#uploadExcelV2").attr('class','btn-info');alert("上傳Excel成功,請點擊確認添加數據");return false;} else {alert(r.message);}}});
});
這里還是通過上傳獲取文件的url再通過流處理轉換成File類型并把對應的Excel下載到服務器,其他的和V1版本是一樣的
當點擊確定導入的時候,如果之前上傳沒錯,再訪問一次后臺
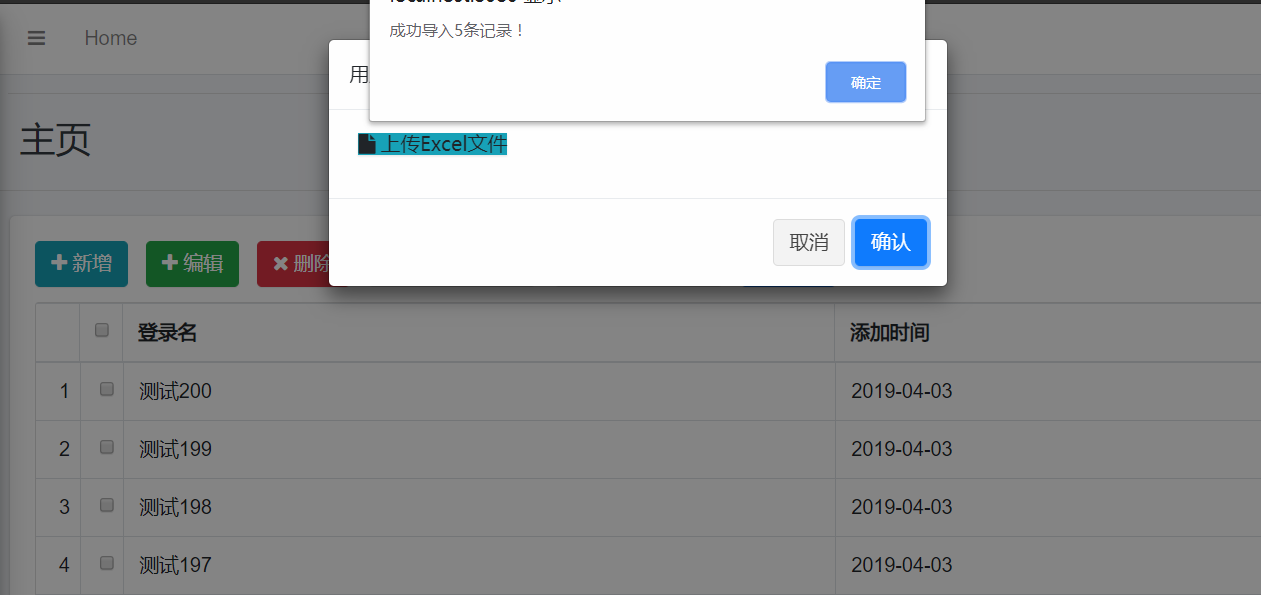
$("#importV2Button").click(function () {var fileUrl = $("#fileUrl").val();$.ajax({type: 'post',dataType: 'json',url: 'users/importV2?fileUrl=' + fileUrl,contentType:'application/json',success:function (result) {if (result.resultCode==200){closeModal();reload();alert("成功導入"+result.data+"條記錄!");}else {closeModal();alert(result.message);};},error:function () {reset();alert("操作失敗!");}});
});
后端邏輯
控制層
package com.ssm.demo.controller;import com.ssm.demo.common.Result;
import com.ssm.demo.common.ResultGenerator;
import com.ssm.demo.controller.enums.UploadFileTypeEnum;
import com.ssm.demo.utils.FileUtil;
import org.apache.commons.io.FileUtils;
import org.springframework.stereotype.Controller;
import org.springframework.web.bind.annotation.RequestMapping;
import org.springframework.web.bind.annotation.RequestMethod;
import org.springframework.web.bind.annotation.RequestParam;
import org.springframework.web.bind.annotation.ResponseBody;
import org.springframework.web.multipart.MultipartFile;import javax.servlet.ServletContext;
import javax.servlet.http.HttpServletRequest;
import java.io.File;
import java.io.IOException;
import java.text.SimpleDateFormat;
import java.util.Date;
import java.util.Random;import static com.ssm.demo.common.Constants.FILE_PRE_URL;/*** Created by 13 on 2017/7/17.*/
@Controller
@RequestMapping("/upload")
public class UploadFileController {/*** 通用 文件上傳接口(可以上傳圖片、視頻、excel等文件,具體格式可在UploadFileTypeEnum中進行配置)** @return*/@RequestMapping(value = "/file", method = RequestMethod.POST)@ResponseBodypublic Result uploadFile(HttpServletRequest request, @RequestParam("file") MultipartFile file) {ServletContext sc = request.getSession().getServletContext();String type = file.getOriginalFilename().substring(file.getOriginalFilename().lastIndexOf(".") + 1, file.getOriginalFilename().length());String fileName = null;UploadFileTypeEnum uploadFileTypeEnum = UploadFileTypeEnum.getFileEnumByType(type);if (uploadFileTypeEnum == UploadFileTypeEnum.ERROR_TYPE) {//格式錯誤則不允許上傳,直接返回錯誤提示return ResultGenerator.genFailResult("請檢查文件格式!");} else {//生成文件名稱通用方法SimpleDateFormat sdf = new SimpleDateFormat("yyyyMMdd_HHmmss");Random r = new Random();StringBuilder tempName = new StringBuilder();tempName.append(sdf.format(new Date())).append(r.nextInt(100)).append(".").append(type);fileName = tempName.toString();}try {String dir = sc.getRealPath("/upload");FileUtils.writeByteArrayToFile(new File(dir, fileName), file.getBytes());} catch (IOException e) {//文件上傳異常return ResultGenerator.genFailResult("文件上傳失敗!");}Result result = ResultGenerator.genSuccessResult();//返回文件的全路徑StringBuilder fileUrl = new StringBuilder();fileUrl.append(FILE_PRE_URL).append("/upload/").append(fileName);result.setData(fileUrl.toString());return result;}/*** @param chunks 當前所傳文件的分片總數* @param chunk  當前所傳文件的當前分片數* @return* @Description: 大文件上傳前分片檢查* @author: 13*/@ResponseBody@RequestMapping(value = "/checkChunk")public Result checkChunk(HttpServletRequest request, String guid, Integer chunks, Integer chunk, String fileName) {try {String uploadDir = FileUtil.getRealPath(request);String ext = fileName.substring(fileName.lastIndexOf("."));// 判斷文件是否分塊if (chunks != null && chunk != null) {//文件路徑StringBuilder tempFileName = new StringBuilder();tempFileName.append(uploadDir).append(File.separator).append("temp").append(File.separator).append(guid).append(File.separator).append(chunk).append(ext);File tempFile = new File(tempFileName.toString());//是否已存在分片,如果已存在分片則返回SUCCESS結果if (tempFile.exists()) {return ResultGenerator.genSuccessResult("分片已經存在!跳過此分片!");}}} catch (Exception ex) {ex.printStackTrace();return ResultGenerator.genFailResult("error");}return ResultGenerator.genNullResult("不存在分片");}/*** @param chunks 當前所傳文件的分片總數* @param chunk  當前所傳文件的當前分片數* @return* @Description: 大文件分片上傳* @author: 13*/@ResponseBody@RequestMapping(value = "/files")public Result upload(HttpServletRequest request, String guid, Integer chunks, Integer chunk, String name, MultipartFile file) {String filePath = null;//上傳存儲路徑String uploadDir = FileUtil.getRealPath(request);//后綴名String ext = name.substring(name.lastIndexOf("."));StringBuilder tempFileName = new StringBuilder();//等價于 uploadDir + "\\temp\\" + guid + "\\" + chunk + exttempFileName.append(uploadDir).append(File.separator).append("temp").append(File.separator).append(guid).append(File.separator).append(chunk).append(ext);File tempFile = new File(tempFileName.toString());// 判斷文件是否分塊if (chunks != null && chunk != null) {//根據guid 創建一個臨時的文件夾if (!tempFile.exists()) {tempFile.mkdirs();}try {//保存每一個分片
                file.transferTo(tempFile);} catch (Exception e) {e.printStackTrace();}//如果當前是最后一個分片,則合并所有文件if (chunk == (chunks - 1)) {StringBuilder tempFileFolder = new StringBuilder();//等價于 uploadDir + "\\temp\\" + guid + File.separatortempFileFolder.append(uploadDir).append(File.separator).append("temp").append(File.separator).append(guid).append(File.separator);String newFileName = FileUtil.mergeFile(chunks, ext, tempFileFolder.toString(), request);filePath = "upload/chunked/" + newFileName;}} else {//不用分片的文件存儲到files文件夾中StringBuilder destPath = new StringBuilder();destPath.append(uploadDir).append(File.separator).append("files").append(File.separator);String newName = System.currentTimeMillis() + ext;// 文件新名稱try {FileUtil.saveFile(destPath.toString(), newName, file);} catch (IOException e) {e.printStackTrace();}filePath = "upload/files/" + newName;}Result result = ResultGenerator.genSuccessResult();result.setData(filePath);return result;}
}
FileUtil工具類
package com.ssm.demo.utils;import org.apache.commons.io.FileUtils;
import org.springframework.web.multipart.MultipartFile;import javax.servlet.ServletContext;
import javax.servlet.http.HttpServletRequest;
import java.io.*;
import java.net.URL;
import java.net.URLConnection;
import java.util.UUID;public class FileUtil {/*** 轉換MultipartFile對象為java.io.File類型** @param multipartFile* @return*/public static File convertMultipartFileToFile(MultipartFile multipartFile) {File result = null;try {/*** UUID.randomUUID().toString()是javaJDK提供的一個自動生成主鍵的方法。* UUID(Universally Unique Identifier)全局唯一標識符,是指在一臺機器上生成的數字,* 它保證對在同一時空中的所有機器都是唯一的,是由一個十六位的數字組成,表現出來的形式。* 由以下幾部分的組合:當前日期和時間(UUID的第一個部分與時間有關,如果你在生成一個UUID之后,* 過幾秒又生成一個UUID,則第一個部分不同,其余相同),時鐘序列,* 全局唯一的IEEE機器識別號(如果有網卡,從網卡獲得,沒有網卡以其他方式獲得),* UUID的唯一缺陷在于生成的結果串會比較長。*** File.createTempFile和File.createNewFile()的區別:*  后者只是創建文件,而前者可以給文件名加前綴和后綴*///這里對生成的文件名加了UUID隨機生成的前綴,后綴是nullresult = File.createTempFile(UUID.randomUUID().toString(), null);multipartFile.transferTo(result);result.deleteOnExit();} catch (Exception e) {e.printStackTrace();}return result;}/*** 根據url獲取文件對象** @param fileUrl* @return*/public static File downloadFile(String fileUrl) {File result = null;try {result = File.createTempFile(UUID.randomUUID().toString(), null);URL url = new URL(fileUrl);URLConnection connection = url.openConnection();connection.setConnectTimeout(3000);BufferedInputStream bis = new BufferedInputStream(connection.getInputStream());BufferedOutputStream bos = new BufferedOutputStream(new FileOutputStream(result));byte[] car = new byte[1024];int l = 0;while ((l = bis.read(car)) != -1) {bos.write(car, 0, l);}bis.close();bos.close();} catch (Exception e) {e.printStackTrace();}return result;}/*** @param request* @return*/public static String getRealPath(HttpServletRequest request) {ServletContext sc = request.getSession().getServletContext();String uploadDir = sc.getRealPath("/upload");return uploadDir;}public static boolean saveFile(String savePath, String fileFullName, MultipartFile file) throws IOException {File uploadFile = new File(savePath + fileFullName);FileUtils.writeByteArrayToFile(new File(savePath, fileFullName), file.getBytes());return uploadFile.exists();}public static String mergeFile(int chunksNumber, String ext, String uploadFolderPath,HttpServletRequest request) {//合并分片流String mergePath = uploadFolderPath;String destPath = getRealPath(request);// 文件路徑String newName = System.currentTimeMillis() + ext;// 文件新名稱
        SequenceInputStream s;InputStream s1;try {s1 = new FileInputStream(mergePath + 0 + ext);String tempFilePath;InputStream s2 = new FileInputStream(mergePath + 1 + ext);s = new SequenceInputStream(s1, s2);for (int i = 2; i < chunksNumber; i++) {tempFilePath = mergePath + i + ext;InputStream s3 = new FileInputStream(tempFilePath);s = new SequenceInputStream(s, s3);}//分片文件存儲到/upload/chunked目錄下StringBuilder filePath = new StringBuilder();filePath.append(destPath).append(File.separator).append("chunked").append(File.separator);saveStreamToFile(s, filePath.toString(), newName);// 刪除保存分塊文件的文件夾
            deleteFolder(mergePath);} catch (FileNotFoundException e) {e.printStackTrace();} catch (Exception e) {e.printStackTrace();}return newName;}private static boolean deleteFolder(String mergePath) {File dir = new File(mergePath);File[] files = dir.listFiles();if (files != null) {for (File file : files) {try {file.delete();} catch (Exception e) {e.printStackTrace();}}}return dir.delete();}private static void saveStreamToFile(SequenceInputStream inputStream, String filePath, String newName)throws Exception {File fileDirectory = new File(filePath);synchronized (fileDirectory) {if (!fileDirectory.exists()) {if (!fileDirectory.mkdir()) {throw new Exception("文件夾創建失敗,路徑為:" + fileDirectory);}}if (!fileDirectory.exists()) {if (!fileDirectory.mkdir()) {throw new Exception("文件夾創建失敗,路徑為:" + fileDirectory);}}}OutputStream outputStream = new FileOutputStream(filePath + newName);byte[] buffer = new byte[1024];int len = 0;try {while ((len = inputStream.read(buffer)) != -1) {outputStream.write(buffer, 0, len);outputStream.flush();}} catch (Exception e) {e.printStackTrace();throw e;} finally {outputStream.close();inputStream.close();}}
}
其他的和V1版本是一樣的
mapper
<update id="deleteUser">update tb_admin_user set is_deleted = 1where id in<foreach collection="array" item="id" open="(" separator="," close=")">#{id}</foreach></update>
效果展示
Excel的導出實現
前端實現
<button class="btn btn-primary" onclick="window.location.href='/users/export'"><i class="fa fa-download"></i> 導出</button>
點擊的時候會直接訪問到Controller層來獲取下載
后端邏輯
?
/*** 導出功能*/@RequestMapping(value = "/export", method = RequestMethod.GET)public void exportUsers(HttpServletRequest request, HttpServletResponse response) {List<AdminUser> userList = adminUserService.getUsersForExport();//單元格表頭String[] excelHeader = {"用戶id", "用戶名", "賬號狀態", "添加時間"};//字段名稱String[] fileds = {"userId", "userName", "status", "createTime"};//單元格寬度內容格式int[] formats = {4, 2, 1, 1};//單元格寬度int[] widths = {256 * 14, 512 * 14, 256 * 14, 512 * 14};try {List<Map<String, Object>> excelData = new ArrayList<Map<String, Object>>();SimpleDateFormat formatter = new SimpleDateFormat("yyyy-MM-dd HH:mm:ss");if (CollectionUtils.isNotEmpty(userList)) {for (AdminUser user : userList) {Map<String, Object> map = new HashMap<>();map.put("userId", user.getId());map.put("userName", user.getUserName());map.put("status", user.getIsDeleted() == 0 ? "正常賬號" : "廢棄賬號");map.put("createTime", formatter.format(user.getCreateTime()));excelData.add(map);}}String excelName = "用戶數據_" + System.currentTimeMillis();PoiUtil.exportFile(excelName, excelHeader, fileds, formats, widths, excelData, request, response);} catch (Exception e) {e.printStackTrace();}}
?
注:這里的一些工具類在上一篇寫過了
?
)


)

