注:以下采用終端XmanagerEnterprise 4中的Xshell連接
1、安裝前參數修改
vi /etc/security/limits.conf??? --末尾添加如下
oracle soft nproc 2047
oracle hard nproc 16384
oracle soft nofile 1024
oracle hard nofile 65536
vi /etc/sysctl.conf? ????????--末尾添加如下
fs.aio-max-nr = 1048576
fs.file-max = 6815744
kernel.shmall = 2097152
kernel.shmmax = 536870912
kernel.shmmni = 4096
kernel.sem = 250 32000 100 128
net.ipv4.ip_local_port_range = 900065500
net.core.rmem_default = 262144
net.core.rmem_max = 4194304
net.core.wmem_default = 262144
net.core.wmem_max = 1048586
--保存退出,執行如下
Sysctl –p
2、使用root登錄執行如下
groupadd ?-g 501 oinstall??? --創建組
useradd ?-m oracle -g 501 ???--創建用戶
passwd oracle???????????? --修改oracle用戶密碼
3、使用root上傳oracle安裝包
Liunx_for_oracle_1of2_64bit.zip
Liunx_for_oracle_2of2_64bit.zip
unzip Liunx_for_oracle_1of2_64bit.zip
unzip Liunx_for_oracle_2of2_64bit.zip
chown -R oracle:oinstall database
3、使用Oracle登錄執行如下
oracle@linux-rmav:~> xhost +
access control disabled, clients canconnect from any host
oracle@linux-rmav:~> cd /soft/database/
oracle@linux-rmav:/soft/database>./runInstaller
Starting Oracle Universal Installer...
Checking Temp space: must be greater than120 MB.?? Actual 661391 MB??? Passed
Checking swap space: must be greater than150 MB.?? Actual 32765 MB??? Passed
Checking monitor: must be configured todisplay at least 256 colors.??? Actual16777216??? Passed
Preparing to launch Oracle UniversalInstaller from /tmp/OraInstall2014-03-17_05-01-41PM. Please wait...oracle@linux-rmav:/soft/database>
出現圖形界面如下:
(圖1.0)
勾選不需要郵件通知時提示,點擊“Yes”,點擊“Next”
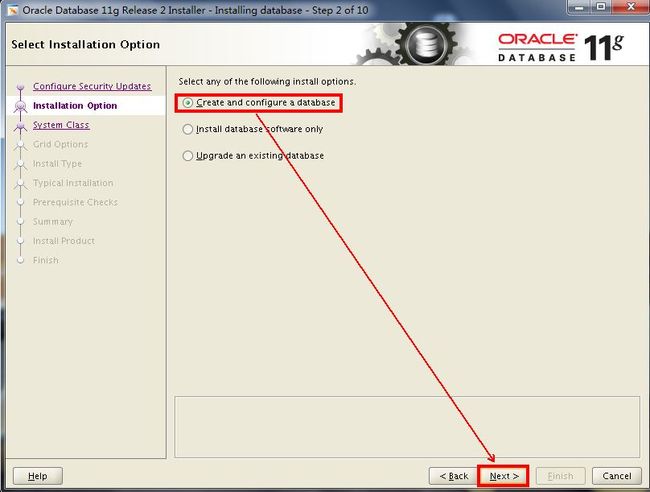
(圖1.1)
創建與配置一個數據庫
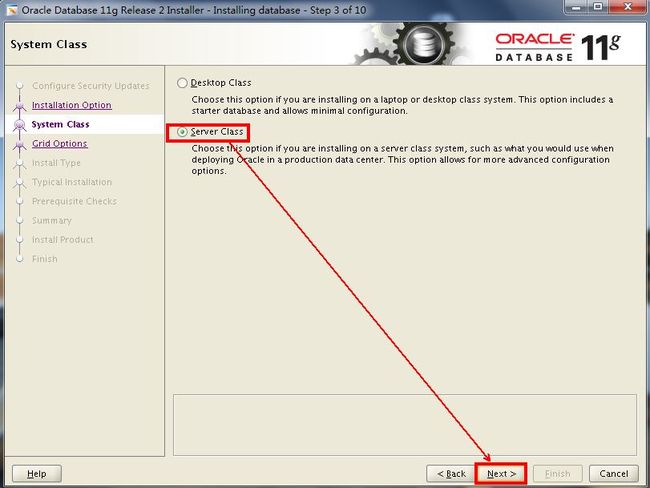
(圖1.2)
創建單實例數據庫,如果是RAC則選擇第二項。
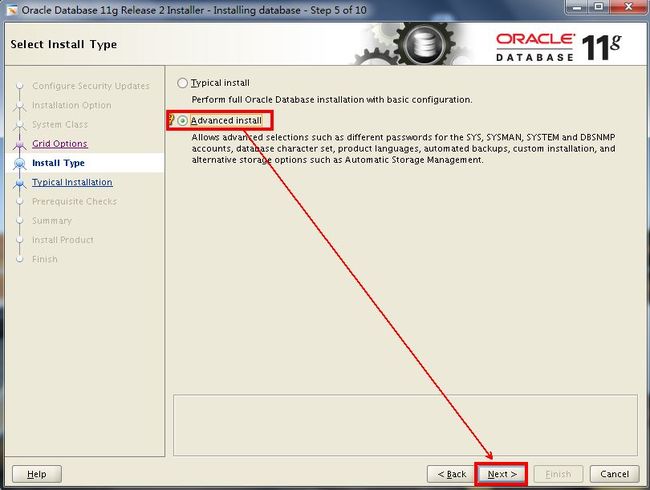
(圖1.3)
選擇“Advanced install”,后面將會使用配置字符集、內存分配等。
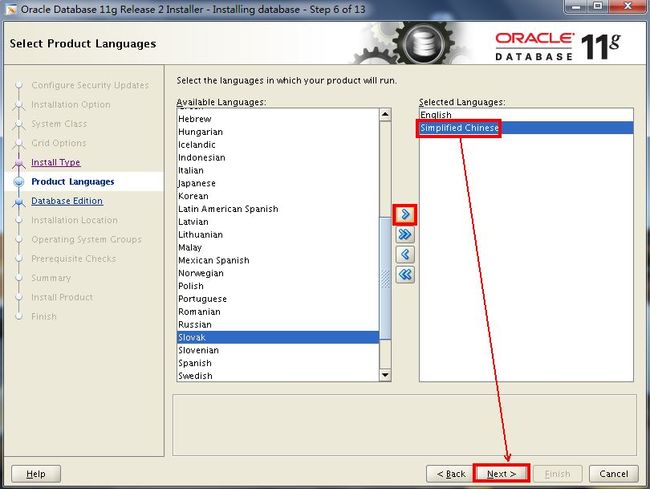
(圖1.4)
默認語言為“English”,再從左邊添加“SimplifiedChinese”
(圖1.5)
選擇安裝“Enterprise Edition(企業版)”
(圖1.5)
選擇Oracle安裝路徑,目前路徑為安裝時的默認路徑。
(圖1.6)
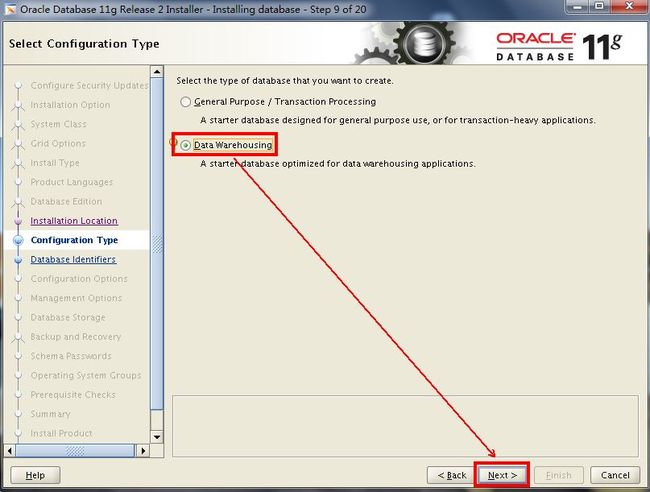
選擇數據庫類型,默認為“general purpose/transaction processing(通用/事務型)”,這里選擇“Data Warehousing(數據倉庫型)”。
(圖1.7)
填寫全局數據庫名與填寫數據庫服務標識(SID)
(圖1.8)
數據庫內存大小設置,默認為系統內存的40%,此處為默認。
(圖1.9)
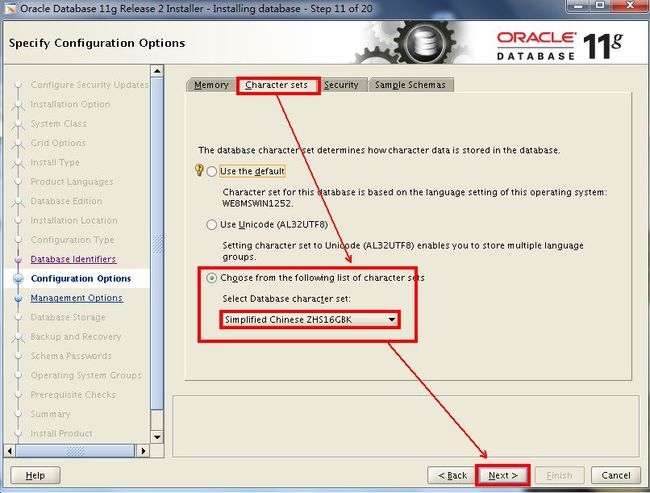
選擇相應的數據庫字符集編碼為:ZHS16GBK
(圖1.10)
此處為默認
(圖1.11)
指定數據文件存放路徑,此處默認
(圖1.12)
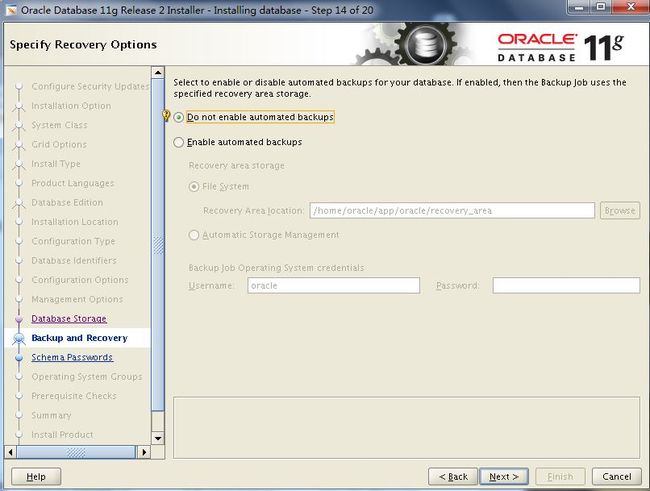
是否啟用回滾,如果是事務型則需要啟用,此處默認
(圖1.13)
設置SYS、SYSTEM、SYSMAN、DBSNMP用戶的密碼設置,此處統一設置密碼
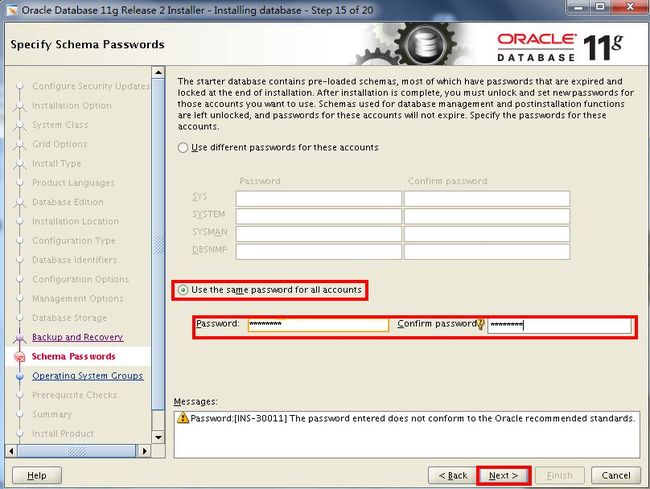
(圖1.14)
指定數據庫管理員組與數據庫操作員組,此處指定為oinstall組
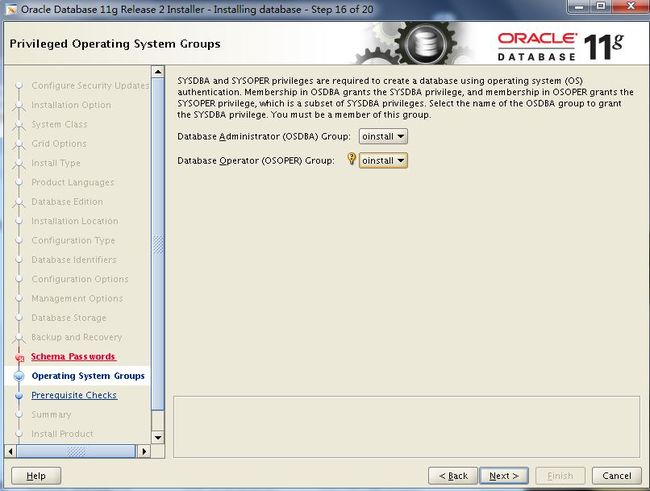
(圖1.15)
Oracle會默認檢查需要安裝的rpm包是否安裝,如果沒安裝則會列出信息,如果沒有相應的包則可以在系統安裝盤中查找相應的安裝包安裝。
(圖1.16)
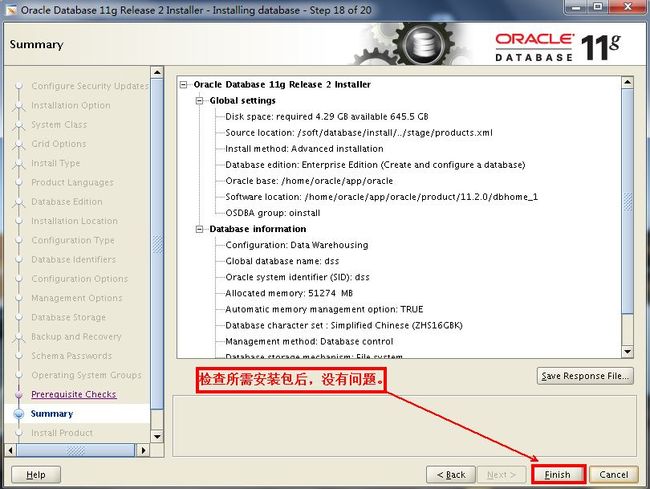
(圖1.17)
開始數據庫安裝
(圖1.18)
數據庫實例安裝
(圖1.19)
數據庫安裝成功,
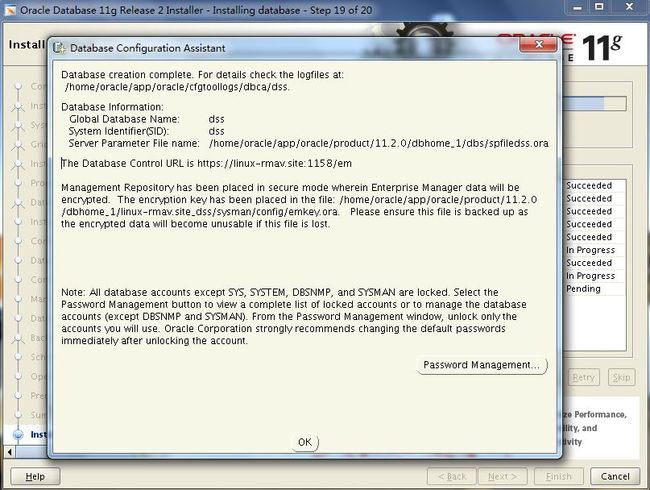
(圖1.20)
使用root用戶登錄執行如下:
linux-rmav:~# sh /home/oracle/app/oracle/product/11.2.0/dbhome_1/root.sh
RunningOracle 11g root.sh script...
Thefollowing environment variables are set as:
ORACLE_OWNER= oracle
ORACLE_HOME=?/home/oracle/app/oracle/product/11.2.0/dbhome_1
Enterthe full pathname of the local bin directory: [/usr/local/bin]:
The file"dbhome" already exists in /usr/local/bin.? Overwrite it? (y/n)
[n]: y
Copying oraenv to /usr/local/bin ...
The file"coraenv" already exists in /usr/local/bin.? Overwrite it? (y/n)
[n]: y
Copying coraenv to /usr/local/bin ...
Entrieswill be added to the /etc/oratab file as needed by
DatabaseConfiguration Assistant when a database is created
Finishedrunning generic part of root.sh script.
Nowproduct-specific root actions will be performed.
Finishedproduct-specific root actions.
(圖1.21)
數據庫安裝完成。


)
)